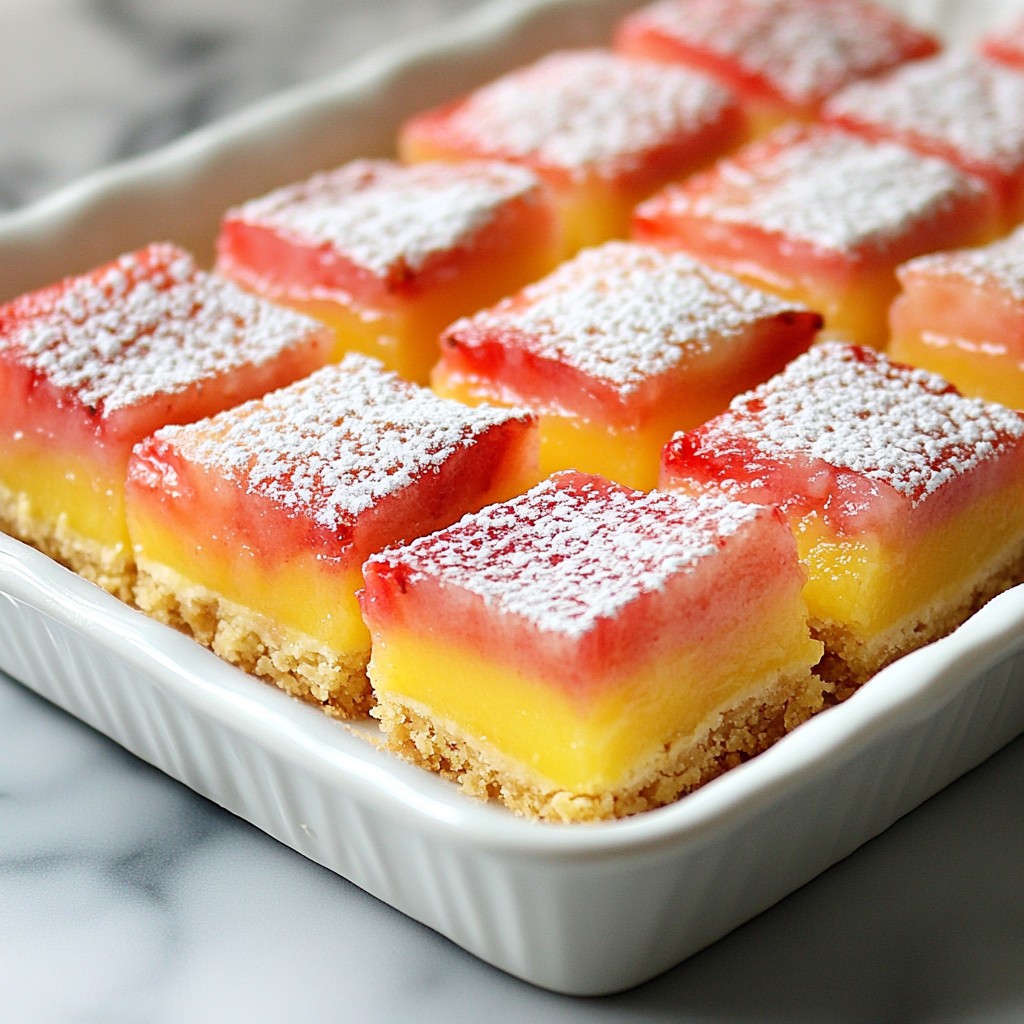
Looking for a sweet and tangy treat to cool you off this summer? Strawberry Lemonade Bars are the perfect answer! With a buttery crust and zesty filling, these bars will make your taste buds dance. I'm here to guide you through each step of this delicious recipe, so you can impress your friends and family. Let's dive into the world of these delightful bars and bring some sunshine to your table!
Why I Love This Recipe
- Bright Flavors: The combination of strawberries and lemons creates a refreshing burst of flavor that dances on your palate.
- Easy to Make: This recipe comes together quickly, making it perfect for last-minute gatherings or a sweet treat during the week.
- Perfect for Any Occasion: Whether it’s a summer barbecue or a cozy family dinner, these bars are sure to impress everyone.
- Beautiful Presentation: The vibrant pink and yellow hues make these bars not only delicious but also visually stunning on any dessert table.
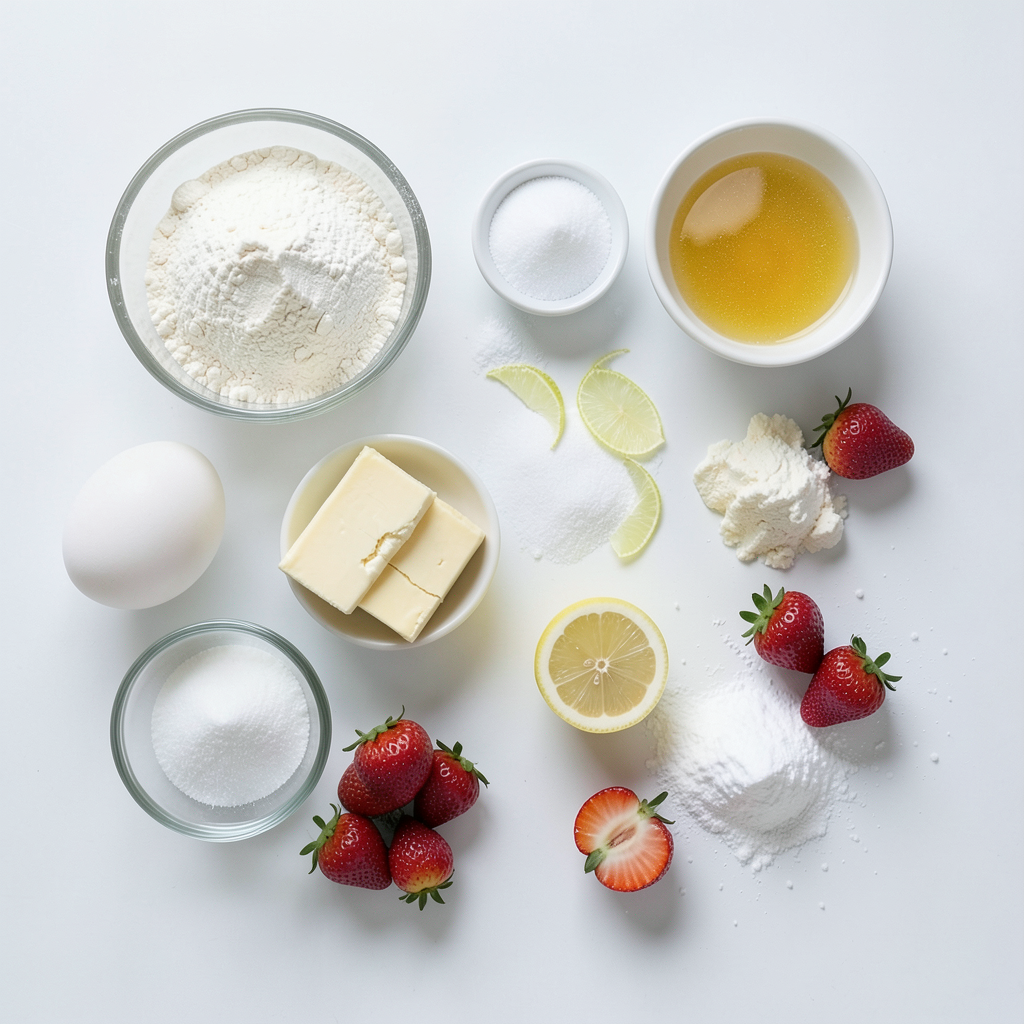
Ingredients
Main Ingredients for Strawberry Lemonade Bars
To make your Strawberry Lemonade Bars, gather these main ingredients:
- 1 cup all-purpose flour
- 1/4 cup granulated sugar
- 1/4 teaspoon salt
- 1/2 cup unsalted butter, melted
- 2 large eggs
- 1 cup granulated sugar (for filling)
- 2 tablespoons lemon zest (about 2 lemons)
- 1/2 cup fresh lemon juice (about 2-3 lemons)
- 1 cup fresh strawberries, pureed
- 1/4 teaspoon baking powder
- Powdered sugar for dusting
These ingredients create a sweet and tangy treat perfect for summer days.
Optional Ingredients for Variations
You can adjust the flavor with these optional ingredients:
- Fresh mint leaves for a refreshing twist
- A pinch of vanilla extract for added depth
- Different fruits like raspberries or blueberries for a fun mix
Feel free to get creative and make these bars your own!
Equipment Needed
You will need some basic kitchen tools:
- 8x8-inch baking pan
- Mixing bowls
- Whisk
- Measuring cups and spoons
- Rubber spatula
- Baking parchment (optional for easy removal)
These tools will help you whip up these delightful bars in no time.
Step-by-Step Instructions
Preparation of the Crust
Start by preheating your oven to 350°F (175°C). Grease an 8x8-inch baking pan. In a medium bowl, mix together 1 cup of all-purpose flour, 1/4 cup of granulated sugar, and 1/4 teaspoon of salt. Then, pour in 1/2 cup of melted unsalted butter. Stir this mixture until it looks like wet sand. Next, press it evenly into the bottom of the pan to form your crust. Bake this for 15 minutes, or until it turns lightly golden. After baking, take it out and let it cool slightly.
Making the Strawberry Lemon Filling
While the crust cools, grab another bowl. Whisk together 2 large eggs and 1 cup of granulated sugar until frothy. Add in 2 tablespoons of lemon zest and 1/2 cup of fresh lemon juice. Then, mix in 1 cup of pureed fresh strawberries. This is where the magic happens! Make sure everything blends well. Finally, sprinkle 1/4 teaspoon of baking powder over your mixture. Gently fold it in until just blended.
Baking Process and Cooling Tips
Pour the strawberry-lemon filling over the pre-baked crust. Carefully return the pan to the oven. Bake for an additional 25-30 minutes. You’ll know it’s done when the filling is set. A toothpick inserted in the center should come out clean. Once baked, remove from the oven and let the bars cool completely in the pan. After they cool, cut them into squares. Dust with powdered sugar just before serving for a pretty finish. Enjoy your delightful summer treat!
Tips & Tricks
How to Achieve the Perfect Crust
To get a great crust, use cold butter. It helps form a flaky texture. Mix the flour, sugar, and salt well. When you add the melted butter, stir until it looks like wet sand. Press the mixture firmly into the pan. This helps it hold together during baking. Bake until it is lightly golden, about 15 minutes. Let it cool slightly before adding the filling.
Flavor Enhancement Suggestions
Add some zest to your bars! Use lemon zest for a fresh taste. You can also mix in a bit of vanilla extract. If you love strawberries, try adding some whole berries to the filling. They will give bursts of flavor. For a twist, add a pinch of salt. It balances the sweetness and enhances the flavor.
Common Mistakes to Avoid
Don’t rush the cooling process. Let the crust cool before adding the filling. If you do not, the filling may not set right. Also, avoid overmixing the filling. This can make the texture dense. Lastly, check the bars before the timer goes off. Insert a toothpick to see if they are done. If it comes out clean, your bars are ready!
Pro Tips
- Use fresh strawberries: For the best flavor, always use fresh strawberries instead of frozen. They provide the sweetest taste and vibrant color.
- Adjust sweetness: Depending on the ripeness of your strawberries, you may want to adjust the sugar in the filling. Taste your strawberry puree before adding the sugar.
- Cool completely: Allow the bars to cool completely in the pan before cutting them. This helps them set properly and makes for cleaner cuts.
- Dust before serving: Dust the bars with powdered sugar just before serving for a beautiful presentation and added sweetness.
Variations
Gluten-Free Strawberry Lemonade Bars
You can easily make gluten-free strawberry lemonade bars. Just swap the all-purpose flour for a gluten-free blend. Many brands mix rice flour and tapioca starch. This change keeps the taste while being safe for those with gluten issues.
Vegan Version of the Recipe
To make a vegan version, replace the eggs with flax eggs. Mix one tablespoon of ground flaxseed with two tablespoons of water for each egg. Let it sit until it thickens. Use coconut oil instead of butter for a rich flavor. This swap makes your bars plant-based and delicious.
Using Different Fruits for Alternatives
Feel free to switch up the fruit! Try using raspberries or blueberries instead of strawberries. Each fruit gives a new twist to the taste. You can also mix fruits for a fun flavor explosion. Just keep the same amount of puree to stay true to the recipe.
Storage Info
Best Practices for Storing Bars
To keep your strawberry lemonade bars fresh, store them in an airtight container. This will help keep moisture out and maintain their taste. If you have cut the bars, place a layer of parchment paper between the pieces. This step prevents them from sticking together. Always keep the bars in the fridge. The cool temperature helps them stay firm and tasty.
How Long Do They Last?
When stored correctly, these bars last about five days in the fridge. After that, you might notice a change in texture and taste. If they start to look or smell off, it’s best to toss them. Always check for any signs of spoilage before enjoying them.
Freezing and Thawing Instructions
You can freeze these bars to enjoy later. Wrap each bar individually in plastic wrap and then place them in a freezer bag. They can stay frozen for up to three months. To thaw, take the bars out and let them sit at room temperature for about an hour. This method helps maintain their taste and texture. Enjoy your delicious treat anytime!
FAQs
Can I use frozen strawberries?
Yes, you can use frozen strawberries. Just thaw and drain them before mixing. This keeps the filling from being too watery. You might need to blend them a bit longer to make a smooth puree. Frozen strawberries can still give great flavor to your bars.
How do I know when the bars are done baking?
You will know the bars are done when the filling is set. Insert a toothpick into the center. If it comes out clean, the bars are ready. The edges should look slightly brown. Let them cool in the pan for best results.
What can I serve with Strawberry Lemonade Bars?
These bars pair well with whipped cream or vanilla ice cream. A scoop adds a nice creaminess. You can also serve them with fresh berries for a fun twist. A glass of iced tea or lemonade goes perfectly too!
You’ve learned about making tasty strawberry lemonade bars, from ingredients to storage. We covered main and optional ingredients, key tools, and step-by-step instructions. You now know how to perfect your crust and avoid common mistakes. Plus, I shared ideas for gluten-free and vegan options.
Enjoy these bars fresh or stored for later. With these tips, your treats will always shine. Try your own twists, and share them with friends. Happy baking!