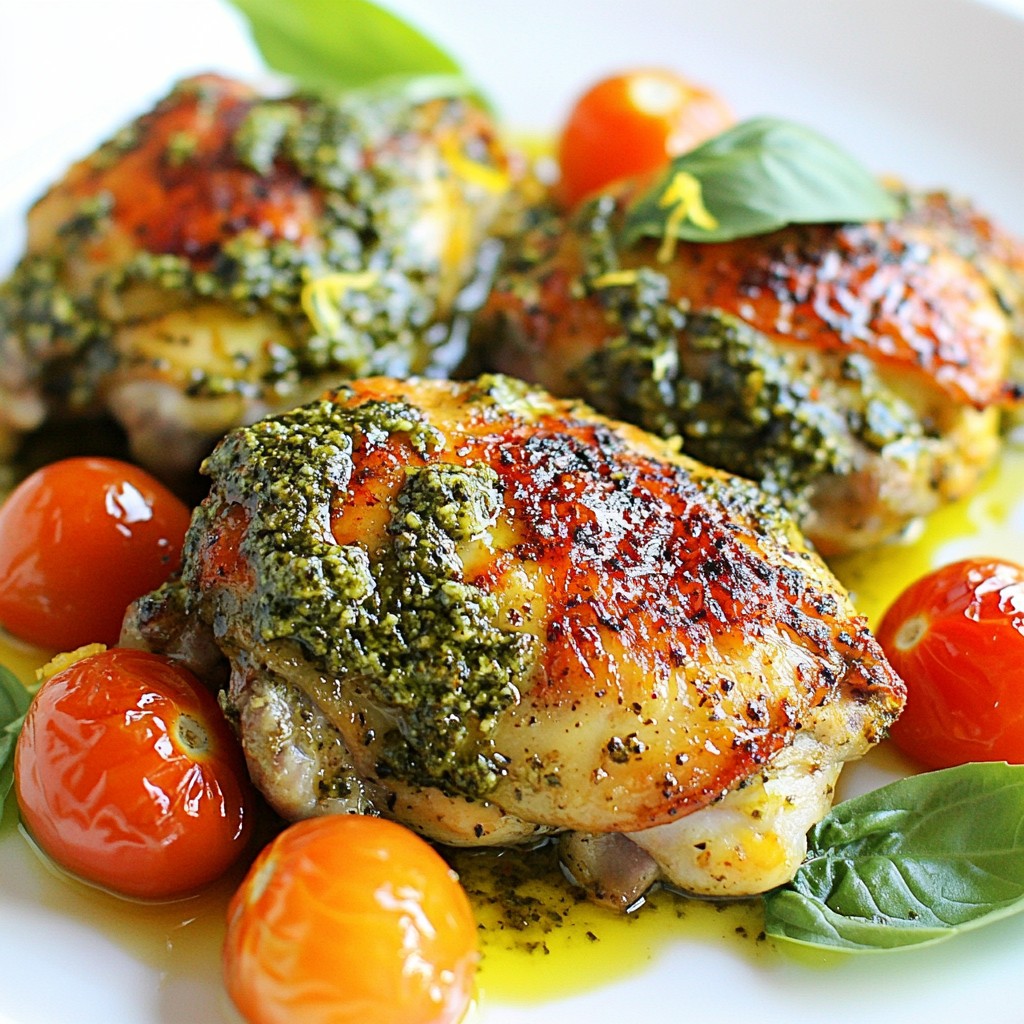
Looking for a quick and tasty dinner idea? You’ll love these oven-baked pesto chicken thighs! This simple meal combines juicy chicken, vibrant pesto, and easy seasonings for a dish packed with flavor. I’ll guide you through each step—from prep to plate—so you can impress your family without stress. Ready to savor a delicious, hassle-free dinner? Let’s dive in!
Why I Love This Recipe
- Flavor Explosion: The combination of basil pesto and zesty lemon creates a burst of flavor that elevates the chicken to a whole new level.
- Crispy Skin: Baking the chicken thighs at a high temperature ensures a crispy, golden skin that contrasts beautifully with the juicy meat.
- Easy Preparation: This recipe requires minimal prep time, making it perfect for busy weeknights or casual gatherings.
- Versatile Side Dishes: Pair these chicken thighs with a variety of sides like roasted vegetables or a fresh salad for a complete meal.
Ingredients
Main Ingredients
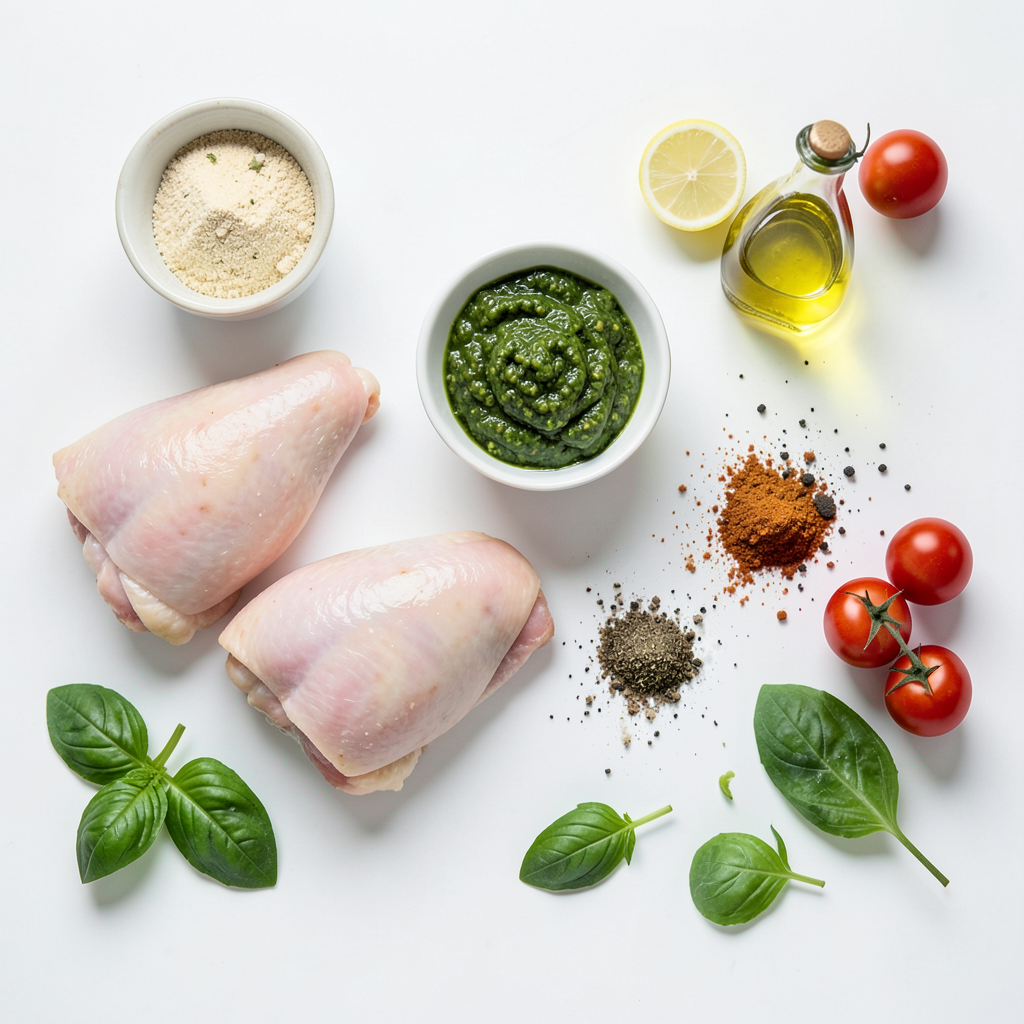
- 4 bone-in, skin-on chicken thighs
- 1/2 cup basil pesto
- 2 tablespoons olive oil
- 1 teaspoon garlic powder
- 1 teaspoon smoked paprika
- 1/2 teaspoon salt
- 1/4 teaspoon black pepper
- Zest of 1 lemon
- 1 tablespoon lemon juice
These main ingredients make your pesto chicken juicy and flavorful. The chicken thighs are perfect for this recipe. They stay moist and have a nice crispy skin. Basil pesto adds a rich herb taste, while the seasonings give a nice kick.
Optional Ingredients
- Cherry tomatoes
- Fresh basil leaves
Cherry tomatoes add a sweet touch and bright color. They roast well next to the chicken. Fresh basil leaves can make your dish look and taste special. You can use these for garnish when serving.
Tools Needed
- Baking dish
- Mixing bowl
- Measuring spoons
A baking dish holds everything together as it cooks. A mixing bowl helps you combine the ingredients easily. Measuring spoons ensure you get the right amount of each spice. Having the right tools makes cooking fun and easy.
Step-by-Step Instructions
Preparation Steps
- Preheat the oven to 400°F (200°C).
- Pat dry the chicken thighs with paper towels. This helps the skin get crispy.
Seasoning Process
- In a small bowl, mix 2 tablespoons of olive oil, 1 teaspoon of garlic powder, 1 teaspoon of smoked paprika, 1/2 teaspoon of salt, 1/4 teaspoon of black pepper, the zest of 1 lemon, and 1 tablespoon of lemon juice.
- Pour the seasoning mix over the chicken thighs. Rub it all over the chicken. Make sure every part is coated well.
Baking Instructions
- Spread 1/2 cup of basil pesto on top of the chicken thighs. Make it an even layer.
- Place the chicken thighs skin-side up in a baking dish. If you want, add cherry tomatoes around them for extra flavor and color.
- Bake the chicken in the preheated oven for about 35-40 minutes. The chicken is done when it reaches 165°F (75°C) and the skin is crispy.
Tips & Tricks
Enhancing Flavor
For a twist on basil pesto, try sun-dried tomato pesto. This gives a rich, tangy taste. You can also use arugula or spinach for your pesto. Both add freshness and depth.
To infuse more herbs, consider adding thyme or rosemary. These herbs pair well with chicken. You can mix them into the pesto or sprinkle them on top before cooking.
Ensuring Crispy Skin
To ensure crispy skin, pat the chicken dry with paper towels. This removes moisture. Dry skin helps it get crispy in the oven.
Set your oven to 400°F (200°C). This hot temperature helps the skin crisp up nicely. Make sure to place the chicken skin-side up in the baking dish for the best results.
Serving Suggestions
Serve your oven-baked pesto chicken thighs with roasted vegetables. Carrots and green beans are great choices. They add color and nutrition to your plate.
For garnishing, sprinkle fresh basil leaves on top. This adds a nice touch and looks beautiful. You can also add cherry tomatoes for a pop of color.
Pro Tips
- Pat the Chicken Dry: Ensuring the chicken thighs are dry before seasoning will help achieve a crispy skin when baked.
- Use Fresh Pesto: If possible, opt for homemade basil pesto for a fresher and more vibrant flavor that will elevate the dish.
- Rest the Chicken: Allow the chicken to rest for a few minutes after baking; this will help the juices redistribute, keeping the meat moist.
- Add Vegetables: Consider adding other vegetables like bell peppers or zucchini to the baking dish for a complete one-pan meal.
Variations
Substitutions
You can easily swap out the chicken thighs for boneless thighs. Boneless chicken cooks faster. Keep an eye on the oven to avoid overcooking.
If you want a different flavor, try other sauces. BBQ sauce can give a sweet twist. Teriyaki sauce adds an Asian flair.
Flavor Twists
Want some heat? Add red pepper flakes to the seasoning mix. This gives a spicy kick. You can also add jalapeños on top before baking.
Explore different kinds of pesto! Sun-dried tomato pesto offers a rich flavor. Spinach pesto is another great choice. Each type brings a new taste to the dish.
Dietary Considerations
For gluten-free options, make sure your pesto has no gluten. Most store-bought pestos are safe, but check the label.
If you're on a low-carb diet, skip the cherry tomatoes. They add some carbs. You can also pair this dish with a salad instead of rice or bread.
Storage Info
Leftover Storage
To keep your leftover oven-baked pesto chicken thighs fresh, follow these steps:
- Refrigeration guidelines: Place chicken in an airtight container. Store it in the fridge. It will stay good for up to four days.
- Freezing instructions: If you want to keep it longer, freeze the chicken. Wrap it well in plastic wrap or foil. You can also use a freezer-safe bag. It will last for up to three months in the freezer.
Reheating Tips
When you are ready to eat your leftovers, here are the best ways to reheat them:
- Best methods for reheating: The oven is the best choice. Preheat it to 350°F (175°C). Place the chicken on a baking sheet. Heat for about 15-20 minutes.
- Maintaining crispiness: To keep the skin crispy, cover the chicken loosely with foil. This helps keep moisture in but allows the skin to crisp up as well.
Shelf Life
Knowing how long your leftovers last is important:
- How long leftovers last: In the fridge, your pesto chicken will last four days. In the freezer, it can last up to three months.
- Signs of spoilage: Look for changes in color or a bad smell. If the chicken feels sticky or slimy, it’s best to throw it away. Always trust your senses to keep your meals safe.
FAQs
Common User Questions
Can I use chicken breasts instead of thighs? Yes, you can use chicken breasts. They will cook faster than thighs. Reduce cooking time to about 25-30 minutes. Check that the internal temperature reaches 165°F (75°C). This ensures they are safe to eat.
What should I do if the chicken is overcooked? If the chicken is overcooked, it may be dry. To fix this, serve it with a sauce or gravy. A splash of broth can help add moisture. You can also shred the chicken for use in salads or wraps.
Recipe Adjustments
How to adjust for fewer servings? To make fewer servings, simply halve the recipe. Use two chicken thighs and adjust the pesto and seasoning accordingly. This keeps the flavors balanced while saving food.
Can I make this recipe ahead of time? Yes, you can prepare the chicken in advance. Season and coat the thighs with pesto. Cover and store in the fridge for up to 24 hours. When ready, bake as instructed. This saves time on busy nights.
Nutritional Information
Calories per serving Each serving contains about 350 calories. This may vary based on portion size and added ingredients.
Key nutritional highlights
- Protein: Chicken thighs provide a good amount of protein.
- Healthy fats: Olive oil adds beneficial fats.
- Vitamins: Pesto brings vitamins from basil, garlic, and nuts.
- Antioxidants: Lemon zest offers antioxidants that support health.
This blog post covered an easy chicken thigh recipe using pesto and simple tools. We discussed key ingredients, preparation steps, and baking instructions. I shared tips for a crispy finish and ideas for side dishes. Plus, I explored variations for different diets and flavors.
Now, you can enjoy a tasty meal that’s easy to prepare. Don’t be afraid to get creative with flavors and ingredients! Your kitchen is ready for delicious success.