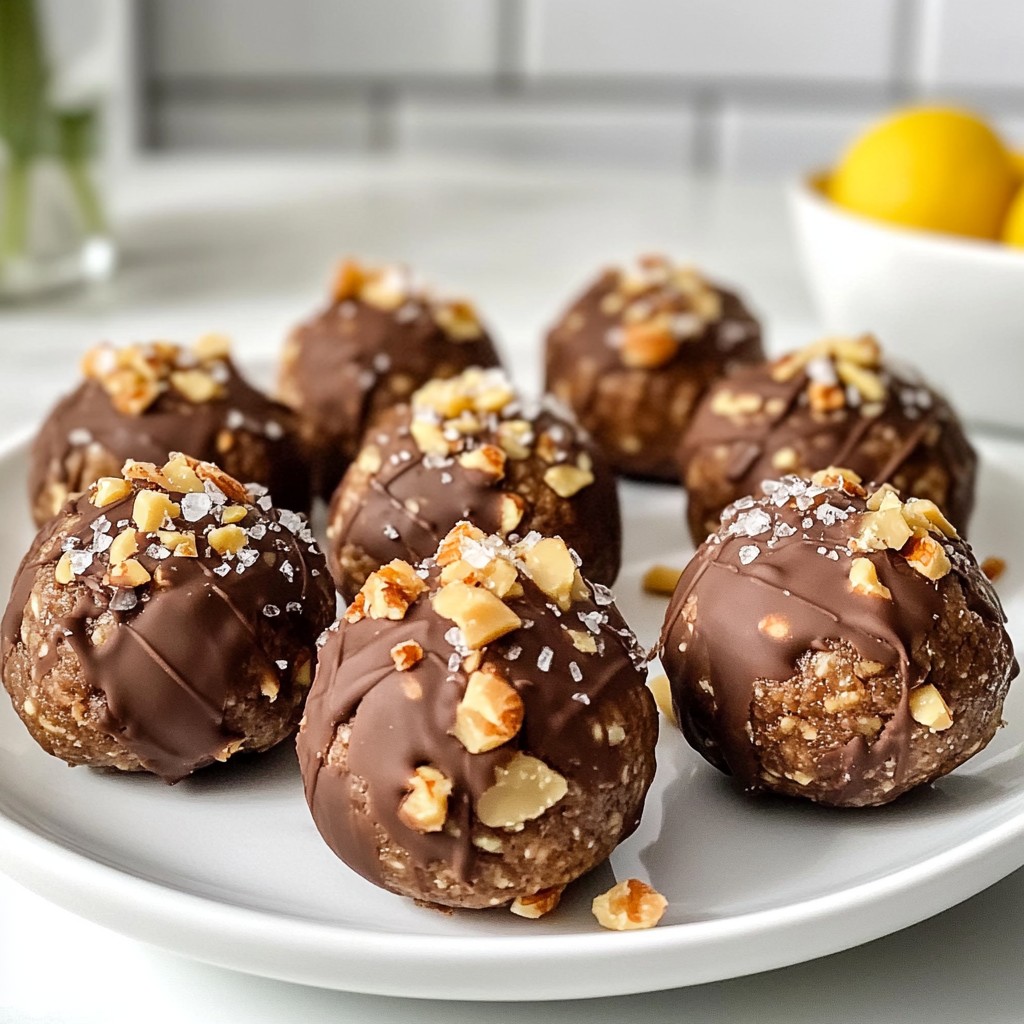
Looking for a tasty and healthy snack? Let me introduce you to Peanut Butter Cup Energy Balls! These little bites are packed with flavor and the fuel you need for your busy day. With easy steps and simple ingredients, you can whip up a batch in no time. Whether you enjoy them as a midday treat or a post-workout boost, these energy balls are sure to satisfy. Let’s dive into the delicious details!
Why I Love This Recipe
- Quick and Easy: This recipe only takes 10 minutes to prepare, making it perfect for a busy lifestyle.
- Healthy Ingredients: Packed with rolled oats, natural peanut butter, and nuts, these energy balls are nutritious and satisfying.
- Customizable: You can easily swap in your favorite nuts or add different mix-ins like dried fruits or seeds.
- Perfect Snack: These energy balls are great for on-the-go snacking, providing a boost of energy whenever you need it!
Ingredients
Essential Ingredients
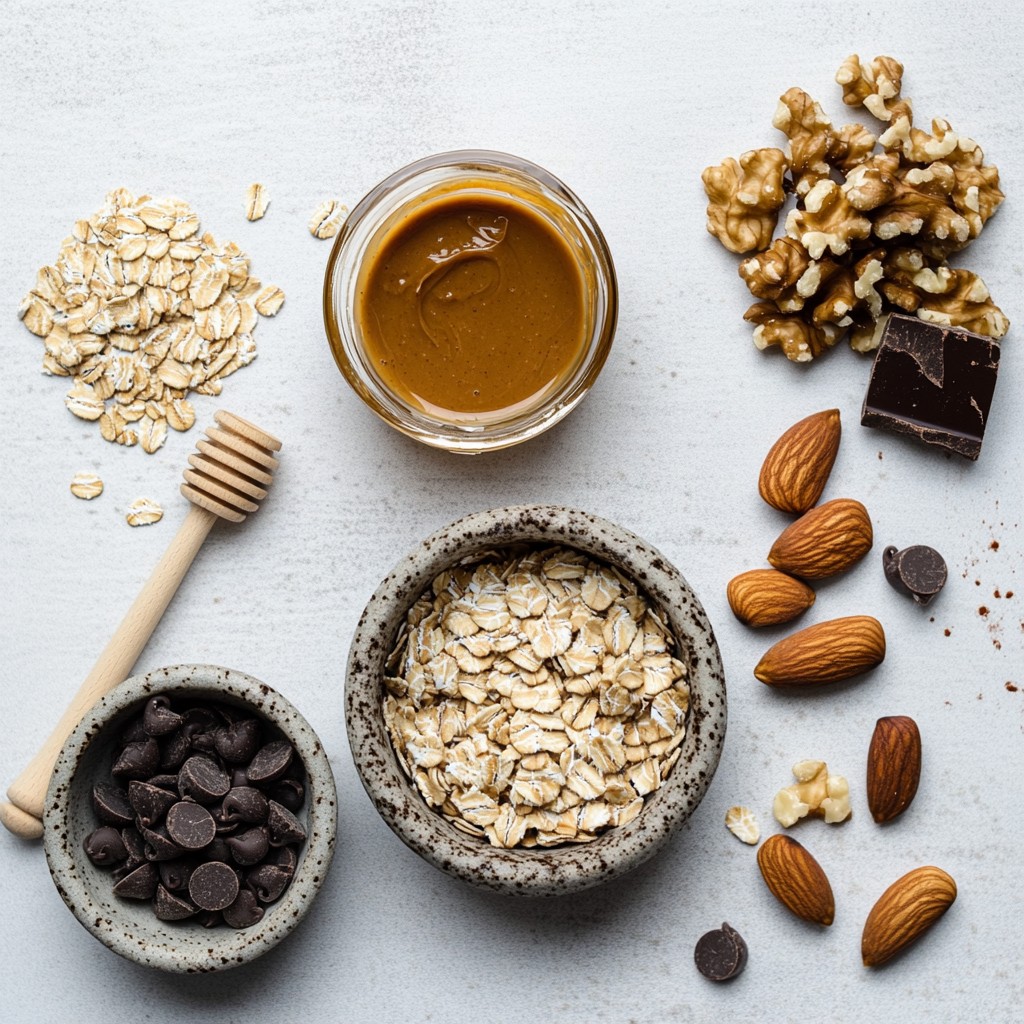
To make tasty Peanut Butter Cup Energy Balls, you need a few key ingredients:
- 1 cup rolled oats
- 1/2 cup natural peanut butter
- 1/4 cup honey or maple syrup
- 1/4 cup cocoa powder
- 1/4 cup dark chocolate chips
- 1/4 cup chopped nuts (like almonds or walnuts)
- 1/4 teaspoon sea salt
- 1 teaspoon vanilla extract
These ingredients work together to create a chewy, sweet snack. The oats give them a nice base. The peanut butter adds creaminess and protein. Cocoa powder and dark chocolate chips make them taste like a treat.
Optional Add-ins
If you want to mix it up, consider adding:
- 1/4 cup shredded coconut
- 1/4 cup dried fruit (like raisins or cranberries)
- 1 tablespoon chia seeds or flaxseeds
These add-ins can change the flavor and texture. They also boost the nutrition. Feel free to get creative and add what you like!
Substitutions for Allergies
If you have allergies, don't worry! You can swap out some ingredients:
- Use almond butter instead of peanut butter for nut allergies.
- Replace honey with agave syrup for a vegan option.
- Omit chocolate chips if you want a lower sugar option.
Always check labels to avoid allergens. These swaps keep the energy balls tasty and safe for everyone.
Step-by-Step Instructions
Preparation Steps
Start with a large mixing bowl. Add 1 cup of rolled oats, 1/4 cup of cocoa powder, and 1/4 teaspoon of sea salt. Stir these dry ingredients well. This forms a tasty base for your energy balls.
Mixing the Ingredients
In a separate bowl, mix 1/2 cup of natural peanut butter, 1/4 cup of honey or maple syrup, and 1 teaspoon of vanilla extract. Stir until smooth and creamy. This mixture adds sweetness and flavor to your energy balls. Pour this wet mixture into the dry ingredients. Mix it all together until you have a thick dough.
Rolling and Chilling the Energy Balls
Now comes the fun part! Use your hands to roll the mixture into small balls, about 1 inch wide. Place these balls on a parchment-lined baking sheet. Once you roll all the mixture, put the baking sheet in the fridge. Chill the energy balls for at least 30 minutes. This helps them hold their shape. After chilling, enjoy your healthy snack!
Tips & Tricks
How to Achieve the Perfect Texture
To get the best texture in your Peanut Butter Cup Energy Balls, focus on your mixing. Make sure to blend the dry ingredients first. This way, the oats and cocoa powder mix well. When you add the wet mix, stir until it’s smooth. If the mixture is too sticky, add more oats. If it’s too dry, a splash of honey helps. Rolling the balls should feel easy, not messy. Aim for about one inch in size for each ball. This size is perfect for snacking.
Storing Your Energy Balls
Store your energy balls in an airtight container. This keeps them fresh and tasty. You can keep them in the fridge for up to a week. If you want to enjoy them longer, consider freezing them. Just make sure to separate each ball with parchment paper. This way, they don’t stick together. When you want to snack, take out a few and let them sit for a few minutes before eating.
Making Ahead of Time
These energy balls are great for meal prep. You can make them a few days in advance. Just roll them up and store them as mentioned. This helps you grab a healthy snack when you’re busy. You can also make a big batch and share them with friends. They love these tasty treats! Plus, they are simple and quick to make, so you won’t spend a lot of time in the kitchen.
Pro Tips
- Use Creamy Peanut Butter: For a smoother texture, opt for creamy peanut butter instead of crunchy. This will make it easier to combine the ingredients and roll into balls.
- Chill the Mixture: If the mixture is too sticky to roll, refrigerate it for about 10 minutes before shaping. This will make it easier to handle.
- Experiment with Add-Ins: Feel free to customize your energy balls by adding ingredients like dried fruit, seeds, or protein powder for an extra boost.
- Perfect Storage: Store the energy balls in an airtight container in the refrigerator. They can last for up to a week, making them a great grab-and-go snack.
Variations
Different Flavor Additions
You can change the flavor of your Peanut Butter Cup Energy Balls easily. Try adding different extracts like almond or coconut. You can also add spices like cinnamon or nutmeg for warmth. If you love fruit, mix in dried cranberries or chopped dates. These additions can make each batch unique and tasty.
Dietary Modifications (Vegan, Gluten-Free)
To make these energy balls vegan, simply swap honey for maple syrup. This keeps the sweet flavor while making it plant-based. If you need gluten-free options, use certified gluten-free oats. This way, everyone can enjoy these snacks without worry.
Customizing with Nuts and Seeds
Nuts and seeds can boost the nutrition of your energy balls. Try using chopped peanuts, almonds, or walnuts. If you prefer seeds, add sunflower seeds or chia seeds. Both options add crunch and extra nutrients. You can mix and match to find your perfect blend!
Storage Info
Best Practices for Storage
Store your Peanut Butter Cup Energy Balls in an airtight container. This keeps them fresh and tasty. Place the container in the refrigerator to maintain the right texture. Avoid leaving them at room temperature for too long. This prevents them from becoming too soft or sticky.
Shelf Life of Energy Balls
These energy balls last about one week when stored properly in the fridge. After a week, they may start to lose their flavor and texture. If you want to enjoy them longer, consider freezing them.
Freezing for Long-Term Storage
To freeze your energy balls, first roll them into small balls. Place them on a baking sheet in a single layer. Freeze them for about an hour until firm. After that, transfer them to a freezer-safe bag or container. They can last up to three months in the freezer. Just thaw them in the fridge before eating for the best taste.
FAQs
Can I use other nut butters?
Yes, you can use other nut butters! Almond butter, cashew butter, or sunflower seed butter work great. Just keep in mind that the flavor will change a bit. Each nut butter adds its own unique taste. For a nut-free option, sunflower seed butter is perfect. It keeps the recipe safe for those with nut allergies.
How long do these energy balls last?
These energy balls last up to a week in the fridge. Store them in an airtight container to keep them fresh. If you want them to last longer, you can freeze them. They can stay good in the freezer for about three months. Just make sure to let them thaw before you eat them.
Can I add protein powder to the recipe?
Yes, adding protein powder is an easy way to boost nutrition! You can mix in about 1/4 cup of your favorite protein powder. This will make the energy balls even more filling. Just adjust the wet ingredients a little if needed. This helps keep the texture just right.
In this post, we explored how to make energy balls with essential ingredients and optional add-ins. I shared step-by-step instructions for preparation, mixing, and chilling. We covered tips for texture, storage, and making them ahead. I also discussed variations, including flavor options and dietary needs.
Overall, these energy balls are easy to customize and perfect for snacks. Try different flavors to keep things fun. Enjoy making a batch that fits your taste and needs!