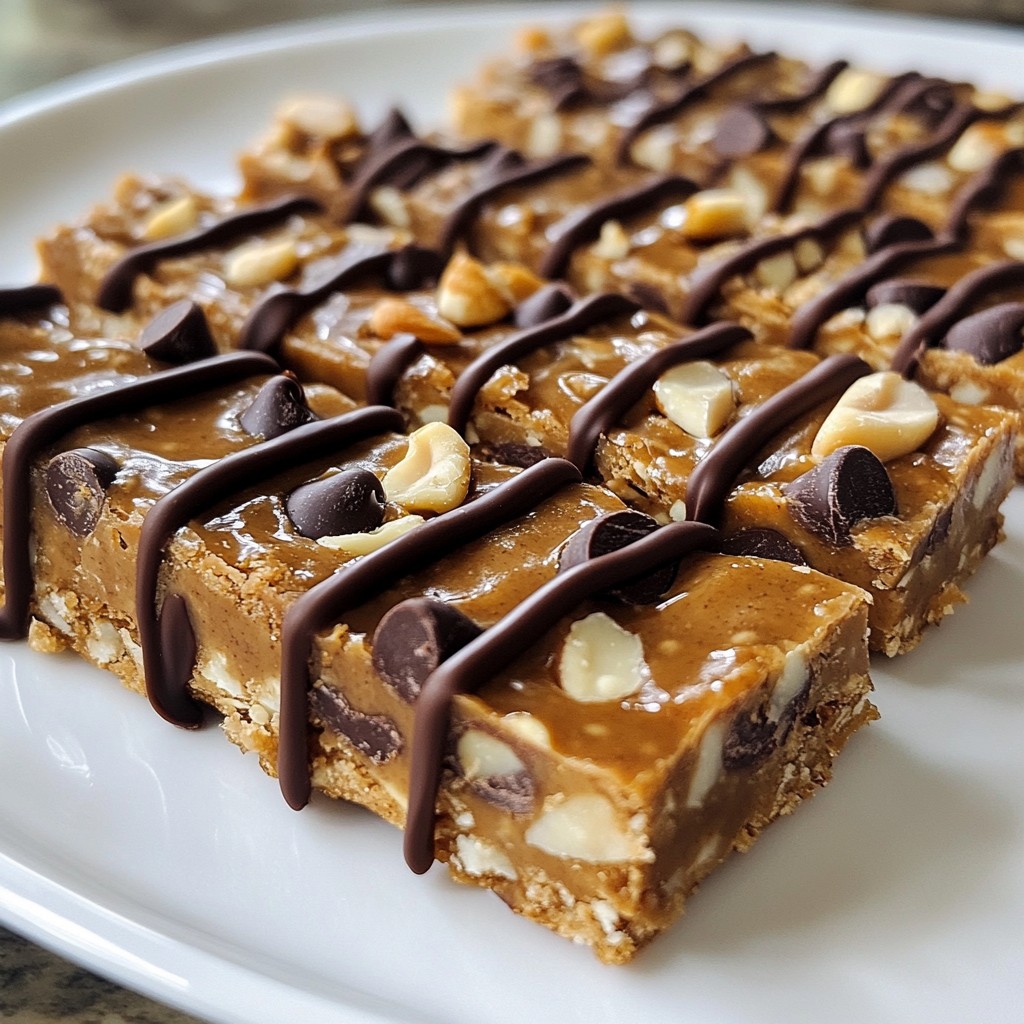
Are you tired of low-energy snack options? Let me introduce you to Peanut Butter Chocolate Chip Energy Bars! These bars are packed with protein, flavor, and energy, making them the perfect pick-me-up for your day. In this article, I’ll guide you through an easy recipe, share tips for customization, and offer storage ideas to keep them fresh. Get ready to fuel your body in a delicious way!
Why I Love This Recipe
- Nutritious and Energizing: These energy bars are packed with protein and healthy fats, making them a perfect snack to fuel your day.
- Quick and Easy: With just 10 minutes of prep time, you can whip up these delicious bars with minimal effort.
- Customizable: Add your favorite nuts or dried fruits to personalize the flavor and texture to your liking.
- Perfect for On-the-Go: These bars are great for meal prep and make a convenient grab-and-go snack for busy days.
Ingredients
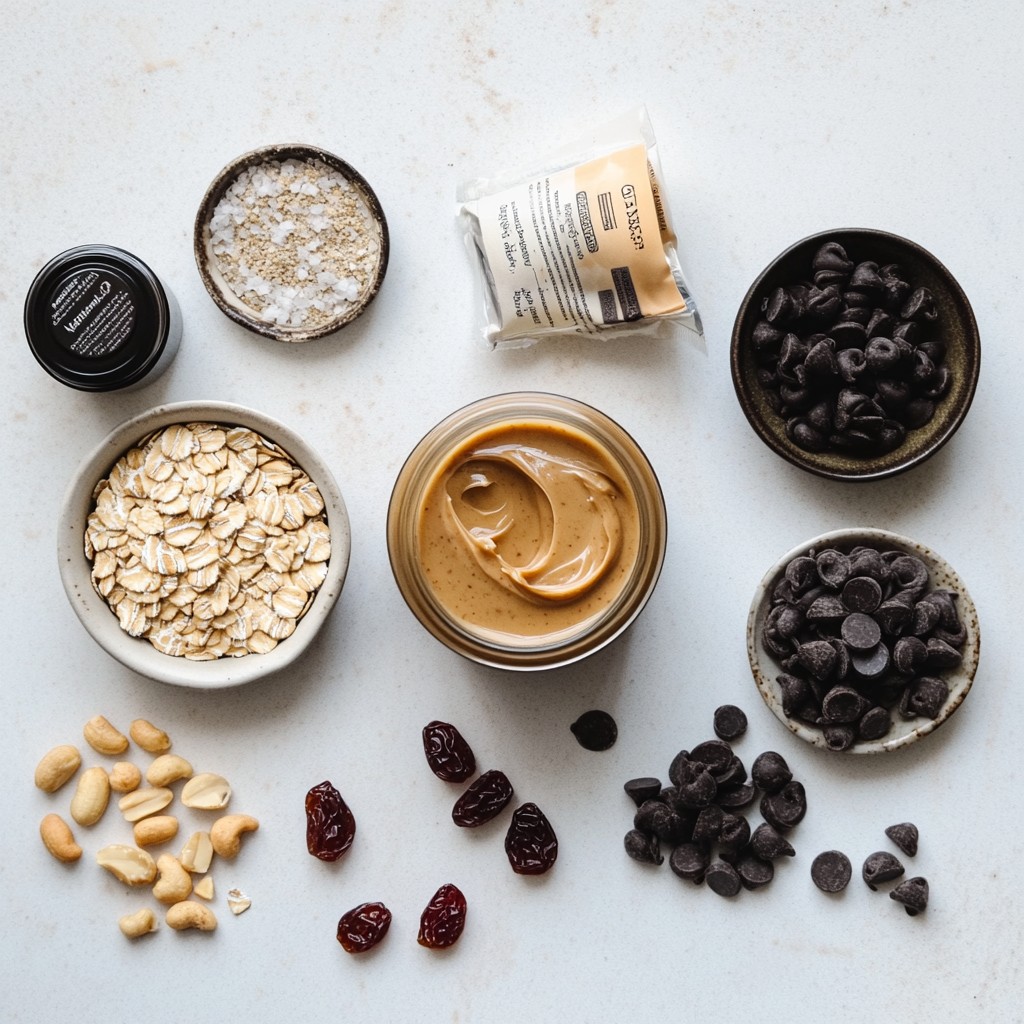
List of Ingredients
- 1 cup natural peanut butter
- 1/2 cup honey or maple syrup
- 2 cups rolled oats
- 1/2 cup protein powder (vanilla or chocolate)
- 1/2 teaspoon salt
- 1 teaspoon vanilla extract
- 1/2 cup dark chocolate chips
- 1/4 cup chopped nuts (almonds or walnuts)
- 1/4 cup dried fruit (raisins or cranberries) - optional
The ingredients in these bars are simple and wholesome. Natural peanut butter gives rich flavor and healthy fats. Honey or maple syrup adds sweetness and binds everything together. Rolled oats provide a chewy texture and good carbs for energy.
Protein powder boosts the protein content, which helps keep you full. A touch of salt enhances flavor, while vanilla extract adds depth. Dark chocolate chips give a sweet bite, and nuts add crunch. You can also toss in dried fruits for extra sweetness and texture.
Nutritional Information
Each serving offers around:
- Calories: 200
- Protein: 6g
- Carbohydrates: 24g
- Fats: 9g
These bars give you a good mix of nutrients. They are perfect for a quick snack or a boost before a workout.
Equipment Needed
- Medium saucepan
- Mixing bowl
- Baking dish
Gather these tools before you start. They make the process smooth and quick. You’ll love how easy it is to whip up these energy bars!
Step-by-Step Instructions
Preparation Steps
To make these energy bars, start by combining the peanut butter and sweetener. I like to use honey, but maple syrup works too. In a medium saucepan, heat the peanut butter and honey on low. Stir it until it melts together. Remove it from the heat and let it cool.
Next, mix your dry ingredients. In a large bowl, combine the rolled oats, protein powder, and salt. Stir well to ensure everything mixes evenly. This helps with the texture of your bars.
Assembly and Pressing
Now, it's time to pour the mixtures together. Add the peanut butter mixture and vanilla extract into your dry ingredients. Stir until every bit of the dry mix is coated. This step is crucial for flavor!
Then, fold in the dark chocolate chips, chopped nuts, and any dried fruit you want to add. Make sure everything is evenly mixed. Now, take an 8x8-inch baking dish and line it with parchment paper. Leave some paper hanging over the sides for easy removal later.
Transfer the mixture into the dish and pack it down firmly. Use a spatula or your hands to press it into an even layer. This helps your bars hold together well.
Chilling and Cutting
Let the bars chill in the fridge for at least one hour. This time helps them firm up nicely. After they set, lift the mixture out using the parchment overhang.
Now, it's time to cut! Use a sharp knife to slice it into bars or squares. For clean edges, try wiping the knife with a damp cloth between cuts. Enjoy your tasty energy bars!
Tips & Tricks
Storing Energy Bars
Store energy bars in the fridge for the best taste and texture. Wrap them in parchment paper. This keeps them fresh and easy to grab. For longer storage, freeze the bars. They will last up to three months. Just wrap them well in plastic wrap and then in foil. When you want one, let it thaw for a bit.
Adjusting Sweetness
You can change the sweetness to fit your taste. If you like it sweeter, add more honey or maple syrup. Start with one tablespoon more. Mix it well and taste. You can also reduce the sweetener as needed. This way, you get the balance you enjoy.
Enhancing Flavor
Want to boost the flavor? Try adding mix-ins! Shredded coconut adds a nice chew. Chia seeds or flaxseeds bring extra nutrition. You can also sprinkle in spices like cinnamon or nutmeg. These changes make each batch unique and fun to eat.
Pro Tips
- Storage: Keep these energy bars in an airtight container in the refrigerator for up to one week for optimal freshness.
- Customizations: Feel free to swap out the nuts and dried fruits based on your preference or dietary needs. Try sunflower seeds or pumpkin seeds for a nut-free version!
- Sweetness Level: Adjust the sweetness by using more or less honey or maple syrup according to your taste. You can also use a sugar-free syrup if desired.
- Protein Boost: For an extra protein boost, consider adding chia seeds or flaxseeds to the mixture before pressing it into the pan.
Variations
Protein Powder Options
You can choose protein powder based on your taste. Vanilla powder adds a sweet touch. Chocolate powder gives a rich flavor. You can even try other flavors like strawberry or mocha. This choice makes your bars more fun.
Nut-Free Alternatives
If you need a nut-free option, almond butter works well. Sun butter is another great choice. It has a unique taste and is safe for schools. These swaps keep the bars creamy without nuts.
Flavor Combinations
You can change the flavors with the seasons. For fall, add pumpkin spice for a warm taste. In summer, use dried berries for a fruity kick. This keeps your energy bars fresh and exciting all year round.
Serving Suggestions
Presentation Tips
To make your energy bars shine, try these ideas. First, use a wooden platter for a rustic look. Stack the bars neatly to show off their layers. Drizzle some melted chocolate on top for a fancy touch. You can also wrap each bar in parchment paper. Tie them with twine for a cute grab-and-go snack. This makes them look nice and keeps them fresh!
Pairing Suggestions
These energy bars pair well with a few snacks. You can enjoy them with a glass of milk for a classic combo. Try pairing them with yogurt for a tasty treat. Fresh fruit, like bananas or apples, makes a healthy side. If you want something warm, a cup of tea or coffee works great too. These options will enhance your snack time!
Meal Prep Ideas
These bars are perfect for weekly snacks. Make a batch on the weekend and store them in the fridge. They stay fresh for up to a week. Cut them into squares for easy grab-and-go options. You can also freeze them for longer storage. Just thaw before eating. This way, you always have a healthy snack ready!
FAQs
How long do Peanut Butter Chocolate Chip Energy Bars last?
These energy bars can last up to a week in the fridge. If you freeze them, they can stay fresh for up to three months. Just wrap each bar in parchment paper for easy storage. This keeps them tasty and ready to grab!
Can I make these energy bars vegan?
Yes, you can easily make these bars vegan. Simply replace honey with maple syrup. Use plant-based protein powder too. This way, you can enjoy the bars while keeping them cruelty-free.
What can I substitute for protein powder?
If you don’t have protein powder, you can use ground oats. Just blend rolled oats until they are fine. You can also add nut flour for some protein. This keeps the texture nice and chewy.
Can I use other sweeteners besides honey or maple syrup?
Absolutely! You can try agave syrup or brown rice syrup. Both options work well and add a unique flavor. Just remember to adjust the amount to keep the right sweetness.
How do I adjust the recipe for different serving sizes?
To change the number of bars, you can simply divide or multiply the ingredients. For example, if you want to make half, use half of each ingredient. If you want more, double everything. Just keep the ratio the same for the best results!
You now know how to make tasty energy bars. We covered the ingredients, tools, and steps. Don't forget to try tips for storage and sweetness. You can also switch flavors to match your taste. These bars fit well into your meal prep and snack ideas. With the right mix-ins, you can create fun treats. Enjoy your homemade bars anytime you need a boost!