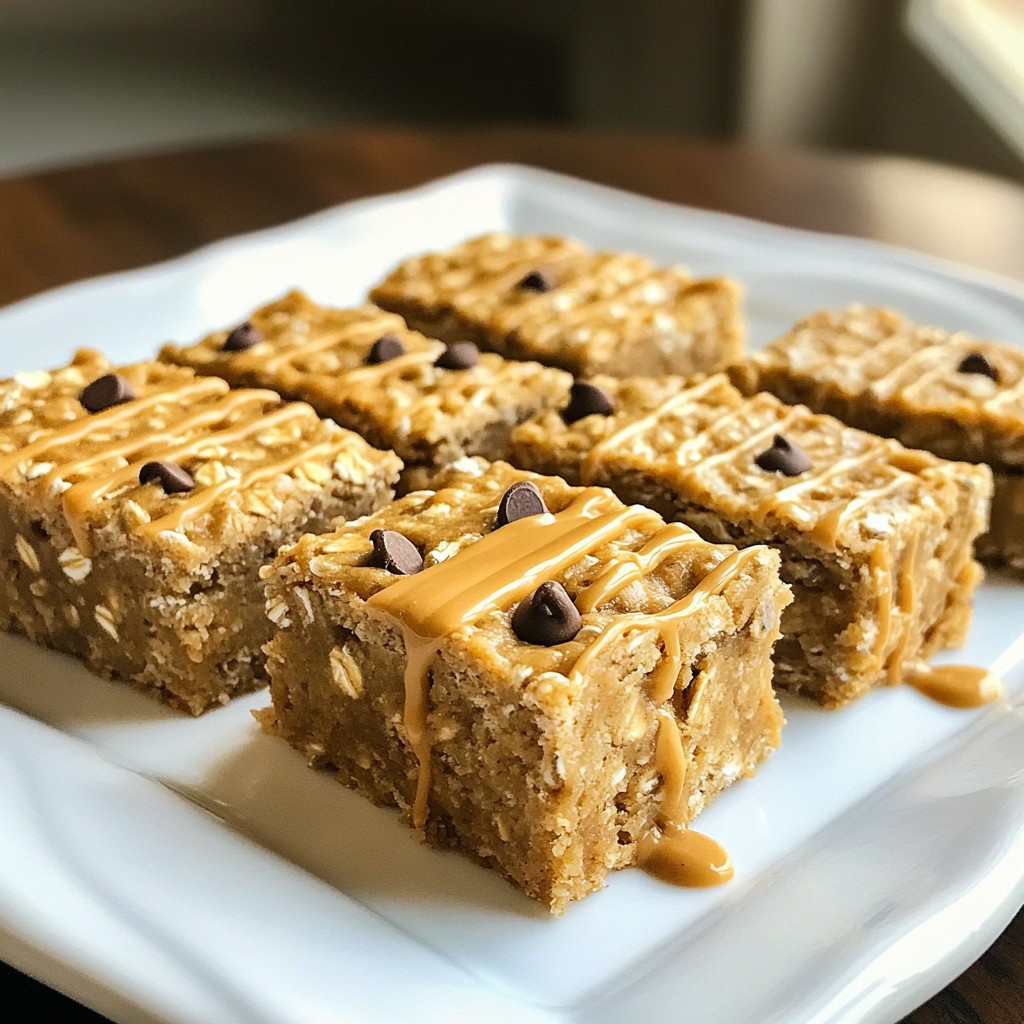
Looking for a tasty, easy snack? You’re in the right place! These No Bake Peanut Butter Oat Bars are simple to make and packed with flavor. You’ll love how quick and fun it is to whip them up. Plus, they’re perfect for any time of day. Let’s explore the ingredients and steps to create your new favorite snack! Your taste buds will thank you.
Why I Love This Recipe
- Quick and Easy: This recipe takes just 10 minutes of prep time, making it perfect for busy days or last-minute snacks.
- Healthy Ingredients: Packed with rolled oats, chia seeds, and peanut butter, these bars are a wholesome treat that’s great for energy.
- Customizable: You can easily tweak this recipe by adding your favorite nuts, seeds, or dried fruits to suit your taste.
- Make Ahead: These bars store well in the fridge, making them a convenient grab-and-go snack for the whole week.
Ingredients
Main Ingredients for No Bake Peanut Butter Oat Bars
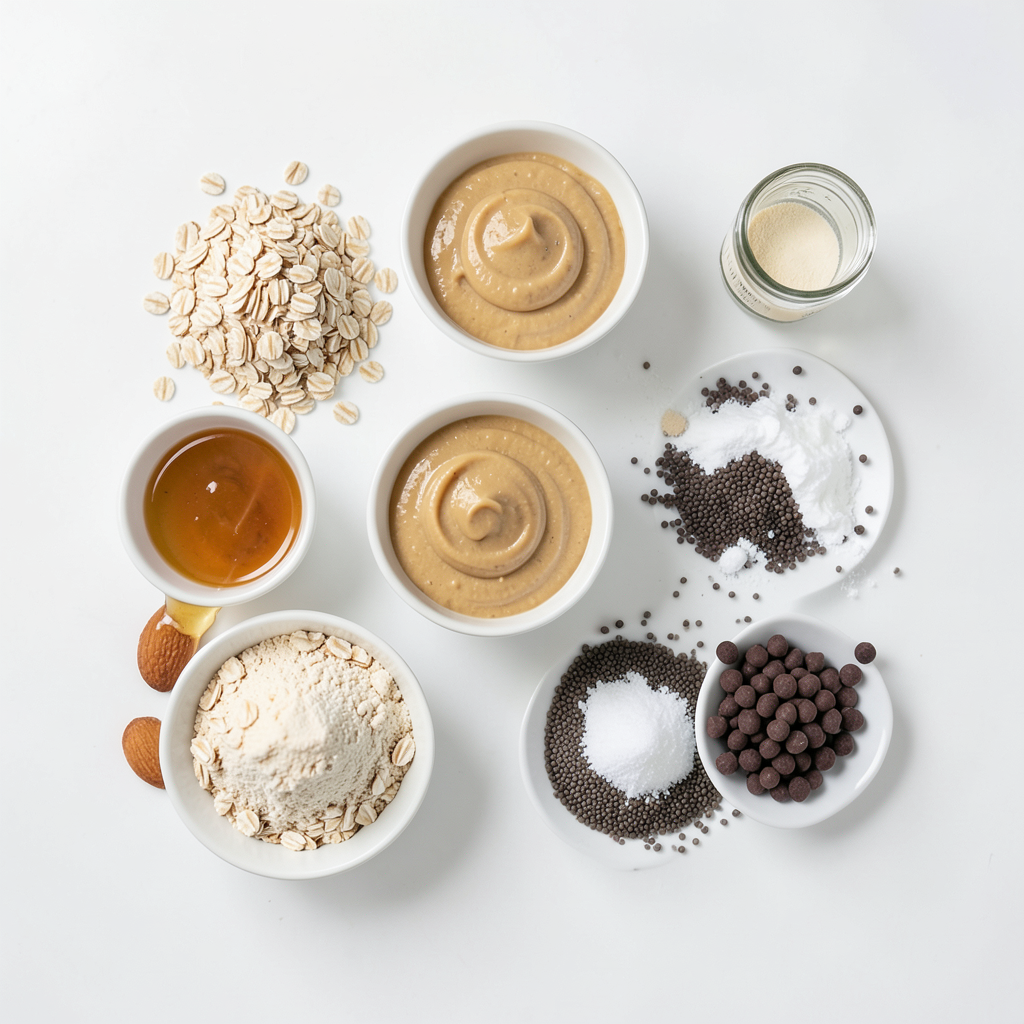
To make these tasty bars, you need a few key items:
- 1 cup rolled oats
- 1 cup creamy peanut butter
- 1/2 cup honey or maple syrup
- 1/2 cup almond flour (or whole wheat flour)
- 1/4 cup chia seeds
- 1/4 teaspoon salt
- 1 teaspoon vanilla extract
These ingredients come together to give you a chewy and nutty treat. The oats form the base, while peanut butter adds creaminess. Honey or maple syrup brings sweetness, and chia seeds add a health boost.
Optional Ingredients for Customization
You can add mini chocolate chips for a sweet twist. Here are more ideas to personalize your bars:
- Dried fruits like raisins or cranberries
- Chopped nuts for crunch
- Seeds like sunflower or pumpkin
Feel free to mix and match. Each addition changes the flavor and texture, making your bars unique.
Substitutions and Allergies
If you have allergies or dietary needs, here are some swaps:
- Use sunflower seed butter instead of peanut butter for nut-free bars.
- Maple syrup works well if you want to avoid honey.
- Almond flour can be swapped with oat flour or regular flour.
Always check labels for allergens. This way, you can enjoy the bars safely!
Step-by-Step Instructions
Preparation of Dry Ingredients
First, gather your dry ingredients. You need rolled oats, almond flour, chia seeds, and salt. In a large bowl, add 1 cup of rolled oats. Next, add 1 cup of almond flour. If you want whole wheat flour, that works too. Then, mix in 1/4 cup of chia seeds and 1/4 teaspoon of salt. Stir everything well until it is all combined.
Making the Peanut Butter Mixture
Now, let’s make the peanut butter mixture. In a microwave-safe bowl, add 1 cup of creamy peanut butter and 1/2 cup of honey or maple syrup. Heat it in the microwave for about 30 seconds. This helps the mixture blend better. After heating, stir until it is smooth. It should look creamy and shiny.
Combining the Ingredients and Setting the Bars
Next, pour the warm peanut butter mixture into the dry ingredients. Add 1 teaspoon of vanilla extract to the mix. Stir everything together until it is fully combined. If you like chocolate, fold in 1/2 cup of mini chocolate chips. Line an 8x8 inch baking dish with parchment paper. Leave some paper hanging over the edges. This helps you lift the bars out later. Press the mixture firmly into the dish, making it even. The tighter you pack it, the better the bars will hold. Place the dish in the fridge for 1-2 hours. This helps the bars set. Once set, lift them out using the parchment paper and cut them into squares or rectangles. Enjoy your tasty snacks!
Tips & Tricks
Ensuring the Bars Hold Together
To keep your bars from falling apart, press the mixture tightly in the pan. Use your hands or a spatula to pack it down firmly. The more compact the mixture, the better it will set. Letting them chill in the fridge for at least two hours is key. It helps them firm up nicely. You can also try adding more almond flour or chia seeds if you want more binding power.
Serving and Presentation Suggestions
For a fun touch, serve the bars on a wooden cutting board. You can also use a colorful plate to make them pop. Drizzle some extra peanut butter over the top for a nice look. If you want to make them portable, wrap each bar in foil. This makes them easy to grab for a snack on the go. You could also cut them into fun shapes with cookie cutters for a creative twist.
Storage Tips for Freshness
Store your oat bars in an airtight container to keep them fresh. They can last in the fridge for up to a week. If you want to keep them longer, you can freeze them. Just wrap each bar in plastic wrap and then place them in a freezer bag. Frozen bars will last for about three months. When you’re ready to eat them, let them thaw in the fridge for a few hours.
Pro Tips
- Choose the Right Peanut Butter: Use natural peanut butter without added sugars or oils for a healthier option and a better texture.
- Chill for Firmness: Allowing the bars to set in the refrigerator for a few hours ensures they hold their shape when cut.
- Customize Your Add-ins: Feel free to add nuts, dried fruit, or seeds to the mixture for added flavor and nutrition.
- Storage Tips: Store the bars in an airtight container in the fridge for up to a week or freeze them for longer shelf life.
Variations
Adding Different Mix-Ins (e.g., nuts, dried fruit)
You can make your no bake peanut butter oat bars unique by adding mix-ins. Nuts like almonds or walnuts add crunch and healthy fats. Dried fruits like cranberries or raisins bring natural sweetness and chewiness. Just remember to keep the total mix-ins to about one cup. This way, the bars stay firm and slice nicely. You can play around with your favorites or use what you have on hand.
Flavoring with Extracts or Spices
To add depth to your bars, try flavoring with extracts or spices. A dash of cinnamon can give warmth and comfort. You might also add a bit of almond extract for a nutty twist. If you prefer a fresh taste, a hint of orange zest can brighten the flavor. Just a little goes a long way. Experiment with these flavors to find your perfect blend.
Alternative Sweeteners and Their Effects
While honey or maple syrup works well, there are other sweeteners to try. Agave nectar is a great choice for a lighter taste. Coconut sugar adds a caramel-like flavor. Each sweetener changes the texture slightly. For a low-calorie option, consider stevia. It’s much sweeter, so use less. Adjust the amounts to fit your taste and health needs.
Storage Info
Best Containers for Storage
To keep your no bake peanut butter oat bars fresh, choose the right container. Airtight containers work best. Glass containers are great, as they don’t absorb odors. If you use plastic, make sure it’s BPA-free. You can also wrap the bars in foil or wax paper for easy grab-and-go snacks.
Refrigeration vs. Freezing
You can store these bars in the fridge or freezer. Refrigeration helps them stay firm and fresh. They will last about a week when chilled. Freezing is a good option for long-term storage. Just make sure to wrap each bar well. They can last up to three months in the freezer. When ready, let them thaw in the fridge or at room temperature.
Shelf Life of No Bake Peanut Butter Oat Bars
The shelf life of these bars depends on how you store them. In the fridge, they last about 5 to 7 days. If frozen, they can last up to three months. Always check for any changes in smell or texture before eating. Proper storage keeps these tasty bars ready for your next snack!
FAQs
Can I use crunchy peanut butter instead of creamy?
Yes, you can use crunchy peanut butter. This will add a nice texture. The bars will have little bits of peanuts. It makes each bite more interesting. Just keep the same amount as the creamy type.
How long do no bake oat bars last?
These bars last about one week in the fridge. Store them in an airtight container. You can freeze them too. They can last for up to three months in the freezer. Just let them thaw before you enjoy them.
Can I make these bars vegan-friendly?
Yes, you can make these bars vegan. Use maple syrup instead of honey. Also, choose vegan chocolate chips if you want. The rest of the ingredients are already vegan. This way, everyone can enjoy these tasty bars!
You now know how to make delicious no bake peanut butter oat bars. We covered the key ingredients, step-by-step instructions, and useful tips. Don’t forget to customize with your favorite mix-ins and flavors!
Store these bars properly to keep them fresh. Enjoy the easy recipes and answers to common questions. You can create tasty snacks that fit your needs and preferences. Making these bars is simple, fun, and rewarding.