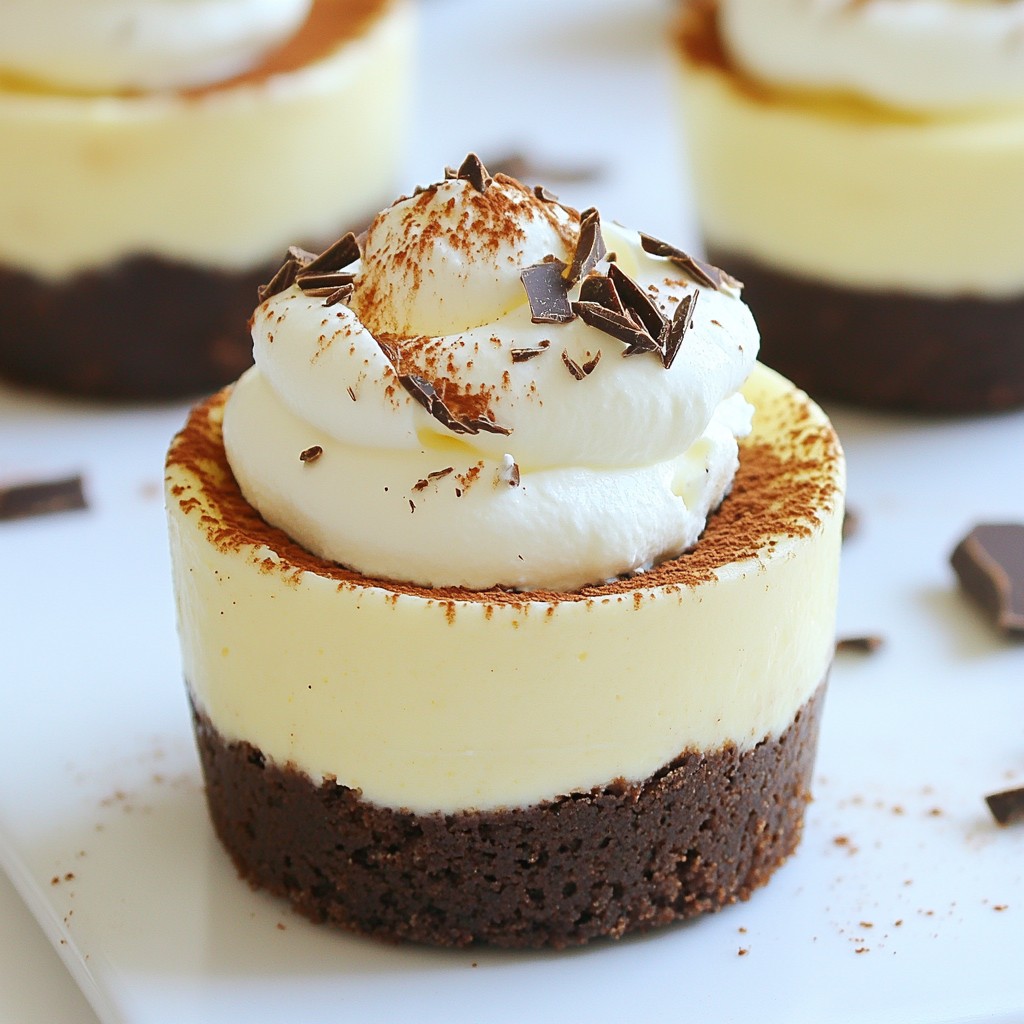
Looking for a quick and delicious dessert? These No-Bake Chocolate Cheesecake Cups are your answer! Imagine rich chocolate and creamy cheesecake, all in a handy cup. Perfect for parties or a sweet treat at home, you can whip them up in no time. Follow my easy steps to create this delightful dessert that everyone will love. Let's dive into the ingredients and get started on this tasty journey!
Why I Love This Recipe
- Decadent Flavor: This no-bake chocolate cheesecake is rich and creamy, making it a perfect indulgence for chocolate lovers.
- Easy to Prepare: With just 20 minutes of prep time, this recipe is simple enough for anyone to make without the need for baking.
- Perfect for Any Occasion: These cheesecake cups are a delightful dessert for parties, gatherings, or just a sweet treat at home.
- Customizable Toppings: You can top these cheesecake cups with whipped cream, chocolate shavings, or even fresh berries for a personal touch.
Ingredients
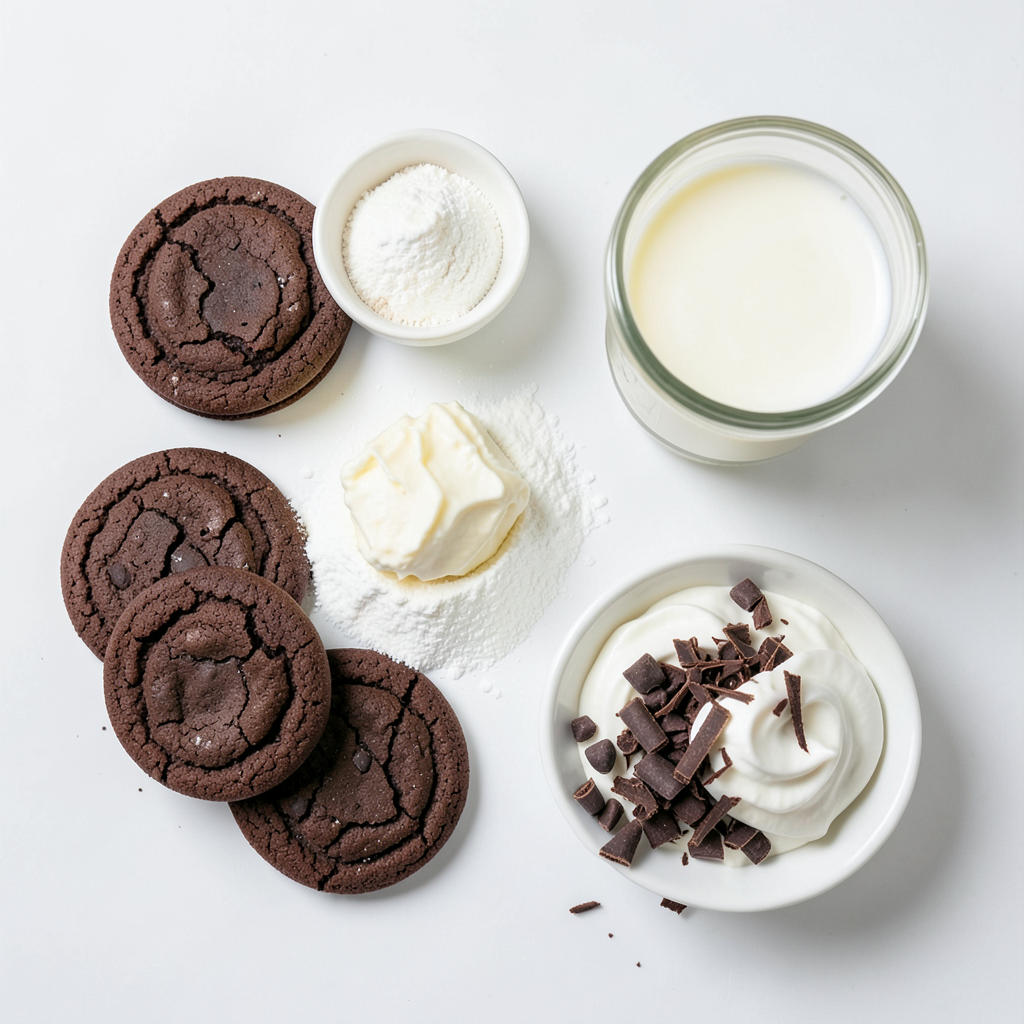
When making no-bake chocolate cheesecake cups, you need a few key ingredients. Each one plays a big role in creating layers of flavor. Here’s your list:
- 1 cup chocolate sandwich cookies, crushed
- 2 tablespoons unsalted butter, melted
- 8 oz cream cheese, softened
- 1/2 cup powdered sugar
- 1 cup heavy whipping cream
- 1 teaspoon vanilla extract
- 1/2 cup semi-sweet chocolate chips, melted (and cooled)
- Whipped cream for topping
- Chocolate shavings or cocoa powder for garnish
These ingredients combine to create a rich and creamy dessert. The chocolate sandwich cookies form a crunchy crust. The cream cheese adds a smooth texture, while the whipped cream keeps it light. Don't forget the chocolate chips! They add a deep, rich chocolate flavor. Using whipped cream on top not only looks great but also adds a fluffy touch. Finally, adding chocolate shavings or cocoa powder gives it a beautiful finish. This is a dessert you will love to share—and enjoy!
Step-by-Step Instructions
Preparation of the Cookie Crust
1. First, take 1 cup of chocolate sandwich cookies and crush them into fine crumbs. You can use a food processor or place them in a bag and crush them with a rolling pin.
2. Next, melt 2 tablespoons of unsalted butter in a small bowl. Mix the melted butter into the cookie crumbs until they are fully coated.
3. Now, divide the cookie mixture evenly among individual serving cups. Use your fingers or the back of a spoon to press it firmly into the bottom, forming a nice crust.
Making the Cheesecake Filling
1. In a large bowl, combine 8 oz of softened cream cheese and 1/2 cup of powdered sugar. Beat them together until the mixture is smooth and creamy.
2. In another bowl, pour in 1 cup of heavy whipping cream and add 1 teaspoon of vanilla extract. Whip it until stiff peaks form, which means it holds its shape well.
3. Gently fold the whipped cream into the cream cheese mixture. Make sure to mix until fully integrated without deflating the whipped cream.
Assembling the Cheesecake Cups
1. Now it’s time to add flavor! Pour in 1/2 cup of melted semi-sweet chocolate chips that have cooled down. Fold it into the cream cheese mixture until it is well combined.
2. Spoon or pipe the chocolate cheesecake mixture into the cups over the cookie crust. Fill them about 3/4 full to give some space for toppings.
3. Finally, refrigerate the cheesecake cups for at least 4 hours. This helps them set properly and gives you that delicious, creamy texture.
Tips & Tricks
How to Achieve the Perfect Texture
To get a smooth and creamy filling, use room temperature cream cheese. Cold cream cheese makes it hard to mix well. Let it sit out for about 30 minutes before you start. This helps blend it better with the sugar.
Whipping the heavy cream to stiff peaks is key. This makes the dessert light and fluffy. To do this, use a clean bowl and beaters. Start on low speed, then increase to high. Stop when the cream holds its shape without drooping.
Serving Suggestions
Toppings can add fun and flavor. I like to use whipped cream on top. You can also sprinkle chocolate shavings or cocoa powder for extra flair. Fresh berries, like raspberries or strawberries, add a nice burst of flavor. Mint leaves can give a fresh touch too.
Common Mistakes to Avoid
One big mistake is overmixing the filling. This can make the texture less smooth. Mix just until combined, so it stays fluffy.
Another mistake is not chilling the cups long enough. They need at least 4 hours to set properly. If you skip this step, they will not hold their shape. Patience is key for the best results!
Pro Tips
- Chill Your Ingredients: Make sure your cream cheese is at room temperature before mixing. This will help achieve a smoother consistency.
- Whip the Cream Properly: When whipping the heavy cream, ensure that your bowl and beaters are cold. This helps the cream to whip faster and hold its shape better.
- Use Quality Chocolate: For the best flavor, opt for high-quality semi-sweet chocolate chips. The chocolate taste will greatly influence the overall flavor of the cheesecake.
- Let It Set: Allow the cheesecake cups to chill in the refrigerator for the full 4 hours or overnight if possible. This ensures a firmer texture and richer flavor.
Variations
Flavor Variations
You can change up the flavor of your cheesecake cups easily. Try adding 1/4 cup of peanut butter to the cream cheese mix. This gives a rich, nutty taste that pairs well with chocolate. You can also use different extracts. Almond or coffee extract adds a unique twist. If you prefer a lighter taste, swap the semi-sweet chocolate for white chocolate. Melt it just like the dark chocolate. It will create a creamy, dreamy dessert.
Dietary Modifications
For gluten-free options, use gluten-free chocolate cookies. They work just as well as regular cookies. Check the label to make sure they are safe for your needs. If you want a vegan version, use dairy-free cream cheese. You can also replace heavy cream with coconut cream for a rich texture. Both options keep the taste delightful without any animal products.
Presentation Ideas
The look of your dessert matters. Use different types of cups to make it fun. Try mason jars, shot glasses, or even fancy dessert cups. Each cup can give a new feel to your dessert. For a seasonal touch, decorate with toppings. Fresh berries, crushed nuts, or holiday sprinkles can add color. You can also use mint leaves for a fresh look. These small changes can make your cheesecake cups a feast for the eyes!
Storage Info
How to Store the Cheesecake Cups
Store your no-bake chocolate cheesecake cups in airtight containers. This keeps them fresh and tasty. If you don’t have containers, cover each cup tightly with plastic wrap. Make sure they fit well inside your fridge. The cold air helps them stay firm and delicious.
Freezing the Cheesecake Cups
If you want to freeze them, follow these steps:
1. Place the cups in a single layer on a baking sheet.
2. Freeze for about 2 hours until they are solid.
3. After freezing, wrap each cup in plastic wrap. This keeps them from getting freezer burn.
When you are ready to enjoy them, take them out. Let them thaw in the fridge for about 4 hours. This helps them regain their creamy texture.
Shelf Life and Best Before
These cheesecake cups last about 5 days in the fridge. Keep an eye on them. If they start to smell off or look strange, it’s time to toss them. Freshness is key for the best taste!
FAQs
How long do No-Bake Chocolate Cheesecake Cups need to set?
These cheesecake cups need at least 4 hours to set. This time allows the filling to firm up. If you can wait longer, up to overnight is even better. This extra time helps the flavors blend well.
Can I make these cheesecake cups ahead of time?
Yes, you can make these cups ahead of time. Prepare them a day or two before you serve them. Just keep them covered in the fridge. This way, they stay fresh and ready for your guests.
What can I substitute for cream cheese?
If you want a different flavor, try mascarpone cheese. It is creamy and rich. You can also use Greek yogurt for a lighter option. Just pick one that fits your taste or diet needs.
How do I know when the cheesecake cups are set?
Look for a firm texture when you touch the filling. It should not jiggle. If it's slightly soft but holds shape, it's set. You can also check by gently shaking the cup. The filling should feel stable.
This blog post explored how to make no-bake chocolate cheesecake cups. We covered ingredients, step-by-step instructions, and tips for success. You learned how to create a rich filling, perfect crust, and even variations to try. Remember to store them right and watch for signs of spoilage. Whether serving at a party or enjoying a treat, these cheesecake cups are a delight. With practice, you'll master this recipe and impress your friends. Enjoy your delicious creations!