Are you ready to elevate your chicken dinners? Garlic Dill Pickle Chicken Tenders are the answer! With just a few ingredients, you can create crispy, juicy tenders bursting with flavor. This recipe uses tangy dill pickle juice and savory seasoning, making it a crowd-pleaser. Dive into this culinary adventure, and learn how to make chicken that everyone will crave! Let’s get started on this tasty journey!
Why I Love This Recipe
- Flavorful Marinade: The dill pickle juice tenderizes the chicken while infusing it with a tangy flavor that makes every bite delicious.
- Crunchy Coating: The combination of flour and panko breadcrumbs creates a perfectly crispy texture that contrasts beautifully with the juicy chicken inside.
- Quick and Easy: This recipe comes together quickly with minimal prep, making it a perfect weeknight dinner option.
- Customizable Dipping Sauces: Serve these tenders with your favorite sauces, whether it's classic ranch or a spicy aioli, to elevate the dish even further.
Ingredients
Main Ingredients
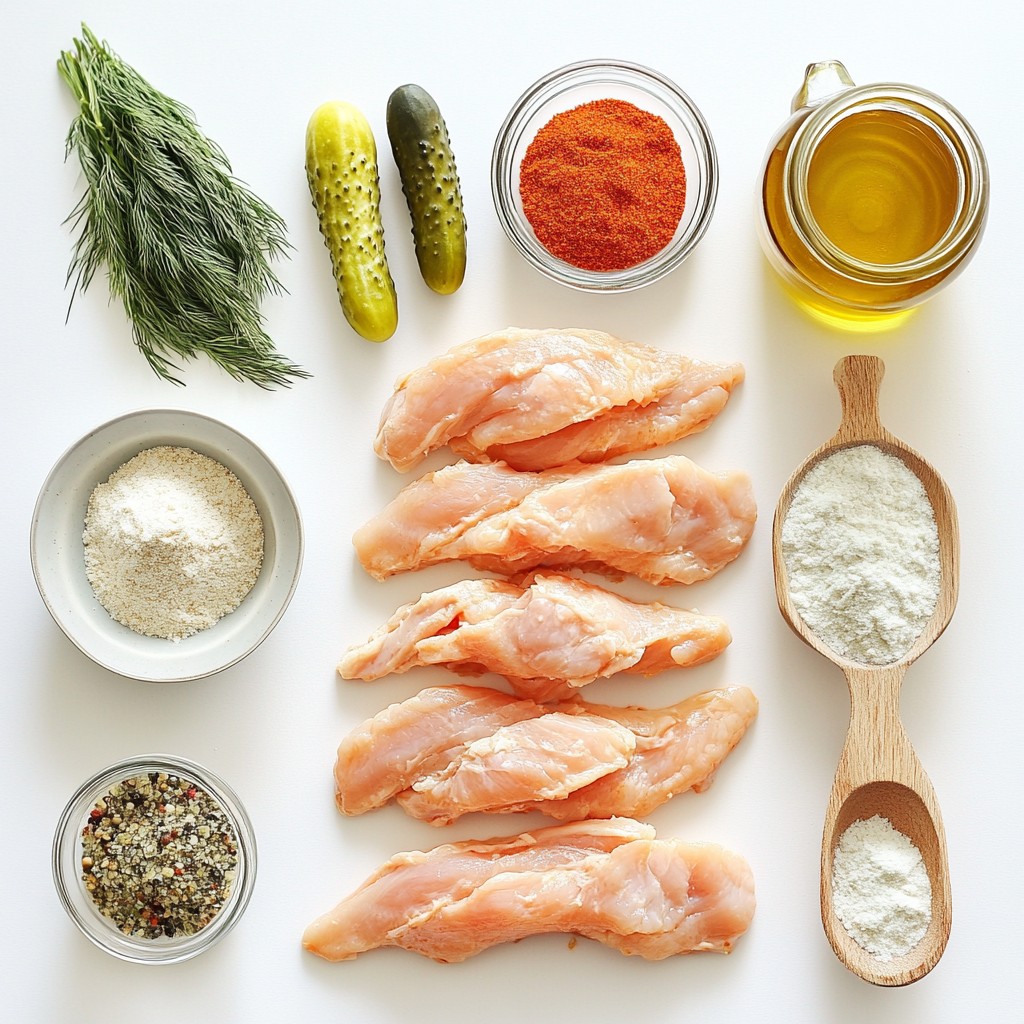
- 1 lb chicken breast
- 1 cup dill pickle juice
- 1 cup buttermilk
- 1 cup all-purpose flour
- 1 cup panko breadcrumbs
Seasonings
- 1 tablespoon garlic powder
- 1 tablespoon dried dill
- 1 teaspoon paprika
- 1 teaspoon salt
- ½ teaspoon black pepper
Optional Ingredients
- Vegetable oil for frying
- Dipping sauce suggestions
For this recipe, I start with fresh chicken breast. I cut it into thin strips. These will cook evenly and stay juicy. The magic begins with dill pickle juice. I soak the chicken in this for at least an hour. The longer, the better! This step packs in flavor and keeps the chicken tender.
Next, I mix buttermilk with seasonings. Garlic powder, dill, paprika, salt, and black pepper give depth to the dish. I soak the chicken in this mix for about 20 minutes. This allows the flavors to meld beautifully.
For the crispy coating, I blend flour and panko breadcrumbs. The panko adds that perfect crunch. I coat each chicken strip in the mixture. It’s key to make sure each piece is well-covered. This helps create a crispy texture when frying.
When it comes to frying, I use vegetable oil. It’s perfect for frying because it has a high smoke point. Make sure the oil is hot before adding the chicken. This keeps the coating from becoming soggy. For dipping, I suggest ranch or a spicy aioli. They complement the flavors well. Enjoy these tasty chicken tenders!
Step-by-Step Instructions
Marinating the Chicken
First, take 1 pound of chicken breast and cut it into strips. Place these strips in a large bowl. Pour in 1 cup of dill pickle juice. This juice adds great flavor and keeps the chicken moist. Marinate the chicken for at least 1 hour. For the best taste, you can marinate it overnight in the fridge. The longer the chicken sits, the more flavor it absorbs.
Preparing the Soaking Mixture
Next, we need to make the soaking mixture. In a separate bowl, combine 1 cup of buttermilk with 1 tablespoon of garlic powder, 1 tablespoon of dried dill, 1 teaspoon of paprika, 1 teaspoon of salt, and ½ teaspoon of black pepper. Mix it well until combined. Soak the marinated chicken strips in this mixture for about 20 minutes. This step helps to add more flavor and keep the chicken juicy.
Bread the Chicken
Now, let’s prepare the breading station. In a shallow dish, mix together 1 cup of all-purpose flour and 1 cup of panko breadcrumbs. This mix gives the chicken a crispy texture. Take each chicken strip out of the buttermilk mixture. Let the excess liquid drip off, then dredge the strip in the flour-panko mixture. Make sure each piece is well coated. Repeat this for all the chicken strips.
Frying the Chicken
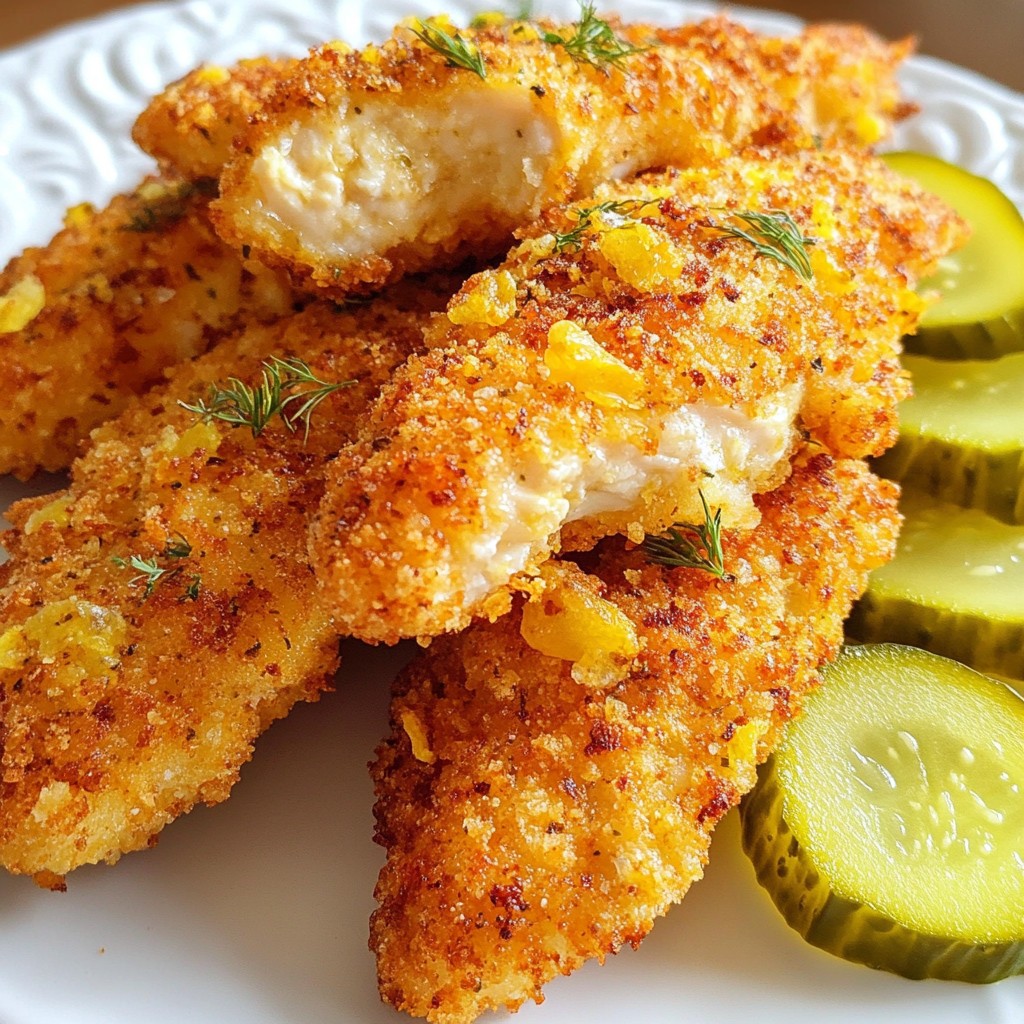
Heat about ½ inch of vegetable oil in a large skillet over medium heat. To check if the oil is ready, drop a small piece of bread in. If it sizzles, you are good to go. Carefully place the coated chicken tenders in the hot oil. Fry in batches to avoid overcrowding the pan. Cook each piece for about 4 to 5 minutes on each side. They should turn golden brown and be cooked through.
Serving Suggestions
Once cooked, transfer the chicken tenders to a paper towel-lined plate. This helps soak up any extra oil. Serve the tenders hot, alongside dill pickle slices. They pair well with dipping sauces like ranch or a spicy aioli. Enjoy your crispy and juicy garlic dill pickle chicken tenders!
Tips & Tricks
Ensuring Flavorful Chicken Tenders
To make your chicken tenders burst with flavor, start with marinating them. I suggest using dill pickle juice as a base. This juice adds a tangy taste and helps keep the chicken tender.
- Marinate the chicken for at least 1 hour.
- For even better flavor, let it sit overnight.
Rinse the chicken lightly after marinating. This helps to remove excess salt and pickle taste. Pat the chicken dry with paper towels. This step makes the breading stick better.
Achieving the Perfect Crunch
The crunch of the chicken is key. To get this right, use panko breadcrumbs. They add a great texture.
- Heat oil to medium heat, about 350°F.
- Avoid overcrowding the pan. Cook in batches if needed.
If your tenders turn out soggy, check the oil temperature. It should be hot enough to fry quickly. If you have a thermometer, use it to check.
General Cooking Advice
Knowing when the chicken is cooked is important. The internal temperature should reach 165°F.
Using a meat thermometer helps ensure you hit this mark. If you don’t have one, cut into a tender. The meat should be white with no pink inside.
These tips will help you make the best garlic dill pickle chicken tenders. Enjoy your cooking!
Pro Tips
- Marinate for Maximum Flavor: The longer you marinate the chicken in dill pickle juice, the more flavorful and tender it will become. Aim for at least 1 hour, but overnight is even better!
- Use a Thermometer: To ensure your chicken tenders are cooked perfectly, use a meat thermometer. The internal temperature should reach 165°F (75°C) for safe consumption.
- Maintain Oil Temperature: Keep an eye on the oil temperature while frying. If the oil is too hot, the outside will burn before the chicken is cooked through. A medium heat is ideal for even cooking.
- Experiment with Dipping Sauces: While dill pickles and ranch are classic pairings, feel free to try other sauces like honey mustard, BBQ, or a spicy aioli for a fun twist!
Variations
Flavor Variations
You can mix up the flavor of your chicken tenders in fun ways. Try adding different spices to your buttermilk soak. A tablespoon of onion powder or cayenne pepper can give it a nice kick. You can also change the dill pickle juice. Use spicy pickle juice for heat or sweet pickle juice for a twist.
Cooking Method Alternatives
If you want to bake your garlic dill pickle chicken tenders, preheat your oven to 400°F. Place the breaded tenders on a lined baking sheet. Bake for 20-25 minutes, flipping halfway. For air-frying, set your air fryer to 375°F. Cook the tenders in a single layer for about 10-12 minutes. Check for golden brown and crispiness.
Serving Variations
Dipping sauces can add fun to your meal. Try ranch, honey mustard, or a zesty buffalo sauce. To complete your meal, pair the tenders with sides. French fries, coleslaw, or a fresh salad work well. You can also serve them with dill pickle slices for extra crunch!
Storage Info
Storing Leftover Chicken Tenders
You should store leftover chicken tenders in the fridge. Place them in an airtight container. This keeps them fresh and moist. They will stay good for about 3 to 4 days. When reheating, use an oven or an air fryer. This helps keep the tenders crispy. Avoid using a microwave, as it can make them soggy.
Freezing Guidelines
To freeze chicken tenders, let them cool first. Then, wrap each tender in plastic wrap. Place them in a freezer bag. Squeeze out the air to prevent freezer burn. They can last about 2 to 3 months in the freezer. When ready to eat, transfer them to the fridge overnight to thaw. You can also use the microwave, but this may affect their texture.
Shelf Life
In the fridge, these chicken tenders last about 3 to 4 days. You will know they are bad if they smell sour or have a slimy texture. If you notice any discoloration, it’s best to throw them away. Always check the tenders before eating. Your safety is important!
FAQs
How long should I marinate chicken in pickle juice?
You should marinate the chicken in pickle juice for at least 1 hour. For even better flavor, you can let it sit overnight. This helps the chicken absorb the tangy taste and stay juicy.
Can I use chicken thighs instead of breasts?
Yes, you can use chicken thighs instead of breasts. Thighs have more fat, which can make them juicier. The flavor will also be richer. Just cut them into strips like you would with chicken breasts.
What is the best way to reheat leftover chicken tenders?
The best way to reheat chicken tenders is in an oven or air fryer. Preheat to 350°F (175°C). Place the tenders on a baking sheet and heat for 10-15 minutes. This keeps them crispy.
What dipping sauces pair well with garlic dill pickle chicken tenders?
Some great dipping sauces include ranch, honey mustard, and spicy aioli. You can also try a yogurt-based dip or even more dill pickle slices for extra flavor.
Are there any alternatives to buttermilk?
If you don’t have buttermilk, you can use regular milk mixed with vinegar or lemon juice. Just let it sit for 5 minutes. This gives you a similar tangy taste.
Can I make these chicken tenders ahead of time?
Yes, you can prepare the chicken tenders ahead of time. Marinate and soak them as usual. Then, bread them and store in the fridge for a few hours. Just fry them when you’re ready to eat.
This blog post covered how to make tasty garlic dill pickle chicken tenders. You now have the key ingredients, from chicken breast to panko. I shared every step, from marinating to frying, to help you achieve perfect crunchiness. You also learned storage tips and creative variations to try.
Enjoy these chicken tenders with your favorite dips. Experiment with seasonings and cooking methods for a unique touch. The fun lies in making this recipe your own. Happy cooking!