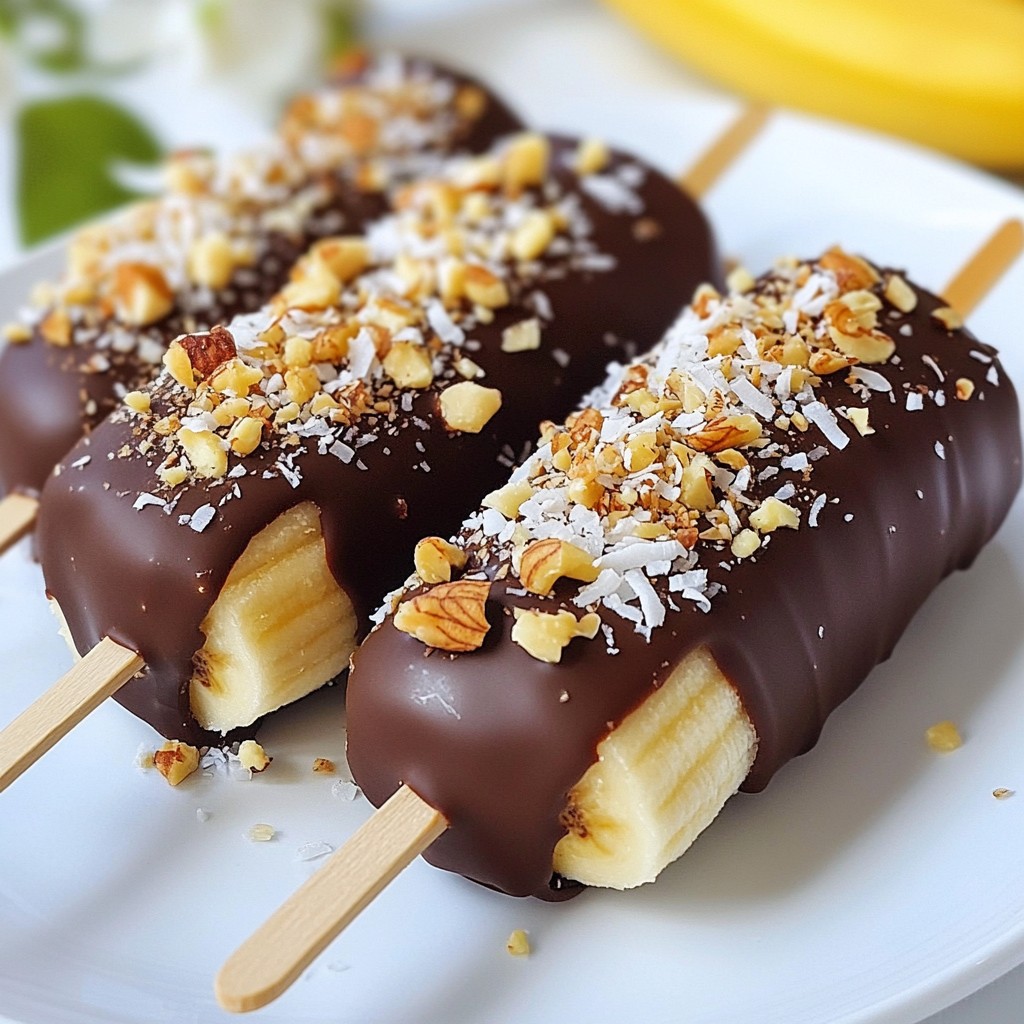
Looking for a fun treat that's easy to make? I have the perfect solution: Chocolate Covered Banana Pops! These sweet snacks are not just simple to whip up; they’re also delicious and healthy. In this post, I'll walk you through the ingredients, quick steps, and creative tips needed to create these bites of joy. Get ready to impress your friends and family with this delightful dessert!
Why I Love This Recipe
- Quick and Easy: This recipe takes just 15 minutes to prepare, making it a perfect last-minute treat.
- Healthy Twist: Using bananas adds natural sweetness and nutrition, making these pops a guilt-free dessert option.
- Customizable: Feel free to mix and match toppings like nuts or coconut to suit your taste preferences.
- Fun for Kids: Kids love helping to make these pops, making it a great family activity in the kitchen.
Ingredients
Essential Ingredients for Chocolate Covered Banana Pops
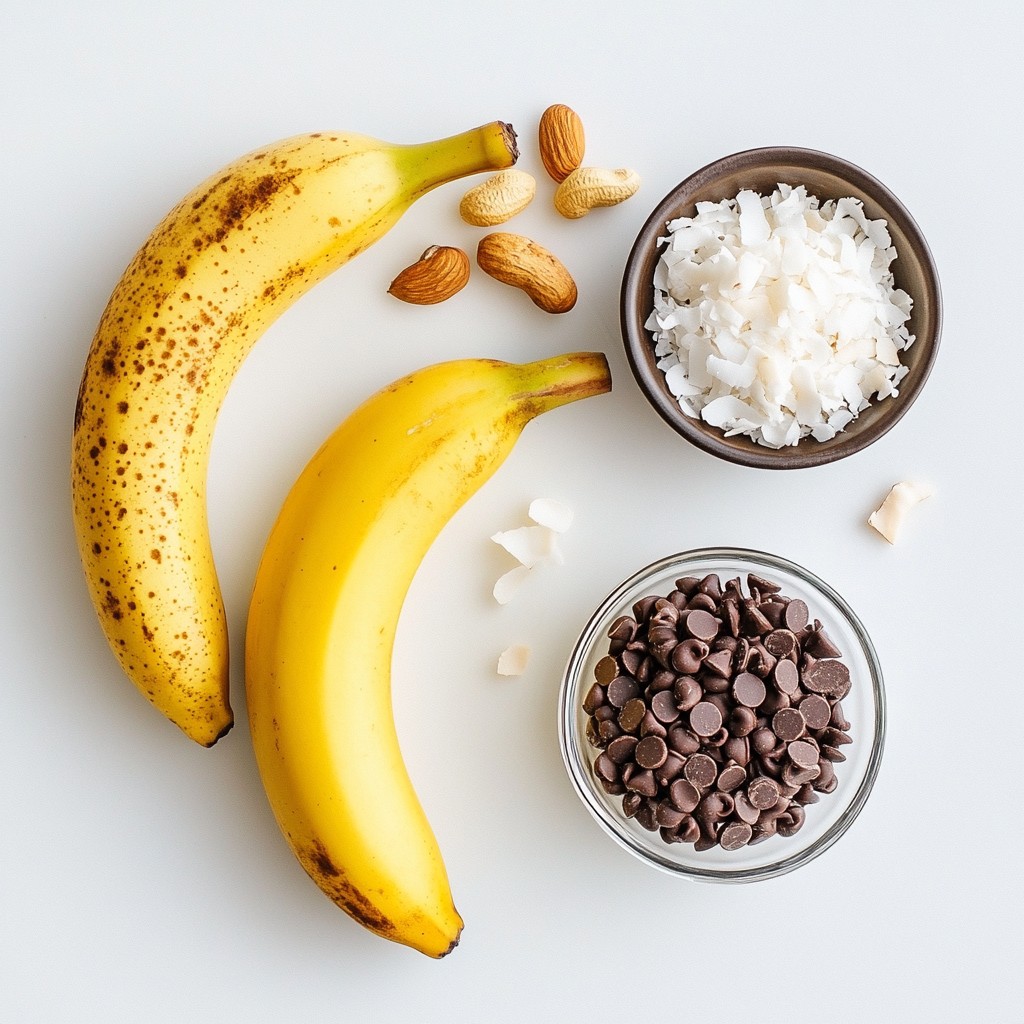
To make chocolate covered banana pops, you need just a few key items. Here’s what you'll need:
- 2 ripe bananas
- 1 cup dark chocolate chips
- 1 tablespoon coconut oil
- Popsicle sticks
These ingredients create a rich and creamy treat that is sure to please!
Optional Toppings and Add-ins
If you want to get creative, consider adding some fun toppings. Here are some optional choices:
- 1/4 cup crushed nuts (almonds, walnuts, or peanuts)
- 1/4 cup shredded coconut
These add-ins boost flavor and texture, making your pops more exciting!
Recommended Tools and Equipment
To make your chocolate covered banana pops, you'll need a few tools:
- A microwave-safe bowl
- A parchment-lined baking sheet or a plate
- A knife for cutting bananas
Having these tools ready will help you work smoothly and quickly. Enjoy making your delicious treat!
Step-by-Step Instructions
Preparation of Bananas
Start with 2 ripe bananas. Peel them and cut each banana into half or thirds. The size depends on how big you want your pops. Next, take a popsicle stick and insert it into each banana piece. Push it in halfway to keep it steady.
Melting Chocolate and Coconut Oil
Now, grab 1 cup of dark chocolate chips and 1 tablespoon of coconut oil. Place them in a microwave-safe bowl. Heat this mixture in the microwave. Do this in 30-second bursts. Stir in between until the chocolate is smooth and melted.
Coating and Freezing Process
Dip each banana pop into the melted chocolate. Make sure to cover it fully. Let any extra chocolate drip off. You can now roll the banana pops in crushed nuts or shredded coconut for extra flavor. Place the coated pops on a parchment-lined baking sheet. Once you coat them all, put the sheet in the freezer. Freeze for at least 2 hours, until they are firm.
- Serving Suggestions: Serve the pops on a fun plate or stand. For a nice touch, drizzle more melted chocolate on top or sprinkle extra nuts before you serve. Enjoy these treats straight from the freezer!
Tips & Tricks
How to Achieve a Smooth Chocolate Coating
To get a smooth chocolate coat, use good chocolate chips. Dark chocolate chips work best. Adding coconut oil helps the chocolate melt better. Be sure to heat the chocolate in short bursts. Microwave it for 30 seconds and stir. Repeat until it’s fully melted. When dipping, make sure to cover the banana pops completely. Allow the excess chocolate to drip off before moving to the next step. This gives a clean finish.
Best Practices for Freezing
Freezing your banana pops is key for the best taste. First, lay them out on a parchment-lined baking sheet. Make sure they do not touch each other. This helps them freeze evenly. Freeze them for at least 2 hours. This time allows the chocolate to harden well. You can keep them longer if you want. Wrap them in plastic wrap for extra freshness.
Serving and Presentation Ideas
Serving your chocolate-covered banana pops can be fun! You can place them on a decorative plate or a colorful stand. Drizzling some extra melted chocolate on top adds flair. Sprinkle extra crushed nuts for a nice touch, too. You can even add a scoop of ice cream on the side for a treat. Enjoy these pops at parties or just as a snack!
Pro Tips
- Use ripe bananas: The riper the bananas, the sweeter and creamier the pops will be. Look for bananas with brown spots for optimal flavor.
- Experiment with toppings: Get creative with your toppings! Try different nuts, sprinkles, or even drizzle with caramel for a unique twist.
- Keep chocolate warm: If the chocolate starts to harden while you're coating the pops, simply microwave it for a few seconds to regain the smooth consistency.
- Storage tips: Store leftover pops in an airtight container in the freezer to keep them fresh and prevent freezer burn.
Variations
Different Types of Chocolate to Use
You can play with different types of chocolate for your banana pops. Dark chocolate is rich and bold, perfect for a sweet treat. Milk chocolate gives a creamier taste that kids love. White chocolate adds a sweet and smooth twist, making it fun and different. You can even try flavored chocolate, like mint or orange, for a unique taste. Each type changes the flavor, so feel free to mix and match!
Creative Toppings to Try
When it comes to toppings, the sky is the limit! Here are some fun ideas:
- Crushed nuts: Use almonds, walnuts, or peanuts for a crunchy bite.
- Shredded coconut: It adds a tropical flair to your pops.
- Sprinkles: Bright and colorful sprinkles make them festive.
- Mini chocolate chips: For extra chocolatey goodness on top.
- Sea salt: A sprinkle of sea salt balances the sweetness.
- Dried fruit: Add pieces of dried strawberries or cranberries for a tangy kick.
Mix and match these toppings to create your perfect pop!
Healthier Alternatives
If you want a healthier option, try sugar-free chocolate. It still tastes great but cuts down on sugar. You can also use dark chocolate with a high cacao content. This type has more health benefits. Another idea is to coat the banana pops in yogurt instead of chocolate. Greek yogurt adds protein and can be just as tasty! These options let you enjoy your treat while making it a bit better for you.
Storage Info
How to Store Chocolate Covered Banana Pops
Store your chocolate covered banana pops in the freezer. Use a safe, airtight container. A freezer bag works well too. This keeps them fresh and tasty. Make sure to place a piece of parchment paper between pops. This prevents them from sticking together.
Shelf Life and Freezing Tips
Chocolate covered banana pops last for about 1 month in the freezer. After that, they may lose flavor or texture. To keep them fresh, wrap each pop in plastic wrap. Then place them in an airtight container. This helps to lock in the taste and quality.
Thawing Instructions for Enjoyment
To enjoy your banana pops, take them out of the freezer. Let them sit at room temperature for about 5 to 10 minutes. This makes them easier to bite into. If you’re in a hurry, you can microwave them for a few seconds. Just be careful not to melt the chocolate!
FAQs
Can I use other fruits instead of bananas?
Yes, you can use many fruits. Strawberries, apples, or pineapple work well too. Just remember to cut them into bite-sized pieces. This makes them easy to dip in chocolate. Each fruit brings its own flavor and fun. Try different fruits and find your favorite!
What if I don’t have popsicle sticks?
No popsicle sticks? No problem! You can use toothpicks or even skewers. Just make sure they are clean and safe for food. If you want, you can skip the sticks and just dip the fruit pieces. You can eat them right off the plate!
Are chocolate covered banana pops healthy?
Chocolate covered banana pops can be healthy! Bananas are full of vitamins and minerals. Dark chocolate has antioxidants, which are good for you. However, they are still a treat. Enjoy them in moderation. Balance them with other healthy foods for a tasty diet.
How long do chocolate covered banana pops last?
Chocolate covered banana pops last about two weeks in the freezer. Store them in an airtight container. This keeps them fresh and tasty. If you plan to eat them soon, you can keep them in the fridge for a day or two. Enjoy your sweet treat!
You learned how to make delicious chocolate-covered banana pops. We covered essential ingredients, tools, and step-by-step instructions. I shared tips for smooth coatings and creative toppings. You now know how to store them and their shelf life.
Enjoy experimenting with different fruits or healthier options. These treats are fun and easy to make. Now go and impress your friends with your tasty skills!