FREE DINNER EBOOK! Get your copy!
  • Cookie Policy
  • GDPR Policy
  • Disclaimer
  • Terms Of Use
  • Visit my other site: Fun Cookie Recipes
cozy citrus kitchen
  • Home
  • Dinner
  • Desserts
  • Drinks
  • Appetizers
  • Contact
  • About
  • Privacy Policy
  • Home
  • Dinner
  • Desserts
  • Drinks
  • Appetizers
  • Contact
  • About
  • Privacy Policy
  • Cookie Policy
  • GDPR Policy
  • Disclaimer
  • Terms Of Use
Visit my other site: Fun Cookie Recipes

HOME / CATEGORIES /

Latest

- 4 large portobello mushroom caps - 1 cup cherry tomatoes, halved - 1 cup fresh mozzarella balls, halved - 1 cup fresh basil leaves, chopped - 2 tablespoons balsamic glaze - 2 tablespoons olive oil - 1 teaspoon garlic powder - Salt and pepper to taste - Optional: Grated Parmesan cheese for topping When choosing portobello mushrooms, look for caps that are firm and smooth. They should be dark brown and free from spots. Avoid any that feel slimy or have a strong odor. For tomatoes, choose plump cherry tomatoes that are bright and shiny. They should feel heavy for their size. Fresh mozzarella should be soft and slightly springy. Always go for basil that is bright green with no browning or wilting. Fresh herbs bring out the best flavors in your dish. If you can't find portobello mushrooms, you can use large cremini or shiitake mushrooms. For mozzarella, consider using burrata or even feta cheese for a tangy twist. If you are out of balsamic glaze, a mix of vinegar and honey can work well. For those who want to skip cheese, you can add more vegetables or nuts for a different texture. {{ingredient_image_1}} First, heat your oven to 400°F (200°C). Grab four large portobello mushroom caps. Use a damp cloth to clean them well. Make sure to remove the stems gently. This will give you a nice space to fill later. In a large bowl, mix one cup of halved cherry tomatoes, one cup of halved fresh mozzarella balls, and one cup of chopped fresh basil leaves. This mix brings freshness and flavor. Drizzle two tablespoons of balsamic glaze and two tablespoons of olive oil over the mix. Add one teaspoon of garlic powder. Season with salt and pepper to taste. Stir the mixture gently to combine all the flavors. Place the cleaned portobello caps, gill-side up, on a baking sheet lined with parchment paper. Spoon the Caprese mixture into each cap. Pack the filling slightly for a hearty bite. If you like, sprinkle some grated Parmesan cheese on top. Bake them in your preheated oven for about 20 minutes. The mushrooms should be tender, and the cheese will be melted and bubbly. Once they are done, let them cool for a couple of minutes before serving. Enjoy the fresh and flavorful meal! When making Caprese stuffed portobellos, avoid overcooking the mushrooms. If they get too soft, they lose their shape. Clean the caps gently; don’t use water, as they can soak it up. Make sure to season the filling well. Under-seasoned food can taste bland and uninviting. Finally, pack the filling too lightly. If you don’t fill them well, they won’t have enough flavor. To boost the flavor of your dish, try adding fresh herbs. Oregano or thyme pairs well with the basil. A pinch of red pepper flakes adds heat and zest. You can also use fresh garlic instead of garlic powder for a more robust taste. Consider a splash of lemon juice for brightness. This adds a fresh, zesty touch that balances the richness of the cheese. Serve your stuffed portobellos on a rustic wooden board for a lovely display. Drizzle some extra balsamic glaze around the plate for a nice touch. Fresh basil leaves scattered on top make the dish pop. You could also pair them with a light salad for a complete meal. A side of crusty bread works well, too, perfect for soaking up any juices. Pro Tips Choose Fresh Ingredients: For the best flavor, select ripe cherry tomatoes, fresh mozzarella, and vibrant basil. Don’t Overstuff: While it’s tempting to pack the filling, leaving some space will help the mushrooms cook evenly. Experiment with Cheese: Try adding different cheeses like goat cheese or feta for a unique twist on flavor. Let Them Rest: Allow the stuffed mushrooms to cool for a few minutes after baking to enhance the flavors and avoid burns. {{image_2}} Caprese stuffed portobellos are already vegetarian. You can keep it simple with the classic recipe. For a twist, try adding roasted red peppers. They add a sweet, smoky flavor. You can also use different cheeses like goat cheese or feta. Each cheese gives a new taste. This recipe is gluten-free. Make sure your balsamic glaze does not have gluten. You can easily check the label. Use fresh ingredients and avoid any bread-based toppings. This way, you keep the meal safe for gluten-sensitive friends. You can get creative with other ingredients too. Try adding spinach or arugula for some greens. You can mix in olives for a briny taste. If you like spice, add crushed red pepper flakes. Just be careful not to overpower the flavors. These changes keep the dish fresh and fun! After your meal, let the Caprese stuffed portobellos cool down. Then, place them in an airtight container. You can store them in the fridge for up to three days. This keeps them fresh and tasty. If you want to keep them longer, consider freezing them. To reheat, preheat your oven to 350°F (175°C). Place the stuffed portobellos on a baking sheet. Cover them with foil to keep them moist. Heat for about 15 minutes. Check if they are warm all the way through. You can also use a microwave. Heat them for about one minute. Enjoy them warm for the best taste. You can freeze these delicious mushrooms for up to two months. Pack them tightly in a freezer-safe container. Make sure to label the container with the date. When you are ready to eat, thaw them in the fridge overnight. Then, reheat them in the oven as mentioned above. This way, you can enjoy this meal anytime! Yes, you can prepare the Caprese filling in advance. Mix the cherry tomatoes, mozzarella, and basil. Store it in the fridge for up to a day. You can stuff the portobello caps just before baking. This saves time and keeps the mushrooms fresh. These stuffed mushrooms pair well with many sides. You can serve them with a light salad or garlic bread. A fresh arugula salad adds a nice touch. You might also enjoy them with grilled vegetables or a simple pasta dish. Yes, you can use other mushrooms if you like. For example, large shiitake or cremini mushrooms work well. Just make sure they are big enough to hold the filling. Each type adds a different flavor and texture, so feel free to experiment! You learned how to create tasty Caprese stuffed portobellos. I shared tips on choosing fresh ingredients and ways to make your dish shine. We covered mistakes to avoid and how to store leftovers. You even saw fun variations and answered key questions. Now, go ahead and try making these portobellos. They can impress your family or guests. Your skills in the kitchen will grow with each dish you create. Enjoy cooking and tasting!

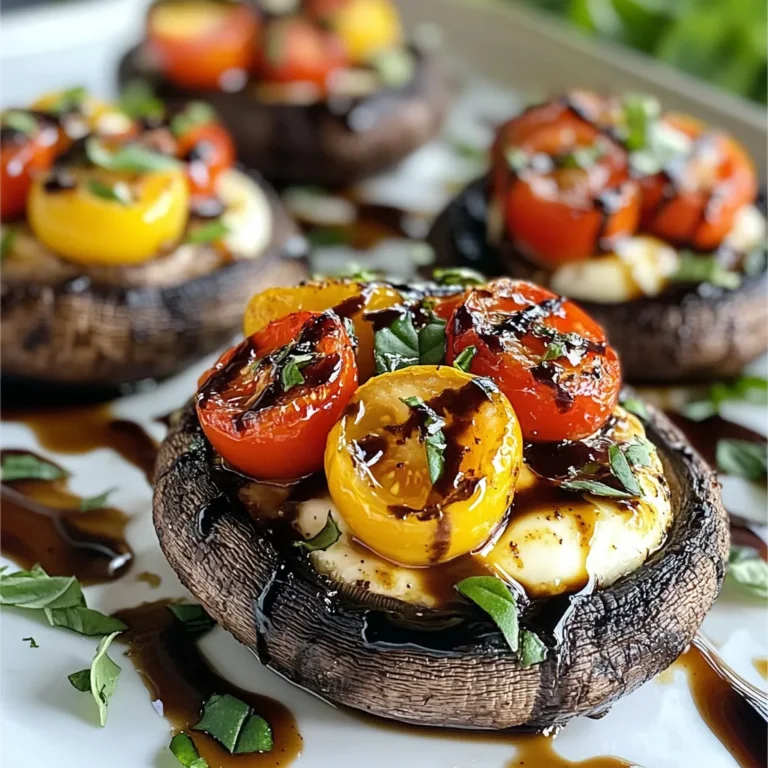
Caprese Stuffed Portobellos Fresh and Flavorful Meal

The main ingredients make this dish rich and tasty. You need: - 1 cup quinoa, rinsed and drained - 2 cups vegetable broth - 1 tablespoon olive oil - 1 small red onion, diced - 2 cloves garlic, minced - 1 red bell pepper, diced - 1 yellow bell pepper, diced - 1 can (15 oz) black beans, rinsed and drained - 1 can (15 oz) corn, drained - 1 can (14.5 oz) diced tomatoes with green chilies Quinoa is the star here. It cooks fluffy and adds protein. Vegetable broth gives it a savory base. Olive oil smooths everything out. Onions and garlic create a delicious aroma. The bell peppers add color and sweetness. Black beans bring extra protein and fiber. Corn adds a nice crunch. Lastly, the diced tomatoes add juiciness and zest. The right spices make this dish pop. You will use: - 1 tablespoon chili powder - 1 teaspoon cumin - 1 teaspoon smoked paprika - Salt and pepper to taste Chili powder gives heat and depth. Cumin adds a warm, earthy flavor. Smoked paprika brings a subtle smokiness. Salt and pepper enhance all the flavors. Mix these spices well to get a balanced taste in every bite. Garnishes make the meal look and taste even better. Use: - 1 avocado, sliced (for garnish) - Fresh cilantro, chopped (for garnish) - Lime wedges (for serving) Sliced avocado adds creaminess and healthy fats. Fresh cilantro gives a bright, fresh note. Lime wedges add zing when squeezed over the dish. Together, these garnishes make each serving feel special and fresh. Enjoy! {{ingredient_image_1}} 1. First, bring 2 cups of vegetable broth to a boil in a medium saucepan. 2. Once boiling, add 1 cup of rinsed quinoa. 3. Reduce the heat to low and cover the pot. 4. Let it cook for about 15 minutes. The quinoa will be fluffy when done. 1. While the quinoa cooks, heat 1 tablespoon of olive oil in a large skillet over medium heat. 2. Add 1 small diced red onion. Cook for 3 to 4 minutes until soft. 3. Next, add 2 cloves of minced garlic. Stir for 1 minute to avoid burning. 4. Now, toss in 1 diced red bell pepper and 1 diced yellow bell pepper. Sauté for 5 more minutes until they soften. 1. Once the veggies are ready, mix in the cooked quinoa. 2. Add 1 can of rinsed black beans, 1 can of drained corn, and 1 can of diced tomatoes with green chilies. 3. Sprinkle in 1 tablespoon of chili powder, 1 teaspoon of cumin, 1 teaspoon of smoked paprika, salt, and pepper to taste. 4. Stir everything well and heat through for about 5 to 7 minutes. Adjust the seasoning if needed. 5. Serve hot, garnished with avocado slices, fresh cilantro, and lime wedges on the side. To make quinoa great, start by rinsing it well. Rinsing removes bitter saponins. Place the quinoa in a fine mesh strainer. Rinse under cold water for about 2 minutes. This step makes your quinoa taste better. Cooking time is key. Use a 2:1 ratio of broth to quinoa. Bring the broth to a boil before adding quinoa. Reduce heat and cover. Cook for about 15 minutes. Check if it is fluffy and all liquid is gone. If needed, cook a few more minutes. Seasoning can make or break your dish. I recommend adjusting the chili powder to your taste. If you like heat, add more chili powder or some cayenne. You can also try adding a dash of hot sauce for extra kick. For deeper flavor, add some cumin and smoked paprika. These spices bring warmth and complexity. Don’t forget to taste as you go. Adjust salt and pepper to fit your needs. Serve your Tex Mex quinoa in a large bowl. It looks great with bright colors. Top each serving with sliced avocado and chopped cilantro. The green adds a nice pop to the dish. Lime wedges on the side are a must. They add freshness and zest when squeezed on top. You can also serve this dish in colorful bowls. It makes the meal feel special and fun. Pro Tips Perfectly Cooked Quinoa: To achieve fluffy quinoa, make sure to rinse it thoroughly before cooking to remove any bitterness from the saponins. This will enhance the flavor and texture. Veggie Variations: Feel free to customize the vegetables in this skillet. Zucchini, corn, or even spinach can be great additions for extra nutrition and flavor. Spice it Up: Adjust the spice levels according to your taste. If you prefer more heat, consider adding diced jalapeños or a pinch of cayenne pepper to the skillet. Meal Prep Friendly: This dish can be made ahead of time and stored in the refrigerator for up to 4 days. Reheat it quickly for a nutritious and satisfying meal. {{image_2}} You can easily boost this meal with protein. Adding chicken, shrimp, or tofu makes it heartier. If you choose chicken, cook it in the skillet before adding the vegetables. For shrimp, toss them in after the veggies soften. If you prefer tofu, make sure to press it first to remove excess water. Then, cube it and sauté it until golden. This adds a nice texture and taste. This dish is naturally vegetarian and can be made vegan by sticking to plant-based ingredients. Use vegetable broth, and skip any dairy garnishes. To make it vegan, add more beans or nuts for protein. You can also add roasted sweet potatoes for a sweet twist. Just make sure everything you use is dairy-free. Quinoa is great, but you can swap it for other grains too. Rice works well, especially brown rice for added fiber. Farro is another option that adds a chewy texture. If you want something different, try barley or bulgur wheat. Each grain gives a unique flavor and can change up this dish. Just adjust the cooking time based on the grain you select. To store leftovers of the Tex Mex Quinoa Skillet, let it cool first. Then, transfer it to an airtight container. This helps keep the dish fresh. You can store it in the fridge for up to four days. When you're ready to eat, just reheat it in the microwave or on the stove. For freezing, portion the skillet into smaller containers. Make sure you leave some space in each container. This space allows for expansion as the dish freezes. It’s best to consume it within three months for the best taste. When you want to enjoy it again, thaw it in the fridge overnight. Reheat it on the stove or in the microwave until hot. In the fridge, the Tex Mex Quinoa Skillet lasts about four days. If you freeze it, it can stay good for about three months. Always check for any off smells or changes in texture before eating. This ensures you enjoy a safe and tasty meal every time. Quinoa is a small, round seed that cooks like a grain. It is high in protein and fiber. It has all nine essential amino acids, making it a complete protein. Quinoa is also rich in vitamins and minerals, including magnesium, iron, and B vitamins. Here are key benefits: - Gluten-Free: Safe for those with gluten allergies. - High in Protein: Supports muscle growth and repair. - Rich in Fiber: Aids digestion and helps you feel full. - Low Glycemic Index: Helps maintain stable blood sugar levels. Eating quinoa can boost your health and add variety to meals. You can use it in salads, bowls, or as a side dish. Yes, you can prepare the Tex Mex quinoa skillet ahead of time. Meal prepping saves time and helps with healthy eating. Here are some tips: - Cook Quinoa in Advance: Make quinoa ahead and store it in the fridge for up to five days. - Sauté Veggies Early: You can cook the onion, garlic, and peppers and store them separately. - Combine Later: Mix the cooked quinoa, veggies, and beans when ready to eat. This dish reheats well, making it a great choice for busy days. Just warm it on the stove or in the microwave. If you don't have vegetable broth, don't worry! You can use many alternatives. Here are some great options: - Water: Simple and easy; just add extra spices for flavor. - Chicken Broth: Adds a richer taste if you are not vegetarian. - Bone Broth: A nutritious choice that adds depth to the flavor. - Homemade Broth: Simmer vegetable scraps with water for a fresh option. Feel free to use whatever you have on hand. Each choice will bring its own twist to the dish. This Tex Mex Quinoa Skillet combines wholesome ingredients and bold flavors. We covered main components like quinoa, beans, and spices that bring this dish to life. Helpful tips for cooking, enhancing flavor, and presentation can elevate your meal. Don't forget about variations to fit your diet, and easy storage tips for leftovers make this even better. It’s a fun, healthy option for any meal. Enjoy making this dish your own!

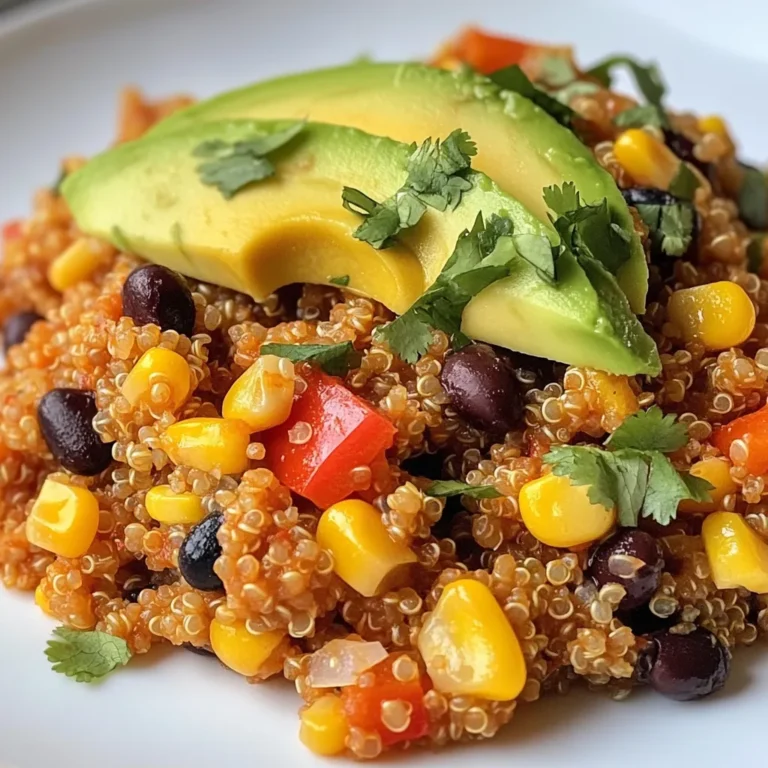
Tex Mex Quinoa Skillet Flavorful and Easy Meal

To make the best Caramelized Onion Swiss Burgers, you need a few key ingredients. Here’s what you’ll need: - Ground beef (80/20 blend) - Salt and pepper - Swiss cheese - Onions - Butter and olive oil - Burger buns - Dijon mustard (optional) - Toppings (arugula or lettuce) These ingredients come together to create a juicy and flavorful burger. The ground beef gives the patty its richness. The Swiss cheese adds a nice, creamy texture that melts beautifully. Onions, when caramelized, bring out a sweet flavor that pairs perfectly with the savory beef. Using butter and olive oil helps to caramelize the onions to a golden brown. The burger buns hold everything together and add a satisfying crunch when toasted. You can always add Dijon mustard for a little kick, but fresh arugula or lettuce adds a crisp bite. This list is simple but essential for that perfect burger experience. Make sure to gather everything before you start cooking. Having all your ingredients ready will make the process smoother and more fun! {{ingredient_image_1}} To start, set your skillet over medium heat. Add two tablespoons of butter and one tablespoon of olive oil. Let them melt together. Once melted, add two large onions, thinly sliced. Stir the onions every few minutes. This helps them cook evenly. Cook for about 20 to 25 minutes. You want them soft and golden brown. Lightly season with salt. This will bring out their natural sweetness. While the onions cook, it's time to prepare the patties. Take one pound of ground beef and divide it into four equal portions. Shape each portion gently into a patty, about three-quarters of an inch thick. Use your thumb to make a small indentation in the center of each patty. This keeps them flat while cooking. Season both sides with salt and pepper. Next, choose your cooking method. You can use a skillet or a grill. Heat it to medium-high. Add the burger patties and cook for about four to five minutes. Look for a nice browning on one side. Then, flip the patties over. After flipping, place a slice of Swiss cheese on each patty. It's best to cover the skillet with a lid. This helps the cheese melt quickly. Cook for another three to four minutes. Check the doneness to ensure it's to your liking. While the burgers cook, you can toast the buns. Use a separate skillet or place them under the broiler. Lightly toast until they are golden brown. Timing is key here, so keep an eye on them. You want them crisp but not burnt. Now it's time to build your burger. On the bottom half of each bun, spread a thin layer of Dijon mustard if you like. Place the cooked patty with melted Swiss cheese on top. Add a generous helping of caramelized onions next. If you want, layer fresh arugula or lettuce on top. Finally, place the other half of the bun on top. Enjoy your delicious creation! To make great caramelized onions, you need patience. Cook them low and slow. Start with medium heat. Let the onions soften and turn golden brown over about 20-25 minutes. Stir them occasionally. This helps them cook evenly. A pinch of salt brings out their sweetness. If you want more flavor, add a bit of balsamic vinegar or a sprinkle of sugar halfway through cooking. This boosts the taste even more. The choice of ground beef is key for your burger. I recommend using an 80/20 blend. This means 80% lean meat and 20% fat. This mix gives you juicy burgers. If you choose a leaner mix, like 90/10, your burger may dry out. The fat helps with flavor and moisture. Always season your beef with salt and pepper. This simple step adds great taste. Your burger can be as unique as you want! Try adding Dijon mustard for a tangy kick. Fresh arugula or lettuce adds a nice crunch. For grill marks, press down lightly on the patties while they cook. This gives that great outdoor grill look. You can also experiment with toppings like pickles, tomatoes, or even avocado. The choice is yours, so be creative! Pro Tips Perfect Patty Shape: Ensure your patties are slightly larger than the buns, as they will shrink while cooking. This helps avoid any burger-to-bun ratio issues! Onion Caramelization: Stir the onions occasionally but allow them to sit undisturbed for a few minutes at a time. This enhances their caramelization and deepens the flavor. Cheese Melting: Covering the skillet with a lid when adding cheese helps trap steam, ensuring it melts evenly over the burger. Flavor Boost: For an extra layer of flavor, consider adding a splash of balsamic vinegar to the caramelized onions towards the end of cooking. {{image_2}} You can change the cheese to suit your taste. Try Gouda for a smoky flavor. Cheddar adds a sharp bite, while blue cheese gives a tangy twist. Each cheese pairs well with toppings. For instance, Gouda complements crispy bacon. Cheddar works great with fresh tomatoes. Blue cheese adds depth to caramelized onions. If you want a lighter option, use ground turkey or chicken. They still taste great with caramelized onions. For a vegetarian choice, try black bean patties. Lentil patties also work well and have a hearty texture. Both options soak up flavors nicely. Get creative with your burger mix! Add spices like garlic powder or cumin to the meat. This gives your burgers a flavorful kick. For toppings, consider caramelized mushrooms for an earthy taste. Crispy bacon adds crunch and a savory element. Each twist makes your burger unique and fun! To keep your burger patties fresh, place them in a sealed container. Store them in the fridge for up to three days. For longer storage, you can freeze them. Wrap each patty in plastic wrap, then place them in a freezer bag. They will stay good for about three months. When you're ready to eat, just thaw them overnight in the fridge. Store your caramelized onions in an airtight container. They will stay fresh in the fridge for about a week. To keep the flavor strong, avoid keeping them near strong-smelling foods. When you're ready to use them, reheat them in a skillet over low heat. Stir occasionally until they warm through. If you have unopened burger buns, store them in a cool, dry place. Once opened, keep the buns in a sealed bag to avoid drying out. For day-old buns, you can toast them to bring back some crispness. Just place them in a skillet or under the broiler for a few minutes until golden. This adds great texture to your burgers! To check if your burger is done, use a meat thermometer. Insert it into the center of the patty. For beef, aim for 160°F for safety. You can also look at the burger's color. The juices should run clear, not pink. The meat should look brown on the outside. Press the patty gently; it should feel firm but springy. These steps will help you cook a safe and tasty burger. Yes, you can make caramelized onions ahead of time. Cook them and let them cool. Store them in an airtight container in the fridge. They will stay fresh for up to five days. When you're ready to use them, just reheat in a pan over medium heat. Add a splash of water or oil if they seem dry. This will bring back the sweet, rich flavor you love. Fries are a classic side that goes well with burgers. You can choose regular potato fries or sweet potato fries for a twist. Salads also make a great match. A simple green salad with vinaigrette or a creamy coleslaw can add freshness. For drinks, try a cold soda, iced tea, or a light beer. These beverages balance the rich flavors of the burger and keep the meal refreshing. Making a Caramelized Onion Swiss Burger is simple and fun. We covered the key ingredients, from juicy ground beef to the sweetness of caramelized onions. I shared easy steps to craft the perfect burger at home. Don’t forget the tips for customization and storage to keep meals fresh. Enjoy experimenting with different cheeses or toppings to find your favorite combination. With practice, you’ll impress your friends and family with delicious burgers every time. Keep these steps in mind, and have fun in the kitchen!

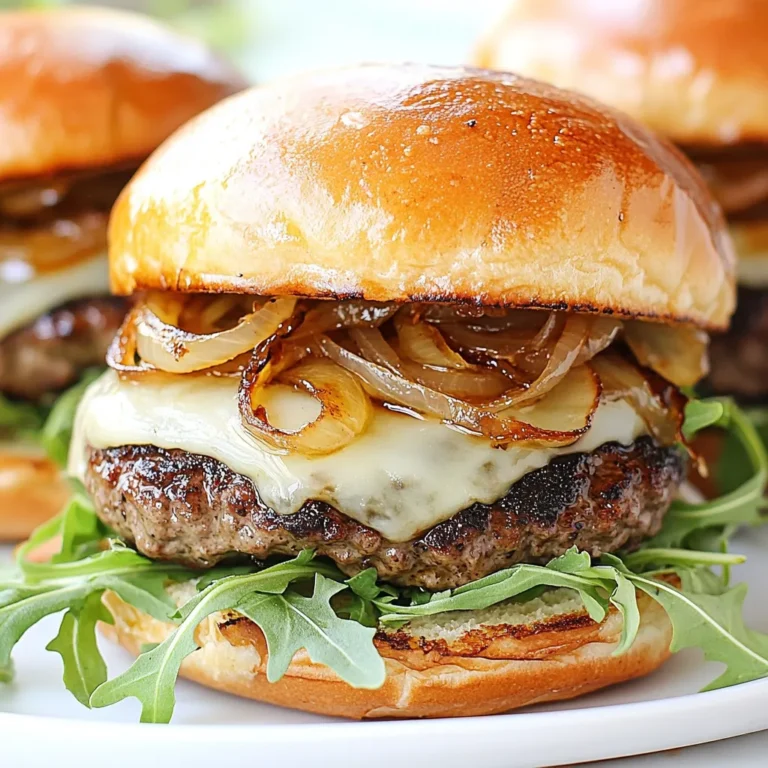
Caramelized Onion Swiss Burgers Juicy and Flavorful Treat

- 1 pound rotini pasta - 2 cups cooked chicken, shredded - 1 can (15 oz) white beans, drained and rinsed - 1 can (4 oz) diced green chilies To make White Chicken Chili Mac, you need a few key ingredients. The rotini pasta gives it a fun shape that holds sauce well. I love using shredded chicken for a hearty touch. White beans add creaminess and protein, while diced green chilies bring a nice kick. - 1 cup shredded Monterey Jack cheese - Fresh cilantro, chopped When serving, I recommend adding shredded Monterey Jack cheese. It melts beautifully and adds a rich flavor. Fresh cilantro brightens the dish and adds color, making it look as good as it tastes. - 1 tablespoon olive oil - 4 cups chicken broth - 1 cup heavy cream - Spices: 1 teaspoon ground cumin and 1 teaspoon chili powder In addition to the main ingredients, you need some cooking staples. Olive oil is perfect for sautéing. Chicken broth adds depth and flavor to the dish. Heavy cream creates that creamy texture we all love. Cumin and chili powder are essential for that warm, spicy flavor. {{ingredient_image_1}} First, fill a large pot with water and add salt. Bring the water to a boil. Once it is boiling, add 1 pound of rotini pasta. Cook the pasta until it is al dente, about 8 to 10 minutes. After cooking, drain the pasta and set it aside. Next, use the same pot and heat 1 tablespoon of olive oil over medium heat. Add a small onion, finely chopped. Sauté the onion until it becomes translucent, about 3 to 4 minutes. Then, stir in 2 cloves of minced garlic, 1 teaspoon of ground cumin, and 1 teaspoon of chili powder. Cook this mixture for about 1 minute until the spices smell nice and fragrant. Now, pour in 4 cups of chicken broth and bring it to a simmer. Add in 2 cups of cooked, shredded chicken, 1 can of drained white beans, and 1 can of diced green chilies. Stir everything together well. Lower the heat and mix in 1 cup of heavy cream. Let it warm through for about 3 to 4 minutes. Finally, add the cooked rotini pasta back into the pot and stir until it is well mixed. Season with salt and pepper to taste. Remove from heat and stir in 1 cup of shredded Monterey Jack cheese until it melts. Your creamy dish is ready to enjoy! To make your White Chicken Chili Mac shine, focus on the pasta first. Cook the rotini until it is al dente, which means it should have a slight bite. This texture holds up well when mixed with the other ingredients. After cooking, drain it and set it aside to keep it from overcooking. Next, keep the cream from separating. When you add the heavy cream, do so over low heat. Stir gently and watch the temperature. If it gets too hot, the cream can split, ruining your dish. To boost the flavor, think about adding spices. Smoked paprika or cayenne can add warmth. A pinch of oregano or thyme can also bring out the flavors of the chicken and beans. You can also switch up the cheese. Try pepper jack for some heat or a sharp cheddar for a bolder flavor. Each cheese offers a unique texture and flavor, enhancing your dish. Garnishing makes a big difference. Top your chili mac with fresh cilantro for a pop of green. You can also add a sprinkle of cheese right before serving. This adds flavor and makes the dish look inviting. Serve in colorful bowls to make the meal more appealing. Pro Tips Use Rotini for Texture: The twists and turns of rotini pasta hold onto the creamy sauce and chunks of chicken beautifully, providing a satisfying bite in every spoonful. Make it Spicier: If you enjoy a kick, consider adding some diced jalapeños or a splash of your favorite hot sauce when simmering the broth for an extra layer of heat. Substitute for a Lighter Option: For a lighter version, you can swap the heavy cream with half-and-half or a plant-based cream alternative, which still yields a creamy texture. Garnish Creatively: Fresh cilantro adds a burst of flavor, but feel free to mix it up with avocado slices, lime wedges, or even a sprinkle of tortilla strips for added crunch. {{image_2}} You can change the proteins in this dish. Ground turkey works well. If you want a vegetarian option, use beans instead of chicken. Great northern or cannellini beans add good texture. You can also switch up the pasta. While rotini is perfect, you can try elbow macaroni or even gluten-free pasta. Just cook according to package instructions. To make this dish vegetarian, swap chicken broth with vegetable broth. You can add extra beans for protein. Use coconut cream instead of heavy cream for a lighter option. If you like spice, add more chili powder. You can also use jalapeños for extra heat. For less spice, use mild green chilies or skip them altogether. White Chicken Chili Mac pairs great with a fresh salad. A simple green salad adds crunch. You can also serve it with cornbread for a cozy meal. For a fun twist, add tortilla chips on top. They add a nice crunch and flavor. You can garnish with extra cilantro for a fresh touch. To keep your White Chicken Chili Mac fresh, store it in an airtight container. This helps prevent drying out. Place it in the fridge within two hours of cooking. It stays good for about 3 to 4 days. Label the container with the date, so you know when it was made. When it’s time to enjoy your leftovers, you have a few options. The best way is to reheat it on the stove. Pour the chili mac into a pot over low heat. Stir it often to warm it evenly. If it looks thick, add a splash of chicken broth or cream to bring back its creamy texture. You can also use a microwave. Heat it in a bowl, covered with a damp paper towel. Stir halfway through to ensure it heats evenly. Yes, you can freeze White Chicken Chili Mac! It freezes well. Let it cool completely before packing it. Use a freezer-safe container or a heavy-duty freezer bag. Remove as much air as possible to avoid freezer burn. It can be frozen for up to 3 months. When ready to eat, thaw it in the fridge overnight and reheat as mentioned above. Enjoy the flavors again! Yes, you can make White Chicken Chili Mac in advance. This dish holds up well when stored. To store it, let it cool first. Place it in an airtight container. You can keep it in the fridge for up to three days. When you're ready to eat, reheat it gently on the stove. Add a splash of chicken broth to keep it creamy. If you want a lighter option, try using half-and-half. You can also use coconut milk for a dairy-free choice. Another option is Greek yogurt; just stir it in at the end to avoid curdling. Each substitute will give a different taste and texture, so choose what suits your needs. Leftovers of White Chicken Chili Mac last about three days in the fridge. Always store it in a tightly sealed container. If it starts to smell or look off, it's best to throw it away. Always check for any signs of spoilage before eating. This article covered how to make a tasty White Chicken Chili Mac. We explored each ingredient and the steps to cook it perfectly. You learned tips for storing leftovers and how to make the dish your own. In the end, this recipe is fun and versatile. With simple swaps, you can cater to different tastes. Enjoy making this comforting meal and share it with others. Your kitchen will smell amazing, and your family will love it!

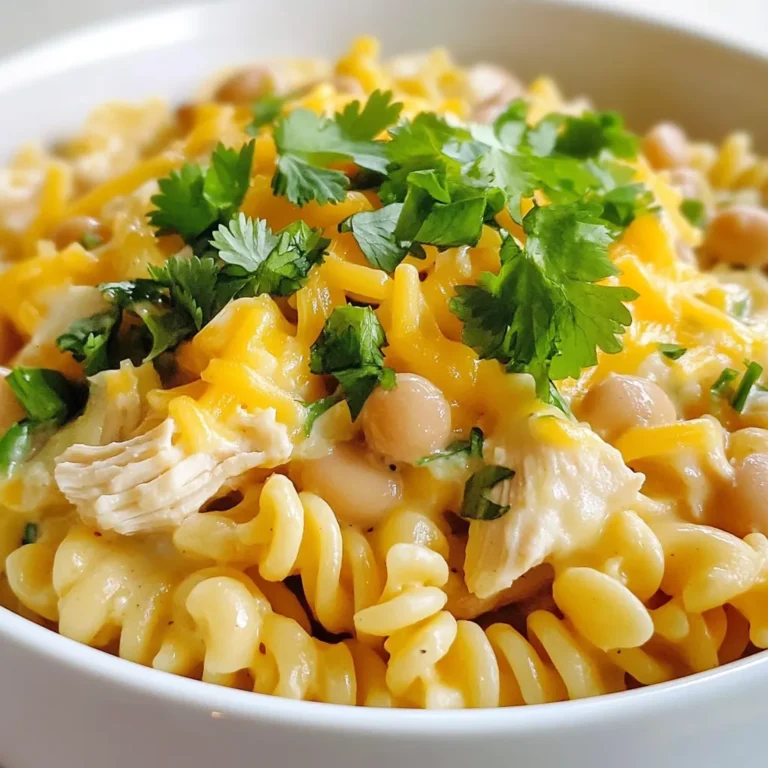
White Chicken Chili Mac Creamy and Flavorful Dish

- 1 lb thinly sliced beef (ribeye or sirloin) - 1/4 cup soy sauce - 2 tablespoons brown sugar - 2 tablespoons sesame oil - 4 cloves garlic, minced - 1 inch ginger, grated - 1 tablespoon gochujang (Korean chili paste) - 2 green onions, chopped - 2 cups cooked jasmine or sticky rice - 1 cucumber, julienned - 1 carrot, julienned - 1 cup kimchi (store-bought or homemade) - Sesame seeds for garnish - Lettuce leaves for wrapping When making Korean BBQ beef bowls, you need simple yet flavorful ingredients. Start with thinly sliced beef, like ribeye or sirloin. This choice gives a tender bite. Use soy sauce for saltiness, and brown sugar adds a touch of sweetness. Sesame oil brings a nutty taste that rounds out the flavors. To spice things up, add minced garlic and grated ginger. They provide warmth and depth. Gochujang, a spicy Korean chili paste, adds heat and a unique flavor. Fresh green onions give a nice crunch and color. For the bowl itself, prepare jasmine or sticky rice. This rice serves as the base. You can add optional ingredients like julienned cucumbers and carrots for freshness. Kimchi adds a tangy kick. Don’t forget sesame seeds for garnish. Wrap it all in lettuce leaves for a fun twist! {{ingredient_image_1}} To start, mix the marinade. Take a bowl and add: - 1/4 cup soy sauce - 2 tablespoons brown sugar - 2 tablespoons sesame oil - 4 cloves garlic, minced - 1 inch ginger, grated - 1 tablespoon gochujang Stir these ingredients well. This mix gives a rich taste. The soy sauce adds saltiness, and the brown sugar balances it with sweetness. Gochujang adds a nice kick. Let it sit for a minute to blend flavors. Now, let’s marinate the beef. Use 1 lb thinly sliced beef, like ribeye or sirloin. Add the beef to the marinade. Make sure each piece is coated well. Cover the bowl and place it in the fridge. The best time for marinating is at least 30 minutes. For even better taste, let it sit for up to 2 hours. This time helps the beef soak up all the flavors. Next, we will cook the beef. Heat a large skillet or grill pan over medium-high heat. Once hot, add the marinated beef in batches. Cook the beef for about 2-3 minutes on each side. You want them to be well browned. Avoid overcrowding the pan. Remove the beef from the heat once done. This ensures it stays juicy and tender. Now for the fun part—assembling the bowls! Start by layering 2 cups of cooked jasmine or sticky rice in each bowl. Then, add the cooked beef on top. Next, add some color with julienned cucumbers and carrots. Don’t forget a scoop of kimchi for that tangy crunch. For a nice finish, sprinkle chopped green onions and sesame seeds on top. You can also serve with lettuce leaves. These can wrap the beef and veggies for a fun twist. Enjoy your colorful and tasty Korean BBQ beef bowls! For Korean BBQ beef bowls, ribeye and sirloin are great choices. Ribeye gives a rich, juicy flavor. Sirloin is leaner and still tender. Select thin slices for quick cooking. Aim for slices about 1/4 inch thick. This thickness cooks evenly and stays tender. To avoid overcooking, keep a close eye on the beef. Cook it on high heat for a short time. This creates a nice sear and locks in flavor. Each side needs just 2-3 minutes. Use a hot skillet or grill pan to get the best results. Arranging your bowls is key for a stunning meal. Start with a base of rice. Then, layer the beef and colorful veggies on top. Add kimchi for a pop of color and flavor. Finish with green onions and sesame seeds. For fun, serve with lettuce leaves for wrapping. This adds a nice touch to your dining experience. Pro Tips Marinate Longer for More Flavor: The longer you marinate the beef, the more flavorful it will be. Aim for at least 2 hours if you have the time! Get the Right Heat: Ensure your skillet or grill pan is hot enough before adding the beef. This helps achieve a nice sear and keeps the meat tender. Customize Your Veggies: Feel free to add other vegetables like bell peppers or radishes to enhance the color and crunch of your bowls. Use Day-Old Rice: If you have leftover rice, use it! Day-old rice is less sticky and will hold up better when mixed with the beef and veggies. {{image_2}} You can use chicken, pork, or tofu instead of beef. For chicken, use thinly sliced breast or thigh. Pork shoulder works well too. Tofu is a great choice for a plant-based option. Adjust cooking times based on the protein you choose. Chicken and pork need about 4-5 minutes per side. Tofu may need a bit longer to get crispy. Always ensure your protein is fully cooked before serving. To make a vegetarian or vegan version, replace beef with marinated tempeh or mushrooms. Both options soak up flavors well. For the marinade, use soy sauce, brown sugar, and sesame oil. Add some extra spices for a kick. Top the bowls with fresh vegetables like bell peppers or radishes. You can also use avocado for creaminess and flavor. This adds healthy fats and makes the dish more filling. You can add traditional Korean ingredients for authenticity. Try using gochugaru, which are Korean red pepper flakes, for extra heat. Add sesame seeds and seaweed for more texture. Feel free to customize with local flavors. Consider adding mango or pineapple for a sweet twist. You can also use local herbs to create a unique flavor profile. This way, you can enjoy different tastes while keeping the core of the dish intact. To keep your Korean BBQ Beef Bowls fresh, store the beef and vegetables separately. This helps maintain their texture and flavor. Use airtight containers to prevent air from getting in. Here are some tips: - Use glass or plastic containers with tight lids. - Label the containers with the date. - Keep the beef and veggies in the fridge for up to three days. When reheating, avoid drying out your beef and rice. The best methods are: - For beef: Use a skillet over medium heat. Add a splash of water to keep it moist. - For rice: Heat in the microwave with a damp paper towel on top. This helps steam the rice. Always ensure proteins reach 165°F to be safe. Freezing is a great way to save leftovers. Here’s how to do it: - Cool the beef and vegetables completely before freezing. - Store in freezer-safe bags or containers, removing as much air as possible. To thaw, place in the fridge overnight. Reheat as mentioned above to enjoy your tasty meal again! For the best Korean BBQ Beef Bowls, I recommend using ribeye or sirloin. Ribeye is tender and rich in flavor. Sirloin is leaner but still tasty. Both cuts work well when sliced thin. Slicing the beef against the grain helps it stay tender. Yes, you can make this dish gluten-free! Use tamari instead of soy sauce. Tamari has a similar taste but is made without wheat. You can also check for gluten-free gochujang at your local store. Many brands offer gluten-free options. I suggest marinating the beef for at least 30 minutes. This allows the flavors to soak in. If you have more time, marinate for up to 2 hours for even better taste. Just remember to keep it in the fridge while marinating. You can serve Korean BBQ Beef Bowls with various side dishes. Try kimchi for a spicy kick. Pickled vegetables add a nice crunch. You can also serve a simple salad or steamed broccoli. Lettuce leaves are great for wrapping the beef too! Korean BBQ beef bowls are a fun and tasty meal. We explored key ingredients like beef, marinade, and toppings. I shared tips for marinating and cooking to boost flavor. You can customize the bowls with different proteins and veggies too! Store leftovers correctly for future meals and enjoy them later. With these steps, you can create delicious bowls that friends and family will love. Dive in and enjoy every bite!

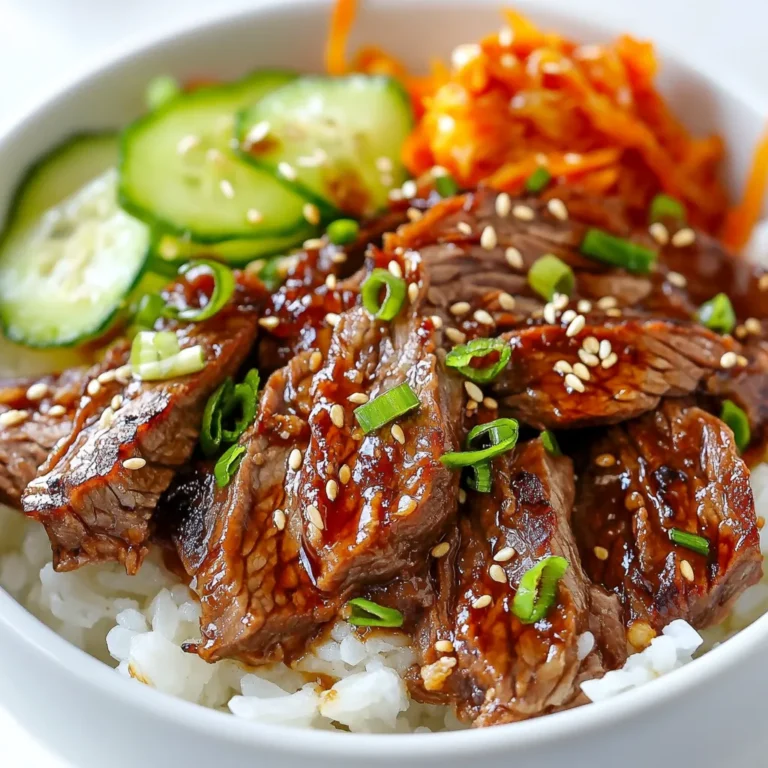
Korean BBQ Beef Bowls Flavorful and Easy Dinner Recipe

- 8 oz. noodles (egg or rice noodles) - 1 lb. beef sirloin, thinly sliced - 4 cloves garlic, minced - 2 tablespoons soy sauce - 1 tablespoon oyster sauce - 1 tablespoon chili garlic sauce (adjust for spice level) - 1 red bell pepper, thinly sliced - 1 cup snap peas - 3 green onions, chopped - Fresh cilantro for garnish (optional) - 2 tablespoons sesame oil - 1 tablespoon vegetable oil Gather these ingredients before you start cooking. The noodles form the base, while the beef adds protein. Garlic brings a rich aroma and flavor. Soy sauce, oyster sauce, and chili garlic sauce create a savory and spicy blend. For the vegetables, the red bell pepper gives sweetness, and snap peas add crunch. Green onions and cilantro make great garnishes, adding freshness. Don’t forget the oils! Sesame oil adds a unique taste. Vegetable oil helps cook the beef properly. Each ingredient adds to the overall balance and taste of the dish. Enjoy the process of prepping these ingredients; it's part of the fun! {{ingredient_image_1}} 1. Bring a large pot of salted water to a boil. 2. Add 8 oz. of noodles and cook according to package instructions. 3. Drain the noodles and set them aside. 4. Toss the noodles with 2 tablespoons of sesame oil to keep them from sticking. 1. In a bowl, combine 1 lb. of thinly sliced beef with: - 2 tablespoons soy sauce - 1 tablespoon oyster sauce - Salt and pepper to taste 2. Mix well and let the beef marinate for 10-15 minutes. 1. Heat 1 tablespoon of vegetable oil in a large skillet or wok over medium-high heat. 2. Add the marinated beef to the skillet. Cook for about 3-4 minutes, stirring often until browned. 3. Remove the beef from the skillet and set it aside. 4. In the same skillet, add more sesame oil and 4 cloves of minced garlic. Sauté for about 30 seconds until fragrant. 5. Toss in 1 thinly sliced red bell pepper and 1 cup of snap peas. Stir-fry for 2-3 minutes until the veggies are tender but crisp. 6. Return the beef to the skillet, add the noodles, and drizzle with 1 tablespoon of chili garlic sauce. 7. Toss everything together until well coated and heated through. 8. Serve hot, garnished with 3 chopped green onions and fresh cilantro if desired. To adjust spice levels, use chili garlic sauce wisely. Start with one tablespoon. Taste the dish as you go. If you want more heat, add a bit more sauce. For those who like milder flavors, skip the chili garlic sauce altogether. Prevent noodles from sticking by tossing them with sesame oil right after cooking. This oil adds flavor and keeps the noodles loose. You can also rinse the noodles under cold water. This helps stop the cooking process and keeps them from clumping. To enhance the flavor, consider adding a dash of lime juice or a sprinkle of sugar. Lime gives a fresh taste, while sugar balances the spice. You can also try adding crushed red pepper flakes for more heat. Best oils for stir-frying include sesame oil and vegetable oil. Sesame oil adds a nutty flavor, while vegetable oil has a high smoke point. This means it cooks well at high heat without burning. An ideal skillet for stir-frying is a large non-stick pan or wok. A non-stick surface helps prevent food from sticking and makes clean-up easy. For tender beef, slice it thinly against the grain. This makes each bite easier to chew. Cook the beef quickly over high heat to keep it juicy. Stir-fry for just a few minutes, then remove it from the pan. This keeps the beef tender and flavorful. Pro Tips Use High Heat: Cooking the beef over high heat helps to sear it quickly, locking in the juices and enhancing the flavor. Don’t Overcook the Veggies: Keep the bell peppers and snap peas crisp by stir-frying them just until tender. This preserves their nutrients and adds a nice crunch. Customize the Spice Level: Adjust the amount of chili garlic sauce according to your spice preference. Start with less and add more if needed. Fresh Herbs Make a Difference: Garnishing with fresh cilantro not only adds color but also enhances the overall flavor profile of the dish. {{image_2}} If you want to switch things up, try different proteins. Chicken is a great option. Tofu works well too if you prefer plant-based meals. You can also add more vegetables. Broccoli, carrots, or bell peppers can bring fresh crunch. For those who need gluten-free meals, use rice noodles instead of egg noodles. Check the sauces as well; many brands offer gluten-free versions. If you want a vegan dish, swap beef for tempeh or mushrooms. You can replace oyster sauce with a mushroom-based sauce to keep it plant-friendly. To boost the heat, add different peppers. Sliced jalapeños or Thai chilis can make it spicy. Fresh herbs like basil or mint can brighten the dish. Try adding sesame seeds for a nutty crunch. You can also sprinkle in some crushed red pepper or even a dash of lime juice for extra zing. To store leftovers, first let the dish cool down. Place the noodles and beef in an airtight container. This keeps them fresh and safe. You can enjoy your leftovers for up to three days. Reheat only what you plan to eat. This helps maintain the dish's original taste. If you want to freeze the noodles and beef, let them cool completely. Divide them into portions and place them in freezer bags. Remove as much air as possible to avoid freezer burn. You can freeze the dish for up to three months. When it's time to eat, thaw it overnight in the fridge. Reheat on the stove or in the microwave until hot. Spicy garlic noodles pair well with many sides. Try serving with a simple cucumber salad or steamed broccoli. For a drink, iced tea or lemonade works great. To reheat, use a skillet for the best taste. Add a splash of water or broth to prevent sticking and keep it moist. Can I use different types of noodles? Yes, you can use various noodles. Egg noodles and rice noodles both work well. If you enjoy a different texture, try chow mein or udon noodles. How can I make this dish spicier? To add more heat, increase the chili garlic sauce. You can also add fresh sliced chili peppers or red pepper flakes for an extra kick. What sides pair well with spicy garlic noodles? Serve these noodles with a light salad or steamed broccoli. You can also add some spring rolls for a crunchy side. Can I substitute beef in this recipe? Absolutely. You can use chicken, shrimp, or tofu instead. Just adjust the cooking time based on what you choose. How long does it take to cook the beef properly? Cook the beef for about 3-4 minutes in the skillet. It should be browned and cooked through but still tender. What are the approximate calories per serving? This dish has around 500 calories per serving, depending on the beef and sauces used. Are there any allergens in this recipe? Yes, this recipe contains soy and sesame, which are common allergens. Adjust the ingredients if needed. This blog post covered the key ingredients, steps, and tips for making a delicious noodle dish. You learned about the main components like beef, noodles, and sauces, and how to stir-fry them correctly. Remember, small changes can make big differences. You can swap ingredients or adjust spice levels to fit your taste. Whether you keep it classic or try a twist, great flavor is the goal. Enjoy experimenting in the kitchen!

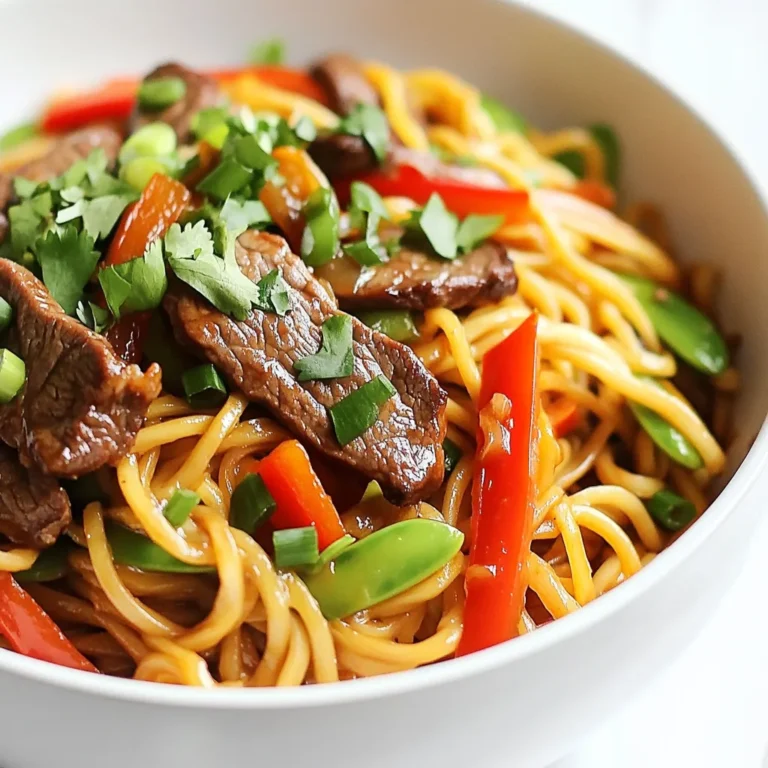
Spicy Garlic Noodles with Beef Flavorful Delight

For this dish, you will need the following main ingredients: - 1 lb (450g) ground beef - 2 tablespoons gochujang (Korean chili paste) - 2 tablespoons soy sauce - 1 tablespoon sesame oil - 1 tablespoon brown sugar - 3 cloves garlic, minced - 1-inch piece ginger, grated - 2 green onions, chopped (plus extra for garnish) - 1 medium carrot, julienned - 1 cup cooked jasmine rice - 1 cup broccoli florets These ingredients combine to create a tasty and spicy flavor. The ground beef is the star, while the gochujang adds heat. Soy sauce gives a savory kick, and sesame oil brings a nutty taste. Brown sugar balances the spice with sweetness. The condiments and seasonings are key to this recipe. The gochujang is essential for that authentic Korean flavor. Soy sauce adds saltiness and depth. Sesame oil enhances the aroma and richness. Garlic and ginger bring a fresh, zesty touch. Each of these ingredients works together to make the beef vibrant. Garnishes can elevate your dish. Here are some options: - Chopped green onions - Sesame seeds These add crunch and flavor. The green onions give freshness, while sesame seeds add a nice crunch. You can also add sliced radishes or cilantro for more color and taste. Feel free to get creative with your garnishes! {{ingredient_image_1}} Start by gathering all your ingredients. This makes cooking easy and fast. You'll need: - 1 lb (450g) ground beef - 2 tablespoons gochujang - 2 tablespoons soy sauce - 1 tablespoon sesame oil - 1 tablespoon brown sugar - 3 cloves garlic, minced - 1-inch piece ginger, grated - 2 green onions, chopped - 1 medium carrot, julienned - 1 cup cooked jasmine rice - 1 cup broccoli florets - Sesame seeds for garnish Next, chop the green onions and julienne the carrot. Grate the ginger and mince the garlic. This helps the flavors mix well. In a mixing bowl, combine the ground beef with gochujang, soy sauce, sesame oil, brown sugar, garlic, and ginger. Mix it all together until well blended. Next, heat a large skillet over medium-high heat. Add the marinated beef to the skillet. Cook it, breaking it apart with a spatula. This takes about 5 to 7 minutes. The beef should turn brown and be fully cooked. While the beef cooks, steam the broccoli florets for about 3 to 4 minutes. They should stay bright green and tender-crisp. After the beef is cooked, add the julienned carrots to the skillet. Stir-fry them for 2 to 3 minutes. They should soften but still have a nice crunch. Now, it's time to assemble your bowls! Start by dividing the cooked jasmine rice into serving bowls. Top each bowl with the spicy beef mixture and steamed broccoli. For a finishing touch, garnish each bowl with chopped green onions and a sprinkle of sesame seeds. Enjoy your colorful and tasty Spicy Korean Beef Bowls! To get the best flavor, always use fresh ingredients. The garlic and ginger should be freshly minced and grated. This adds a strong, bright taste. Gochujang is key for spice and depth. Don't skip it! Mix the ground beef well with the sauces. Let it marinate for at least 10 minutes. This helps the flavors blend nicely. Feel free to add more gochujang if you like it hot. Use a large skillet over medium-high heat. This allows the beef to cook evenly. Break the beef apart with a spatula as it cooks. This helps it brown nicely. Aim for 5-7 minutes of cooking time. Make sure there’s no pink left in the meat. For even better taste, let it sizzle a bit before stirring. This adds a nice crust to the beef. Make your bowls look colorful and fun! Start with a base of jasmine rice. Then, add the spicy beef mixture on top. Arrange the broccoli and carrots around the beef for color. Sprinkle chopped green onions and sesame seeds on top for a nice finish. For a playful touch, use short bamboo chopsticks across the bowl. This makes the dish inviting and pretty! Pro Tips Marinate for Flavor: For an extra depth of flavor, marinate the beef for at least 30 minutes before cooking. This allows the spices to penetrate the meat better. Vegetable Variations: Feel free to swap out the broccoli and carrots for your favorite vegetables, such as bell peppers or snap peas, to customize the dish to your taste. Rice Alternatives: If jasmine rice isn't available, try using brown rice or quinoa for a healthier whole grain option. Serving Suggestions: Serve with a side of kimchi for an authentic Korean touch, adding a tangy and spicy contrast to the dish. {{image_2}} You can swap beef for chicken or tofu. For chicken, use ground chicken. Cook it just like beef, using the same spices. For tofu, choose firm tofu. Crumble it up and cook until golden. Both options work well and add their own flavors. If you want a meatless meal, try lentils or mushrooms. Cook lentils until they are tender. Sauté mushrooms until they are brown and soft. Mix them with the same spices for a rich taste. These options are filling and tasty. You can serve Spicy Korean Beef Bowls with many sides. Try pickled vegetables for a crunchy contrast. A simple salad with sesame dressing can also be refreshing. For a heartier meal, add kimchi on the side. Each side enhances the flavors of the beef bowls. To keep your spicy Korean beef bowls fresh, store them in an airtight container. Place the bowls in the fridge. They will stay good for about 3-4 days. Make sure to separate the rice and beef if you can. This helps keep everything nice and fresh. When you're ready to enjoy your leftovers, use a microwave for quick reheating. Place the beef and rice in a microwave-safe dish. Cover it with a damp paper towel to keep moisture in. Heat in short bursts, about 30 seconds at a time, until hot. Stir halfway through to ensure even heating. You can also reheat it on the stove. Just use medium heat and add a splash of water to help steam it. If you want to save some for later, freezing is a great option. Allow the beef to cool completely before freezing. Place it in a freezer-safe container or bag. It will last for about 2-3 months in the freezer. When you’re ready to eat, thaw it in the fridge overnight. Then reheat it using the methods above. Just remember, the veggies might not be as crunchy after freezing. Gochujang is a Korean chili paste. It has a sweet and spicy taste. You can find it in most grocery stores. Look in the international aisle or Asian section. You can also order it online. Yes, you can prepare this dish in advance. You can cook the beef and veggies ahead of time. Store them in the fridge for up to three days. When you are ready to eat, just reheat it. This makes it easy for busy days. Yes, there is a gluten-free option. Use tamari instead of soy sauce. Tamari is a gluten-free soy sauce. Make sure to check the label on gochujang. Some brands may contain gluten. Always read the ingredients for safety. This blog post covered how to make tasty Spicy Korean Beef Bowls. We looked at key ingredients, cooking steps, and tips for better flavor. You learned how to store leftovers and even tweak the recipe. Whether you want chicken or tofu, there are many ways to enjoy this meal. In the end, these bowls are easy to make and taste great. Enjoying homemade meals can bring joy and flavor to your table.

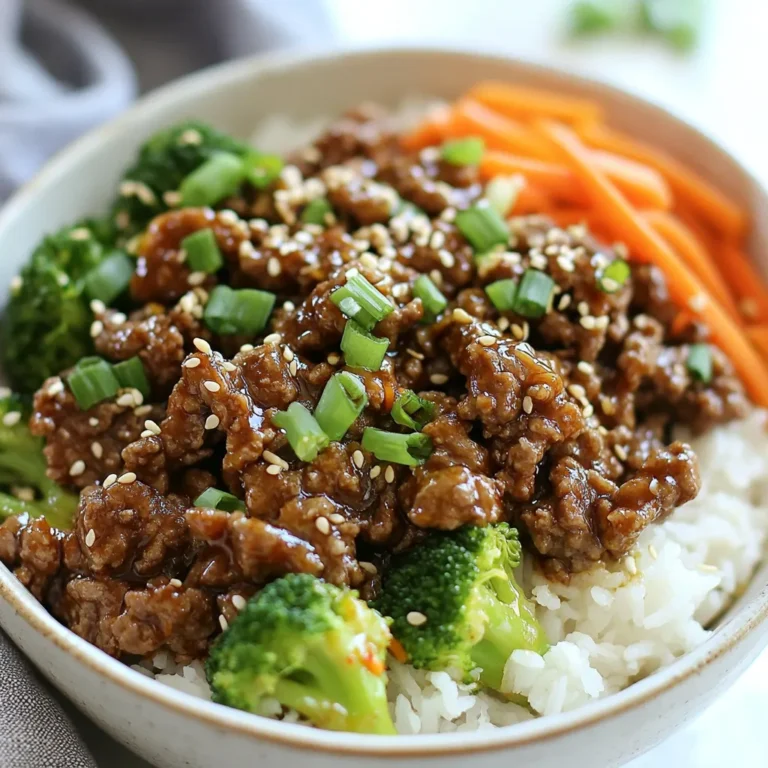
Spicy Korean Beef Bowls Flavorful and Easy Meal

- 1 cup orzo pasta - 4 cups vegetable broth - 2 tablespoons olive oil - 1 medium onion, finely chopped - 3 cloves garlic, minced - 8 oz cremini mushrooms, sliced - 1/2 cup heavy cream - 1/2 cup grated Parmesan cheese - Salt and pepper, to taste - Fresh parsley, chopped (for garnish) To make creamy mushroom orzo risotto, you need simple and fresh ingredients. Start with orzo pasta, which is small and rice-shaped. It cooks quickly and absorbs flavors well. Next, grab vegetable broth. This adds depth and richness to the dish. Olive oil is essential for sautéing. It gives flavor and helps cook the onions and mushrooms. For aromatics, use a medium onion and garlic. They create a fragrant base. Cremini mushrooms add earthy notes. Their texture and taste enhance the dish's comfort factor. Heavy cream brings a rich, smooth consistency. It turns the orzo into a creamy delight. Parmesan cheese adds a salty, nutty flavor. Grate it fresh for the best taste. Don’t forget salt and pepper to season. Finally, fresh parsley brightens the dish. It adds color and a fresh touch. These ingredients come together to create a warm, comforting meal. Each one plays a key role in building layers of flavor and texture. {{ingredient_image_1}} 1. Preparing vegetable broth Start by bringing the vegetable broth to a simmer in a saucepan. Keep it warm on low heat. This helps when you add it to the orzo. 2. Sautéing onions and garlic In a large skillet, heat the olive oil over medium heat. Add the finely chopped onion. Sauté until the onion turns translucent, which takes about 3 to 4 minutes. Then, stir in the minced garlic. Cook for another minute until fragrant. 3. Cooking mushrooms Add the sliced cremini mushrooms to the skillet. Cook for 5 to 6 minutes until they soften and brown. This step adds a rich flavor to your dish. 4. Toasting orzo pasta Next, add 1 cup of orzo pasta to the skillet. Stir it for 1 to 2 minutes to lightly toast it. This gives the orzo a nice, nutty flavor. 5. Gradual addition of broth Begin adding the warm vegetable broth, one cup at a time. Stir often until most of the liquid is absorbed. Continue this process until the orzo is creamy and tender, which takes about 10 to 12 minutes. 6. Stirring in cream and cheese Once the orzo is cooked, lower the heat. Stir in the heavy cream and grated Parmesan cheese. Mix well until it becomes creamy and smooth. 7. Final seasoning tips Taste your risotto and add salt and pepper as needed. This final touch enhances the flavors. 8. Presentation tips Serve the risotto in shallow bowls. Garnish with fresh parsley and a sprinkle of Parmesan cheese. For a fancy touch, add some sautéed mushrooms on the side. Achieving the right creaminess To make your risotto creamy, use the right amount of broth. Add the broth slowly and stir often. This helps the orzo release its starch. The starch is what gives your dish that rich, creamy texture you want. Timing and temperature management Keep the heat medium to low while cooking. If it's too high, you risk burning the bottom. Stir frequently to ensure even cooking. This way, your orzo cooks well without sticking. Dos and don'ts of risotto-making Do use fresh ingredients like herbs and mushrooms. They add great flavor. Don’t rush the process. Risotto needs time to develop its taste. Avoid adding all the broth at once. This can make your orzo mushy. Instead, let each cup absorb before adding more. Pro Tips Use Quality Broth: For the best flavor, use a high-quality vegetable broth or homemade broth. The richness of the broth will enhance the overall taste of the risotto. Don’t Rush the Cooking: Allow the orzo to absorb the broth gradually. This slow cooking process helps achieve that creamy texture typical of risotto. Experiment with Mushrooms: While cremini mushrooms work wonderfully, feel free to mix in other varieties like shiitake or portobello for a unique flavor profile. Garnish Creatively: Elevate your dish with a sprinkle of fresh herbs or chili flakes for a pop of color and added flavor. Consider adding toasted pine nuts for extra crunch. {{image_2}} You can make your creamy mushroom orzo risotto even better with simple add-ins. Spinach adds color and health. Toss in a handful of fresh spinach when you stir in the cream. It wilts quickly and looks great in the dish. Peas bring sweetness and crunch. Add them in the last few minutes of cooking. They cook fast and keep their bright green color. Both options make your meal more vibrant and tasty. Try different types of mushrooms for varied flavors. Cremini mushrooms are rich, but you can use shiitake or button mushrooms too. Each type gives a unique taste. Mix them for a fun flavor twist. If you want a vegan version, swap the cream and cheese with plant-based options. Use coconut milk for creaminess. Nutritional yeast makes a great cheese substitute. It has a cheesy flavor and adds nutrients. These swaps keep the dish creamy and delicious without dairy. Experiment with these variations to make your risotto your own! Storing leftovers: Allow the risotto to cool down first. Then, place it in an airtight container. Store it in the fridge. It will stay fresh for about 3 days. Reheating instructions: To reheat, add a splash of water or broth. This helps keep it creamy. Heat it on the stove over low heat. Stir gently to warm it evenly. You can also use the microwave. Heat it in short bursts, stirring in between. Freezing suggestions: Freezing is possible but may change the texture. If you freeze it, use a freezer-safe container. It can last for up to 2 months. When ready to eat, thaw it in the fridge overnight. Reheat as mentioned above for best results. Yes, you can use other small pasta types. Try ditalini or acini di pepe. Each will change the texture but keep the flavor. Cook times may vary. Keep an eye on them as they cook. To make it vegetarian, use vegetable broth and leave out the cheese. For vegan, swap heavy cream with coconut milk or cashew cream. Nutritional yeast can replace Parmesan for a cheesy flavor. This risotto pairs well with a fresh salad or roasted vegetables. Grilled chicken or fish also complements it nicely. For a light meal, serve it with crusty bread and a glass of white wine. You can store leftovers in an airtight container for up to three days. Reheat on the stove with a splash of broth or water to loosen it up. If you freeze it, consume it within a month for best taste. I covered how to make creamy mushroom orzo risotto from start to finish. You learned about key ingredients, step-by-step instructions, and tips for the best texture. We also explored tasty variations and proper storage techniques. Now, you can confidently create this dish and impress your friends and family. Enjoy the creamy goodness and feel free to experiment with flavors that suit your taste. Dive in and make your own delicious risotto today!

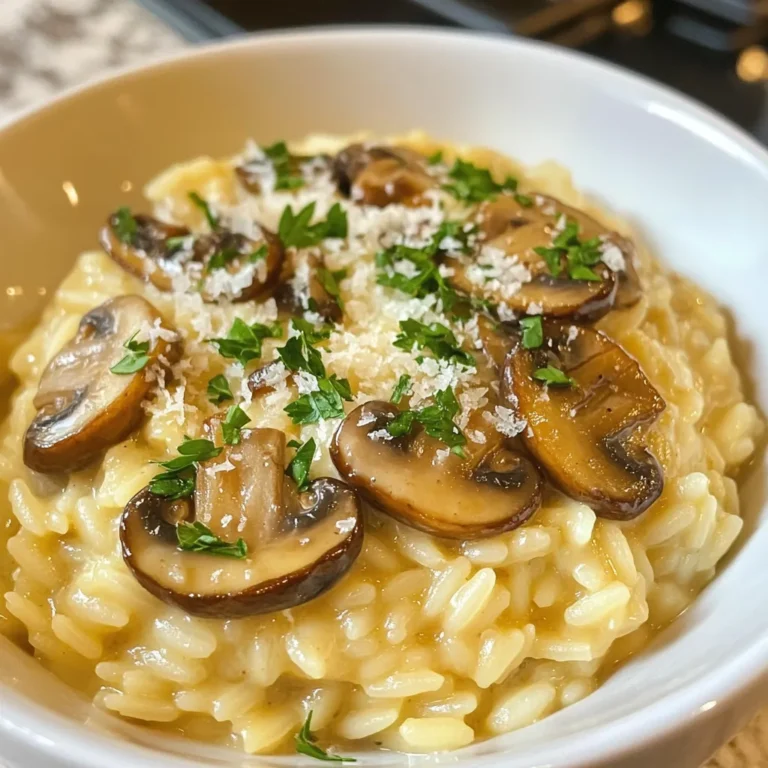
Creamy Mushroom Orzo Risotto Luscious Comfort Food

To make honey mustard pretzel chicken, gather these items: - 4 boneless, skinless chicken breasts - 1 cup pretzel crumbs (finely crushed pretzels) - 1/2 cup whole wheat breadcrumbs - 1/2 cup Dijon mustard - 1/4 cup honey - 1 teaspoon garlic powder - 1 teaspoon onion powder - Salt and pepper to taste - 2 tablespoons olive oil - Fresh parsley, chopped (for garnish) You can swap some ingredients if needed. For instance: - Use panko breadcrumbs instead of whole wheat breadcrumbs for a crunchier texture. - Substitute maple syrup for honey if you prefer a vegan option. - If you don't have Dijon mustard, yellow mustard works too, though the flavor will change slightly. - For a gluten-free dish, use gluten-free pretzels and breadcrumbs. Fresh ingredients boost flavor and texture. Here are some tips: - Choose chicken breasts that feel firm and have no discoloration. - Look for pretzels that are crunchy and not stale. Fresh pretzels will blend better. - Use high-quality Dijon mustard for a robust taste. The better the mustard, the better the dish. - Fresh parsley should have vibrant green leaves. Avoid any wilted or yellowing bits. - Always check the expiration dates on honey and spices for the best flavor. {{ingredient_image_1}} First, set your oven to 400°F (200°C). This heat will help make the chicken golden and crispy. Line a baking sheet with parchment paper. This will keep the chicken from sticking. Gather your ingredients: chicken breasts, pretzel crumbs, whole wheat breadcrumbs, Dijon mustard, honey, garlic powder, onion powder, salt, pepper, olive oil, and parsley. Having everything ready makes cooking easier. In a small bowl, mix the Dijon mustard, honey, garlic powder, onion powder, salt, and pepper. Whisk it until smooth. Set aside 1/4 cup of this sauce for later. Place the chicken breasts in a shallow dish or a zip-top bag. Pour the honey mustard mixture over the chicken. Make sure each piece is well coated. Marinate for at least 15 minutes. This step adds great flavor to the chicken. In another bowl, combine the pretzel crumbs and whole wheat breadcrumbs. Mix them well. After marinating, take the chicken from the sauce. Let the extra sauce drip off. Coat each chicken breast in the breadcrumb mixture. Press gently so crumbs stick well. Place the coated chicken on the prepared baking sheet. Drizzle each piece lightly with olive oil. This helps them crisp up in the oven. Bake for 20-25 minutes. Check that the chicken is golden brown and reaches an internal temperature of 165°F (74°C). Once done, let it rest for a few minutes. Before serving, drizzle the reserved honey mustard sauce over the chicken. Garnish with chopped parsley for a fresh touch. To get a crunchy crust, use finely crushed pretzels. They add great flavor. Mix them well with whole wheat breadcrumbs. This mix will stick to the chicken better. Drizzle olive oil on top before baking. It helps to crisp each piece. Bake at 400°F (200°C) for 20-25 minutes. Keep an eye on the chicken. You want it golden brown and cooked through. Marinating the chicken is key for great taste. A quick soak of 15 minutes works well. It allows the flavors to soak in. If you have more time, let it marinate for up to an hour. The longer it sits, the more flavor it gains. Use the leftover honey mustard sauce to drizzle on top before serving. This adds a nice finishing touch. This chicken pairs well with many sides. Try serving it with a fresh salad. Roasted veggies also complement the dish nicely. You can serve it with mashed potatoes for a cozy meal. Don’t forget to sprinkle some parsley on top. It gives a pop of color and freshness. Enjoy this dish warm for the best taste! Pro Tips Choose the Right Chicken: Opt for organic, free-range chicken breasts for a juicier and more flavorful dish. Perfect Pretzel Crumbs: For the best texture, crush pretzels into fine crumbs using a food processor or by placing them in a zip-top bag and rolling with a rolling pin. Marination Time: Allow the chicken to marinate for at least 30 minutes for deeper flavor infusion; marinating overnight in the fridge is even better. Serving Suggestions: Serve with a side of roasted vegetables or a fresh salad to balance the richness of the chicken. {{image_2}} You can easily make this dish gluten-free. Just swap regular pretzels for gluten-free pretzels. Use gluten-free breadcrumbs in place of whole wheat ones. This way, everyone can enjoy the crispy goodness! Want a kick? Add some heat! Mix in a teaspoon of hot sauce or cayenne pepper to the honey mustard sauce. This spicy twist will excite your taste buds. You can also sprinkle some chili powder into the breadcrumb mix for extra flavor. Honey mustard pretzel chicken pairs well with many sides. Try serving it with roasted veggies or a fresh salad. You can also add mashed potatoes or rice for a filling meal. Each side brings its own flavor and texture to the dish, making it even better! To store leftover Honey Mustard Pretzel Chicken, let it cool completely. Then, place it in an airtight container. This helps keep the chicken fresh. You can store it in the fridge for up to three days. Make sure to label the container with the date. This way, you won't forget when you made it. When you are ready to eat leftovers, reheating is easy. Preheat your oven to 350°F (175°C). Place the chicken on a baking sheet. Cover it with foil to keep it moist. Heat for about 15-20 minutes. Check that the internal temperature reaches 165°F (74°C). This ensures it is safe to eat. Freezing is a great option for longer storage. Wrap each piece of chicken tightly in plastic wrap. Then, place them in a freezer-safe bag. Remove as much air as possible to prevent freezer burn. You can freeze the chicken for up to three months. When you want to enjoy it again, thaw it in the fridge overnight before reheating. Yes, you can use chicken thighs. They have more fat and flavor. This will make your dish juicier. Just make sure to adjust the cooking time. Thighs may take a bit longer to cook through. Aim for an internal temperature of 165°F (74°C). To check for doneness, use a meat thermometer. Insert it into the thickest part of the chicken. The safe temperature is 165°F (74°C). If you don't have a thermometer, cut into the chicken. The meat should be white and the juices clear. If it's still pink, it needs more cooking. Absolutely! You can make the honey mustard sauce a day ahead. Store it in the fridge in an airtight container. This will let the flavors meld together. Just remember to reserve some for drizzling later. Before using, stir it well to blend the ingredients. In this blog post, we covered how to make delicious honey mustard pretzel chicken. We detailed the key ingredients, prep steps, and tips for extra flavor and texture. You learned about fun variations and how to store your leftovers. Remember, using fresh ingredients can make a big difference. My final thought? This recipe is simple and rewarding. Enjoy your meal and impress your family with a tasty twist on chicken!

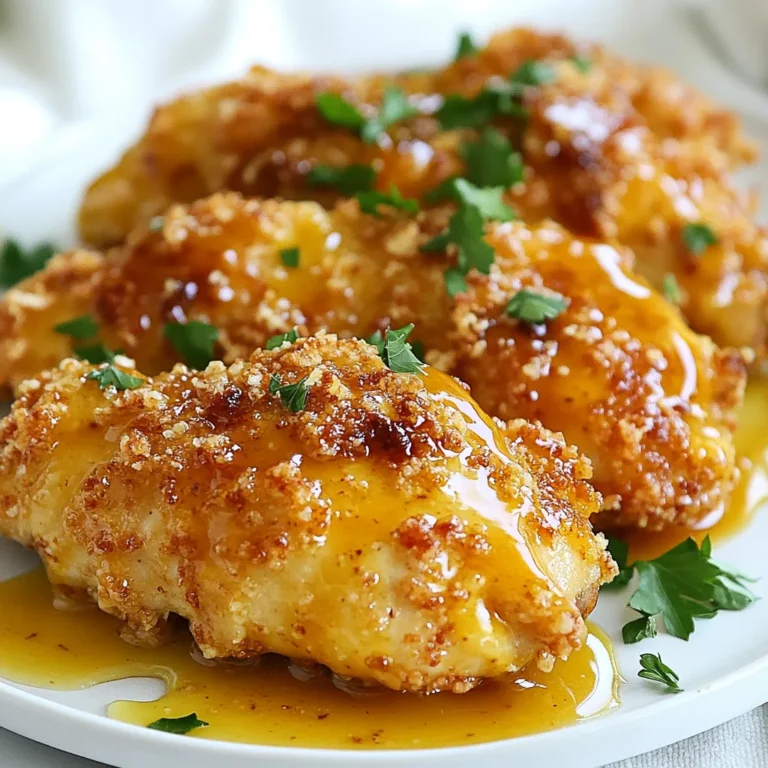
Honey Mustard Pretzel Chicken Crispy and Flavorful Dish

PREV 1 … 71 72
cozy citrus kitchen

explore

DessertsDinnerAppetizersDrinks

Our Policies

  • Cookie Policy
  • Copyright Policy
  • Disclaimer
  • GDPR Policy
  • Terms Of Use
Back to Top
  • About
  • Contact Us
  • Privacy Policy
© 2026 cozy citrus kitchen