FREE DINNER EBOOK! Get your copy!
  • Cookie Policy
  • GDPR Policy
  • Disclaimer
  • Terms Of Use
  • Visit my other site: Fun Cookie Recipes
cozy citrus kitchen
  • Home
  • Dinner
  • Desserts
  • Drinks
  • Appetizers
  • Contact
  • About
  • Privacy Policy
  • Home
  • Dinner
  • Desserts
  • Drinks
  • Appetizers
  • Contact
  • About
  • Privacy Policy
  • Cookie Policy
  • GDPR Policy
  • Disclaimer
  • Terms Of Use
Visit my other site: Fun Cookie Recipes

HOME / CATEGORIES /

Latest

To make Lemon Raspberry Cheesecake Cookies, you need: - 1 cup unsalted butter, softened - 1 cup cream cheese, softened - 1 cup granulated sugar - 1 large egg - 2 teaspoons vanilla extract - Zest of 1 lemon - 2 tablespoons lemon juice - 2 cups all-purpose flour - 1 teaspoon baking powder - 1/2 teaspoon salt - 1 cup fresh raspberries (or frozen, thawed and drained) These ingredients create a tasty base for your cookies. The butter and cream cheese give them a rich and creamy texture. The zest and juice from the lemon add a bright, fresh flavor. You can also use: - 1/2 cup white chocolate chips These chips add a sweet twist to your cookies. They melt slightly during baking, giving a delightful creaminess. If you need to swap some ingredients, here are some ideas: - Use coconut oil instead of unsalted butter for a dairy-free option. - Replace cream cheese with a dairy-free cream cheese for a vegan choice. - For a gluten-free version, try almond flour or gluten-free flour mix. These substitutions keep the cookies delicious while fitting your needs. Enjoy your baking adventure! {{ingredient_image_1}} First, gather all your ingredients. You will need 1 cup of unsalted butter and 1 cup of cream cheese. Make sure both are softened. Next, get 1 cup of granulated sugar and 1 large egg. Don’t forget 2 teaspoons of vanilla extract, the zest of 1 lemon, and 2 tablespoons of lemon juice. You also need 2 cups of all-purpose flour, 1 teaspoon of baking powder, and 1/2 teaspoon of salt. Finally, have 1 cup of fresh raspberries or frozen ones that are thawed and drained. Optional white chocolate chips can add extra sweetness. Now, preheat your oven to 350°F (175°C). Line two baking sheets with parchment paper. In a large bowl, beat the softened butter and cream cheese together until smooth. This should take about 1-2 minutes. Gradually add the granulated sugar while you mix. Keep beating until the mixture is fluffy. Next, mix in the egg, vanilla extract, lemon zest, and lemon juice. Make sure everything blends well. In another bowl, whisk together the flour, baking powder, and salt. Slowly add this dry mix to the wet ingredients. Stir until just combined. Be careful not to overmix! Gently fold in the raspberries and white chocolate chips. Using a tablespoon, scoop out the dough. Place each scoop onto your prepared baking sheets. Make sure to space them about 2 inches apart. Now, it’s time to bake! Put the sheets in the preheated oven for 12-15 minutes. Watch for the edges to turn golden and the centers to look set. Once they are ready, remove them from the oven. Let the cookies cool on the baking sheet for 5 minutes. After that, transfer them to a wire rack to cool completely. If you want to store the cookies, place them in an airtight container. They will stay fresh for about a week at room temperature. For longer storage, you can freeze them. Just make sure to wrap them well! Enjoy your baking! To bake the best lemon raspberry cheesecake cookies, follow these easy tips: - Softened Ingredients: Make sure your butter and cream cheese are softened. This helps them mix well. - Don’t Overmix: Gently fold in raspberries and chocolate chips. Overmixing can break the raspberries. - Use a Cookie Scoop: This keeps cookies uniform in size. They will bake evenly. - Check the Oven: Every oven is different. Start checking cookies at 12 minutes. Look for golden edges. Serve your cookies in a fun and bright way. Here are some ideas: - Platter Presentation: Arrange cookies on a pretty platter. - Garnish: Dust cookies with powdered sugar. Add fresh raspberries and lemon wedges. - Pairing: Serve with tea or lemonade. The flavors will match nicely. You can change these cookies up for new tastes. Try these variations: - Add Nuts: Chopped almonds or pecans add a nice crunch. - Use Other Berries: Swap raspberries for blueberries or strawberries. - Add Spices: A pinch of cinnamon or nutmeg can add warmth. - Chocolate Swirls: Melt some chocolate and swirl it into the dough before baking. Pro Tips Chill the Dough: For best results, chill the cookie dough for at least 30 minutes before baking. This helps the cookies maintain their shape and results in a chewier texture. Fresh vs. Frozen Raspberries: If using frozen raspberries, make sure to thaw and drain them well to avoid excess moisture in the cookie dough, which can lead to soggy cookies. White Chocolate Pairing: Consider using flavored white chocolate chips, such as raspberry or lemon, to enhance the flavor profile of your cookies even further. Storage Tips: Store the cookies in an airtight container at room temperature for up to one week. You can also freeze them for up to three months for a sweet treat later! {{image_2}} You can mix and match flavors to create fun twists. Try adding blueberries or strawberries for a fruity kick. If you love chocolate, swap in dark chocolate chips instead of white ones. You can also use lemon extract for a stronger lemon taste. This way, you can enjoy a new cookie every time. To make these cookies vegan, replace the egg with a flax egg. Mix one tablespoon of ground flaxseed with two and a half tablespoons of water. Let it sit for a few minutes to thicken. Use vegan cream cheese and dairy-free butter. For gluten-free options, use a 1:1 gluten-free flour blend. These swaps keep the flavor while meeting dietary needs. Change the flavors with the seasons for fun treats. In spring, add fresh mint or lavender for a floral note. In fall, mix in pumpkin spice for a cozy flavor. You can even sprinkle in some cinnamon for a warm touch. These seasonal twists make your cookies exciting all year round! To keep your Lemon Raspberry Cheesecake Cookies fresh, store them in an airtight container. This helps maintain their soft texture and flavor. You can layer the cookies with parchment paper to prevent sticking. If you store them at room temperature, they last about five days. For longer storage, consider the fridge. Freezing these cookies is easy. Let them cool completely first. Place them in a single layer on a baking sheet. Freeze until solid, then transfer them to a freezer bag. Make sure to remove as much air as possible. These cookies can last up to three months in the freezer. When you want to eat them, thaw overnight in the fridge or at room temperature. Lemon Raspberry Cheesecake Cookies are best within five days at room temperature. If they look dry or hard, they may be stale. Mold or an off smell are clear signs of spoilage. Always check for these signs before enjoying your cookies. These cookies stand out because they mix rich cream cheese with zesty lemon and fresh raspberries. The creamy texture balances the fruity flavors. Each bite offers a delightful blend of sweet and tart. The addition of white chocolate chips adds a touch of luxury. This mix of flavors and textures makes them special. Yes, you can make these cookies ahead of time. Prepare the dough and scoop it onto baking sheets. Cover the sheets with plastic wrap and chill them in the fridge for up to 24 hours. You can also freeze the dough for longer storage. Just thaw it in the fridge before baking. The cookies are done when the edges turn a light golden color. The centers should look set but still soft. You can gently touch the top; if it springs back, they are ready. Avoid overbaking, as this can dry them out. If you need a substitute for cream cheese, use mascarpone or Greek yogurt. Both options provide a creamy texture. However, they will change the flavor slightly. You can also use a vegan cream cheese for a dairy-free option. Absolutely! These cookies make a lovely gift. They look pretty on a plate and taste amazing. Package them in a nice box or jar. Add a ribbon for a personal touch. Friends and family will love receiving these tasty treats. In this post, we covered the key ingredients for Lemon Raspberry Cheesecake Cookies, including essential and optional ones. I shared step-by-step baking instructions and tips for perfect cookies every time. We explored variations, vegan options, and how to store your treats. These cookies are a tasty treat for any occasion. Enjoy baking and sharing these unique flavors!

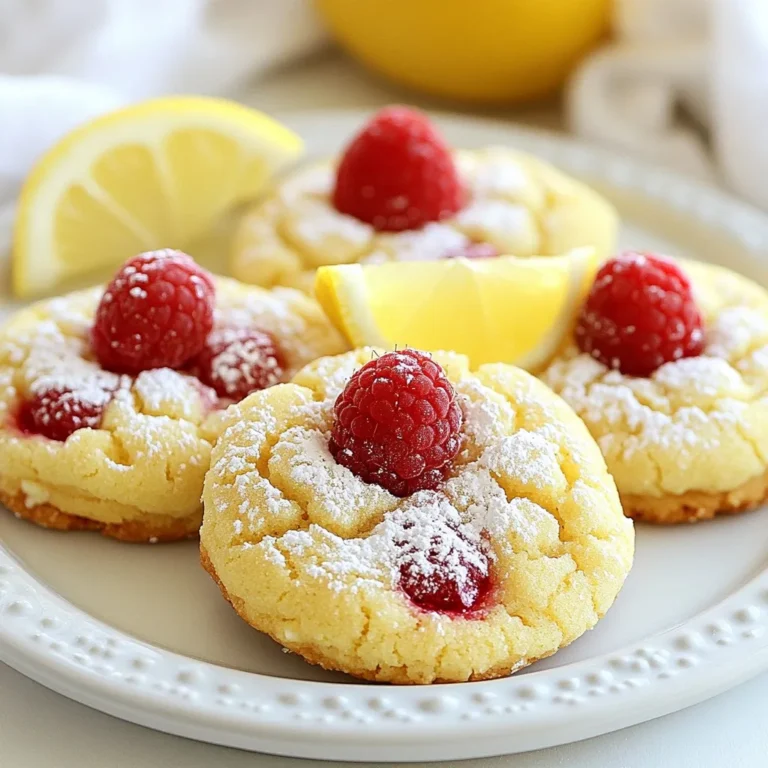
Lemon Raspberry Cheesecake Cookies Delightful Treat

- 1 ½ cups gingerbread cookie crumbs - ½ cup unsalted butter, melted - 2 cups cream cheese, softened - 1 cup granulated sugar - 2 large eggs - 1 teaspoon vanilla extract - 1 teaspoon ground ginger - 1 teaspoon ground cinnamon - ½ teaspoon ground nutmeg - ½ cup sour cream - ¼ cup molasses - Pinch of salt If you want to swap out the butter, use coconut oil or vegetable oil. For cream cheese, try silken tofu for a vegan option. You can also use maple syrup instead of granulated sugar for a healthier choice. Accurate measurements are key to great baking. Use a kitchen scale for best results, especially for dry ingredients. Measuring cups can be tricky, so double-check for accuracy. Always level off your measuring cups for the best outcome. {{ingredient_image_1}} Start by preheating your oven to 350°F (175°C). Next, grease a 9x9-inch baking pan with butter or cooking spray. Line the bottom with parchment paper. Make sure to leave some overhang. This will help you lift the bars out later. In a medium bowl, mix 1 ½ cups of gingerbread cookie crumbs with ½ cup of melted unsalted butter. Stir until the crumbs are well coated. Press this mixture firmly and evenly into the bottom of the prepared pan. This forms the tasty crust for your bars. In a large mixing bowl, beat 2 cups of softened cream cheese until it is smooth. This should take about 2 minutes. Next, add 1 cup of granulated sugar and mix until it is fully blended. Add 2 large eggs one at a time, mixing well after each. Then, mix in 1 teaspoon of vanilla extract, 1 teaspoon of ground ginger, 1 teaspoon of ground cinnamon, ½ teaspoon of ground nutmeg, and a pinch of salt. Finally, stir in ½ cup of sour cream and ¼ cup of molasses until the mixture is completely smooth. Pour the cheesecake mixture over the crust in the pan. Use a spatula to spread it evenly. Bake in the oven for 40 to 45 minutes. The edges should be set while the center remains slightly jiggly. It will firm up as it cools. Turn off the oven and let the cheesecake cool inside for about an hour. This gradual cooling helps prevent cracks. After an hour, transfer the pan to the refrigerator. Chill for at least 4 hours or overnight. Once chilled, lift the cheesecake out using the parchment overhang. Slice it into bars and enjoy! To ensure a smooth filling, beat the cream cheese well. Mix it for about two minutes until it's creamy. Add sugar next and mix until fully blended. When you add eggs, do so one at a time. Mix well after each egg. This helps the filling stay smooth. To avoid cracks on the surface, do not overbake the cheesecake. Bake until the edges are set but the center remains slightly jiggly. Cooling it slowly in the oven also helps. After baking, turn off the oven and leave the cheesecake inside for an hour. This method prevents rapid temperature changes. For garnishing, dust the tops with powdered sugar. This adds a lovely touch. You can also drizzle caramel sauce for extra sweetness. Serve these bars with a dollop of whipped cream for a tasty treat. Fresh fruits like berries or sliced apples pair well too. They add color and freshness. One common mistake is overmixing the filling. This can add too much air and lead to cracks. Mix just until all ingredients are combined. Another mistake is underbaking the cheesecake. Make sure to follow the baking time closely. The edges should be set, and the center should not be too firm. Pro Tips Crust Consistency: Ensure the gingerbread cookie crumbs are finely crushed and mixed thoroughly with melted butter for a firm crust that holds together well. Room Temperature Ingredients: Allow cream cheese and eggs to come to room temperature before mixing. This ensures a smoother batter without lumps. Cooling Technique: After baking, let the cheesecake cool in the oven with the door slightly ajar. This gradual cooling helps prevent cracks on the surface. Chilling Time: For the best flavor and texture, chill the cheesecake bars overnight. This allows the flavors to meld and the filling to set perfectly. {{image_2}} You can make your gingerbread cheesecake bars even better. Here are two fun options: - Adding chocolate chips: Mix in a cup of semi-sweet chocolate chips. They add a rich taste and a lovely texture. The chocolate pairs well with the warm spices in the bars. - Incorporating pumpkin spice: Swap out some of the ground ginger or cinnamon for pumpkin spice. This mix adds a cozy flavor. It makes the bars feel extra festive during the holidays. If you or your guests need gluten-free treats, I have you covered. Here’s how to adjust the recipe: - Using gluten-free cookie crumbs: Look for gluten-free gingerbread cookie crumbs at the store. You can also crush gluten-free gingersnaps. This keeps the crust tasty and safe for all. - Adjustments for gluten-sensitive diets: Check all other ingredients for gluten. Most cream cheeses and sugars are gluten-free. This way, everyone can enjoy your bars without worry. If you plan to share these bars, consider these ideas: - Adjusting the recipe for larger gatherings: Simply double the recipe. Use a larger pan, like a 9x13-inch dish. Bake for a bit longer, checking for doneness. - Mini cheesecake bars concept: For bite-sized treats, use a muffin tin. Line each cup with paper liners. Fill them with the cheesecake mix. Bake until set. These mini bars are perfect for parties! These variations make your gingerbread cheesecake bars even more enjoyable. Feel free to mix and match to find your favorite! Store your gingerbread cheesecake bars in an airtight container. This keeps them fresh and moist. They will last for up to one week in the fridge. Make sure to place a piece of wax paper between the bars. This keeps them from sticking together. For best taste, enjoy them within the first few days. You can freeze these cheesecake bars for later enjoyment. First, wrap each bar in plastic wrap. Then, place them in a freezer-safe bag. They will stay good for up to three months. To thaw, move them to the fridge overnight. This keeps their texture nice and creamy. Sometimes, you may want to warm your cheesecake bars. If so, heat them in the oven at 300°F (150°C). Just for about 10 minutes will do. This brings back their creamy goodness. Avoid using the microwave, as it can change the texture. Enjoy them warm or chilled! Gingerbread cheesecake bars last about 5 to 7 days in the fridge. Store them in an airtight container to keep them fresh. If you want to make them last longer, consider freezing them. They can stay good for up to 3 months in the freezer. Just wrap them tightly in plastic wrap and foil. Yes, you can make gingerbread cheesecake bars a day or two ahead. This is a great idea for busy days. Just keep them in the fridge after baking. They taste even better after sitting for a while. This lets the flavors mix nicely. If you need an egg substitute, you have options. Use 1/4 cup applesauce for each egg. You can also use 1 tablespoon of ground flaxseed mixed with 2.5 tablespoons of water. Let it sit for a few minutes to thicken. These choices work well and keep your bars moist. Chilling is very important. It helps the bars set properly, making them easier to cut. Chilling also enhances the flavors, making each bite richer and creamier. Aim for at least 4 hours in the fridge, or overnight if you can wait. Absolutely! You can customize your bars with fun toppings. Try dusting them with powdered sugar for a sweet touch. Caramel sauce or whipped cream adds extra flavor. Fresh fruit, like berries, make a great addition too. Get creative and enjoy your unique twist! This recipe brings the cozy flavor of gingerbread into rich cheesecake bars. We covered ingredients, substitutes, and tips to ensure success. Accurate measuring and proper baking are key. Remember to cool your bars gradually for the best texture. Enjoy experimenting with flavors and toppings. These bars are perfect for any gathering. With some practice, you'll master this dessert and impress your friends and family. Dive into these delicious treats and share them with those you love. Happy baking!

Gingerbread Cheesecake Bars Delightful Holiday Treat

For Cheesy Spinach Pesto Stuffed Shells, gather these tasty items: - 20 large pasta shells - 1 cup ricotta cheese - 1 cup shredded mozzarella cheese - 1/2 cup grated Parmesan cheese - 1 cup fresh spinach, chopped - 1/2 cup basil pesto - 1/2 teaspoon garlic powder - Salt and pepper to taste - 1 cup marinara sauce - Fresh basil leaves for garnish You can swap some ingredients if needed. Here are a few ideas: - Use cottage cheese instead of ricotta for a lighter option. - Try vegan cheese in place of mozzarella for a dairy-free meal. - If you can't find basil pesto, make your own or use sun-dried tomato pesto. - For a kick, add a pinch of red pepper flakes to the cheese mix. Fresh ingredients make a big difference in flavor. Fresh spinach adds a vibrant taste. It also packs in nutrients. Using fresh cheeses improves creaminess. Fresh basil gives a lovely aroma. Avoid old or stale ingredients for the best outcome. Cooking with fresh items helps you create a dish that shines. {{ingredient_image_1}} First, preheat your oven to 375°F (190°C). This step gets the oven ready for baking. Next, cook the large pasta shells. Follow the package instructions until they are al dente. This means they should be firm but not hard. Once cooked, drain the shells and set them aside. Now, grab a mixing bowl. Combine the ricotta cheese, shredded mozzarella, and grated Parmesan. Add the chopped spinach and basil pesto to the bowl. Sprinkle in garlic powder, salt, and pepper. Mix all the ingredients well until they blend together nicely. While preparing, keep an eye on the shells. Make sure they do not stick together. If they do, gently separate them with a fork. Once your cheese mixture is ready, it’s time to stuff the shells. Use a spoon to fill each shell with the cheese mix. Use a good amount, but don’t overfill. Place the stuffed shells seam side up in a baking dish. After all the shells are in, spread marinara sauce over them. Make sure to cover each shell completely with sauce. This keeps them moist while baking. For extra cheesiness, sprinkle any leftover mozzarella and Parmesan on top. Cover the dish with aluminum foil. Bake for 20 minutes. After that, remove the foil and bake for another 10 minutes. This helps the cheese get bubbly and golden. Once they are done, let the shells cool for a few minutes. Finally, garnish with fresh basil leaves before serving. Enjoy your delicious Cheesy Spinach Pesto Stuffed Shells! To keep your pasta shells intact, cook them carefully. Start with a large pot of water. Add salt to enhance the flavor. Boil the shells until they are al dente. This means they should still be firm when you bite them. After cooking, drain them gently. Rinse with cold water to stop the cooking process. Handle the shells with care to avoid cracking. When stuffing the shells, use a small spoon or a piping bag. This makes it easier to fill them evenly. Don’t overfill; leave a little space at the top. If you overstuff, the filling may spill out during baking. Place the stuffed shells seam side up in your baking dish. This helps keep them together and makes for a nice presentation. Add extra flavor by using spices. You can mix in a pinch of red pepper flakes for heat. Fresh herbs like parsley or thyme can also brighten the dish. Consider adding a dash of lemon juice for a fresh twist. These small changes can elevate your Cheesy Spinach Pesto Stuffed Shells from tasty to amazing. Always taste your filling before stuffing to adjust the flavors as needed. Pro Tips Use Fresh Spinach: Always opt for fresh spinach over frozen for a brighter flavor and better texture in your stuffed shells. Customize Your Cheese: Feel free to mix in other cheeses like feta or goat cheese for a unique twist on flavor. Make Ahead: Prepare the stuffed shells in advance and refrigerate them until ready to bake, making dinner prep a breeze. Extra Flavor Boost: Add red pepper flakes or Italian seasoning to the marinara sauce for an extra kick of flavor. {{image_2}} You can keep these stuffed shells vegetarian by using plant-based cheese. Look for ricotta made from nuts or tofu. You can also add more veggies. Artichokes, mushrooms, or bell peppers work well. They add flavor and nutrients. For a protein boost, add cooked chicken or sausage. Shred the chicken and mix it into the cheese filling. If you prefer sausage, choose Italian sausage for extra flavor. Cook it first, then crumble it into the mixture. This adds a savory touch to your meal. If you need a gluten-free option, use gluten-free pasta shells. Many brands offer great choices that hold up well. You can also make your own shells using almond flour. Just ensure your other ingredients are also gluten-free. This way, everyone can enjoy this tasty dish. After enjoying Cheesy Spinach Pesto Stuffed Shells, you may have some leftovers. To store them, let the shells cool completely. Then, place them in an airtight container. This keeps the flavors fresh and prevents drying out. Store the container in the fridge for up to three days. To reheat, preheat your oven to 350°F (175°C). Place the stuffed shells in a baking dish. Add a splash of marinara sauce on top to keep them moist. Cover the dish with foil. Bake for about 15-20 minutes. Check to ensure they are heated through. If using a microwave, heat one serving at a time for about 2-3 minutes. If you want to freeze the stuffed shells, do so before baking. Assemble the shells in a baking dish and cover tightly with plastic wrap. Then, wrap the dish in aluminum foil for extra protection. Label with the date. You can freeze them for up to three months. When ready to cook, bake straight from the freezer. Just add an extra 10-15 minutes to the baking time. Enjoy the flavors of your Cheesy Spinach Pesto Stuffed Shells anytime! You should bake Cheesy Spinach Pesto Stuffed Shells for about 30 minutes. First, cover the dish with foil and bake for 20 minutes. After that, remove the foil and bake for another 10 minutes. This helps the cheese get bubbly and brown. Yes, you can make these shells ahead of time. Prepare the shells and fill them with the cheese mixture. Place them in the fridge for up to 24 hours before baking. Just remember to let them sit at room temperature for about 15 minutes before baking. This helps them cook evenly. Stuffed shells pair well with many sides. Here are a few ideas: - A simple green salad with a lemon vinaigrette. - Garlic bread for a nice crunch. - Steamed veggies like broccoli or green beans. - A light soup, like minestrone. These sides bring balance and flavor to your meal. Enjoy! This blog post covered everything you need for Cheesy Spinach Pesto Stuffed Shells. We discussed the list of ingredients and how fresh ones make a big difference. Following that, I shared step-by-step instructions for prep, cooking, and assembly. I also gave tips to help prevent breakage and enhance flavors. You can try various options like vegetarian choices or gluten-free pasta. Lastly, we addressed storage and reheating. Remember, these stuffed shells are a fun dish to share. Enjoy making them your way!

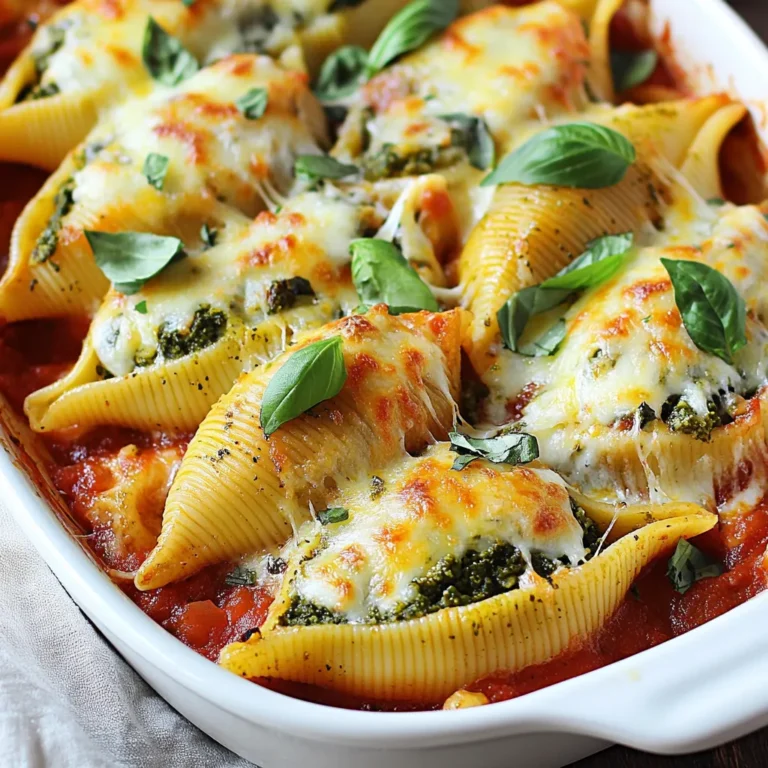
Cheesy Spinach Pesto Stuffed Shells Healthy Delight

- Firm tofu - Fresh orange juice - Soy sauce - Fresh ginger - Garlic To make a great Orange Ginger Tofu Stir Fry, you need a few crucial ingredients. Firm tofu serves as the base for this dish. It holds its shape and absorbs flavors well. Fresh orange juice adds a bright, sweet taste. Soy sauce gives the dish saltiness and umami. Fresh ginger and garlic add warmth and depth. - Red bell pepper - Baby broccoli or broccoli florets - Carrot The vegetables make this stir fry colorful and healthy. Red bell pepper brings sweetness and crunch. Baby broccoli or broccoli florets add a nice bite and nutrients. Carrots offer a sweet flavor and vibrant color. Together, these veggies balance texture and taste. - Olive oil - Cornstarch - Seasonings for taste - Garnish options: sesame seeds and green onions Olive oil helps cook the tofu and vegetables without sticking. Cornstarch thickens the sauce, making it rich and glossy. You can use salt and pepper to adjust flavors. For garnish, sesame seeds and green onions add a nice finish. They also enhance the dish's visual appeal. {{ingredient_image_1}} To start, cut the firm tofu into bite-sized cubes. You want them about one inch thick. Next, pat the tofu dry with a paper towel. This step is key! Removing moisture helps the tofu get crispy when you cook it. If you skip this, the tofu will steam instead of fry, and you won’t get that nice golden color. Now, let’s make the sauce. In a medium bowl, whisk together the freshly squeezed orange juice, soy sauce, minced ginger, and minced garlic. This blend gives your stir fry its great flavor. Make sure to mix it well so that all the ingredients combine. Set the sauce aside for later. Heat two tablespoons of olive oil in a large skillet or wok over medium-high heat. Once the oil is hot, add the tofu cubes. Cook them for about 8 to 10 minutes. Flip the cubes every few minutes until they are golden brown on all sides. After browning the tofu, add the sliced red bell pepper, baby broccoli, and julienned carrot. Stir-fry these veggies for around five minutes. You want them to be tender but still crisp. Next, pour the orange-ginger sauce you made earlier into the skillet. Stir everything together. Let it simmer for 2 to 3 minutes to blend the flavors. To thicken the sauce, add the cornstarch mixed with water. Stir continuously until it reaches your desired thickness. Finally, season with salt and pepper to taste. Remove the skillet from heat and garnish with sesame seeds and chopped green onions. Your Orange Ginger Tofu Stir Fry is now ready to enjoy! To achieve crispy tofu, start with firm tofu. Drain and press it well. This helps remove moisture. Cut the tofu into small cubes. Sauté it over medium-high heat in olive oil. Cook until golden brown. This usually takes about 8-10 minutes. Flip the cubes occasionally for even cooking. If you prefer alternatives, you can use tempeh or seitan. Both have great textures and flavors. They can also soak up the sauce well. For vibrant colors and flavors, choose fresh veggies. I recommend using red bell pepper, baby broccoli, and carrots. They add crunch and sweetness to the dish. In different seasons, feel free to swap in other vegetables. Zucchini, snow peas, or bell peppers work well too. Balance the flavors by mixing sweet and savory vegetables. This gives your stir fry depth. You can customize the sauce to fit your taste. If you like it sweeter, add more orange juice. For heat, try adding red pepper flakes or sriracha. You can also enhance the citrus flavor by adding lime juice. This brightens up the dish. Adjust the soy sauce for saltiness as needed. Always taste as you go to find your perfect mix. Pro Tips Press the Tofu: Ensure to press your tofu well to remove excess moisture; this helps it absorb the flavors better and achieve a crispy texture. Use Fresh Ingredients: Opt for freshly squeezed orange juice and fresh ginger to enhance the overall flavor of the dish. Customize the Veggies: Feel free to swap in your favorite vegetables based on what you have on hand, such as snap peas or bell peppers. Adjust the Sauce: Taste the sauce before serving; you can add more soy sauce for saltiness or more orange juice for sweetness as per your preference. {{image_2}} You can switch the tofu for chicken, shrimp, or tempeh. Chicken works great if you want a meat option. Just cut it into small pieces and cook it until golden. Shrimp adds a nice touch of seafood flavor. Cook them until they turn pink. Tempeh is a good choice for a plant-based protein. It has a nutty taste and firm texture. To spice things up, add chili paste or sesame oil. Chili paste gives a kick that many love. A bit goes a long way, so start small. Sesame oil adds a warm, nutty flavor. Just a drizzle can change the dish. You can also add fresh herbs like cilantro. It brightens the dish and adds a fresh taste. You can try other sauces too. Teriyaki sauce brings a sweet and savory flavor. Just swap it with the orange-ginger sauce. Peanut sauce is another tasty option. It adds creaminess and a rich taste to the stir fry. Each sauce gives a new twist to your meal. To store your Orange Ginger Tofu Stir Fry, let it cool first. Place it in an airtight container. Refrigerate it within two hours of cooking. This helps keep the flavors fresh. It will last up to four days in the fridge. Make sure to label the container with the date. To reheat leftovers, I recommend using a skillet. Heat a little oil over medium heat. Add the stir fry and cook until it’s warm. This method keeps the tofu crispy. You can also use a microwave. Just heat it in short bursts, stirring in between. Be careful not to overcook it, as this can make the tofu tough. You can freeze this stir fry for later use. Place it in a freezer-safe container. It will stay good for about three months. To thaw, move it to the fridge overnight. Reheat in a skillet for the best texture. Avoid freezing if you use delicate vegetables, as they may become mushy. Yes, you can prepare this dish ahead of time. Cook the tofu and vegetables, then let them cool. Store them in airtight containers in the fridge. When you're ready to eat, reheat them in a pan. Add the sauce fresh to keep the flavors bright. This makes meal prep easy and saves time on busy days. You can serve this stir fry with many sides. Here are some ideas: - Steamed jasmine rice - Quinoa for a nutty flavor - Cauliflower rice for a low-carb option - Noodles for a heartier meal - A fresh salad with a light dressing These sides complement the orange ginger flavors well. Yes, this recipe can be gluten-free. Just replace soy sauce with gluten-free tamari. Make sure your cornstarch is also gluten-free. The other ingredients in the recipe are naturally gluten-free. This makes it a great option for those with gluten sensitivities. Enjoy your tasty meal without worry! This recipe for Orange Ginger Tofu Stir Fry is packed with flavor and nutrients. You learned about the key ingredients, like firm tofu, fresh veggies, and a zesty sauce. I shared tips for perfecting your tofu and how to customize the dish to fit your taste. Remember, you can mix it up with other proteins or sauces. Storing leftovers properly keeps the dish fresh. This stir fry is both quick and easy, making it a great choice for any meal. Enjoy creating a delicious dish that fits your lifestyle!

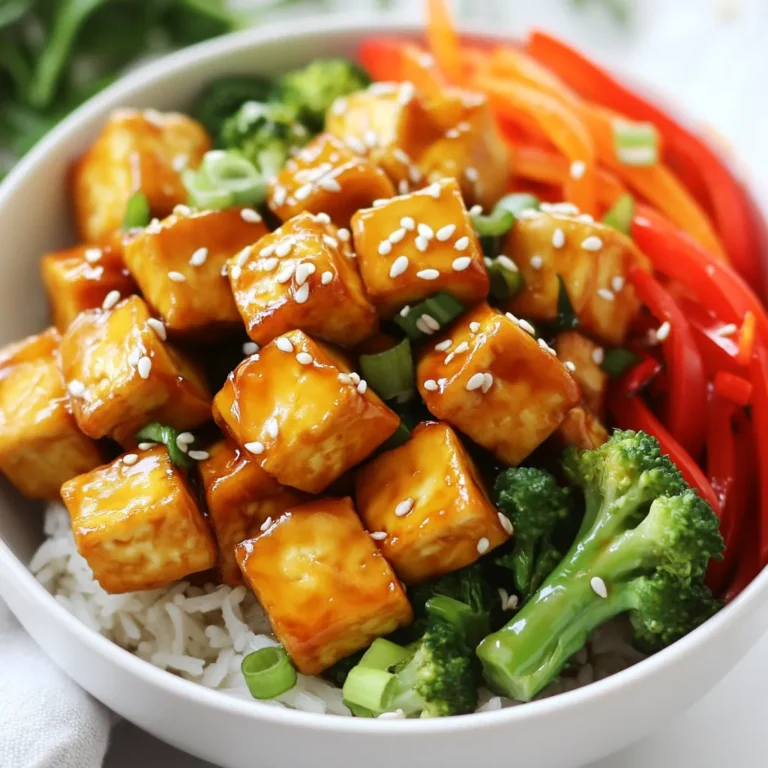
Orange Ginger Tofu Stir Fry Flavorful and Healthy Meal

For these tasty meatballs, you will need: - 1 pound ground turkey - 1/2 cup breadcrumbs - 1/4 cup grated Parmesan cheese - 1/4 cup chopped green onions - 2 cloves garlic, minced - 1 egg, beaten - 1/4 cup sweet chili sauce - 2 tablespoons soy sauce - 1 tablespoon fresh ginger, grated - Salt and pepper to taste - Cooking spray or olive oil for baking These ingredients blend to create a rich flavor. Ground turkey keeps the meatballs lean, while breadcrumbs add texture. The Parmesan cheese gives a salty bite. Sweet chili sauce brings a wonderful sweetness and zing. Not all ingredients need to be set in stone. If you don’t have ground turkey, try ground chicken or even beef. For a gluten-free option, use gluten-free breadcrumbs. If you lack fresh ginger, ground ginger works too. You can switch sweet chili sauce with teriyaki or BBQ sauce for a different taste. Green onions can be replaced with chives or shallots. These swaps keep the dish fun and fresh. To make these meatballs, you will need: - A large mixing bowl - A baking sheet - Parchment paper or cooking spray - Measuring cups and spoons - A mixing spoon or your hands for blending This simple setup makes cooking easy and enjoyable. Having the right tools helps you mix well and shape the meatballs. It’s all about keeping the process smooth. {{ingredient_image_1}} Start by preheating your oven to 400°F (200°C). Line a baking sheet with parchment paper. Lightly spray it with cooking spray or brush it with olive oil. In a large bowl, mix together the ground turkey, breadcrumbs, and grated Parmesan cheese. Add chopped green onions and minced garlic to the bowl. Then, crack the egg into the mixture. Pour in the sweet chili sauce and soy sauce. Grate fresh ginger and add it too. Season with salt and pepper. Mix all the ingredients well, but don't over-mix. This keeps the meatballs tender. Now, shape the mixture into golf ball-sized meatballs, about 1 inch in diameter. Place them on the prepared baking sheet. Bake the meatballs in the oven for 20 to 25 minutes. Check for an internal temperature of 165°F (74°C) to ensure they are fully cooked. For extra flavor, brush the meatballs with more sweet chili sauce during the last 5 minutes of baking. This gives them a nice shine and kick. To make sure your meatballs are perfect, use a meat thermometer. This helps you find the right temperature. Avoid pressing too hard on the meatballs while mixing. This keeps them light and airy. If you want crispier meatballs, bake them for a few extra minutes. Let the meatballs cool for a few minutes before serving. This helps them hold their shape. Enjoy your delicious sweet chili turkey meatballs! To keep your meatballs moist, use ground turkey with some fat. The fat adds juicy flavor. Mixing in breadcrumbs helps keep moisture in. Don't over-mix the meatball mixture. Just blend well enough so everything combines. This step helps keep them tender. You can boost the flavor of your sweet chili sauce. Add a splash of lime juice for tang. A bit of honey can make it sweeter. If you like heat, mix in some chili flakes. Fresh chopped herbs, like cilantro or basil, add freshness. Taste as you go to find your perfect mix. Presentation makes a big difference! Serve the meatballs on a nice platter. Drizzle extra sweet chili sauce over them for shine. Sprinkle sesame seeds and chopped parsley on top for color. Use toothpicks for easy serving at parties. This makes them fun and easy to eat! Pro Tips Keep It Tender: Avoid over-mixing the meatball mixture. This helps to maintain a tender texture when baked. Flavor Boost: For a richer flavor, consider adding a splash of lime juice or zest to the mixture for a citrusy kick. Freezing Tips: You can freeze uncooked meatballs. Just arrange them on a baking sheet, freeze until solid, then transfer to a bag for later use. Perfect Pairing: Serve these meatballs with a side of rice or noodles to complement the sweet chili flavors and soak up the sauce. {{image_2}} You can make Sweet Chili Turkey Meatballs even healthier. Start by choosing lean turkey. Lean turkey has less fat but still tastes great. You can also use whole wheat breadcrumbs for extra fiber. If you want, add chopped spinach or grated carrots to the mix. These veggies boost nutrition and add color. Sweet chili sauce is tasty, but other sauces work well too. Teriyaki sauce gives a sweet and salty flavor. BBQ sauce adds a smoky twist. If you like a bit of heat, try sriracha mixed with honey. Each sauce changes the taste, so feel free to experiment. Think about how you want to serve your meatballs. For a party, serve them with toothpicks. Drizzle extra sauce on top and sprinkle sesame seeds for a fun look. If it’s a weeknight dinner, serve the meatballs over rice or noodles. They taste great with steamed veggies on the side. You can even add them to a sub for a yummy sandwich. To store leftover meatballs, let them cool first. Place them in an airtight container. Keep the meatballs in the fridge for up to four days. If you have more, you can freeze them for later use. To reheat, preheat your oven to 350°F (175°C). Place the meatballs on a baking sheet. Heat them for about 10-15 minutes. You can also use the microwave. Heat them for 1-2 minutes, checking often. If you want to freeze meatballs, shape them first. Lay them on a baking sheet in a single layer. Freeze them for 1-2 hours until firm. Then, transfer them to a freezer bag. They will last for up to three months. When ready to eat, thaw them overnight in the fridge before reheating. Yes, you can make Sweet Chili Turkey Meatballs ahead of time. Shape the meatballs and place them on a baking sheet. Cover them and store in the fridge for up to a day. This way, you save time on busy days. You can also freeze them for up to three months. Just remember to thaw them in the fridge before cooking. You can serve Sweet Chili Turkey Meatballs with many sides. Here are some tasty options: - Steamed rice or jasmine rice - Stir-fried vegetables - Noodles tossed in soy sauce - A fresh salad with sesame dressing - Crispy spring rolls These sides balance the sweet and spicy flavors of the meatballs. To check if the meatballs are done, use a meat thermometer. Insert it into the center of a meatball. It should read 165°F (74°C). You can also cut one open. The inside should be no longer pink, and the juices should run clear. This ensures they are safe to eat and perfectly cooked. In this post, we explored how to make sweet chili turkey meatballs. We covered key ingredients, simple steps for preparation, and helpful tips for keeping your meatballs moist. You learned about variations and how to store any leftovers. With these insights, you can create delicious meatballs for any meal. Remember, cooking is fun, so feel free to mix and match. Enjoy your cooking journey!

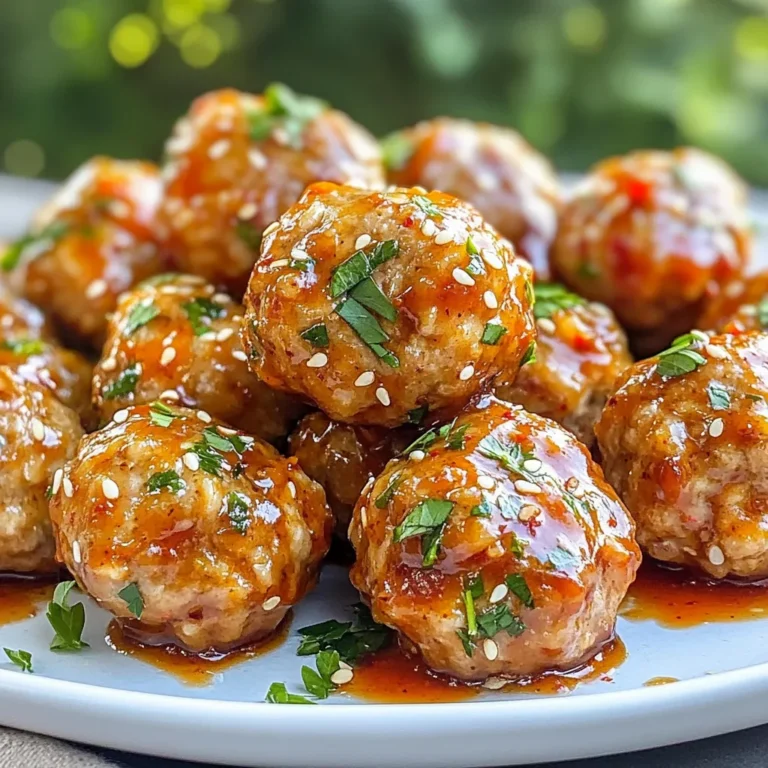
Sweet Chili Turkey Meatballs Flavorful and Easy Meal

- 1 cup quinoa - 1 can (15 oz) black beans - 1 cup corn kernels - 1 ripe avocado - 1 cup cherry tomatoes - 1 red bell pepper - 1 teaspoon cumin - 1 teaspoon chili powder - Salt and pepper to taste - Greek yogurt or sour cream - Shredded cheese - Hot sauce To make these savory quinoa black bean burrito bowls, gather all the main ingredients first. Rinse the quinoa and drain the black beans. You can use fresh or frozen corn. Dice the ripe avocado, halve the cherry tomatoes, and chop the red bell pepper. These fresh ingredients add flavor and color. Next, collect your spices and seasonings. Cumin and chili powder give the bowls warmth and depth. Don't forget salt and pepper to enhance all the flavors. Finally, consider any optional toppings you might want. Greek yogurt or sour cream add creaminess. Shredded cheese brings richness, and hot sauce can give a nice kick. These toppings let you customize each bowl to your liking. Enjoy the process of creating your colorful and tasty meal. {{ingredient_image_1}} 1. In a medium saucepan, combine 1 cup of rinsed quinoa with 2 cups of vegetable broth. 2. Bring the mixture to a boil over medium heat. 3. Once boiling, reduce the heat to low. 4. Cover the saucepan and let it simmer for 15 minutes. 5. The quinoa will be fluffy and the broth absorbed when done. 1. In a large mixing bowl, combine 1 can of rinsed black beans, 1 cup of corn, 1 diced red bell pepper, and 1 cup of halved cherry tomatoes. 2. Add 1 teaspoon of cumin, 1 teaspoon of chili powder, salt, and pepper to taste. 3. Squeeze in the juice of 1 lime and mix well. 4. This will coat all ingredients with a nice flavor. 1. In individual serving bowls, layer the cooked quinoa at the bottom. 2. Next, add a generous scoop of the black bean mixture on top. 3. Finish each bowl with diced avocado and a sprinkle of fresh cilantro. 4. You can add optional toppings like Greek yogurt, shredded cheese, or hot sauce for extra flavor. 5. Serve right away and enjoy your colorful and tasty burrito bowls! To avoid mushy quinoa, always rinse it first. Rinsing removes bitter saponins. This step helps your quinoa taste great and stay fluffy. Use a fine mesh strainer to rinse it under cold water for about a minute. Next, use the right water-to-quinoa ratio. I recommend two cups of vegetable broth for one cup of quinoa. This ratio keeps the quinoa light and fluffy, not soggy. Adjusting spice levels can change your meal. If you like more heat, add extra chili powder or hot sauce. For a milder taste, cut back on the spices. Taste as you go! Experiment with toppings to keep it fun. You could add black olives, jalapeños, or even fresh corn salsa. Each topping adds its own flavor and texture. Try different combinations to find your favorite! Making burrito bowls ahead of time is easy. Cook a big batch of quinoa and store it in the fridge. You can prepare the black bean mixture and keep it separate. This way, everything stays fresh and tasty. For the best flavor, store the diced avocado separately. Mix it in just before serving to prevent browning. You can also squeeze some lime juice on the avocado to help it stay fresh longer. Pro Tips Rinse the Quinoa: Always rinse quinoa under cold water before cooking to remove its natural coating, called saponin, which can make it taste bitter. Customize the Veggies: Feel free to substitute or add your favorite vegetables to the black bean mixture for a personal touch—zucchini, spinach, or radishes work great! Make It Ahead: Prepare the quinoa and black bean mixture in advance and store them separately in the fridge for a quick assembly during busy weeknights. Experiment with Spices: Adjust the cumin and chili powder to your taste, or add other spices like smoked paprika or cayenne pepper for extra flavor! {{image_2}} You can make your burrito bowls heartier with protein. Grilled chicken adds a tasty boost. Simply slice it and layer it on top. If you prefer plant-based options, try tofu. Marinate it in lime juice and spices before grilling. Tempeh is another great choice. It has a firm texture and absorbs flavors well. While quinoa is a star here, you can swap it out. Brown rice offers a chewy texture and nutty flavor. Couscous cooks quickly and adds a light bite. For a gluten-free option, try millet or even cauliflower rice. These options keep your bowls diverse and exciting. Using seasonal vegetables can enhance your dish. Fresh corn in summer or squash in fall adds vibrancy. You can also mix in seasonal greens. Fresh herbs like cilantro or parsley lift the flavors. They add color and freshness to your bowls, making each bite delightful. To keep your quinoa black bean burrito bowls fresh, store leftovers in the fridge. Use an airtight container. This helps prevent moisture loss and keeps flavors intact. You can refrigerate them for up to three days. If you have extra ingredients, store them separately. This keeps everything crisp and fresh. You can freeze quinoa and the black bean mixture for later. Divide them into portions and place them in freezer bags. Squeeze out excess air before sealing. To thaw, move them to the fridge overnight. Reheat in a pan or microwave. Add a splash of water to keep it moist while reheating. Assembled burrito bowls last about three days in the fridge. Look for signs of spoilage. If the ingredients smell off or look slimy, it's best to discard them. Fresh ingredients will keep your meal tasty and safe to eat. If you store them correctly, they will stay delicious for days. Yes, you can prepare these bowls ahead. Meal prep can save time. Cook quinoa and let it cool. Store it in an airtight container in the fridge. You can also mix the black bean filling in advance. Just keep the ingredients separate until you are ready to eat. This keeps everything fresh and tasty. When ready to serve, simply layer the quinoa and filling. Add toppings just before serving for the best taste. Yes, this recipe is vegan. It uses only plant-based ingredients. If you want to add toppings, check the ingredients. Greek yogurt and sour cream are not vegan. You can skip these or use vegan alternatives. Shredded cheese can also be replaced with a vegan option. This way, you can enjoy a fully vegan bowl. Canned quinoa is not common. It is usually better to cook fresh quinoa. Cooking it is easy and quick. If you're in a hurry, you can use pre-cooked quinoa packets. These can be found at most stores. Just heat them up and mix with your black bean filling. This makes a fast and easy meal. In this blog post, we explored how to make tasty quinoa black bean burrito bowls. We covered the main ingredients, spices, and optional toppings. I shared step-by-step cooking instructions to get the right texture and taste. You learned tips for meal prep and ways to store your bowls. Remember, you can modify recipes with different proteins and grains. Experiment with seasonal veggies for more flavor. Enjoy your fresh, homemade burrito bowls and share them with friends!

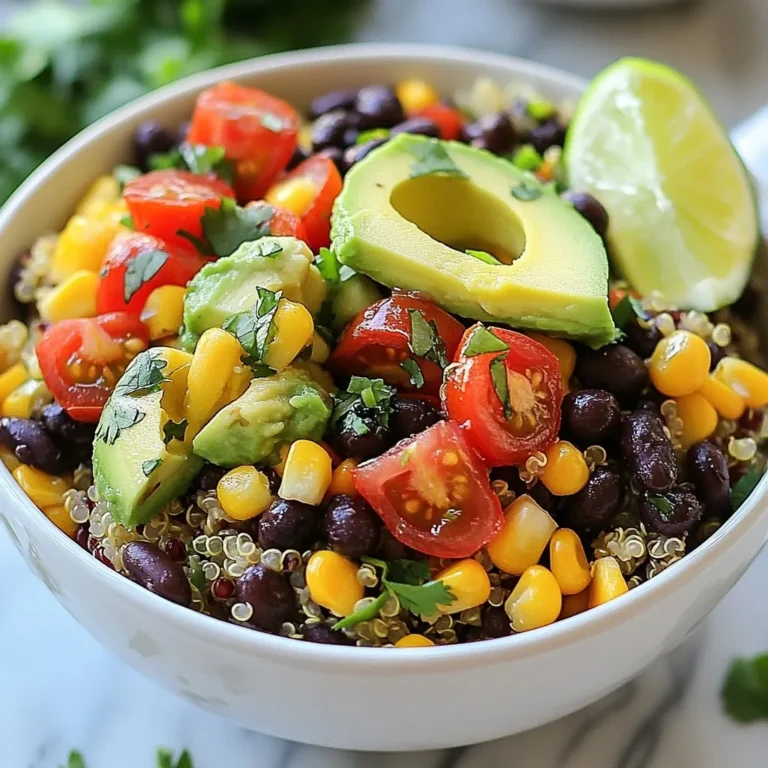
Savory Quinoa Black Bean Burrito Bowls Recipe

For a classic chicken pot pie, you need these main ingredients: - 1 lb boneless, skinless chicken breasts, diced - 1 cup carrots, diced - 1 cup peas (fresh or frozen) - 1 cup potatoes, diced - 1/2 cup celery, diced - 1 onion, finely chopped - 4 tablespoons unsalted butter - 1/3 cup all-purpose flour - 2 cups chicken broth - 1 cup whole milk - 1 teaspoon dried thyme - 1 teaspoon garlic powder - Salt and pepper to taste - 1 package (2 crusts) refrigerated pie crusts - 1 egg, beaten (for egg wash) These ingredients come together to create a warm, hearty dish. The chicken provides protein, while the veggies add flavor and nutrients. The butter and flour form the base of a creamy sauce, making each bite rich and satisfying. To enhance your pot pie, consider these optional garnishes: - Fresh chopped parsley - Cracked black pepper - A sprinkle of paprika Garnishes add color and flavor. They make the dish look appealing and taste even better. Keep these pantry staples on hand to make this dish easier: - Olive oil - Chicken bouillon cubes - Bay leaves Having these items ready helps you whip up this comforting meal whenever you want. They can boost the flavor and make cooking smoother. {{ingredient_image_1}} Start by gathering all your ingredients. You need 1 pound of chicken breasts. Dice them into small pieces. Next, prepare 1 cup of diced carrots, 1 cup of peas, and 1 cup of diced potatoes. Don’t forget to chop 1/2 cup of celery and 1 onion finely. In a large skillet, melt 4 tablespoons of unsalted butter over medium heat. Add the onion, carrots, and celery. Cook for about 5 minutes, until the onion looks clear. Then, add the diced chicken. Cook until the chicken is no longer pink, which takes about 7-8 minutes. Once the chicken is cooked, sprinkle 1/3 cup of all-purpose flour on top. Stir it well to coat everything. This helps to thicken the filling. Cook for 1-2 minutes to remove the raw taste of the flour. Gradually pour in 2 cups of chicken broth and 1 cup of whole milk. Stir as you pour to mix it well. Bring this mixture to a simmer. It will start to thicken. Add in the peas, diced potatoes, 1 teaspoon of dried thyme, 1 teaspoon of garlic powder, and season with salt and pepper. Stir well and simmer for another 5 minutes until the filling is heated through. Remove it from heat. Roll out one pie crust and place it in a 9-inch pie dish. Spoon the chicken filling into the crust, spreading it evenly. Roll out the second crust and lay it over the filling. Crimp the edges to seal the pie, then cut several slits in the top for steam to escape. To make it golden, brush the top crust with a beaten egg. Preheat your oven to 425°F (220°C). Bake the pie for 30-35 minutes or until the crust is golden brown and the filling bubbles. Once done, let it cool for 10 minutes before slicing and serving. Enjoy your warm, comforting chicken pot pie! To make a great pie crust, start with cold ingredients. Use chilled butter and ice water. This helps create a flaky texture. Roll out the dough evenly. Aim for a thickness of about 1/8 inch. If the dough cracks, just press it back together. Chill the crust for 30 minutes before baking. This sets the shape and prevents shrinkage. For a golden look, brush the top with beaten egg before baking. Herbs and spices bring life to your pot pie. Dried thyme adds warmth and depth. A teaspoon is enough to make a difference. Garlic powder gives a nice flavor without being strong. Feel free to add other herbs like rosemary or parsley. Fresh herbs can also boost the taste. Just chop them finely and stir them into the filling. Avoid overcooking the chicken. It should be cooked until just no longer pink. Overcooked chicken can turn dry and tough. Be careful not to add too much flour. It can make the filling too thick. Stir gently when adding broth and milk to prevent lumps. Lastly, don’t forget to cut slits in the top crust. This allows steam to escape and keeps your crust from getting soggy. Pro Tips Use Leftover Chicken: This recipe is a great way to use up leftover rotisserie chicken, which will save you time in the cooking process. Vegetable Variations: Feel free to add or substitute vegetables like corn or green beans based on your preferences or what you have on hand. Make Ahead: You can prepare the filling in advance and store it in the refrigerator. Just assemble and bake the pie when you are ready to enjoy it. Perfect Crust: For an extra flaky crust, ensure your butter is cold and handle the dough as little as possible. {{image_2}} You can make a tasty vegetarian pot pie. Start by swapping out chicken for mushrooms or tofu. Use vegetable broth instead of chicken broth. This way, you keep the creamy filling while enjoying plant-based goodness. Add more vegetables like zucchini or bell peppers. They add color and flavor. Feel free to mix in your favorite veggies. Corn, green beans, or even butternut squash work well. Each veggie brings unique taste and texture. Just make sure to cook the vegetables enough before adding them to the pie. This step ensures everything is tender and delicious. You can also change the spices to match the veggies you choose. Using leftover chicken makes this dish quick and easy. Simply shred or chop the chicken into bite-sized pieces. This way, you cut down on cooking time. Rotisserie chicken is a great option. It’s tasty and saves you time. Just remember to adjust the seasoning, as rotisserie chicken can be salty. Enjoy the ease of using what you have for a cozy meal. To keep leftover pot pie fresh, let it cool first. Cover it tightly with plastic wrap or aluminum foil. You can also place it in an airtight container. Store it in the fridge for up to three days. This helps keep the flavors intact and the crust from getting soggy. When ready to eat, preheat your oven to 350°F (175°C). Place the pot pie on a baking sheet. Cover it with aluminum foil to prevent the crust from burning. Heat for about 20 to 25 minutes. If you want a crispier crust, remove the foil for the last 5 to 10 minutes. This makes the crust flaky and delicious. You can freeze chicken pot pie for later use. Before baking, wrap it well in plastic wrap and then in foil. This helps prevent freezer burn. You can freeze it for up to three months. When you are ready to bake it, do not thaw. Preheat your oven to 425°F (220°C) and bake it for about 50 to 60 minutes. Check for a golden crust and bubbly filling. Yes, you can use frozen vegetables. They save time and still taste great. Just add them in the same step as the fresh peas. They will cook in the filling. Frozen vegetables are convenient and often just as nutritious. You can tell the pot pie is done when the crust is golden brown. The filling should also bubble around the edges. Bake it for 30-35 minutes. If it looks golden and smells amazing, it’s ready to eat! Chicken pot pie pairs well with simple sides. You can serve it with a fresh salad or steamed veggies. Mashed potatoes also make a nice side. For a cozy meal, add some warm bread on the side. Enjoy your comforting meal! This blog post showed you how to make a classic chicken pot pie. You learned about key ingredients, like chicken and vegetables, and optional garnishes. The step-by-step guide made it easy to prep and bake the pie. You discovered tips for a flaky crust and common mistakes to avoid. We also explored fun variations and how to store leftovers. Enjoy this comforting dish with your loved ones, and remember, you can adapt it to your taste! Happy cooking!

Classic Chicken Pot Pie Comforting and Hearty Meal

- 1 lb (450g) boneless, skinless chicken breast, cut into 1-inch cubes - 1/4 cup honey - 1/4 cup fresh lime juice - 2 cloves garlic, minced - 1 tablespoon soy sauce - 1 teaspoon ground cumin - 1/2 teaspoon chili powder - Salt and pepper to taste - Wooden or metal skewers (if using wooden, soak in water for 30 minutes) - Fresh lime wedges and cilantro for garnish Using fresh ingredients is key to great flavor. Fresh chicken tastes better and cooks more evenly. Fresh limes give a bright zing that blends well with honey. Fresh garlic adds a sharp, delicious taste that you can't get from dried. When you pick fresh herbs, like cilantro, they make your dish pop. The bright green color also looks great on the plate. Fresh ingredients help your dish shine, making every bite enjoyable. This recipe contains common allergens. The main allergens are soy and garlic. Some people may have soy allergies. If you need a soy-free option, try coconut aminos. Garlic can also cause issues for some. If you have garlic allergies, you can skip it or use garlic powder. Always check labels to ensure your ingredients are safe for you and your guests. {{ingredient_image_1}} To start, gather your ingredients. In a medium bowl, mix together the honey, fresh lime juice, minced garlic, soy sauce, ground cumin, chili powder, salt, and pepper. Whisk them until everything blends well. This marinade is key for flavor. It adds sweetness and tang to the chicken. Once mixed, add the chicken cubes. Make sure they are well coated in the marinade. Cover the bowl with plastic wrap. Place it in the fridge for at least 30 minutes. For more flavor, you can marinate for up to 2 hours. After marinating, it's time to skewer the chicken. If you're using wooden skewers, soak them in water for 30 minutes first. This helps prevent burning. Take the marinated chicken and thread the cubes onto the skewers. Leave a small space between each piece. This space helps the chicken cook evenly. Aim for about 4 to 5 pieces of chicken per skewer. You want to make sure not to pack them too tightly. Now it’s time to grill! Preheat your grill or grill pan to medium-high heat. Once hot, place your skewers on the grill. Cook them for about 12 to 15 minutes. Turn the skewers often to ensure even cooking. The chicken is done when it reaches an internal temperature of 165°F (75°C). After grilling, let the skewers rest for a couple of minutes before serving. This resting time helps keep the chicken juicy. Serve hot with fresh lime wedges and chopped cilantro for a tasty finish. To make the best honey lime chicken skewers, focus on the marinade. Use fresh lime juice for bright flavor. Honey adds sweetness and helps caramelize the chicken. I like to mix garlic, soy sauce, ground cumin, and chili powder for depth. Let the chicken soak in the marinade for at least 30 minutes. If you have time, marinate for up to 2 hours. This gives the flavors a chance to soak in. Grilling is key for these skewers. Preheat your grill to medium-high heat. This helps get nice grill marks and a good sear. When you place the skewers on the grill, leave space between the pieces. This helps them cook evenly. Turn the skewers every few minutes. You want a nice golden color. Cook until the chicken reaches 165°F (75°C). This ensures it is safe to eat. After grilling, let the skewers rest for a couple of minutes. This helps the juices settle. For serving, arrange the skewers on a platter. You can drizzle any leftover marinade over them for extra flavor. Fresh lime wedges and chopped cilantro make great garnishes. They add color and freshness. Pair the skewers with grilled veggies or a salad for a complete meal. Enjoy your tasty creation! Pro Tips Marinating Time: For the best flavor, marinate the chicken for at least 1 hour, but up to 2 hours is optimal. Grill Temperature: Ensure your grill is preheated to medium-high heat for even cooking and to achieve nice grill marks. Resting Period: Let the skewers rest for a few minutes after grilling to allow the juices to redistribute for a juicier bite. Vegetable Pairing: Add colorful bell peppers and red onions to the skewers for added flavor and visual appeal. {{image_2}} You can swap chicken for other proteins. Try using shrimp, beef, or pork. Shrimp cooks fast and adds a nice twist. Beef will give a rich flavor, while pork adds sweetness. Just adjust cooking times for each protein. Shrimp cooks in about 5-7 minutes. Beef and pork may need 10-12 minutes on the grill. Want to boost the flavor? Add fresh herbs like cilantro or mint to the marinade. They bring brightness and freshness. You can also add a splash of hot sauce for some heat. If you love citrus, mix in orange juice or zest for a new taste. Experiment with spices too. Paprika or smoked paprika can add depth. For a meat-free meal, use vegetables or plant-based proteins. Firm tofu works great when marinated. Cut it into cubes and soak in the honey lime mix. You can also use bell peppers, zucchini, and mushrooms on the skewers. They soak up the marinade well and grill beautifully. Cook for 8-10 minutes, turning often, until tender and charred. You can store leftover honey lime chicken skewers in the fridge. Place them in an airtight container. They stay fresh for up to three days. Make sure they cool down before sealing. The flavors will continue to meld, making them even tastier. If you have more leftovers, freezing is a great option. Wrap each skewer tightly in plastic wrap. Then, place them in a freezer-safe bag. They can last up to three months in the freezer. Thaw them overnight in the fridge before cooking. This keeps the meat juicy and flavorful. To reheat, you can use an oven or grill. Preheat your oven to 350°F (175°C) and place the skewers on a baking sheet. Heat for about 10-15 minutes until warmed through. If using a grill, heat it to medium. Grill the skewers for about 5-7 minutes, turning often. This method adds a nice char and keeps them delicious. Yes, you can marinate the chicken overnight. This will add more flavor. Just make sure to cover the bowl tightly. The longer the chicken sits in the marinade, the more it absorbs those tasty honey and lime flavors. However, if you are short on time, 30 minutes works too. These skewers pair well with many sides. Here are some ideas: - Grilled vegetables like zucchini and bell peppers. - A fresh salad with mixed greens. - Rice or quinoa for a filling option. - Corn on the cob for a sweet crunch. - Flatbreads to soak up the sauce. These sides will balance the sweet and tangy taste of the skewers. Absolutely! You can use key limes for a stronger flavor. If you want a different sweetener, try maple syrup or agave nectar. Each option will give a unique twist to the dish. Just keep the same ratios to ensure the marinade stays balanced. In this post, we explored fresh ingredients, step-by-step grilling, and tips for success. Using quality ingredients makes a big difference in taste. I shared methods to prepare, grill, and store your chicken skewers, along with delicious variations. Remember to adjust seasonings to your liking and try new flavors. Enjoy your cooking and share these tips with friends! Simple steps lead to great meals that everyone will love. Happy grilling!

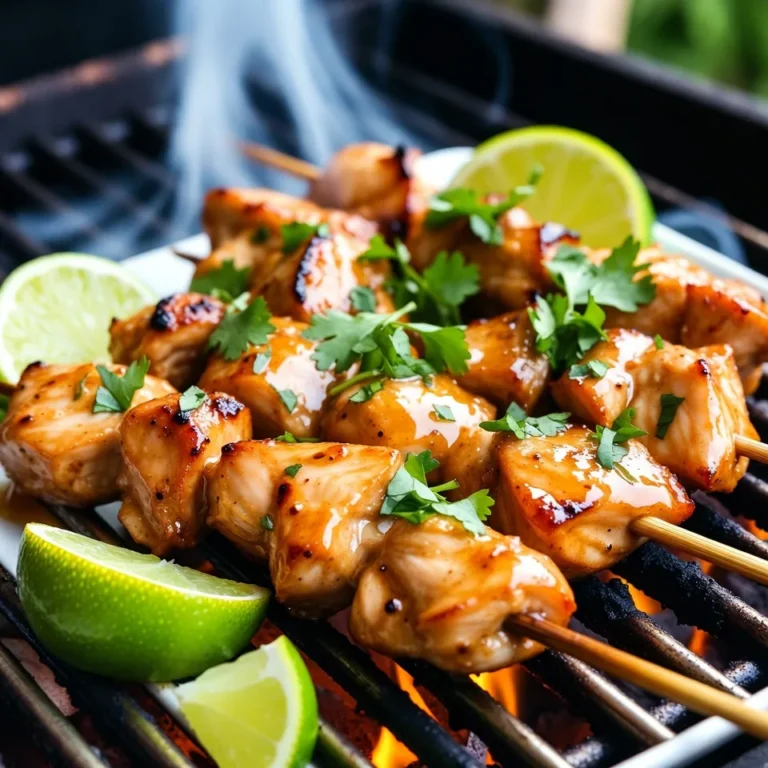
Honey Lime Chicken Skewers Flavorful Grilled Delight

- 2 large sweet potatoes, thinly sliced - 1 tablespoon olive oil - 1 teaspoon smoked paprika - 1/2 teaspoon garlic powder - 1/2 teaspoon chili powder - Salt and pepper to taste These sweet potatoes form the base of our nachos. They add a sweet and earthy flavor. The olive oil helps crisp them up. The seasonings bring in great taste. Smoked paprika adds a nice depth, while garlic powder and chili powder give a kick. - 1 cup black beans, drained and rinsed - 1 cup corn kernels (fresh or frozen) - 1 cup cherry tomatoes, halved - 1 avocado, diced - 1/2 cup shredded cheese (cheddar or a dairy-free alternative) - 1/4 cup Greek yogurt or sour cream - Fresh cilantro, chopped (for garnish) - Jalapeños (sliced, for garnish, optional) These toppings make the nachos colorful and tasty. Black beans add protein, and corn gives sweetness. The cherry tomatoes and avocado bring fresh flavor. Cheese adds richness, while yogurt or sour cream adds creaminess. Cilantro and jalapeños give a nice finish with a pop of color and heat. - Vegan and gluten-free options - Suggested alternatives for toppings For a vegan twist, use dairy-free cheese and yogurt. You can swap black beans for lentils for a different protein. Try adding roasted peppers or spinach for more flavor. Feel free to mix and match based on what you love! This dish is all about making it your own. {{ingredient_image_1}} First, you need to preheat the oven to 425°F (220°C). This step ensures your nachos will bake evenly and get nice and crispy. Next, take two large sweet potatoes and slice them thinly. In a big bowl, add the sliced sweet potatoes. Drizzle in one tablespoon of olive oil. Then, sprinkle one teaspoon of smoked paprika, half a teaspoon of garlic powder, and half a teaspoon of chili powder over the potatoes. Add salt and pepper to taste. Toss everything together until the sweet potatoes are well coated with the seasonings. Once your sweet potatoes are ready, spread them out in a single layer on a baking sheet. Make sure they don't overlap too much, so they can crisp up nicely. Bake them in the oven for 20 to 25 minutes. Flip the slices halfway through to ensure even baking. When they are golden brown and crispy, remove them from the oven. Now, it's time to layer! Arrange the baked sweet potatoes on a large serving platter. Top them with one cup of black beans, one cup of corn kernels, and one cup of halved cherry tomatoes. Then add one diced avocado and half a cup of shredded cheese on top. Return the loaded nachos to the oven and bake for another 5 to 7 minutes. This time, you want the cheese to melt and get bubbly. After baking, take them out of the oven. Drizzle with a quarter cup of Greek yogurt or sour cream. This adds a creamy touch that complements the sweet potatoes. For a beautiful finish, sprinkle fresh chopped cilantro on top. If you like a bit of heat, add sliced jalapeños as well. Now your loaded sweet potato nachos are ready to serve! Enjoy them hot! For great nachos, slice your sweet potatoes thin. Aim for about 1/4 inch thick. This size helps them cook evenly. Thinner slices get crispy while thicker ones may stay soft. To bake your sweet potatoes perfectly, preheat your oven to 425°F (220°C). Toss the slices with olive oil and spices in a bowl. Spread them out on a baking sheet. Make sure they lie flat. Bake for 20-25 minutes, flipping halfway through. This method gives them that perfect crunch. After enjoying your nachos, store leftovers in an airtight container. Keep them in the fridge for up to three days. This helps maintain their flavor and texture. Avoid stacking them too high, as this can make them soggy. When you're ready to eat the leftovers, reheat them in the oven. Preheat the oven to 350°F (175°C). Place the nachos on a baking sheet and heat for about 10 minutes. This keeps them crispy and warm. To make these nachos a full meal, serve them with a side salad or grilled veggies. This adds freshness and crunch. You can also pair them with a tangy salsa or guacamole for extra flavor. For a fun twist, try serving nachos in small bowls or on individual plates. This adds a personal touch. You can also layer the toppings differently for a unique look each time. Get creative and enjoy! Pro Tips Perfectly Crisp Sweet Potatoes: To achieve the crispiest sweet potato nachos, ensure that the slices are evenly cut and not overcrowded on the baking sheet. This allows for proper air circulation and even cooking. Seasoning Variations: Feel free to experiment with different spices! Adding cumin, coriander, or even a pinch of cayenne can elevate the flavor profile of your nachos. Cheese Alternatives: For a dairy-free option, use vegan cheese or nutritional yeast as a topping. It will still provide a cheesy flavor without the dairy! Serving Suggestions: Serve with a side of salsa or guacamole for an extra burst of flavor. You can also provide toppings on the side so everyone can customize their nachos! {{image_2}} You can easily make this dish vegan. To do this, swap out the cheese and sour cream. For cheese, use a dairy-free option made from nuts or soy. Instead of sour cream, try a plant-based yogurt. You can also add toppings like roasted chickpeas or sautéed mushrooms for extra flavor. These choices keep the dish tasty and satisfying. Loaded sweet potato nachos can be gluten-free. Ensure that all your ingredients are gluten-free. Most sweet potatoes, beans, and veggies are safe. For toppings, use corn and fresh herbs. Check labels on processed items like cheese and sauces. This way, you avoid gluten while enjoying your meal. To boost the flavor, add spices and herbs. Cumin and coriander add warmth. Fresh herbs like parsley or basil brighten the dish. You can also try unique ingredients like pickled red onions or roasted red peppers. These extras give your nachos a personal touch that is sure to impress! To keep your loaded sweet potato nachos fresh, refrigerate the leftovers. Place them in an airtight container. This keeps moisture out. You can store them for up to three days. If you want to freeze your nachos, layer them in a freezer-safe bag. Make sure to remove as much air as possible. They can last up to two months in the freezer. When you want to eat them, thaw them in the fridge overnight. The toppings have different shelf lives. Black beans last about three to four days in the fridge. Corn kernels can stay fresh for up to five days. Cherry tomatoes last about a week. Avocados, once cut, should be eaten within one day. To keep your ingredients fresh longer, store them separately. Use airtight containers and keep them in the fridge. It helps maintain their taste and texture. When it's time to enjoy your nachos again, reheating is key. Preheat your oven to 350°F (175°C). Place the nachos on a baking sheet. Heat for about 10 minutes, just until warm. You can also use the microwave, but it may not keep the crispiness. If you choose this method, heat in short bursts of 30 seconds. Check often to avoid mushy nachos. For best results, use the oven to keep the texture intact. Sweet potatoes are packed with nutrients. They are a great source of fiber, vitamins, and minerals. Here are some key benefits: - Rich in Vitamin A: This vitamin helps your eyes and skin. - High in Fiber: Fiber aids digestion and keeps you full. - Low in Calories: They are a healthy option for weight management. - Antioxidants: These compounds help fight free radicals in your body. Yes, you can prepare parts of these nachos in advance. First, slice and season your sweet potatoes. You can store them in the fridge. Just make sure to cover them to keep them fresh. You can also cook the sweet potatoes a day ahead. Assemble the nachos right before baking for the best taste. To add heat to your nachos, you can try these ideas: - Jalapeños: Add fresh or pickled jalapeños on top. - Hot Sauce: Drizzle your favorite hot sauce over the nachos. - Spicy Seasoning: Mix cayenne pepper with your spices before cooking. - Chipotle Peppers: Add chopped chipotle peppers for a smoky heat. There are many fun toppings you can try: - Black Olives: Sliced black olives add a salty taste. - Grilled Chicken: Shredded grilled chicken boosts protein. - Greek Yogurt: Use Greek yogurt for a creamy touch. - Pico de Gallo: Fresh pico de gallo adds a zesty flavor. - Lettuce: Add shredded lettuce for a crunchy texture. These alternatives let you customize your nachos to your liking! Loaded sweet potato nachos are a fun and healthy twist on a classic dish. We explored essential ingredients, preparation steps, and tips to make them crispy. You can customize them with various toppings and try vegan or gluten-free options. Remember to store leftovers properly to enjoy them later. Loaded sweet potato nachos are versatile and perfect for meals or snacks. You have everything you need to create these delicious nachos. Enjoy experimenting and make this dish your own!

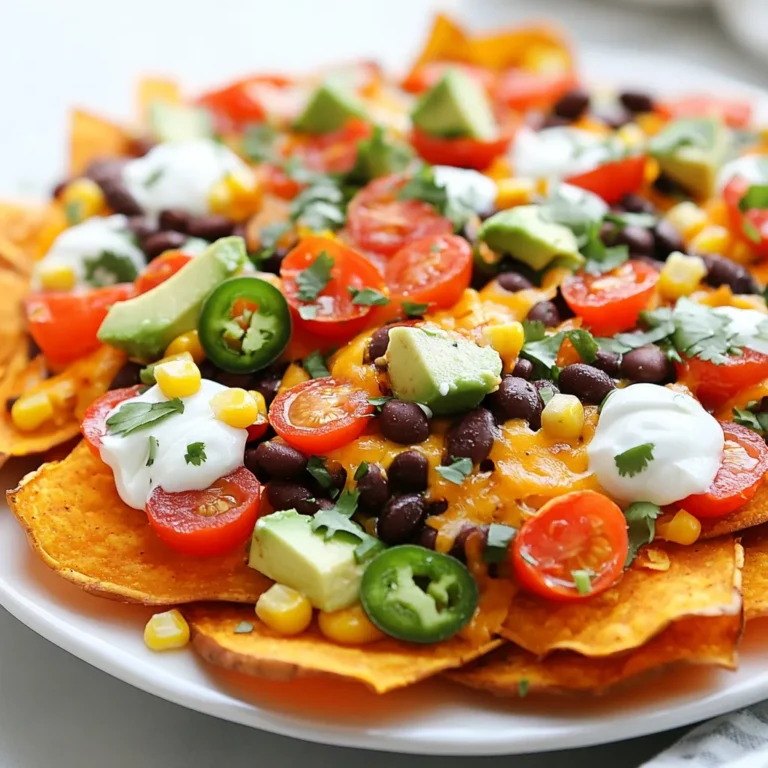
Loaded Sweet Potato Nachos Flavorful and Fun Dish

To make Garlic Herb Butter Roasted Turkey, gather these ingredients: - 1 whole turkey (12-14 pounds) - 1 cup unsalted butter, softened - 10 cloves of garlic, minced - 2 tablespoons fresh rosemary, chopped - 2 tablespoons fresh thyme, chopped - 2 tablespoons fresh sage, chopped - 2 tablespoons lemon zest - Salt and pepper to taste - 2 cups low-sodium chicken broth - 1 large onion, quartered - 1 lemon, halved - 2 cups carrots, chopped - 2 cups celery, chopped The herb butter is the star of this recipe. The mix adds rich flavor and moisture. Use these components: - Softened butter is the base. It helps spread the herbs easily. - Garlic provides a strong, savory kick. It pairs well with turkey. - Fresh herbs like rosemary, thyme, and sage add depth. They bring a garden-fresh taste. - Lemon zest brightens the mixture with a citrus touch. It cuts through the richness of the butter. - Salt and pepper enhance the overall flavor. Adjust to your taste. For this recipe, I recommend a whole turkey between 12 to 14 pounds. This size serves about 10 to 12 people, making it perfect for gatherings. When choosing your turkey, look for fresh or frozen options. A natural or organic turkey often has better flavor. Avoid pre-brined turkeys, as they may be too salty. Fresh birds are best if you can find them. {{ingredient_image_1}} Start by preheating your oven to 325°F (165°C). This step warms the oven for even cooking. Next, gather your ingredients. You need a whole turkey, butter, garlic, herbs, salt, pepper, and broth. In a medium bowl, mix the softened butter with minced garlic, chopped rosemary, thyme, sage, lemon zest, salt, and pepper. This mix brings great flavor to your turkey. Now, pat the turkey dry with paper towels. This helps the skin crisp up nicely. Carefully loosen the skin from the turkey breast with your fingers. This allows you to add flavor under the skin. Spread half of your garlic herb butter mixture under the skin. Rub the rest all over the outside of the turkey. Next, stuff the turkey cavity. Add quartered onion, halved lemon, and extra herbs. These flavors will infuse the meat while it cooks. Tie the turkey legs together with kitchen twine. Tuck the wing tips under the bird to avoid burning. Place the turkey on a rack in a roasting pan, breast side up. Surround it with chopped carrots and celery. Pour the chicken broth into the bottom of the pan. This helps keep the turkey moist. Roast the turkey in your preheated oven. Baste it every 30 minutes with the pan juices. This keeps the meat juicy and adds flavor. Cook until the internal temperature reaches 165°F (74°C). This usually takes about 3 to 3.5 hours. Use a meat thermometer for accuracy. Once your turkey is done, take it out of the oven. Let it rest for at least 20 minutes before carving. This waiting time allows the juices to spread throughout the meat. Carving too soon could dry it out. After resting, carve the turkey and place it on a large platter. Garnish with fresh herbs and lemon slices for a beautiful presentation. Serve with the roasted veggies on the side for a complete meal. Enjoy! To make the garlic herb butter, start with softened unsalted butter. This makes it easy to mix. Next, add minced garlic, chopped rosemary, thyme, sage, and lemon zest. Mix until it is smooth and creamy. This butter adds rich flavor and keeps the turkey moist. You can also add salt and pepper for more taste. Make sure to spread some of this mix under the turkey skin. This step is key for juicy meat. Basting is simple but very important. It helps keep the turkey juicy and flavorful. Every 30 minutes, use a baster to spoon the pan juices over the turkey. This adds moisture and flavor. The juices come from the chicken broth and fat that drips from the turkey. If you don’t baste, the skin may dry out. Basting helps create a beautiful, golden-brown skin. Timing is crucial when roasting a turkey. A 12-14 pound turkey takes about 3 to 3.5 hours at 325°F (165°C). Use a meat thermometer to check the internal temperature. It should reach 165°F (74°C) in the thickest part of the breast. If you take it out too early, the turkey will be undercooked. Let the turkey rest for at least 20 minutes after cooking. This helps the juices settle and makes carving easier. Pro Tips Let it Rest: Always allow the turkey to rest for at least 20 minutes after roasting. This helps the juices redistribute, ensuring a moist and flavorful bird. Use a Meat Thermometer: For the best results, use a meat thermometer to check the internal temperature. The turkey is done when it reaches 165°F (74°C) in the thickest part of the breast and thigh. Flavor Booster: For extra flavor, consider brining the turkey overnight in a saltwater solution. This will enhance moisture and flavor throughout the meat. Herb Variations: Feel free to mix and match herbs according to your taste. Fresh herbs like tarragon or parsley can add a unique twist to the garlic herb butter. {{image_2}} You can change the herbs in your butter mix to create new tastes. Try using fresh parsley for a bright flavor. Basil adds a sweet touch, while oregano gives a nice, earthy taste. For a spicier kick, add some crushed red pepper flakes. Each herb adds its own flair, making your turkey unique. Instead of just onion and lemon, you can use apples or oranges for a sweet twist. Chopped nuts like walnuts or pecans add crunch. You can also try wild rice or bread cubes soaked in broth for a hearty filling. Each option brings a different taste and texture to your turkey. Roasting gives the turkey a golden skin and juicy meat. It’s a classic method that works well for larger birds. Grilling, on the other hand, adds a smoky flavor. If you grill, use indirect heat to cook the turkey evenly. Both methods yield tasty results, so choose what you prefer. After enjoying your garlic herb butter roasted turkey, store leftovers right. First, let the turkey cool down. Next, carve the turkey and place the pieces in airtight containers. This keeps the turkey fresh and safe. You can store it in the fridge for up to four days. For best taste, cover the turkey with plastic wrap or foil before sealing your container. When reheating turkey, keep it juicy. Preheat your oven to 325°F (165°C). Place the turkey pieces in a baking dish. Add a splash of chicken broth or water to keep it moist. Cover the dish with foil to trap steam. Heat for about 20 to 30 minutes or until warm. You can also use a microwave for quick reheating. Just cover the turkey, and heat in short bursts. Be careful not to overcook it, or it may dry out. If you have extra turkey, freezing is a great option. First, carve the turkey into smaller pieces. Wrap each piece tightly in plastic wrap. Then place the wrapped pieces in freezer bags. Make sure to remove as much air as possible. This helps prevent freezer burn. You can freeze turkey for up to four months. When ready to eat, thaw it in the fridge overnight before reheating. You can check if your turkey is fully cooked by using a meat thermometer. Insert it into the thickest part of the breast without touching the bone. The turkey is done when it reaches 165°F (74°C). If you don’t have a thermometer, you can cut into the turkey. The juices should run clear, not pink. Yes, you can make the garlic herb butter a day or two in advance. Just mix the softened butter with minced garlic, chopped herbs, and lemon zest. Store it in the fridge in an airtight container. When you’re ready to use it, let it sit at room temperature for a bit to soften. Roasted turkey pairs well with many side dishes. Here are some great options: - Mashed potatoes - Green bean casserole - Cranberry sauce - Stuffing - Roasted Brussels sprouts - Sweet potato casserole These sides offer a mix of flavors and textures to enhance your meal. We covered the key steps to prepare a tasty turkey. You learned about ingredients and how to make a great herb butter mix. I walked you through preparation, roasting, and resting. Plus, you gained tips for perfect juiciness and flavor. Variations let you personalize your dish. Finally, I shared how to store and reheat leftovers. Enjoy cooking your turkey and impress your guests with your skills!

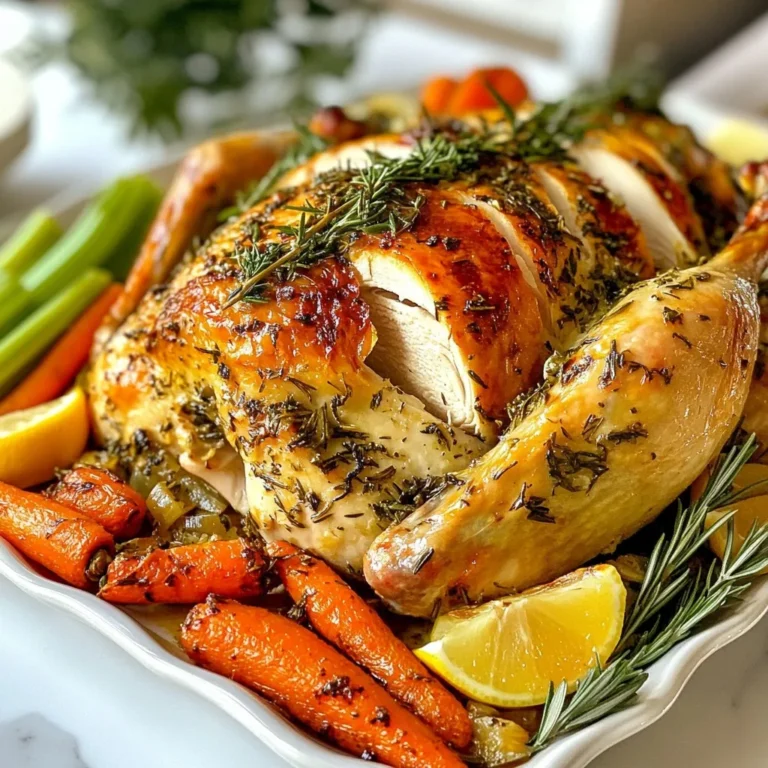
Garlic Herb Butter Roasted Turkey Flavorful and Juicy

PREV 1 … 69 70 71 72 NEXT
cozy citrus kitchen

explore

DessertsDinnerAppetizersDrinks

Our Policies

  • Cookie Policy
  • Copyright Policy
  • Disclaimer
  • GDPR Policy
  • Terms Of Use
Back to Top
  • About
  • Contact Us
  • Privacy Policy
© 2026 cozy citrus kitchen