FREE DINNER EBOOK! Get your copy!
  • Cookie Policy
  • GDPR Policy
  • Disclaimer
  • Terms Of Use
  • Visit my other site: Fun Cookie Recipes
cozy citrus kitchen
  • Home
  • Dinner
  • Desserts
  • Drinks
  • Appetizers
  • Contact
  • About
  • Privacy Policy
  • Home
  • Dinner
  • Desserts
  • Drinks
  • Appetizers
  • Contact
  • About
  • Privacy Policy
  • Cookie Policy
  • GDPR Policy
  • Disclaimer
  • Terms Of Use
Visit my other site: Fun Cookie Recipes

HOME / CATEGORIES /

Latest

- 1 lb ground turkey - 2 cups fresh spinach, finely chopped - 1/2 cup feta cheese, crumbled - 1/2 cup breadcrumbs - 1 large egg - 3 cloves garlic, minced - 1/4 cup onion, finely chopped - 1 tablespoon olive oil - 1 teaspoon dried oregano - 1 teaspoon salt - 1/2 teaspoon black pepper - 1/4 teaspoon red pepper flakes (optional) Use these measurements for best results. A pound of ground turkey makes about 4-6 servings. For spinach, two cups means a lot of flavor. Feta adds a nice tang, while breadcrumbs give the meatballs a good texture. The egg binds it all together. Use three cloves of garlic for a nice kick. One-fourth cup of onion adds sweetness and depth. Olive oil keeps the meatballs moist. Oregano, salt, black pepper, and red pepper flakes bring out the best flavors. If you don’t have ground turkey, try chicken or beef. Fresh spinach can swap with frozen, but drain it first. If feta cheese is not on hand, goat cheese works well. Breadcrumbs can be replaced with crushed crackers or oats. You can use egg substitutes if needed. For garlic, garlic powder is a good option. If you want less heat, skip the red pepper flakes. These swaps keep the taste great and the recipe easy. {{ingredient_image_1}} 1. Start by preheating your oven to 400°F (200°C). This helps the meatballs cook evenly. 2. Line a baking sheet with parchment paper. It makes cleanup easy and helps keep the meatballs from sticking. 3. In a large mixing bowl, mix together the ground turkey, chopped spinach, and crumbled feta cheese. 4. Add in the breadcrumbs, egg, minced garlic, and chopped onion. 5. Pour in the olive oil, dried oregano, salt, black pepper, and red pepper flakes if you like a little heat. 6. Use your hands to mix everything together gently. Avoid overmixing to keep the meatballs tender. 1. Shape the mixture into 1-inch meatballs. Place them on the baking sheet, leaving space between each one. 2. Slide the baking sheet into the oven and bake for 20-25 minutes. 3. Keep an eye on them. They should turn golden brown and be cooked through. 4. Check the internal temperature. It should reach 165°F (75°C) for safe eating. - Prep Time: 15 minutes - Baking Time: 20-25 minutes - Total Time: 40 minutes - Oven Temperature: 400°F (200°C) These steps make it simple to enjoy Spinach Feta Turkey Meatballs. Just follow the instructions, and you’ll have a tasty dish ready in no time! To keep meatballs moist, use fresh ingredients. Fresh spinach and feta add moisture. The egg helps bind everything together. Avoid overmixing the meat. Mix gently until just combined. This technique keeps the meatballs tender. Add more flavor with herbs and spices. Fresh herbs like parsley or dill brighten the dish. You can also add lemon zest for a fresh kick. If you like heat, try more red pepper flakes. A splash of Worcestershire sauce can enhance umami flavors. Baking is an easy and healthy method. It allows the meatballs to cook evenly. For extra flavor, broil them for the last few minutes. This adds a nice crust. You can also pan-fry them for a crispy outside. Just make sure to cook them through to 165°F. Pro Tips Use Fresh Spinach: Fresh spinach gives the meatballs a vibrant flavor and color. If using frozen spinach, ensure it's well-drained to avoid excess moisture. Chill the Mixture: For easier handling, chill the meatball mixture in the fridge for about 15 minutes before forming the meatballs. This helps them hold their shape during baking. Experiment with Cheese: While feta adds a delicious tang, try substituting with goat cheese or mozzarella for different flavor profiles. Make Ahead: These meatballs can be made in advance and stored in the freezer. Freeze them uncooked on a baking sheet, then transfer to a zip-top bag for easy meal prep later. {{image_2}} You can switch up the cheese for fun. Try using goat cheese for a tangy twist. Mozzarella gives a nice, gooey texture. If you want more flavor, use aged cheddar. Each cheese brings a unique taste to the meatballs. This lets you change the dish to match your mood. Ground turkey is great, but you can use other meats, too. Ground chicken works well and is just as lean. If you prefer beef, use lean ground beef for a richer flavor. You can even try ground lamb for a Mediterranean vibe. These options keep the recipe fresh and exciting. Seasonings can elevate your meatballs. For a spicier kick, add more red pepper flakes. If you love herbs, mix in fresh parsley or basil. For a smoky flavor, try smoked paprika. You can also use Italian seasoning for a robust taste. Changing the seasonings makes each batch unique. Once you make the Spinach Feta Turkey Meatballs, let them cool down. Place them in an airtight container. They stay fresh in the fridge for up to four days. Keep them stored properly to avoid drying out. If you want to enjoy them later, just follow the next steps. To freeze these meatballs, first, let them cool completely. Then, arrange them on a baking sheet. Freeze for about an hour. This step keeps them from sticking together. Once frozen, transfer them to a freezer bag. They can be stored for up to three months. Label the bag with the date to keep track. When it’s time to reheat, there are a few easy methods. You can use the oven. Set it to 350°F (175°C). Place the meatballs on a baking sheet and heat for about 15 minutes. Another option is to use the microwave. Heat them on medium power for about one to two minutes. Always check that they are heated all the way through. Feel free to enjoy them with your favorite sauce or side! Yes, you can make these meatballs ahead of time. You can prepare the meatballs and store them in the fridge. Just cover them with plastic wrap. They will stay fresh for up to 24 hours. You can also freeze them for later. Place the raw meatballs on a tray and freeze them. Once frozen, put them in a freezer bag. They will last for about three months. When you are ready to cook, no need to thaw. Just bake them straight from the freezer. This saves time on busy nights. These meatballs are so versatile! You can serve them on a platter with fresh herbs. Try adding parsley or basil for color. Marinara sauce is a great dip too. If you want a full meal, serve them over whole grain spaghetti. You can also toss them in a salad or use them in a wrap. The flavors blend well with many sides. Use your favorite sides to create a balanced meal. Get creative and enjoy! Yes, you can use frozen spinach. Just make sure to thaw and drain it well. Excess water can make the meatballs soggy. Frozen spinach is a great option when fresh is not available. It still holds good nutrients and flavor. Measure out two cups after it's drained. Using frozen spinach can save time in meal prep too. In this blog post, we explored the key elements for making delicious Spinach Feta Turkey Meatballs. We covered important ingredients, detailed step-by-step cooking instructions, and shared useful tips to keep your meatballs moist and flavorful. Remember, you can customize these meatballs with different cheeses or meats to suit your taste. Proper storage is also key for keeping them fresh. Enjoy creating this dish whenever you like!

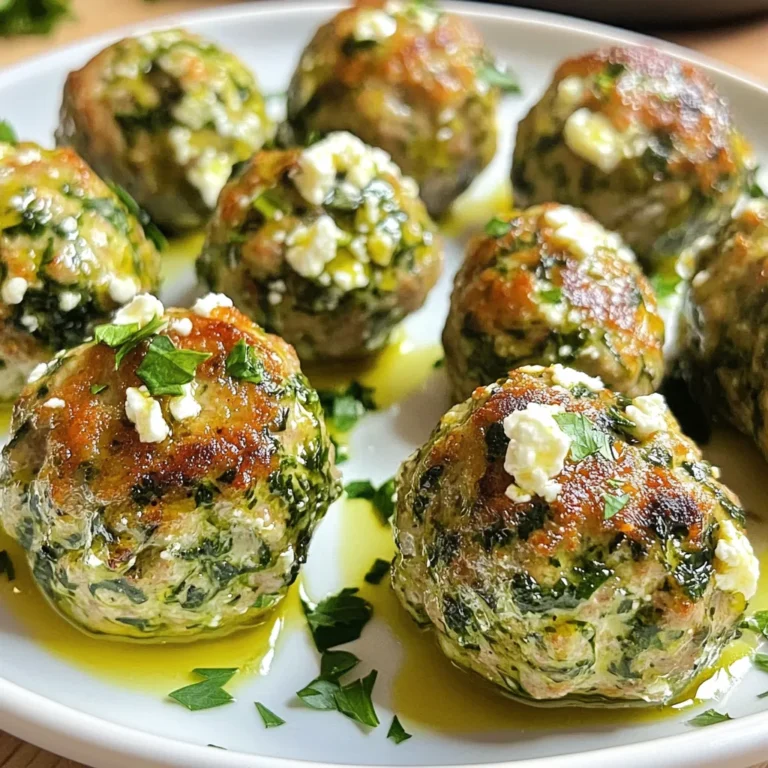
Spinach Feta Turkey Meatballs Flavorful and Easy Recipe

- 1 lb (450g) boneless, skinless chicken breasts, sliced - 2 tablespoons olive oil - 1 medium onion, sliced - 1 red bell pepper, sliced - 1 yellow bell pepper, sliced - 3 cloves garlic, minced - 1 teaspoon chili powder - 1 teaspoon cumin - 1/2 teaspoon smoked paprika - Salt and pepper to taste - 8 oz (225g) penne pasta - 4 cups chicken broth - 1 cup cherry tomatoes, halved - 1 cup shredded cheddar cheese - Fresh cilantro, chopped (for garnish) - Lime wedges (for serving) This recipe serves four people. You will need one pound of chicken. For veggies, use one medium onion and two bell peppers. I like to use one red and one yellow for color. You will also need three cloves of garlic. The spices include one teaspoon of chili powder, one teaspoon of cumin, and half a teaspoon of smoked paprika. For the pasta, grab eight ounces of penne. You will use four cups of chicken broth to cook the pasta. Add one cup of cherry tomatoes and one cup of shredded cheddar cheese. Finally, garnish with fresh cilantro and serve with lime wedges. If you don't have boneless chicken, you can use thighs instead. They stay juicy. You can swap olive oil with any cooking oil you have. If you don’t have red or yellow bell peppers, green ones work too. For spices, if you lack smoked paprika, you can skip it or use regular paprika. If you want to make it vegetarian, replace chicken with black beans or tofu. Use vegetable broth instead of chicken broth. Feel free to get creative with the cheese, too! Any melty cheese works well. {{ingredient_image_1}} Start by heating 2 tablespoons of olive oil in a large pot over medium heat. Once the oil is hot, add 1 pound of sliced chicken breasts. Season the chicken with salt, pepper, chili powder, cumin, and smoked paprika. Cook the chicken for about 5 to 7 minutes. You want it to be browned and cooked through. After cooking, take the chicken out and set it aside. This step brings out the chicken's flavor and keeps it juicy. In the same pot, add 1 sliced medium onion and 1 sliced red bell pepper, along with 1 sliced yellow bell pepper. Sauté these veggies for around 3 to 4 minutes. You want them to start softening but still have a little crunch. Next, stir in 3 minced garlic cloves. Cook for another minute until the garlic smells great. This adds a nice aroma and depth to your dish. Now it's time to add 8 ounces of penne pasta and 4 cups of chicken broth to the pot. Stir everything together to combine well. Bring this mixture to a boil. Once boiling, reduce the heat to low. Cover the pot and let it simmer for 10 to 12 minutes. Stir occasionally to stop the pasta from sticking. You want the pasta to be al dente, meaning it's firm but cooked. Once the pasta is cooked, return the chicken to the pot. Also, add 1 cup of halved cherry tomatoes. Stir everything together and let it heat for another 2 to 3 minutes. Finally, take the pot off the heat and sprinkle 1 cup of shredded cheddar cheese on top. Cover the pot for a couple of minutes so the cheese melts. Garnish with fresh chopped cilantro, and serve with lime wedges on the side for that extra zing. To get juicy chicken, slice it evenly. This helps it cook at the same rate. Use a hot pot with olive oil to sear the chicken. Season early with salt, pepper, chili powder, and cumin. Cooking for 5-7 minutes gives you a nice brown color and great flavor. Make sure the chicken reaches 165°F for food safety. For best results, use penne pasta. It holds sauces well. Add the pasta to the pot with chicken broth. Stir often to prevent sticking. Cover the pot and let it simmer for 10-12 minutes. This cooks the pasta perfectly while soaking up all those delicious flavors. Check it for doneness a minute or two before the time is up. To boost flavor, try adding lime juice. It adds a fresh zing that brightens the dish. Fresh cilantro on top gives a lovely herbal note. If you like heat, add a pinch of cayenne or some jalapeños. Experiment with different spices, like oregano or onion powder, to find your favorite mix. Pro Tips Use Fresh Ingredients: Fresh vegetables and herbs enhance the flavor of your dish, making it more vibrant and delicious. Customize Your Spices: Feel free to adjust the spices according to your taste. Adding a pinch of cayenne can give it an extra kick! Perfect Pasta Cooking: To avoid mushy pasta, check it a minute or two before the package instructions suggest, as it will continue to cook slightly after being removed from heat. One-Pot Cooking Benefit: This method not only minimizes cleanup but also allows the flavors to meld beautifully as everything cooks together. {{image_2}} You can make this dish vegetarian by omitting the chicken. Use 1 can of black beans instead. Rinse and drain the beans before adding them to the pot. Cook the veggies as usual, then add the beans with the pasta. This gives you protein without meat. You'll still have a hearty and tasty meal. If you want to switch up the protein, try shrimp or beef. For shrimp, add them in during the last few minutes of cooking. They cook quick and keep their flavor. If using beef, slice it thinly and cook it before the veggies. Ground turkey or sausage also works well! Each option brings a new twist to the dish. You can change the flavors easily. Try adding different spices like oregano or taco seasoning. For a kick, include jalapeños or hot sauce. You can also swap out the bell peppers for zucchini or spinach. For extra creaminess, stir in a splash of cream or a dollop of sour cream before serving. Each swap makes the dish unique and fun! After you enjoy your One Pot Chicken Fajita Pasta, store leftovers in an airtight container. Let the pasta cool down first. Place it in the fridge. It will last for up to 3 days. If you want it to stay fresh longer, consider freezing it. To reheat, you can use a microwave or a stovetop. If using a microwave, place your pasta in a bowl. Cover it with a damp paper towel. Heat for 1-2 minutes, stirring halfway through. For the stovetop, add a splash of chicken broth to the pot and warm over low heat. Stir until heated through. If you decide to freeze your pasta, make sure to use a freezer-safe container. It can last up to 2 months in the freezer. When ready to eat, thaw it overnight in the fridge. Reheat as mentioned above. Enjoy your delicious meal even after a while! Yes, you can prepare One Pot Chicken Fajita Pasta in advance. Cook it fully, then let it cool. Store it in an airtight container in the fridge for up to three days. When ready to eat, simply reheat it on the stove or in the microwave. To check if the chicken is done, use a meat thermometer. The internal temperature should reach 165°F (75°C). If you don’t have a thermometer, cut into the chicken. It should be white inside, with no pink. Absolutely! You can swap penne for other pasta shapes like fusilli, macaroni, or even spaghetti. Just adjust the cooking time based on the pasta type. Ensure the pasta cooks until al dente for the best texture. This dish pairs well with a fresh salad or warm tortillas. You could also serve it with guacamole or salsa for extra flavor. Lime wedges add a nice zing to the meal. One Pot Chicken Fajita Pasta stays fresh in the fridge for about three to four days. Make sure to store it in a sealed container to keep it safe and tasty. If you notice any strange smells or colors, it’s best to toss it out. This blog post covered all you need to make One Pot Chicken Fajita Pasta. We looked at ingredients, steps, and helpful tips. I shared ways to customize the dish, including vegetarian options and storage advice. In the end, this recipe is easy and fun. It brings great flavors without much fuss. Enjoy trying new ideas and making this meal your own! You’ll see how simple cooking can be.

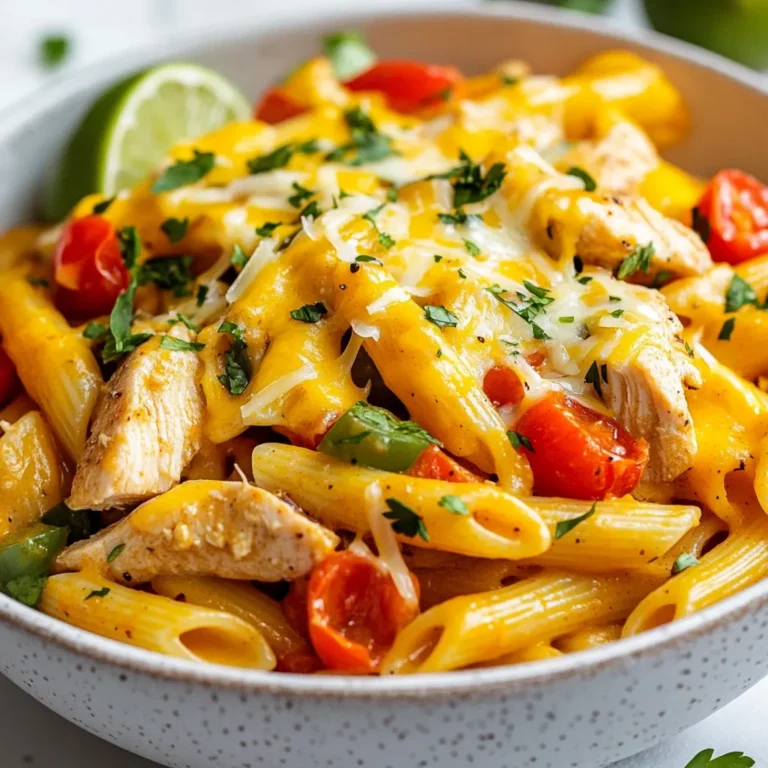
One Pot Chicken Fajita Pasta Easy and Flavorful Meal

- 1 lb ground chicken - 2 cloves garlic, minced - 1/4 cup fresh parsley, chopped - 1/4 cup fresh basil, chopped - 1/2 cup breadcrumbs - 1/4 cup grated Parmesan cheese - 1 large egg - 1 teaspoon dried oregano - 1/2 teaspoon salt - 1/4 teaspoon black pepper - 1 tablespoon olive oil (for cooking) The main star here is ground chicken. It gives the meatballs a light and tender bite. You also need fresh garlic to add that rich flavor. I love using parsley and basil. They bring freshness and color. Breadcrumbs help bind everything together. The grated Parmesan adds a nice cheesy touch. Don’t forget the egg; it helps the meatballs hold their shape. The oregano, salt, and pepper give the meatballs depth and flavor. - Marinara sauce - Additional herbs for garnish While the meatballs are tasty on their own, marinara sauce makes them even better. You can serve the meatballs drizzled with warm marinara. It adds moisture and flavor. I also like to use extra herbs for garnish. They make the dish look pretty and add a fresh taste. {{ingredient_image_1}} To start making your garlic herb chicken meatballs, grab a large mixing bowl. Next, combine the following ingredients: - 1 lb ground chicken - 2 cloves garlic, minced - 1/4 cup fresh parsley, chopped - 1/4 cup fresh basil, chopped - 1/2 cup breadcrumbs - 1/4 cup grated Parmesan cheese - 1 large egg - 1 teaspoon dried oregano - 1/2 teaspoon salt - 1/4 teaspoon black pepper Mix these items until they blend well. I prefer using my hands for this, but a spatula works, too. Be careful not to overmix. Overmixing makes the meatballs tough instead of tender. After mixing, it’s time to shape the meatballs. Take a handful of the mixture and form it into a ball. Aim for golf ball-sized meatballs. Place them on a baking sheet lined with parchment paper. This helps with easy clean-up later. Now, preheat your oven to 400°F (200°C). This temperature is key for getting a nice golden brown on the outside. Remember to drizzle olive oil over the meatballs before you bake them. This oil helps them crisp up nicely. Bake for 20-25 minutes. Check that they are cooked through and golden. While your meatballs bake, heat some marinara sauce in a small saucepan over medium heat. Once the meatballs are ready, serve them hot, topped with the warm marinara sauce. You can also sprinkle more fresh herbs on top for a nice touch. For a fun presentation, try serving the meatballs on a platter with toothpicks. This makes them easy for guests to grab. You can also pair them with a side of pasta or a fresh salad. Enjoy your delicious garlic herb chicken meatballs! To make great meatballs, you must mix the ingredients just right. Overmixing makes them tough. Use your hands to blend the ground chicken and spices gently. Just combine until it's evenly mixed. This keeps them tender and juicy. Another trick is to keep the meat mixture cool. If it's warm, the fat can melt away. This can make meatballs dry. You can chill the mixture for 10-15 minutes before shaping. It helps to keep everything together. You can bake or fry these meatballs. Baking is easier and less messy. If you bake, use an oven set to 400°F (200°C). This gives a nice brown color and cooks them well. If you prefer frying, heat olive oil in a pan over medium heat. Fry until browned all over. This adds flavor but can take longer than baking. Choose the method that fits your style best. If using the oven, line your baking sheet with parchment paper. This helps with easy cleanup and keeps meatballs from sticking. By following these tips, you will have perfect garlic herb chicken meatballs every time! Pro Tips Keep It Tender: Be careful not to overmix the meatball mixture; this helps keep them tender and juicy. Chill Before Baking: For firmer meatballs, refrigerate the formed meatballs for 30 minutes before baking. This helps them hold their shape. Use Fresh Herbs: Fresh herbs enhance the flavor significantly compared to dried. If possible, use fresh parsley and basil for the best taste. Perfect Baking: To ensure even cooking, rotate the baking sheet halfway through the cooking time for uniformly browned meatballs. {{image_2}} You can change the ground chicken in this recipe. Try ground turkey for a leaner option. If you want a meatless version, use lentils or chickpeas. They both work great! For herbs, feel free to swap out parsley and basil. You might like using cilantro or thyme instead. Each herb gives the meatballs a new taste. Experiment and find what you enjoy! Serve these meatballs in many fun ways! One great option is to make meatball subs. Just place the meatballs in a soft roll and top with marinara sauce and cheese. You can also add meatballs to pasta dishes. Toss them with your favorite pasta and sauce. It makes a hearty meal that everyone will love. Consider using a slow cooker for a simple meal. Just mix all the ingredients, form the meatballs, and place them in the slow cooker with sauce. Cook on low for 6-8 hours. If you want a smoky flavor, try grilling the meatballs. Form them as usual and place them on a hot grill. Cook for about 10-12 minutes. Just make sure to check they are cooked through. These variations help you make the recipe your own! Enjoy trying new ideas! To keep your leftover meatballs fresh, follow these steps: - Refrigeration: Place meatballs in an airtight container. They stay good for up to 3 days. Make sure they cool down before sealing. - Freezing: For long-term storage, freeze meatballs. Place them in a freezer-safe bag or container. Lay them flat to save space. They last for up to 3 months. Label the bags with the date for easy tracking. When you’re ready to eat your meatballs again, here’s how to reheat them: - Oven Method: Preheat your oven to 350°F (175°C). Place meatballs on a baking sheet. Heat for about 10-15 minutes until warm. - Stovetop Method: Heat a bit of olive oil in a pan. Add meatballs and cook on medium heat. Turn them often for even heating. - Microwave Method: Place meatballs in a microwave-safe dish. Cover with a damp paper towel. Heat in short bursts of 30 seconds. Check and stir in between to keep them juicy. For all methods, make sure they are hot all the way through. Enjoy! To check if your meatballs are done, use a meat thermometer. The inside should reach 165°F. If you don’t have a thermometer, cut one in half. The meat should be white, not pink. You might also notice a nice golden color on the outside. This shows they are ready to eat. Always check a few meatballs to be sure. Yes, you can swap ground chicken for other meats. Ground turkey works well and is lean too. Ground beef adds more flavor and fat. You can even try ground pork for a richer taste. Each type of meat gives a different flavor, so feel free to experiment! To keep meatballs from breaking, use the right amount of binder. In this recipe, breadcrumbs and egg help hold them together. Don’t overmix the meatball mixture; this can make them tough. Also, form them gently into balls. Make sure they are not too loose or too tight. Finally, let them rest for a few minutes before cooking to help them stay firm. We explored the key ingredients for delicious meatballs, starting with ground chicken, herbs, and spices. I shared steps for mixing, shaping, and baking, plus tips for keeping them juicy. You learned various serving options, including marinara sauce and creative ideas. Remember, you can customize with different ingredients and methods. Whether baking or grilling, these meatballs are fun and easy to make. Enjoy your cooking adventure and delight in every bite!

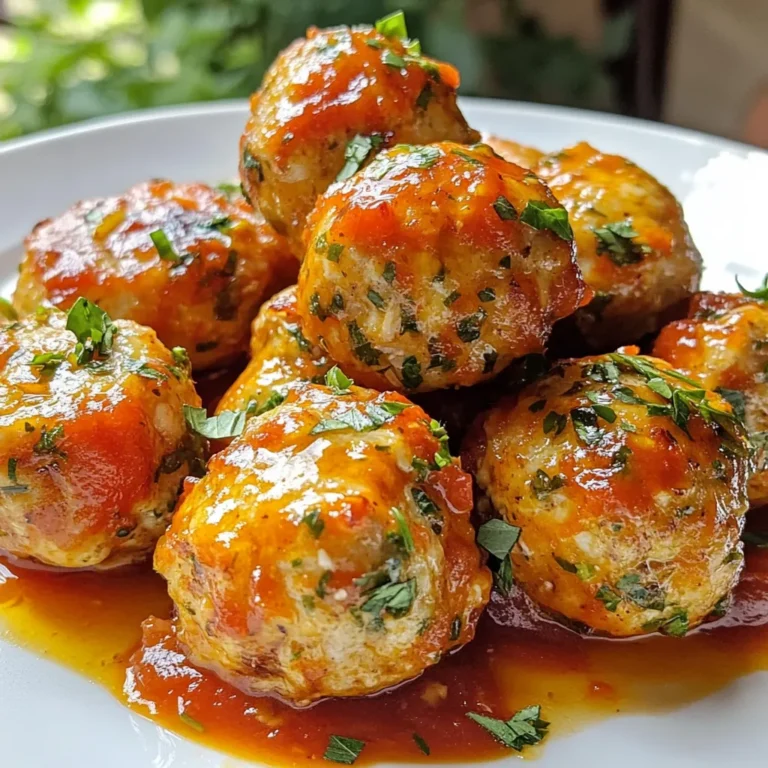
Garlic Herb Chicken Meatballs Flavorful and Easy Recipe

- 1 lb large shrimp (peeled and deveined) - 2 fresh jalapeños (finely chopped, seeds removed) - Zest and juice of 2 limes - 4 cloves garlic (minced) - 3 tablespoons olive oil - 1 teaspoon honey - 1 teaspoon smoked paprika - Salt and pepper to taste - Fresh cilantro (chopped for garnish) - Lime wedges (for serving) This recipe is simple, yet it packs a punch of flavor. I love using fresh ingredients that bring out the best in this dish. The shrimp should be large, peeled, and deveined. This makes them easy to grill and ensures they soak up the marinade well. The jalapeños add a nice kick. Make sure to remove the seeds if you want less heat. The zest and juice of the limes brighten the dish. You’ll want both for a fresh taste. For the marinade, I use minced garlic, olive oil, honey, and smoked paprika. The garlic adds depth, the olive oil keeps the shrimp moist, and the honey balances the heat and acidity. Smoked paprika gives a unique warmth that enhances the shrimp's flavor. Don’t forget salt and pepper. These basic seasonings bring out the best in all your ingredients. Fresh cilantro adds a lovely herbaceous note, and lime wedges are perfect for serving. They add an extra burst of flavor when squeezed over the grilled shrimp. Gather these ingredients and get ready to create a flavorful dish that impresses! {{ingredient_image_1}} To start, gather your ingredients. In a medium bowl, combine these items: - 2 fresh jalapeños, finely chopped - Zest and juice of 2 limes - 4 cloves garlic, minced - 3 tablespoons olive oil - 1 teaspoon honey - 1 teaspoon smoked paprika - Salt and pepper to taste Mix them well. This mix is your marinade. The jalapeños add heat, while lime gives a fresh taste. Garlic adds depth, and honey balances the spice. Now, it’s time for the shrimp! Add 1 pound of large, peeled, and deveined shrimp to your bowl. Make sure every shrimp gets coated with the marinade. Cover the bowl with plastic wrap. Place it in the fridge for at least 30 minutes. You can leave it for up to 2 hours. The longer it sits, the more flavor it absorbs. Next, preheat your grill to medium-high heat. If you use wooden skewers, soak them in water for 20 minutes first. This step keeps them from burning. Thread the marinated shrimp onto the skewers, about 4-6 shrimp per skewer. Now, place the skewers on the grill. Cook them for 2-3 minutes on each side. Watch for the shrimp to turn pink and opaque. Overcooking can make them tough, so stay alert! Once done, remove the skewers from the grill and let them rest for a couple of minutes. For the best flavor, marinate the shrimp for at least 30 minutes. If you want more taste, let them sit for up to 2 hours. This gives the shrimp time to soak up all those yummy flavors from the marinade. The lime juice and jalapeños will really make a difference. To cook shrimp evenly, heat the grill to medium-high. Thread the shrimp on skewers, about 4-6 per skewer. Grill them for 2-3 minutes on each side. Watch them closely! Overcooking makes shrimp tough. You want them pink and opaque, not rubbery. Serve the shrimp on a bright platter. Drizzle some lime juice over them for a fresh look. Add chopped cilantro on top for color. For a fun side, pair them with grilled veggies or a fresh salad. Lime wedges on the side add a nice touch too. Pro Tips Marinate for Flavor: Allow the shrimp to marinate for at least 30 minutes, but up to 2 hours for a more intense flavor. Control the Heat: If you prefer less heat, make sure to remove the seeds from the jalapeños before chopping them. Perfectly Cooked Shrimp: Cook the shrimp just until they turn pink and opaque; overcooking can make them tough and rubbery. Garnish for Presentation: Fresh cilantro and lime wedges not only add flavor but also enhance the visual appeal of the dish. {{image_2}} You can easily adjust the heat of your jalapeño lime grilled shrimp. If you want more spice, keep the seeds in the jalapeños. They add heat! For a milder dish, remove the seeds before chopping. You can also try using serrano peppers for a different flavor. Each option gives a unique taste and heat level. Feel free to enhance the shrimp with more spices or herbs. Try adding cumin or cayenne for extra warmth. Fresh herbs like parsley or dill can also brighten the dish. You can even mix in some lime zest for a stronger citrus flavor. These small changes can make a big impact on taste. If you don't have a grill, you can still enjoy this dish! Use a stovetop grill pan or broil the shrimp in your oven. For stovetop grilling, heat the pan on medium-high heat and cook the shrimp for 2-3 minutes on each side. If broiling, place the shrimp on a baking sheet and broil for about 2-4 minutes. Make sure to watch closely so they don't overcook. No matter the method, you'll end up with delicious shrimp! To store leftover Jalapeño Lime Grilled Shrimp, place it in an airtight container. Make sure the shrimp cools down to room temperature first. You can keep it in the fridge for up to three days. When you are ready to eat it, check for any off smells. If it smells good, it should be safe to enjoy. If you want to freeze the grilled shrimp, it’s easy! First, let the shrimp cool completely. Then, place it in a freezer-safe bag. Try to remove as much air as possible to prevent freezer burn. You can freeze it for up to three months. When you are ready to use it, thaw the shrimp in the fridge overnight. To reheat shrimp, use a skillet on low heat. Add a splash of olive oil to keep them moist. Stir gently for about five minutes until they are warm. Avoid using the microwave, as it can make the shrimp tough. Always check if they are heated through before serving. Yes, you can use frozen shrimp. Just be sure to thaw them first. To thaw, place shrimp in a bowl of cold water for about 15-20 minutes. You can also leave them in the fridge overnight. Rinse the shrimp under cold water once thawed. This helps remove any ice and keeps them fresh. Cooked shrimp turn pink and opaque. They curl into a nice C shape. If you see gray or translucent areas, they need more time on the grill. Always cook shrimp for 2-3 minutes on each side. Overcooking makes them tough and rubbery. For a balanced meal, pair the shrimp with: - Grilled vegetables like zucchini and bell peppers - A fresh green salad with lime vinaigrette - Cilantro lime rice for a tasty side - Corn on the cob for a sweet crunch These sides complement the shrimp's bold flavors and create a colorful plate. In this post, we covered a simple recipe for Jalapeño Lime Grilled Shrimp. We discussed the key ingredients, how to prepare the marinade, and grilling tips. I shared ways to adjust the spice level and creative serving ideas. Remember, marinating shrimp boosts flavor and proper cooking prevents overcooking. Enjoy this dish with your choice of sides for a tasty meal. Cooking should be fun, so use this recipe as your base and make it your own. Happy grilling!

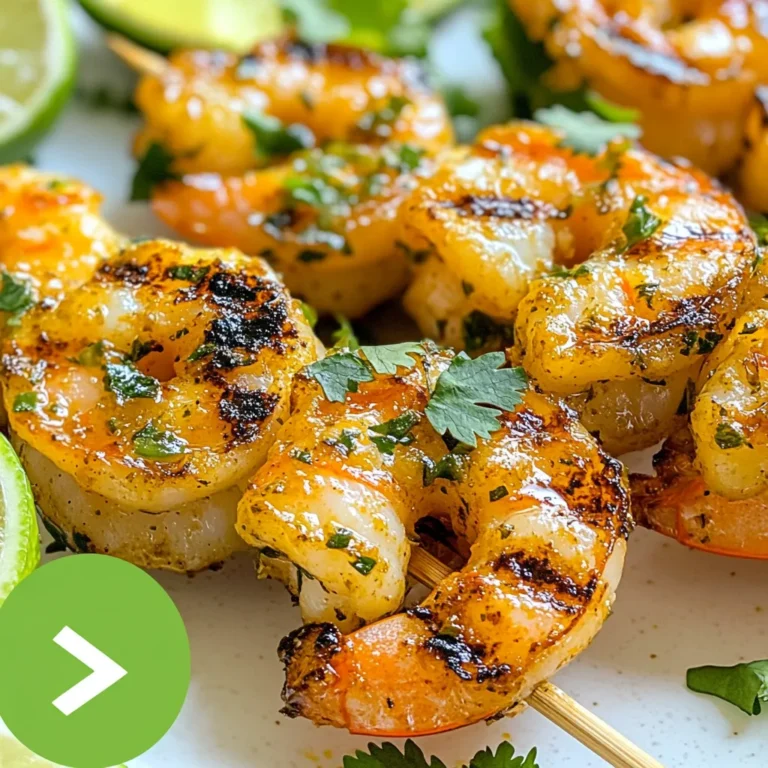
Jalapeño Lime Grilled Shrimp Flavorful and Easy Recipe

- 2 ripe mangos, peeled and diced - 1 banana, sliced - 1 cup coconut milk (or other plant-based milk) - 1 tablespoon honey or agave syrup (optional for sweetness) - 1/2 cup Greek yogurt (for creaminess) - 1/2 teaspoon vanilla extract - Suggested toppings: sliced kiwi, shredded coconut, granola, chia seeds, mint leaves For this Tropical Mango Smoothie Bowl, you need fresh, ripe mangos. Mangos bring a sweet and juicy flavor that shines in this dish. Make sure your mangos are soft to the touch. This means they are ripe and ready to eat. Next, add a banana. Bananas make the smoothie creamy and add natural sweetness. Slice the banana into small pieces before blending. Coconut milk is the next key ingredient. It gives a smooth, rich texture. You can use other plant-based milks if you prefer. Honey or agave syrup is optional. If you like a sweeter bowl, add a tablespoon. But ripe fruit often provides enough sweetness. Greek yogurt adds creaminess and protein. Use half a cup to keep the bowl thick and satisfying. A touch of vanilla extract enhances the flavor. Just half a teaspoon is enough to brighten the taste. For toppings, be creative! Sliced kiwi adds a nice pop of color. Shredded coconut gives a tropical crunch. Granola adds texture, while chia seeds offer a health boost. Fresh mint leaves finish the bowl beautifully, adding a fresh aroma. Gather all these ingredients, and you're ready to make a delightful and healthy smoothie bowl! {{ingredient_image_1}} 1. Blending the base ingredients Start by gathering your ingredients. In a blender, combine: - 2 ripe mangos, peeled and diced - 1 banana, sliced - 1 cup coconut milk - 1 tablespoon honey (optional) - 1/2 cup Greek yogurt - 1/2 teaspoon vanilla extract Blend these ingredients on high speed. You want a smooth and creamy texture. If the mixture is too thick, add a splash more coconut milk. 2. Achieving desired consistency Keep blending until everything mixes well. The smoothie should be thick but pourable. If it feels too thin, add more yogurt. If it’s too thick, add coconut milk. 1. Pouring the smoothie into a bowl Once you have the perfect blend, pour it into a bowl. Use a spatula to scrape the sides of the blender to get every last drop. 2. Arranging the toppings for visual appeal Now for the fun part—adding toppings! Decorate your smoothie bowl with: - Sliced kiwi - Shredded coconut - A handful of granola - Chia seeds - Fresh mint leaves Arrange these toppings in a way that looks beautiful. You want it to be as tasty to the eyes as it is to the palate! 1. Ways to enjoy the smoothie bowl You can enjoy this smoothie bowl for breakfast or as a snack. It’s packed with nutrients and a great way to start your day. Use a spoon for the best experience! 2. Ideal time to serve Serve this smoothie bowl right after making it. This keeps it fresh and cold. You can also make it for brunch or a summer gathering to impress friends and family. You can swap coconut milk for almond or oat milk. These options work well and keep it creamy. If you want a dairy-free yogurt, try coconut yogurt or cashew yogurt. Both add creaminess and flavor. To get a smooth texture, blend the fruits and liquids on high speed. If it feels too thick, add more coconut milk slowly. Taste the mixture before serving. If you like it sweeter, add a little honey or agave syrup. Make your smoothie bowl look fun! Arrange the toppings in colorful patterns. Use sliced kiwi, shredded coconut, granola, and chia seeds. Fresh mint leaves add a nice touch, too. Bright fruits make it pop and look delicious. Pro Tips Use Frozen Fruits: For a thicker and colder smoothie bowl, consider using frozen mango and banana instead of fresh ones. Adjust Sweetness: Taste your smoothie before serving; you can always add more honey or agave syrup if you prefer a sweeter flavor. Experiment with Toppings: Feel free to mix and match your favorite toppings, such as nuts, seeds, or other fruits, for added texture and flavor. Blend in Greens: For an extra nutritional boost, add a handful of spinach or kale to the smoothie before blending. {{image_2}} You can change up your smoothie bowl with different fruits. Try using ripe pineapple or juicy papaya instead of mango. These fruits add new flavors and nutrients. You can also mix in berries like blueberries or strawberries. They give a lovely color and a burst of sweetness. Want to make your smoothie bowl even healthier? Add a handful of spinach or kale. These greens blend well and add vitamins without changing the taste much. You can also include a scoop of nut butter. It adds protein and creaminess, making it more filling. Spices can bring a new twist to your bowl. Try adding a pinch of ginger for a warm kick or a sprinkle of cinnamon for sweetness. Adjust the sweetness by adding more honey or agave syrup if you like it sweeter. Just taste as you go to find your perfect balance. If you have leftover smoothie bowl, place it in an airtight container. Store it in the fridge. It will stay fresh for about one day. To keep it extra tasty, cover the top with plastic wrap. This helps prevent browning. You can freeze the smoothie mixture if you want to save some for later. Pour the smoothie into ice cube trays or freezer-safe bags. This makes it easy to use later. To keep the flavor, make sure to seal bags tightly. You can also label them with the date for easy reference. When you are ready to enjoy your frozen smoothie bowl, take it out of the freezer. If you used ice cube trays, pop them into a bowl. Let them sit at room temperature for a bit. For bags, place them in the fridge overnight to thaw slowly. This keeps the texture nice. If you are in a hurry, you can use the microwave on low. Just heat it gently to avoid cooking the smoothie. You can use plant-based yogurt. Almond or coconut yogurt works well. These options add creaminess too. If you want a non-dairy choice, look for brands with live cultures. This keeps the tangy flavor. You can also use silken tofu for a protein boost. It blends smoothly and is great for texture. To make a dairy-free bowl, swap Greek yogurt for plant-based yogurt. Use coconut milk or almond milk in place of regular milk. You can skip honey or use agave syrup for sweetness. This way, you keep the flavor while avoiding dairy. The result is still delicious and creamy! Yes, you can prepare the smoothie base ahead of time. Blend the ingredients and store in the fridge. It stays fresh for up to 24 hours. For best results, add toppings right before serving. This keeps them crunchy and colorful. Mangoes are rich in vitamins A and C. They help boost your immune system. The banana adds potassium, which is great for heart health. Coconut milk provides healthy fats that keep you full. The toppings like chia seeds add fiber and protein. This bowl is a tasty way to stay healthy! To make this recipe vegan, use plant-based yogurt and milk. Skip honey and use agave syrup instead. All the other ingredients are already plant-based. This way, you enjoy the same great taste without animal products. It’s a wonderful option for a vegan diet! This blog post covered the key ingredients for a tasty smoothie bowl, like ripe mango, banana, and coconut milk. I shared step-by-step instructions to make blending easy and fun. You learned tips on substitutions and creative toppings to enhance your bowl. Seasonal variations offer new flavors, while storage tips keep your leftovers fresh. Incorporating these ideas will make your smoothie bowl delicious and enjoyable. Embrace the fun of blending and topping to create your perfect bowl!

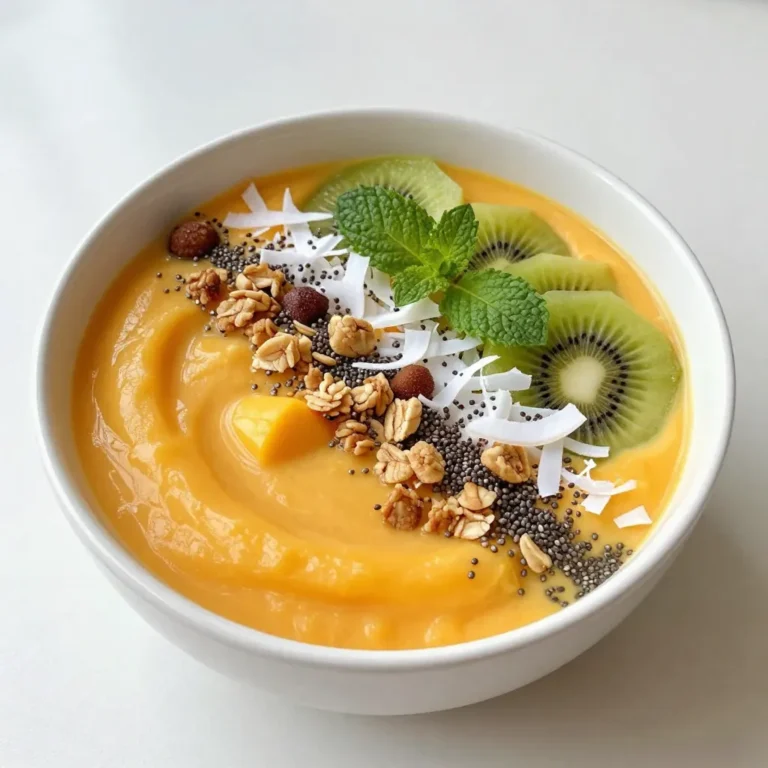
Tropical Mango Smoothie Bowl Delightful and Healthy

- 8 ounces penne pasta - 1 pound shrimp, peeled and deveined - 1 tablespoon Cajun seasoning - 1 tablespoon olive oil - 1 small onion, diced - 2 cloves garlic, minced - 1 bell pepper, diced (red or green) - 1 cup heavy cream - 1 cup shredded cheddar cheese - 1 cup diced tomatoes (canned or fresh) - 1/2 cup grated Parmesan cheese - Salt and pepper to taste - Fresh parsley, chopped (for garnish) To make a great Cajun shrimp pasta bake, you need a few key ingredients. Start with penne pasta, which holds the sauce well. You’ll need a pound of shrimp. Make sure they are peeled and deveined for easy cooking. Cajun seasoning brings the heat and flavor. I like to use one tablespoon, but you can adjust it to your taste. A tablespoon of olive oil helps sauté the veggies. You need one small onion, diced finely, to add sweetness. Next, gather some extra ingredients. Minced garlic adds a rich taste. A bell pepper, either red or green, adds crunch and color. The dish needs creaminess, so one cup of heavy cream is perfect. Cheddar cheese is a must for that gooey texture. Use one cup, shredded. For added flavor, include one cup of diced tomatoes. You can use fresh or canned, depending on what you have. For seasoning and topping, you'll want half a cup of grated Parmesan cheese. Salt and pepper enhance all the flavors. Finally, chop fresh parsley for a beautiful finish. With these ingredients, you can create a hearty and flavorful Cajun shrimp pasta bake that everyone will love! {{ingredient_image_1}} - Preheat your oven to 375°F (190°C). - Cook 8 ounces of penne pasta until al dente, then set aside. - In a large skillet, heat 1 tablespoon of olive oil over medium heat. - Add 1 small diced onion and 1 diced bell pepper. Sauté them until soft, about 5 minutes. - Add 2 minced garlic cloves and cook for 1 minute until fragrant. - Season 1 pound of shrimp with 1 tablespoon of Cajun seasoning, salt, and pepper. Add the shrimp to the skillet and cook until they turn pink, about 3-4 minutes. - Stir in 1 cup of heavy cream and 1 cup of diced tomatoes. Simmer for 2-3 minutes to blend the flavors. - Gently fold in the cooked penne pasta and half of 1 cup of shredded cheddar cheese. - Transfer the mixture to a greased baking dish and spread it evenly. Top with the remaining cheddar cheese and sprinkle with 1/2 cup of grated Parmesan cheese. - Bake the dish for 20-25 minutes until the top is golden and bubbly. - Allow it to cool for a few minutes before garnishing with chopped parsley. To get the best texture, cook the penne pasta al dente. This means it should be firm but not hard. This helps it hold up well during baking. Overcooking shrimp can lead to a rubbery texture. Cook the shrimp just until they turn pink and opaque. This keeps them tender and juicy. Cajun seasoning can vary in heat. Adjust it to match your taste. If you want more depth, add a splash of Worcestershire sauce. This adds a savory note that complements the dish well. Using high-quality cheese makes a big difference. It melts better and gives a richer flavor. After baking, let the dish sit for a few minutes. This helps it set and makes it easier to serve. Pro Tips Perfectly Cooked Shrimp: Be careful not to overcook the shrimp; they should only be cooked until they turn pink and opaque, about 3-4 minutes. Cheese Selection: For a more complex flavor, try mixing different types of cheese, such as pepper jack or gouda, with the cheddar. Herb Infusion: Enhance the dish by adding fresh herbs like thyme or basil for a pop of flavor and freshness. Make Ahead: This pasta bake can be prepared in advance and stored in the fridge, making it a great option for meal prep or entertaining. {{image_2}} You can switch up the seafood in this dish. If you don't want shrimp, use scallops or lobster. Both options add a sweet, rich flavor. For an extra special touch, sauté some crab meat. It gives a luxurious feel to the bake. Adding vegetables can boost the dish's health and flavor. Spinach or zucchini mix in well and add color. You can also toss in some broccoli. It not only adds nutrition but also makes the dish vibrant and appealing. If you need a gluten-free meal, choose gluten-free pasta. It works just as well in this recipe. For those who are dairy-free, swap out heavy cream for plant-based cream. This keeps the dish creamy without dairy. To keep your Cajun shrimp pasta bake fresh, store it in an airtight container in your refrigerator. It’s best to eat it within 3-4 days for the best flavor. This dish tastes great, but it can lose its charm if left too long. You can freeze the baked dish for up to 2 months. Make sure to let it cool first. To reheat, thaw it overnight in your fridge before cooking. This helps keep the texture just right. For the best results, reheat your pasta bake in the oven. It warms evenly and keeps the top crispy. If you need a quicker option, use the microwave. Just add a little moisture, like a splash of water, to keep it from drying out. Enjoy your delicious meal again! Yes, just thaw and dry them before cooking. Frozen shrimp works well. It saves time and still tastes great. Just remember to pat them dry. This step keeps extra water out of your dish. Increase Cajun seasoning or add hot sauce. Adjust the spice to fit your taste. More seasoning gives a kick that many love. Hot sauce can add flavor and heat too. Add a little at a time, so it doesn’t overwhelm the dish. Yes, assemble and refrigerate before baking. This makes it easy for busy days. Just mix everything and store it in the fridge. When you're ready, pop it in the oven. It saves time and still tastes fresh. Serve with a side salad or garlic bread for a complete meal. A crisp salad adds freshness. Garlic bread brings warmth and heartiness to the table. Together, they round out the dish nicely. Enjoy a full-flavored meal that satisfies. This Cajun shrimp pasta bake blends rich flavors with easy steps. You learned how to cook pasta, sauté shrimp, and layer tasty ingredients. Adjust seasonings to fit your taste and explore fun variations. Remember, this dish is great for leftovers and can be stored easily. Enjoy sharing it with family and friends. Cooking should be fun and satisfying, and this recipe delivers that every time. Now, get cooking and enjoy your delicious creation!

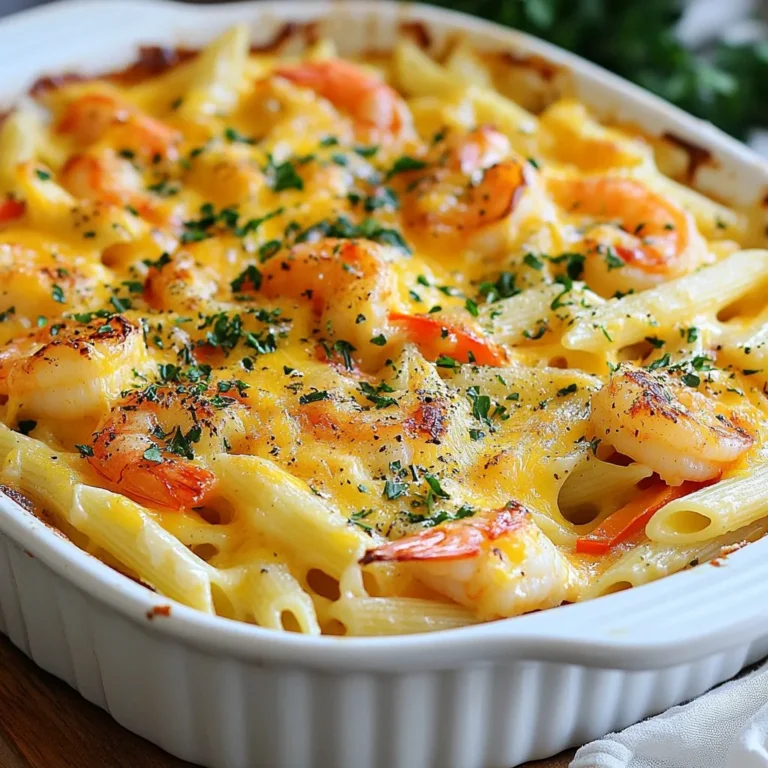
Cajun Shrimp Pasta Bake Hearty and Flavorful Dish

- 1 lb ground chicken or turkey - 1/2 cup breadcrumbs (preferably panko for extra crunch) - 1/4 cup grated Parmesan cheese - 1/4 cup green onions, finely chopped - 1 large egg - 2 cloves garlic, minced - 1 teaspoon ginger, minced - 1/4 teaspoon black pepper - 1/2 teaspoon salt - 1 tablespoon olive oil I love using ground chicken or turkey for these meatballs. They stay moist and tender. Breadcrumbs give them a nice texture. Panko is my go-to choice because it adds extra crunch. Parmesan cheese brings a rich flavor that pairs well with the honey Sriracha sauce. Green onions give a fresh taste. Garlic and ginger add depth and warmth. Don’t forget the egg; it helps hold everything together. Finally, a bit of salt and black pepper adds just the right seasoning. - 1/3 cup honey - 1/4 cup Sriracha sauce - 1 tablespoon soy sauce (or tamari for gluten-free) - 1 tablespoon rice vinegar - 1 teaspoon sesame oil - 1 tablespoon water The sauce is what makes these meatballs truly special. Honey adds sweetness, while Sriracha gives it heat. Soy sauce adds umami, making the flavors pop. Rice vinegar adds a bit of tanginess, balancing the sweetness. Sesame oil brings a nutty taste, which is lovely. Just a bit of water helps to thin the sauce so it coats the meatballs well. This sauce is simple, yet it packs a punch. {{ingredient_image_1}} - Preheating the oven: Start by preheating your oven to 400°F (200°C). This step is key for crispy meatballs. - Mixing the ingredients: In a large bowl, combine 1 lb of ground chicken or turkey, 1/2 cup of breadcrumbs, and 1/4 cup of grated Parmesan cheese. Add in 1/4 cup of finely chopped green onions, 1 large egg, 2 minced garlic cloves, 1 tsp of minced ginger, 1/4 tsp of black pepper, and 1/2 tsp of salt. Mix these ingredients gently until just combined. Avoid overmixing to keep the meatballs tender. - Forming the meatballs: Use your hands to shape the mixture into small meatballs, about 1 to 1.5 inches wide. Place each meatball on a baking sheet lined with parchment paper. - Baking instructions: Drizzle 1 tablespoon of olive oil over the meatballs. This helps them crisp up nicely. Bake in your preheated oven for 20 to 25 minutes. They should be golden brown and cooked through. - Whisking the sauce ingredients: While the meatballs bake, grab a small saucepan. Whisk together 1/3 cup of honey, 1/4 cup of Sriracha sauce, 1 tablespoon of soy sauce, 1 tablespoon of rice vinegar, 1 teaspoon of sesame oil, and 1 tablespoon of water. - Cooking until thickened: Heat the mixture over medium heat. Bring it to a simmer and cook for about 5 minutes, until it thickens slightly. This sauce adds a sweet and spicy kick to your meatballs. To get the best texture in your meatballs, avoid overmixing. When you combine the ingredients, mix gently. This helps keep the meatballs tender. Using panko breadcrumbs is key. Panko gives a nice crunch that regular breadcrumbs can’t match. This crunchy texture makes the meatballs even more enjoyable. You can enhance the flavor by adding spices or herbs. Try adding a pinch of garlic powder or some fresh parsley. These small changes can make a big difference. Adjust the heat level with Sriracha. If you like it spicy, add more Sriracha. For a milder taste, use less. You can even mix in some honey to balance the heat. Garnishing your meatballs makes them look great. Use chopped green onions or sesame seeds on top. They add color and flavor. Pair the meatballs with side dishes like rice or steamed veggies. These sides complement the sweet and spicy flavors of the meatballs perfectly. Pro Tips Use Panko Breadcrumbs: Opt for panko breadcrumbs instead of regular ones for a lighter, crispier texture in your meatballs. Don’t Overmix: When combining the ingredients, mix just until combined to keep the meatballs tender and juicy. Adjust the Spice Level: Feel free to adjust the Sriracha amount in the sauce to suit your spice preference; add more for a hotter kick! Garnish for Presentation: Garnish with extra green onions or sesame seeds just before serving to add a pop of color and flavor. {{image_2}} You can switch the ground chicken or turkey for other meats. Ground beef or pork works well. They add a rich flavor that pairs nicely with the sauce. For a gluten-free option, use gluten-free breadcrumbs. These work just as well as regular ones, keeping your meatballs tasty. Want more heat? Add extra Sriracha to the sauce. This will give your meatballs a kick. You can also mix in cayenne pepper or chili flakes. Just a pinch can turn up the spice level. Adjust it to your taste for a fun twist. If you prefer a plant-based meal, substitute ground meat with a vegan alternative. Brands like Beyond Meat or lentils can work great. For binding, use a flax egg. Mix one tablespoon of ground flaxseed with three tablespoons of water. Let it sit for five minutes before adding it to your mixture. This keeps your meatballs together without meat. To keep your Honey Sriracha Meatballs fresh, store them in the fridge. Place them in an airtight container. They will stay good for up to three days. Make sure they cool down before sealing the container. This helps avoid moisture build-up. If you want to save them for longer, freeze the meatballs. First, let them cool completely. Then, place them in a single layer on a baking sheet. Freeze them for about an hour. Once they are firm, transfer them to a freezer bag. Remove as much air as possible. These meatballs can last up to three months in the freezer. When it's time to eat, you have two main options: the oven or the microwave. The oven is best for keeping their crispy texture. Preheat it to 350°F (175°C). Place the meatballs on a baking sheet and heat for about 10-15 minutes. If you're in a hurry, you can use the microwave. Place the meatballs in a microwave-safe dish. Cover them with a damp paper towel to keep them moist. Heat them in short bursts, stirring in between. This will help keep the flavor strong and the meatballs tender. Honey Sriracha meatballs last in the fridge for about 3 to 4 days. Store them in an airtight container. Make sure they cool down before placing them in the fridge. This helps keep them fresh and tasty. Yes, you can make Honey Sriracha meatballs ahead of time. You can prepare the meatball mixture and shape them. Store the raw meatballs in the fridge for up to 24 hours. You can also freeze them for longer storage. Just thaw before baking. Honey Sriracha meatballs pair well with many sides. Here are some great options: - Steamed rice or jasmine rice - Stir-fried vegetables for a healthy boost - Noodles tossed with sesame oil - A fresh green salad for crunch These sides enhance the meal and balance the flavors. Yes, you can easily adjust the spice level. For less heat, use less Sriracha. You can also add honey to balance the spice. If you want more heat, add extra Sriracha or a pinch of cayenne. Taste as you go to find your perfect level. Honey Sriracha meatballs combine flavor and ease in a delightful dish. You learned about the key ingredients, step-by-step prep, and tips for the best results. With options for variations and smart storage hacks, you have everything to whip up this meal. Embrace your creativity in the kitchen and enjoy these tasty meatballs with your favorite sides! Taste frustrations away as you adapt these recipes to your liking. Cooking can be fun, so let these meatballs inspire your next meal.

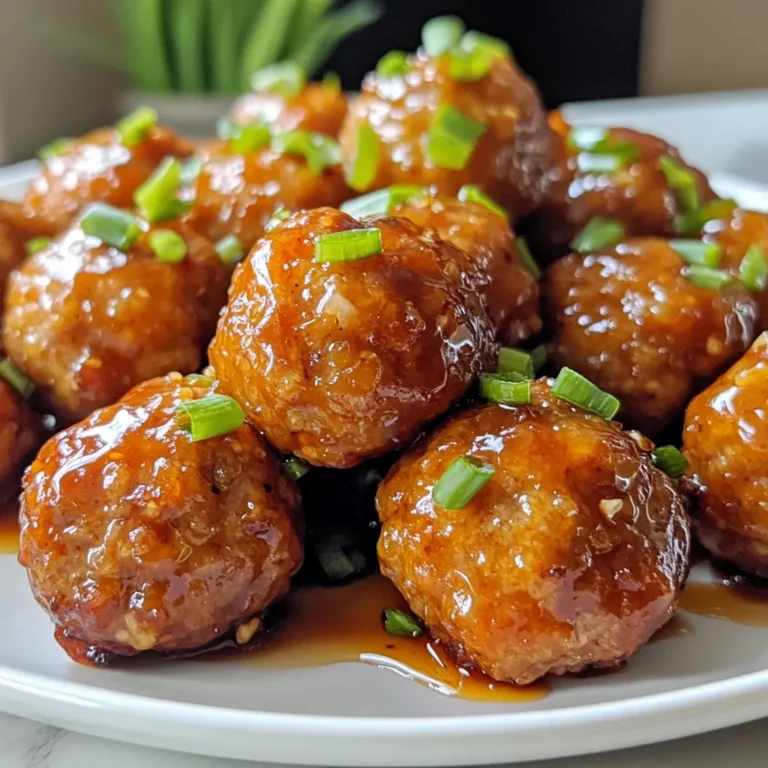
Honey Sriracha Meatballs Tasty and Easy Recipe

When making Maple Pecan Sweet Potato Casserole, you need a few key items. Here’s what you’ll gather for this tasty dish: - Sweet potatoes: You’ll need 4 large sweet potatoes. Peel and cube them for easy cooking. - Maple syrup and other liquids: Use 1/2 cup of maple syrup, 1/4 cup of melted unsalted butter, and 1/2 cup of milk. You can choose non-dairy milk if you prefer. - Spices and seasonings: Grab 1 teaspoon of vanilla extract, 1/2 teaspoon of cinnamon, 1/4 teaspoon of nutmeg, and some salt to taste. These will add depth to your flavor. - Topping ingredients: For the crunchy topping, you will need 1 cup of chopped pecans, 1/2 cup of brown sugar, 1/4 cup of all-purpose flour, and 2 tablespoons of melted butter. Each ingredient plays an important role in making your casserole a hit. The sweet potatoes provide a creamy base, while the maple syrup adds sweetness. The spices bring warmth, and the pecans give a delightful crunch. When combined, these ingredients create a cozy dish perfect for any gathering. {{ingredient_image_1}} To start, you need to prep the sweet potatoes. Take four large sweet potatoes and peel them. Then, cut them into cubes. This helps them cook faster and evenly. Next, boil and mash the sweet potatoes. Place the cubed sweet potatoes in a large pot. Cover them with water and bring it to a boil. Cook for about 15 to 20 minutes, or until they are soft. Once done, drain the water and return the sweet potatoes to the pot. Use a masher to mash them until smooth. Now, it’s time to mix the wet and dry ingredients. Add 1/2 cup of maple syrup, 1/4 cup of melted butter, 1/2 cup of milk, 1 teaspoon of vanilla extract, 1/2 teaspoon of cinnamon, and 1/4 teaspoon of nutmeg to the mashed sweet potatoes. Don’t forget to add a pinch of salt. Stir everything together until well combined. For layering in the baking dish, grab a greased 9x13 inch baking dish. Transfer the sweet potato mixture into the dish and spread it evenly across the bottom. Next, prepare the pecan topping. In a separate bowl, mix 1 cup of chopped pecans, 1/2 cup of brown sugar, 1/4 cup of all-purpose flour, and 2 tablespoons of melted butter. Make sure the pecans are coated well with the mixture. Now it’s time for baking. Sprinkle the pecan topping evenly over the sweet potato layer. Preheat your oven to 375°F (190°C) and bake for 25 to 30 minutes. Look for a golden topping and make sure the casserole is heated through. To get smooth mashed sweet potatoes, start by boiling them until they are soft. This usually takes about 15 to 20 minutes. Once they are soft, drain the water and mash them well. A potato masher works great for this. If you want to make it extra smooth, use a hand mixer. This makes the sweet potatoes creamy. To avoid sogginess in your casserole, don’t add too much liquid when mixing in the milk and syrup. Just enough will keep it moist but not runny. Also, make sure to bake it long enough to let the top get crispy. For extra flavor, consider adding more spices. A pinch of ginger or allspice can liven up the dish. You can also try a splash of maple extract for a stronger maple taste. This makes the dish even more delightful. Balancing sweetness is key. If your maple syrup is very sweet, reduce the brown sugar in the topping. This will help keep the dish from being overly sweet. Use a 9x13 inch baking dish for this recipe. It fits the amount perfectly and allows for even cooking. Glass or ceramic dishes work best, as they heat evenly. For mashing, a sturdy potato masher is best. A hand mixer can help if you want a smoother texture. Make sure to have measuring cups and spoons ready for accuracy. Using the right tools makes cooking easier and more fun! Pro Tips Choosing Sweet Potatoes: Opt for firm, smooth-skinned sweet potatoes for the best texture and flavor in your casserole. Maple Syrup Substitutes: If you don't have maple syrup, you can use honey or agave syrup as a substitute, but adjust the sweetness to your preference. Pecan Topping Crunch: For an extra crunch, toast the pecans in a dry skillet over medium heat for a few minutes before adding them to the topping. Make-Ahead Option: Prepare the sweet potato mixture a day in advance and store it in the fridge. Just add the topping and bake before serving. {{image_2}} You can make this casserole fit many diets. For a dairy-free option, use coconut milk or almond milk instead of regular milk. This keeps the creamy texture while making it safe for those with dairy issues. You can also skip the butter and use coconut oil for a vegan twist. If nuts are a concern, swap out the pecans for seeds like sunflower or pumpkin. These options give a nice crunch without the allergy worries. Just be sure to check for any cross-contamination if you're serving someone with nut allergies. Maple syrup is the star of this dish, but you can try other natural sweeteners. Honey or agave syrup can work well too. Just keep in mind that these may change the flavor slightly. If you want to reduce sugar, use less maple syrup and add a bit of mashed banana. This keeps the sweetness without the full sugar load. Feel free to get creative with flavors. Adding chopped apples or pears brings a fruity twist. You could also mix in dried cranberries for a pop of color and taste. For nut lovers, try walnuts or almonds instead of pecans. If you want to go savory, reduce the maple syrup and add garlic or herbs. This gives the casserole a whole new vibe, perfect for a unique side dish. Mixing sweet and savory can surprise your guests in the best way. After you enjoy your Maple Pecan Sweet Potato Casserole, you can refrigerate any leftovers. Place the casserole in an airtight container. This helps keep it fresh and tasty. You can store it in the fridge for up to four days. When reheating, use the oven for best results. Preheat your oven to 350°F (175°C). Cover the casserole with foil to keep it moist. Heat for about 20 minutes or until warm. You can also use a microwave, but the oven gives a better texture. To keep the casserole longer, freezing is a great option. Allow the dish to cool completely before freezing. Use a freezer-safe container or wrap it tightly with plastic wrap and foil. It can last for up to three months in the freezer. When you’re ready to enjoy it again, thaw the casserole overnight in the fridge. After it’s thawed, reheat it in the oven at 350°F (175°C) for about 25 to 30 minutes. This helps restore its creamy texture. In the fridge, the casserole will stay good for about four days. If you freeze it, aim to use it within three months for the best taste. Always check for any signs of spoilage before eating. This ensures you enjoy the dish at its best! Can I make this dish ahead of time? Yes, you can make this casserole ahead of time. Prepare it up to the baking step. Cover and store it in the fridge. When you're ready, bake it straight from the fridge. This makes it easy for holiday meals. What is the best way to serve the casserole? Serve the casserole warm. Scoop it onto plates or serve family-style from the baking dish. It pairs well with roasted meats or as a holiday side dish. Add a sprinkle of extra pecans on top for a nice touch. Can I use canned sweet potatoes instead? Yes, you can use canned sweet potatoes. Drain and mash them before mixing. Adjust the syrup based on the sweetness of the canned potatoes. This saves time but may change the texture slightly. Overview of calories and macronutrients This casserole serves about eight people. Each serving has roughly 250 calories. It contains 5 grams of protein, 10 grams of fat, and 40 grams of carbs. The healthy fats come from pecans, while sweet potatoes provide fiber and vitamins. Health benefits of sweet potatoes and pecans Sweet potatoes are high in vitamin A, good for your eyes. They also provide fiber, which helps digestion. Pecans are rich in healthy fats and antioxidants. They can help reduce inflammation and improve heart health. Suggested side dishes Pair this casserole with green beans or a fresh salad. These sides add color and crunch to your meal. You can also serve it with cranberry sauce for a sweet-tart balance. Pairing with main courses This dish goes great with glazed ham or roasted turkey. The sweetness of the casserole complements savory flavors. It’s a crowd-pleaser for any festive occasion. Enjoy the harmony of flavors on your plate! This blog post covered how to make a delicious sweet potato casserole from scratch. We discussed ingredients, step-by-step preparation, and baking instructions. You learned tips to enhance flavors and perfect texture, plus dietary options and storage info. Sweet potatoes are healthy, tasty, and versatile. Now, you have the tools to create a dish that impresses everyone. Enjoy making and sharing it for any occasion!

Maple Pecan Sweet Potato Casserole Delicious Dish

To make this dish, gather these key ingredients: - 1 cup uncooked jasmine rice (or rice of choice) - 1 lb shrimp, peeled and deveined - 2 tablespoons honey - 3 cloves garlic, minced - 2 tablespoons soy sauce - 1 tablespoon sesame oil - ½ cup green peas (fresh or frozen) - ½ cup carrots, finely diced - 2 green onions, chopped - 2 eggs, beaten - Salt and pepper to taste - Extra sesame oil for frying These ingredients come together to create a sweet and savory meal. You can customize your fried rice with these options: - Bell peppers, diced - Broccoli florets - Corn kernels - Chopped cilantro or parsley - Cashews or peanuts for crunch These add-ins can enhance the dish and add more flavor or texture. For the best results, use the following tools: - Large skillet or wok - Mixing bowl - Cooking spoon or spatula - Rice cooker (optional) These tools will help you cook the shrimp and rice evenly, making your meal a success. {{ingredient_image_1}} To make great fried rice, start with jasmine rice or your favorite type. Rinse the rice under cold water until the water runs clear. This step removes excess starch and helps the rice cook better. Follow the package instructions to cook the rice. For the best flavor and texture, let the rice cool completely. Day-old rice works best because it’s drier and won’t clump. If you can, cook the rice a day ahead. Next, let’s prepare the shrimp. In a mixing bowl, combine shrimp, honey, minced garlic, soy sauce, salt, and pepper. This blend gives the shrimp a sweet and savory taste. Make sure to mix well so all shrimp are coated. Let them marinate for about 10 minutes. This step helps the shrimp soak up the flavors, making each bite delicious. Now, it’s time to cook! Heat a large skillet or wok over medium-high heat. Add a splash of sesame oil to the pan. Once the oil is hot, add the marinated shrimp. Stir-fry the shrimp for about 2-3 minutes until they turn pink and are fully cooked. Remove the shrimp from the skillet and set them aside. You will add them back later. This quick cooking keeps the shrimp tender and juicy, which is key for a tasty meal. Using day-old rice makes a big difference. Fresh rice has moisture. This moisture can make your fried rice sticky. Day-old rice is drier and holds its shape better. When you cook, it will fry up nice and fluffy. Always store leftover rice in the fridge. Let it cool first, then store it in an airtight container. This helps keep the rice fresh. To avoid mushy rice, rinse it well before cooking. Rinsing removes excess starch. This starch can cause the rice to clump together. Use a 1:1.5 ratio of rice to water. This ratio helps give you the right texture. Also, let the rice cool after cooking. Spread it out on a baking sheet to cool faster. This step helps prevent mushiness. Seasoning is key in this dish. Honey adds sweetness. Soy sauce gives it a savory touch. Start with 2 tablespoons of soy sauce. Taste as you go. You can always add more, but it's hard to take it out. For a kick, add a pinch of red pepper flakes. They bring a nice heat that balances well with the honey. Experiment with the amounts to find what you like best. Pro Tips Use Day-Old Rice: For the best texture, use rice that has been cooked and refrigerated overnight. This helps the grains firm up, preventing mushiness in the fried rice. Perfectly Marinated Shrimp: For an extra layer of flavor, let the shrimp marinate for at least 20-30 minutes if time allows. This enhances the sweetness and garlic flavor. High Heat is Key: Cooking on medium-high heat ensures that everything cooks quickly and evenly, giving you that delicious stir-fried flavor without overcooking the ingredients. Customize Your Veggies: Feel free to add other vegetables like bell peppers or broccoli. Just chop them small and add them when you stir-fry the carrots for even cooking. {{image_2}} If you want a veggie twist, swap shrimp for tofu or mushrooms. Tofu absorbs flavors well. It adds protein and gives a nice texture. Use firm tofu for the best results. You can also add more vegetables like bell peppers, broccoli, or zucchini. These will make your dish colorful and healthy. You can easily change proteins in this dish. Try chicken, beef, or even tempeh. Each option brings its own flavor. For veggies, consider using snap peas, baby corn, or spinach. Mix and match to find your favorite combo. This dish is very adaptable, allowing you to use what you have on hand. To make your fried rice exciting, add spices. Try ginger for a warm kick or chili flakes for heat. You can also add curry powder for an Indian twist. A splash of lime juice gives a fresh taste. Don't be afraid to experiment with flavors from different cultures. To keep your Honey Garlic Shrimp Fried Rice fresh, store it in an airtight container. Make sure it cools to room temperature first. Avoid stacking it too high, as this can cause uneven cooling. Label the container with the date, so you know when it was made. When you're ready to enjoy leftovers, add a splash of water to the rice. This helps keep it moist during reheating. Use a skillet or microwave. If using a skillet, heat it on medium-low. Stir often to avoid sticking. For the microwave, cover the bowl with a damp paper towel. Heat in short bursts, stirring in between. To freeze, let the dish cool completely before placing it in a freezer-safe bag. Squeeze out as much air as possible to prevent freezer burn. It can last up to three months in the freezer. To thaw, move it to the fridge overnight. Reheat and enjoy your flavorful meal again! Yes, you can use frozen shrimp. Just thaw them first. Place the shrimp in cold water for about 15 minutes. This helps them to cook evenly. Frozen shrimp works well and saves time. I recommend jasmine rice for this dish. It has a nice aroma and a fluffy texture. You can also use basmati or long-grain rice. Just make sure your rice is cool before frying. Day-old rice gives the best results. It helps to avoid mushiness. Honey Garlic Shrimp Fried Rice lasts about three to four days in the fridge. Store it in an airtight container. Make sure it cools completely before putting it away. When you're ready to eat, just reheat it in a pan or microwave. This post covered how to make Honey Garlic Shrimp Fried Rice. We explored key ingredients, helpful tips, and variations to suit your tastes. Remember, day-old rice boosts texture, while marinating shrimp adds flavor. You can make it veggie-friendly, too. Lastly, proper storage helps keep leftovers fresh. Enjoy your cooking adventure, and let this dish bring joy to your table!

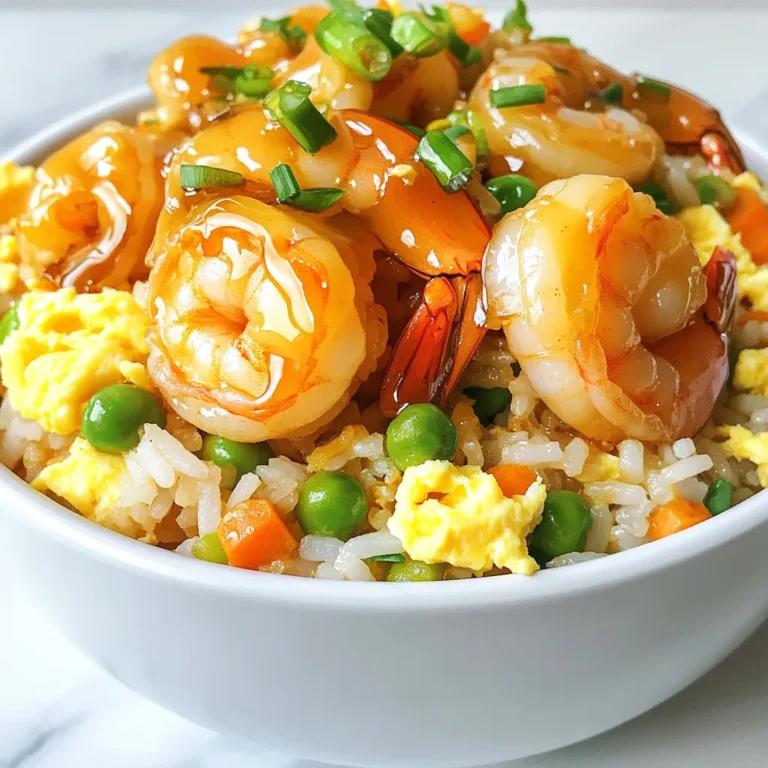
Honey Garlic Shrimp Fried Rice Flavorful Meal Guide

- 1 cup orzo pasta - 3 tablespoons unsalted butter - 4 cloves garlic, minced - 1 cup vegetable broth - 1 cup heavy cream - 1 cup freshly grated Parmesan cheese - Salt and pepper to taste - 2 tablespoons fresh parsley, chopped - Zest of 1 lemon Orzo pasta is small and cooks quickly. It absorbs flavors well. Butter adds a rich taste and creaminess. Garlic gives this dish a nice, bold flavor. Vegetable broth adds depth without overpowering. Heavy cream makes the sauce silky and smooth. Parmesan cheese brings a savory, nutty flavor. Fresh parsley adds color and freshness. Lemon zest brightens the dish and adds a zing. If you want a lighter dish, use olive oil instead of butter. You can swap heavy cream for half-and-half or milk to cut calories. For a dairy-free option, use coconut cream and nutritional yeast for cheese flavor. Any small pasta can work if you don’t have orzo. If you like heat, add red pepper flakes for a kick. {{ingredient_image_1}} To start, gather your ingredients for Garlic Butter Parmesan Orzo. You will need: - 1 cup orzo pasta - 3 tablespoons unsalted butter - 4 cloves garlic, minced - 1 cup vegetable broth - 1 cup heavy cream - 1 cup freshly grated Parmesan cheese - Salt and pepper to taste - 2 tablespoons fresh parsley, chopped - Zest of 1 lemon First, bring a medium pot of salted water to a boil. Add the orzo pasta and cook it until al dente. This usually takes around 8 to 10 minutes, but always check the package for exact times. Once done, drain the orzo and set it aside. In a large skillet, melt the butter over medium heat. As the butter melts, it releases wonderful flavor. Add your minced garlic and sauté for 1 to 2 minutes. You want it to be fragrant but not browned. Browned garlic can taste bitter, and we want a nice, fresh taste. Next, pour in the vegetable broth and heavy cream. Stir the mixture to combine well. Bring it to a gentle simmer. This step helps blend the flavors. Gradually whisk in the grated Parmesan cheese until it melts into a creamy sauce. Season this mixture with salt and pepper to your taste. Now, add the cooked orzo to the skillet. Stir well to coat all the pasta with the cheese sauce. Let it cook for an additional 2 to 3 minutes. This step warms everything through and allows the orzo to soak in the flavors. - Use plenty of water to boil your orzo. This keeps it from sticking together. - Always check your pasta a minute or two before the package time. This helps you get that perfect al dente texture. - When mixing in the cheese, do it gradually. This helps create a smooth sauce. - For a fresh twist, add lemon zest and chopped parsley at the end. This brightens the dish. Follow these steps, and you will have a creamy, flavorful Garlic Butter Parmesan Orzo that’s sure to impress! To make a creamy sauce, start with medium heat. Too high can burn the butter and garlic. Melt the butter first, then add garlic. Stir it for just 1-2 minutes. You want it to smell great, not brown. Next, mix in the vegetable broth and cream. Let it simmer gently. This helps the flavors blend well. Gradually whisk in the Parmesan cheese. This step makes the sauce smooth and creamy. Don’t rush it; let it melt fully before adding the orzo. One common mistake is overcooking the orzo. Follow the package instructions closely. Drain it once it's al dente. Another mistake is using too much heat. High heat can curdle the cream and ruin the sauce. Make sure to taste as you go. This way, you can adjust salt and pepper. Lastly, don’t forget the lemon zest. It adds a fresh flavor that brightens the dish. To enhance flavors, try adding herbs. Fresh basil or thyme works well. You can also mix in some red pepper flakes for heat. If you like a nutty taste, add toasted pine nuts. For a savory touch, sauté some mushrooms or spinach in the garlic butter. These additions create layers of flavor and make the dish even more exciting. Pro Tips Use Fresh Garlic: Freshly minced garlic gives a more vibrant flavor compared to pre-minced options. Choose Quality Parmesan: Opt for a good quality Parmesan cheese for the best creamy texture and flavor. Don't Overcook the Orzo: Keep an eye on the orzo while cooking; it should be al dente for the best bite. Customize with Veggies: Add your favorite vegetables like spinach or peas for extra nutrition and color. {{image_2}} You can easily boost your Garlic Butter Parmesan Orzo with veggies. Fresh spinach adds color and nutrients. Just toss it in when you add the orzo. You can also use peas for sweetness. They cook quickly and add a nice pop. Roasted bell peppers bring a smoky flavor. Just chop them and mix them in. Zucchini or broccoli florets work well too. Steam them first, then fold them into the dish. Adding protein makes this dish heartier. Cooked chicken or shrimp blends well with the flavors. You can use leftover rotisserie chicken for ease. Just shred it and mix it in. For a vegetarian option, try chickpeas or white beans. They add texture and protein without meat. Tofu is another great choice. Just cube and sauté it in the garlic butter first. If you want a dairy-free version, swap the heavy cream. Use coconut cream for a rich texture. It adds a hint of sweetness that works well. Nutritional yeast can replace Parmesan cheese. It gives a cheesy flavor without dairy. Check the butter too; use a plant-based option. These swaps keep your orzo creamy and delicious. You can keep Garlic Butter Parmesan Orzo in the fridge. Place it in an airtight container. It stays fresh for about 3 to 4 days. Make sure it cools down before sealing. This helps keep the flavor and texture. Freezing is great for longer storage. To freeze, let the orzo cool completely. Put it in a freezer-safe bag or container. Remove as much air as possible. It can last for up to 2 months in the freezer. When ready to eat, thaw it overnight in the fridge. Reheating orzo is easy. You can use the microwave or a stove. For the microwave, add a splash of water. Heat in short bursts, stirring in between. On the stove, warm it in a pan. Add a bit of butter or cream for extra moisture. This keeps it from drying out. Garlic Butter Parmesan Orzo lasts about 3 to 5 days in the fridge. Store it in an airtight container. Make sure to let it cool before sealing it. This dish tastes best fresh, but it holds up well for a few days. You can reheat it in a pan or microwave. Yes, you can use other types of pasta. Just keep in mind that cooking times may change. Smaller shapes like couscous or ditalini work well too. If you use larger pasta, adjust the liquid to ensure it cooks right. Each pasta type offers a unique texture and flavor to the dish. Garlic Butter Parmesan Orzo pairs great with many dishes. You can try it with grilled chicken or shrimp for protein. A fresh salad adds a nice crunch. Roasted vegetables also complement the creamy orzo. You can even serve it as a side with your favorite steak or fish. This blog post covered essential ingredients for Garlic Butter Parmesan Orzo, and their benefits. I shared preparation steps and cooking techniques to help you make it perfectly. Tips include best practices for a creamy sauce and avoiding common mistakes. Variations with vegetables and protein add fun twists. Lastly, I provided storage and reheating guidelines. Remember, cooking is all about trying new things. So, get creative and enjoy!

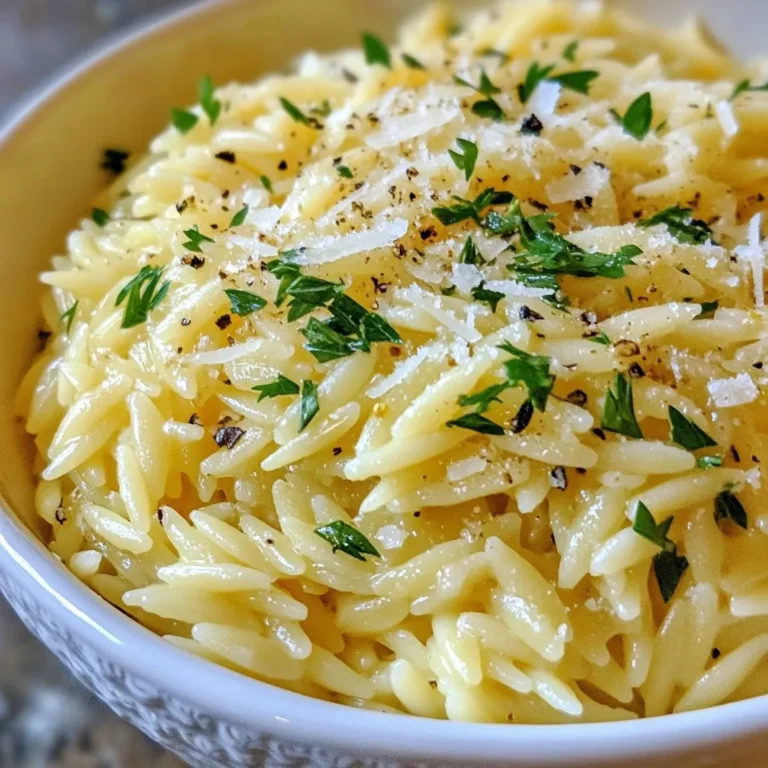
Garlic Butter Parmesan Orzo Flavorful and Simple Dish

PREV 1 … 68 69 70 … 72 NEXT
cozy citrus kitchen

explore

DessertsDinnerAppetizersDrinks

Our Policies

  • Cookie Policy
  • Copyright Policy
  • Disclaimer
  • GDPR Policy
  • Terms Of Use
Back to Top
  • About
  • Contact Us
  • Privacy Policy
© 2026 cozy citrus kitchen