FREE DINNER EBOOK! Get your copy!
  • Cookie Policy
  • GDPR Policy
  • Disclaimer
  • Terms Of Use
  • Visit my other site: Fun Cookie Recipes
cozy citrus kitchen
  • Home
  • Dinner
  • Desserts
  • Drinks
  • Appetizers
  • Contact
  • About
  • Privacy Policy
  • Home
  • Dinner
  • Desserts
  • Drinks
  • Appetizers
  • Contact
  • About
  • Privacy Policy
  • Cookie Policy
  • GDPR Policy
  • Disclaimer
  • Terms Of Use
Visit my other site: Fun Cookie Recipes

HOME / CATEGORIES /

Latest

- 2 cups all-purpose flour - 1 cup granulated sugar - ½ cup unsalted butter, softened - 1 cup sour cream - 1 tablespoon ground cinnamon - ½ cup brown sugar - 1 cup chopped pecans (optional) - 1 ½ teaspoons baking powder - ½ teaspoon baking soda - ½ teaspoon salt - 1 large egg - 1 teaspoon vanilla extract Gathering your ingredients is key to making this cake a success. Start with two cups of all-purpose flour. This will provide the base for your cake. Then, grab one cup of granulated sugar to sweeten it up. You need half a cup of unsalted butter, softened, which helps to create a rich texture. Next, you will want one cup of sour cream. This gives the cake moisture and a nice tang. For the cinnamon sugar mixture, you need one tablespoon of ground cinnamon. This will be the star of your flavor. You also need half a cup of brown sugar, which adds a lovely depth. If you like, add one cup of chopped pecans for a crunchy twist. Now, let’s not forget the baking essentials. You will need one and a half teaspoons of baking powder to help your cake rise. You also want half a teaspoon of baking soda and half a teaspoon of salt to balance the flavors. Don’t forget one large egg to bind everything together. Finally, add one teaspoon of vanilla extract for that warm, inviting aroma. With these ingredients ready, you’re set to make a delightful cinnamon roll coffee cake! {{ingredient_image_1}} - Preheat the oven to 350°F (175°C). - Grease a 9x13 inch baking dish. Start by making your kitchen warm and inviting. Preheating the oven helps the cake rise well. Greasing the dish helps the cake come out easily after baking. - Combine dry ingredients in a bowl. - Add wet ingredients and mix until smooth. In a large bowl, whisk together 2 cups of flour, 1 cup of sugar, 1 ½ teaspoons of baking powder, ½ teaspoon of baking soda, and ½ teaspoon of salt. This mix gives the cake its structure. Next, add ½ cup of softened butter, 1 large egg, 1 teaspoon of vanilla extract, and 1 cup of sour cream. Use an electric mixer to blend everything until smooth. This should take about 2-3 minutes. - Prepare the cinnamon sugar mixture. - Layer the batter and sprinkle the cinnamon sugar mixture. In a separate bowl, mix 1 tablespoon of ground cinnamon with ½ cup of brown sugar. If you like nuts, add 1 cup of chopped pecans. This mixture gives a sweet crunch. Pour half of the batter into the greased dish and spread it out. Sprinkle half of the cinnamon mixture over the batter. Pour the rest of the batter on top and spread it gently. Finally, add the rest of the cinnamon sugar on top for a sweet finish. - Create a swirl with a knife. - Bake and cool the cake. Using a butter knife or skewer, gently swirl through the batter. This adds a nice marble effect. Place the dish in the preheated oven. Bake for 30-35 minutes. Check if it’s done by inserting a toothpick in the center; it should come out clean. Let the cake cool in the pan for about 10 minutes. Then transfer it to a wire rack. Enjoy this sweet treat warm or at room temperature! - Use fresh ingredients for better flavor. Fresh eggs and baking powder help the cake rise nicely. - Ensure butter is softened for easier mixing. Soft butter blends well, making your batter smooth. - Serve warm with a glaze or icing. A simple glaze of powdered sugar and milk adds sweetness. - Pair with coffee or tea for breakfast or dessert. The warm cinnamon flavor complements drinks perfectly. - Tips for avoiding a dry cake: Make sure not to overmix the batter. Overmixing can lead to a tough texture. - Adjusting baking time for different ovens: Every oven is unique. Start checking a few minutes early to avoid overbaking. Pro Tips Use Room Temperature Ingredients: For the best texture, make sure your butter and egg are at room temperature before mixing. This helps create a smoother batter. Don’t Overmix the Batter: Mix just until combined to avoid a dense cake. Overmixing can lead to gluten development, which makes the cake tough. Customize Your Nuts: If you’re not a fan of pecans, try walnuts or even chocolate chips for a different twist on the classic cinnamon roll flavor. Check for Doneness: Ovens vary, so start checking your cake a few minutes before the recommended time. A toothpick should come out clean when it’s fully baked. {{image_2}} You can change up your cinnamon roll coffee cake with flavor additions. Adding chocolate chips gives a rich taste. You can use dark or milk chocolate, depending on your choice. You can also mix in fresh fruit like blueberries or raspberries. This adds a juicy burst of flavor. If you want a nutty twist, try substituting nuts. Chopped walnuts or almonds work well. They add crunch and a unique taste. You can even skip the nuts if you prefer a smoother texture. If you need gluten-free options, you can swap regular flour with gluten-free flour. Look for blends that mimic all-purpose flour. They work well for this recipe. For a dairy-free version, substitute unsalted butter with coconut oil or vegan butter. Instead of sour cream, you can use non-dairy yogurt. This keeps your cake moist and tasty while fitting your dietary needs. Get creative by mixing flavors! You can combine cinnamon roll coffee cake with other cake types. For example, a chocolate coffee cake adds a rich twist. Layer your cake with frosting to make it more like a dessert cake. A cream cheese frosting pairs nicely with the cinnamon flavor. This adds sweetness and a creamy texture, making each bite delightful. To store leftover cake at room temperature, place it in an airtight container. This keeps the cake fresh for about three days. If you don't have a container, you can cover the cake with plastic wrap. Make sure it is fully cooled before wrapping to avoid sogginess. For long-term storage, you can freeze the cake. First, let the cake cool completely. Then, slice it into squares. Wrap each slice in plastic wrap. Next, place all wrapped slices in a freezer bag or an airtight container. This keeps the cake fresh for up to three months. When ready to eat, remove a slice from the freezer and let it thaw in the fridge overnight. To reheat for the best taste, preheat your oven to 350°F (175°C). Place the slices on a baking sheet. Cover with foil to keep moisture in. Heat for about 10-15 minutes. You can also use the microwave. Heat each slice for about 20-30 seconds. Enjoy it warm for a delightful treat! Yes, you can make this cake ahead of time. Once baked, let it cool completely. Wrap it well in plastic wrap or foil. Store it at room temperature for up to three days. For longer storage, freeze it for up to three months. When ready to serve, simply thaw it overnight in the fridge. You can reheat slices in the microwave for a warm treat. If you don’t have sour cream, you can use plain yogurt. Greek yogurt works well. It gives a similar texture and tang. You can also mix milk with lemon juice or vinegar. Use one tablespoon of lemon juice or vinegar for each cup of milk. Let it sit for five minutes before using. To check if the cake is done, insert a toothpick into the center. If it comes out clean or with a few crumbs, it’s ready. If the toothpick has wet batter, it needs more time. You should also look for a golden-brown top. The edges may pull away from the pan slightly. Yes, you can use a different baking dish. If using a smaller dish, the cake may take longer to bake. If using a larger dish, the cake will bake faster. Always check for doneness with a toothpick, regardless of the dish size. Adjust baking times as needed based on how deep the batter is in the dish. You learned how to make a delicious Cinnamon Roll Coffee Cake. We covered the key ingredients like flour, butter, and sugar. The step-by-step instructions make it easy to follow. Remember to use fresh ingredients for the best taste and explore fun variations. You can decorate it or save leftovers for later. Enjoy this tasty treat for breakfast or dessert. With these tips, you’ll bake a perfect cake every time. Try it out and share your results!

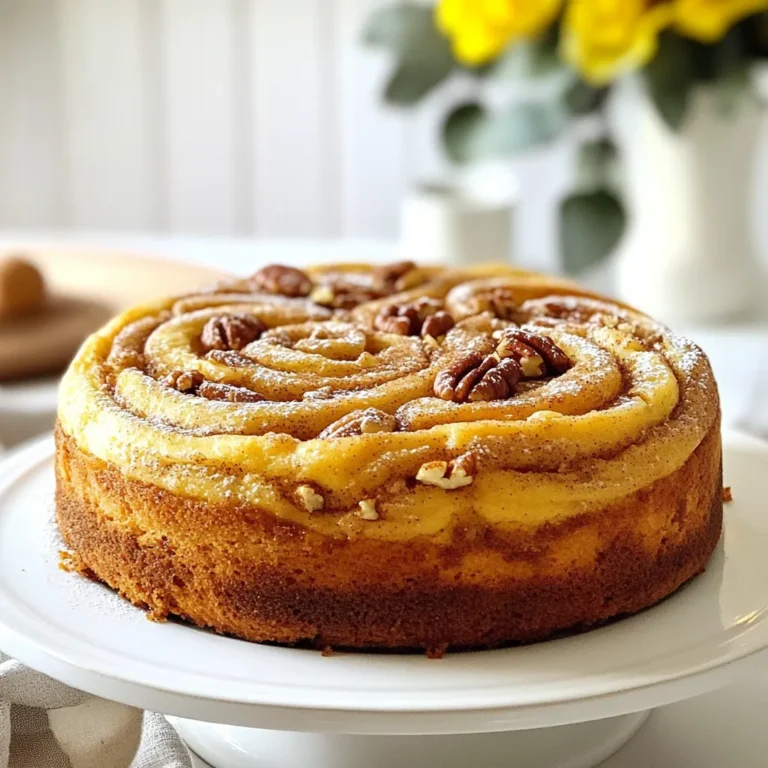
Cinnamon Roll Coffee Cake Delightful and Simple Recipe

For this Mango Avocado Salsa Chicken, you will need a few key items. Here’s what you’ll gather: - Chicken breasts: 4 boneless, skinless chicken breasts. - Marinade components: - 1 teaspoon garlic powder - 1 teaspoon cumin - 1 teaspoon paprika - 2 tablespoons olive oil - Salt and pepper to taste - Salsa ingredients: - 1 ripe mango, diced - 1 ripe avocado, diced - 1 small red onion, finely chopped - 1 jalapeño, deseeded and minced - 1/4 cup fresh cilantro, chopped - Juice of 1 lime - 1 tablespoon honey (optional for sweetness) Each of these ingredients plays a role in creating bright, bold flavors. The chicken absorbs the spices well, while the salsa adds freshness and creaminess. The sweet mango and creamy avocado work together nicely. The lime juice brightens it all up, making every bite a delight. {{ingredient_image_1}} 1. First, preheat your grill or stovetop grill pan over medium-high heat. This step ensures your chicken cooks evenly and gets those nice grill marks. 2. Next, prepare the marinade. In a small bowl, mix together 1 teaspoon of garlic powder, 1 teaspoon of cumin, 1 teaspoon of paprika, and 2 tablespoons of olive oil. Add salt and pepper to taste. This blend adds great flavor to the chicken. 1. Brush the marinade evenly on both sides of the chicken breasts. Make sure they are well coated. This helps keep the chicken juicy. 2. Grill the chicken for about 6-7 minutes on each side. You want the internal temperature to reach 165°F (75°C). The chicken should no longer be pink in the middle. 3. After grilling, let the chicken rest for a few minutes. This resting period helps the juices settle back in, making the chicken moist and tender. 1. While the chicken rests, prepare the mango avocado salsa. In a medium bowl, combine the diced mango, diced avocado, finely chopped red onion, minced jalapeño, chopped cilantro, lime juice, and honey if you want extra sweetness. 2. Gently toss all the ingredients together. Be careful not to mash the avocado. You want to keep the pieces intact for a nice texture in your salsa. Now your Mango Avocado Salsa Chicken is ready to enjoy! To grill chicken perfectly, set your grill to medium-high heat, around 375°F to 450°F. This temperature makes the chicken cook evenly and keeps it juicy. Place the chicken on the grill and cook it for 6-7 minutes on each side. To check doneness, use a meat thermometer. The chicken should reach 165°F (75°C). If you don’t have a thermometer, cut the chicken. The meat must be white, not pink. To boost the flavor of your salsa, consider adding spices. A pinch of chili powder or a dash of cayenne can add heat. You can also add diced bell peppers or corn for extra crunch. Try different herbs too. Mint or basil can give your salsa a fresh twist. Feel free to mix in some diced fruits like pineapple or peach for a sweet touch. Plating can turn a good meal into a great one. Slice the grilled chicken neatly and place it on a plate. Top it generously with the colorful mango avocado salsa. For garnishing, sprinkle fresh cilantro on top. You can also add lime wedges on the side for a pop of color. A colorful plate makes the dish more appealing and fun to eat! Pro Tips Marinate for Flavor: For even more flavor, let the chicken marinate in the seasoning mix for at least 30 minutes before grilling. Perfectly Ripened Avocado: Choose an avocado that yields slightly to gentle pressure for the best texture in your salsa. Adjust Heat Level: If you prefer a milder salsa, skip the jalapeño or remove the seeds and membranes before mincing. Serve with Sides: This dish pairs beautifully with rice or a fresh green salad for a complete meal. {{image_2}} You can switch out the chicken for shrimp or tofu. Both options work well and add a unique twist. If you want to try different fruits in your salsa, consider using pineapple or peach. These fruits will bring a nice sweetness and freshness to the dish. For those on a low-carb or keto diet, you can use skinless chicken thighs instead of breasts. This small change can keep the meal tasty and fit your diet. If you want a vegan or vegetarian option, try grilled portobello mushrooms instead of chicken. They have a meaty texture and soak up flavors well. You can bake or pan-sear the chicken if you don't have a grill. Baking takes about 25-30 minutes at 375°F (190°C). Make sure the chicken reaches 165°F (75°C). For the salsa, you can add new ingredients like diced bell peppers or mango chutney. These small changes give you a fresh take on the classic recipe. To keep your Mango Avocado Salsa Chicken fresh, store the chicken and salsa separately. This helps maintain the chicken's texture and prevents the salsa from getting mushy. Use airtight containers for storage. Glass containers work best, but any plastic container with a tight seal will do. - Place the chicken in a container with a lid. - Store the salsa in a different container. This way, both will stay fresh for longer. To reheat chicken without drying it out, use the oven. Preheat your oven to 350°F (175°C). Cover the chicken with foil and heat for about 15-20 minutes. This keeps the moisture in. For salsa, it’s best served cold, but if you want it warm, heat it gently on the stovetop. Use low heat and stir often. This helps prevent burning. Yes, you can freeze chicken. For best results, wrap the chicken tightly in plastic wrap, then place it in a freezer bag. Remove as much air as possible. It will stay fresh for up to three months. Salsa is not ideal for freezing. The texture changes when thawed. Instead, enjoy it fresh. If you have extra salsa, store it in the fridge for about 2-3 days. Can I make the mango avocado salsa ahead of time? Yes, you can make mango avocado salsa ahead of time. Store it in the fridge for up to two days. Just remember, the avocado may brown slightly. To slow this down, squeeze more lime juice on top. What sides pair well with Mango Avocado Salsa Chicken? This dish goes well with many sides. Here are some great options: - Rice or quinoa for a filling base - Black beans for added protein - Grilled veggies for a fresh crunch - Tortilla chips for a fun texture How long do I grill chicken for perfect results? Grill chicken for about 6-7 minutes on each side. Check that the internal temperature reaches 165°F (75°C). This ensures your chicken is juicy and safe to eat. Is the salsa safe for meal prep? Yes, the salsa is safe for meal prep. Just store it in an airtight container in the fridge. Use it within two days for the best taste and freshness. Can I use frozen mango or avocado for this recipe? You can use frozen mango, but fresh mango tastes better. Frozen avocado can be mushy, so I recommend fresh avocados instead. What if I can't find ripe avocados? If ripe avocados are hard to find, try these tips: - Look for avocados that yield slightly to gentle pressure. - Place firm avocados in a paper bag for a day or two to ripen. - If all else fails, use guacamole as a substitute. This blog post shared how to make delicious Mango Avocado Salsa Chicken. We covered ingredients, cooking steps, tips, and storage methods. Remember to marinate your chicken well and grill it to perfection. Fresh salsa adds flavor and color, making your dish pop. Experiment with different ingredients and storage practices for variety. Enjoy this tasty meal that impresses family and friends! Eating well can be simple and fun. Try out these recipes, and make it your own!

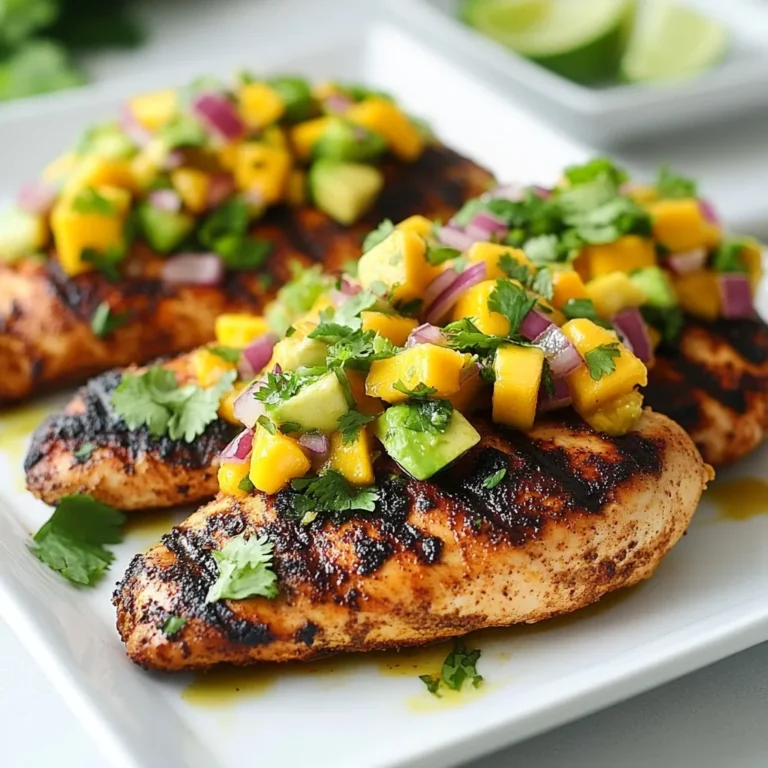
Mango Avocado Salsa Chicken Flavorful and Simple Meal

For the Spicy Garlic Noodle Stir-Fry, you will need: - 8 oz. rice noodles - 2 tablespoons vegetable oil - 4 cloves garlic, minced - 1 teaspoon ginger, grated - 1 red bell pepper, sliced - 1 cup sugar snap peas - 2 green onions, chopped - 3 tablespoons soy sauce - 1 tablespoon sriracha (adjust to taste) - 1 tablespoon sesame oil - Sesame seeds for garnish - Fresh cilantro for garnish These ingredients create a colorful and tasty dish that bursts with flavor. If you need to swap ingredients, here are some ideas: - Use any noodles you like, such as egg noodles or udon. - Swap vegetable oil for olive oil or peanut oil. - For garlic lovers, add more garlic for extra flavor. - If you don’t have sriracha, try hot sauce or chili paste. - Replace red bell pepper with yellow or green peppers. These substitutions keep the dish delicious while fitting your pantry. Using fresh ingredients enhances the taste of your dish. Fresh garlic and ginger give a strong flavor. Fresh veggies add crunch and color. However, dried or pre-minced options can save time. Just remember, fresh tends to be tastier. If you use dried ginger or garlic, start with less. Adjust as you taste. Now you have all the details you need to gather your ingredients and start cooking! {{ingredient_image_1}} To start, cook the rice noodles. Follow the instructions on the package. Usually, it takes about 5-7 minutes. Drain them well and set them aside. Make sure they don't stick together. A little oil can help if needed. Next, grab a large wok or skillet. Heat 2 tablespoons of vegetable oil over medium-high heat. Add 4 minced cloves of garlic and 1 teaspoon of grated ginger. Sauté these for about 30 seconds until they smell great. Then, toss in 1 sliced red bell pepper and 1 cup of sugar snap peas. Stir-fry these for about 3-4 minutes. They should soften but still stay crisp. Now, it's time to mix everything. Add the cooked rice noodles to the pan. Stir to combine them with the vegetables. Pour in 3 tablespoons of soy sauce, 1 tablespoon of sriracha, and 1 tablespoon of sesame oil. Mix well so the noodles soak up the sauce. Continue to stir-fry for another 2-3 minutes. Everything should be hot and mingled well. Finally, fold in 2 chopped green onions. Transfer your stir-fry to a serving dish. Garnish with sesame seeds and fresh cilantro for that extra touch. Enjoy your meal! To boost the heat, use more sriracha or add red pepper flakes. You can also try fresh chili peppers. Slice them thin and mix them in. For a smoky flavor, add chipotle powder. Adjust the amount based on your taste. You want a balance that excites your palate. For the best texture, cook the rice noodles just right. Follow the package instructions closely. Drain them thoroughly to avoid sogginess. Rinse them with cold water after draining. This stops the cooking process and keeps them firm. Toss the noodles with a little oil to prevent sticking. Use a hot wok for great stir-frying. Heat the oil until it shimmers. Add garlic and ginger for a quick sizzle. Keep stirring to avoid burning. Add your veggies in batches. This keeps them crisp and colorful. Don’t overcrowd the pan; it can lead to steaming instead of frying. Stir quickly for even cooking and flavor mixing. Pro Tips Cook Noodles Al Dente: To prevent the noodles from becoming mushy, cook them just until they are al dente. They will continue to cook slightly when stir-fried. Customize Spice Level: Adjust the amount of sriracha based on your heat preference. You can also add fresh chilies for an extra kick. Add Protein: For a more filling meal, consider adding protein like tofu, chicken, or shrimp. Cook them before adding the vegetables. Fresh Herbs Make a Difference: Garnish with freshly chopped cilantro or basil for added flavor and freshness in every bite. {{image_2}} You can easily add protein to your spicy garlic noodle stir-fry. Chicken, tofu, and shrimp are great choices. If you use chicken, cut it into small pieces and cook it first. Sauté the chicken in the wok until it turns golden brown. Then, add garlic and ginger as you normally would. For tofu, use firm or extra-firm tofu. Cube it and pan-fry until it's crispy. Shrimp cooks fast, so add it right before the noodles. Cook until it turns pink and opaque. Feel free to swap or add vegetables to your stir-fry. You can use broccoli, carrots, or bok choy. These veggies add color and crunch. If you want a touch of sweetness, try adding baby corn or snap peas, just like in the recipe. Make sure to cut the veggies into bite-sized pieces. This helps them cook evenly and blend well with the noodles. If you need a gluten-free option, substitute regular soy sauce with tamari. Tamari tastes just as good and is safe for gluten-free diets. You can also look for gluten-free rice noodles. They work perfectly in this dish. Just follow the cooking instructions on the package. Enjoy your spicy garlic noodle stir-fry with these simple swaps! After a tasty meal, let the Spicy Garlic Noodle Stir-Fry cool. Use a clean, airtight container. Store the noodles in the fridge for up to three days. If you leave them out too long, they can spoil. Always check for any odd smells or colors before eating leftovers. To reheat, use a pan on medium heat. Add a splash of water or oil to prevent sticking. Stir the noodles for about five minutes. You can also use a microwave. Heat in short bursts, stirring every 30 seconds. This helps keep the noodles moist and tasty. You can freeze this dish if you want it later. Use a freezer-safe container, leaving space at the top. The noodles can stay good for up to a month. When you are ready to eat, thaw them in the fridge overnight. Reheat as mentioned above for the best taste. Rice noodles work best for stir-fry. They cook quickly and soak up flavors well. You can also use egg noodles or udon if you prefer a chewier texture. Each type offers a unique taste and feel, so choose based on your liking. Yes, you can easily make this dish vegetarian. Use vegetable oil and replace any meat with tofu or extra veggies. This keeps the dish flavorful and satisfying. You can also add more protein by including edamame or chickpeas. You can adjust the spice level by changing the amount of sriracha. Start with less if you prefer mild heat. Taste as you go, and add more if you want it spicier. You can also add red pepper flakes for an extra kick. This article covered tasty ingredients, step-by-step cooking, and useful tips for stir-frying. I shared ways to substitute ingredients and different noodle types. You learned how to enhance flavors and make your dish unique with protein and veggies. When storing leftovers, remember the best methods for freezing and reheating. Use this guide to create delicious meals. Cooking can be fun with the right approach and knowledge. Enjoy your tasty stir-fry adventure!

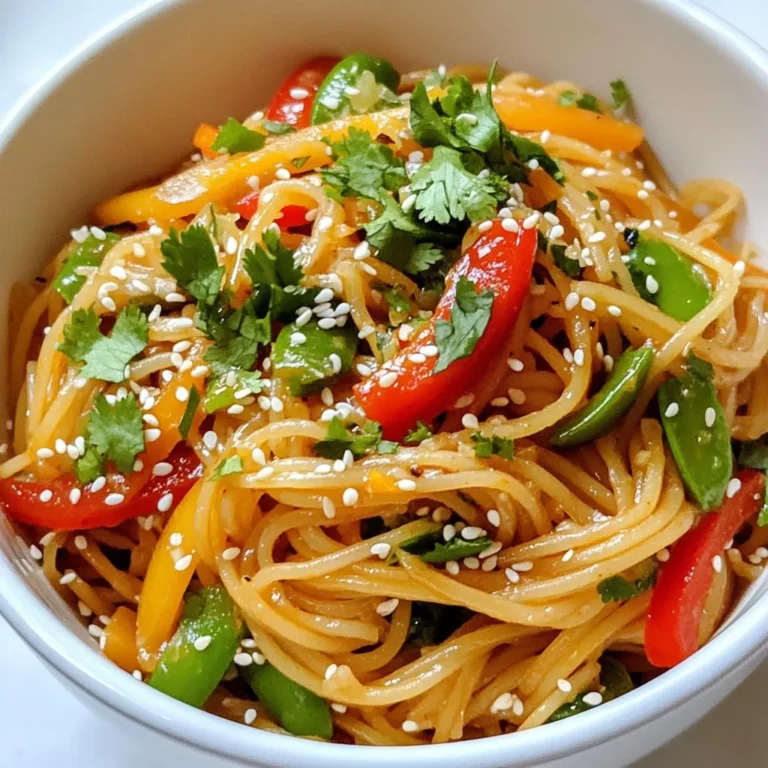
Spicy Garlic Noodle Stir-Fry Flavorful Dinner Recipe

To make mushroom spinach lasagna rolls, you need the right ingredients. Here’s what you will need: - 8 lasagna noodles - 1 tablespoon olive oil - 1 small onion, finely chopped - 2 cloves garlic, minced - 8 ounces mushrooms, sliced (cremini or button) - 4 cups fresh spinach - 1/2 teaspoon dried oregano - 1/2 teaspoon salt - 1/4 teaspoon black pepper - 1 cup ricotta cheese - 1 cup shredded mozzarella cheese, divided - 1/2 cup grated Parmesan cheese - 1 cup marinara sauce These ingredients come together to create a dish that is both simple and full of flavor. The lasagna noodles serve as a cozy blanket for the filling. The olive oil helps to sauté the onion and garlic, adding depth to the dish. Fresh mushrooms and spinach bring earthy notes and vibrant color. The cheeses layer in creaminess, while the marinara ties everything together with its rich taste. When you gather these ingredients, think about how each one works together. The balance of flavors and textures makes this dish truly special. Enjoy the process of preparing your mushroom spinach lasagna rolls! {{ingredient_image_1}} First, cook 8 lasagna noodles in boiling water. Follow the package instructions. You want them al dente, which means they should be firm but not hard. This keeps them from falling apart later. After cooking, drain the noodles. Place them on a clean kitchen towel to avoid sticking. You can also drizzle a bit of olive oil on them for extra help. In a large skillet, heat 1 tablespoon of olive oil over medium heat. Add 1 small, finely chopped onion. Cook it until it turns translucent, which takes about 3-4 minutes. Next, add 2 cloves of minced garlic and 8 ounces of sliced mushrooms. Cook for around 5-7 minutes. The mushrooms should soften and release their liquid. Then, toss in 4 cups of fresh spinach, 1/2 teaspoon of dried oregano, 1/2 teaspoon of salt, and 1/4 teaspoon of black pepper. Cook everything until the spinach wilts, which should take about 2-3 minutes. Remove the skillet from heat and let it cool for a few minutes. In a mixing bowl, combine your cooked mushroom-spinach mix with 1 cup of ricotta cheese. Add 1/2 cup of shredded mozzarella cheese and 1/4 cup of grated Parmesan cheese. Mix well to ensure everything blends together. This filling should be creamy but not too runny. If it feels too loose, add more cheese to firm it up. Take one lasagna noodle and place about 2-3 tablespoons of the filling at one end. Roll it tightly from that end. Place the roll seam-side down in a baking dish. Repeat this step for the rest of the noodles and filling. Once all rolls are in the dish, pour 1 cup of marinara sauce over them. Make sure each roll is well covered. Sprinkle the rest of the mozzarella and Parmesan cheese on top. Cover the baking dish with foil. Bake in a preheated oven at 375°F (190°C) for 25 minutes. After that, remove the foil and bake for another 15 minutes. This helps the cheese get bubbly and golden. Let the lasagna rolls cool for about 5 minutes before serving. Serve them hot and enjoy! To make your Mushroom Spinach Lasagna Rolls shine, add fresh herbs. Basil and thyme work well. They bring a fresh taste that lifts every bite. You can also try spices like red pepper flakes for a kick. For cheese, consider using goat cheese or cottage cheese. These options add creaminess and change the flavor profile. Mixing cheeses can create a unique taste that surprises your guests. One common mistake is overcooking the noodles. If they are too soft, they may tear when you roll them. Cook them just until al dente. This keeps them firm and easy to handle. Another mistake is not using enough sauce. A good amount of marinara sauce helps keep the rolls moist. It also adds flavor. Make sure you cover each roll well with sauce before baking. Garnishing is key for a beautiful dish. Fresh basil or parsley adds color and freshness. A sprinkle of grated Parmesan on top gives a nice touch too. For side dishes, serve your lasagna rolls with mixed greens. A simple salad with a light vinaigrette pairs well. This adds a nice crunch and balances the meal. Pro Tips Use Fresh Ingredients: Opt for fresh mushrooms and spinach for maximum flavor and nutritional benefits. Prevent Sticking: Lay cooked lasagna noodles flat on a clean kitchen towel to prevent them from sticking together. Cheese Varieties: Experiment with different cheeses like goat cheese or feta for a unique twist on the filling. Make Ahead: Assemble the rolls a day in advance and store in the fridge. Just add a few extra minutes to the baking time! {{image_2}} - Gluten-free options: You can use gluten-free lasagna noodles. Many brands offer great taste and texture. Cook them as directed. This makes the dish friendly for those with gluten allergies. - Vegan alternatives: Swap ricotta with tofu or cashew cheese. Use nutritional yeast to add a cheesy flavor. Replace mozzarella and Parmesan with plant-based cheeses. This way, everyone can enjoy the meal. - Adding different vegetables: Try zucchini, bell peppers, or kale for extra nutrients. Just sauté them like the mushrooms. They add color and taste to your dish. - Using various sauces: Besides marinara, you can use pesto or Alfredo sauce. Each sauce brings its own unique taste. Mix and match to find your favorite. - Pairing with salads: A fresh green salad works well. Toss in some cherry tomatoes and cucumber for a crunchy bite. The salad adds lightness to the rich rolls. - Suggested wine pairings: A light red wine like Pinot Noir complements the dish. If you prefer white, try Chardonnay. Both enhance the flavors of the lasagna rolls. To keep your Mushroom Spinach Lasagna Rolls fresh, use these tips: - Refrigeration tips: Store leftovers in an airtight container. They will stay good in the fridge for up to four days. Make sure to cool them down before sealing the container. - Freezing guidelines: For longer storage, freeze the lasagna rolls. Wrap each roll in plastic wrap, then place them in a freezer-safe bag. They can last for up to three months in the freezer. When you’re ready to eat, thaw them overnight in the fridge. To enjoy your lasagna rolls again, follow these steps: - Best methods for reheating: The oven works best for reheating. Preheat it to 350°F (175°C). Place the rolls in a baking dish and cover with foil. Heat for about 20-25 minutes until warmed through. - Ensuring the dish remains moist: Add a splash of marinara sauce over the rolls before reheating. This helps keep the dish moist and tasty. If you use a microwave, cover the dish with a damp paper towel to keep the moisture in. Heat in short bursts to avoid drying out the rolls. Yes, you can prepare these rolls ahead of time. Make the filling and assemble the rolls. Cover them tightly with plastic wrap or foil. Store them in the fridge for up to 24 hours before baking. If you want to freeze them, put them in a safe container. They can last up to three months in the freezer. When ready to cook, thaw them overnight in the fridge. Then, bake as instructed. If you need a ricotta substitute, try cottage cheese. Blend it for a smoother texture. You can also use cream cheese or goat cheese for a richer taste. Mashed tofu works well for a vegan option. Add a splash of lemon juice for more flavor. Each option will give a different taste, so choose what you like best. These lasagna rolls can last in the fridge for 3 to 5 days. Make sure to store them in an airtight container. Always check for any signs of spoilage before eating. If they smell off or look strange, it's best to toss them. Enjoy them warm for a comforting meal. Yes, you can use no-boil lasagna noodles! Layer them with sauce and filling just like regular noodles. No-boil noodles absorb moisture from the sauce while baking. You may need to add extra sauce to ensure they cook well. Follow the package instructions for baking time, as it may vary. This saves time and effort, making your cooking easier. In this post, we covered the key ingredients for delicious Mushroom Spinach Lasagna Rolls, along with step-by-step instructions. I shared tips to enhance flavor and avoid common mistakes, as well as variations to suit dietary needs. Remember, storing and reheating correctly keeps your dish fresh. With these guidelines, you can create a tasty meal everyone will love. Cooking should be fun and rewarding, so try these ideas and enjoy your time in the kitchen. Your lasagna journey starts now!

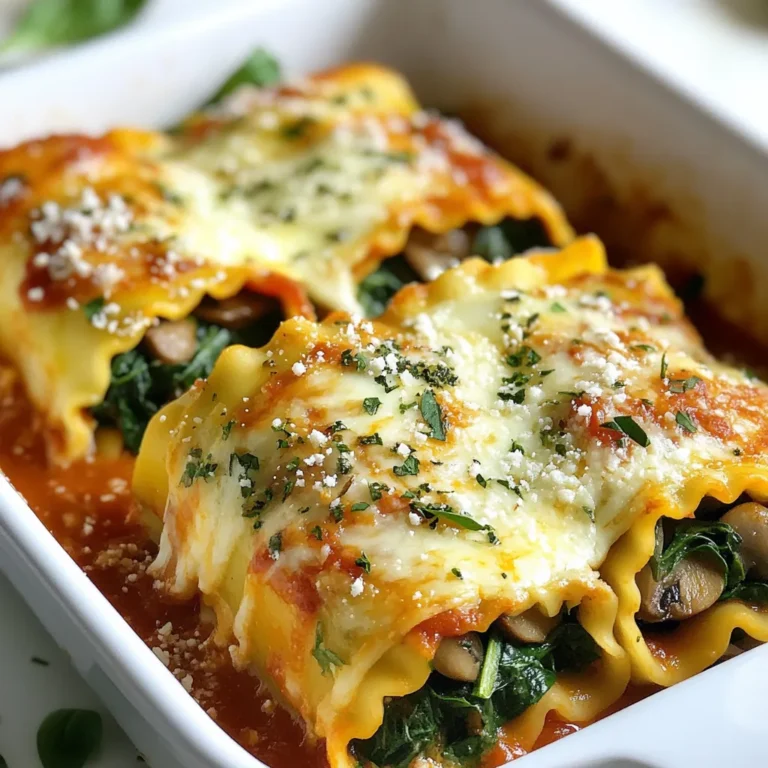
Mushroom Spinach Lasagna Rolls Simple and Flavorful Dish

To make delicious roasted red pepper hummus, you need: - 1 cup roasted red peppers (jarred or homemade) - 1 can (15 oz) chickpeas, drained and rinsed - 1/4 cup tahini - 2 tablespoons olive oil - 2 tablespoons lemon juice - 1 clove garlic, minced - Salt and pepper to taste These ingredients come together to create a creamy and flavorful hummus. The roasted peppers add a sweet and smoky flavor that pairs well with chickpeas. Tahini gives it a rich texture. The lemon juice and garlic enhance the taste, making it irresistible. For a fresh crunch, you will need: - 4 large whole wheat tortillas - 1 cup fresh spinach leaves - 1 cup cherry tomatoes, halved - 1/2 cucumber, thinly sliced These fresh veggies add color and nutrients. Spinach packs in vitamins, while tomatoes and cucumbers provide hydration and crunch. Whole wheat tortillas offer fiber and make the wrap filling more satisfying. To take your wraps to the next level, consider adding: - Feta cheese crumbles (optional) Feta adds a tangy flavor that complements the hummus well. You can sprinkle it on top for a delicious finish. If you want a more substantial meal, feel free to add more toppings like olives or roasted veggies. {{ingredient_image_1}} To start, gather your ingredients. You need roasted red peppers, chickpeas, tahini, olive oil, lemon juice, garlic, salt, and pepper. Place all these in your food processor. Blend them together until smooth. If it is too thick, add a bit more olive oil. Taste it and adjust the salt and pepper as needed. This hummus will be creamy and full of flavor. Now, take your large whole wheat tortillas. Lay them flat on a clean surface. Use a spatula or knife to spread a thick layer of the hummus on each tortilla. Leave a small space at the edges. Next, layer fresh spinach leaves, halved cherry tomatoes, and thin cucumber slices over the hummus. If you like cheese, sprinkle some feta on top. Carefully roll each tortilla from one end to the other. Make sure it is tight but not too tight. Once rolled, use a sharp knife to cut the wraps in half diagonally. This makes them easier to eat. You can serve them right away or wrap them in parchment paper. For a nice touch, add extra cherry tomatoes and cucumber slices on the side. Drizzle with olive oil and sprinkle fresh herbs for a lovely look. To make your hummus super creamy, start with the right ingredients. Use jarred or homemade roasted red peppers. The chickpeas should be drained and rinsed well. Adding tahini, olive oil, and lemon juice helps blend things smoothly. Blend until it looks silky. If it’s too thick, add a bit of water or more olive oil. Scraping down the sides of the bowl can help mix everything evenly. If you have extra wraps, store them right to keep them fresh. Wrap them in parchment paper to hold in moisture. Place them in an airtight container or a zip-top bag. Try to remove as much air as you can. Store them in the fridge for up to three days. For longer storage, you can freeze the wraps. Just make sure to wrap them well to avoid freezer burn. Adding herbs and spices can take your wraps to the next level. Fresh herbs like basil or parsley add a burst of flavor. You can also sprinkle in some cumin or smoked paprika for warmth. For a kick, try adding red pepper flakes. Mixing in these flavors with the hummus will make it even tastier. Remember to taste as you go, so you find the right balance! Pro Tips Make Your Own Roasted Peppers: If you have the time, roasting your own red peppers adds a deeper flavor to the hummus. Simply char them on a grill or in the oven until the skin is blackened, then peel and use. Experiment with Spices: Feel free to add spices like cumin or smoked paprika to the hummus for an extra flavor kick. Just a pinch can transform the taste! Wrap Tightly: When rolling your wraps, make sure to roll them tightly for easy handling and to prevent the filling from spilling out. Chill Before Serving: After assembling the wraps, let them chill in the refrigerator for about 30 minutes. This helps the flavors meld together and makes them easier to slice. {{image_2}} You can switch up the ingredients in your hummus. Try using roasted garlic instead of fresh garlic for a sweeter taste. You can also add some spices like cumin or smoked paprika for extra flavor. For a creamier texture, add a bit of Greek yogurt. If you want a nutty twist, try almond butter in place of tahini. These changes keep the hummus fresh and fun. If you need gluten-free wraps, use rice paper, lettuce leaves, or gluten-free tortillas. These options work great and are easy to find. For a low-carb choice, try using collard greens or zucchini slices instead of traditional tortillas. These wraps taste good and cut down on carbs. You can still enjoy all the flavors while sticking to your diet needs. Seasonal ingredients make your wraps even better. In the summer, use fresh basil or arugula instead of spinach. In the fall, try adding roasted butternut squash or sweet potatoes for a cozy touch. Winter brings hearty greens like kale. In spring, fresh peas or radishes can add a nice crunch. Changing the ingredients based on the season brings new life to your wraps. To keep your wraps fresh, wrap them tightly in plastic wrap. This helps prevent air from getting in. You can also use a container with a lid. Store them in the fridge. They stay good for about 2 to 3 days. If you want, you can cut them in half before storing. This makes them easy to grab later. If you want to save wraps for later, freezing is a great choice. First, wrap each one in plastic wrap. Then, place them in a freezer bag. Be sure to squeeze out as much air as possible. They can last for up to 3 months in the freezer. When you are ready to eat, just thaw them in the fridge overnight. To reheat your wraps, take them out of the fridge or freezer. If they are frozen, let them thaw first. You can reheat them in a skillet over medium heat. Cook each side for about 2 to 3 minutes until warm. This keeps the wrap nice and soft. You can also use the microwave. Just wrap them in a damp paper towel and heat for about 30 to 40 seconds. Enjoy your tasty meal! Yes, you can use store-bought hummus. It saves time and still tastes great. Just choose a flavor you like. A roasted red pepper flavor works best for this wrap. You can skip blending and go straight to assembly. These wraps stay fresh for about three days in the fridge. Store them in an airtight container. If you are worried about sogginess, wrap them in parchment paper first. This helps keep the tortillas from getting too soft. If you don’t have tahini, try peanut butter or almond butter. These will change the taste but still give creaminess. You can also use sunflower seed butter for a nut-free option. Just keep in mind the flavor will differ slightly. Roasted red pepper hummus wraps are simple and tasty. We explored key ingredients that boost flavor and texture. I shared steps to blend the perfect hummus and assemble delicious wraps. Tips helped you achieve creaminess and store leftovers right. Various options make this dish fit any diet. Enjoy your wraps now, and remember, creativity is key!

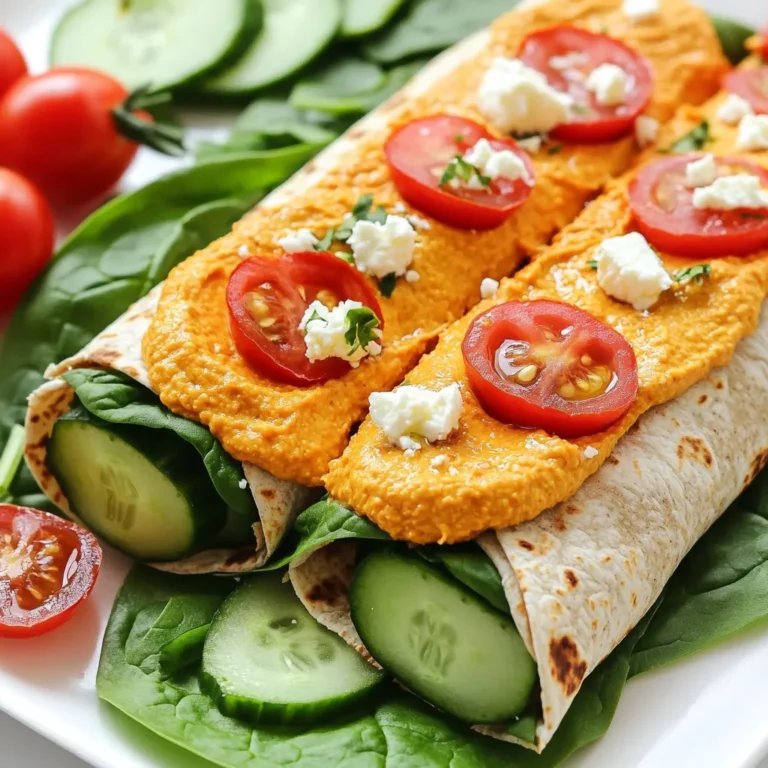
Roasted Red Pepper Hummus Wraps Healthy and Tasty Meal

- 8 ounces elbow macaroni - 2 cups cooked chicken, shredded - 1 cup buffalo wing sauce - 2 tablespoons unsalted butter - 1 tablespoon all-purpose flour - 2 cups milk - 2 cups shredded sharp cheddar cheese - 1 cup shredded mozzarella cheese - 1 teaspoon garlic powder - 1 teaspoon onion powder - Salt and pepper to taste - 1/4 cup chopped green onions (for garnish) The main ingredients create a solid base for your dish. The elbow macaroni holds the sauce well. The chicken adds protein and flavor, while buffalo wing sauce gives it that signature kick. - 1/4 cup crumbled blue cheese (optional) Adding blue cheese can enhance the dish. It adds a rich, tangy taste that pairs well with buffalo sauce. You can also use ranch dressing for a creamier flavor. - Sharp cheddar cheese - Mozzarella cheese Sharp cheddar brings a bold taste to the dish. Mozzarella adds creaminess and stretch. You can mix in other cheeses like gouda or pepper jack for more depth. Experimenting with different cheeses can make your mac and cheese unique! {{ingredient_image_1}} Start with a large pot. Fill it with water and add salt. Bring the water to a boil. Add 8 ounces of elbow macaroni. Cook the pasta according to the package instructions. Aim for al dente, which means it should still have a bite. Once done, drain the pasta and set it aside. In the same pot, melt 2 tablespoons of unsalted butter over medium heat. Once the butter melts, stir in 1 tablespoon of all-purpose flour. This creates a roux. Cook it for about 1 minute until it turns golden. Gradually whisk in 2 cups of milk. Make sure there are no lumps. Keep whisking until the sauce thickens. This should take about 3 to 5 minutes. Remove the pot from the heat. Now, stir in 2 cups of shredded sharp cheddar cheese and 1 cup of shredded mozzarella cheese. Mix until the cheese melts and becomes creamy. Next, add 2 cups of shredded chicken and 1 cup of buffalo wing sauce. Season with 1 teaspoon of garlic powder, 1 teaspoon of onion powder, salt, and pepper to taste. Mix well to combine all the flavors. Add the cooked macaroni back into the pot. Stir until every piece of pasta is coated in the cheesy buffalo sauce. For serving, spoon the buffalo chicken mac and cheese into bowls or a baking dish. Top it off with 1/4 cup of chopped green onions. If you like blue cheese, sprinkle 1/4 cup of crumbled blue cheese on top. Enjoy this delightful dish! To make a creamy cheese sauce, start with a roux. Melt butter in your pot. Add flour and stir for one minute. This thickens the sauce. Next, slowly add milk while whisking. This step helps avoid lumps. Keep stirring until the sauce thickens, around three to five minutes. Remove the pot from heat before adding cheese. Stir in sharp cheddar and mozzarella until melted. The sauce should be smooth and creamy. Buffalo chicken mac and cheese can be spicy. To control the heat, use less buffalo wing sauce. You can mix in some sour cream for creaminess and coolness. If you like more heat, add extra wing sauce. Taste as you go to find your perfect balance. Remember, each brand of sauce has its own spice level. If you have leftovers, store them in an airtight container. This keeps the dish fresh for three to four days. You can also freeze it for a longer shelf life. Just make sure to cool it first before freezing. To reheat, use the oven or microwave. Add a splash of milk if the sauce is too thick after reheating. This will help restore its creaminess. Pro Tips Use High-Quality Cheese: Opt for sharp cheddar and fresh mozzarella for the best flavor and creaminess in your mac and cheese. Customize the Heat: Adjust the amount of buffalo sauce according to your spice preference; start with less and add more as needed. Make It Ahead: Prepare the dish in advance and refrigerate it; bake it right before serving for a quick meal option. Add Extra Ingredients: Feel free to mix in vegetables like spinach or broccoli for added nutrition and color in your dish. {{image_2}} You can make a tasty vegetarian version of Buffalo Chicken Mac and Cheese. Instead of chicken, use cooked cauliflower or chickpeas. These options add texture and protein. You can also add some sautéed bell peppers or spinach for color and nutrients. Use vegetable broth instead of chicken broth in your cheese sauce. This keeps the flavor rich and hearty. For a gluten-free version, swap regular macaroni for gluten-free pasta. Many brands make great gluten-free pasta that holds up well. For the sauce, use a gluten-free flour blend in place of all-purpose flour. This keeps the sauce thick and creamy. Check your buffalo wing sauce for gluten, as some brands add wheat. You can change the flavor of your Buffalo Chicken Mac and Cheese with a few fun twists. For a BBQ flavor, mix in some barbecue sauce with the buffalo sauce. This gives a sweet and smoky taste. If ranch is your favorite, add ranch seasoning to the cheese sauce. You can also mix in some hot sauce for extra heat. Each of these options gives a new spin to your dish, making it even more exciting. After you enjoy your Buffalo Chicken Mac and Cheese, store leftovers in an airtight container. This keeps the taste fresh. Make sure to let it cool first. Place it in the fridge if you plan to eat it within three days. For longer storage, follow the freezing steps below. To reheat, use the microwave or stovetop. If using the microwave, place the mac and cheese in a microwave-safe bowl. Heat it in short bursts, stirring in between. This ensures even warming. On the stovetop, warm it over low heat. Add a splash of milk to keep it creamy. Stir often to avoid burning. For freezing, place the cooled mac and cheese in a freezer-safe container. Seal it tightly to prevent freezer burn. It will stay good for up to three months. When you are ready to eat it, defrost in the fridge overnight. Reheat as mentioned above for the best taste. Buffalo chicken mac and cheese is a fun twist on the classic dish. It has creamy cheese, tender pasta, and spicy buffalo chicken. The dish is rich in flavor and texture. You get the warmth from the cheese and a kick from the buffalo sauce. It’s a comfort food that blends two favorites into one tasty meal. Yes, you can make buffalo chicken mac and cheese ahead of time. Just prepare the dish up to the baking step. Then, store it in the fridge for up to two days. When you’re ready to serve it, bake it at 350°F until it’s hot and bubbly. This makes it perfect for busy nights or gatherings. Buffalo chicken mac and cheese pairs well with many sides. Here are some tasty options: - Celery sticks: They add a nice crunch. - Carrot sticks: They offer a sweet balance. - Green salad: A fresh salad can lighten the meal. - Garlic bread: This adds a comforting touch. These sides round out your meal and keep it fun! Buffalo Chicken Mac and Cheese combines bold flavors with a creamy texture. We covered essential ingredients, steps, and tips to create this dish. You learned how to cook pasta, prepare cheese sauce, and assemble everything. I shared storage tips for your leftovers and fun variations to try. This dish is a crowd-pleaser and easy to make. Enjoy experimenting with flavors and serving options. Your kitchen can become a hub of delicious meals with Buffalo Chicken Mac and Cheese!

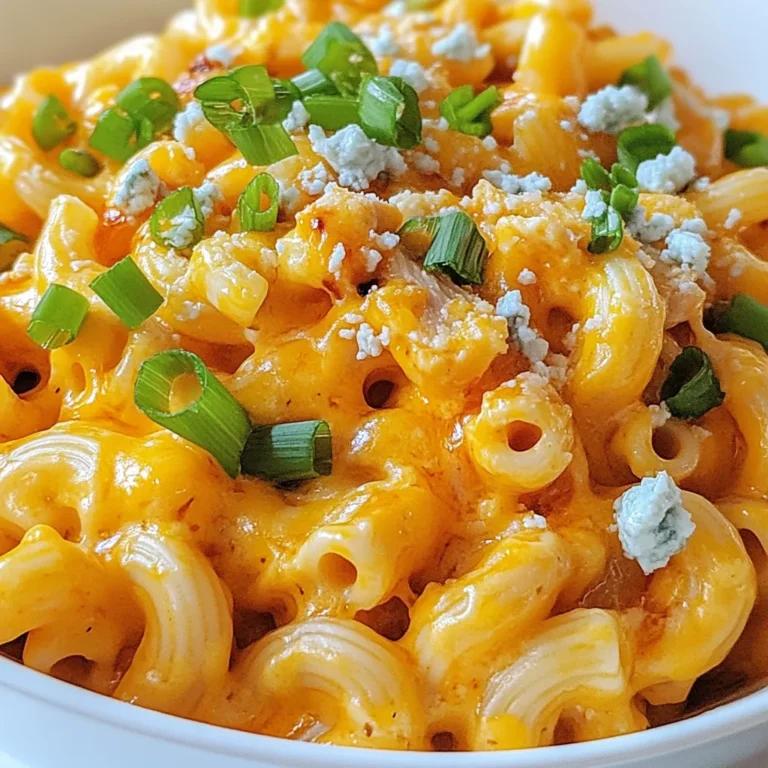
Buffalo Chicken Mac and Cheese Delightful Comfort Meal

- 4 bone-in, skin-on chicken thighs - 1/4 cup honey - 2 tablespoons soy sauce - 2 tablespoons apple cider vinegar - 1 tablespoon sriracha (adjust to taste) - 3 cloves garlic, minced - 1 tablespoon fresh ginger, grated - 1 teaspoon smoked paprika - 1/2 teaspoon black pepper - 1/2 teaspoon salt - 2 green onions, sliced (for garnish) - Sesame seeds (for garnish) To make these sweet and spicy chicken thighs, you need a few tools. Grab a skillet, an oven-safe dish, and a resealable bag. Using bone-in, skin-on chicken thighs is key. The skin adds flavor and keeps the meat juicy. Bone-in thighs stay moist during cooking. This makes every bite tender and flavorful. You can switch things up if you want. Try boneless thighs, but keep in mind that cooking times change. Enjoy the cooking journey. It's all about finding what you love! {{ingredient_image_1}} - Preheat the oven: Set your oven to 400°F (200°C). This helps cook the chicken evenly. - Mix the marinade ingredients: In a bowl, combine the following: - 1/4 cup honey - 2 tablespoons soy sauce - 2 tablespoons apple cider vinegar - 1 tablespoon sriracha - 3 cloves garlic, minced - 1 tablespoon fresh ginger, grated - 1 teaspoon smoked paprika - 1/2 teaspoon black pepper - 1/2 teaspoon salt Whisk these until smooth and well blended. - Marinate chicken thighs: Place 4 bone-in, skin-on chicken thighs in a large bag. Pour the marinade over them, making sure to coat each piece. Seal the bag and refrigerate for at least 30 minutes. For a deeper flavor, marinate for up to 4 hours. - Searing the chicken thighs: After marinating, take the chicken out and let it sit for 10 minutes. Heat an oven-safe skillet over medium-high heat. Place the chicken skin-side down in the hot skillet. Sear for 5-7 minutes, or until the skin turns crispy and golden. - Baking in the oven: Flip the chicken thighs over in the skillet. Pour the reserved marinade on top. Transfer the skillet to the oven. Bake for 25-30 minutes, or until the internal temperature reaches 165°F (75°C). - Checking for doneness: Use a meat thermometer to check the temperature. This ensures the chicken is safe to eat. - Resting period for the chicken: Once cooked, take the chicken out of the oven. Let it rest for 5-10 minutes. This keeps it juicy. - Presentation and serving suggestions: Serve the chicken on a platter. Drizzle with the pan sauce. Garnish with sliced green onions and sesame seeds. This dish pairs well with steamed jasmine rice or sautéed vegetables for a colorful meal. Marinate your chicken thighs for at least 30 minutes. For the best flavors, go up to 4 hours. This gives the chicken time to soak up the sweet and spicy marinade. You can make the marinade a day ahead. Just store it in the fridge in an airtight container. It saves time and boosts flavor. To get crispy skin, preheat your oven to 400°F (200°C). Sear the chicken skin-side down for 5-7 minutes in a hot skillet. This creates a golden crust. To keep your chicken juicy, avoid overcooking. Cook it until it reaches 165°F (75°C). Let it rest for 5-10 minutes after baking. This helps the juices stay inside. Serve your chicken thighs with steamed jasmine rice or sautéed vegetables. These sides complement the dish well. For a beautiful presentation, drizzle the pan sauce over the chicken. Garnish with sliced green onions and sesame seeds. This adds color and makes your plate look fancy. Pro Tips Marinate for Maximum Flavor: For the best flavor, marinate the chicken thighs for at least 2 hours, or overnight if possible. This allows the flavors to penetrate deeply into the meat. Ensure Crispy Skin: To achieve perfectly crispy skin, make sure to pat the chicken thighs dry with paper towels before searing them in the skillet. Check Internal Temperature: Always use a meat thermometer to check that the chicken reaches an internal temperature of 165°F (75°C) for safe consumption. Rest Before Serving: Let the chicken rest for 5-10 minutes after cooking. This helps the juices redistribute, ensuring juicy and tender meat. {{image_2}} You can change the sweetener in this recipe. Try using maple syrup or agave instead of honey. Both can give a nice flavor twist. You can also switch the hot sauce. Use a different one if you prefer a milder or hotter taste. Grilling the chicken can add a smoky flavor. Just marinate and then cook it on the grill. You can also bake it in the oven, as the recipe suggests. If you prefer, use a slow cooker. Cook the marinated chicken on low for about six hours for tender results. Think about adding different spices. For a Cajun twist, use Cajun seasoning. If you want a Caribbean vibe, add allspice or jerk seasoning. Also, you can tweak the sauce. Adding coconut milk can give it a tropical feel. Each change can transform the dish into something special. To keep your cooked chicken thighs fresh, store them properly. First, let the chicken cool down to room temperature. Then, place the chicken thighs in an airtight container. You can also use a resealable plastic bag. This keeps moisture in and air out. If you plan to eat them later in the week, refrigerate them. If you want to save them for longer, freezing is best. - Refrigerate: Store in the fridge for up to 4 days. - Freeze: For longer storage, freeze for up to 3 months. When you’re ready to enjoy the leftovers, reheating is key. The oven works best for keeping the chicken juicy. Set your oven to 350°F (175°C). Place the chicken in an oven-safe dish. Cover it with foil to keep moisture in. Heat for about 15-20 minutes, or until warmed through. If you’re short on time, the microwave is a quick option. Place the chicken on a microwave-safe plate. Cover it with a damp paper towel to trap steam. Heat in short bursts of 30 seconds. Check often to avoid drying it out. Cooked chicken can last in the fridge for about 4 days. If frozen, it can remain safe for up to 3 months. Always check for signs of spoilage. Look for changes in color or smell. If the chicken feels slimy or has an off odor, it’s best to discard it. Keeping your chicken thighs safe ensures they stay delicious! To add more heat, try these tips: - Use more sriracha in the marinade. - Add red pepper flakes for extra kick. - Include chopped fresh jalapeños or serrano peppers. - Substitute the sriracha with a hotter sauce. - Serve with a spicy dipping sauce on the side. These tweaks will boost the spice level and enhance the flavor. Yes, you can use boneless chicken thighs. - Cut the cooking time by about 10 minutes. - Ensure the internal temperature reaches 165°F (75°C). - You may need less marinade, so adjust amounts. - Boneless thighs can cook faster, so watch closely. This change will still give you a tasty dish. Absolutely! This recipe works well for meal prep. - Marinate the chicken ahead of time for quick cooking. - Cook a batch and store in airtight containers. - Refrigerate for up to 4 days or freeze for longer. - Reheat in the oven or microwave for best results. Meal prep makes enjoying this dish easy and fun! This recipe for honey garlic chicken thighs gives you a great mix of flavors. You learned about the key ingredients and the steps to make it tasty. I shared tips for marinating and cooking so your chicken stays juicy. You can even try different flavors or storage methods. Remember, this dish is not just about taste—it's fun to prepare and share. Try it out and enjoy the delicious results!

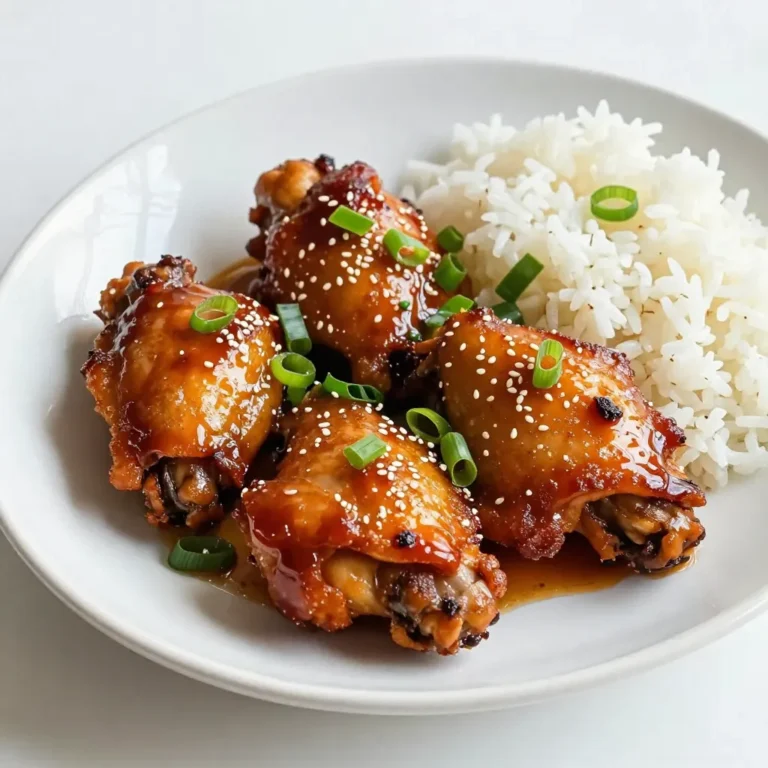
Sweet and Spicy Chicken Thighs Flavorful Recipe Guide

To make Teriyaki Shrimp Quinoa Bowls, gather these items: - 1 cup quinoa, rinsed - 2 cups water or vegetable broth - 1 lb shrimp, peeled and deveined - 1/4 cup teriyaki sauce (store-bought or homemade) - 1 tablespoon sesame oil - 2 cups mixed vegetables (e.g., bell peppers, broccoli, and snap peas) - 1 tablespoon olive oil - 2 green onions, sliced - 1 tablespoon sesame seeds - Salt and pepper to taste You can switch things up with these optional ingredients: - Add garlic or ginger for extra flavor. - Use different vegetables like carrots or zucchini. - Try brown rice instead of quinoa for a heartier base. - Top with avocado slices for creaminess. - Include nuts, like cashews, for added crunch. Each main ingredient in this dish offers great health perks: - Quinoa is a complete protein, packed with fiber and minerals. - Shrimp is low in calories and high in protein, good for muscle health. - Vegetables provide vitamins, minerals, and antioxidants, boosting immunity. - Teriyaki sauce adds flavor, but check for low-sodium options to cut salt. - Sesame oil has healthy fats and may support heart health. These ingredients not only taste great but also nourish your body! {{ingredient_image_1}} To start, rinse your quinoa under cold water. This step helps remove the bitter taste. In a medium saucepan, combine one cup of rinsed quinoa with two cups of water or vegetable broth. Bring it to a boil over medium-high heat. Once it starts boiling, lower the heat to low. Cover the saucepan and let it simmer for about 15 minutes. The quinoa will absorb the liquid and become fluffy. When done, fluff it with a fork and set it aside. Next, grab a large skillet and heat one tablespoon of olive oil over medium heat. Add two cups of mixed vegetables, like bell peppers, broccoli, and snap peas. Sauté them for about 5 to 7 minutes. You want them to be crisp-tender and colorful. Sprinkle some salt and pepper to taste. Once cooked, remove the vegetables from the skillet and set them aside. Now, use the same skillet for the shrimp. Add one tablespoon of sesame oil to the pan. Then, add one pound of peeled and deveined shrimp. Cook the shrimp for 2 to 3 minutes on each side. They will turn pink and opaque when ready. Pour in a quarter cup of teriyaki sauce, stirring well to coat the shrimp. Let it heat through for an extra 1 to 2 minutes. Now, it's time to assemble your bowls! Divide the cooked quinoa among serving bowls. Top each bowl with the sautéed vegetables and teriyaki shrimp. Finish by sprinkling sliced green onions and sesame seeds on top. Enjoy your tasty and healthy meal! To prevent overcooking shrimp, cook them quickly. Shrimp should only take 2-3 minutes on each side. They turn pink and opaque when done. Remove them from heat as soon as you see this change. Overcooked shrimp can become tough and rubbery. Keep a close eye on them while cooking. Timing is key for a perfect bite. You can boost flavors by adding herbs and spices. A pinch of garlic powder or fresh garlic adds depth. Ginger can also bring a nice zing. If you like heat, try a dash of red pepper flakes. Season the vegetables well with salt and pepper as they cook. This brings out their natural sweetness. Taste your dish as you go to find the right balance. For a great presentation, use bright bowls. Layer the quinoa, veggies, and shrimp artfully. Arrange the shrimp neatly on top of the quinoa. Sprinkle sesame seeds and sliced green onions for color. You can also add a lime wedge for a fresh touch. This not only looks good but makes the meal pop with flavor! Pro Tips Rinse Your Quinoa: Always rinse quinoa before cooking to remove its natural coating, called saponin, which can impart a bitter taste. Perfectly Cooked Shrimp: Cook shrimp just until they turn pink and opaque; overcooking can make them rubbery. Vegetable Variety: Feel free to mix and match your favorite vegetables; adding seasonal produce can enhance flavor and nutrition. Garnish for Flavor: Don't skip the green onions and sesame seeds—they add a burst of flavor and a nice crunch to the dish. {{image_2}} You can swap shrimp for other proteins. Chicken is a great choice. Use boneless chicken breast for a leaner option. Simply cut it into bite-sized pieces. Cook it in the skillet until golden brown. For a plant-based twist, try tofu. Firm tofu works best. Press it to remove extra moisture. Then, cube it and sauté until crispy. Both options absorb the teriyaki sauce well, adding lots of flavor. Feel free to change the vegetables based on the season. In spring, use asparagus or snap peas. In summer, zucchini or corn add a fresh crunch. Fall brings sweet potatoes or Brussels sprouts, which are hearty and delicious. In winter, root vegetables like carrots and turnips work nicely. This keeps your meals colorful and exciting throughout the year. Want a gluten-free teriyaki sauce? It’s easy to make at home. Use tamari instead of regular soy sauce. Combine it with honey, garlic, and ginger for a tasty mix. This way, you cater to gluten-free diets without losing flavor. You can enjoy your teriyaki shrimp quinoa bowls worry-free! To keep your Teriyaki Shrimp Quinoa Bowls fresh, store leftovers in airtight containers. Make sure to let the dish cool first. This helps prevent moisture buildup. You can keep them in the fridge for up to three days. If you plan to eat them later, separate the shrimp from the quinoa and vegetables. This keeps the shrimp from turning rubbery. When you reheat, use a pan on medium heat. Add a splash of water or broth to keep it moist. Stir often to heat evenly. You can also use a microwave. Just cover the bowl with a damp paper towel. Heat in short bursts, stirring in between. This method helps keep the shrimp tender and the veggies crisp. If you want to freeze your bowls, divide them into single servings. Use freezer-safe containers or bags. This way, you can grab one when you need it. Teriyaki Shrimp Quinoa Bowls can stay good in the freezer for up to two months. To thaw, move a serving to the fridge overnight. Then, follow the reheating tips above for the best taste. Yes, you can use frozen shrimp. Just thaw them first. Place them in cold water for about 10-15 minutes. After thawing, peel and devein them if needed. This method works well to keep shrimp fresh in taste. If you don't have quinoa, try brown rice or farro. Both grains have a nice texture. You can also use cauliflower rice for a low-carb option. Each will bring a different flavor to your bowl. Making teriyaki sauce is simple. Combine equal parts soy sauce and water. Add a tablespoon of sugar and a dash of garlic. You can also add ginger for extra flavor. Mix it well and heat it on the stove until the sugar dissolves. Adjust the taste to your liking! In this blog post, we explored teriyaki shrimp quinoa bowls. You learned about key ingredients, cooking steps, and tips to prevent overcooking shrimp. We discussed variations with proteins and veggies, plus storage tips for leftovers. This dish is easy to make and packed with flavor. You can mix it up based on what you have. Enjoy creating your own version of this healthy meal!

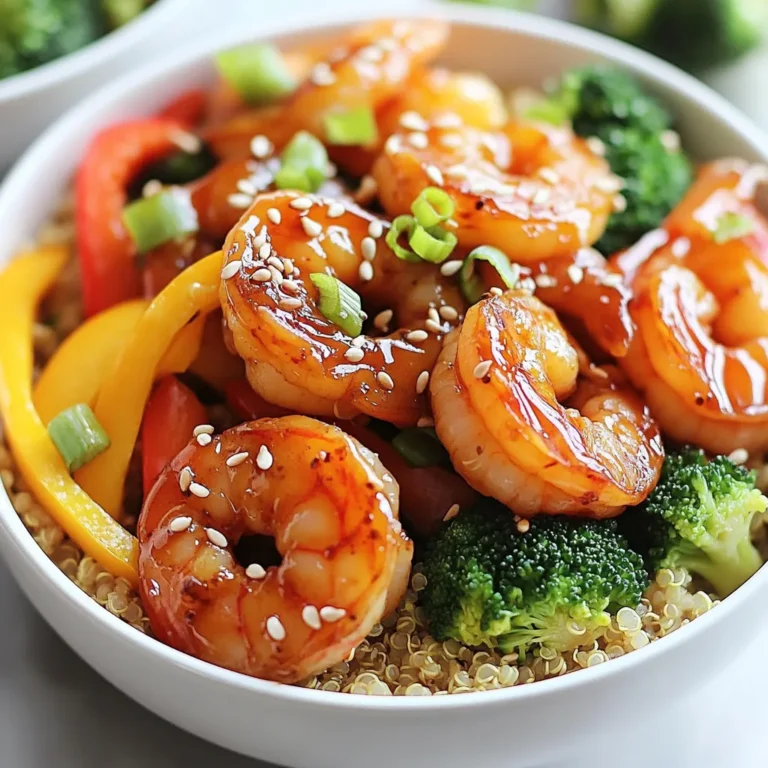
Teriyaki Shrimp Quinoa Bowls Tasty and Healthy Meal

To make apple cinnamon energy balls, gather these key items: - 1 cup rolled oats - 1 cup almond butter (or any nut butter of choice) - 1 cup dried apples, chopped - 1/2 cup honey or maple syrup - 1 teaspoon ground cinnamon - 1/2 teaspoon vanilla extract - 1/4 teaspoon salt These ingredients work together to create a tasty and wholesome snack. The oats give a nice texture, while the dried apples add sweetness. Almond butter binds it all together and adds healthy fats. You can boost the flavor with these optional ingredients: - 1/4 cup flaxseeds (for added nutrition) - 1/2 cup chopped nuts (like walnuts or pecans) Flaxseeds are great for extra omega-3s. Chopped nuts add crunch and a nutty taste. Feel free to mix and match to find your favorite combo. If you need to make swaps, here are some ideas: - Use sunflower seed butter instead of almond butter for nut-free options. - Swap honey for agave syrup to make it vegan. - Choose gluten-free oats for a gluten-free version. These alternatives let everyone enjoy these energy balls, no matter their diet. Choose what fits your needs best! {{ingredient_image_1}} Making apple cinnamon energy balls is easy and fun. Start by gathering all your ingredients. You will need rolled oats, almond butter, dried apples, honey or maple syrup, ground cinnamon, vanilla extract, salt, and optional add-ins like flaxseeds and nuts. 1. In a large mixing bowl, combine the rolled oats, almond butter, and chopped dried apples. 2. Add in the honey or maple syrup, ground cinnamon, vanilla extract, and salt. 3. Stir the mixture well until everything blends together. If you want more texture, fold in flaxseeds and chopped nuts. 4. Ensure the mixture feels sticky and can hold together. If it seems too wet, add more oats. If it is too dry, add a bit more nut butter or honey. 1. Once the mixture is ready, use your hands to roll it into small balls, about 1 inch wide. 2. Place the balls on a baking sheet lined with parchment paper. 3. After shaping, refrigerate the energy balls for about 30 minutes to help them firm up. 4. Store any leftovers in an airtight container in the fridge. They stay fresh for up to a week. To make the best apple cinnamon energy balls, follow these tips: - Use fresh, high-quality ingredients. This will make a big difference in taste. - Mix well to ensure each bite has a balanced flavor. - If your mixture feels too wet, add more oats. If it’s too dry, add more nut butter. - Roll the mixture into uniform balls for even texture. Many people make these mistakes when making energy balls: - Not measuring ingredients accurately can change the texture. - Skipping the chill time can lead to soft, hard-to-handle balls. - Forgetting to taste the mixture before rolling can lead to bland bites. - Not storing them properly can reduce freshness and flavor. Enjoy your energy balls in many ways: - Pack them as a quick snack for school or work. - Serve them at parties for a healthy treat option. - Pair them with yogurt or fruit for a balanced breakfast. - Store them in an airtight container in the fridge for easy access. Pro Tips Storage Tip: Keep your energy balls in an airtight container in the fridge to maintain their freshness and flavor for up to a week. Customizable Ingredients: Feel free to substitute the dried apples with other dried fruits like cranberries or apricots for a different flavor profile. Texture Variation: For a chewier texture, consider adding more dried fruit or using rolled oats instead of quick oats. Nut Butter Options: Experiment with different nut butters such as peanut butter or sunflower seed butter for a unique taste and nutritional benefits. {{image_2}} You can mix it up with these simple ideas. Try adding cocoa powder for chocolate lovers. You can also swap dried apples for raisins or cranberries. For a nutty twist, use different nuts like pecans or almonds. Want a tropical taste? Add some shredded coconut! Each choice brings new flavors and fun. Making these energy balls fit your diet is easy. Use gluten-free oats to make them gluten-free. For a vegan option, replace honey with maple syrup. You can also pick a nut butter that matches your needs. If you're nut-free, sunflower seed butter works great! These swaps keep the taste and nutrition intact. Boosting nutrition is simple. Add chia seeds or hemp seeds for extra protein. You can also stir in some spirulina or matcha powder for a health kick. If you want fiber, ground flaxseeds are a great choice too. These superfoods help make your snacks even better while keeping them tasty! To keep your energy balls fresh, store them in an airtight container. This helps to seal in moisture and flavor. I prefer using glass jars or plastic containers with tight lids. Place them in the fridge, where they stay cool and safe. This method keeps them tasty for up to a week. Always check for any signs of spoilage before eating. If you want to save some for later, freezing is a great choice. First, shape your energy balls and place them on a baking sheet. Make sure they are not touching each other. Freeze them for about two hours. Once firm, transfer the balls to a freezer-safe bag. Label the bag with the date, and they can last for up to three months. You can grab them any time you need a quick snack. Apple cinnamon energy balls can last up to a week in the fridge. If you notice any off smells or changes in texture, it’s best to toss them. Signs of spoilage include a slimy feel or mold. Always trust your senses. When in doubt, throw it out! Apple cinnamon energy balls are packed with nutrients. They contain oats, which provide fiber. Fiber helps digestion and keeps you full. The dried apples add natural sweetness and vitamins. Almond butter gives healthy fats and protein. Honey or maple syrup adds energy. Overall, these bites offer a great mix of carbs, protein, and healthy fats. You can use fresh apples, but they change the texture. Fresh apples have more water, making the mixture too wet. If you use fresh apples, chop them small. You may need to add more oats to balance. Dried apples work best for a chewy, sweet taste. Store apple cinnamon energy balls in the fridge for up to a week. Place them in an airtight container. This keeps them fresh and tasty. If you notice any changes in smell or texture, it’s best to toss them out. Yes, these energy balls are great for kids! They are healthy and easy to eat. Kids love the sweet taste of apples and cinnamon. You can pack them in lunchboxes for a quick snack. They also provide energy for playtime and school. Absolutely! You can use any nut butter you like. Peanut butter, cashew butter, or sunflower seed butter work well too. Just keep in mind the flavor may change slightly. Each nut butter adds its unique taste and nutrition. Choose what you enjoy most! Apple cinnamon energy balls are simple to make and fun to eat. We discussed key ingredients, how to prepare, and tips for success. Remember to explore flavor variations and storage methods to enjoy these snacks longer. You can customize them to fit your needs—think vegan or gluten-free. These bites are tasty, nutritious, and great for kids, too. With a little practice, you can create delicious energy balls that fuel your day. Now, grab your ingredients and start making your own!

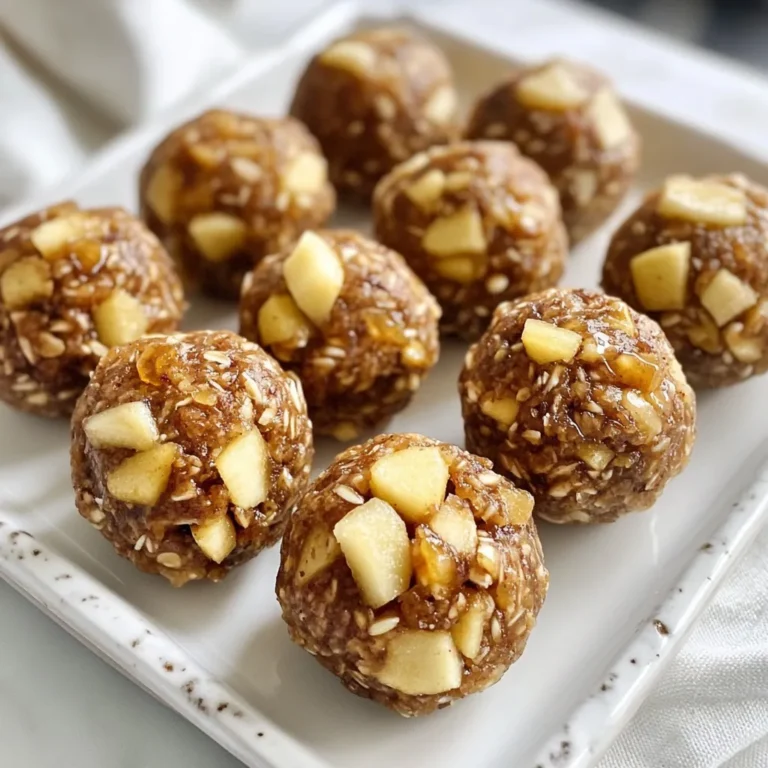
Apple Cinnamon Energy Balls Tasty and Nutritious Snack

To make these tasty chocolate peanut butter protein balls, you will need: - 1 cup rolled oats - 1/2 cup natural peanut butter - 1/4 cup honey or maple syrup - 1/2 cup chocolate protein powder - 1/4 cup ground flaxseed - 1/4 cup mini dark chocolate chips - 1 teaspoon vanilla extract - Pinch of salt You can swap out some ingredients if you need to. Here are a few ideas: - Rolled oats: Use quick oats or almond flour for a different texture. - Peanut butter: Almond butter or sunflower seed butter work well too. - Honey or maple syrup: Agave syrup is a good substitute for sweetness. - Chocolate protein powder: Vanilla protein powder can add a nice flavor twist. - Ground flaxseed: Chia seeds can replace flaxseed for a similar crunch. - Mini dark chocolate chips: Use white chocolate chips or dried fruit for variety. These protein balls pack a punch in the nutrition department. Here’s why they are great: - Protein: The protein powder and peanut butter help build muscle and keep you full. - Fiber: Rolled oats and flaxseed provide fiber, which aids digestion and keeps you satisfied. - Healthy Fats: Peanut butter and flaxseed contain good fats that are great for heart health. - Antioxidants: Dark chocolate chips add nutrients that help fight free radicals. These chocolate peanut butter protein balls are not just tasty but also a smart choice for a snack! {{ingredient_image_1}} First, grab a large mixing bowl. Add 1 cup of rolled oats. Then, pour in 1/2 cup of natural peanut butter. Next, drizzle in 1/4 cup of honey or maple syrup. Use a spatula or spoon to mix until smooth. After that, add 1/2 cup of chocolate protein powder. Sprinkle in 1/4 cup of ground flaxseed. Toss in 1/4 cup of mini dark chocolate chips for a sweet bite. Don’t forget 1 teaspoon of vanilla extract and a pinch of salt. Stir everything until you see a sticky dough form. Now, it’s time to shape the mixture. Use your hands to scoop a tablespoon of the dough. Roll it gently into a ball. Keep doing this until you shape all the mix into balls. You should get about 12 tasty protein balls. If the mix feels too sticky, wet your hands slightly. This will help you roll them easily. Once you have all the balls rolled, place them on a baking sheet or plate. Line it with parchment paper so they don’t stick. Next, put the baking sheet in the fridge. Chill the protein balls for at least 30 minutes. This makes them firm and easier to eat. Enjoy your delicious snack once they are ready! To get the best texture, use natural peanut butter. It mixes well and keeps your protein balls moist. If you want them a bit firmer, add more oats or ground flaxseed. This will help create a nice balance. You can also adjust the honey or maple syrup for sweetness. If the mix is too sticky, chill it for 10 minutes before rolling. These protein balls make a great snack anytime. You can serve them as is or pair them with fresh fruit. Try slices of apple or banana for a fun contrast. For a colorful presentation, arrange them on a plate and sprinkle mini chocolate chips or shredded coconut on top. This small touch adds a nice look and extra flavor. One common mistake is using too much liquid. If you add too much honey or peanut butter, the mixture becomes too sticky. Always measure accurately. Another mistake is not chilling the balls long enough. Chilling helps them firm up and hold their shape. Lastly, don’t skip the salt. It enhances the taste and balances the sweetness. Pro Tips Use a Cookie Scoop: To ensure all protein balls are the same size, consider using a cookie scoop for perfectly uniform portions. Chill for Better Texture: Refrigerating the protein balls for a longer time, up to a few hours, can enhance their texture and firmness. Mix Up the Flavors: Feel free to experiment with different nut butters, such as almond or cashew, or add spices like cinnamon for a unique twist. Store Properly: Keep the protein balls in an airtight container in the fridge for up to a week or freeze them for longer storage. {{image_2}} You can make these protein balls vegan. Simply use maple syrup instead of honey. Choose a plant-based protein powder. Use a nut butter that is dairy-free, like almond butter. The taste will still be rich and tasty! To make gluten-free protein balls, use certified gluten-free oats. Double-check your protein powder for gluten content. This way, everyone can enjoy them without worry. They will still hold their shape and flavor. You can mix up the flavors for fun! Try adding shredded coconut for a tropical twist. Or, use almond butter instead of peanut butter for a new taste. You can even add spices like cinnamon for more warmth. Each change gives you a fresh take on this snack! To keep your chocolate peanut butter protein balls fresh, store them in an airtight container. Place a piece of parchment paper between layers to prevent sticking. You can keep them in the fridge for easy access. They make a quick snack anytime you need energy. Avoid leaving them at room temperature for too long, as the warm weather can make them too soft. If you want to save some for later, freezing is a great option. First, roll your protein balls as usual. Then, place them on a baking sheet lined with parchment paper. Freeze them for about an hour until they harden. After that, transfer the balls to a freezer-safe bag or container. This method keeps them fresh for up to three months. When you’re ready to eat, just thaw them in the fridge or at room temperature. When stored properly in the fridge, these protein balls will last about one week. If you freeze them, the shelf life extends to about three months. Always check for any changes in smell or texture before eating. If they look or smell off, it's best to toss them. Enjoy your healthy snack and keep it fresh! Protein balls serve as quick snacks. They are great for energy. You can eat them before or after workouts. They also help curb sweet cravings. These tasty bites fit well in lunchboxes. They offer protein, fiber, and healthy fats. Enjoy them during busy days or when you need a boost. Yes, you can use any nut butter. Almond butter, cashew butter, or sunflower seed butter work well. Each nut butter gives a unique taste. Choose one that fits your diet or flavor preference. Just make sure it is smooth. This helps mix the ingredients evenly. Chocolate peanut butter protein balls last about a week. Store them in the fridge for best results. If you want to keep them longer, freeze them. They can last up to three months in the freezer. Just thaw before eating. They will still taste great! In this post, I covered how to make protein balls. We looked at ingredients, steps, and helpful tips. You learned about substitutions and nutritional perks. I shared ways to improve texture and avoid common errors. We explored tasty variations, storage tips, and answered your FAQs. These protein balls are easy, healthy snacks you can enjoy anytime. Explore different flavors to keep it fun! Start making them today and treat yourself well.

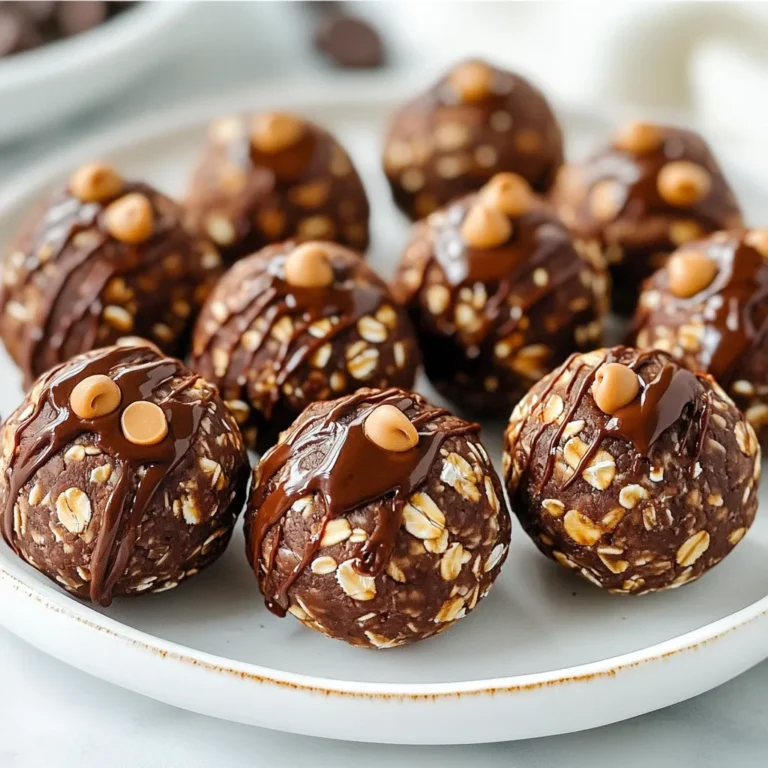
Chocolate Peanut Butter Protein Balls Easy Snack Recipe

PREV 1 … 66 67 68 … 72 NEXT
cozy citrus kitchen

explore

DessertsDinnerAppetizersDrinks

Our Policies

  • Cookie Policy
  • Copyright Policy
  • Disclaimer
  • GDPR Policy
  • Terms Of Use
Back to Top
  • About
  • Contact Us
  • Privacy Policy
© 2026 cozy citrus kitchen