FREE DINNER EBOOK! Get your copy!
  • Cookie Policy
  • GDPR Policy
  • Disclaimer
  • Terms Of Use
  • Visit my other site: Fun Cookie Recipes
cozy citrus kitchen
  • Home
  • Dinner
  • Desserts
  • Drinks
  • Appetizers
  • Contact
  • About
  • Privacy Policy
  • Home
  • Dinner
  • Desserts
  • Drinks
  • Appetizers
  • Contact
  • About
  • Privacy Policy
  • Cookie Policy
  • GDPR Policy
  • Disclaimer
  • Terms Of Use
Visit my other site: Fun Cookie Recipes

HOME / CATEGORIES /

Latest

Here are the key ingredients for Spicy Cajun Shrimp Tacos: - 1 pound shrimp, peeled and deveined - 2 tablespoons Cajun seasoning - 1 tablespoon olive oil - 1 cup red cabbage, shredded - 1 avocado, sliced - 1/4 cup fresh cilantro, chopped - 1 lime, juiced - 8 small corn tortillas - Salt and pepper to taste - Optional: sour cream or Greek yogurt for topping You can swap some ingredients if needed. Try these options: - Use chicken or tofu instead of shrimp. - Substitute green cabbage for red cabbage. - Swap lime juice with lemon juice. - Use any fresh herbs, like parsley, in place of cilantro. - Try Greek yogurt instead of sour cream for a tangy twist. I love to serve these tacos with a few sides. Here are some ideas: - Pair with rice or quinoa for a filling meal. - Add a side of black beans for extra protein. - Serve with a fresh salad on the side. - Offer extra lime wedges for a zesty touch. - For a fun twist, serve with tortilla chips and salsa. {{ingredient_image_1}} Start by rinsing the shrimp under cold water. This helps remove any grit. Next, take a medium bowl and add the peeled and deveined shrimp. Sprinkle in the Cajun seasoning. Toss the shrimp well until they are fully coated. This step adds flavor to every bite. Heat olive oil in a skillet over medium-high heat. Once the oil is hot, add the shrimp. Cook them for 2 to 3 minutes per side. You will know they are done when they turn pink and opaque. This means they are cooked through. Remove the shrimp from heat and set them aside. Now it's time to build your tacos! First, warm the corn tortillas in a dry skillet. Heat them for about 30 seconds on each side. This makes them soft and easy to fold. Next, place a good amount of shredded red cabbage on each tortilla. Then, add the cooked Cajun shrimp on top. Follow this with slices of avocado and chopped cilantro. Squeeze fresh lime juice over the tacos. Finally, season with salt and pepper to taste. If you like, add a dollop of sour cream or Greek yogurt on top for creaminess. Enjoy your tasty creation! To cook shrimp just right, start with fresh or thawed shrimp. Pat them dry to remove excess moisture. This helps them sear nicely. Toss the shrimp with Cajun seasoning in a bowl. Make sure they get an even coat. Heat olive oil in a skillet over medium-high heat. When the oil is hot, add the shrimp. Cook for 2-3 minutes on each side. They should turn pink and opaque. Remove them quickly when done to avoid overcooking. For the best taco experience, use small corn tortillas. They add a nice flavor and texture. Warm them in a dry skillet for about 30 seconds on each side. You can also use flour tortillas if you prefer a softer bite. Make sure they are pliable, so they hold the shrimp and toppings well. To make your tacos even tastier, add fresh lime juice right before serving. It brightens the flavors. You can also include slices of avocado for creaminess. Fresh cilantro adds a pop of color and flavor. If you like it creamy, add a dollop of sour cream or Greek yogurt. These extras will take your Spicy Cajun Shrimp Tacos to the next level! Pro Tips Perfectly Cooked Shrimp: Cook the shrimp just until they turn pink and opaque to avoid overcooking, which can make them rubbery. Homemade Cajun Seasoning: Consider making your own Cajun seasoning blend for a fresher taste. Combine paprika, cayenne, garlic powder, and dried herbs for a customizable flavor. Warm Tortillas: Keep your corn tortillas warm in a clean kitchen towel after heating them to prevent them from drying out before serving. Fresh Ingredients: Use fresh lime juice and ripe avocados for the best flavor and texture in your tacos. {{image_2}} You can swap ingredients to match your taste or what you have. If you cannot find shrimp, chicken or fish works well too. You can use chicken breast, diced and cooked in the same way. For a lighter touch, try using zucchini or bell peppers instead of shrimp. Instead of red cabbage, you can use green cabbage or even lettuce for crunch. If you want more creaminess, swap avocado for guacamole or a creamy dressing. To make these tacos vegan or vegetarian, skip the shrimp. Instead, use black beans or chickpeas. They provide protein and flavor. You can also add tofu for a nice texture. Season them with Cajun spices just like the shrimp. For toppings, keep the avocado and cilantro, and add some diced tomatoes or corn for more color and taste. If you love heat, add more Cajun seasoning to your shrimp. You can also mix in some hot sauce or diced jalapeños. For a milder taste, use less seasoning. You can also add a dollop of sour cream or Greek yogurt to cool down the heat. If you are making these for kids, go light on the spice. Let each person add their own heat, so everyone is happy! To keep your Spicy Cajun Shrimp Tacos fresh, store leftovers in an airtight container. Place the shrimp, toppings, and tortillas in separate containers. This way, the tortillas won't get soggy. You can store them in the fridge for up to two days. When you are ready to eat the leftovers, reheat the shrimp in a skillet. Use medium heat for about 2-3 minutes, or until they are hot. Warm the tortillas in a dry skillet for about 30 seconds on each side. This helps them stay soft and pliable. If you want to save the shrimp tacos for later, freeze the cooked shrimp. Place them in a freezer-safe bag or container. Remove as much air as you can to prevent freezer burn. You can freeze the shrimp for up to three months. When ready to eat, thaw in the fridge overnight and reheat as mentioned above. You can serve these tacos with a fresh salad or rice. A simple green salad adds crunch. You might try coleslaw for more texture. Rice with lime or cilantro works well too. Don't forget fresh salsa or guacamole for extra flavor! Yes, you can use frozen shrimp. Just be sure to thaw them first. Place them in cold water for about 15 minutes. Drain them well before seasoning. This keeps the shrimp juicy and tasty. To make Cajun seasoning at home, mix these spices: - 1 tablespoon paprika - 1 teaspoon cayenne pepper - 1 teaspoon garlic powder - 1 teaspoon onion powder - 1 teaspoon dried thyme - 1 teaspoon dried oregano - 1 teaspoon black pepper - 1 teaspoon salt Combine all spices in a bowl. Store any extra in a jar. This mix packs a flavorful punch for any dish! In this article, we explored how to make Spicy Cajun Shrimp Tacos. We covered ingredients, step-by-step cooking, tips for a perfect dish, and tasty variations. You learned how to store leftovers and answered common questions. Use this guide to create delicious tacos that will impress anyone. Cooking at home can be fun and rewarding. Enjoy every bite and share your meals with loved ones.

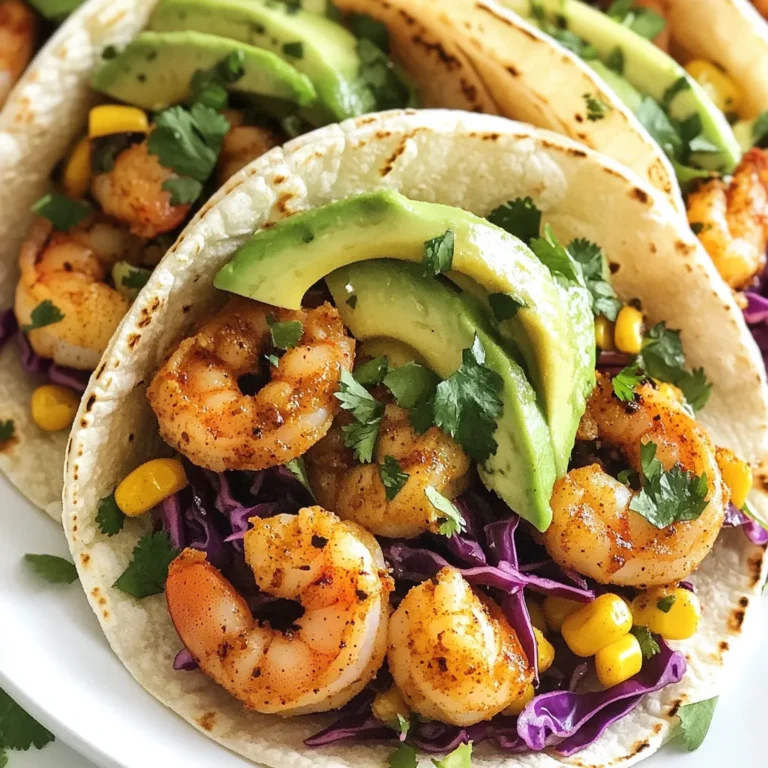
Spicy Cajun Shrimp Tacos Tasty and Easy Recipe

To make these tasty raspberry pistachio macarons, you will need the following key ingredients: - 120g almond flour - 200g powdered sugar - 100g egg whites (about 3 large eggs), at room temperature - 30g granulated sugar - A pinch of salt - 50g shelled pistachios, finely chopped (plus more for garnish) - 1 cup fresh raspberries (for filling) - 1 cup unsalted butter, softened - 2 cups powdered sugar (for buttercream filling) - 1 teaspoon vanilla extract These ingredients create a soft and chewy macaron shell with a rich and creamy filling. The almond flour adds a nice nutty flavor, while the raspberries give a burst of freshness. To make your macarons even more special, consider these optional ingredients: - Pink gel food coloring - Raspberry puree (for adding to the buttercream) Adding gel coloring not only makes your macarons pretty but also highlights the raspberry flavor. Using raspberry puree in the filling will deepen the fruity taste. Using high-quality ingredients is key for great macarons. Here’s what to look for: - Almond flour: Find finely ground almond flour for the best texture. - Powdered sugar: Choose pure powdered sugar, free from additives. - Eggs: Use fresh, organic eggs for the best flavor. - Butter: Opt for high-fat, unsalted butter for a creamy filling. Quality ingredients lead to better flavor and texture, making your macarons truly shine. {{ingredient_image_1}} Before you start, gather your ingredients. This makes the process smoother. Preheat your oven to 300°F (150°C). Line two baking sheets with parchment paper or silicone mats. This step helps the macarons bake evenly. First, sift the almond flour and powdered sugar into a bowl. This keeps the shells light. In another bowl, whisk the egg whites with a pinch of salt until foamy. Gradually add the granulated sugar while whisking. Keep going until you see stiff peaks form. If you want, add pink gel food coloring now. Next, gently fold the sifted almond flour mix into the egg whites. Use a rubber spatula and a figure-eight motion. Stop when the batter flows like lava. It should not be too runny. Transfer the batter to a piping bag fitted with a round tip. Pipe small circles on the lined sheets, leaving space between each one. Tap the sheets on the counter to release air bubbles. Let them sit for 30-60 minutes until the tops are dry. Bake the macarons for 15-20 minutes. Look for the feet to form and the tops to crisp up. Let them cool completely before removing them from the sheets. In a mixing bowl, beat the softened butter until it’s smooth. Slowly add the powdered sugar. Keep mixing until well combined. Add the vanilla extract for flavor. For an extra twist, mix in a bit of raspberry puree. This makes the buttercream even more delicious. Take half of the macaron shells and flip them upside down. Pipe a generous dollop of buttercream on each. Add a few fresh raspberries on top of the filling. Gently press another shell on top to create a sandwich. For a fun touch, sprinkle finely chopped pistachios on the sides of each macaron. This adds crunch and color to your treat. When making macarons, avoid these common errors: - Not weighing ingredients: Use a kitchen scale for precise measurements. - Overmixing the batter: Mix just until the batter flows like lava. - Skipping the drying step: Let your piped batter sit until the tops are not sticky. - Opening the oven door: Keep it closed while baking for even heat. Each mistake can lead to flat or cracked macarons. To get the right macaron consistency, follow these steps: - Sift the dry ingredients: This removes lumps and aerates the mix. - Whip egg whites correctly: Whip until stiff peaks form, but don’t overdo it. - Fold gently: Use a figure-eight motion when combining the dry mix and egg whites. - Check the ribbon stage: The batter should fall in a thick ribbon from the spatula. These techniques help create a smooth, shiny macaron shell. Here are some tools you need for great macarons: - Kitchen scale: For accurate ingredient measurement. - Mixing bowls: Use separate bowls for dry and wet ingredients. - Rubber spatula: For gently folding the batter without deflating it. - Piping bags: To pipe the batter onto baking sheets. - Silicone baking mats or parchment paper: To prevent sticking. Having the right tools makes baking much easier. Pro Tips Room Temperature Egg Whites: Ensure your egg whites are at room temperature for optimal volume when whisking. This will help achieve the perfect meringue consistency for your macarons. Proper Folding Technique: When combining the dry ingredients with the meringue, use a gentle folding motion to avoid deflating the mixture. The goal is to achieve a smooth batter that flows like lava. Resting the Macarons: Allow the piped macaron shells to rest until they form a skin on the surface, which can take 30-60 minutes. This step is crucial for developing the iconic 'feet' during baking. Flavor Enhancements: For an extra burst of flavor, consider adding a small amount of raspberry puree to the buttercream filling. This will elevate the taste and provide a lovely color contrast. {{image_2}} You can change the filling to match your taste. Try using lemon curd for a tart kick. You can also mix in some chocolate ganache for a rich flavor. If you love nuts, consider adding almond paste to the buttercream. Fresh herbs like mint can add a refreshing twist too. Each choice gives the macaron a new flavor that excites your taste buds. The color of your macarons can be as fun as their taste. You can use blue or green gel food coloring for a unique look. Swirl two colors together for a marbled effect. This adds a visual treat to your plate. To decorate, sprinkle chopped pistachios on the sides. You can also add gold or silver edible glitter for a fancy touch. The colorful macarons will impress at any event. If you have dietary needs, you can still enjoy these macarons. Use a gluten-free almond flour blend for a gluten-free version. For a dairy-free option, replace butter with coconut cream in the filling. You can also use aquafaba instead of egg whites for a vegan version. Each swap allows you to enjoy these treats without worry. To keep your raspberry pistachio macarons fresh, store them in an airtight container. Place parchment paper between layers to avoid sticking. Keep them in the fridge if you plan to eat them in a few days. Let them come to room temperature before serving for the best taste. Macarons can last in the fridge for up to five days. If stored properly, they stay fresh and tasty. You can also keep them at room temperature for about two days, but they may lose their crisp texture. Freezing macarons is a great way to enjoy them later. Place them in a single layer on a baking sheet and freeze until solid. Then, transfer them to an airtight container. They can last up to three months in the freezer. To enjoy, let them thaw in the fridge overnight before serving. Macarons and macaroons are not the same. Macarons are delicate French cookies made with almond flour. They have a smooth top and a creamy filling. Macaroons, on the other hand, are chewy cookies made with shredded coconut. They are often sweet and dense. You can see that the key difference lies in the ingredients and texture. Yes, you can use frozen raspberries! Just thaw them first and drain excess liquid. This helps avoid a runny filling. Fresh raspberries have great flavor, but frozen ones work too. They can still add a nice touch to your macarons. Your batter is overmixed if it becomes too runny. It should flow like lava when you lift your spatula. If it spreads out too much and loses shape, you mixed it too long. Aim for a thick consistency that gently holds its shape. If your macarons do not rise, check your oven temperature. It should be at 300°F (150°C). Also, ensure you whipped your egg whites to stiff peaks. Failing to do so can lead to flat macarons. Proper piping and resting times before baking are important too. You can find great ingredients at specialty baking shops or online. Look for finely ground almond flour and pure vanilla extract. Quality matters for taste and texture. Check local stores for fresh raspberries and pistachios, as they can make a big difference in your macarons. In this article, we explored how to make delicious raspberry pistachio macarons. We discussed key and optional ingredients for the best flavor. You learned step-by-step instructions to create the perfect shells and buttercream filling. I shared tips to avoid common mistakes and essential tools for success. Lastly, we covered storage methods and answered your FAQs. Making macarons can be a fun experience. With practice and care, you’ll bake great treats every time. Enjoy this journey and share your tasty results!

Raspberry Pistachio Macarons Delicious Flavor Fusion

- 20 jumbo pasta shells - 2 cups cooked chicken, shredded or diced - 1 cup ricotta cheese - 1 cup grated mozzarella cheese, divided - ½ cup grated Parmesan cheese - 2 cups Alfredo sauce (store-bought or homemade) - 2 cloves garlic, minced - 1 teaspoon Italian seasoning - Salt and pepper to taste - Fresh parsley, chopped, for garnish This dish starts with jumbo pasta shells. They hold the filling well and look fun. You'll need about 20 shells for a good meal. Next, cooked chicken adds protein. You can shred or dice it, whichever you prefer. Cheese is key to creamy flavor. Use 1 cup of ricotta cheese for smoothness. Mozzarella cheese brings stretch and gooeyness. You’ll divide this cheese; half goes in the filling, and half on top. Don’t forget the Parmesan cheese; it adds a nice bite. For sauce, you can use 2 cups of Alfredo sauce. You may choose store-bought, but homemade is great too. Garlic adds a punch of flavor. Just 2 cloves, minced, will do. Italian seasoning gives it a warm, herby taste. Lastly, add salt and pepper to your liking. Finally, fresh parsley makes it pretty. It adds a pop of color and freshness when you serve your dish. Each ingredient plays a role in making Chicken Alfredo Stuffed Shells a tasty family meal. {{ingredient_image_1}} - Preheating the oven: Start by preheating your oven to 375°F (190°C). This ensures your dish cooks evenly. - Cooking pasta shells: Boil water in a large pot. Cook the jumbo pasta shells until al dente, as per the package instructions. After cooking, drain the shells and let them cool slightly. - Mixing filling ingredients: In a large bowl, combine 2 cups of cooked chicken, 1 cup of ricotta cheese, ½ cup of grated Parmesan cheese, and half of the mozzarella cheese. Add 2 cloves of minced garlic, 1 teaspoon of Italian seasoning, and season with salt and pepper. Mix it all well. - Stuffing the shells: Take each cooled shell and fill it generously with the chicken and cheese mixture. Place them opening side up in a lightly greased baking dish. - Preparing the baking dish: Lightly grease your baking dish with non-stick spray to prevent sticking. Spread about 1 cup of Alfredo sauce on the bottom. - Layering the sauce and shells: After stuffing the shells, pour the remaining Alfredo sauce over the top. Sprinkle the rest of the mozzarella cheese on top for a nice melt. - Baking times and temperatures: Cover the dish with aluminum foil and bake for 25 minutes. Remove the foil and bake for another 10-15 minutes. You want the cheese to be bubbly and slightly golden. - Letting the dish rest: Once done, take the dish out of the oven. Let it sit for a few minutes before serving. This helps the flavors set. - Garnishing tips: Before serving, garnish with freshly chopped parsley for a pop of color and freshness. - Ideal side dishes: Pair these stuffed shells with a simple green salad or some garlic bread for a complete meal. Enjoy! - Use store-bought Alfredo sauce for quick prep. - Cook pasta shells al dente to avoid mushiness. - Avoid overstuffing the shells; it makes them hard to bake. - Add red pepper flakes for some heat. - Mix in fresh herbs like basil or oregano. - Use a blend of mozzarella and provolone for a richer taste. - For creaminess, add a bit of cream cheese to the filling. Pro Tips Perfectly Cooked Shells: Make sure to cook the jumbo pasta shells just until al dente, as they will continue to cook while baking in the oven, preventing them from becoming mushy. Customize the Filling: Feel free to add vegetables like spinach or mushrooms to the chicken and cheese mixture for extra flavor and nutrition. Make-Ahead Option: You can prepare the stuffed shells a day in advance. Just cover them tightly with plastic wrap and refrigerate until you’re ready to bake. Cheese Variation: Experiment with different types of cheese, such as fontina or gouda, to give your dish a unique flavor twist! {{image_2}} You can easily swap chicken for shrimp or veggies. Shrimp adds a nice touch. Just cook it quickly to keep it tender. For veggies, try spinach, mushrooms, or zucchini. Chop them small and mix them in with the cheese. You can also use ground turkey or beef for a different flavor. If you need gluten-free options, use gluten-free pasta shells. Many brands offer good choices. For those who want dairy-free, swap ricotta and mozzarella for nut-based cheeses. You can also use a dairy-free Alfredo sauce. Check labels to ensure they fit your needs. Homemade Alfredo sauce is easy and tasty. Just melt butter, add heavy cream, and stir in Parmesan. If you want to change things up, try a marinara sauce or pesto. These can add a fresh twist to your stuffed shells. To store your Chicken Alfredo Stuffed Shells, let them cool first. Place leftovers in an airtight container. This keeps the shells fresh. You can keep them in the fridge for up to three days. If you want to enjoy them later, be sure to reheat them fully before serving. Freezing stuffed shells is easy. First, let them cool completely. Then, wrap each shell in plastic wrap or foil. You can also place them in a freezer-safe container. They can last up to three months in the freezer. When you're ready to eat, let them thaw in the fridge overnight. Reheat them in the oven at 375°F (190°C) for about 20-25 minutes until hot. You can make these stuffed shells ahead of time. Prepare the filling and stuff the shells, but do not bake them yet. Cover them tightly and store in the fridge for up to two days. When you're ready to enjoy, just bake as directed. This makes dinner quick and easy on busy nights! How do I make homemade Alfredo sauce? To make homemade Alfredo sauce, you need butter, heavy cream, and Parmesan cheese. Melt 1/2 cup of butter in a pan. Add 1 cup of heavy cream and stir for a few minutes. Then, mix in 1 cup of grated Parmesan cheese. Season with salt and pepper. This sauce is rich and creamy, perfect for your stuffed shells. Can I use whole wheat pasta shells? Yes, you can use whole wheat pasta shells. They add more fiber and a nutty flavor. Just cook them according to the package instructions. The filling will taste great with whole wheat shells. How do I know when the stuffed shells are cooked perfectly? The stuffed shells are cooked when the cheese is bubbly and slightly golden. Bake covered for 25 minutes, then remove the foil and bake for another 10-15 minutes. Let the dish rest for a few minutes before serving. This helps the flavors settle. What to do if filling is too dry? If your filling is too dry, add a bit more Alfredo sauce or a splash of milk. This will make the filling creamier. Mixing in extra ricotta cheese can also help. Why did my cheese not melt properly? If your cheese did not melt, it may not have been fresh. Always use fresh cheese for the best melt. Also, make sure to bake it covered for the first part of cooking. This traps the heat and helps the cheese melt evenly. Can I assemble the dish the night before? Yes, you can assemble the dish the night before. Just cover it tightly with foil and store it in the fridge. When ready to bake, add a few extra minutes to the cooking time if it’s cold from the fridge. This way, you can have a warm meal ready fast. This blog post covered how to make delicious stuffed pasta shells. We looked at key ingredients, step-by-step instructions, and useful tips. Experimenting with flavors, proteins, and sauces can bring new life to this dish. Remember to store leftovers properly and consider meal prep for busy days. With these insights, you can create a meal that delights and satisfies everyone at the table. Enjoy cooking!

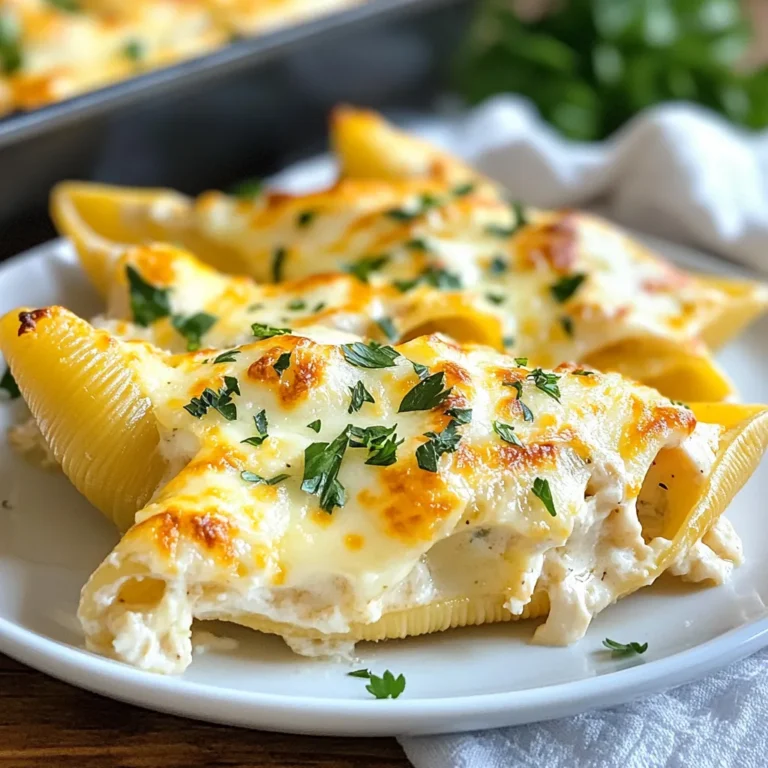
Chicken Alfredo Stuffed Shells Flavorful Family Meal

- 1 lb chicken breast, cut into strips - 1 cup breadcrumbs (preferably panko for extra crunch) - 1/2 cup grated Parmesan cheese - 1 teaspoon garlic powder - 1 teaspoon Italian seasoning - 1/2 teaspoon paprika - 2 large eggs - Salt and pepper to taste - Olive oil spray or 2 tablespoons olive oil To make the best Parmesan crusted chicken strips, fresh ingredients matter. Use chicken that looks pink and firm. For the breadcrumbs, choose panko. They give a better crunch than regular ones. Check the Parmesan cheese too; it should smell fresh and nutty. Store it in the fridge for longer life. If you don’t have chicken breast, try chicken thighs. They stay juicy and tender. For cheese, you can use pecorino Romano for a sharper taste. If you are out of garlic powder, fresh minced garlic works great. Just adjust the amount based on your taste. Instead of olive oil, you can use melted butter for a richer flavor. {{ingredient_image_1}} First, gather your ingredients. You need chicken breast, breadcrumbs, Parmesan cheese, garlic powder, Italian seasoning, paprika, eggs, and some olive oil. Cut the chicken breast into strips. Make sure they are all about the same size for even cooking. Preheat your oven to 400°F (200°C) and line a baking sheet with parchment paper. This helps keep the chicken from sticking. Now it’s time to coat the chicken. In a shallow bowl, mix the breadcrumbs, grated Parmesan, garlic powder, Italian seasoning, paprika, salt, and pepper. Use a whisk to blend them well. In another bowl, beat the eggs until they are smooth. Dip each chicken strip into the egg first, then roll it in the breadcrumb mix. Press down gently to make sure the crumbs stick. Place the coated strips on the baking sheet. If you want them extra crispy, spray or drizzle olive oil on top. Bake the chicken for 20 to 25 minutes. Flip them halfway through for even browning. The chicken should be golden and reach an internal temperature of 165°F. To check if the chicken is done, use a meat thermometer. Insert it into the thickest part of the strip. If it reads 165°F, it’s safe to eat. If you don’t have a thermometer, cut into a chicken strip. The meat should be white and the juices clear. Let the chicken rest for about 5 minutes before serving. This helps keep it juicy and tender. To make your chicken strips extra crispy, use panko breadcrumbs. Panko is lighter and crunchier than regular breadcrumbs. Before baking, spray a light coat of olive oil on top. This helps create a golden crust. For even more crunch, bake on a wire rack on your baking sheet. This allows air to circulate around the chicken. Want to jazz up the flavor? Add some lemon zest to the breadcrumb mix. This gives a fresh, zesty taste. You can also mix in some crushed red pepper flakes for a spicy kick. If you like herbs, fresh parsley or basil can add brightness. Don’t forget to serve with marinara sauce for a delicious dip! Avoid skipping the egg wash. It helps the breading stick well. Another mistake is overcrowding the baking sheet. Give each chicken strip space to cook evenly. Make sure you flip them halfway through baking for an even crisp. Lastly, check the internal temperature. It should reach 165°F to ensure it's safe to eat. Pro Tips Choose the Right Breadcrumbs: Using panko breadcrumbs will give your chicken strips an extra crunch that regular breadcrumbs can't match. Season Your Chicken: Don't forget to season your chicken strips with salt and pepper before breading for enhanced flavor. Check for Doneness: Use a meat thermometer to ensure the chicken reaches an internal temperature of 165°F for safe eating. Let Them Rest: Allow the chicken strips to rest for a few minutes after baking. This helps the juices redistribute, keeping them moist and tender. {{image_2}} To make spicy Parmesan crusted chicken strips, add more heat to the mix. Use cayenne pepper or red pepper flakes in the breadcrumb mix. A teaspoon of either will give it a nice kick. You can also try hot sauce in the egg mixture for added flavor. This simple change makes a big impact. If you want gluten-free chicken strips, swap the breadcrumbs. Use gluten-free panko or crushed cornflakes instead. Make sure the Parmesan cheese is also labeled gluten-free. This way, you avoid any gluten while still enjoying the crispy texture. It’s a great way to cater to dietary needs. You can serve these chicken strips in many fun ways. For a casual dinner, pair them with marinara sauce for dipping. For a party, serve them on skewers with a side of ranch dressing. You can also make a salad with the strips on top, adding a fresh twist. They work well for game day, family gatherings, or even a quick lunch. To keep your Parmesan crusted chicken strips fresh, start by cooling them. Place the strips in an airtight container. They can stay in the fridge for up to three days. For best taste, eat them within two days. If you want them to last longer, consider freezing. To reheat your chicken strips, use an oven for best results. Preheat your oven to 350°F (175°C). Place the strips on a baking sheet. Bake for about 10-15 minutes. This helps keep them crispy. You can also use a microwave, but the texture won’t be as nice. Heat in short bursts to avoid drying them out. If you want to freeze the chicken strips, do so before cooking. Place the breaded strips in a single layer on a baking sheet. Freeze until solid, then transfer them to a freezer bag. They can last up to three months in the freezer. When ready to cook, bake from frozen. Just add a few extra minutes to the cooking time. Yes, you can use regular breadcrumbs. They will work fine. However, panko gives a crispier texture. This crunch makes the chicken strips even tastier. If you want the best results, stick with panko. These chicken strips last about 3 to 4 days in the fridge. Make sure to store them in an airtight container. This keeps them fresh and prevents any odors. If you want them to last longer, consider freezing them. Absolutely! Air-frying works great for these chicken strips. Preheat your air fryer to 400°F (200°C). Cook the strips for about 10 to 12 minutes. Flip them halfway to ensure even cooking. They will come out crispy and juicy, just like from the oven. You learned about the key ingredients for perfect chicken strips and how to keep them fresh. I shared tips for baking and checking doneness, ensuring they're crispy and delicious. You also discovered fun variations, storage tips, and common mistakes to avoid. Remember, experimenting with flavors and techniques will help you make these strips your own. Enjoy creating tasty meals and sharing them with loved ones!

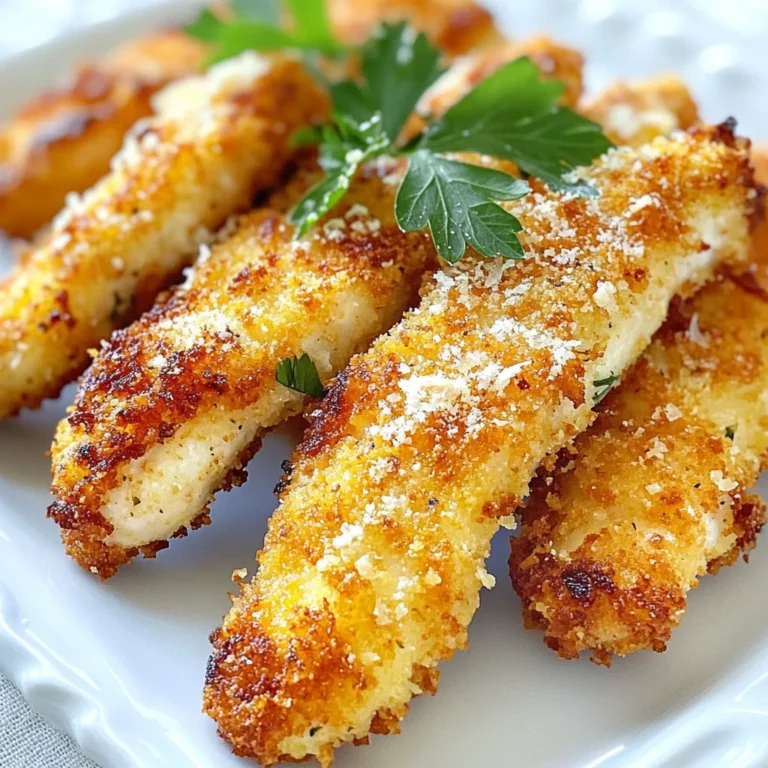
Parmesan Crusted Chicken Strips Crispy and Juicy Treat

To make Coconut Lime Rice with Shrimp, you need a few simple and fresh ingredients. Each one plays a key role in building flavor and texture. Here’s what you’ll need: - 1 cup jasmine rice: This rice is fragrant and sticky, perfect for absorbing flavors. - 1 can (13.5 oz) coconut milk: This adds creaminess and a tropical taste. - 1 cup vegetable broth: Use this for extra depth in flavor. - 1 tablespoon lime zest: This brings a bright, citrusy note. - 2 tablespoons fresh lime juice: This adds acidity that balances the dish. - 1 pound shrimp, peeled and deveined: Shrimp cooks quickly and adds protein. - 2 tablespoons olive oil: This helps sauté shrimp, adding richness. - 2 garlic cloves, minced: Garlic gives a wonderful aroma and flavor. - 1 teaspoon fresh ginger, grated: Ginger adds warmth and a bit of spice. - Salt and pepper to taste: These enhance all the flavors in the dish. - Fresh cilantro, for garnish: Cilantro adds freshness and color. - Lime wedges, for serving: Extra lime gives a punch of flavor at the table. Gathering these ingredients will set you up for success. Each one brings something special to the dish, making it delicious and satisfying. As you work with these items, remember that fresh ingredients will yield the best results. Enjoy the process of preparing this delightful meal! {{ingredient_image_1}} Rinsing the Rice Start by rinsing the jasmine rice. Use cold water and a fine mesh strainer. This step removes excess starch. Rinse until the water runs clear. It helps the rice stay fluffy and not sticky. Cooking the Rice with Coconut Milk and Broth In a medium saucepan, combine the rinsed rice, coconut milk, and vegetable broth. Add a pinch of salt. Bring this mixture to a boil over medium heat. Once it boils, lower the heat to a simmer. Cover the saucepan and cook for 15-20 minutes. The rice is done when the liquid is absorbed and the rice is tender. Fluffing and Adding Lime Zest and Juice After cooking, remove the rice from heat. Use a fork to fluff the rice gently. Then, stir in the lime zest and lime juice. This adds a bright flavor to your rice. Cover the rice to keep it warm while you cook the shrimp. Sautéing Garlic and Ginger In a large skillet, heat the olive oil over medium-high heat. Add the minced garlic and grated ginger. Sauté for 1-2 minutes until they smell great. This step builds a strong flavor base for your shrimp. Adding and Cooking the Shrimp Now, add the shrimp to the skillet. Season them with salt and pepper. Cook for 2-3 minutes on each side. The shrimp will turn pink and opaque when they are ready. This is how you know they are cooked through. Seasoning the Shrimp Once cooked, remove the skillet from heat. Squeeze fresh lime juice over the shrimp. This adds a zesty kick and enhances the flavor. Now, you are ready to serve your dish! Spoon the coconut lime rice onto plates and top it with the shrimp. Enjoy the fresh taste! Importance of Rinsing Rice Rinsing jasmine rice is key. It removes extra starch, making the rice fluffy. When you skip this step, the rice can become sticky and clump together. Rinse it under cold water until the water runs clear. This simple step makes a big difference. Cooking Time Tips Cook the rice for about 15-20 minutes. Keep the heat low to let it simmer. Once the liquid absorbs, the rice will be tender. After cooking, fluff it with a fork. Stir in lime zest and juice while the rice is warm. This adds fresh flavor and keeps it light. Marinating Tips To boost shrimp flavor, consider marinating them. A quick soak in lime juice, salt, and pepper works well. Even 15 minutes can add depth. You can also add garlic or ginger for extra taste. Just be careful not to marinate for too long, or the shrimp may become tough. Best Cooking Techniques Sauté the shrimp in olive oil over medium-high heat. Cook them for about 2-3 minutes on each side. They should turn pink and opaque when done. This quick method keeps them juicy and tender. Finish by squeezing lime juice over the shrimp for a zesty touch. Pro Tips Rinse the Rice: Always rinse jasmine rice under cold water until the water runs clear to remove excess starch, ensuring a fluffier texture. Perfectly Cooked Shrimp: Cook shrimp just until they turn pink and opaque, about 2-3 minutes per side, to avoid overcooking and ensure tenderness. Flavor Boost: Squeezing fresh lime juice over the shrimp right before serving enhances the dish's brightness and flavor profile. Garnish with Freshness: Don't skip the fresh cilantro as a garnish; it adds a burst of color and a fresh herbal note that complements the dish. {{image_2}} You can swap jasmine rice for brown rice or quinoa. Brown rice adds more fiber and nutrients. Quinoa is a great option if you want a gluten-free dish. Both give a different texture and taste. For proteins, shrimp is great, but you can use chicken or tofu. Chicken works well when cooked correctly, and it absorbs flavors well. Tofu is an excellent choice for a plant-based meal. It soaks up the coconut milk and lime flavors too. Spices can elevate your dish. Adding cumin or coriander gives a warm, earthy taste. Just a pinch can make your rice pop with flavor. Vegetables are another fun addition. Think about adding peas or bell peppers. They add color and crunch. You can sauté them with garlic and ginger for extra flavor. This makes your meal more vibrant and healthy. - Storing Leftover Coconut Lime Rice: Place the rice in an airtight container. It can stay fresh in the fridge for up to four days. Before sealing, let it cool down to room temperature. This helps prevent excess moisture. - Storing Cooked Shrimp: Store the shrimp in a separate container. Make sure it is also airtight. Cooked shrimp can last in the fridge for up to three days. It's best to keep shrimp separate from rice to maintain texture. - Best Methods to Reheat Rice: To reheat rice, add a splash of water or broth in a microwave-safe bowl. Cover it with a lid or damp paper towel. Heat it for about one to two minutes. Stir halfway through to ensure even heating. You can also reheat rice on the stove. Add a little water to a saucepan, then heat on low. Stir occasionally until hot. - Reheating Shrimp without Drying Out: Reheat shrimp in a skillet on low heat. Add a tiny bit of olive oil or butter to keep it moist. Heat for about two minutes, stirring gently. You can also use the microwave. Place shrimp in a bowl with a sprinkle of water. Cover and heat for about 30 seconds. Check and stir, then heat again if needed. Can I use frozen shrimp for this recipe? Yes, you can use frozen shrimp. Just thaw them before cooking. Place the shrimp in cold water for about 15 minutes. This helps them cook evenly. Is there a substitute for coconut milk? If you don’t have coconut milk, you can use almond milk or soy milk. They add a different flavor but still work well. You can also mix heavy cream with some water for a creamy texture. How can I make the dish spicier? To spice it up, add red pepper flakes or diced jalapeños. You can also use a spicy sauce like Sriracha. Just mix it in with the shrimp for a nice kick. What to do if the rice is too sticky? If the rice sticks, add a bit more water and cook it on low heat. Stir gently to break up clumps. Next time, rinse the rice better to remove more starch. How to tell when shrimp are properly cooked? Shrimp are done when they turn pink and opaque. They should curl into a “C” shape. If they are still gray or feel tough, they need more cooking time. This blog post provided you with a simple way to make Coconut Lime Rice and Shrimp. We covered key ingredients, step-by-step instructions, tips for the perfect dish, and tasty variations. Remember, rinsing the rice is key for good texture. You can swap proteins or add spices for more flavor. With proper storage and reheating, you can enjoy your meal later too. Now, gather your ingredients and enjoy cooking this bright, delicious dish!

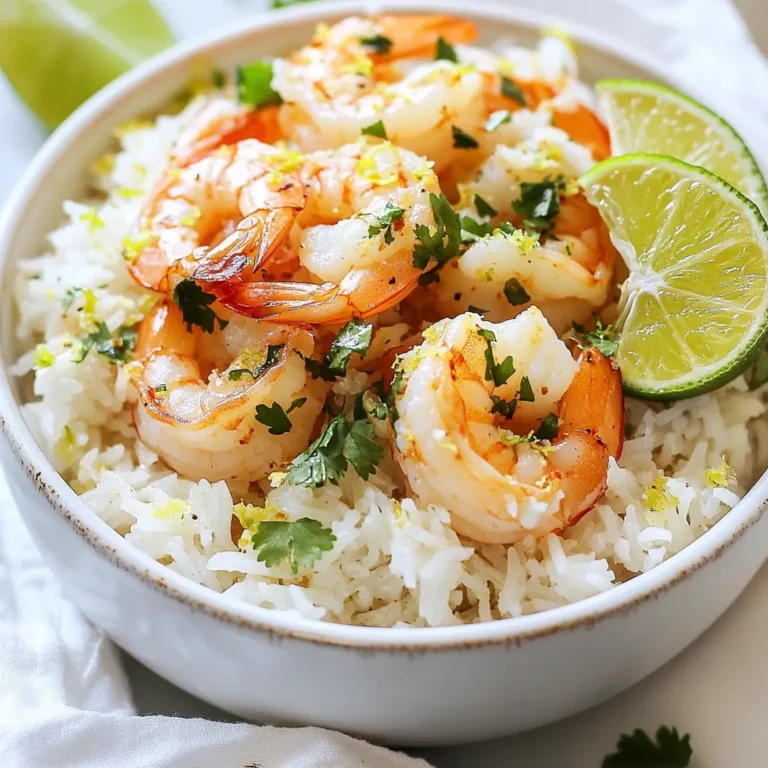
Coconut Lime Rice with Shrimp Savory and Simple Dish

- 1 lb boneless chicken thighs, sliced - 2 tablespoons gochujang (Korean chili paste) - 1 tablespoon soy sauce - 1 tablespoon sesame oil - 3 cloves garlic, minced - 1-inch piece ginger, grated - 1 tablespoon brown sugar These main ingredients come together to create a rich, spicy flavor. The gochujang gives the dish its signature kick. The soy sauce and sesame oil add depth, while garlic and ginger boost the taste. Brown sugar balances the spice, making it delicious. - 1 cup cooked brown rice - 1 cup steamed broccoli florets - 1 carrot, julienned - 2 green onions, sliced - Sesame seeds for garnish - Salt and pepper to taste These accompaniments are key for a complete meal. The brown rice provides a hearty base. Broccoli and carrots add color and nutrients. Green onions and sesame seeds give extra crunch and flavor. Salt and pepper enhance the overall taste, making each bite delightful. {{ingredient_image_1}} First, grab a medium bowl. In the bowl, combine these ingredients: - 2 tablespoons gochujang - 1 tablespoon soy sauce - 1 tablespoon sesame oil - 3 cloves garlic, minced - 1-inch piece ginger, grated - 1 tablespoon brown sugar Mix well until everything is blended. This marinade gives the chicken its spicy and sweet flavor. Next, take 1 pound of sliced boneless chicken thighs. Add the chicken to the marinade. Make sure every piece is coated evenly. Cover the bowl and place it in the fridge. Let it marinate for at least 30 minutes. If you have time, marinate for 2 hours. This will deepen the flavor. Now, heat a non-stick skillet over medium-high heat. Once hot, add the marinated chicken. Make sure to discard any leftover marinade. Cook the chicken for about 6 to 8 minutes. Stir occasionally until the chicken turns brown and is fully cooked. Season with salt and pepper to taste. While the chicken cooks, prepare the sides. Use 1 cup of cooked brown rice and 1 cup of steamed broccoli florets. If you haven’t steamed the broccoli yet, do it now. Once the chicken is done, grab two bowls. Divide the brown rice between them. Top each bowl with the spicy chicken, steamed broccoli, and julienned carrots. Finally, add sliced green onions and a sprinkle of sesame seeds on top. This adds color and crunch. Enjoy your tasty meal! Marinating your chicken is key to great flavor. I recommend marinating for at least 30 minutes. For the best taste, go for 2 hours. This allows the flavors to soak deep into the chicken. Gochujang, soy sauce, and sesame oil create a rich mix that makes each bite fantastic. To keep your chicken tender and juicy, heat your skillet well before adding the chicken. A hot pan gives the meat a nice sear. Cook the chicken for 6-8 minutes. Stir it often to ensure even cooking. Always check that the chicken is cooked through. Season with salt and pepper for that extra flavor boost. Serve your spicy Korean chicken bowls in deep dishes. This makes for a beautiful presentation. Start with a layer of brown rice. Top it with the spicy chicken and the steamed broccoli. Add julienned carrots for crunch. Finally, sprinkle sliced green onions and sesame seeds on top. You can even add pickled radish for a pop of color and tang. Pro Tips Marinating Time: Allow the chicken to marinate for at least 1 hour for the best flavor absorption. The longer it marinates, the more flavorful it will be! Cooking Temperature: Make sure your skillet is hot before adding the chicken. This helps achieve a nice sear and prevents the chicken from becoming soggy. Vegetable Variations: Feel free to swap out the broccoli and carrots for your favorite vegetables, such as bell peppers or snap peas, to customize the dish! Serving Suggestions: For added flavor, serve with a drizzle of extra sesame oil or a squeeze of lime over the finished bowls. {{image_2}} If you want to switch up the protein, try using tofu, beef, or shrimp. Tofu works great for a vegetarian option. Use firm tofu, and press it to remove excess water. For beef, go with thinly sliced flank steak. Cook it like the chicken for best results. Shrimp cooks quickly and adds a nice texture. Just be sure to adjust cooking times. Brown rice is tasty, but you can mix it up with other grains. Quinoa is a great choice because it’s high in protein. Cauliflower rice is a low-carb option that absorbs flavors well. If you love noodles, try soba or rice noodles for a unique twist. Just cook them according to package directions and add them to your bowl. Want more heat? Add extra gochujang or chili flakes to the marinade. You can also mix in some diced bell peppers or snap peas for color and crunch. If you prefer milder flavors, reduce the gochujang and add a splash of lime juice. This gives a fresh taste that brightens the dish. Remember, cooking is all about what you like! Store your Spicy Korean Chicken Bowls in an airtight container. This keeps them fresh. Place the bowls in the fridge within two hours of cooking. Enjoy them within three days for the best taste. To reheat, use the microwave. Place the bowl in for about one to two minutes. Stir halfway to heat evenly. You can also use a skillet. Warm it on low heat with a splash of water. This helps keep the chicken moist. If you want to freeze, let the chicken cool completely first. Portion the bowls into freezer-safe containers. Make sure to seal them tightly. They can last up to three months in the freezer. To defrost, place in the fridge overnight. Reheat as mentioned above. Enjoy your meal anytime! Spicy Korean Chicken Bowls are a tasty meal featuring marinated chicken, rice, and veggies. The dish uses boneless chicken thighs, making it juicy and flavorful. The marinade is made with gochujang, soy sauce, sesame oil, garlic, ginger, and brown sugar. You serve the chicken over cooked brown rice, steamed broccoli, and julienned carrots. Garnish with green onions and sesame seeds for extra taste. This dish is vibrant, full of flavor, and easy to enjoy. Yes, you can easily make this dish vegetarian or vegan. Instead of chicken, use firm tofu or tempeh. Marinate the tofu just like the chicken for the best taste. You can also add more veggies, like bell peppers or snap peas. Use vegetable broth instead of chicken broth in the rice for extra flavor. This way, you get a delicious meal without meat. You can find Spicy Korean Chicken Bowls at various Korean restaurants or eateries. Look for places that specialize in Korean barbecue or bibimbap. Many Asian fusion restaurants also offer this dish. If you are unsure, check online reviews or food apps for local recommendations. Enjoying this dish at a restaurant can give you new ideas for your home cooking! This article shared how to make Spicy Korean Chicken Bowls. You learned about key ingredients like chicken thighs and gochujang, which add bold flavors. I also explained marinating and cooking techniques for tasty results. You can customize this dish with different proteins and rice options. Remember to store leftovers correctly for the best taste later. Enjoy making these bowls, and don’t hesitate to get creative with your meal!

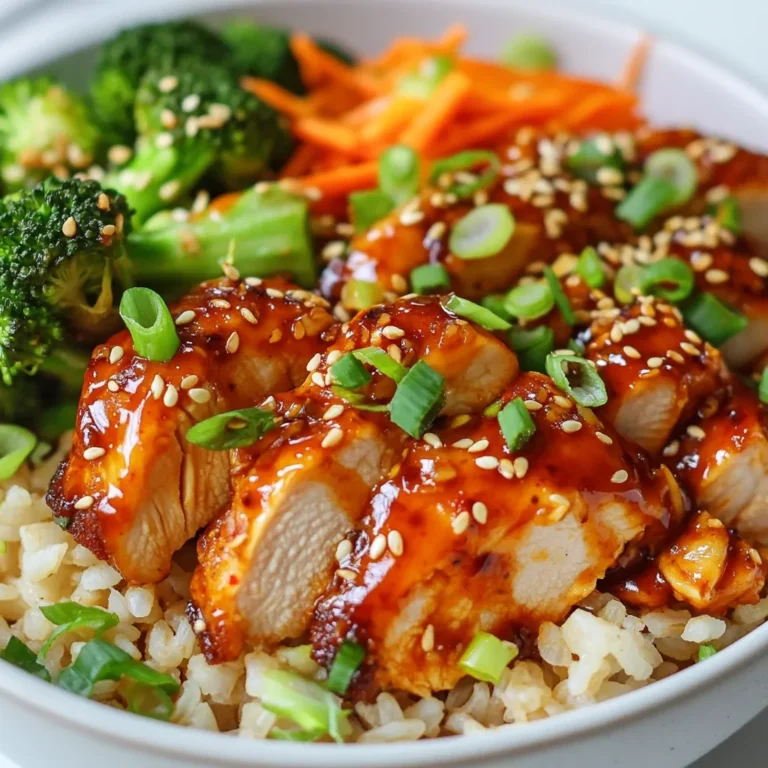
Spicy Korean Chicken Bowls Tasty and Easy Meal Plan

- 2 cups all-purpose flour - 1 cup granulated sugar - ½ cup unsalted butter, softened - 1 cup sour cream - 1 tablespoon ground cinnamon - ½ cup brown sugar - 1 cup chopped pecans (optional) - 1 ½ teaspoons baking powder - ½ teaspoon baking soda - ½ teaspoon salt - 1 large egg - 1 teaspoon vanilla extract Gathering your ingredients is key to making this cake a success. Start with two cups of all-purpose flour. This will provide the base for your cake. Then, grab one cup of granulated sugar to sweeten it up. You need half a cup of unsalted butter, softened, which helps to create a rich texture. Next, you will want one cup of sour cream. This gives the cake moisture and a nice tang. For the cinnamon sugar mixture, you need one tablespoon of ground cinnamon. This will be the star of your flavor. You also need half a cup of brown sugar, which adds a lovely depth. If you like, add one cup of chopped pecans for a crunchy twist. Now, let’s not forget the baking essentials. You will need one and a half teaspoons of baking powder to help your cake rise. You also want half a teaspoon of baking soda and half a teaspoon of salt to balance the flavors. Don’t forget one large egg to bind everything together. Finally, add one teaspoon of vanilla extract for that warm, inviting aroma. With these ingredients ready, you’re set to make a delightful cinnamon roll coffee cake! {{ingredient_image_1}} - Preheat the oven to 350°F (175°C). - Grease a 9x13 inch baking dish. Start by making your kitchen warm and inviting. Preheating the oven helps the cake rise well. Greasing the dish helps the cake come out easily after baking. - Combine dry ingredients in a bowl. - Add wet ingredients and mix until smooth. In a large bowl, whisk together 2 cups of flour, 1 cup of sugar, 1 ½ teaspoons of baking powder, ½ teaspoon of baking soda, and ½ teaspoon of salt. This mix gives the cake its structure. Next, add ½ cup of softened butter, 1 large egg, 1 teaspoon of vanilla extract, and 1 cup of sour cream. Use an electric mixer to blend everything until smooth. This should take about 2-3 minutes. - Prepare the cinnamon sugar mixture. - Layer the batter and sprinkle the cinnamon sugar mixture. In a separate bowl, mix 1 tablespoon of ground cinnamon with ½ cup of brown sugar. If you like nuts, add 1 cup of chopped pecans. This mixture gives a sweet crunch. Pour half of the batter into the greased dish and spread it out. Sprinkle half of the cinnamon mixture over the batter. Pour the rest of the batter on top and spread it gently. Finally, add the rest of the cinnamon sugar on top for a sweet finish. - Create a swirl with a knife. - Bake and cool the cake. Using a butter knife or skewer, gently swirl through the batter. This adds a nice marble effect. Place the dish in the preheated oven. Bake for 30-35 minutes. Check if it’s done by inserting a toothpick in the center; it should come out clean. Let the cake cool in the pan for about 10 minutes. Then transfer it to a wire rack. Enjoy this sweet treat warm or at room temperature! - Use fresh ingredients for better flavor. Fresh eggs and baking powder help the cake rise nicely. - Ensure butter is softened for easier mixing. Soft butter blends well, making your batter smooth. - Serve warm with a glaze or icing. A simple glaze of powdered sugar and milk adds sweetness. - Pair with coffee or tea for breakfast or dessert. The warm cinnamon flavor complements drinks perfectly. - Tips for avoiding a dry cake: Make sure not to overmix the batter. Overmixing can lead to a tough texture. - Adjusting baking time for different ovens: Every oven is unique. Start checking a few minutes early to avoid overbaking. Pro Tips Use Room Temperature Ingredients: For the best texture, make sure your butter and egg are at room temperature before mixing. This helps create a smoother batter. Don’t Overmix the Batter: Mix just until combined to avoid a dense cake. Overmixing can lead to gluten development, which makes the cake tough. Customize Your Nuts: If you’re not a fan of pecans, try walnuts or even chocolate chips for a different twist on the classic cinnamon roll flavor. Check for Doneness: Ovens vary, so start checking your cake a few minutes before the recommended time. A toothpick should come out clean when it’s fully baked. {{image_2}} You can change up your cinnamon roll coffee cake with flavor additions. Adding chocolate chips gives a rich taste. You can use dark or milk chocolate, depending on your choice. You can also mix in fresh fruit like blueberries or raspberries. This adds a juicy burst of flavor. If you want a nutty twist, try substituting nuts. Chopped walnuts or almonds work well. They add crunch and a unique taste. You can even skip the nuts if you prefer a smoother texture. If you need gluten-free options, you can swap regular flour with gluten-free flour. Look for blends that mimic all-purpose flour. They work well for this recipe. For a dairy-free version, substitute unsalted butter with coconut oil or vegan butter. Instead of sour cream, you can use non-dairy yogurt. This keeps your cake moist and tasty while fitting your dietary needs. Get creative by mixing flavors! You can combine cinnamon roll coffee cake with other cake types. For example, a chocolate coffee cake adds a rich twist. Layer your cake with frosting to make it more like a dessert cake. A cream cheese frosting pairs nicely with the cinnamon flavor. This adds sweetness and a creamy texture, making each bite delightful. To store leftover cake at room temperature, place it in an airtight container. This keeps the cake fresh for about three days. If you don't have a container, you can cover the cake with plastic wrap. Make sure it is fully cooled before wrapping to avoid sogginess. For long-term storage, you can freeze the cake. First, let the cake cool completely. Then, slice it into squares. Wrap each slice in plastic wrap. Next, place all wrapped slices in a freezer bag or an airtight container. This keeps the cake fresh for up to three months. When ready to eat, remove a slice from the freezer and let it thaw in the fridge overnight. To reheat for the best taste, preheat your oven to 350°F (175°C). Place the slices on a baking sheet. Cover with foil to keep moisture in. Heat for about 10-15 minutes. You can also use the microwave. Heat each slice for about 20-30 seconds. Enjoy it warm for a delightful treat! Yes, you can make this cake ahead of time. Once baked, let it cool completely. Wrap it well in plastic wrap or foil. Store it at room temperature for up to three days. For longer storage, freeze it for up to three months. When ready to serve, simply thaw it overnight in the fridge. You can reheat slices in the microwave for a warm treat. If you don’t have sour cream, you can use plain yogurt. Greek yogurt works well. It gives a similar texture and tang. You can also mix milk with lemon juice or vinegar. Use one tablespoon of lemon juice or vinegar for each cup of milk. Let it sit for five minutes before using. To check if the cake is done, insert a toothpick into the center. If it comes out clean or with a few crumbs, it’s ready. If the toothpick has wet batter, it needs more time. You should also look for a golden-brown top. The edges may pull away from the pan slightly. Yes, you can use a different baking dish. If using a smaller dish, the cake may take longer to bake. If using a larger dish, the cake will bake faster. Always check for doneness with a toothpick, regardless of the dish size. Adjust baking times as needed based on how deep the batter is in the dish. You learned how to make a delicious Cinnamon Roll Coffee Cake. We covered the key ingredients like flour, butter, and sugar. The step-by-step instructions make it easy to follow. Remember to use fresh ingredients for the best taste and explore fun variations. You can decorate it or save leftovers for later. Enjoy this tasty treat for breakfast or dessert. With these tips, you’ll bake a perfect cake every time. Try it out and share your results!

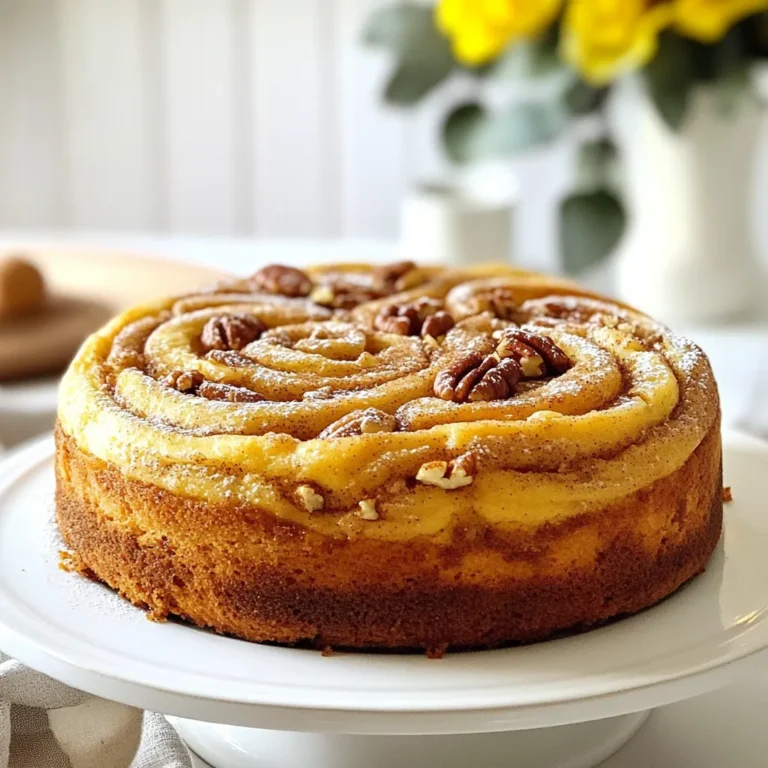
Cinnamon Roll Coffee Cake Delightful and Simple Recipe

For this Mango Avocado Salsa Chicken, you will need a few key items. Here’s what you’ll gather: - Chicken breasts: 4 boneless, skinless chicken breasts. - Marinade components: - 1 teaspoon garlic powder - 1 teaspoon cumin - 1 teaspoon paprika - 2 tablespoons olive oil - Salt and pepper to taste - Salsa ingredients: - 1 ripe mango, diced - 1 ripe avocado, diced - 1 small red onion, finely chopped - 1 jalapeño, deseeded and minced - 1/4 cup fresh cilantro, chopped - Juice of 1 lime - 1 tablespoon honey (optional for sweetness) Each of these ingredients plays a role in creating bright, bold flavors. The chicken absorbs the spices well, while the salsa adds freshness and creaminess. The sweet mango and creamy avocado work together nicely. The lime juice brightens it all up, making every bite a delight. {{ingredient_image_1}} 1. First, preheat your grill or stovetop grill pan over medium-high heat. This step ensures your chicken cooks evenly and gets those nice grill marks. 2. Next, prepare the marinade. In a small bowl, mix together 1 teaspoon of garlic powder, 1 teaspoon of cumin, 1 teaspoon of paprika, and 2 tablespoons of olive oil. Add salt and pepper to taste. This blend adds great flavor to the chicken. 1. Brush the marinade evenly on both sides of the chicken breasts. Make sure they are well coated. This helps keep the chicken juicy. 2. Grill the chicken for about 6-7 minutes on each side. You want the internal temperature to reach 165°F (75°C). The chicken should no longer be pink in the middle. 3. After grilling, let the chicken rest for a few minutes. This resting period helps the juices settle back in, making the chicken moist and tender. 1. While the chicken rests, prepare the mango avocado salsa. In a medium bowl, combine the diced mango, diced avocado, finely chopped red onion, minced jalapeño, chopped cilantro, lime juice, and honey if you want extra sweetness. 2. Gently toss all the ingredients together. Be careful not to mash the avocado. You want to keep the pieces intact for a nice texture in your salsa. Now your Mango Avocado Salsa Chicken is ready to enjoy! To grill chicken perfectly, set your grill to medium-high heat, around 375°F to 450°F. This temperature makes the chicken cook evenly and keeps it juicy. Place the chicken on the grill and cook it for 6-7 minutes on each side. To check doneness, use a meat thermometer. The chicken should reach 165°F (75°C). If you don’t have a thermometer, cut the chicken. The meat must be white, not pink. To boost the flavor of your salsa, consider adding spices. A pinch of chili powder or a dash of cayenne can add heat. You can also add diced bell peppers or corn for extra crunch. Try different herbs too. Mint or basil can give your salsa a fresh twist. Feel free to mix in some diced fruits like pineapple or peach for a sweet touch. Plating can turn a good meal into a great one. Slice the grilled chicken neatly and place it on a plate. Top it generously with the colorful mango avocado salsa. For garnishing, sprinkle fresh cilantro on top. You can also add lime wedges on the side for a pop of color. A colorful plate makes the dish more appealing and fun to eat! Pro Tips Marinate for Flavor: For even more flavor, let the chicken marinate in the seasoning mix for at least 30 minutes before grilling. Perfectly Ripened Avocado: Choose an avocado that yields slightly to gentle pressure for the best texture in your salsa. Adjust Heat Level: If you prefer a milder salsa, skip the jalapeño or remove the seeds and membranes before mincing. Serve with Sides: This dish pairs beautifully with rice or a fresh green salad for a complete meal. {{image_2}} You can switch out the chicken for shrimp or tofu. Both options work well and add a unique twist. If you want to try different fruits in your salsa, consider using pineapple or peach. These fruits will bring a nice sweetness and freshness to the dish. For those on a low-carb or keto diet, you can use skinless chicken thighs instead of breasts. This small change can keep the meal tasty and fit your diet. If you want a vegan or vegetarian option, try grilled portobello mushrooms instead of chicken. They have a meaty texture and soak up flavors well. You can bake or pan-sear the chicken if you don't have a grill. Baking takes about 25-30 minutes at 375°F (190°C). Make sure the chicken reaches 165°F (75°C). For the salsa, you can add new ingredients like diced bell peppers or mango chutney. These small changes give you a fresh take on the classic recipe. To keep your Mango Avocado Salsa Chicken fresh, store the chicken and salsa separately. This helps maintain the chicken's texture and prevents the salsa from getting mushy. Use airtight containers for storage. Glass containers work best, but any plastic container with a tight seal will do. - Place the chicken in a container with a lid. - Store the salsa in a different container. This way, both will stay fresh for longer. To reheat chicken without drying it out, use the oven. Preheat your oven to 350°F (175°C). Cover the chicken with foil and heat for about 15-20 minutes. This keeps the moisture in. For salsa, it’s best served cold, but if you want it warm, heat it gently on the stovetop. Use low heat and stir often. This helps prevent burning. Yes, you can freeze chicken. For best results, wrap the chicken tightly in plastic wrap, then place it in a freezer bag. Remove as much air as possible. It will stay fresh for up to three months. Salsa is not ideal for freezing. The texture changes when thawed. Instead, enjoy it fresh. If you have extra salsa, store it in the fridge for about 2-3 days. Can I make the mango avocado salsa ahead of time? Yes, you can make mango avocado salsa ahead of time. Store it in the fridge for up to two days. Just remember, the avocado may brown slightly. To slow this down, squeeze more lime juice on top. What sides pair well with Mango Avocado Salsa Chicken? This dish goes well with many sides. Here are some great options: - Rice or quinoa for a filling base - Black beans for added protein - Grilled veggies for a fresh crunch - Tortilla chips for a fun texture How long do I grill chicken for perfect results? Grill chicken for about 6-7 minutes on each side. Check that the internal temperature reaches 165°F (75°C). This ensures your chicken is juicy and safe to eat. Is the salsa safe for meal prep? Yes, the salsa is safe for meal prep. Just store it in an airtight container in the fridge. Use it within two days for the best taste and freshness. Can I use frozen mango or avocado for this recipe? You can use frozen mango, but fresh mango tastes better. Frozen avocado can be mushy, so I recommend fresh avocados instead. What if I can't find ripe avocados? If ripe avocados are hard to find, try these tips: - Look for avocados that yield slightly to gentle pressure. - Place firm avocados in a paper bag for a day or two to ripen. - If all else fails, use guacamole as a substitute. This blog post shared how to make delicious Mango Avocado Salsa Chicken. We covered ingredients, cooking steps, tips, and storage methods. Remember to marinate your chicken well and grill it to perfection. Fresh salsa adds flavor and color, making your dish pop. Experiment with different ingredients and storage practices for variety. Enjoy this tasty meal that impresses family and friends! Eating well can be simple and fun. Try out these recipes, and make it your own!

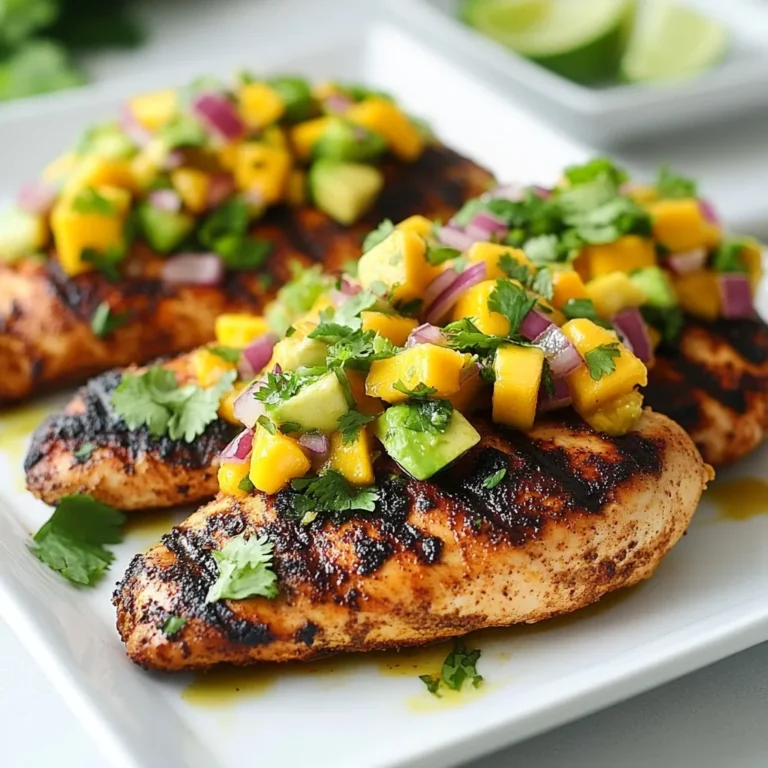
Mango Avocado Salsa Chicken Flavorful and Simple Meal

For the Spicy Garlic Noodle Stir-Fry, you will need: - 8 oz. rice noodles - 2 tablespoons vegetable oil - 4 cloves garlic, minced - 1 teaspoon ginger, grated - 1 red bell pepper, sliced - 1 cup sugar snap peas - 2 green onions, chopped - 3 tablespoons soy sauce - 1 tablespoon sriracha (adjust to taste) - 1 tablespoon sesame oil - Sesame seeds for garnish - Fresh cilantro for garnish These ingredients create a colorful and tasty dish that bursts with flavor. If you need to swap ingredients, here are some ideas: - Use any noodles you like, such as egg noodles or udon. - Swap vegetable oil for olive oil or peanut oil. - For garlic lovers, add more garlic for extra flavor. - If you don’t have sriracha, try hot sauce or chili paste. - Replace red bell pepper with yellow or green peppers. These substitutions keep the dish delicious while fitting your pantry. Using fresh ingredients enhances the taste of your dish. Fresh garlic and ginger give a strong flavor. Fresh veggies add crunch and color. However, dried or pre-minced options can save time. Just remember, fresh tends to be tastier. If you use dried ginger or garlic, start with less. Adjust as you taste. Now you have all the details you need to gather your ingredients and start cooking! {{ingredient_image_1}} To start, cook the rice noodles. Follow the instructions on the package. Usually, it takes about 5-7 minutes. Drain them well and set them aside. Make sure they don't stick together. A little oil can help if needed. Next, grab a large wok or skillet. Heat 2 tablespoons of vegetable oil over medium-high heat. Add 4 minced cloves of garlic and 1 teaspoon of grated ginger. Sauté these for about 30 seconds until they smell great. Then, toss in 1 sliced red bell pepper and 1 cup of sugar snap peas. Stir-fry these for about 3-4 minutes. They should soften but still stay crisp. Now, it's time to mix everything. Add the cooked rice noodles to the pan. Stir to combine them with the vegetables. Pour in 3 tablespoons of soy sauce, 1 tablespoon of sriracha, and 1 tablespoon of sesame oil. Mix well so the noodles soak up the sauce. Continue to stir-fry for another 2-3 minutes. Everything should be hot and mingled well. Finally, fold in 2 chopped green onions. Transfer your stir-fry to a serving dish. Garnish with sesame seeds and fresh cilantro for that extra touch. Enjoy your meal! To boost the heat, use more sriracha or add red pepper flakes. You can also try fresh chili peppers. Slice them thin and mix them in. For a smoky flavor, add chipotle powder. Adjust the amount based on your taste. You want a balance that excites your palate. For the best texture, cook the rice noodles just right. Follow the package instructions closely. Drain them thoroughly to avoid sogginess. Rinse them with cold water after draining. This stops the cooking process and keeps them firm. Toss the noodles with a little oil to prevent sticking. Use a hot wok for great stir-frying. Heat the oil until it shimmers. Add garlic and ginger for a quick sizzle. Keep stirring to avoid burning. Add your veggies in batches. This keeps them crisp and colorful. Don’t overcrowd the pan; it can lead to steaming instead of frying. Stir quickly for even cooking and flavor mixing. Pro Tips Cook Noodles Al Dente: To prevent the noodles from becoming mushy, cook them just until they are al dente. They will continue to cook slightly when stir-fried. Customize Spice Level: Adjust the amount of sriracha based on your heat preference. You can also add fresh chilies for an extra kick. Add Protein: For a more filling meal, consider adding protein like tofu, chicken, or shrimp. Cook them before adding the vegetables. Fresh Herbs Make a Difference: Garnish with freshly chopped cilantro or basil for added flavor and freshness in every bite. {{image_2}} You can easily add protein to your spicy garlic noodle stir-fry. Chicken, tofu, and shrimp are great choices. If you use chicken, cut it into small pieces and cook it first. Sauté the chicken in the wok until it turns golden brown. Then, add garlic and ginger as you normally would. For tofu, use firm or extra-firm tofu. Cube it and pan-fry until it's crispy. Shrimp cooks fast, so add it right before the noodles. Cook until it turns pink and opaque. Feel free to swap or add vegetables to your stir-fry. You can use broccoli, carrots, or bok choy. These veggies add color and crunch. If you want a touch of sweetness, try adding baby corn or snap peas, just like in the recipe. Make sure to cut the veggies into bite-sized pieces. This helps them cook evenly and blend well with the noodles. If you need a gluten-free option, substitute regular soy sauce with tamari. Tamari tastes just as good and is safe for gluten-free diets. You can also look for gluten-free rice noodles. They work perfectly in this dish. Just follow the cooking instructions on the package. Enjoy your spicy garlic noodle stir-fry with these simple swaps! After a tasty meal, let the Spicy Garlic Noodle Stir-Fry cool. Use a clean, airtight container. Store the noodles in the fridge for up to three days. If you leave them out too long, they can spoil. Always check for any odd smells or colors before eating leftovers. To reheat, use a pan on medium heat. Add a splash of water or oil to prevent sticking. Stir the noodles for about five minutes. You can also use a microwave. Heat in short bursts, stirring every 30 seconds. This helps keep the noodles moist and tasty. You can freeze this dish if you want it later. Use a freezer-safe container, leaving space at the top. The noodles can stay good for up to a month. When you are ready to eat, thaw them in the fridge overnight. Reheat as mentioned above for the best taste. Rice noodles work best for stir-fry. They cook quickly and soak up flavors well. You can also use egg noodles or udon if you prefer a chewier texture. Each type offers a unique taste and feel, so choose based on your liking. Yes, you can easily make this dish vegetarian. Use vegetable oil and replace any meat with tofu or extra veggies. This keeps the dish flavorful and satisfying. You can also add more protein by including edamame or chickpeas. You can adjust the spice level by changing the amount of sriracha. Start with less if you prefer mild heat. Taste as you go, and add more if you want it spicier. You can also add red pepper flakes for an extra kick. This article covered tasty ingredients, step-by-step cooking, and useful tips for stir-frying. I shared ways to substitute ingredients and different noodle types. You learned how to enhance flavors and make your dish unique with protein and veggies. When storing leftovers, remember the best methods for freezing and reheating. Use this guide to create delicious meals. Cooking can be fun with the right approach and knowledge. Enjoy your tasty stir-fry adventure!

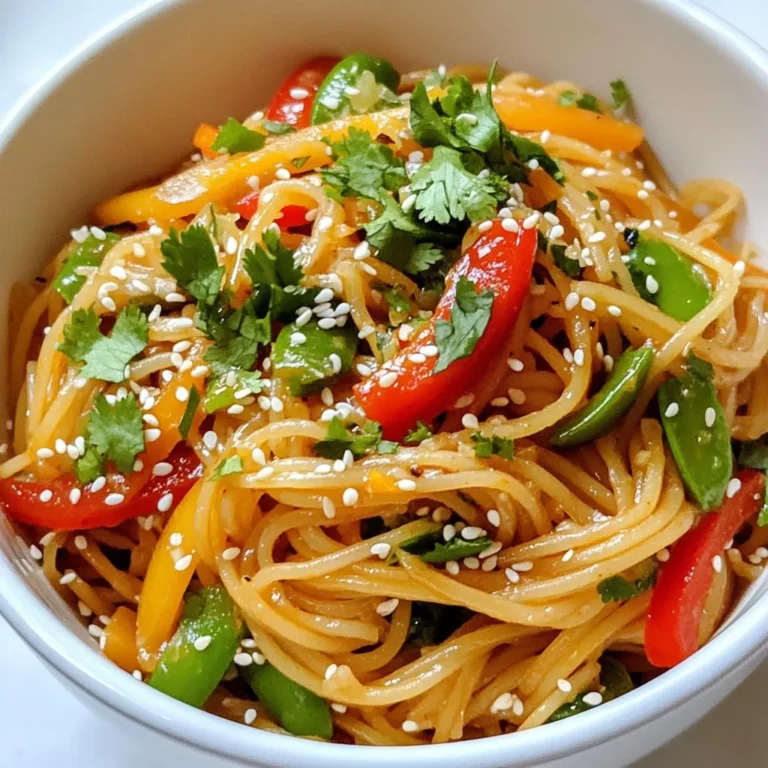
Spicy Garlic Noodle Stir-Fry Flavorful Dinner Recipe

To make mushroom spinach lasagna rolls, you need the right ingredients. Here’s what you will need: - 8 lasagna noodles - 1 tablespoon olive oil - 1 small onion, finely chopped - 2 cloves garlic, minced - 8 ounces mushrooms, sliced (cremini or button) - 4 cups fresh spinach - 1/2 teaspoon dried oregano - 1/2 teaspoon salt - 1/4 teaspoon black pepper - 1 cup ricotta cheese - 1 cup shredded mozzarella cheese, divided - 1/2 cup grated Parmesan cheese - 1 cup marinara sauce These ingredients come together to create a dish that is both simple and full of flavor. The lasagna noodles serve as a cozy blanket for the filling. The olive oil helps to sauté the onion and garlic, adding depth to the dish. Fresh mushrooms and spinach bring earthy notes and vibrant color. The cheeses layer in creaminess, while the marinara ties everything together with its rich taste. When you gather these ingredients, think about how each one works together. The balance of flavors and textures makes this dish truly special. Enjoy the process of preparing your mushroom spinach lasagna rolls! {{ingredient_image_1}} First, cook 8 lasagna noodles in boiling water. Follow the package instructions. You want them al dente, which means they should be firm but not hard. This keeps them from falling apart later. After cooking, drain the noodles. Place them on a clean kitchen towel to avoid sticking. You can also drizzle a bit of olive oil on them for extra help. In a large skillet, heat 1 tablespoon of olive oil over medium heat. Add 1 small, finely chopped onion. Cook it until it turns translucent, which takes about 3-4 minutes. Next, add 2 cloves of minced garlic and 8 ounces of sliced mushrooms. Cook for around 5-7 minutes. The mushrooms should soften and release their liquid. Then, toss in 4 cups of fresh spinach, 1/2 teaspoon of dried oregano, 1/2 teaspoon of salt, and 1/4 teaspoon of black pepper. Cook everything until the spinach wilts, which should take about 2-3 minutes. Remove the skillet from heat and let it cool for a few minutes. In a mixing bowl, combine your cooked mushroom-spinach mix with 1 cup of ricotta cheese. Add 1/2 cup of shredded mozzarella cheese and 1/4 cup of grated Parmesan cheese. Mix well to ensure everything blends together. This filling should be creamy but not too runny. If it feels too loose, add more cheese to firm it up. Take one lasagna noodle and place about 2-3 tablespoons of the filling at one end. Roll it tightly from that end. Place the roll seam-side down in a baking dish. Repeat this step for the rest of the noodles and filling. Once all rolls are in the dish, pour 1 cup of marinara sauce over them. Make sure each roll is well covered. Sprinkle the rest of the mozzarella and Parmesan cheese on top. Cover the baking dish with foil. Bake in a preheated oven at 375°F (190°C) for 25 minutes. After that, remove the foil and bake for another 15 minutes. This helps the cheese get bubbly and golden. Let the lasagna rolls cool for about 5 minutes before serving. Serve them hot and enjoy! To make your Mushroom Spinach Lasagna Rolls shine, add fresh herbs. Basil and thyme work well. They bring a fresh taste that lifts every bite. You can also try spices like red pepper flakes for a kick. For cheese, consider using goat cheese or cottage cheese. These options add creaminess and change the flavor profile. Mixing cheeses can create a unique taste that surprises your guests. One common mistake is overcooking the noodles. If they are too soft, they may tear when you roll them. Cook them just until al dente. This keeps them firm and easy to handle. Another mistake is not using enough sauce. A good amount of marinara sauce helps keep the rolls moist. It also adds flavor. Make sure you cover each roll well with sauce before baking. Garnishing is key for a beautiful dish. Fresh basil or parsley adds color and freshness. A sprinkle of grated Parmesan on top gives a nice touch too. For side dishes, serve your lasagna rolls with mixed greens. A simple salad with a light vinaigrette pairs well. This adds a nice crunch and balances the meal. Pro Tips Use Fresh Ingredients: Opt for fresh mushrooms and spinach for maximum flavor and nutritional benefits. Prevent Sticking: Lay cooked lasagna noodles flat on a clean kitchen towel to prevent them from sticking together. Cheese Varieties: Experiment with different cheeses like goat cheese or feta for a unique twist on the filling. Make Ahead: Assemble the rolls a day in advance and store in the fridge. Just add a few extra minutes to the baking time! {{image_2}} - Gluten-free options: You can use gluten-free lasagna noodles. Many brands offer great taste and texture. Cook them as directed. This makes the dish friendly for those with gluten allergies. - Vegan alternatives: Swap ricotta with tofu or cashew cheese. Use nutritional yeast to add a cheesy flavor. Replace mozzarella and Parmesan with plant-based cheeses. This way, everyone can enjoy the meal. - Adding different vegetables: Try zucchini, bell peppers, or kale for extra nutrients. Just sauté them like the mushrooms. They add color and taste to your dish. - Using various sauces: Besides marinara, you can use pesto or Alfredo sauce. Each sauce brings its own unique taste. Mix and match to find your favorite. - Pairing with salads: A fresh green salad works well. Toss in some cherry tomatoes and cucumber for a crunchy bite. The salad adds lightness to the rich rolls. - Suggested wine pairings: A light red wine like Pinot Noir complements the dish. If you prefer white, try Chardonnay. Both enhance the flavors of the lasagna rolls. To keep your Mushroom Spinach Lasagna Rolls fresh, use these tips: - Refrigeration tips: Store leftovers in an airtight container. They will stay good in the fridge for up to four days. Make sure to cool them down before sealing the container. - Freezing guidelines: For longer storage, freeze the lasagna rolls. Wrap each roll in plastic wrap, then place them in a freezer-safe bag. They can last for up to three months in the freezer. When you’re ready to eat, thaw them overnight in the fridge. To enjoy your lasagna rolls again, follow these steps: - Best methods for reheating: The oven works best for reheating. Preheat it to 350°F (175°C). Place the rolls in a baking dish and cover with foil. Heat for about 20-25 minutes until warmed through. - Ensuring the dish remains moist: Add a splash of marinara sauce over the rolls before reheating. This helps keep the dish moist and tasty. If you use a microwave, cover the dish with a damp paper towel to keep the moisture in. Heat in short bursts to avoid drying out the rolls. Yes, you can prepare these rolls ahead of time. Make the filling and assemble the rolls. Cover them tightly with plastic wrap or foil. Store them in the fridge for up to 24 hours before baking. If you want to freeze them, put them in a safe container. They can last up to three months in the freezer. When ready to cook, thaw them overnight in the fridge. Then, bake as instructed. If you need a ricotta substitute, try cottage cheese. Blend it for a smoother texture. You can also use cream cheese or goat cheese for a richer taste. Mashed tofu works well for a vegan option. Add a splash of lemon juice for more flavor. Each option will give a different taste, so choose what you like best. These lasagna rolls can last in the fridge for 3 to 5 days. Make sure to store them in an airtight container. Always check for any signs of spoilage before eating. If they smell off or look strange, it's best to toss them. Enjoy them warm for a comforting meal. Yes, you can use no-boil lasagna noodles! Layer them with sauce and filling just like regular noodles. No-boil noodles absorb moisture from the sauce while baking. You may need to add extra sauce to ensure they cook well. Follow the package instructions for baking time, as it may vary. This saves time and effort, making your cooking easier. In this post, we covered the key ingredients for delicious Mushroom Spinach Lasagna Rolls, along with step-by-step instructions. I shared tips to enhance flavor and avoid common mistakes, as well as variations to suit dietary needs. Remember, storing and reheating correctly keeps your dish fresh. With these guidelines, you can create a tasty meal everyone will love. Cooking should be fun and rewarding, so try these ideas and enjoy your time in the kitchen. Your lasagna journey starts now!

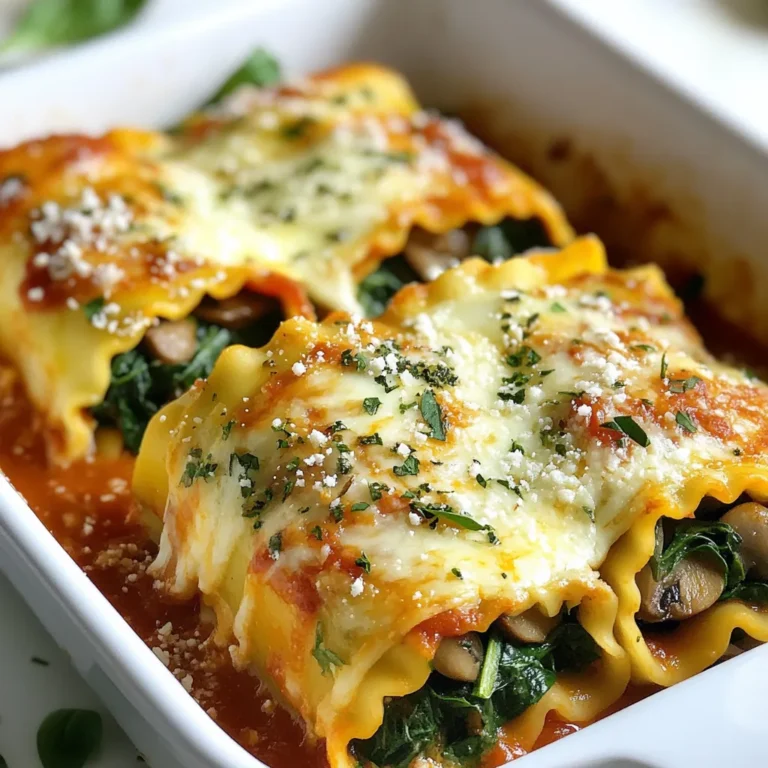
Mushroom Spinach Lasagna Rolls Simple and Flavorful Dish

PREV 1 … 46 47 48 … 52 NEXT
cozy citrus kitchen

explore

DessertsDinnerAppetizersDrinks

Our Policies

  • Cookie Policy
  • Copyright Policy
  • Disclaimer
  • GDPR Policy
  • Terms Of Use
Back to Top
  • About
  • Contact Us
  • Privacy Policy
© 2025 cozy citrus kitchen