FREE DINNER EBOOK! Get your copy!
  • Cookie Policy
  • GDPR Policy
  • Disclaimer
  • Terms Of Use
  • Visit my other site: Fun Cookie Recipes
cozy citrus kitchen
  • Home
  • Dinner
  • Desserts
  • Drinks
  • Appetizers
  • Contact
  • About
  • Privacy Policy
  • Home
  • Dinner
  • Desserts
  • Drinks
  • Appetizers
  • Contact
  • About
  • Privacy Policy
  • Cookie Policy
  • GDPR Policy
  • Disclaimer
  • Terms Of Use
Visit my other site: Fun Cookie Recipes

HOME / CATEGORIES /

Latest

To make a savory pesto chicken caprese flatbread, gather these fresh ingredients: - 2 flatbreads (store-bought or homemade) - 1 cup cooked chicken breast, shredded - 1/2 cup basil pesto - 1 cup cherry tomatoes, halved - 1 cup fresh mozzarella balls (bocconcini), halved - 1 tablespoon balsamic glaze - Fresh basil leaves for garnish - Salt and pepper to taste - Olive oil for drizzling Each ingredient plays a key role in building flavor. The flatbread acts as a perfect base, crispy and warm. The shredded chicken gives protein and heartiness to the dish. Basil pesto adds a rich, herby taste that ties it all together. Cherry tomatoes offer a burst of sweetness, while fresh mozzarella brings a creamy texture. Balsamic glaze adds a tangy finish that elevates the dish. Fresh basil leaves not only garnish but also enhance the overall aroma and flavor. Don’t forget to season with salt and pepper for balance, and a drizzle of olive oil for richness. Using fresh, quality ingredients will make a big difference. They help create a flatbread that feels gourmet yet simple to make. Each bite should feel fresh and delicious. {{ingredient_image_1}} - Preheat the oven to 400°F (200°C). - Prepare a baking sheet lined with parchment paper. - In a bowl, mix the shredded chicken with half of the basil pesto. - Spread the remaining pesto evenly over the flatbreads. - Add the pesto chicken, halved cherry tomatoes, and mozzarella balls on top. - Bake the flatbreads in the oven for 10-12 minutes. - They should be crispy, and the cheese should melt. - Remove the flatbreads from the oven and let them cool slightly. - Drizzle balsamic glaze over the top. - Garnish with fresh basil leaves. - Cut into slices and serve warm. Choosing the right flatbreads is key. Look for flatbreads that are sturdy. They should hold the weight of the toppings without getting soggy. You can use store-bought options for ease or make your own for a fresh taste. For optimal chicken preparation, always use cooked chicken breast. Shredded chicken mixes well with pesto. You can use leftover chicken or rotisserie chicken for speed. The more flavor in the chicken, the better your flatbread will taste. To make crispy flatbreads, preheat your oven to 400°F (200°C) before baking. This helps them get that perfect crunch. Place them on a baking sheet lined with parchment paper for easy cleanup. To ensure melted cheese, use fresh mozzarella balls. They melt beautifully and add a creamy texture. Space the cheese evenly on the flatbreads. This way, every bite gets a gooey surprise. Best accompaniments for this dish include a simple side salad. A light green salad with a lemon vinaigrette pairs well. You may also serve it with crunchy vegetable sticks for a fresh crunch. For garnishing ideas, use fresh basil leaves on top. They add a burst of flavor and a lovely look. Drizzling balsamic glaze over the flatbread adds a sweet touch. It makes the dish even more appealing and tasty. Pro Tips Tip Title: Use Fresh Ingredients: Always opt for fresh basil and ripe cherry tomatoes for the best flavor in your flatbread. Tip Title: Customize Your Pesto: Add nuts or cheese to your pesto for a richer flavor profile that complements the chicken. Tip Title: Baking Time: Keep an eye on the flatbreads while baking; every oven is different, and you want them crispy, not burnt. Tip Title: Perfect Balsamic Drizzle: For a gourmet touch, heat the balsamic glaze slightly before drizzling to enhance its sweetness and flavor. {{image_2}} You can mix things up by changing the protein. Instead of chicken, try turkey or tofu. Both options work well with the other flavors. For cheese, fresh mozzarella is great, but you can use goat cheese or feta for a twist. Add spices like red pepper flakes for heat or garlic powder for extra flavor. Fresh herbs like oregano or thyme can also boost taste. If you want a different sauce, consider using sun-dried tomato paste or a creamy ranch dressing. To make this dish gluten-free, select gluten-free flatbreads. You can find these at many stores. For a vegan version, swap chicken for chickpeas or tempeh and use vegan cheese. You can also make your own pesto with nuts, oil, and herbs for a tasty vegan option. To keep your flatbread fresh, store it in the fridge. Use an airtight container. This will keep the flatbread from drying out. You can enjoy it for up to three days. If you want to save it longer, consider freezing. Wrap the flatbread tightly in plastic wrap, then place it in a freezer bag. It can last for up to two months in the freezer. When you're ready to eat your leftovers, you have two great options: the oven or the microwave. The oven is best for keeping the texture. Preheat it to 350°F (175°C) and bake the flatbread for about 10 minutes. This will make it crispy again. If you’re in a hurry, use the microwave. Heat it for about 30 seconds. Watch it closely to avoid making it soggy. For both methods, let it cool a bit before you dig in. Enjoy your delicious pesto chicken caprese flatbread! Can I use store-bought pesto? Yes, you can use store-bought pesto. It saves time and tastes great. If you want, you can add some fresh herbs for more flavor. Try mixing in a bit of garlic or cheese to make it special. How do I ensure my flatbread doesn’t get soggy? To keep your flatbread crispy, use less pesto. Also, pre-bake the flatbreads for a few minutes before adding toppings. This helps create a nice barrier. Make sure to bake them until the cheese is bubbly and golden. Can I make this dish ahead of time? Yes, you can prep some parts ahead. Cook the chicken and cut the veggies in advance. Just store them in the fridge. When you're ready, assemble and bake the flatbreads for a quick meal. What are some side dishes to pair with it? Great sides include a green salad or roasted veggies. You can also serve it with a light soup. These sides keep the meal fresh and balanced. What’s the best way to cook the chicken for this recipe? I recommend poaching or grilling the chicken. Both methods keep the chicken juicy. If you have leftover chicken, that's perfect too! Just shred it and mix with the pesto. How can I modify this recipe to make it healthier? To make it healthier, use whole wheat flatbreads. You can also try adding more veggies, like spinach or bell peppers. For a lower-fat option, choose part-skim mozzarella. These swaps keep the flavor while cutting calories. This blog post showed how to make pesto chicken Caprese flatbreads. We covered the key ingredients, preparation steps, and baking tips. You learned how to switch ingredients to fit your taste and diet. I also shared how to store and reheat your leftovers. In the end, this dish is fun and easy to make. Enjoy customizing it for your guests or family. Happy cooking!

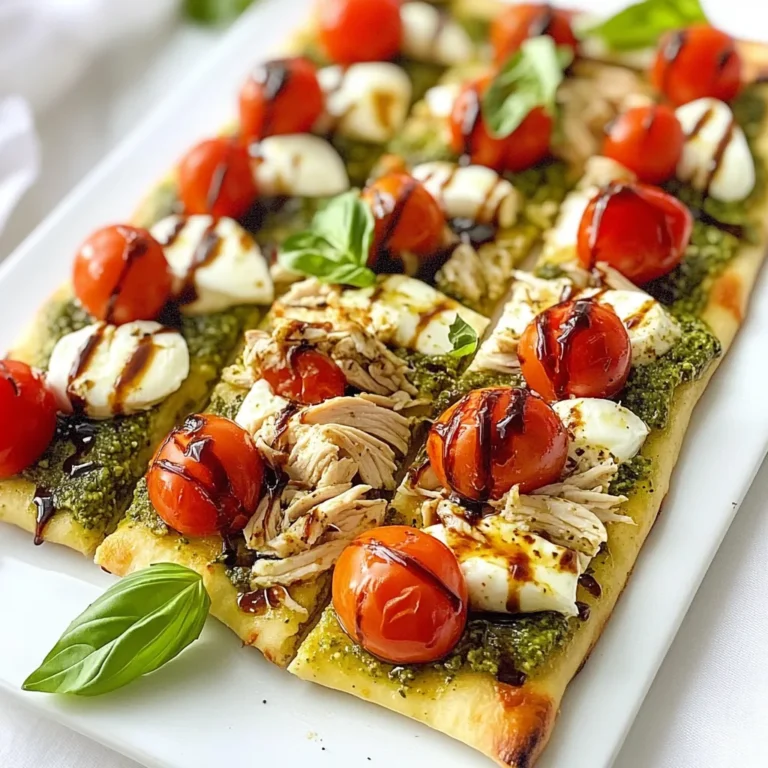
Savory Pesto Chicken Caprese Flatbread Recipe

To make Chili Lime Chicken Wings, you need: - 2 pounds chicken wings - 2 tablespoons olive oil - Zest and juice of 2 limes - 1 tablespoon honey For the perfect flavor, include these seasonings: - 3 tablespoons chili powder - 1 teaspoon cumin - 1 teaspoon garlic powder - 1 teaspoon onion powder - 1/2 teaspoon smoked paprika - Salt and pepper to taste Add a fresh touch with these garnishes: - Fresh cilantro, chopped - Lime wedges for serving These ingredients create a tasty and zesty dish. The lime adds brightness, while the chili powder gives a kick. You can adjust the seasonings based on your taste. Enjoy experimenting! {{ingredient_image_1}} First, I start by prepping the wings. Pat the chicken wings dry with paper towels. This helps them crisp up nicely when cooked. Next, I make the marinade. In a large bowl, I mix together the olive oil, chili powder, cumin, garlic powder, onion powder, smoked paprika, lime zest, lime juice, honey, salt, and pepper. I stir until everything blends well. Now it's time to marinate the wings. I add the chicken wings to the bowl. I toss them in the marinade until they are fully coated. I cover the bowl and place it in the fridge. For the best flavor, I let them marinate for at least 30 minutes. If I have time, I let them sit for up to 4 hours. After marinating, I preheat the oven to 425°F (220°C). I prepare a baking sheet by lining it with parchment paper or aluminum foil. This makes cleanup easy. Then, I arrange the marinated wings in a single layer on the baking sheet. I bake them for 25-30 minutes. Halfway through, I flip the wings to ensure even cooking. When they turn golden brown and crispy, I switch to the broiler for the last 2-3 minutes. I keep a close watch to avoid burning. Finally, I take the wings out of the oven and let them rest for a few minutes. I garnish them with chopped cilantro and serve with lime wedges on the side. To get crispy chicken wings, start by drying them well. Use paper towels to soak up any extra moisture. This step is key for a nice crunch. Next, marinate them for at least 30 minutes. The longer, the better! You can marinate for up to 4 hours for great flavor. When cooking, place the wings in a single layer. This allows hot air to circulate around them. For extra crispiness, switch to broil for the last few minutes. Keep a close eye so they don’t burn. Want to add your twist? You can change the spice level by using different chili powders. If you like heat, add cayenne pepper to the marinade. For a sweeter taste, increase the honey. You can also mix in herbs like oregano or thyme for more depth. Experiment with your favorite spices! The key is to balance the heat and sweetness. Don’t be afraid to taste the marinade before adding the wings. Serve your chili lime chicken wings with lime wedges on the side. Fresh lime juice adds a bright kick. You can also make a creamy dip, like ranch or blue cheese, for a cool contrast. For a fun twist, try serving them with tortilla chips or a fresh salsa. Garnish your wings with chopped cilantro for a colorful touch. Pair these wings with a refreshing drink like iced tea or a light beer. Enjoy every flavorful bite! Pro Tips Dry the Wings: Make sure to thoroughly pat the chicken wings dry before marinating. This step is crucial for achieving a crispy skin when baked. Adjust Spice Levels: Feel free to adjust the amount of chili powder according to your heat preference. You can also add cayenne pepper for an extra kick! Use Fresh Ingredients: Using fresh lime juice and zest enhances the flavor significantly compared to bottled varieties. Always opt for fresh where possible. Rest Before Serving: Let the wings rest for a few minutes after baking. This allows the juices to redistribute, resulting in juicier wings. {{image_2}} If you want more heat, add cayenne pepper or hot sauce to the marinade. Start with 1 teaspoon of cayenne. You can also use fresh jalapeños for a different kick. Chop them finely and mix them in with the other spices. This extra spice level will make your wings even more exciting. For a sweeter twist, you can increase the honey to 2 tablespoons. This adds a nice balance to the spicy flavors. You might also try adding a splash of orange juice for a fruity note. This change gives your wings a sweet and tangy flavor that pairs well with the chili lime base. Both methods work well, but they give different results. Baking the wings in the oven makes them crispy and flavorful. Use a high temperature of 425°F (220°C) for great results. On the other hand, the air fryer cooks the wings faster and can achieve an even crispier skin. Set the air fryer to 400°F (200°C) and cook for about 20-25 minutes, shaking the basket halfway through. Both ways give you delicious chili lime wings, so choose what works best for you. To keep your chili lime chicken wings fresh, let them cool first. Place them in a shallow, airtight container. You can also use a resealable bag. Make sure to remove as much air as possible. This helps prevent freezer burn. Store them in the fridge for up to three days. When you're ready to enjoy your wings again, preheat your oven to 350°F (175°C). Spread the wings on a baking sheet. Heat them for about 15-20 minutes. Flip them halfway through for even warming. You can also use an air fryer. Just set it to 350°F (175°C) and cook for 8-10 minutes. This keeps them crispy. If you want to save your wings for later, freezing is a great option. First, let the wings cool completely. Place them in a single layer on a baking sheet. Freeze them for about 1-2 hours. Once frozen, transfer them to a freezer bag. They will stay good for up to three months. To reheat, follow the instructions above but add a few more minutes to cook through. You can marinate chicken wings for at least 30 minutes. For the best taste, marinate them for up to 4 hours. This time allows the flavors to soak in well. If you are short on time, even a quick 30-minute soak works. Just remember, longer is better for flavor. Yes, you can use other types of chicken. Drumsticks or chicken thighs work great too. Just keep in mind that cooking times may change. Thicker pieces will need more time to cook through. Make sure to check their internal temperature for safety. Chili Lime Chicken Wings go well with many sides. Here are some great options to consider: - Crunchy coleslaw - Fresh guacamole with tortilla chips - Corn on the cob - Rice or quinoa salad - Spicy potato wedges These sides balance the zesty flavors and make your meal fun and complete. Now you know how to make tasty Chili Lime Chicken Wings. We covered the key ingredients, step-by-step cooking, and expert tips to get them just right. I shared fun variations and how to store your wings, too. Try these easy recipes for your next meal. You'll impress friends and family with your skills and the great taste. Remember, cooking is all about enjoying the process and sharing good food. Happy cooking!

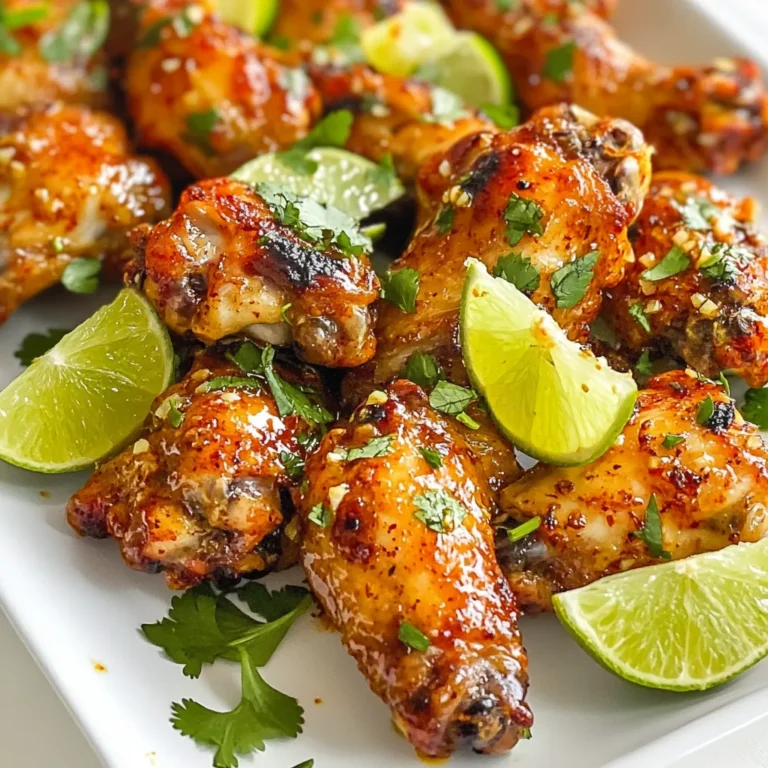
Chili Lime Chicken Wings Flavorful and Simple Dish

- 2 lbs ripe tomatoes, quartered - 1 large onion, chopped - 4 cloves garlic, whole - 2 tablespoons olive oil - Salt and pepper to taste - 4 cups vegetable broth - 1 teaspoon dried basil - 1 teaspoon dried oregano - 1 cup heavy cream - Fresh basil leaves for garnish What can I use instead of heavy cream? You can try coconut milk or cashew cream. Both options give a rich taste. How do I choose the best tomatoes? Look for ones that feel heavy and smell sweet. Ripe tomatoes have a bright red color and firmness. Can I use vegetable broth instead of chicken broth? Yes, vegetable broth works great here. It gives a nice flavor without meat. {{ingredient_image_1}} To start, you need to roast the tomatoes, onion, and garlic. First, preheat your oven to 400°F (200°C). On a large baking sheet, spread out the quartered tomatoes, chopped onion, and whole garlic cloves. Drizzle 2 tablespoons of olive oil over the veggies. Sprinkle salt and pepper to taste. Roast these for about 25-30 minutes. You want the tomatoes caramelized and the onions tender. After roasting, remove the pan from the oven. Let the veggies cool for a few minutes. Once cool enough to handle, squeeze the garlic from its skins and throw away the skins. This garlic will add a sweet flavor to your soup. Now, it’s time to combine the ingredients in a pot. In a large pot, mix the roasted tomatoes, onions, garlic, 4 cups of vegetable broth, 1 teaspoon of dried basil, and 1 teaspoon of dried oregano. Bring this mixture to a simmer over medium heat. Let it cook for about 10 minutes to blend the flavors well. For a smooth texture, use an immersion blender to blend the soup. If you don’t have one, carefully transfer the soup to a regular blender in batches. Blend until it is silky and smooth. Next, you’ll want to incorporate cream and adjust the seasoning. Return the blended soup to the pot, and stir in 1 cup of heavy cream. Heat it over low heat until warmed through. Taste the soup and add more salt and pepper if needed. For serving, ladle the soup into bowls and garnish with fresh basil leaves on top. This simple touch makes the dish even more inviting. Enjoy your creamy roasted tomato soup! - Ensuring even roasting: Cut tomatoes into equal sizes. This helps them cook at the same rate. Spread them out on the baking sheet without crowding. Leave space for air to flow. - Seasoning adjustments before roasting: Use olive oil generously to coat the tomatoes and onion. This gives them a rich flavor. Sprinkle salt and pepper evenly. You can also add a pinch of sugar to enhance sweetness. - Using an immersion blender vs. traditional blender: An immersion blender is easy for this soup. You blend right in the pot. A traditional blender works too, but be careful with hot soup. Blend in small batches and let steam escape. - Tips for achieving the perfect soup consistency: Start blending on low speed. This helps avoid splatters. Blend until smooth, but you can leave some bits for texture if you like. If the soup is too thick, add a bit more broth. - Adding spices for extra flavor: Try adding a pinch of red pepper flakes for heat. A dash of smoked paprika brings a nice depth. Experiment with spices like cumin for a unique twist. - Incorporating fresh herbs vs. dried herbs: Fresh basil adds bright flavor at the end. Dried herbs work well during cooking. They release their flavor slowly. Use about three times the amount of fresh herbs compared to dried. Pro Tips Use Ripe Tomatoes: For the best flavor, select ripe tomatoes. They should be slightly soft to the touch and have a rich color. Enhance Flavor with Fresh Herbs: While dried herbs are convenient, try adding fresh basil or oregano during the last few minutes of cooking for a vibrant flavor boost. Adjust Creaminess: If you prefer a lighter soup, you can substitute half-and-half or milk for some of the heavy cream. Serve with Crusty Bread: This soup pairs wonderfully with crusty bread or grilled cheese sandwiches for a comforting meal. {{image_2}} To make this soup dairy-free, replace the heavy cream with coconut cream or cashew cream. Both options add a rich, creamy texture without dairy. You can also use silken tofu blended until smooth for a protein boost and a creamy base. You can enhance the soup by adding vegetables like carrots or bell peppers. Just chop them and roast them with the tomatoes. They add sweetness and nutrition. You can also incorporate protein options like beans. White beans or chickpeas will make the soup more filling. For a Mediterranean twist, sprinkle in some feta cheese before serving. It adds a nice salty flavor. If you like spice, add red pepper flakes to give it a kick. Start with a pinch and adjust to your taste. To store any leftover soup, let it cool first. Pour it into an airtight container. This helps keep the soup fresh. In the fridge, it stays good for about 3 to 4 days. Always check for any off smells before you eat it. You can freeze creamy roasted tomato soup for later use. To do this, let it cool completely. Then, pour it into freezer-safe bags or containers. Remove as much air as possible. This helps prevent freezer burn. When you are ready to enjoy it, thaw it overnight in the fridge. Reheat on the stove or microwave. To keep the flavor and texture, avoid freezing it with the cream. Instead, add the cream when you reheat it. This gives you a smooth and creamy soup. When it’s time to reheat your soup, use low heat on the stove. Stir it gently to avoid sticking. You can also use a microwave, but stir halfway through. This helps heat it evenly. To prevent separation of ingredients, stir well as it heats. If you notice any separation, blend it again until smooth. This way, you get a creamy texture every time! You can change the soup's thickness easily. For a thicker soup, blend it longer. You can also add more heavy cream or a bit of cornstarch mixed with water. If you want it thinner, add more vegetable broth. Always taste and adjust after you add. Yes, you can use canned tomatoes. Look for whole peeled tomatoes for the best taste. Drain the tomatoes before using them. You may want to cut back on the broth since canned tomatoes have more liquid. The soup will still be delicious! This soup pairs well with many sides. Consider grilled cheese for a classic combo. You can also serve it with crusty bread or a fresh salad. For a fun twist, add croutons or a sprinkle of cheese on top. Enjoy! In this guide, we covered a delicious creamy roasted tomato soup recipe. You learned about key ingredients and helpful substitutes. I also shared step-by-step instructions for making, blending, and serving. You discovered tips for roasting and enhancing flavors, as well as variations like vegan options. Lastly, I discussed storage methods to keep your soup fresh. Making this soup is easy and fun. You can impress friends and family with your skills! Enjoy your cooking journey and share this tasty dish with others.

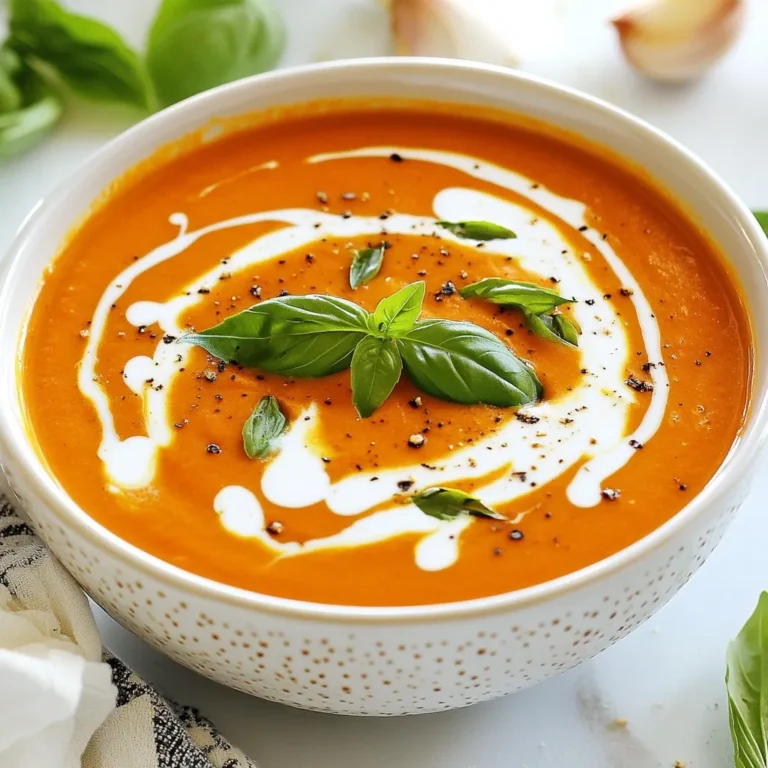
Creamy Roasted Tomato Soup Comforting and Flavorful Dish

- 1 lb ground beef - 2 tablespoons sesame oil - 2 cloves garlic, minced - 1 tablespoon fresh ginger, grated - 1/4 cup soy sauce (or tamari for gluten-free) - 2 teaspoons rice vinegar - 1 tablespoon honey - 1/4 cup green onions, chopped - 1 small carrot, finely grated - 1/2 red bell pepper, finely diced - 1 tablespoon sesame seeds - 1 head of butter or romaine lettuce, leaves separated These ingredients make the base of the dish. The ground beef gives a hearty flavor. The sesame oil adds depth, while garlic and ginger bring freshness. Soy sauce and honey balance the flavors with saltiness and sweetness. The veggies add crunch and color. - Sriracha or chili flakes You can add Sriracha or chili flakes for a spicy kick. This heat enhances the dish's depth. Adjust the amount based on your taste. - Ground beef can be swapped for turkey or tofu. - Tamari can replace soy sauce for a gluten-free option. - Use any crunchy veggies like cucumber or bell pepper instead of carrots. Substituting ingredients keeps the dish fresh. It allows you to try new flavors while still enjoying the core recipe. {{ingredient_image_1}} First, heat 2 tablespoons of sesame oil in a large skillet over medium heat. Add 2 cloves of minced garlic and 1 tablespoon of grated ginger. Stir for about 1 minute until you can smell the ginger and garlic. Next, add 1 pound of ground beef to the skillet. Break up the meat using a spatula. Cook until the beef turns brown and is no longer pink. This should take about 5 to 7 minutes. While the beef cooks, grab a small bowl. In that bowl, mix together 1/4 cup of soy sauce, 2 teaspoons of rice vinegar, and 1 tablespoon of honey. This sauce adds great flavor to your beef. Once the beef is browned, pour the sauce over it. Stir well to coat the beef evenly. Let it cook for another 2 to 3 minutes. This helps the sauce thicken a bit. Next, stir in 1/4 cup of chopped green onions, 1 small finely grated carrot, and 1/2 of a diced red bell pepper. Cook these veggies for 2 to 3 minutes until they begin to soften. Once done, remove the skillet from heat and sprinkle 1 tablespoon of sesame seeds over the mixture. To serve, take leaves from a head of butter or romaine lettuce. Spoon the beef mixture into the leaves. If you like heat, add Sriracha or chili flakes. Roll them up like wraps, and you’re all set to enjoy! To get the best texture in your sesame ginger beef, use high heat. This helps brown the beef quickly. Break the beef apart well while it cooks. This keeps the meat tender and mixes well with the veggies. Stir often to keep it from sticking. For a crunch, add the carrots and bell peppers just before the beef is done. This keeps them crisp and fresh. For a fun look, use big, leafy butter or romaine lettuce. Arrange the wraps on a platter. Drizzle a bit of extra sauce over the top. Sprinkle sesame seeds for a nice touch. You can also add sliced green onions. Serve with a small bowl of Sriracha or chili flakes on the side for guests who want some heat. One mistake is cooking the beef too long. This makes it dry and tough. Watch the heat and don’t overcrowd the pan. Another mistake is not using enough sauce. The sauce adds flavor and moisture. Lastly, don’t skip the veggies. They add crunch and color to your wraps. Pro Tips Use Fresh Ingredients: Fresh garlic and ginger will provide the best flavor, so opt for fresh rather than powdered or jarred versions. Customize Your Heat: Adjust the amount of Sriracha or chili flakes based on your heat preference. Start with a small amount and add more if desired. Try Different Greens: While lettuce is traditional, you can experiment with other greens like collard greens or Swiss chard for a unique wrap experience. Meal Prep Friendly: You can prepare the beef mixture ahead of time and store it in the fridge. Just reheat before serving in the lettuce wraps. {{image_2}} You can swap ground beef with other proteins. Ground turkey makes a leaner option. It has a mild flavor, which soaks up the sauce well. For a plant-based choice, try crumbled tofu. Press the tofu to remove excess water, then cook it like the beef. Use the same spices and sauces to keep the taste consistent. To change the heat level, adjust the Sriracha. If you like mild flavors, use less or skip it. For more heat, add chili flakes while cooking. You can also mix in fresh chopped chili peppers. This adds both spice and color to your wraps. Feel free to get creative with veggies. Add bell peppers for crunch, or try mushrooms for a savory taste. Shredded cabbage can give more texture. You could also use snow peas for a fresh bite. The key is to mix colors and textures for a fun and tasty wrap. To keep your sesame ginger beef fresh, store it in an airtight container. Let the beef cool first. Place the beef in the fridge within two hours after cooking. It will stay good for up to three days. If you have leftover lettuce leaves, keep them separate. Store them in a damp paper towel inside a sealed bag. This helps keep them crisp. When you're ready to eat the leftovers, heat the beef gently. Use a skillet over medium heat. Stir often to heat evenly. You can also use a microwave. Place the beef in a microwave-safe bowl. Heat it in short bursts, stirring in between. This helps avoid hot spots. Always check that it’s hot all the way through before serving. If you want to save some for later, freezing works well. Pack the cooled beef in an airtight container or a freezer bag. Squeeze out as much air as possible before sealing. Label the bag with the date. The beef can last up to three months in the freezer. When you’re ready to eat it, thaw it overnight in the fridge. Reheat it as mentioned earlier, and enjoy! Yes, you can make these wraps ahead of time. Cook the beef mixture and let it cool. Store it in the fridge for up to three days. When you are ready to eat, just reheat the beef. Prepare the lettuce leaves fresh right before serving. This keeps them crisp and tasty. Butter lettuce or romaine lettuce works best for these wraps. Both types have large, sturdy leaves. They hold the filling well and provide a nice crunch. You can also try iceberg lettuce for a different texture. Just make sure the leaves are fresh and not wilted. To make this recipe gluten-free, use tamari instead of soy sauce. Tamari has a similar flavor but does not contain wheat. All other ingredients in this recipe are naturally gluten-free. This way, you can enjoy the dish without worry. This blog post covered all you need for making Sesame Ginger Beef Lettuce Wraps. We went through the main ingredients, easy steps for cooking, and tips for a tasty meal. You learned about different protein choices and how to spice things up. Remember to store leftovers well and reheat them properly. Don’t hesitate to try the variations. Cooking should be fun and adaptable. Enjoy your wraps and impress your friends with your delicious meals!

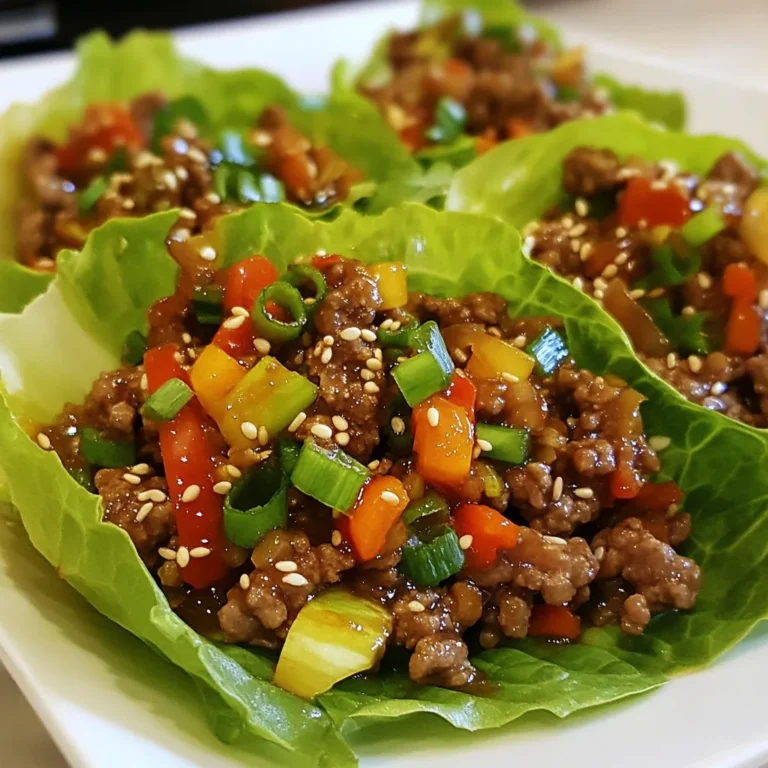
Savory Sesame Ginger Beef Lettuce Wraps Recipe

- 1.5 pounds boneless, skinless chicken thighs - 1 cup all-purpose flour - 2 large eggs, beaten - 1 cup panko breadcrumbs - 1 teaspoon garlic powder - 1 teaspoon ginger powder - Salt and pepper to taste - 1/4 cup soy sauce - 1/4 cup fresh orange juice - 1/4 cup honey - Zest of 1 orange - 1 tablespoon cornstarch - 1 tablespoon sesame oil - Garnish: sliced green onions and sesame seeds I love using chicken thighs for this dish. They stay juicy and tender. Start with 1.5 pounds of boneless, skinless chicken thighs. Cut them into bite-sized pieces for even cooking. Next, you'll need the coating. Mix 1 cup of all-purpose flour with salt, pepper, 1 teaspoon of garlic powder, and 1 teaspoon of ginger powder. This mix adds great flavor to the chicken. For the crunch, use 1 cup of panko breadcrumbs. Panko gives a nice crispy finish. You will also need 2 large eggs, beaten, to help the breadcrumbs stick well. Now, let’s talk about the orange sauce. It brings everything together. You’ll need 1/4 cup of soy sauce and the same amount of fresh orange juice. Honey adds sweetness, and you’ll need 1/4 cup of it. Don't forget the zest of 1 orange. It adds a bright flavor. Also, include 1 tablespoon of cornstarch. This helps thicken the sauce. Lastly, use 1 tablespoon of sesame oil for a nutty taste. Garnish with sliced green onions and sesame seeds. They add color and a fresh touch. This mix of ingredients will make your dish shine. {{ingredient_image_1}} - First, preheat your oven to 400°F (200°C). This helps the chicken cook evenly. - Next, line a large sheet pan with parchment paper. This makes cleanup easier. - In a shallow bowl, mix 1 cup of all-purpose flour, 1 teaspoon of garlic powder, 1 teaspoon of ginger powder, and a pinch of salt and pepper. This mix adds flavor and helps the coating stick. - Cut 1.5 pounds of boneless, skinless chicken thighs into bite-sized pieces. - Dip each piece of chicken into the flour mix first. This helps the egg and breadcrumbs stick. - Next, dip the floured chicken into 2 beaten eggs, covering it well. - Finally, coat the chicken with 1 cup of panko breadcrumbs. Press gently so they stick. - Place the coated chicken on the prepared sheet pan in a single layer. This allows it to cook evenly. - In a medium bowl, whisk together 1/4 cup of soy sauce, 1/4 cup of fresh orange juice, and 1/4 cup of honey. - Add the zest of 1 orange, 1 tablespoon of cornstarch, and 1 tablespoon of sesame oil. - Mix until well combined. This sauce adds a tasty glaze to the chicken. - Pour the orange sauce evenly over the chicken on the sheet pan. Make sure each piece is coated. - Bake in the preheated oven for 25-30 minutes. The chicken should turn golden brown. - Turn the chicken halfway through the baking time. This helps it cook evenly and stay crispy. - Check the chicken’s internal temperature; it should reach 165°F (74°C) when done. To get that crispy texture, start with dry chicken. Pat the chicken pieces with paper towels. This helps the coating stick better. Use the three-step coating method: first, dip in flour, then eggs, and finally, panko breadcrumbs. When pressing the panko, use your fingers to gently press down. This ensures the breadcrumbs stick well. Don’t be shy about getting a nice layer of panko on each piece. You can add extra spices to boost flavor. Consider adding paprika or crushed red pepper for some heat. A little bit of black pepper adds a nice kick too. Balancing sweetness and saltiness is key. If you find it too sweet, add a bit more soy sauce. This will help balance the flavor and make it more savory. One common mistake is overbaking the chicken. Check for doneness at 25 minutes. The chicken should be golden brown and reach an internal temperature of 165°F. Another mistake is applying sauce incorrectly. Make sure to pour the sauce evenly over the chicken. This ensures every piece gets that tasty orange flavor. Pro Tips Marinate for Extra Flavor: Allow the chicken to marinate in the orange sauce for at least 30 minutes before baking. This will enhance the flavor and juiciness of the chicken. Use Fresh Ingredients: Freshly squeezed orange juice and zest will provide a brighter and more vibrant flavor compared to bottled juice. Achieve Maximum Crispiness: For extra crunch, you can briefly fry the breaded chicken pieces in hot oil before baking. This will give them an even crispier texture. Serve Immediately: For the best texture, serve the chicken immediately after baking. Letting it sit too long can cause it to lose its crispiness. {{image_2}} You can swap chicken thighs for chicken breasts if you prefer. Chicken breasts are leaner, but thighs add more flavor. If you want a plant-based option, try tofu or tempeh. Press and cube the tofu for best results. For a gluten-free coating, use ground almonds or gluten-free breadcrumbs instead of all-purpose flour. Both options give a nice crunch. To add a sweet and spicy kick, mix sriracha or chili sauce into the orange sauce. This change brings a new layer of flavor. For citrus alternatives, you can use lime or grapefruit juice. Each will give a unique twist to the dish. Roasting vegetables alongside the chicken makes a complete meal. Try bell peppers, broccoli, or snap peas. They add color and nutrients. When adding vegetables, adjust the cooking time. Harder veggies like carrots need more time than soft ones like zucchini. Check them at the halfway point and stir for even cooking. To keep your orange chicken fresh, place it in the fridge. Use an airtight container for best results. Make sure the chicken cools down before sealing. This way, it won’t get soggy. Leftovers stay good for about three to four days. To reheat, use the oven for the best crispiness. Preheat your oven to 350°F (175°C). Place the chicken on a baking sheet. Heat for about 10-15 minutes. Check if it’s hot throughout. If you prefer, you can use a microwave. Just keep in mind, the chicken may not be as crispy. You can freeze the orange chicken before or after cooking. To freeze before cooking, coat the chicken and place it in a freezer bag. Remove as much air as possible. For after cooking, let the chicken cool. Then, wrap it tightly in foil or plastic wrap. Store it in a freezer-safe container. When ready to eat, thaw in the fridge overnight before reheating. This will help maintain the taste and texture. Yes, you can use chicken breasts. They are leaner than thighs. This means they cook faster and may dry out more easily. Chicken thighs give a juicier bite and richer flavor. If you use breasts, be careful not to overcook them. Bake the chicken for 25-30 minutes. Make sure the internal temperature reaches 165°F (74°C). Use a meat thermometer to check. This will help keep the chicken safe to eat and perfectly cooked. You can double the recipe. Just use a larger sheet pan. If your pan is crowded, cooking times may change. Check the chicken for doneness to ensure it cooks evenly. Serve it with steamed rice or sautéed vegetables. These sides balance the flavors well. You can also add a fresh salad for a light touch. Enjoy the bright taste of orange chicken with these options! This blog post covers how to make delicious sheet pan orange chicken. We explored the essential ingredients, from the chicken and coating to the sweet and tangy sauce. I shared step-by-step instructions to ensure perfect results, plus helpful tips and common mistakes to avoid. You can also customize your dish with substitutes or tasty sides. With proper storage and reheating methods, your leftovers will stay fresh and tasty. Enjoy this dish with loved ones and impress them with your cooking skills!

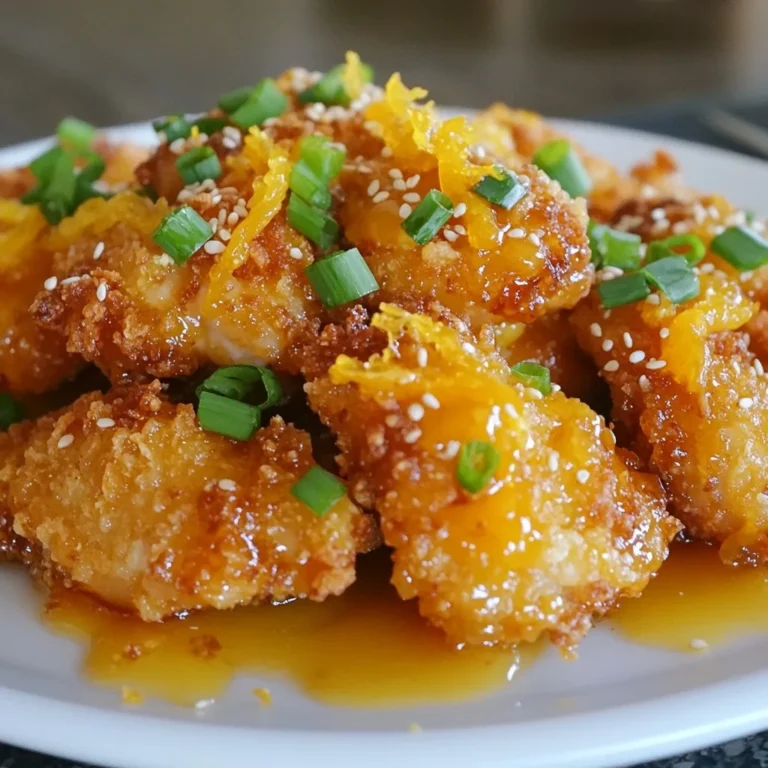
Sheet Pan Orange Chicken Simple and Tasty Dinner

- 1 large head of cauliflower - 3 tablespoons olive oil - 2 teaspoons ground turmeric - 1 teaspoon smoked paprika - 1 teaspoon garlic powder - 1 teaspoon salt - ½ teaspoon black pepper - 2 tablespoons fresh lemon juice - 2 tablespoons chopped fresh parsley (for garnish) The star of this dish is the cauliflower. Choose a large head for thick, meaty steaks. Olive oil helps the spices stick and adds richness. Ground turmeric gives the cauliflower its bright yellow color and earthy taste. Smoked paprika brings a nice depth to the flavor. Garlic powder adds a savory punch, while salt and black pepper enhance all the flavors. Lemon juice adds a zesty brightness to finish the dish. Finally, parsley gives a fresh touch for garnish. - 1 tablespoon tahini (optional, for serving) Tahini can add a creamy and nutty flavor to the dish. If you want to drizzle it on top, mix it with a bit of water. This step makes it easier to pour over the steaks. - Cauliflower: Low in calories, high in fiber, and packed with vitamins C and K. - Turmeric: Contains curcumin, known for its anti-inflammatory effects. - Olive Oil: Rich in healthy fats that can lower heart disease risk. - Lemon Juice: High in vitamin C, which boosts the immune system. - Parsley: Full of antioxidants and can help with digestion. These ingredients not only make the dish tasty but also provide health benefits. Enjoying this dish allows you to eat well while treating your taste buds. {{ingredient_image_1}} First, gather your ingredients. You need a large head of cauliflower, olive oil, and spices. Remove the green leaves from the cauliflower. Slice it into ¾-inch thick steaks. You will get two or three steaks from the center. Save any florets for roasting later. Preheat your oven to 425°F (220°C). Line a baking sheet with parchment paper. This helps with easy cleanup. In a bowl, mix olive oil, turmeric, smoked paprika, garlic powder, salt, and black pepper. Whisk until smooth. Brush both sides of the cauliflower steaks with this mixture. Place the steaks on the baking sheet. Roast the cauliflower for 20 minutes. After that, flip the steaks carefully. Roast them for an extra 15 to 20 minutes. You want them golden brown and tender. Once done, drizzle fresh lemon juice over the steaks. Let them rest for a few minutes before serving. Enjoy your turmeric roasted cauliflower steaks! To boost the taste of turmeric roasted cauliflower steaks, add a few simple ingredients. Consider using fresh herbs like thyme or rosemary. They pair well with the spices. You can also try a touch of cayenne for heat. This gives the dish a nice kick. A sprinkle of lemon zest adds brightness too. Don't be shy to mix flavors you enjoy! Even cooking is key to great cauliflower steaks. Start by cutting the cauliflower into even slices, about ¾-inch thick. This ensures they cook at the same rate. When brushing the turmeric mix, make sure to coat both sides. This helps each bite have rich flavor. Flip the steaks halfway through the roasting time. This way, both sides get golden brown and tender. Using the right tools makes cooking easier. A sharp knife helps slice the cauliflower smoothly. A sturdy cutting board is also important for safety. Use a whisk for mixing the spice blend—it helps combine everything well. A baking sheet lined with parchment paper makes cleanup a breeze. If you have a spatula, use it to flip the steaks gently. These simple tools can make a big difference in your cooking experience. Pro Tips Choose the Right Cauliflower: Look for a cauliflower that is firm and dense with tightly packed florets, avoiding any that have discoloration or soft spots. Spice it Up: Feel free to experiment with additional spices such as cumin or coriander to add a unique flavor twist to your cauliflower steaks. Perfect Roasting: Ensure the cauliflower steaks are evenly coated with the oil and spice mixture to achieve a beautifully caramelized exterior. Serving Suggestions: Serve with a side of quinoa or a fresh salad to make this dish a complete meal that’s both nutritious and filling. {{image_2}} You can change the taste of turmeric roasted cauliflower steaks by adding more spices. Try using cumin for a warm, earthy flavor. If you like heat, add a pinch of cayenne pepper. For a fresh twist, consider adding curry powder. Each spice gives your dish a unique taste and keeps it exciting. These cauliflower steaks pair well with many vegetarian and vegan sides. Serve them with a quinoa salad for a healthy meal. You can also enjoy them with roasted chickpeas for added protein. If you want something creamy, a yogurt sauce works great. These options keep your meal balanced and full of flavor. When serving turmeric roasted cauliflower steaks, presentation is key. Arrange them on a plate and drizzle with tahini. Garnish with fresh parsley for color. You can serve them alongside brown rice or a fresh green salad. This adds texture and makes the meal more filling. Enjoy your flavorful delight! To keep your leftover cauliflower steaks fresh, first, let them cool down. Then, place them in an airtight container. Store the container in the fridge for up to three days. If you want to keep them longer, consider freezing them. When reheating, the oven works best. Preheat your oven to 350°F (175°C). Place the steaks on a baking sheet. Heat for about 10 to 15 minutes. This method keeps them crispy on the outside and warm inside. Avoid using the microwave, as it can make them soggy. To freeze your cauliflower steaks, wrap each one in plastic wrap. Then, place them in a freezer bag. Remove as much air as possible to prevent freezer burn. They can last for up to three months in the freezer. When ready to eat, thaw them in the fridge overnight before reheating. Turmeric is a bright yellow spice. It has many health benefits. Curcumin, its active ingredient, helps fight inflammation. It may also boost your immune system. Turmeric may improve brain function and lower heart disease risk. Some studies suggest it can help with arthritis pain. Plus, it is full of antioxidants. Adding turmeric to your meals can make them both tasty and healthy. Yes, you can use fresh turmeric root. Fresh root has a stronger flavor and aroma. Use about one tablespoon of grated fresh turmeric for every teaspoon of ground. Peel the root before grating to remove the skin. Keep in mind that fresh turmeric can stain your hands and surfaces. Use gloves and a cutting board you don’t mind staining. Leftover cauliflower florets are great for many dishes. You can roast them with olive oil and spices for a quick snack. Add them to salads for extra crunch. You can blend them into soups for creaminess. Another option is to add them to stir-fries or omelets. These florets are versatile and can enhance many meals. This blog post covered the essential ingredients for making cauliflower steaks and their key benefits. I provided step-by-step instructions, tips to enhance flavors, and variations for different diets. Storing and reheating tips help you enjoy leftovers easily. Remember, cooking is about exploring and having fun. Use these insights to create your perfect cauliflower steak. Enjoy the journey of flavor and nutrition as you experiment in the kitchen. Your meals can be simple, tasty, and healthy!

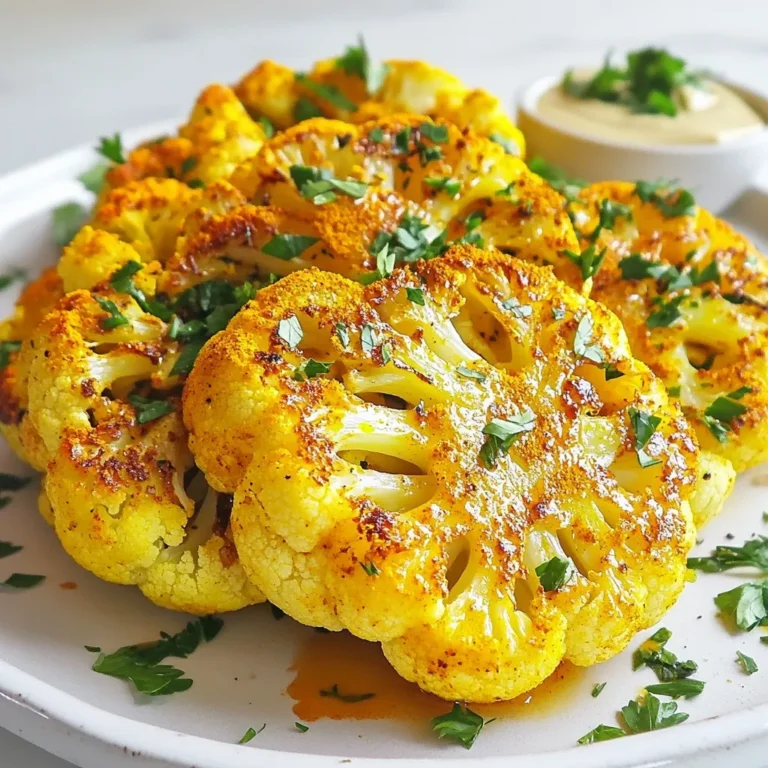
Turmeric Roasted Cauliflower Steaks Flavorful Delight

- 1 large head of cauliflower, cut into florets - 6 cloves of garlic, unpeeled - 3 tablespoons olive oil - ½ cup cream cheese, softened - ½ cup milk (dairy or plant-based) - Salt and pepper to taste - Fresh chives, chopped (for garnish) The main star of this dish is the cauliflower. When you choose your cauliflower, look for firm florets. A large head gives you enough for a lovely side dish. Next, the roasted garlic adds depth. Six cloves might seem like a lot, but roasting sweetens the flavor and makes it creamy. You will need olive oil to coat the vegetables. It helps with roasting and adds richness. Cream cheese is key for that velvety texture. You can use dairy or plant-based milk to adjust creaminess. Don't forget salt and pepper for flavor! Lastly, fresh chives make a bright garnish. They add color and a mild onion taste. These ingredients work together to create a dish that is rich, creamy, and full of flavor. Each bite of creamy roasted garlic mashed cauliflower is a delight. {{ingredient_image_1}} First, preheat your oven to 400°F (200°C). This heat helps the vegetables roast well. Next, take your large head of cauliflower and cut it into florets. Place them on a baking sheet. Add 6 unpeeled garlic cloves to the same sheet. Drizzle 2 tablespoons of olive oil on top. Toss the cauliflower and garlic to coat them evenly. Season with salt and pepper to make them tasty. Now, roast the vegetables in the hot oven for 25 to 30 minutes. You’ll know they are done when the cauliflower is tender and has a nice caramel color. The garlic should be soft and golden. This roasting time brings out sweet flavors and makes them perfect for mashing. After roasting, take the baking sheet out and let it cool a bit. Squeeze the roasted garlic from its skins into a bowl. In a food processor, combine the roasted cauliflower, garlic, ½ cup of cream cheese, ½ cup of milk, and 1 tablespoon of olive oil. Blend it all together until smooth and creamy. If you like, taste it and add more salt and pepper. This step helps you get the perfect flavor. Transfer your creamy mashed cauliflower to a serving bowl. Enjoy this fluffy delight! To make this dish creamy, use the right mix of cream cheese and milk. I suggest using half a cup of each. This balance gives you a rich and smooth texture. If you want to mix in more flavors, try adding herbs like thyme or rosemary. You can also add a squeeze of lemon juice for brightness. Roasting your garlic and cauliflower just right makes all the difference. Roast them at 400°F for 25 to 30 minutes. Look for golden edges on the cauliflower. The garlic should feel soft when you squeeze it. This timing ensures rich flavors and the best texture. To keep your mashed cauliflower fresh, store it in an airtight container. The fridge works well for up to three days. If you want to freeze it, put it in a freezer-safe container. Just remember to leave space for expansion. When reheating, use a microwave or stovetop. Add a splash of milk to keep it creamy. Pro Tips Roasting for Flavor: Roast the cauliflower and garlic until they are deeply caramelized for a richer, sweeter flavor. Texture Matters: For an ultra-creamy texture, blend the cauliflower and garlic while they are still warm. Season Gradually: Taste the mashed cauliflower as you mix in salt and pepper to ensure balanced seasoning. Garnish Creatively: Experiment with different herbs or toppings, such as parsley or crispy bacon bits, for added flavor and visual appeal. {{image_2}} You can swap the cream cheese and milk for plant-based options. Use vegan cream cheese and almond, soy, or oat milk. This change keeps the taste creamy and rich. You can still enjoy a tasty dish without dairy. These swaps work well for many diets. To boost the flavor, think about adding herbs or spices. Fresh or dried thyme, rosemary, or parsley can give a nice touch. A pinch of nutmeg adds warmth, while chili flakes bring heat. Taste as you mix until you find your favorite combo. These additions make your mash unique and fun. Mixing in other veggies can change up the flavor. Try adding steamed carrots or broccoli for color and nutrition. Sweet potatoes or butternut squash add sweetness and depth. Just steam or roast them first, then blend them in. You can create a mash that fits your taste and mood. To keep your creamy mashed cauliflower fresh, store it in an airtight container. Make sure it cools down first. Place it in the fridge and use it within three to four days. This helps maintain its taste and texture. If you need to reheat, you can do it straight from the fridge. You can freeze mashed cauliflower for up to three months. Use a freezer-safe container or a bag. Leave some space for expansion as it freezes. When ready to use, thaw it in the fridge overnight. This helps to preserve flavors and textures when you reheat it. To reheat, use a microwave or stovetop. If using a microwave, heat in short bursts, stirring in between. For the stovetop, place it in a pan and add a splash of milk. Stir gently over low heat until warm. This keeps it creamy and smooth, just like when you first made it. Yes, you can make this dish early. Prepare it, then store it in the fridge. It stays fresh for up to 3 days. When you're ready to eat, reheat it gently on the stove or in the microwave. Add a splash of milk if it seems dry. To make this dish vegan, swap the cream cheese for a plant-based version. You can use cashew cream or coconut cream instead. For milk, choose almond, soy, or oat milk. These changes keep the taste creamy and delicious. Mashed cauliflower is often lower in carbs and calories than mashed potatoes. It has more fiber and vitamins too, such as vitamin C and K. This makes it a great choice for a lighter meal. You can use fresh garlic, but the flavor will be stronger. If you prefer, sauté the fresh garlic in olive oil until soft before blending it in. This will give a nice, rich taste without overpowering the dish. Creamy mashed cauliflower is a tasty, healthy twist on traditional mashed potatoes. You learned about key ingredients, step-by-step prep, and clever storage tips. Remember, the right mix of cream cheese and milk makes all the difference. You can customize it with herbs or other veggies for fun flavors. Enjoy making this dish not just today, but also as a meal prep staple. With these tips, you can impress anyone with your skills while serving a nutritious side that everyone will love.

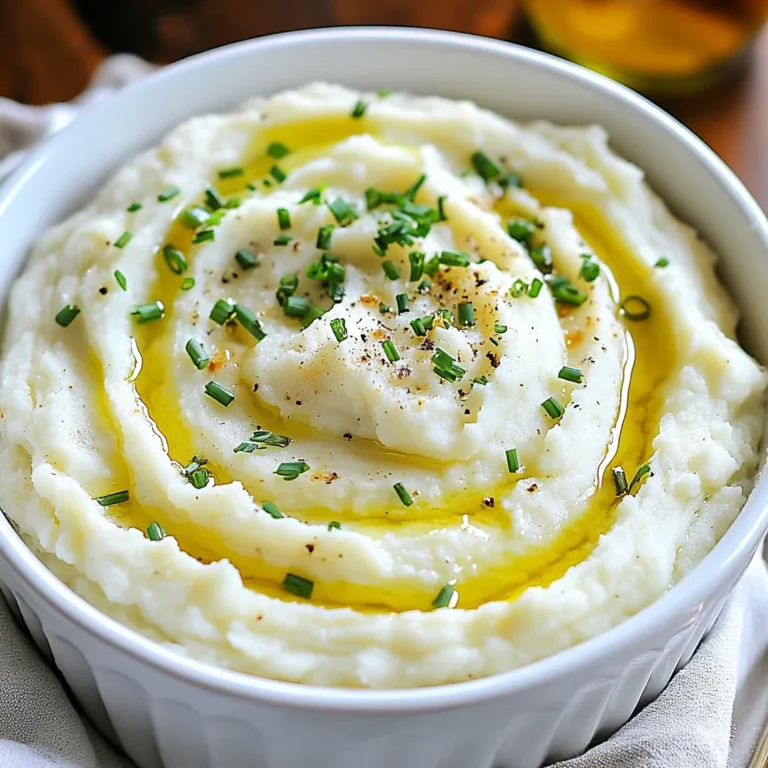
Creamy Roasted Garlic Mashed Cauliflower Delight

To make this tasty Thai Coconut Shrimp Curry, gather these items: - 1 pound large shrimp, peeled and deveined - 1 can (13.5 oz) coconut milk - 2 tablespoons red curry paste - 1 tablespoon fish sauce (or soy sauce for a vegetarian option) - 1 tablespoon brown sugar - 1 bell pepper, sliced (red or yellow for color) - 1 cup snap peas, trimmed - 1 small onion, thinly sliced - 3 cloves garlic, minced - 1 tablespoon ginger, grated - 2 tablespoons vegetable oil - Fresh basil leaves for garnish - Cooked jasmine rice for serving Using good quality brands can boost your dish. Here are some I recommend: - Coconut milk: Thai Kitchen or Aroy-D - Red curry paste: Maesri or Thai Kitchen - Fish sauce: Red Boat or Tiparos You can easily adapt this recipe for different diets: - For a vegetarian version, use soy sauce instead of fish sauce. - For a vegan option, stick with soy sauce and omit any shrimp. - You can swap shrimp with tofu or chickpeas for a protein boost. - Use any fresh vegetables you like, such as zucchini or broccoli. {{ingredient_image_1}} Start by heating 2 tablespoons of vegetable oil in a large skillet or wok over medium heat. Once the oil is hot, add 1 thinly sliced onion. Sauté the onion for 2-3 minutes until it turns soft and clear. This step builds the base flavor for your curry. Next, add 3 minced garlic cloves and 1 tablespoon of grated ginger to the skillet. Cook these for about 1 minute until they smell nice. Then, add 2 tablespoons of red curry paste. Mix this well with the onion and cook for 1-2 minutes. This lets the flavors blend together, making your curry rich and tasty. Now, pour in 1 can (13.5 oz) of coconut milk. Stir it well to combine with the curry paste. You’ll also add 1 tablespoon of fish sauce and 1 tablespoon of brown sugar. Mix until the sugar dissolves. Bring the mixture to a gentle simmer. Then, add 1 sliced bell pepper and 1 cup of snap peas. Cook these for about 5 minutes until they are soft but still crisp. Finally, add 1 pound of large shrimp to the skillet. Let them cook for 3-4 minutes until they turn pink and opaque. This step makes the dish hearty and full of flavor. To get the best flavor, use fresh ingredients. Fresh shrimp, garlic, and ginger make a big difference. The red curry paste is key, too. It gives the dish its bold taste. Don’t skip the fish sauce; it adds a salty depth. Balance the sweetness with brown sugar. This mix of flavors is what makes your curry pop. Cook shrimp until they turn pink and opaque. This usually takes just 3-4 minutes. If you overcook them, they can become tough. To check, cut one in half. It should be white all the way through. Adding shrimp at the right time is crucial. Add them after the veggies are tender for the best texture. If you like heat, add more red curry paste. Start with a little and taste as you go. You can also add fresh chili for extra kick. If it's too spicy, balance it with more coconut milk or brown sugar. This way, you can control the heat to suit your taste. Pro Tips Fresh Shrimp Selection: Always choose the freshest shrimp available. Look for shrimp that are firm to the touch and have a mild ocean scent. Customizing Spice Level: Adjust the amount of red curry paste according to your heat preference. Start with less and add more if desired. Vegetable Variations: Feel free to substitute or add your favorite vegetables like zucchini, carrots, or broccoli for added texture and flavor. Garnishing Tips: Fresh herbs elevate the dish! Consider adding cilantro or mint along with basil for a more aromatic finish. {{image_2}} You can easily make this dish vegetarian or vegan. Instead of shrimp, use tofu or tempeh. They soak up the flavors well. Replace fish sauce with soy sauce for a vegan twist. Try adding mushrooms for a rich texture. You can also add eggplant, zucchini, or carrots for extra flavor and nutrients. If you want to switch up the protein, chicken works great. Cut it into bite-sized pieces and cook it the same way as shrimp. You can also try using scallops or firm fish like salmon. Each protein gives a unique taste and texture. Just be sure to adjust cooking times to keep everything tender. Feel free to mix and match your veggies in this curry. Broccoli, green beans, or bok choy add nice crunch. You can also use sweet corn or baby corn for a hint of sweetness. For color, consider adding purple cabbage or carrots. The more veggies you use, the more vibrant and healthy your meal becomes! To keep your Thai coconut shrimp curry fresh, let it cool first. Store it in an airtight container. This helps lock in flavor and moisture. You can keep it in the fridge for up to three days. If you plan to eat it later, store it separately from the rice. This keeps both the curry and rice in good shape. When you're ready to enjoy your leftovers, reheat the curry gently. You can use the stove or microwave. If using the stove, pour the curry into a pan. Heat it on low, stirring often. If using a microwave, cover the bowl and heat it in short bursts. Stir after each burst until warm. Add a splash of water if it seems too thick. If you want to save some for later, you can freeze the curry. Use a freezer-safe container and leave some space at the top. The curry will expand when frozen. It can last up to three months in the freezer. To thaw, move it to the fridge overnight. Reheat as mentioned above for a tasty meal anytime. You can serve Thai Coconut Shrimp Curry with cooked jasmine rice. This rice soaks up the tasty sauce and makes each bite better. You can also add a side of fresh salad with cucumbers and lime for a crunchy contrast. If you like, serve it with crusty bread to dip into the curry sauce. To make your curry spicier, add more red curry paste. Start with one extra tablespoon and taste it. If you want more heat, try adding sliced fresh chili peppers. Thai bird's eye chili works well for a kick. You can also sprinkle some red pepper flakes for extra spice when serving. Yes, you can use frozen shrimp. Just make sure to thaw them before cooking. Place the shrimp in cold water for about 15 minutes to thaw quickly. Pat them dry and then add them to your curry. Frozen shrimp is a great option and still tastes delicious in this dish. This blog post covered key ingredients, step-by-step instructions, and helpful tips for Thai Coconut Shrimp Curry. You learned about best brands, smart substitutions, and options for variations. I shared ways to store leftovers and answered common questions to improve your cooking. In the end, this dish offers tasty flexibility for all diets. Make it your own and enjoy every bite!

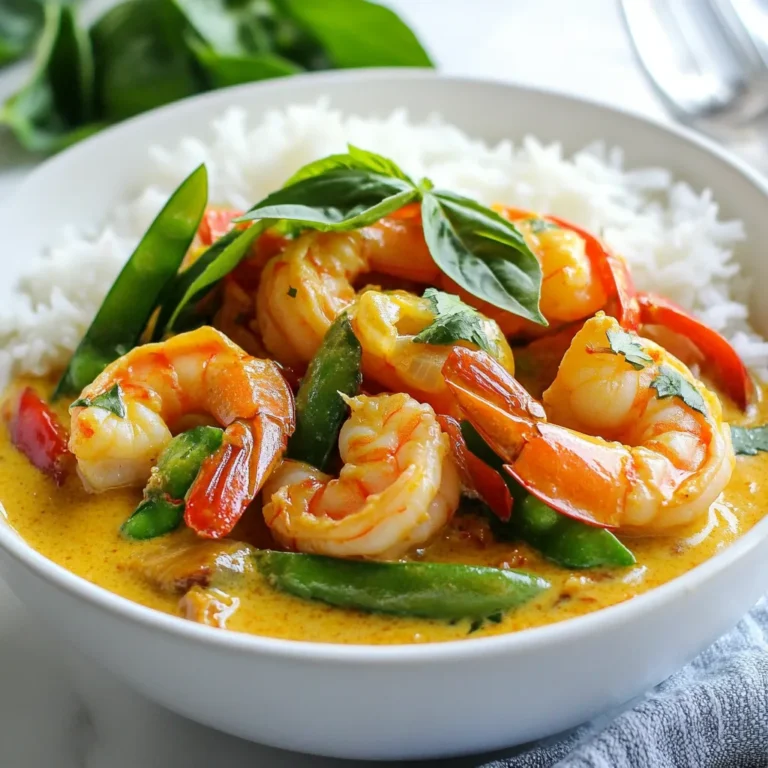
Thai Coconut Shrimp Curry Flavorful Dinner Delight

To make this tasty coffee cake, you need a few key ingredients: - 2 cups all-purpose flour - 1 cup granulated sugar - 1/2 cup unsalted butter, softened - 1 cup sour cream - 2 large eggs - 1 teaspoon vanilla extract - 2 teaspoons baking powder - 1 teaspoon baking soda - 1/2 teaspoon salt - 1 tablespoon ground cinnamon - 1/4 cup brown sugar - 1/2 cup chopped nuts (walnuts or pecans, optional) These items work together to create the soft, moist cake and the sweet, crunchy streusel topping. If you don’t have all-purpose flour, you can use whole wheat flour. It adds a nutty taste. Instead of granulated sugar, brown sugar works well, too. For a dairy-free option, try using almond milk or coconut yogurt in place of sour cream. You can also swap unsalted butter for coconut oil if needed. Eggs can be replaced with flax eggs for a vegan version. To make your coffee cake even better, consider adding some optional ingredients: - 1 teaspoon of almond extract for a nutty flavor. - 1/2 cup of fresh berries or chocolate chips to brighten the cake. - A pinch of nutmeg to deepen the spice flavor. These additions can make your coffee cake unique and delightful! {{ingredient_image_1}} Start by preheating your oven to 350°F (175°C). While the oven warms, grab a 9x13-inch baking pan. Grease it with butter or cooking spray. Then, dust it lightly with flour. This step helps the cake release easily after baking. In a large bowl, cream together 1/2 cup of softened butter and 1 cup of granulated sugar. Use a hand mixer until it looks light and fluffy. Next, add 2 large eggs, one at a time. Mix well after each egg. Then, stir in 1 teaspoon of vanilla extract and 1 cup of sour cream. In another bowl, whisk together 2 cups of all-purpose flour, 2 teaspoons of baking powder, 1 teaspoon of baking soda, and 1/2 teaspoon of salt. Gradually blend the dry mix into the wet mix. Stir gently, and don’t worry about lumps. In a small bowl, combine 1 tablespoon of ground cinnamon, 1/4 cup of brown sugar, and 1/2 cup of chopped nuts if you like. This mixture will create a crunchy topping that adds great flavor. Pour half of the batter into your prepared pan. Spread it evenly. Next, sprinkle half of the streusel topping over the batter. Pour the rest of the batter on top and spread it gently. Finally, add the remaining streusel mixture on top. Place the pan in the oven and bake for 30-35 minutes. Check if it's done by inserting a toothpick into the center. If it comes out clean, your cake is ready. After baking, let the cake cool in the pan for about 10 minutes. Then transfer it to a wire rack to cool completely. For serving, dust the top lightly with powdered sugar. This adds a sweet touch. Enjoy your cake warm or at room temperature, paired with a hot cup of coffee. To make your coffee cake shine, follow these simple tips: - Use fresh ingredients. Old baking powder or stale flour can spoil your cake. - Measure accurately. Use a kitchen scale for best results, especially with flour. - Do not overmix. Mix just until combined. Lumps are okay! - Check the oven temperature. An oven thermometer ensures your cake bakes at the right heat. - Use a cake tester. Stick a toothpick in the center. It should come out clean when done. Here are some common problems you might face: - Cake is too dry. You might have overbaked it or added too much flour. - Cake is too dense. Ensure you measured your ingredients right and used enough leavening agents. - Streusel sinks. Make sure to layer the streusel properly and don’t overmix the batter. Want to make your cake even better? Try these ideas: - Add spices. Mix in nutmeg or cloves for a warm flavor. - Use flavored sour cream. Vanilla or lemon sour cream adds a nice twist. - Top with fruit. Fresh berries or bananas can add moisture and taste. - Drizzle with glaze. A simple icing of powdered sugar and milk can elevate your cake. - Serve warm. Warm coffee cake pairs well with a hot cup of coffee, enhancing both flavors. Pro Tips Use Room Temperature Ingredients: Make sure your butter, eggs, and sour cream are at room temperature for better mixing and a fluffier cake. Prevent Overmixing: Mix the batter until just combined to keep the cake light and tender. A few lumps are perfectly fine! Experiment with Flavors: Try adding vanilla extract or almond extract for a different flavor profile in your coffee cake. Storing Your Cake: Store the cooled coffee cake in an airtight container at room temperature for up to 3 days, or refrigerate for longer freshness. {{image_2}} If you want a nut-free version, just skip the nuts. The cake will still taste great! The streusel will remain crunchy and sweet. Use the same amount of brown sugar and cinnamon for the topping. You might not even miss the nuts! Fruits and chocolate bring new flavors to this cake. You can add berries, apples, or even bananas. Just chop them small and mix them into the batter. If you love chocolate, fold in chocolate chips. They melt and add a lovely richness to each slice. If you need a gluten-free cake, swap the all-purpose flour with a gluten-free blend. Look for a blend that can replace regular flour cup for cup. This will keep the cake soft and moist. Always check that your other ingredients are also gluten-free. To keep your cinnamon streusel coffee cake fresh, store it in an airtight container. This helps prevent it from drying out. You can also wrap it tightly in plastic wrap. For best taste, eat the cake within three days. If you want to keep it longer, freezing is a great option. You can freeze this coffee cake easily. First, let the cake cool completely. Then, cut it into slices. Wrap each slice in plastic wrap, then place them in a freezer bag. Make sure to label the bag with the date. The cake will stay good for up to three months in the freezer. When you're ready to eat it, just take out a slice and let it thaw. To enjoy your coffee cake warm, reheat it in the oven. Preheat the oven to 350°F (175°C). Place the cake on a baking sheet. Heat for about 10 minutes or until warm. You can also use the microwave. Heat a slice for about 20-30 seconds. This method is quick but may make the cake a bit softer. Enjoy your warm treat with coffee! Yes, you can use other flours. For example, whole wheat flour adds fiber. Almond flour works too, but it may change the texture. If using gluten-free flour, check for a blend that mimics all-purpose flour. This may keep the cake moist and fluffy. The cake can stay fresh for up to four days at room temperature. Store it in an airtight container to keep moisture in. You can also place it in the fridge for a week. If you want to keep it longer, freeze it. Wrap it well, and it can last for up to three months. Yes, you can make it dairy-free easily. Use dairy-free butter or coconut oil instead of regular butter. Substitute sour cream with coconut yogurt or a nut-based yogurt. These swaps will keep the cake moist and tasty without dairy. This cake pairs well with many drinks. A hot cup of coffee is perfect. Tea or milk also works well. Fresh fruit, like berries, adds a nice touch. For a fun twist, serve it with whipped cream or a scoop of vanilla ice cream. We covered the key parts of making a great Cinnamon Streusel Coffee Cake. You learned about essential ingredients and how to swap them. I shared steps for mixing, baking, and serving this tasty treat. With tips for success and fun variations, you can adapt this recipe to your needs. In the end, enjoy the joy this cake brings. Happy baking!

Cinnamon Streusel Coffee Cake Irresistible Breakfast Treat

For BBQ Chicken Stuffed Sweet Potatoes, gather these tasty items: - 4 medium sweet potatoes - 2 cups shredded cooked chicken - 1/2 cup barbecue sauce - 1/2 cup corn - 1/2 cup black beans - 1/2 cup shredded cheddar cheese - 1/4 cup chopped green onions - 1 tablespoon olive oil - Salt and pepper to taste - Optional toppings: sour cream, avocado, jalapeños These ingredients work together to create a delicious meal. The sweet potatoes add natural sweetness and fiber. Shredded chicken brings protein, while barbecue sauce adds flavor and tang. Corn and black beans give texture and color. Cheddar cheese melts on top, making everything creamy and rich. When you pick ingredients, choose fresh and high-quality items. This choice makes a big difference in taste. If you have leftover chicken, use it! It saves time and adds flavor. You can also customize your toppings. Add jalapeños for spice, or sour cream for creaminess. Each ingredient plays a role in making this dish tasty and healthy. {{ingredient_image_1}} 1. Preheat your oven to 400°F (200°C). This makes sure the sweet potatoes cook evenly. 2. Wash the sweet potatoes well. Use a fork to poke holes in each potato. This allows steam to escape while baking. 3. Place the potatoes on a baking sheet lined with parchment paper. Bake for 45-60 minutes. They are done when a fork easily pierces them. 1. In a medium bowl, combine 2 cups of shredded cooked chicken, 1/2 cup of barbecue sauce, 1/2 cup of corn, and 1/2 cup of black beans. 2. Add 1/4 cup of chopped green onions to the mix. 3. Stir everything well. Make sure all the ingredients are coated in the sauce. Add salt and pepper to taste for extra flavor. 1. Once the sweet potatoes cool a bit, slice each in half lengthwise. 2. Carefully scoop out some flesh, leaving about 1/4 inch intact. This creates space for your filling. 3. Fill each potato half with the BBQ chicken mixture. Press down gently to pack it in. 4. Sprinkle 1/2 cup of shredded cheddar cheese on top of each filled potato. 5. Return the stuffed potatoes to the oven. Bake for another 10-15 minutes, until the cheese melts and bubbles. Enjoy making this tasty dish! Choosing the right sweet potatoes Select medium-sized sweet potatoes. They should feel firm and smooth. Look for ones with even skin and no bruises. The sweeter the potato, the better the dish will taste. If you find organic ones, grab them for added flavor. Tips for shredding chicken Use leftover chicken or rotisserie chicken for ease. Let the chicken cool before shredding. Two forks work great for this task. Simply pull the chicken apart into bite-sized pieces. Shredded chicken mixes well with the BBQ sauce. Store-bought brands vs homemade Store-bought BBQ sauces save time. They come in various flavors, like smoky or spicy. Homemade sauce allows you to control the taste. Try mixing ketchup, brown sugar, and vinegar for a quick homemade version. Flavor profiles to consider Think about the sweetness or heat you want. A sweet sauce complements the sweet potato. If you like heat, go for a spicy BBQ sauce. Mix and match to find your favorite combination. Pairing with side dishes Serve your stuffed sweet potatoes with a fresh salad. Coleslaw or corn on the cob also works well. These sides add crunch and balance to the meal. Presentation tips for serving Place each stuffed potato on a colorful plate. Garnish with chopped green onions and a dollop of sour cream. A slice of avocado can add creaminess and color. Make your dish look as good as it tastes! Pro Tips Choose the Right Sweet Potatoes: Look for firm, unblemished sweet potatoes for the best flavor and texture. Customize Your Filling: Feel free to add other ingredients like diced bell peppers or jalapeños for extra flavor and spice. Make Ahead: Prep the sweet potatoes and filling in advance, then assemble and bake when ready to serve. Garnish for Extra Flavor: Don’t skip the optional toppings like avocado or sour cream to enhance the dish’s creaminess and taste. {{image_2}} You can make BBQ chicken stuffed sweet potatoes vegetarian. Replace the chicken with cooked quinoa or lentils. These choices add protein and flavor. You can also mix in some diced mushrooms or bell peppers. They add great texture and taste. If you love heat, add jalapeños to your filling. Chop them up and mix them with the BBQ chicken. You can also use a spicy barbecue sauce. This gives your dish a nice kick. Don't be shy to experiment with different spice levels. For gluten-free options, ensure your barbecue sauce is gluten-free. Most sauces are, but it’s good to check. You can also use gluten-free toppings like avocado or sour cream. If you need dairy-free choices, try using dairy-free cheese. It melts well and keeps the dish tasty. To keep your BBQ chicken stuffed sweet potatoes fresh, store them in the fridge. Use airtight containers to prevent moisture loss. Glass or plastic containers work well. If you have extra toppings, store them separately. This keeps things crisp and tasty. You can reheat your stuffed sweet potatoes in two ways: the microwave or the oven. - Microwave: Place the potato on a microwave-safe plate. Heat for 1-2 minutes. Check if it’s warm. If not, heat for another minute. - Oven: Preheat your oven to 350°F (175°C). Wrap the sweet potato in foil. Bake for about 10-15 minutes. This method keeps the texture nice. To maintain the best texture, avoid microwaving for too long. It can make the potatoes soggy. Freezing stuffed sweet potatoes is easy. Let them cool completely. Wrap each potato in plastic wrap, then place them in a freezer bag. Remove as much air as possible. - Thawing and Reheating Tips: When ready to eat, take the potato out of the freezer. Thaw it in the fridge overnight. For reheating, use the oven method mentioned above. This helps keep them tasty and warm. Bake sweet potatoes for 45-60 minutes at 400°F (200°C). Check them after 45 minutes. To test, poke a fork into the thickest part. If it's soft, they are done. Yes, you can use different beans. Great options include pinto beans, kidney beans, or chickpeas. Just rinse and drain them before adding to your mixture. Each type brings its own flavor and texture. Look for melted cheese and a golden top. The sweet potatoes should be tender. You can poke them with a fork to check. If they feel soft and the cheese is bubbly, they’re ready to enjoy! This recipe for BBQ chicken stuffed sweet potatoes is fun and easy. You learned how to prep sweet potatoes and mix tasty fillings. I shared tips for making it your own, whether through spicy sauces or vegetarian swaps. Proper storage and reheating tips help you enjoy leftovers later. Try this dish with your favorite sides for a complete meal. I hope you feel inspired to create your own tasty version at home. Enjoy the deliciousness!

BBQ Chicken Stuffed Sweet Potatoes Tasty and Healthy

PREV 1 … 45 46 47 … 52 NEXT
cozy citrus kitchen

explore

DessertsDinnerAppetizersDrinks

Our Policies

  • Cookie Policy
  • Copyright Policy
  • Disclaimer
  • GDPR Policy
  • Terms Of Use
Back to Top
  • About
  • Contact Us
  • Privacy Policy
© 2025 cozy citrus kitchen