FREE DINNER EBOOK! Get your copy!
  • Cookie Policy
  • GDPR Policy
  • Disclaimer
  • Terms Of Use
  • Visit my other site: Fun Cookie Recipes
cozy citrus kitchen
  • Home
  • Dinner
  • Desserts
  • Drinks
  • Appetizers
  • Contact
  • About
  • Privacy Policy
  • Home
  • Dinner
  • Desserts
  • Drinks
  • Appetizers
  • Contact
  • About
  • Privacy Policy
  • Cookie Policy
  • GDPR Policy
  • Disclaimer
  • Terms Of Use
Visit my other site: Fun Cookie Recipes

HOME / CATEGORIES /

Latest

- 1 can (15 oz) chickpeas, drained and rinsed - 2 tablespoons tahini - 2 tablespoons fresh lime juice - 1 small jalapeno, seeded and chopped - 2 cloves garlic, minced - 1/4 cup olive oil - 1/2 teaspoon ground cumin - Salt and pepper to taste - Fresh cilantro for garnish - Lime wedges for serving I find using a can of chickpeas makes this dip easy. Drain and rinse them well. Use two tablespoons of tahini to add creaminess. Fresh lime juice gives it a bright taste, so squeeze two tablespoons. A small jalapeno adds heat. Make sure to seed and chop it finely. You will need two cloves of minced garlic for flavor. Use a quarter cup of olive oil to help blend it all smoothly. Ground cumin adds a warm note, so only half a teaspoon is needed. Always season with salt and pepper to taste. Fresh cilantro adds color and freshness. I love to sprinkle it on top. Lime wedges are perfect for serving alongside. They give an extra zing when squeezed over the hummus. Using colorful veggie sticks, like carrots and cucumbers, makes for a fun and healthy dip option. {{ingredient_image_1}} To start, gather your ingredients. You will need: - 1 can (15 oz) chickpeas, drained and rinsed - 2 tablespoons tahini - 2 tablespoons fresh lime juice - 1 small jalapeno, seeded and chopped - 2 cloves garlic, minced - 1/4 cup olive oil - 1/2 teaspoon ground cumin - Salt and pepper to taste - Fresh cilantro for garnish - Lime wedges for serving First, drain and rinse the chickpeas. This step helps remove extra salt. Next, chop the jalapeno. Removing the seeds makes the dip less spicy. Mince the garlic to release its strong flavor. Now, place all your prepared ingredients in a food processor. Add the chickpeas, tahini, lime juice, chopped jalapeno, and minced garlic. Pulse the mixture until it is smooth. This step is key for a creamy texture. While the processor runs, slowly drizzle in the olive oil. This helps the hummus become creamy. After that, add the ground cumin. Season with salt and pepper. Blend again until everything is mixed well. Taste your hummus and adjust the seasoning if needed. If you want more tang, add extra lime juice. When it tastes just right, transfer it to a serving bowl. Use a spoon to make a small dip in the center. Drizzle a bit more olive oil on top. Finish by garnishing with fresh cilantro leaves. This adds color and fresh taste. Serve with lime wedges and colorful veggie sticks for dipping. Enjoy your zesty and flavorful dip! To make your hummus creamy, blend the chickpeas well. Start by adding tahini and lime juice. Then, add the chopped jalapeno and minced garlic. Pulse until smooth. While blending, slowly drizzle in olive oil. This method helps achieve a nice, creamy texture. If it’s too thick, add a bit of water. Blend again until it’s just right. If you want a milder dip, remove the seeds from the jalapeno. You can also use half a jalapeno instead of a whole one. For more heat, add extra jalapeno or even a pinch of cayenne pepper. Remember to taste as you go. This way, the spice level matches your liking. Always use fresh lime juice for the best taste. Fresh cilantro adds a nice touch too. You can even toss in some chopped herbs like parsley or mint. Experiment with different spices, like smoked paprika or chipotle powder, for a unique twist. Fresh ingredients will take your hummus to the next level. Pro Tips Adjusting the Heat: If you prefer a milder hummus, use only half of the jalapeno or remove the seeds and membranes, which contain the most heat. Perfectly Smooth Texture: For an ultra-smooth hummus, peel the chickpeas before blending. This takes a bit more time but results in a creamier texture. Add Flavor Depth: Toast the cumin seeds before grinding them to enhance their flavor, giving your hummus a more aromatic profile. Storage Tips: Store leftover hummus in an airtight container in the refrigerator for up to a week. Drizzle a little olive oil on top before sealing to keep it fresh. {{image_2}} You can add roasted garlic to your jalapeno lime hummus for a rich taste. To do this, roast whole garlic cloves until soft. When blending, mix these roasted cloves with the other ingredients. This change gives a sweet, deep flavor. For a creamy twist, add ripe avocado. Mash one avocado and mix it into the base hummus. This makes the dip even smoother and adds healthy fats. The lime juice will still shine through, balancing the richness. You can change the herbs and spices for a new flavor. Try adding fresh cilantro or parsley for brightness. A pinch of smoked paprika can add a nice depth. Experimenting with different spices lets you make this dip your own. These variations keep your hummus exciting and tasty. Each one offers a unique flavor that makes for a great snack or party dip! To keep your jalapeno lime hummus fresh, store it in an airtight container. It stays good in the fridge for up to five days. Make sure to cover the hummus with a layer of olive oil. This helps keep it moist and tasty. Always use a clean spoon when scooping out hummus. This prevents germs from getting in. You can freeze hummus for later use. To freeze, place the hummus in a freezer-safe container. Leave some space at the top since it may expand. You can also use ice cube trays for easy portions. Just pour the hummus into the trays and freeze until solid. Then, pop them out and store in a zip-lock bag. When you’re ready to use frozen hummus, take it out of the freezer. Place it in the fridge for several hours or overnight to thaw. If you're in a hurry, you can microwave it for short bursts. Stir it often to keep it from getting too hot. Once thawed, blend it again for a smooth texture. Add a splash of lime juice or olive oil if it needs extra flavor. Yes, you can make this hummus ahead of time. It tastes even better after a day. Store it in an airtight container in the fridge. It will stay fresh for up to five days. Just give it a good stir before serving. If it seems thick, add a little water or lime juice. You can serve this hummus with many tasty options. Here are some ideas: - Colorful vegetable sticks like carrots, cucumbers, and bell peppers - Pita chips or toasted pita bread - Crackers or breadsticks - Fresh herbs like cilantro for added flavor These sides complement the zesty taste of the hummus. Absolutely! This hummus is great for meal prep. It’s easy to make and stores well. You can pack it in small containers for quick snacks. Pair it with fresh veggies or whole-grain crackers for a quick meal. It adds flavor and nutrition to your week. This blog post covered all you need for great hummus. We discussed ingredients, preparation steps, and tips for creaminess. You learned some tasty variations and how to store your hummus well. In my experience, making hummus is fun and rewarding. Use fresh ingredients to get the best flavor. Enjoy experimenting with spices and garnishes to find your perfect mix! Hummus can fit well into any meal or snack time. Now, get cooking!

Jalapeno Lime Hummus Zesty and Flavorful Dip

The base of this salad is simple and fresh. Here are the key ingredients you need: - 1 can (15 oz) chickpeas, drained and rinsed - 1 medium cucumber, diced - 1 cup cherry tomatoes, halved - 1 red bell pepper, diced - 1/4 red onion, finely chopped - 1/4 cup fresh parsley, chopped - 2 tablespoons olive oil - 2 tablespoons lemon juice - 2 cloves garlic, minced - 1 teaspoon cumin - Salt and pepper to taste Each ingredient plays a role in flavor and texture. The chickpeas add protein and heartiness. The cucumber gives crunch, while cherry tomatoes and red bell pepper offer sweetness. Onion adds a bit of sharpness, and parsley brightens everything up. You can add some optional ingredients to make the salad even better. Consider these: - Avocado for creaminess - Feta cheese for a salty kick - Olives for a briny taste - A pinch of red pepper flakes for heat These extras can take your salad to new heights. Feel free to mix and match based on your taste! This salad is quite adaptable. If you have dietary needs, here are some substitutes: - For a low-sodium option, use low-sodium chickpeas or rinse them well. - If you are vegan, make sure the dressing ingredients are plant-based. - Substitute quinoa for chickpeas if you prefer a grain base. These substitutions help you enjoy the salad while meeting your dietary needs. Always remember to taste as you go to adjust flavors! {{ingredient_image_1}} To start, gather your ingredients. Grab one can of chickpeas, drain them, and rinse well. Next, you need one medium cucumber. Dice it into small pieces. Then, take one cup of cherry tomatoes and cut them in half. Chop one red bell pepper and a quarter of a red onion finely. Now, place all these fresh veggies into a large mixing bowl. This mix brings color and crunch to the salad. The chickpeas add protein, making the meal filling. In a small bowl, you will whisk together the dressing. Use two tablespoons of olive oil as a base. Then, squeeze in two tablespoons of fresh lemon juice. Add in two minced cloves of garlic for that zesty kick. Next, sprinkle in one teaspoon of cumin, along with salt and pepper to taste. Whisk this mixture until it blends smoothly. This dressing will tie all the flavors together beautifully. Now it's time to bring everything together. Pour the dressing over the bowl with the chickpeas and veggies. Gently toss the mixture. Make sure every piece of the salad gets a nice coating of that tasty dressing. After that, add in a quarter cup of freshly chopped parsley. Toss again to mix it well. Let your salad sit for about 10-15 minutes. This rest time helps the flavors meld together. Serve it chilled or at room temperature for a fresh and flavorful meal. To make this salad burst with flavor, use fresh ingredients. Fresh parsley adds a bright note. Use ripe cherry tomatoes for sweetness. Don’t skip the garlic; it brings a punch. For the dressing, whisk the olive oil and lemon juice well. This way, it coats every part of the salad. Let it sit for 10-15 minutes before serving. This helps the flavors blend together. You can serve this salad in many ways. It works well as a side dish at dinner. You can also enjoy it as a light lunch. Try it with pita bread or on a bed of greens. It pairs nicely with grilled chicken or fish. For a fun twist, add some feta cheese or avocado. This will make it richer and even more tasty! If you have a busy week, make this salad ahead of time. You can prepare it a day early. Just store it in the fridge. The flavors will deepen, making it even better. If you know you’ll want leftovers, keep the dressing separate. This keeps the salad fresh and crunchy. Mix it just before eating to keep that crispness! Pro Tips Use Fresh Ingredients: Always opt for fresh vegetables and herbs to enhance the flavor and nutritional value of your salad. Chill Before Serving: Letting the salad sit for 10-15 minutes allows the flavors to meld together, making it more delicious. Adjust Seasoning: Taste the salad after mixing in the dressing and adjust the salt, pepper, or lemon juice to your preference. Make It a Meal: Add protein like grilled chicken or feta cheese to turn this salad into a hearty meal. {{image_2}} You can change this salad by adding different ingredients. Try adding diced avocado for creaminess. Feta cheese gives a nice salty flavor. You can also add olives for a briny kick. Fresh herbs like mint or basil can brighten up the salad. For a crunchy texture, toss in some sunflower seeds or nuts. Each add-in brings new flavors and textures. This salad is already vegetarian and vegan. It contains no animal products. You can keep it vegan by using olive oil instead of butter. If you want more protein, add quinoa or tofu. Both options will make the salad heartier. You can also use a vegan feta for a cheese option without dairy. The dressing is key to this salad. You can mix it up for a new twist. Try using apple cider vinegar instead of lemon juice for a tangy taste. Add a bit of honey or agave for sweetness. For a spicy kick, add red pepper flakes to the dressing. Each change can make the salad feel fresh and exciting. To store your Lemon Garlic Chickpea Salad, place it in an airtight container. Make sure to seal it tightly. This keeps the salad fresh longer. You can store it in the fridge for up to three days. If you want to keep it crisp, try to leave out the dressing until you serve it. For best taste, eat the salad within three days. After that, the veggies may get soggy. Check for any off smells or changes in color. If the salad looks or smells strange, it’s best to throw it away. Always remember to use fresh ingredients to extend its shelf life. Freezing this salad is not recommended. The texture of the veggies changes when frozen. However, if you have leftover dressing, you can freeze it. Just place it in a freezer-safe bag. You can use it for other salads later. When you're ready to use it, let it thaw in the fridge overnight. Yes, you can use dried chickpeas. First, soak them overnight in water. Then, boil them until they are tender. It takes about one to two hours. This method gives you fresh taste and texture. You can store the salad in the fridge for three to four days. Make sure to keep it in a sealed container. The flavors will blend better over time. However, the veggies will lose some crunch after a few days. This salad pairs well with grilled chicken or fish. You can also serve it with pita bread or quinoa. For a light meal, enjoy it with a refreshing yogurt dip. Each option adds a new layer of flavor. This blog post covered how to make a tasty Lemon Garlic Chickpea Salad. We talked about key and optional ingredients, plus substitutions for different diets. You learned step-by-step instructions for making the salad and whisking the dressing. Tips and tricks for the best flavor were also shared, along with variations to keep it exciting. Lastly, we explored storage options and answered common questions. Enjoy making this fresh salad anytime. It's tasty, easy, and good for you!

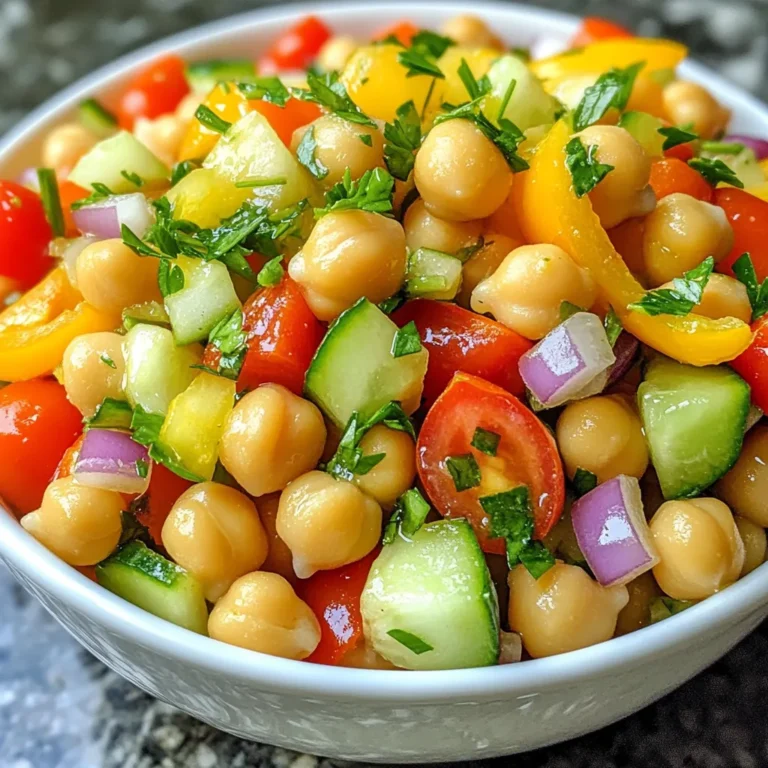
Lemon Garlic Chickpea Salad Fresh and Flavorful Meal

To make Lemon Coconut Energy Bites, you need the following ingredients: - 1 cup rolled oats - 1/2 cup shredded unsweetened coconut - 1/3 cup almond butter (or any nut butter) - 1/4 cup honey or maple syrup - Zest of 1 large lemon - 2 tablespoons fresh lemon juice - 1 teaspoon vanilla extract - Pinch of salt You can add optional ingredients to boost their nutrition: - 2 tablespoons chia seeds - 2 tablespoons flaxseeds These seeds pack extra fiber and omega-3 fatty acids. They help keep you full longer. Don't have almond butter? No problem! You can use any nut butter. Peanut butter works well too. If you want a vegan option, swap honey for maple syrup. For a nut-free version, try sunflower seed butter. It tastes great and keeps the bites tasty. Feel free to mix and match based on what you have at home! {{ingredient_image_1}} First, gather all your ingredients. You will need rolled oats, shredded coconut, almond butter, honey or maple syrup, lemon zest, lemon juice, vanilla extract, a pinch of salt, and optional chia or flaxseeds. This recipe takes about 10 minutes to prep and 30 minutes to chill. You will end up with 12 to 15 tasty bites. In a large mixing bowl, add 1 cup of rolled oats, 1/2 cup of shredded coconut, and 2 tablespoons of chia or flaxseeds if you want some extra nutrition. Mix them well to make sure everything is evenly spread out. Now, in another bowl, combine 1/3 cup of almond butter, 1/4 cup of honey or maple syrup, the zest of 1 large lemon, 2 tablespoons of fresh lemon juice, 1 teaspoon of vanilla extract, and a pinch of salt. Stir this mixture until it is smooth and creamy. Next, pour your wet mix over the dry ingredients. Stir everything together until the oats and coconut are well coated. If your mix feels too sticky, just add a bit more shredded coconut or oats. You want it to hold together but still be easy to shape. With clean hands, grab small amounts of the mixture. Roll them into bite-sized balls, about 1 inch in diameter. Place the energy bites on a lined baking tray or plate. Once you finish rolling them, put the tray in the refrigerator for at least 30 minutes. This helps them firm up nicely. After chilling, transfer the bites to an airtight container. You can store them in the fridge for up to a week. Enjoy your simple and nourishing snacks anytime! To get the right texture for your Lemon Coconut Energy Bites, start with the oats. Use rolled oats, as they give a chewy base. If the mix feels too wet, add more shredded coconut or oats. This helps balance moisture. Aim for a sticky but moldable mix. When you roll the bites, make them about one inch wide. This size makes them easy to grab and eat. Keep your energy bites fresh by storing them in an airtight container. The fridge is best, as it keeps them firm and tasty. They can last up to one week. If you want to store them longer, think about freezing. Just place them in a freezer bag. They will stay fresh for up to three months in the freezer. Let them thaw in the fridge before eating. Avoid using sweetened coconut. It adds too much sugar and alters the taste. Don’t skip the lemon zest. It brightens the flavor and adds freshness. Also, be careful not to overmix the wet and dry ingredients. Overmixing can lead to a dense texture. Lastly, don’t rush the chilling time. Letting the bites chill helps them firm up and hold their shape. Pro Tips Perfectly Measure Your Ingredients: Use a kitchen scale to ensure accurate measurements, especially for sticky ingredients like nut butter and honey. Experiment with Flavors: Feel free to add other mix-ins such as dark chocolate chips, dried fruits, or nuts to customize your energy bites. Chill for Optimal Texture: Allow the energy bites to chill in the refrigerator for longer than 30 minutes for a firmer texture, making them easier to handle. Store Properly: For maximum freshness, store the energy bites in an airtight container in the fridge, and consider freezing them for longer storage. {{image_2}} You can change the taste of your Lemon Coconut Energy Bites easily. Try adding chocolate chips for a sweet twist. Just mix in 1/4 cup of mini chocolate chips. If you love peanut butter, swap out almond butter for peanut butter. This change gives the bites a rich, nutty flavor. You can also blend in spices like cinnamon or nutmeg for a warm taste. Adding extra ingredients can boost the nutrition and flavor. Chopped nuts, like almonds or walnuts, add crunch and healthy fats. Dried fruits, like cranberries or apricots, add sweetness and chewiness. You can mix in 1/4 cup of your favorite nuts or fruits. For a protein boost, add 2 tablespoons of chia seeds or flaxseeds. These tiny seeds pack a lot of nutrients. These energy bites can fit many diets. To make them vegan, use maple syrup instead of honey. This keeps the bites sweet without honey. For a gluten-free option, use certified gluten-free oats. Always check labels to ensure your ingredients are gluten-free. With these changes, everyone can enjoy these tasty snacks. Each Lemon Coconut Energy Bite has about 80 calories. This makes them a great snack. You can enjoy one without feeling guilty. If you eat two, that’s still just 160 calories! Here’s how these bites break down: - Fats: About 4 grams from almond butter and coconut. - Carbohydrates: Roughly 10 grams from oats and honey. - Proteins: Around 2 grams, mainly from almond butter. This balance gives you energy without a sugar crash. These energy bites pack a nutritional punch. - Oats provide fiber, which helps digestion and keeps you full. - Coconut adds healthy fats and can boost heart health. - Almond butter offers protein and good fats, which can help muscle growth. - Lemon juice adds vitamin C, which supports your immune system. - Chia seeds or flaxseeds give extra omega-3s and fiber. These ingredients work together to nourish your body and keep you energized! Lemon Coconut Energy Bites can last up to one week in the fridge. Store them in an airtight container to keep them fresh. If you want to enjoy them later, you can freeze them. Yes, you can freeze these energy bites. They freeze well and maintain their flavor. Place them in a single layer on a baking sheet until firm. Then, transfer them to a freezer-safe bag or container. They can last about three months in the freezer. You can use any nut butter you like. Peanut butter, cashew butter, or sunflower seed butter are great choices. Each will change the flavor a bit but will still taste delicious. In this blog post, we explored how to make delicious energy bites. We covered key ingredients and tasty variations. I shared tips for perfect texture and how to store them fresh. You learned about health benefits and common mistakes to avoid. Energy bites are easy to make and great for snacks. Try different flavors and add-ins to suit your taste. Enjoy making and sharing your energy bites with friends and family.

Lemon Coconut Energy Bites Simple and Nourishing Snack

To make creamy garlic gnocchi, you need a few simple ingredients. They come together to create a delicious dish that everyone will love. Here is the list of ingredients you will need: - 1 pound potato gnocchi - 2 tablespoons olive oil - 4 cloves garlic, minced - 1 cup heavy cream - 1 cup vegetable broth - 1 cup grated parmesan cheese - 1 cup baby spinach - 1 teaspoon crushed red pepper flakes (optional) - Salt and pepper to taste - Fresh basil leaves for garnish Each ingredient plays a key role in the dish. The potato gnocchi serves as the base, giving it a soft and chewy texture. Olive oil adds richness and depth. Minced garlic brings a fantastic aroma and flavor. Heavy cream creates a smooth and creamy sauce, while vegetable broth adds more taste. Grated parmesan cheese gives a savory touch, and baby spinach adds color and nutrients. Crushed red pepper flakes can bring a hint of heat. Finally, salt and pepper enhance all the flavors. Fresh basil leaves make the dish look beautiful and add a fresh finish. This combination makes creamy garlic gnocchi a savory and simple delight. {{ingredient_image_1}} First, bring a large pot of salted water to a boil. Use enough water to let the gnocchi float freely. Add the gnocchi to the boiling water. Cook them until they float to the top. This usually takes about 2 to 3 minutes. Once they rise, drain the gnocchi in a colander. Set them aside while you prepare the sauce. In a large skillet, heat 2 tablespoons of olive oil over medium heat. Add 4 cloves of minced garlic. Sauté the garlic for about 1 minute until it smells good but does not burn. Next, pour in 1 cup of heavy cream and 1 cup of vegetable broth. Stir the mixture well and let it simmer for about 5 minutes. This helps the sauce thicken a bit. After simmering, stir in 1 cup of grated parmesan cheese. Mix until the cheese melts and the sauce is smooth. If you like a little heat, add 1 teaspoon of crushed red pepper flakes now. Now it's time to bring it all together. Gently fold in the drained gnocchi and 1 cup of baby spinach into the sauce. Cook for another 3 to 4 minutes. This allows the spinach to wilt and the gnocchi to heat up. Taste the dish and add salt and pepper to your liking. Once everything is well-mixed and heated, remove the skillet from the heat. Garnish with fresh basil leaves before serving for a fresh touch. Enjoy this creamy garlic gnocchi! To get the sauce just right, focus on the thickness. Start by simmering the cream and broth together. You want it to bubble gently. This helps the sauce thicken. Stir often to keep it smooth. If it gets too thick, add a little more broth. Avoid burnt garlic at all costs. Burnt garlic can ruin your dish. Sauté the minced garlic for only about one minute. You want it fragrant and soft, not brown. As soon as you smell that lovely aroma, it’s time to add the cream. Recognizing when gnocchi is done is easy. Cook them in boiling water. Watch for them to float to the top. Once they float, they are ready! This usually takes about 2-3 minutes. Drain them well before adding them to your sauce. You can use fresh or frozen gnocchi. Fresh gnocchi cooks faster, while frozen takes a bit longer. If you choose frozen, just add a minute or two to the cooking time. Both types are delicious, so pick what you have on hand! Adding extra vegetables can make your dish more colorful and healthy. Try adding bell peppers or mushrooms. You can sauté them with the garlic for added flavor. Adjusting spice levels is simple. If you like heat, add more crushed red pepper flakes. If you prefer it mild, skip the flakes. Always taste as you go. This ensures the flavors are just right for you! Pro Tips Use Fresh Ingredients: For the best flavor, use fresh garlic and quality parmesan cheese. Fresh ingredients significantly enhance the overall taste of the dish. Adjust the Creaminess: If you prefer a lighter sauce, you can replace half of the heavy cream with more vegetable broth. This still maintains a rich flavor while reducing the heaviness. Customize the Greens: Feel free to swap out baby spinach for other greens like kale or arugula. Each will bring a unique flavor and texture to the dish. Perfectly Cooked Gnocchi: Make sure to cook the gnocchi just until they float. Overcooking can lead to a mushy texture, so keep an eye on them while boiling. {{image_2}} You can easily make this dish vegetarian. Just swap chicken broth for vegetable broth. This change keeps the flavor rich and satisfying. Many brands offer tasty vegetable broth. Look for low-sodium options for better control over salt. Want to change the taste? You can add herbs like thyme or oregano. These herbs bring fresh flavors and depth. You can also add protein to your dish. Chicken or shrimp work great with gnocchi. Just cook the protein first, then mix it in with the other ingredients. If you need a gluten-free option, look for gluten-free gnocchi. Many stores sell this alternative now. It cooks just like regular gnocchi and tastes delicious. You can enjoy all the creamy goodness without the gluten. To store leftovers, let the creamy garlic gnocchi cool. Place it in an airtight container. Keep it in the fridge for up to three days. When you're ready to eat, check for any signs of spoilage. Freezing this dish is easy. First, let it cool completely. Portion it into freezer-safe bags or containers. Use a vacuum sealer if you have one. Label the bags with the date. You can freeze the gnocchi for up to two months. Remember, the texture may change a bit after freezing. When reheating, use a skillet for the best results. Add a splash of broth or cream to keep it creamy. Heat over low to medium heat, stirring gently. Avoid high heat to prevent sticking. You can also use the microwave. Place it in a microwave-safe dish and cover it. Heat in short bursts, stirring in between. This way, you keep the texture smooth and delicious. Yes, you can prep creamy garlic gnocchi in advance. First, cook the gnocchi, but do not add the sauce. Let them cool and store them in an airtight container. The sauce can also be made ahead. Store it in the fridge separately. When ready to serve, reheat both the gnocchi and the sauce. Combine them in a skillet until warm. This method keeps the gnocchi fresh and maintains the creamy texture. Making homemade gnocchi is fun and simple. You will need potatoes, flour, and egg. Bake the potatoes until soft, then mash them. Combine the mashed potatoes with flour and egg to form a dough. Roll it out and cut it into small pieces. Use a fork to shape them. For detailed steps, check out online videos or cooking blogs. They provide great visuals and tips. Creamy garlic gnocchi pairs well with many sides. Here are some ideas: - A simple green salad with lemon vinaigrette - Roasted vegetables like zucchini or bell peppers - Grilled chicken or shrimp for protein - Garlic bread for extra flavor Each of these options adds variety to your meal and complements the rich flavors of the gnocchi. In this post, we explored how to make creamy garlic gnocchi from start to finish. We discussed the needed ingredients, cooking steps, and some helpful tips. Don’t forget that small changes can make big flavors. You can experiment with different veggies or protein options. Remember to store any leftovers so you can enjoy them later. Cooking isn’t just about following a recipe; it’s about making it your own. With practice, you’ll create a meal that satisfies your taste buds every time. Enjoy your cooking journey!

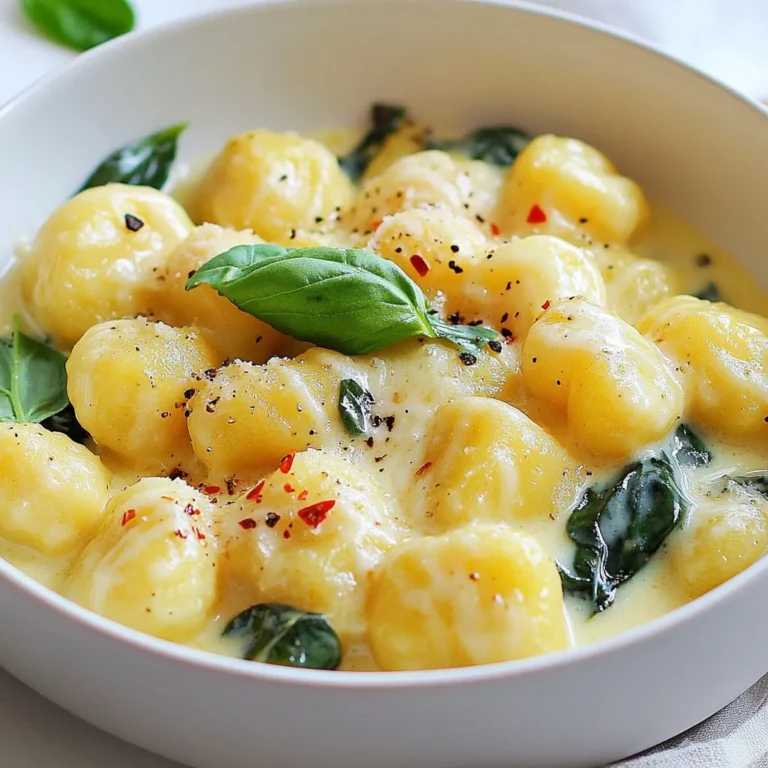
Creamy Garlic Gnocchi Savory and Simple Delight

- 1 lb (450g) ground chicken - 1 tablespoon olive oil - 1 red bell pepper, finely chopped - 1 carrot, grated - 3 green onions, sliced - 1/4 cup sweet chili sauce - 2 tablespoons soy sauce (low sodium) - 1 tablespoon freshly grated ginger - 1 tablespoon lime juice - 1 tablespoon sesame oil - Salt and pepper to taste - 1 head of butter lettuce or iceberg lettuce, leaves separated - Chopped cilantro for garnish (optional) For this dish, I love using fresh and vibrant ingredients. Ground chicken is the star; it cooks quickly and absorbs flavors well. Olive oil helps to sauté the meat and keeps it moist. I use a red bell pepper for color and sweetness. Carrots add crunch and a hint of earthiness. Green onions give a mild sharpness. Sweet chili sauce adds the perfect balance of heat and sweetness. Low-sodium soy sauce enhances flavor without too much salt. Fresh ginger brightens the dish. Lime juice adds a zesty kick. Sesame oil lends a nutty aroma, while salt and pepper bring everything together. For the cups, I prefer butter lettuce or iceberg lettuce. They hold the filling well and provide a crisp bite. If you want, garnish with chopped cilantro for a fresh finish. Each ingredient plays a role in creating a dish that's colorful, tasty, and satisfying. {{ingredient_image_1}} - Heating the olive oil Start by heating one tablespoon of olive oil in a large skillet over medium heat. This oil helps cook the chicken and adds flavor. - Cooking ground chicken Add one pound of ground chicken to the skillet. Cook for about 5 to 7 minutes. Stir often until the chicken is fully cooked and browned. Make sure there are no pink bits left. - Adding vegetables Next, add one finely chopped red bell pepper, one grated carrot, and the white parts of three sliced green onions. Sauté these for 3 to 4 minutes until the veggies are tender. This step adds crunch and color to your dish. - Combining sauces and seasonings Pour in 1/4 cup of sweet chili sauce, 2 tablespoons of low-sodium soy sauce, one tablespoon of freshly grated ginger, one tablespoon of lime juice, and one tablespoon of sesame oil. Stir well to combine. Cook for another 2 to 3 minutes until everything is heated through. Season with salt and pepper to taste. - Final assembly of lettuce cups Remove the skillet from heat and let the mixture cool slightly. Take a lettuce leaf, spoon a generous portion of the chicken mixture into the center, and enjoy! You can top it with the remaining green onion slices and chopped cilantro for a fresh touch. How to prevent chicken from drying out To keep your chicken juicy, use medium heat. Cook the chicken for about 5-7 minutes. Stir it often so it cooks evenly. Adding sweet chili sauce also helps keep the chicken moist. Adjusting spice levels If you want more heat, add chili flakes or sriracha. Start with a small amount. Taste as you go, so you don’t overpower the dish. If you prefer it mild, reduce the sweet chili sauce. Selecting the best lettuce For crispy cups, use butter or iceberg lettuce. Both provide a nice crunch. Make sure to wash the leaves and dry them well. Fresh leaves hold the filling better. How to neatly serve lettuce cups Spoon the chicken mix into the center of each leaf. Don’t overfill; it makes them messy. Arrange them on a platter for a nice display. This makes it easy for guests to grab their own. Creative plating suggestions You can add color and flair! Use a sprinkle of chopped cilantro on top. Place lime wedges around the cups for a pop of color. It makes the dish look vibrant and inviting. Pro Tips Use Fresh Ingredients: Always opt for fresh vegetables and herbs to enhance the flavor of your dish. Customize the Heat: Adjust the amount of sweet chili sauce according to your spice preference. Prep Ahead: You can prepare the chicken mixture ahead of time and store it in the fridge for quick assembly later. Experiment with Wraps: Try using different types of lettuce or even cabbage leaves for a unique texture. {{image_2}} You can switch up proteins in Sweet Chili Chicken Lettuce Cups. Ground turkey works well. For a plant-based option, try tofu. It soaks up flavors nicely. If you need gluten-free options, use tamari instead of soy sauce. You can also use coconut aminos. For vegan adaptations, substitute ground chicken with tempeh or mushrooms. These options still taste great. Want to add some heat? Sprinkle chili flakes or a dash of sriracha into the chicken mix. This will give your cups a nice kick. You can also change the veggies. Try adding diced cucumber, shredded cabbage, or bell pepper. Each adds a new crunch and flavor. Feel free to get creative with your choices. To store your Sweet Chili Chicken Lettuce Cups, place the chicken mixture in an airtight container. This keeps it fresh and safe. Let it cool before sealing to avoid condensation. You can store it in the fridge for up to three days. If you have leftover lettuce, wrap it in a damp paper towel and place it in a sealed bag. This helps keep the leaves crisp and fresh for a day or two. When it's time to eat your leftovers, reheat the chicken mixture in a skillet over low heat. Stir occasionally to ensure even heating. This method keeps the chicken moist and tasty. You can also use a microwave, but heat it in short bursts to avoid drying it out. For the lettuce, serve it fresh. If it feels wilted, run it under cold water and pat it dry. This quick rinse can revive the crispness. Can I make Sweet Chili Chicken Lettuce Cups ahead of time? Yes, you can prepare the chicken filling ahead of time. Cook the chicken mixture, then store it in the fridge. Just remember to keep the lettuce leaves separate. This keeps them crisp and fresh. When you're ready, assemble the cups right before serving. What can I serve with Sweet Chili Chicken Lettuce Cups? These lettuce cups pair well with rice or quinoa. You could also serve them with a light salad. Consider adding some fresh fruit like mango or pineapple for a sweet contrast. For a fun twist, offer extra dipping sauces on the side. Are Sweet Chili Chicken Lettuce Cups suitable for meal prep? Absolutely! This dish is perfect for meal prep. The chicken mixture keeps well in the fridge for up to three days. Just store it in an airtight container. You can pack the lettuce leaves separately. This way, you can enjoy a fresh meal anytime. You learned how to make Sweet Chili Chicken Lettuce Cups using simple, tasty ingredients. We covered cooking steps and gave you tips for a great dish. Remember to adjust spice levels and choose fresh lettuce for the best flavor. Feel free to swap ingredients based on your needs. This dish is easy to store and reheat, making it great for meal prep. Now you can enjoy a fun, healthy meal anytime!

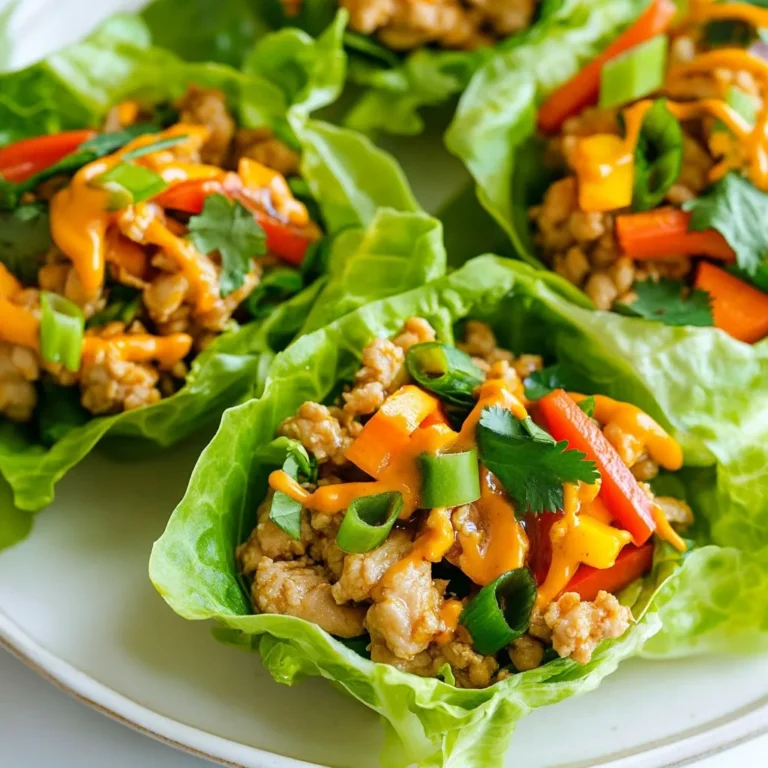
Savory Sweet Chili Chicken Lettuce Cups Delight

To make your Spicy Korean Beef Bowls, you need: - 1 lb (450g) ground beef - 1 tablespoon sesame oil - 3 cloves garlic, minced - 1 inch ginger, grated - 1/4 cup soy sauce - 2 tablespoons gochujang (Korean chili paste) - 2 tablespoons brown sugar - 1 tablespoon rice vinegar - 1 cup broccoli florets - 1 cup carrots, julienned - 2 green onions, sliced - Cooked rice (for serving) - Sesame seeds (for garnish) You can swap ground beef for ground turkey or chicken. These meats work well. If you want a vegetarian option, try using tofu or tempeh. For the soy sauce, you can use tamari for a gluten-free option. If you can’t find gochujang, mix chili paste with a bit of sugar. You can also use honey instead of brown sugar for sweetness. When picking broccoli, look for bright green florets. They should not be yellow or wilted. For carrots, choose firm ones with no soft spots. Fresh green onions should have vibrant green tops and no brown ends. If you can, buy organic to get the best flavor. Always check for freshness to make your dish taste great! {{ingredient_image_1}} Start by heating one tablespoon of sesame oil in your skillet. Use medium heat until it shines. Add three cloves of minced garlic and one inch of grated ginger. Sauté these for about 30 seconds. You want to smell that great aroma! Next, increase the heat to medium-high. Add one pound of ground beef to the skillet. Break it apart with a wooden spoon. Cook this for about 5 to 7 minutes. The beef should be browned and cooked through. In a separate bowl, mix together 1/4 cup of soy sauce, two tablespoons of gochujang, two tablespoons of brown sugar, and one tablespoon of rice vinegar. Stir until it is smooth. Once the beef is ready, pour this sauce over it. Make sure to stir well so everything gets coated. The sweet and spicy flavors will meld perfectly! Now it’s time to add some color and crunch! Add one cup of broccoli florets and one cup of julienned carrots to the beef. Cook these for another five minutes. You want them to be tender but still bright and crisp. Once ready, remove the skillet from the heat. Stir in two sliced green onions, saving some for later. Serve this spicy beef mix over cooked rice. Don’t forget to sprinkle sesame seeds and the reserved green onions on top for a lovely finish! To turn up the heat, add more gochujang. Try using two tablespoons instead of one. You can also add sliced fresh chili peppers. Jalapeños work well. For a smoky flavor, toss in some smoked paprika. This will give your dish a deep, spicy kick. For a great texture, do not overcook the beef. Cook it just until browned. This keeps it juicy and tender. When adding vegetables, cook them until they are bright and crisp. This adds a nice crunch to your bowl. Make sure to stir well so everything mixes evenly. Serve your spicy beef over a bed of hot cooked rice. Jasmine or white rice are great choices. You can also add a side of kimchi for extra flavor. Top your bowl with sesame seeds and more green onions. This makes the dish look colorful and inviting. Pro Tips Use Fresh Ingredients: Fresh garlic and ginger will elevate the flavor of your beef bowls significantly. Try to use them instead of dried or powdered versions for the best taste. Adjust Spice Level: If you prefer a milder dish, reduce the amount of gochujang or add it gradually until you reach your desired spice level. Veggie Variations: Feel free to substitute or add other vegetables like bell peppers, snap peas, or bok choy to customize your bowls and increase nutrition. Rice Choice: For a healthier option, consider using brown rice or cauliflower rice instead of white rice to pack in more nutrients and fiber. {{image_2}} You can easily make a vegetarian version of spicy Korean bowls. Just swap the ground beef for textured vegetable protein or tofu. Both soak up flavors well. Use the same sauce mix to keep that spicy kick. If you want a vegan bowl, ensure you pick a plant-based gochujang. This way, you keep it tasty and friendly for all diets. Don’t stick to just beef! You can use ground turkey or chicken instead. These proteins have a milder taste but work just as well. For a richer flavor, try pork or lamb. They both add a unique twist to your bowls. Just adjust the cooking time based on the protein you choose. Feel free to mix and match your veggies! Bell peppers, snap peas, and zucchini are great options. You can even add mushrooms for an earthy flavor. The key is to keep the veggies vibrant and crisp, so add them at the right time. This keeps your meal colorful and fun to eat! To store your spicy Korean beef bowls, let them cool first. Place the beef and veggies in an airtight container. Make sure to keep the rice separate. Store everything in the fridge for up to three days. This way, your meal stays fresh and tasty. When you're ready to eat, take the beef and rice out of the fridge. You can reheat them in the microwave. Heat the beef for about one to two minutes. Stir halfway to warm it evenly. For the rice, heat it for about 30 seconds. Add a splash of water if it seems dry. If you want to save your spicy Korean beef bowls for later, freezing works well. Pack the cooled beef and veggies in freezer bags or containers. Remove as much air as possible to prevent freezer burn. You can freeze the beef for up to three months. However, it's best to freeze the rice separately. When ready to enjoy, thaw overnight in the fridge and reheat as you normally would. Gochujang is a spicy Korean chili paste. It adds a deep, rich flavor to dishes. You can find gochujang in Asian markets or large grocery stores. Look in the international aisle. Gochujang is often sold in red tubs or squeeze bottles. If you can't find it, try ordering online. Yes, you can use different meats for this recipe. Ground pork, turkey, or chicken work well. Each type will change the taste slightly. If you want a plant-based option, try using firm tofu. Just crumble it before cooking. Make sure to adjust cooking times if you switch meats. Several side dishes complement Spicy Korean Beef Bowls nicely. Here are a few ideas: - Kimchi: This spicy, fermented vegetable dish adds a tangy kick. - Steamed rice: A classic choice for soaking up flavors. - Cucumber salad: A refreshing side that balances the spice. - Pickled radishes: These add crunch and a sweet-tangy taste. Feel free to mix and match these sides to enhance your meal. This article covers how to make Spicy Korean Beef Bowls. We discussed key ingredients, cooking steps, and tips for freshness. You learned ways to boost spice and texture, plus variations for different diets. Storing tips and answers to common questions help you enjoy this dish longer. In conclusion, this meal is flexible and satisfying. You can tailor it to your taste. Enjoy experimenting with your own versions! Trust me; it will be delicious.

Spicy Korean Beef Bowls Flavorful and Easy Recipe

To make the best Oreo stuffed brownies, gather these ingredients: - 1 cup unsalted butter (2 sticks) - 1 1/4 cups granulated sugar - 1 cup packed brown sugar - 4 large eggs - 1 teaspoon vanilla extract - 1 cup all-purpose flour - 1 cup unsweetened cocoa powder - 1/2 teaspoon salt - 1/2 teaspoon baking powder - 16 Oreo cookies (whole for stuffing) - 1/2 cup chocolate chips (optional, for extra fudginess) These ingredients bring a rich flavor and texture to your brownies. The butter adds moisture, while sugars provide sweetness. The cocoa powder gives a deep chocolate taste, and the Oreos add a fun twist. If you want even more chocolate, toss in some chocolate chips. {{ingredient_image_1}} First, preheat your oven to 350°F (175°C). This step is key for even baking. Grease a 9x13 inch baking pan with non-stick spray or line it with parchment paper. This helps with easy removal later. Next, melt 1 cup of unsalted butter in a medium saucepan over low heat. Once it's melted, take it off the heat and let it cool a bit. In a large mixing bowl, mix the melted butter with 1 1/4 cups of granulated sugar and 1 cup of packed brown sugar. Stir until the mixture is smooth. Then, add 4 large eggs, one at a time, mixing well after each. Finally, stir in 1 teaspoon of vanilla extract. In another bowl, whisk together 1 cup of all-purpose flour, 1 cup of unsweetened cocoa powder, 1/2 teaspoon of salt, and 1/2 teaspoon of baking powder. Make sure there are no lumps. This mix gives the brownies their rich flavor and texture. Pour half of the brownie batter into your prepared pan. Spread it evenly. Now, take 16 whole Oreo cookies and place them in a single layer on top of the batter. Finally, pour the rest of the brownie batter over the Oreos. This creates a delicious surprise in every bite. Now, it’s time to bake! Place the pan in the preheated oven. Bake for 30-35 minutes. Check for doneness by inserting a toothpick into the center. It should come out with a few moist crumbs. Be careful not to overbake; you want fudgy brownies. Once baked, take the brownies out of the oven. Let them cool in the pan for at least 20 minutes. This cooling time helps them set up properly. After that, cut them into squares. For a fun touch, you can dust the top with powdered sugar or serve with a scoop of vanilla ice cream. Enjoy your Oreo stuffed brownies! To get fudgy brownies, use melted butter. It makes them richer. Adding chocolate chips adds even more moisture. Use a high-quality cocoa powder for a deep flavor. Mix your batter just until blended. When you overmix, you add air. This makes brownies cakey instead of fudgy. Stir gently when combining dry and wet ingredients. Bake at 350°F for 30-35 minutes. Check with a toothpick. If it comes out with a few moist crumbs, they are done. Remember, underbaking slightly keeps them fudgy. Pro Tips Use Room Temperature Eggs: Using eggs that are at room temperature helps them incorporate better into the batter, resulting in a more uniform texture. Don’t Overmix the Batter: To achieve fudgy brownies, mix the batter just until combined. Overmixing can lead to a cakey texture. Cool Before Cutting: Allow the brownies to cool in the pan for at least 20 minutes. This helps them set up properly and makes cutting easier. Experiment with Toppings: Feel free to add toppings like crushed Oreos, nuts, or a drizzle of chocolate on top before baking for added flavor and texture. {{image_2}} You can switch out the Oreo cookies for other favorites. Try using peanut butter cookies or chocolate chip cookies. Each choice will give a new taste to the brownies. If you love mint, use mint Oreos for a fresh twist. Experimenting with different cookies makes each batch special. Get creative with your toppings! You can sprinkle crushed Oreos on top before baking. This adds flavor and a nice crunch. Another fun option is to add mini marshmallows or nuts. You can also drizzle melted chocolate or caramel on top when they cool. These toppings make each bite even more exciting. Want a gluten-free treat? No problem! You can swap the all-purpose flour for a gluten-free blend. Many brands work well in brownies. Just check the packaging for the right amount to use. This way, everyone can enjoy your Oreo stuffed brownies, no matter their diet. To keep your Oreo stuffed brownies fresh, place them in an airtight container. This will help prevent them from drying out. You can store them at room temperature for up to four days. If you want to keep them longer, refrigeration is a great option. Just remember to wrap them well to avoid any fridge smells. Freezing is a smart way to enjoy your brownies later. Cut the brownies into squares before freezing. Then, wrap each piece tightly in plastic wrap. Place the wrapped brownies in a freezer-safe bag or container. They can last up to three months in the freezer. When you're ready to eat them, just thaw at room temperature for a few hours. If you want warm, gooey brownies, reheating is easy. Preheat your oven to 350°F (175°C). Place the brownies on a baking sheet. Heat them for about 10 minutes. For a quicker option, you can use the microwave. Heat each square for 10 to 15 seconds. Be careful not to overheat, or they might dry out. Enjoy your rich and fudgy treat! You can check if the brownies are done by inserting a toothpick into the center. If it comes out with a few moist crumbs, they are ready. Avoid overbaking to keep them fudgy. The edges should look set, while the center may still appear soft. Yes! You can swap Oreos for any cookie you like. Try peanut butter cookies for a twist. You can also use chocolate chip cookies for a classic combo. Just make sure they are sturdy enough to hold up in the brownie batter. Leftover brownies can be stored for later. Keep them in an airtight container at room temperature for about three days. You can also freeze them for longer storage. Just wrap each brownie tightly in plastic wrap, then place them in a freezer bag. Absolutely! You can make these brownies a day ahead. Just let them cool fully, then cover them tightly. This helps the flavors meld together. Enjoy them cold or warm them up in the microwave briefly before serving. You now know how to make delicious brownies with Oreos. We covered each step, from mixing the ingredients to baking. I also shared tips for fudgy results and various ways to change the recipe. You can store these treats easily and even freeze them. With this guide, you can create tasty brownies every time. Enjoy making, sharing, and munching on your treats!

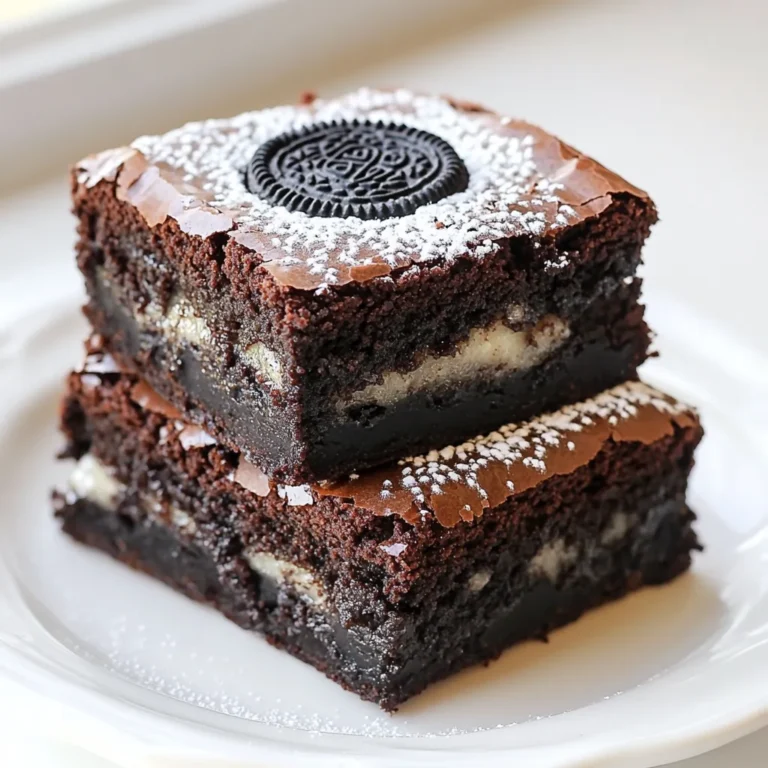
Oreo Stuffed Brownies Rich and Fudgy Delight

- Zucchini and Vegetables - 4 medium zucchinis, spiralized into zoodles - 1 cup red bell pepper, thinly sliced - 1 cup shredded carrots - 2 green onions, chopped - 1/4 cup fresh cilantro, chopped - Peanut Sauce Components - 1/2 cup peanut butter (smooth) - 2 tablespoons soy sauce (or tamari for gluten-free) - 1 tablespoon lime juice - 1 tablespoon sriracha (adjust to taste) - 1 teaspoon grated ginger - 1 tablespoon sesame oil - Garnishes - 1/4 cup unsalted peanuts, chopped (for garnish) - Salt and pepper to taste To make Spicy Thai Peanut Zoodles, you need fresh and simple ingredients. The zoodles start with zucchini, which are healthy and fun to eat. The red bell pepper and carrots add color and crunch. Green onions and cilantro bring freshness to the dish. For the peanut sauce, smooth peanut butter is key. It creates a creamy base. Soy sauce or tamari adds saltiness and depth. Lime juice gives a nice zing. Sriracha adds heat, but you can adjust it for your taste. Grated ginger brings warmth, while sesame oil adds a nutty flavor. Finally, chopped peanuts serve as a great garnish. They add a satisfying crunch. Don’t forget salt and pepper to enhance the flavors. With these ingredients, you are ready to whip up a delicious meal in no time! {{ingredient_image_1}} Start by spiralizing the zucchinis. A spiralizer makes this easy. You want long, thin strands. Once spiralized, place the zoodles in a bowl. Sprinkle them with a little salt. This helps draw out moisture. Let them sit while you prepare the sauce and veggies. In a clean bowl, add the smooth peanut butter. Next, pour in the soy sauce. Squeeze in the lime juice and add sriracha. Grate some ginger into the mix. Finally, drizzle in the sesame oil. Stir everything together until it’s smooth. If the sauce feels thick, add a tablespoon of water. This will help it mix better. Heat a large skillet over medium heat. Add the sliced red bell pepper and shredded carrots. Sauté these for about 2-3 minutes. You want them to soften just a bit. They should still be bright and colorful. Add your zoodles to the skillet. Gently toss them with the sautéed veggies. Cook them together for another 3-4 minutes. This warms the zoodles but keeps them crunchy. You want them to have a nice bite. Take the skillet off the heat. Pour the peanut sauce over the zoodles and veggies. Toss everything well to coat. Taste the dish and add salt and pepper if needed. Serve the zoodles in bowls. Top with chopped green onions, fresh cilantro, and chopped peanuts. Enjoy your colorful, spicy meal! To make zoodles, use a spiralizer. Cut each zucchini in half. Attach one half to the spiralizer. Turn the handle to create long, noodle-like strands. Set the zoodles aside and sprinkle them with salt. This helps remove excess moisture, keeping them firm. If you love heat, add more sriracha. Start with one tablespoon. Taste the sauce, then add more if needed. If you prefer mild flavors, use less sriracha. You can also balance the spice with more peanut butter or lime juice to enhance flavor without adding heat. Do not overcook the zoodles. Cook them for just 3-4 minutes. This helps maintain their crunch. Always toss the zoodles gently with the sauce off the heat. This way, they stay crisp while soaking up the flavors. Enjoy your fresh, crunchy zoodles! Pro Tips Use Fresh Zucchini: Choose firm, fresh zucchinis for the best texture and flavor. Older zucchinis can be watery and less flavorful. Customize Your Sauce: Feel free to experiment with the peanut sauce by adding ingredients like garlic, sesame seeds, or even coconut milk for a creamier texture. Don’t Overcook Zoodles: Zoodles should be cooked just until heated through to maintain their crunch. Overcooking can lead to a mushy texture. Garnish for Flavor: Enhance the dish with additional toppings like crushed red pepper flakes, lime wedges, or a sprinkle of sesame seeds for added flavor and texture. {{image_2}} If you want a gluten-free dish, use tamari instead of soy sauce. Tamari has a similar taste but no gluten. Also, check the peanut butter label. Some brands add gluten. Using fresh ingredients helps keep the dish tasty and safe. This dish is almost vegan! Just make sure your peanut butter and tamari are vegan-friendly. Replace the honey with agave syrup if you want to sweeten the sauce. You can also add tofu for extra protein. Tofu packs a punch of flavor and keeps it plant-based. Want to make it heartier? Add cooked chicken, shrimp, or tofu to the zoodles. Cook the protein separately, then mix it in. Chicken and shrimp work well with the peanut sauce, making it rich and filling. Tofu works great for a vegan option. Just sauté it until golden! To keep your Spicy Thai Peanut Zoodles fresh, place them in an airtight container. Store them in the fridge for up to three days. Make sure the zoodles are cool before sealing the container. This helps keep them crisp and tasty. When you're ready to enjoy your leftovers, reheat them gently. You can use a skillet over low heat. Add a splash of water to keep them moist. Stir often until they are warm. Avoid using the microwave, as it can make the zoodles soggy. Freezing zoodles can change their texture. If you want to freeze them, it’s best to freeze the peanut sauce separately. Place the sauce in a freezer-safe bag. Store it for up to three months. When you're ready to eat, thaw the sauce in the fridge overnight. Cook fresh zoodles to serve with the sauce. This keeps your dish fresh and delicious. Zoodles are noodles made from zucchini. You create them by spiralizing zucchini. This gives a fun twist to dishes. Zoodles are low in carbs and calories. They are perfect for a healthy meal. You can use them like regular pasta in recipes. Yes, you can mix in other vegetables. Broccoli, bell peppers, and snap peas work well. You can also try carrots or spinach. Feel free to get creative with your veggies. This dish is all about your taste! If your sauce is too thick, just add water. Start with one tablespoon. Mix well and see if it thins. You can keep adding water until it’s just right. This way, you can adjust the sauce to your liking. You can prep the zoodles and sauce ahead of time. Store them separately in the fridge. When you are ready, just cook the veggies and mix everything together. This makes it easy for busy days! This blog shared how to make tasty zoodles with peanut sauce. You learned about key ingredients like zucchini, various veggies, and garnishes. I explained how to spiralize zucchini and prepare a creamy peanut sauce. Tips helped you keep the zoodles crunchy and adjust spice levels. You explored gluten-free and vegan options too. In the end, try this dish your way. Enjoy cooking and savor each bite!

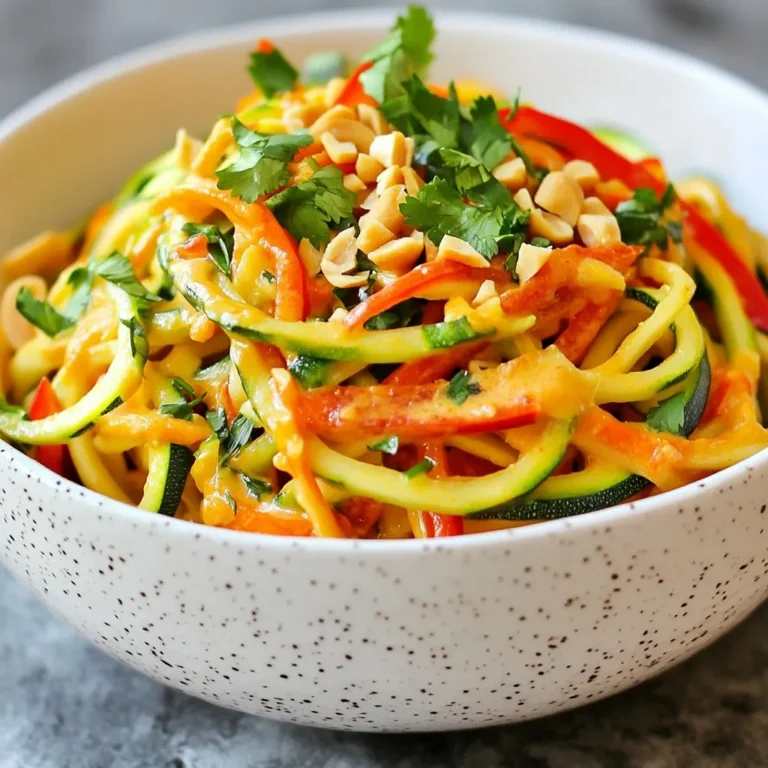
Spicy Thai Peanut Zoodles Simple and Flavorful Dish

To make Snickerdoodle Apple Cobbler, gather the following items: - 4 medium apples, peeled, cored, and sliced - 1 tablespoon lemon juice - 1 teaspoon ground cinnamon - 1 cup all-purpose flour - 1 cup brown sugar, packed - 1/2 cup granulated sugar - 1/2 cup unsalted butter, softened - 1 teaspoon baking powder - 1/2 teaspoon baking soda - 1/2 teaspoon salt - 1 teaspoon vanilla extract - 1 tablespoon ground cinnamon (for sprinkling) - 1 tablespoon sugar (for sprinkling) Here are some easy swaps if you need them: - Use any firm apples like Granny Smith or Honeycrisp. - Swap lemon juice with lime juice for a different twist. - You can use coconut oil instead of butter. - For gluten-free options, use almond or oat flour. - Brown sugar can be replaced with coconut sugar for a healthier choice. Make sure you have these tools handy: - An 8-inch square baking dish - Mixing bowls for combining ingredients - A whisk or electric mixer for blending - A sharp knife and cutting board for slicing apples - Measuring cups and spoons for accuracy - A toothpick to check the cobbler’s doneness Getting these ingredients and tools ready makes the cooking process smooth and fun! {{ingredient_image_1}} Start by peeling and coring 4 medium apples. Slice them thinly for a great texture. Place the slices in a bowl. Add 1 tablespoon of lemon juice and 1 teaspoon of ground cinnamon. Stir well so every slice gets coated. This step keeps the apples fresh and adds flavor. Once mixed, spread the apples evenly in a greased 8-inch square baking dish. In a clean bowl, combine 1/2 cup of softened unsalted butter, 1 cup of brown sugar, and 1/2 cup of granulated sugar. Cream these together until the mixture is light and fluffy. This should take about 2-3 minutes. Next, add 1 cup of all-purpose flour, 1 teaspoon of baking powder, 1/2 teaspoon of baking soda, 1/2 teaspoon of salt, and 1 teaspoon of vanilla extract. Mix well until you have a thick batter that is smooth and creamy. Once your batter is ready, spoon it over the apple slices. Spread the batter gently and evenly to cover the apples. In a small bowl, mix 1 tablespoon of cinnamon and 1 tablespoon of sugar. Sprinkle this mixture over the top of the batter for a sweet finish. Place the dish in a preheated oven set to 350°F (175°C). Bake for 35-40 minutes until the top turns golden brown and a toothpick comes out clean when inserted into the center. To check if your cobbler is done, look for a golden brown top. Insert a toothpick into the center. If it comes out clean, your cobbler is ready. Let it cool for a few minutes before serving. This step helps the flavors settle and makes it easier to cut. Enjoy the warm, comforting taste of snickerdoodle apple cobbler! To get a great cobbler texture, you want a nice balance. The batter should be thick but not too dry. When you spoon it over the apples, spread it gently. You want the apples to peek through a bit. This helps keep the cobbler moist. Bake it just until the top is golden brown. A toothpick should come out clean when it's done. One common mistake is using too much flour. This can make the batter dense. Always measure flour correctly. Another mistake is not prepping the apples well. Toss them with lemon juice and cinnamon for flavor and to prevent browning. Also, don’t skip the sugar and cinnamon sprinkle on top. It adds a nice sweet crust. Serve your Snickerdoodle Apple Cobbler warm. A scoop of vanilla ice cream on top is a perfect match. You can also drizzle caramel sauce for extra sweetness. If you want a fun twist, try serving it with whipped cream. Fresh mint leaves can add a pop of color and flavor. Enjoy it as a cozy dessert for any occasion! Pro Tips Choose the Right Apples: Use a mix of sweet and tart apples, such as Granny Smith and Honeycrisp, for a more complex flavor profile. Don't Skip the Lemon Juice: The lemon juice not only prevents the apples from browning but also adds a nice brightness to the dish. Let it Cool: Allow the cobbler to cool for a few minutes before serving to let the flavors meld and to avoid burns. Serve with Ice Cream: For an indulgent treat, serve warm snickerdoodle apple cobbler with a scoop of vanilla ice cream on top. {{image_2}} You can make a gluten-free version of this dessert. Simply swap the all-purpose flour for a gluten-free blend. Many blends work well, but one with a good mix of starches and flours is best. This change keeps the texture light and fluffy. The taste remains yummy too! You can boost the flavor by adding nuts or other fruits. Chopped walnuts or pecans give a nice crunch. You can also mix in berries, like blueberries or raspberries, for a tangy twist. Just remember to adjust the sugar if your fruit is very sweet. Spices can add a fun twist to your cobbler. For a warm flavor, try adding nutmeg or ginger. You can also use pumpkin spice for a fall touch. Just a pinch can change the whole taste, making it exciting and unique! To keep your Snickerdoodle Apple Cobbler fresh, let it cool first. Then, cover it tightly with plastic wrap or foil. You can also place it in an airtight container. Store it in the fridge for up to 3 days. This way, the flavors stay nice and bright. When you're ready to enjoy leftovers, preheat your oven to 350°F (175°C). Place the cobbler in an oven-safe dish. Cover it with foil to prevent it from getting too brown. Heat for about 15-20 minutes, or until warm. You can also microwave it on a plate, heating for 30-second intervals until warm. If you want to save some for later, freezing is a great option. Allow the cobbler to cool completely. Cut it into portions and wrap each piece in plastic wrap. Place the wrapped pieces in a freezer bag, squeezing out the air. You can freeze it for up to 3 months. To enjoy, thaw it in the fridge overnight and reheat as needed. Yes, you can use any apple you like. I love using Granny Smith for their tartness. Fuji or Honeycrisp work well too. Each type brings its own flavor. Mixing different apples adds depth to your cobbler. Your cobbler is done when the top is golden brown. A toothpick should come out clean when inserted in the center. If it comes out sticky, bake it a bit longer. The apples should be soft, but not mushy. Yes, you can prepare it a day ahead. Just cover it and store it in the fridge. Bake it fresh when you’re ready to serve. This helps the flavors meld together nicely. This dessert pairs well with vanilla ice cream. Whipped cream or a drizzle of caramel also works great. A scoop of yogurt can add a nice tang too. Try serving it warm for the best taste! This blog offers all you need to make a great Snickerdoodle Apple Cobbler. We covered ingredients, helpful tips, and how to bake it just right. You learned about common mistakes and fun variations too. With these steps, you'll bake a tasty treat every time. Enjoy your dessert, and remember, practice makes perfect! Happy baking!

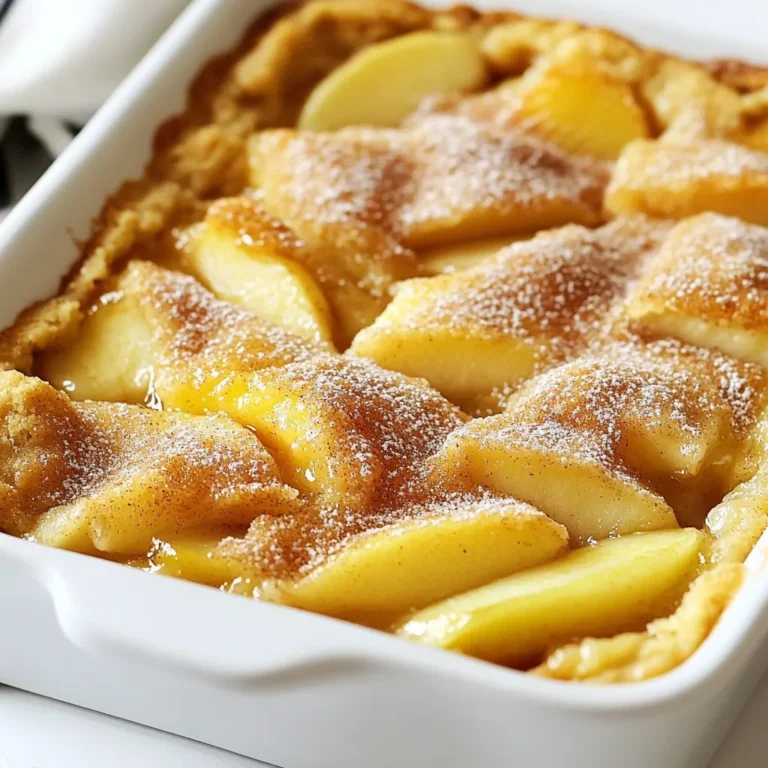
Snickerdoodle Apple Cobbler Simple and Tasty Dessert

- 1 cup quinoa, rinsed - 2 cups vegetable broth - 1 red bell pepper, diced - 1 zucchini, sliced - 1 yellow squash, sliced - 1 red onion, diced - 1 cup cherry tomatoes, halved - 3 tablespoons olive oil - 1 teaspoon garlic powder - 1 teaspoon paprika - 1/2 teaspoon cumin - Salt and pepper to taste The base of this dish is quinoa and vegetable broth. Quinoa is packed with protein, making it a great choice. The broth adds flavor to the quinoa. I love using fresh vegetables. They add color and nutrition. In this recipe, I use red bell pepper, zucchini, yellow squash, red onion, and cherry tomatoes. Each brings a unique taste. Seasonings and olive oil are key. Olive oil helps the veggies roast nicely. Garlic powder and paprika give warmth and depth. Cumin adds an earthy note. Salt and pepper enhance all the flavors. - 1 avocado, sliced - Fresh parsley, chopped (for garnish) Avocado adds creaminess and healthy fats. I always recommend it on these bowls. Fresh parsley brightens the dish and adds a pop of color. - Lemon wedges - Additional garnishes Serving with lemon wedges gives a nice zing. The acidity helps balance the meal. You can also add other garnishes like nuts or seeds for crunch. {{ingredient_image_1}} Rinsing and Boiling Start by rinsing one cup of quinoa under cold water. This helps remove any bitter taste. Then, in a medium pot, bring two cups of vegetable broth to a boil. Add the rinsed quinoa, stir it, and lower the heat. Simmering and Fluffing Cover the pot and let the quinoa simmer on low heat for about 15 minutes. It’s ready when the broth is gone. Turn off the heat and fluff it gently with a fork. This makes it light and fluffy. Chopping and Seasoning While the quinoa cooks, chop your veggies. Dice one red bell pepper, slice one zucchini and one yellow squash, and dice one red onion. Halve one cup of cherry tomatoes. Place all these in a large bowl. Drizzle three tablespoons of olive oil over them. Sprinkle in one teaspoon of garlic powder, one teaspoon of paprika, half a teaspoon of cumin, and salt and pepper to taste. Toss everything together well. Roasting Techniques Spread the seasoned vegetables on a baking sheet. Make sure they are in a single layer. Roast them in a preheated oven at 400°F (200°C) for 25 to 30 minutes. Stir them halfway through for even cooking. They should be tender and slightly caramelized when done. Layering Ingredients To assemble, place a generous scoop of quinoa at the bottom of each bowl. Top it with the roasted vegetables. This creates a colorful and tasty base. Final Garnishes Add slices of avocado on top. Finish with chopped parsley for a fresh touch. Serve each bowl with lemon wedges on the side. The lemon adds a nice zing to the meal. Enjoy your healthy and flavorful roasted veggie quinoa bowls! Water to Quinoa Ratio To cook quinoa perfectly, use a 2:1 ratio. That means two cups of vegetable broth for every cup of quinoa. This helps the quinoa become fluffy and tender. Cooking Time Alternatives If you prefer a quicker method, use a pressure cooker. It cooks quinoa in about 1-2 minutes. Just remember to let the pressure release naturally for best results. Ensuring Even Cooking Cut your veggies into similar sizes. This ensures they cook evenly. Spread them out on the baking sheet, leaving space between them. This helps them roast rather than steam. Achieving Caramelization Use olive oil to coat the veggies well. The oil helps with caramelization. Roast the vegetables at 400°F (200°C) for 25-30 minutes. Stir halfway through to get a nice, golden color. Pairing with Proteins You can add grilled chicken or chickpeas for extra protein. This makes the bowl heartier and more filling. Try different proteins to see what you like best. Customizing Flavor Profiles Add your favorite spices to the roasted veggies. Try adding chili powder for heat or a dash of balsamic vinegar for sweetness. Lemon wedges bring brightness to the dish, so don’t skip them! Pro Tips Perfectly Fluffy Quinoa: To ensure your quinoa is fluffy, rinse it well before cooking to remove any bitterness. Also, let it rest for a few minutes after cooking before fluffing with a fork. Vegetable Roasting: For evenly roasted vegetables, cut them into similar sizes. This ensures that they cook at the same rate and develop that perfect caramelization. Customize Your Veggies: Feel free to swap in your favorite vegetables or whatever you have on hand. Just keep the cooking times in mind for different veggies! Avocado Tips: To prevent your avocado from browning, squeeze some lemon juice on top just before serving. It adds flavor and keeps it vibrant! {{image_2}} Using What's Fresh I love to use fresh, seasonal veggies in my roasted veggie quinoa bowls. You can swap in what you find at your local market. In spring, try peas and asparagus. Summer is great for eggplant and corn. Fall brings butternut squash and Brussels sprouts. Each season offers unique tastes and colors. Exploring Different Flavors Don't be afraid to mix flavors! You can add spicy peppers or sweet carrots. Try using root vegetables in the winter, like parsnips or turnips. Each swap can change the whole dish. This way, you keep things exciting and fresh. Other Ancient Grains Quinoa isn’t your only option. Try farro, bulgur, or freekeh for a different texture. Each grain has its own flavor. They also pack a good amount of protein. You can cook them just like quinoa. Adjust the liquids and cooking times as needed. Gluten-Free Options If you need gluten-free grains, look into millet or buckwheat. Both work well in bowls. They add a nutty taste that pairs nicely with veggies. Make sure to check cooking times for each grain to get it just right. Homemade Dressings Dressing can elevate your bowl. I love making simple dressings with olive oil and lemon juice. Add a pinch of salt and pepper for flavor. You can also mix in herbs like basil or cilantro. A creamy tahini sauce works wonders too. Flavorful Sauces for Serving For a kick, try sriracha or a yogurt sauce. A balsamic glaze adds sweetness. You could even drizzle some pesto on top. These sauces can turn your meal into a gourmet experience. Experiment with different flavors to find what you like best. To keep your roasted veggie quinoa bowls fresh, store them in the fridge. Place leftovers in airtight containers. Make sure they cool down first. Use them within three to four days for the best taste. Glass containers work great for storage. They keep food fresh and help you see what you have. You can also use BPA-free plastic containers. Just ensure they seal well. You can reheat your quinoa bowls easily. Both the microwave and oven work well. For a quick option, use the microwave. Heat for one to two minutes. Stir halfway through to warm evenly. For a crispier texture, the oven is best. Preheat it to 350°F (175°C) and bake for about 10 to 15 minutes. When reheating, add a splash of water to keep the quinoa moist. This step helps prevent it from drying out. If using the oven, cover it with foil for the first few minutes. If you want to save some bowls for later, freezing is a good choice. Cool your bowls completely before freezing. Use airtight containers or freezer bags. Label them with the date to keep track. They can last up to three months in the freezer. Avoid freezing avocado or fresh herbs. They don’t thaw well and lose their taste. It’s best to add these fresh when you’re ready to serve. The best way to cook quinoa is to rinse it first. Rinsing removes bitter flavors. Next, use two cups of vegetable broth for every cup of quinoa. Bring the broth to a boil. Add the rinsed quinoa, then lower the heat. Cover the pot and let it simmer for about 15 minutes. Once the liquid is gone, fluff the quinoa with a fork. Yes, you can make this recipe ahead of time. Cook and store the quinoa and roasted veggies separately. This keeps them fresh and tasty. You can store both in airtight containers in the fridge for up to four days. When you’re ready to eat, just reheat and assemble your bowls. You can customize your veggie mix easily. Try using broccoli, carrots, or sweet potatoes. You can also add spinach or kale for extra nutrients. Mix and match based on what you have on hand. This makes the dish fun and unique every time! This blog post guides you through making a quinoa bowl filled with fresh veggies and tasty seasonings. You learned about key ingredients, cooking methods, and how to customize your meal. Remember, the right toppings and dressings can elevate your dish. Don't be afraid to explore seasonal swaps and different grains. Storing and reheating leftovers is simple, ensuring you enjoy this nutritious meal multiple times. Dive into this recipe and make it your own! Enjoy every bite and save time with meal prep.

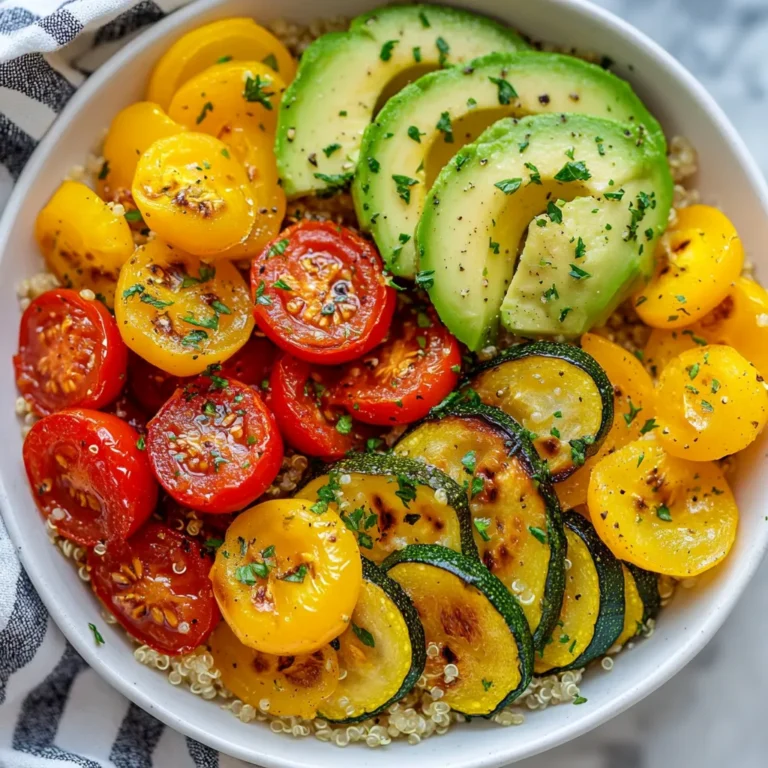
Roasted Veggie Quinoa Bowls Healthy and Flavorful Meal

PREV 1 … 44 45 46 … 52 NEXT
cozy citrus kitchen

explore

DessertsDinnerAppetizersDrinks

Our Policies

  • Cookie Policy
  • Copyright Policy
  • Disclaimer
  • GDPR Policy
  • Terms Of Use
Back to Top
  • About
  • Contact Us
  • Privacy Policy
© 2025 cozy citrus kitchen