FREE DINNER EBOOK! Get your copy!
  • Cookie Policy
  • GDPR Policy
  • Disclaimer
  • Terms Of Use
  • Visit my other site: Fun Cookie Recipes
cozy citrus kitchen
  • Home
  • Dinner
  • Desserts
  • Drinks
  • Appetizers
  • Contact
  • About
  • Privacy Policy
  • Home
  • Dinner
  • Desserts
  • Drinks
  • Appetizers
  • Contact
  • About
  • Privacy Policy
  • Cookie Policy
  • GDPR Policy
  • Disclaimer
  • Terms Of Use
Visit my other site: Fun Cookie Recipes

HOME / CATEGORIES /

Latest

- 2 ripe avocados - 1/2 cup unsweetened cocoa powder - 1/4 cup maple syrup (or honey) - 1/4 cup almond milk - 2 teaspoons vanilla extract - Pinch of sea salt To make avocado chocolate mousse, you need simple ingredients. First, choose two ripe avocados. The riper they are, the creamier your mousse will be. Next, measure out half a cup of unsweetened cocoa powder. This gives your mousse that rich, chocolatey taste. You will also need a quarter cup of maple syrup or honey. This adds sweetness without overpowering the chocolate. Then, grab a quarter cup of almond milk. You may need more to get the right texture. Add two teaspoons of vanilla extract for flavor, and a pinch of sea salt to enhance all the tastes. - Fresh berries - Mint leaves For a pretty touch, use fresh berries and mint leaves as garnishes. Berries add a burst of color and freshness. Mint leaves bring a nice aroma and flavor contrast. These are not just pretty; they make your dessert more exciting! {{ingredient_image_1}} To start, you need to prepare the avocados. First, cut the avocados in half. Use a spoon to scoop out the flesh. Avoid cutting too deep to keep the skin intact. Now, remove the pit with a spoon or knife carefully. Make sure you don’t hurt yourself. Next, measure your cocoa powder and liquids. Use a measuring cup for the cocoa powder. For the maple syrup, you can also use honey if you prefer. Measure out a quarter cup for both. For the almond milk, measure out a quarter cup as well. This is the base for your mousse. Now it's time to blend! Take your food processor and add all the ingredients. This includes the avocados, cocoa powder, maple syrup, almond milk, vanilla extract, and a pinch of sea salt. Blend everything until it's smooth and creamy. Stop to scrape down the sides as needed. This helps mix all the ingredients well. If your mousse is thick, add a tablespoon of almond milk. Blend again until you reach the right consistency. Taste it, and if you want it sweeter, add more maple syrup. Once your mousse is smooth, transfer it into serving bowls or ramekins. Cover them with plastic wrap or lids. Chill in the fridge for at least 30 minutes. This lets the flavors come together and thickens the mousse. When you’re ready to serve, consider some fun garnishes. Fresh berries add color and taste. Mint leaves also give a bright touch. This makes your mousse look as good as it tastes! To make this mousse creamy, use ripe avocados. Ripe avocados are soft and blend easily. This gives you a smooth, rich texture. If your mousse is too thick, add almond milk. Start with a tablespoon at a time. Blend well until you reach the right consistency. Always taste the mousse before serving. If it needs more sweetness, add more maple syrup. You can also use honey if you prefer. This allows you to control the flavor and sweetness. Remember, everyone’s taste is different, so adjust as you like. For a beautiful presentation, get creative with garnishes. Fresh berries add color and flavor. Mint leaves can give a fresh look and taste. You can serve the mousse in small bowls or fancy ramekins. This makes each serving feel special. A great presentation can make dessert even more fun! Pro Tips Use Ripe Avocados: Ensure your avocados are perfectly ripe for the creamiest mousse. They should yield slightly to pressure when squeezed. Customize Sweetness: Adjust the sweetness to your preference by adding more maple syrup or honey in small increments. Taste as you go! Chill for Best Flavor: Allow the mousse to chill for at least 30 minutes. This enhances the flavors and gives it a better texture. Experiment with Garnishes: Try different toppings like coconut flakes, crushed nuts, or a drizzle of chocolate sauce for added flavor and texture. {{image_2}} You can change the sweetness of the mousse easily. If you want to try a different sweetener, use agave syrup. It gives a nice flavor and is vegan. You can also choose sugar-free options like stevia or monk fruit. These are great for those who watch their sugar intake. Adjust the amount to fit your taste. To boost the flavor, add spices like cinnamon or espresso. A little cinnamon can add warmth. Espresso can give the mousse a rich, deep taste. You can also mix in nut butter for added creaminess and a hint of nuttiness. Peanut or almond butter works well here. Just a spoonful makes a big difference. This mousse can easily fit into a vegan or dairy-free diet. Substitute almond milk with other non-dairy options, like coconut milk or oat milk. These can change the taste and texture a bit. If you want it gluten-free, it is already great as is. Just make sure to check the labels for any added ingredients. You can keep avocado chocolate mousse in the fridge for up to three days. Store it in an airtight container. This helps prevent it from browning. You can also cover the surface with plastic wrap. This keeps it fresh. If you want to serve it later, use clear glass bowls to show off the mousse. Yes, you can freeze avocado mousse! Pour the mousse into a freezer-safe container. Leave some space at the top because it will expand when frozen. When you are ready to eat it, thaw it in the fridge overnight. The texture may change a little. It might not be as creamy, but it will still taste great. You can blend it again after thawing to make it smooth. Avocado chocolate mousse has a rich, creamy texture. The flavor is deep and chocolatey. You might not taste the avocado much, but it adds a smoothness. The cocoa gives it a bold taste, while the maple syrup adds sweetness. If you use vanilla, it adds a warm note. Overall, it’s a sweet treat that feels indulgent! Yes, avocado chocolate mousse is healthy! Avocados provide good fats that are great for your heart. They also have fiber, which helps digestion. This mousse is lower in sugar than regular desserts. Plus, it has vitamins and minerals. Eating this mousse can be a tasty way to enjoy healthy fats! Absolutely! You can use different types of milk in this recipe. Almond milk is a great choice for a nutty flavor. If you prefer, you can try coconut milk for a tropical twist. Regular cow’s milk works too. Just make sure to adjust the amount if needed. The goal is to keep the mousse creamy and smooth! In this blog post, I shared how to make avocado chocolate mousse with simple ingredients. We discussed the main ingredients, step-by-step instructions, and tips for the perfect texture. I offered variations for different diets and explained how to store it. My final thought is this: avocado chocolate mousse is not just tasty but also healthy. Whether you enjoy it with fresh berries or try a new twist, it's a fun treat. Dive in and enjoy this creamy delight!

Avocado Chocolate Mousse Sweet and Creamy Delight

- 1 tablespoon olive oil - 1 small onion, diced - 2 cloves garlic, minced - 1 can (14 oz) crushed tomatoes - 4 cups vegetable broth - 1 teaspoon dried oregano - 1/4 teaspoon red pepper flakes (optional for heat) - 1 package (9 oz) cheese tortellini - 1 cup heavy cream - 1/2 cup fresh basil leaves, chopped - Salt and pepper to taste - Grated Parmesan cheese for serving Each ingredient plays an important role. Olive oil adds flavor and helps the onions cook. The onion gives sweetness and depth to the soup. Garlic adds a lovely aroma and taste. Crushed tomatoes form the base and add acidity. Vegetable broth adds richness without meat. Dried oregano brings a hint of earthiness. Red pepper flakes can add warmth if you like heat. Cheese tortellini makes the soup hearty and filling. Heavy cream makes the soup rich and creamy. Fresh basil adds a burst of freshness. Lastly, salt and pepper enhance all the flavors. You can easily swap some ingredients if needed. Use chicken broth instead of vegetable broth for a meatier taste. For a dairy-free option, try coconut milk in place of heavy cream. If you don’t have tortellini, other pasta shapes work too. Fresh herbs can replace dried ones; just use more. If you're out of basil, try parsley for a different flavor. {{ingredient_image_1}} Gather all your ingredients before you start. This makes cooking easier. Chop the onion and garlic ahead of time. Measure out the broth and cream. Having everything ready helps the soup cook faster. 1. Heat the olive oil in a large pot over medium heat. 2. Add the diced onion and sauté for about 5 minutes. Cook until the onion is soft and clear. 3. Stir in the minced garlic and cook for 1-2 minutes. This will fill your kitchen with a lovely smell. 4. Pour in the crushed tomatoes and vegetable broth. Add dried oregano and red pepper flakes if you want some heat. 5. Bring the mixture to a simmer. You will see some bubbles forming. 6. Add the cheese tortellini to the pot. Cook according to the package, usually 3-5 minutes. The tortellini will float to the top when done. 7. Reduce the heat and stir in the heavy cream and chopped basil. Let it warm for about 2-3 minutes. 8. Taste and add salt and pepper as needed. Serve your soup hot. Top it with grated Parmesan cheese and more basil, if you like. Enjoy each spoonful of creamy goodness! To make this creamy tomato basil tortellini soup even better, try these tips. First, add a splash of balsamic vinegar. This gives a nice tangy flavor. You can also mix in some fresh herbs. Thyme or parsley brightens the taste. If you like spice, add more red pepper flakes. Avoid cooking the tortellini too long. They can become mushy if you do. Also, don’t skip the salt and pepper. They help balance the flavors in the soup. Lastly, be careful with the heat when you add the cream. Too high a heat can make it curdle. Serve this soup with crusty bread. It’s perfect for dipping! You can also top it with extra basil or a drizzle of olive oil. A sprinkle of grated Parmesan cheese adds a nice touch too. Enjoy this soup hot for the best flavor! Pro Tips Use Fresh Basil: For the best flavor, use fresh basil instead of dried. Add it at the end of cooking to preserve its vibrant taste and aroma. Adjust the Creaminess: If you want a lighter soup, reduce the amount of heavy cream or substitute it with half-and-half or milk. Enhance the Flavor: Consider adding a splash of balsamic vinegar or a pinch of sugar to balance the acidity of the tomatoes. Storing Leftovers: Store any leftover soup in an airtight container in the fridge for up to 3 days. Reheat gently to avoid overcooking the tortellini. {{image_2}} You can make this soup vegetarian with simple swaps. Use vegetable broth instead of chicken broth. Cheese tortellini is already vegetarian, which is great. If you want to add more veggies, try carrots or spinach. They add color and nutrients. Just chop them small and add them when you cook the onion. For a gluten-free version, choose gluten-free tortellini. Many stores sell these now. You can also use rice or quinoa instead of tortellini. This keeps it hearty while catering to gluten-free diets. Check labels to ensure all ingredients fit your needs. You can mix in other spices for added flavor. Try adding fresh thyme or rosemary for extra depth. A squeeze of lemon juice brightens the taste too. If you like a kick, add more red pepper flakes. For a creamy twist, sprinkle in some goat cheese before serving. These little changes make the soup your own. To store your creamy tomato basil tortellini soup, let it cool first. Pour it into a clean, airtight container. Make sure to seal it well. Place it in the fridge. It can last about 3 to 4 days. Ensure you label the container with the date. When you want to eat the soup again, take it out of the fridge. Pour the soup into a pot. Heat it over medium heat. Stir the soup often to help it warm evenly. If it seems too thick, add a splash of broth. You can also microwave the soup. Use a microwave-safe bowl and cover it loosely. Heat in short bursts, checking and stirring often. If you want to keep the soup longer, freezing is a good choice. Pour the cooled soup into freezer-safe bags or containers. Leave some space at the top for expansion. Label the bags with the date. It can stay frozen for up to 3 months. To thaw, place the soup in the fridge overnight. Reheat it on the stove or in the microwave. Enjoy your delicious soup later! Yes, you can use fresh tomatoes. About 2-3 medium tomatoes will work well. Peel and dice them before adding. Fresh tomatoes add a nice texture and flavor. Just remember to cook them longer to soften. You can use half-and-half or whole milk for a lighter version. For a dairy-free option, try coconut milk. Both options will still make the soup creamy. Adjust the seasoning to balance flavors as needed. The soup can last about 3-4 days in the fridge. Store it in an airtight container. Make sure to cool it down before placing it in the fridge. Reheat it on the stove or in the microwave before serving. This post covered all you need to make a great tortellini soup. We discussed key ingredients and showed how to make simple swaps. The step-by-step guide helps you cook with ease and confidence. Plus, you learned helpful tips and tricks along the way. We also explored tasty variations and how to store leftovers well. Remember, cooking is about having fun and trying new things. Enjoy your tortellini soup and make it your own!

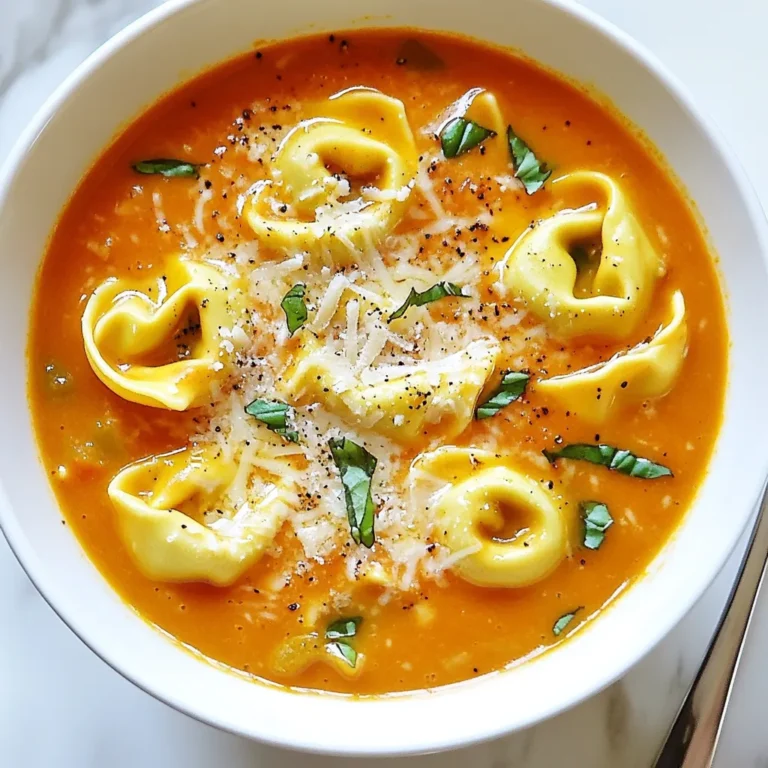
Creamy Tomato Basil Tortellini Soup Delightful Recipe

- 1 cup orzo pasta - 2 boneless, skinless chicken breasts (about 1 pound) - 1 cup heavy cream - 1/2 cup grated Parmesan cheese - 2 tablespoons olive oil - 2 garlic cloves, minced - Zest of 1 lemon - 2 tablespoons fresh lemon juice - 1 teaspoon dried thyme - Salt and pepper to taste - Fresh parsley for garnish Orzo pasta is the star of this dish. It has a small, rice-like shape that absorbs flavors well. The chicken adds protein and gives a lovely texture. Heavy cream makes the sauce rich and smooth. Parmesan cheese brings in a salty, nutty flavor that complements the dish. Garlic adds depth, while lemon zest and juice brighten everything up. Dried thyme adds an earthy taste. Finally, salt and pepper enhance all these flavors. Choose high-quality chicken for the best taste. Look for breasts that are fresh and have no added water. For the cream, use heavy cream for richness. Fresh lemons give the best flavor; always zest and juice them yourself. When selecting Parmesan cheese, get the block and grate it yourself. This ensures better flavor compared to pre-grated cheese. Fresh parsley adds a nice touch. Look for vibrant, green leaves, as this signals freshness. {{ingredient_image_1}} To cook the orzo pasta, start by filling a large pot with water. Add salt to the water to enhance flavor. Bring the water to a boil. When it boils, add 1 cup of orzo pasta. Cook it according to the package instructions, usually about 8-10 minutes. You want it to be al dente, so check it a minute early. Once done, drain the pasta and set it aside. Now, let’s prepare the chicken. Take 2 boneless, skinless chicken breasts. Pat them dry with a paper towel. Season both sides with salt, pepper, and dried thyme. Heat 2 tablespoons of olive oil in a large skillet over medium heat. When the oil is hot, add the chicken breasts. Cook them for about 6-7 minutes on each side until they turn golden brown and reach an internal temperature of 165°F. Remove the chicken from the skillet and let it rest for a few minutes. This helps keep it juicy. Slice the chicken just before serving. In the same skillet, add 2 minced garlic cloves. Sauté them for about 30 seconds until they smell great. Reduce the heat to low. Add 1 cup of heavy cream, lemon zest, and 2 tablespoons of lemon juice to the skillet. Stir the mixture and bring it to a gentle simmer. Then, add ½ cup of grated Parmesan cheese. Whisk it in until it melts and becomes smooth. Taste and add salt and pepper as needed. Finally, add the cooked orzo to the sauce and stir well. Make sure each piece of orzo is coated in that creamy goodness. Now, slice your rested chicken and place it on top of the creamy orzo. Sprinkle fresh parsley for a nice touch. Enjoy your meal! To cook chicken that shines, start with good seasoning. Use salt, pepper, and dried thyme. These flavors really enhance the taste. Heat olive oil in your skillet until hot. Then, add the chicken breasts. Cook them for 6-7 minutes on each side. You want a golden crust and an internal temperature of 165°F. Let the chicken rest after cooking. This keeps it juicy. Slice it just before serving for the best look. Creaminess comes from using heavy cream and Parmesan cheese. After cooking the garlic, reduce the heat. This helps prevent burning. Stir in the heavy cream slowly. Then add the lemon zest and juice. Bring it to a gentle simmer. Whisk in the Parmesan until smooth. This mix should coat the orzo well. If it feels too thick, add a splash of pasta water for balance. Garnishing makes your dish pop! Use fresh parsley for color and taste. Chop it finely and sprinkle on top. You can also add more lemon zest for brightness. A few extra shavings of Parmesan can enhance the look too. For a twist, try a sprinkle of crushed red pepper for a little heat. These simple touches will elevate your creamy lemon Parmesan orzo. Pro Tips Perfectly Cooked Chicken: Ensure the chicken reaches an internal temperature of 165°F for safe consumption and optimal juiciness. Use Fresh Lemon: For the best flavor, use fresh lemon juice and zest instead of bottled varieties; it enhances the dish's brightness. Customize the Herbs: Feel free to substitute dried thyme with fresh thyme or other herbs like basil or oregano to match your taste preferences. Garnish for Flair: Fresh parsley not only adds color but also brings a fresh flavor that complements the creamy orzo beautifully. {{image_2}} You can easily switch to a vegetarian version. Instead of chicken, use mushrooms or zucchini. Sauté them until soft and golden. You can also add some spinach for color and nutrients. Replace the heavy cream with coconut cream or a rich plant-based milk. This gives you creaminess without meat. To boost flavor, try adding fresh herbs. Basil or dill works great with lemon. You can also stir in sun-dried tomatoes for a tangy twist. A pinch of red pepper flakes adds a nice kick. If you like a nutty taste, toss in some toasted pine nuts before serving. Orzo is a fun choice, but other pastas can work too. Try small shapes like ditalini or farfalle. Rice or quinoa can be good substitutes if you want gluten-free. Just remember to adjust cooking times based on what you choose. Each option brings its own unique flavor and texture. You can store your creamy lemon parmesan orzo with chicken in an airtight container. Make sure to let it cool down first. Keep it in the fridge for up to three days. If you want to save it longer, freezing is a good option. To reheat, I recommend using the stovetop. Add a splash of water or chicken broth to the orzo. Heat it on low and stir until warm. This keeps the orzo creamy and tasty. You can also use the microwave. Heat it in short bursts, stirring in between. If you freeze leftovers, place them in a freezer-safe container. Leave some space at the top since the orzo expands. It can last up to three months in the freezer. When you’re ready to enjoy, thaw it overnight in the fridge. Then, reheat as described above. To make orzo from scratch, you need flour and water. You can use semolina flour for a better texture. Mix the flour with water to form a dough. Knead it until smooth. Roll it out thin and cut it into small pieces. Shape each piece into tiny rice-like grains. Cook them in boiling water until they float. This can take about 2 to 3 minutes. Fresh orzo has a great taste and texture. Yes, you can use other cheeses! If you want a strong flavor, try using aged cheddar. For a milder taste, mozzarella works well. Goat cheese can add a nice tang too. Just remember to adjust the amount based on the cheese's strength. Grate or crumble the cheese for easy melting in the sauce. This way, you keep the creamy texture. This dish pairs well with a crisp salad. A simple green salad with vinaigrette is perfect. You can also serve it with steamed vegetables for color and nutrition. Garlic bread complements the meal nicely, adding crunch. For a special touch, some lemon wedges on the side brighten the dish. Enjoying a glass of white wine can enhance the flavors too! This blog post covered all you need for a tasty Creamy Lemon Parmesan Orzo with Chicken. I broke down the key ingredients and shared tips for quality. You learned how to cook orzo, prepare chicken, and create a creamy sauce. I offered cooking tips, variations for your diet, and how to store leftovers. Remember, cooking should be fun and easy. Enjoy experimenting with flavors and making this dish your own!

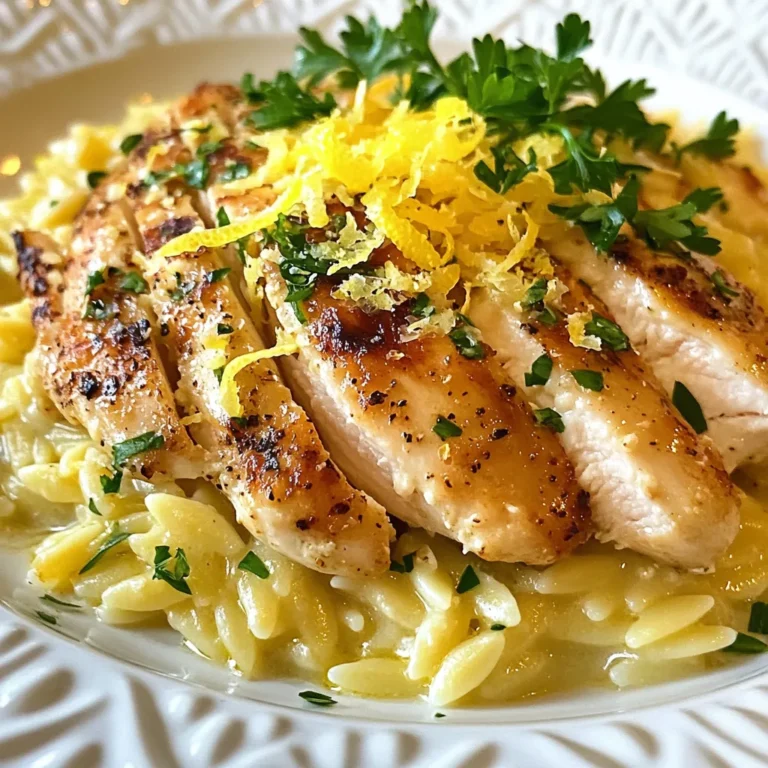
Creamy Lemon Parmesan Orzo with Chicken Delight

- 2 cups cooked chicken breast, shredded - 1 cup black beans, rinsed and drained - 1 cup corn, fresh or frozen - 1 red bell pepper, diced - 1 avocado, diced - 1/2 cup cherry tomatoes, halved - 1/4 cup red onion, finely chopped - 1/2 cup Greek yogurt - 1/4 cup mayonnaise - 2 tablespoons chipotle in adobo sauce, minced - 1 tablespoon lime juice - Salt and pepper to taste - Fresh cilantro, chopped (for garnish) For corn, you can use fresh or frozen. Fresh corn has a sweet crunch. Frozen corn is handy and saves time. Both work great in this salad. If you want to change the protein, rotisserie chicken is a great choice. You can also use grilled shrimp or tofu for a vegetarian option. These swaps keep the salad tasty and fun. {{ingredient_image_1}} 1. Start by mixing the salad ingredients. In a large bowl, add the shredded chicken, black beans, corn, diced red bell pepper, avocado, halved cherry tomatoes, and chopped red onion. Stir them well to mix all the colors and flavors. This step gives you a great base for the salad. 2. Next, prepare the chipotle ranch dressing. In a small bowl, whisk together Greek yogurt, mayonnaise, minced chipotle in adobo sauce, lime juice, salt, and pepper. Mix until it’s smooth and creamy. Taste it to see if you need more salt or lime. 3. Now, combine the salad and dressing. Pour the chipotle ranch dressing over the salad mixture. Gently toss everything together so the dressing coats all the ingredients well. This is where the magic happens, making each bite flavorful. Chilling the salad is important. Cover the bowl with plastic wrap and put it in the fridge for at least 30 minutes. This lets the flavors blend together, making the salad taste even better. For serving, give the salad one last gentle toss. You can garnish it with freshly chopped cilantro for a fresh touch. This adds color and a nice flavor. Serve the salad in a big bowl or on individual plates to impress your guests. Enjoy the tasty and fresh meal! - Choosing the best chicken: I love using cooked chicken breast for this salad. It's easy to shred and adds great flavor. You can also use rotisserie chicken. It saves time and tastes amazing. - Adjusting spice levels with chipotle: Chipotle in adobo sauce brings a smoky kick. Start with 1 tablespoon in your dressing. If you want more heat, add another teaspoon. This way, you control the spice level. - Making it a meal prep option: This salad is perfect for meal prep. Make a big batch and store it in the fridge. It tastes even better after a day! Fill containers for easy grab-and-go lunches. - Essential tools for convenient preparation: You need a sharp knife to chop vegetables. A large mixing bowl helps combine everything well. A whisk is great for mixing the dressing smoothly. - Tips for chopping vegetables effectively: Cut your veggies into even pieces. This helps them mix well and look nice. Use a cutting board to keep your space clean. These tips will help you make a fresh, tasty salad every time! Enjoy the process and have fun in the kitchen! Pro Tips Use Rotisserie Chicken: For a quicker prep time, use store-bought rotisserie chicken instead of cooking your own. Customize the Heat: Adjust the amount of chipotle in adobo sauce to control the spiciness of the salad to your preference. Fresh Ingredients: Use fresh corn and ripe avocados for the best flavor and texture in your salad. Chill for Flavor: Allowing the salad to chill for longer than 30 minutes can enhance the flavors even more. {{image_2}} You can easily adapt this salad for different diets. For a vegetarian option, swap the chicken with grilled tofu or chickpeas. Both add protein and texture. If you want a vegan version, use the same substitutes and replace Greek yogurt and mayonnaise with vegan alternatives. You can find plenty of plant-based yogurt and mayo in stores. For those needing gluten-free options, this salad is already a winner. All the ingredients are naturally gluten-free. Just make sure to check the labels on your dressings and canned goods. To boost the flavor, consider adding more ingredients. Try adding sliced jalapeños for heat or sweet corn for a pop of sweetness. You can toss in diced mango or pineapple for a fruity twist. These additions can make every bite exciting. If you want to change up the ranch dressing, you can use a different base. Swap Greek yogurt for sour cream for a tangy flavor. You could also mix in some avocado for a creamier texture. For a lighter dressing, try using plain yogurt and a splash of buttermilk. To keep your salad fresh, place it in an airtight container. This helps lock in flavor and moisture. Store it in the fridge right after serving. The salad will stay fresh for about 3 days. After that, the veggies may lose their crunch. Always check for any off smells or changes in texture before eating leftovers. Can you freeze chipotle ranch chicken salad? I do not recommend freezing this salad. The veggies and avocado do not freeze well. They will become mushy when thawed. Instead, enjoy it fresh for the best taste. If you still want to freeze it, separate the dressing and salad. Freeze only the chicken and beans. Thaw in the fridge overnight when you are ready to eat. Mix in fresh veggies and dressing right before serving. This keeps the salad tasty and crunchy. You can serve this salad with tortilla chips for crunch. A side of fresh fruit adds sweetness. You might also pair it with warm bread or a light soup. Yes, you can make the dressing a day or two ahead. Just store it in the fridge in a sealed jar. This helps the flavors blend and taste even better. Yes, this salad is healthy. It has lean protein from chicken and fiber from black beans. The veggies add vitamins and minerals, making it a balanced meal. To make it spicier, add more chipotle in adobo sauce. You can also add sliced jalapeños. For a milder taste, reduce the chipotle or use less dressing. Adjust to your taste! In this post, we explored the key ingredients and steps for making a great chipotle ranch chicken salad. You learned how to mix fresh and frozen options, along with alternative proteins. We shared tips for preparation, such as choosing the right chicken and adjusting spice levels. Remember, you can adapt this salad to fit different diets and preferences. Proper storage keeps your leftovers fresh, and you can freeze it too. Now that you have all these ideas, it's time to create your perfect salad! Enjoy every tasty bite.

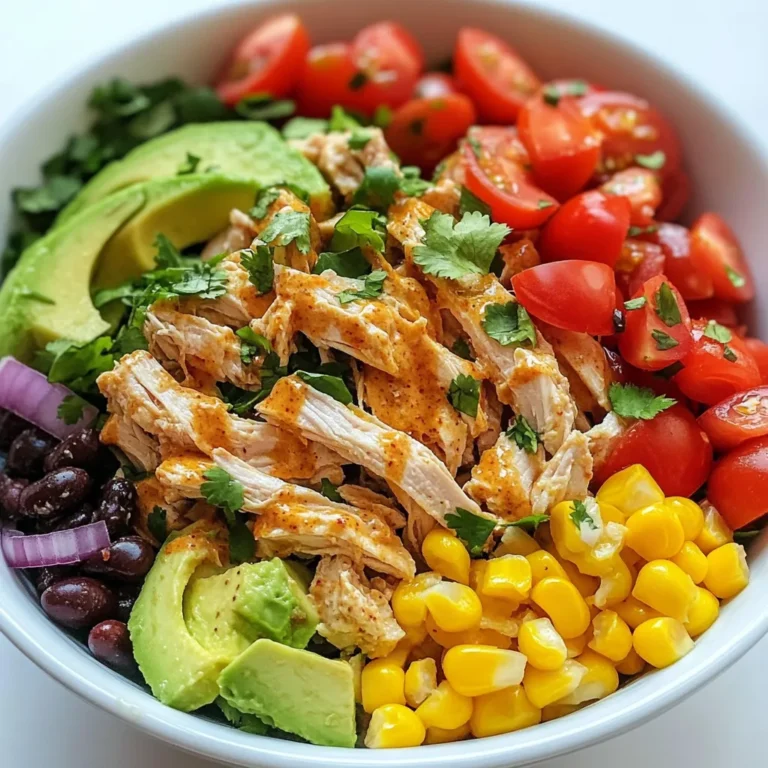
Chipotle Ranch Chicken Salad Tasty and Fresh Meal

- 1 ripe mango, diced - 2 avocados, diced - 1 cup cherry tomatoes, halved - 1 small red onion, finely chopped - 1 red chili, deseeded and minced - 2 tablespoons lime juice - 1 tablespoon extra virgin olive oil - Salt and pepper to taste - Fresh cilantro, for garnish When making Mango Avocado Salad, start with fresh, ripe ingredients. A ripe mango will bring sweetness and flavor. For avocados, choose ones that yield slightly when pressed. Cherry tomatoes add a burst of color and taste. I love using a small red onion for a mild, sweet touch. A red chili adds heat, but feel free to adjust based on your spice level. - Cheese options (feta or queso fresco) - Nuts (almonds or walnuts) - Other herbs (basil or parsley) If you want to get creative, consider adding cheese. Feta or queso fresco can give a creamy texture. Nuts like almonds or walnuts add crunch. Fresh herbs such as basil or parsley can enhance the salad's flavor. {{ingredient_image_1}} To create a tasty Mango Avocado Salad, start with the mango. - Take a ripe mango and slice it. Cut the flesh away from the pit. - Dice the mango into small pieces. This adds sweetness to the salad. Next, move on to the avocados. - Cut the avocados in half and remove the pit. - Scoop the flesh out with a spoon. - Dice the avocado into chunks, just like the mango. Now, let’s chop the cherry tomatoes and red onion. - For the cherry tomatoes, simply cut them in half. - For the red onion, slice it thinly. Then, chop it finely. This gives a nice bite to the salad. Now it’s time to mix all the fresh ingredients. - In a large bowl, combine the diced mango and avocado. - Add the halved cherry tomatoes and finely chopped red onion. - Sprinkle the minced red chili on top for some heat. For the dressing, whisk together lime juice and olive oil in a small bowl. - Pour the dressing over the salad. - Gently toss everything together. Make sure not to mash the avocado. For a beautiful presentation, transfer the salad to a platter or individual bowls. - Garnish with fresh cilantro leaves. This adds color and a nice aroma. - Serve right away to enjoy the freshness! To make your Mango Avocado Salad shine, use ripe ingredients. Ripe mangoes and avocados have the best flavor and creaminess. A good mango should feel slightly soft when you squeeze it gently. For avocados, look for a dark skin tone and a slight give under pressure. Balancing salt and lime juice is key. Start with a pinch of salt and squeeze lime juice over your salad. Taste it, then adjust as needed. This balance enhances the natural flavors. Too much salt can overpower the dish, so go slow. Garnishing with fresh cilantro adds a pop of color and flavor. You can finely chop the leaves or just place whole sprigs on top for a fresh look. This small touch makes your salad more appealing. When serving, think about your options. Individual bowls look neat and are great for parties. A large platter works well for family meals. Just make sure to arrange the salad nicely, so it draws attention. Pro Tips Choose the Right Mango: Look for a mango that gives slightly to pressure and has a sweet aroma at the stem end. This ensures optimal ripeness and flavor. Prevent Avocado Browning: To keep your avocado looking fresh, add a bit more lime juice to the salad. The acidity helps delay oxidation. Customize Heat Level: Adjust the amount of minced red chili according to your spice preference. You can also substitute with jalapeño for a different flavor. Presentation Matters: For an elegant touch, serve the salad in hollowed-out avocado halves or in a clear glass bowl to showcase the vibrant colors. {{image_2}} You can easily make this salad vegan. Just skip the cheese. It stays fresh and tasty without any dairy. For gluten-free options, check all labels. Make sure your ingredients are certified gluten-free. This way, you can enjoy the salad without worry. Want some heat? Add jalapeños! Just chop them finely and mix them in. This gives the salad a spicy kick that makes it exciting. If you prefer sweet, consider adding pineapple or pomegranate seeds. These fruits add a burst of color and sweetness to the dish. After making your salad, store any leftovers in an airtight container. This keeps the salad fresh for about two days. To prevent browning of the avocados, press plastic wrap directly onto the surface of the salad. This cuts out air that causes browning. Another tip is to add a bit more lime juice on top. The acidity helps keep the green color. If you want to enjoy mango and avocado later, you can freeze them. For mango, peel and chop it into cubes. Place the cubes in a single layer on a baking sheet. Freeze them for a few hours, then transfer to a freezer bag. Avocados can also be frozen, but it's best to mash them first. This way, they blend easily into smoothies or dips later. Store the mango and avocado separately. This will keep each ingredient fresh longer. When you're ready to use them, simply thaw what you need. What can I substitute for lime juice? You can use lemon juice instead of lime juice. Lemon has a similar tang. Other options include orange juice or vinegar. Each will change the flavor slightly but will still taste good. How long does the salad last in the fridge? This salad stays fresh for about one day. The avocado can brown quickly. Store it in an airtight container to keep it fresh longer. Can I make this salad ahead of time? Yes, you can prepare the salad ahead of time. Just add the avocado and dressing right before serving. This keeps the salad looking fresh and tasty. This blog post covered all you need for a great mango avocado salad. We discussed essential ingredients, prep steps, and tips for flavor and presentation. You learned how to customize your salad with different add-ons and variations. Remember to store leftovers properly to enjoy them later. With these ideas, you can create a tasty and fresh dish that everyone will love. Enjoy making your next salad!

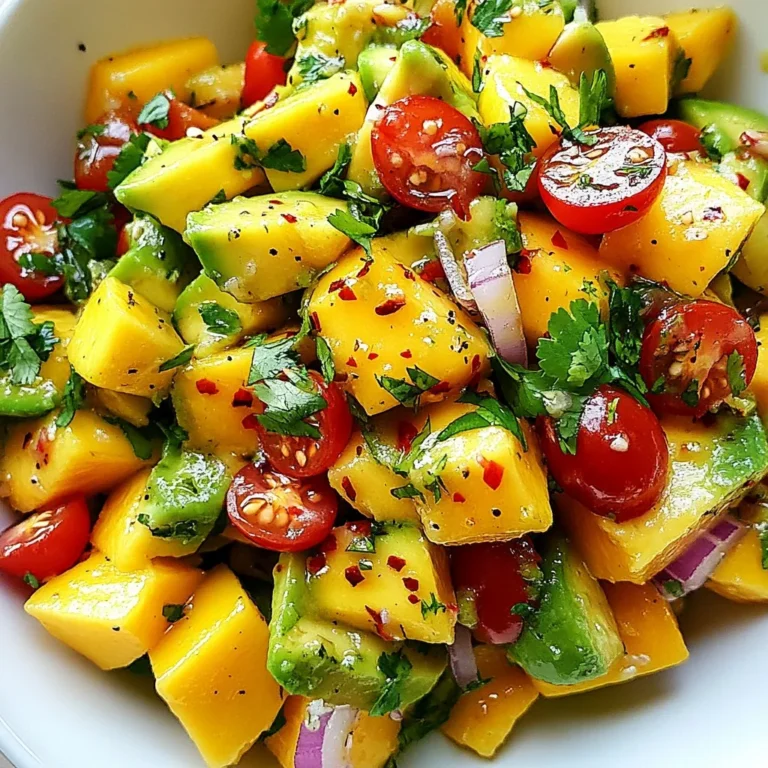
Mango Avocado Salad Fresh and Flavorful Delight

- 1 lb ground beef (or a mix of beef and turkey) - 1 cup breadcrumbs - 1/2 cup finely chopped onion - 1/2 cup grated carrots - 2 cloves garlic, minced - 1/4 cup milk - 1 egg, beaten - 1 tsp dried oregano - 1 tsp salt - 1/2 tsp black pepper For this meatloaf, I love using a blend of ground beef and turkey. It adds flavor while keeping it light. Breadcrumbs keep the meatloaf moist and give it the right texture. Chopped onion and grated carrots add sweetness and a pop of color. The minced garlic gives a nice kick. The milk helps bind everything, while the egg adds richness. - 1/4 cup honey - 1/4 cup ketchup - 2 tbsp soy sauce - 1 tbsp apple cider vinegar The glaze is where the magic happens! Honey brings a sweet touch. Ketchup adds depth and tang. Soy sauce gives umami, while apple cider vinegar adds a little zing. This glaze makes your meatloaf shine and taste amazing. - Chopped parsley Chopped parsley is a great way to finish your meatloaf. It adds a fresh look and a hint of flavor. You can sprinkle it on right before serving for a fun touch. This list of ingredients is simple yet full of flavor. Each part plays a role in making your honey garlic glazed meatloaf a hit! {{ingredient_image_1}} - Preheat your oven to 350°F (175°C). This step is key for cooking the meatloaf evenly. - Grease a baking dish or line it with parchment paper. This helps the meatloaf not stick. - In a large bowl, combine the ground beef, breadcrumbs, chopped onion, grated carrots, minced garlic, milk, beaten egg, oregano, salt, and black pepper. - Mix well until all ingredients are integrated. You want a uniform mixture for a tasty meatloaf. - Shape the mixture into a loaf form and place it in the prepared baking dish. Make it smooth for best results. - In a separate bowl, whisk together the honey, ketchup, soy sauce, and apple cider vinegar to create the glaze. This adds great flavor. - Pour half of the glaze over the meatloaf, spreading it evenly. Reserve the remaining glaze for later. - Bake in the preheated oven for about 50-60 minutes. Check that the internal temperature reaches 160°F (70°C). - During the last 10 minutes of baking, brush the remaining glaze over the meatloaf. This gives it a nice shine and extra flavor. Preheat your oven to 350°F (175°C). This is the best temperature for cooking meatloaf. It helps the meat cook evenly while keeping it moist. Grease your baking dish or line it with parchment paper to prevent sticking. Cook the meatloaf for 50-60 minutes. This time can vary based on your oven and meatloaf size. To be sure it's done, check the internal temperature. It should reach 160°F (70°C). A meat thermometer is helpful here. After baking, let the meatloaf rest for about 10 minutes. This step is very important. Resting helps the juices settle. If you slice too soon, it may fall apart. Serve the meatloaf hot, and feel free to add chopped parsley on top for a fresh look. Enjoy it with your favorite sides! Pro Tips Resting Time: Allow the meatloaf to rest for at least 10 minutes after baking. This helps the juices redistribute, making it more flavorful and easier to slice. Meat Mixture: For a leaner option, consider using ground turkey or a mix of turkey and beef. This will reduce the fat content while still keeping it moist. Glaze Variation: Feel free to customize the glaze by adding your favorite spices or a dash of hot sauce for extra heat. This can elevate the flavor profile of your meatloaf. Serving Suggestions: Pair your honey garlic glazed meatloaf with mashed potatoes or a side of steamed vegetables for a complete meal. {{image_2}} To keep your meatloaf moist, add a little milk and grated carrots. These ingredients help trap moisture. When mixing the meat and other ingredients, use your hands. This helps blend everything evenly without overworking the meat. Overmixing can lead to a tough texture, which we want to avoid. You can boost the flavor by adding fresh herbs like parsley or thyme. Try a pinch of red pepper flakes for a little heat. For the glaze, feel free to swap out honey for maple syrup or brown sugar. Both options add a unique twist to the classic glaze. One big mistake is undercooking the meatloaf. Always check the internal temperature. It should reach 160°F (70°C). Another mistake is slicing too soon. Letting it rest for about 10 minutes helps the juices settle. This makes each slice more flavorful and moist. You can change the meat in this recipe. Ground turkey or chicken works great. They make the dish lighter and just as tasty. If you want a fun twist, try a mix of beef and turkey. This keeps the flavor rich while reducing fat. For a meatless option, use lentils or chickpeas. They add protein and fiber. Mash them up and mix with breadcrumbs and eggs. This version is not only healthy but also delicious. Try a spicy honey garlic glaze for some heat. Add a teaspoon of chili flakes or hot sauce to the glaze. This gives the meatloaf a nice kick. You can also mix in some chopped jalapeños for extra flavor. Adding other vegetables is another fun idea. Bell peppers, zucchini, or spinach blend well. Just chop them finely and mix into the meat. This adds more nutrition and makes the meatloaf colorful. The meatloaf pairs well with many side dishes. Try mashed potatoes, roasted veggies, or a fresh salad. These sides balance the sweetness of the glaze. You can also use the meatloaf in sandwiches. Slice it thick and place it on bread with lettuce and tomato. This makes a tasty lunch or snack. The leftovers are just as good, making them perfect for meal prep! To keep your honey garlic glazed meatloaf fresh, place it in the fridge. Wrap it tightly in plastic wrap or foil. You can also use an airtight container. It will last up to four days. For long-term storage, freeze the meatloaf. Slice it first for easy serving. Place slices in freezer bags, removing as much air as possible. This way, it lasts up to three months. When reheating your leftovers, the best method is the oven. Preheat the oven to 350°F (175°C). Place the meatloaf on a baking sheet. Cover it with foil to keep it moist. Heat for about 20 minutes or until warm. You can also use the microwave. Place a slice on a microwave-safe plate. Cover it with a damp paper towel. Heat for one to two minutes, checking often. This keeps the texture and flavor nice. For quick meals, you can prepare the meatloaf ahead of time. Mix the ingredients and shape the loaf. Store it in the fridge for up to a day before baking. You can also cook it fully and then slice it. Portion the slices into meal containers. This makes it easy to grab a meal on busy days. Just heat and enjoy! You can use crushed crackers, oatmeal, or cornmeal. Each option adds a different flavor and texture. If you want to avoid gluten, try using ground oats or gluten-free breadcrumbs. They will work well in the meatloaf. Yes! To make it gluten-free, use gluten-free breadcrumbs. You can also swap in oats or crushed rice crackers. These ingredients will keep the meatloaf moist and tasty. The best way to check is to use a meat thermometer. Insert it into the center of the meatloaf. It should read 160°F (70°C) when fully cooked. If you don’t have a thermometer, cut into the meatloaf. The juices should run clear, not pink. Yes, you can freeze it! Let the meatloaf cool completely before wrapping it tightly in foil or plastic wrap. Place it in a freezer-safe bag. It can last up to three months in the freezer. Thaw it in the fridge before reheating. Some great sides include mashed potatoes, steamed green beans, or a fresh salad. You can also serve it with roasted vegetables or rice. These sides balance the sweet glaze and make a complete meal. This blog covers how to make the best honey garlic meatloaf. We discussed key ingredients like ground meat, breadcrumbs, and the sweet glaze. You learned step-by-step instructions for preparation, cooking, and serving. I also shared tips for flavor, avoiding mistakes, and storage ideas. In the end, enjoy customizing this recipe to suit your taste. A delicious meatloaf can bring comfort to any meal. Trust my tips to create a dish you’ll love sharing.

Honey Garlic Glazed Meatloaf Flavorful and Easy Recipe

- 12 oz cheese tortellini - 2 chicken breasts, diced - 2 tablespoons olive oil - 2 cloves garlic, minced - 1 cup heavy cream - 1/2 cup basil pesto - 1/2 cup grated Parmesan cheese - 1 cup cherry tomatoes, halved - Fresh basil leaves for garnish In this dish, the cheese tortellini serves as a tasty base. It cooks quickly and absorbs flavors well. The chicken gives protein and heartiness to each bite. Olive oil helps brown the chicken, adding depth to the flavor. Garlic adds a nice kick. It brings warmth to the sauce. Heavy cream makes everything rich and smooth. The basil pesto adds bright, herbaceous notes. It really ties the dish together. Garnishing with grated Parmesan cheese gives a salty touch. Halved cherry tomatoes add freshness and color. Fresh basil leaves on top brighten the plate. These extras make the dish look appealing and add extra flavor. This dish is simple yet satisfying. You can find most of these items in your kitchen. If you love a tasty meal, gather these ingredients and get ready to cook! {{ingredient_image_1}} First, cook the cheese tortellini. Follow the package instructions for best results. Once it is cooked, drain it well. Set it aside while you prepare the rest. Next, heat a large skillet over medium heat. Add two tablespoons of olive oil and let it warm up. Now, add the diced chicken breasts. Sprinkle salt and pepper on top. Cook the chicken for about 5 to 7 minutes. Make sure it turns golden brown and is fully cooked. After that, add two cloves of minced garlic. Sauté for one to two minutes until you smell the garlic. In the same skillet, pour in one cup of heavy cream. Bring it to a gentle simmer. Then, stir in half a cup of basil pesto. Mix it well. Now, add half a cup of grated Parmesan cheese. Keep stirring until the cheese melts and the sauce becomes creamy. Finally, add the cooked tortellini and one cup of halved cherry tomatoes to your skillet. Toss everything together gently. Make sure the tortellini is well coated with the creamy pesto sauce. Cook for another two to three minutes on low heat. Taste it and adjust the salt and pepper if needed. Remove from heat and garnish with fresh basil leaves before serving. Enjoy your delicious meal! To boost the taste of your creamy pesto chicken tortellini, focus on fresh herbs. Fresh basil adds a bright note. You can also try adding a squeeze of lemon juice for a zesty kick. For seasonings, consider red pepper flakes for heat or a pinch of Italian seasoning for depth. Always choose fresh ingredients whenever possible. Fresh garlic and ripe tomatoes will make a big difference. If your sauce is too thick, add a splash of pasta water. This will help loosen it without losing flavor. To thicken the sauce, let it simmer longer. You can also add more grated Parmesan cheese for a creamier texture. If you want a lighter sauce, try using half and half instead of heavy cream. This will keep your dish rich but less heavy. Use a non-stick skillet for even cooking. This helps to avoid sticking, making cleanup easier. A large spoon or spatula is great for mixing your tortellini and sauce. A sharp knife is essential for dicing chicken and mincing garlic. A measuring cup will help you get the right amounts of cream and pesto. Make sure you have a colander for draining the tortellini. These tools will make your cooking process smooth and fun. Pro Tips Perfectly Cooked Chicken: Ensure your chicken is cooked to an internal temperature of 165°F (75°C) for the best texture and safety. Homemade Pesto Option: For an extra burst of flavor, consider making your own basil pesto with fresh ingredients; it can elevate the dish significantly. Adjust the Creaminess: If you prefer a lighter sauce, reduce the amount of heavy cream or substitute with half-and-half for a creamier yet lighter feel. Cherry Tomato Freshness: Add the cherry tomatoes at the end of cooking to keep them juicy and vibrant, enhancing both flavor and presentation. {{image_2}} If you need a gluten-free option, look for gluten-free tortellini. Many brands offer tasty choices that work well in this dish. You can find these in most grocery stores. If you want different proteins, consider shrimp or tofu. Shrimp cooks quickly and adds a lovely flavor. Tofu is a great choice for a plant-based meal. Just make sure to press and season it well. To add more greens, try mixing in some fresh spinach or kale. These add color and nutrients. Just toss them in with the tortellini for a few minutes until they wilt down. You can also add sun-dried tomatoes for a burst of flavor. They give a nice tang that pairs well with the creamy sauce. When serving, think about what pairs well. A fresh salad can balance the richness of the dish. A slice of crusty bread is great for soaking up the sauce. For a fun twist, use a large bowl or a platter to serve. You can layer the tortellini, sauce, and tomatoes for a beautiful presentation. Top it off with fresh basil leaves to make it pop. To keep your creamy pesto chicken tortellini fresh, use airtight containers. Glass or plastic containers work well. Make sure to let the dish cool before sealing. This helps prevent moisture buildup. Store the leftovers in the refrigerator for up to three days. You can also freeze the tortellini for up to three months. If freezing, use freezer-safe containers to avoid freezer burn. When you reheat your dish, do it gently to keep the texture nice. The best methods are using a microwave or a stovetop. If using a microwave, heat in short bursts. Stir in between to heat evenly. On the stovetop, warm over low heat. Add a splash of cream or broth if the sauce is too thick. Taste and adjust the seasoning, as flavors can mellow during storage. In the fridge, your creamy pesto chicken tortellini lasts about three days. In the freezer, it can stay good for up to three months. Look for signs of spoilage like an off smell or mold. If it smells funny or looks different, it’s best to toss it. Keeping an eye on your leftovers ensures you enjoy them safely and deliciously! Yes, you can make this recipe ahead of time. Here’s how to prep for meal prep: - Cook the tortellini: Follow the package instructions, then drain and cool them. - Prepare the chicken: Cook the chicken and let it cool down. Store it in an airtight container. - Make the sauce: Combine cream, pesto, and cheese. Store it in the fridge. When you are ready to eat, just reheat everything in a skillet. Add the chilled tortellini and cherry tomatoes. This saves time and keeps flavors fresh. Absolutely! Using homemade pesto adds a fresh touch. Here are some benefits and things to think about: - Flavor: Homemade pesto can taste brighter and more vibrant. - Control: You can control the ingredients, like oil and nuts. - Storage: Homemade pesto usually lasts up to a week in the fridge. Store-bought pesto is quick and easy. It’s a great choice for busy days. Both options work well in this recipe. Tortellini shines in this dish for several reasons: - Nutritional benefits: Tortellini often has cheese or meat, adding protein. - Cooking ease: It cooks quickly, usually in just a few minutes. - Texture: The soft and chewy texture pairs well with creamy sauces. This makes tortellini a delicious and simple choice for your meal. Creamy pesto chicken tortellini is easy and delicious. We covered the key ingredients, from cheese tortellini to olive oil and fresh basil. I shared simple steps for cooking everything, making a rich sauce, and combining it all. Use my tips for flavor and texture. You can also try fun variations to fit diets or tastes. Store and reheat your leftovers well to enjoy later. This dish is a crowd-pleaser, and you can make it your own. Enjoy your cooking journey with creamy pesto chicken tortellini!

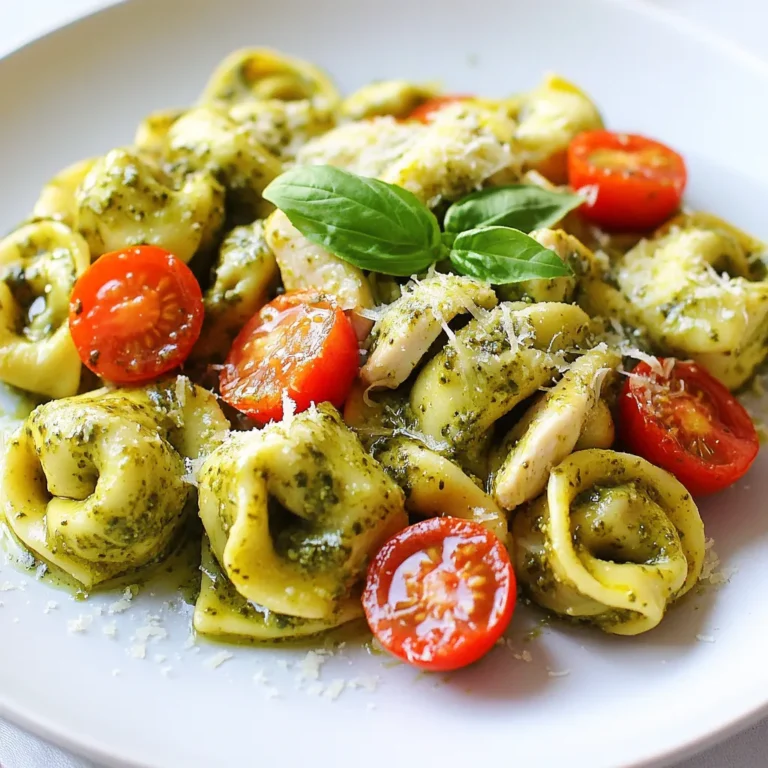
Creamy Pesto Chicken Tortellini Simple and Tasty Meal

- 1 cup rolled oats - 1 cup almond milk (or any milk of choice) - 1 medium apple, grated - 1 teaspoon cinnamon - 2 tablespoons honey or maple syrup - Pinch of salt - 1 tablespoon chia seeds - 1/4 cup Greek yogurt (optional for creaminess) - Chopped nuts (walnuts or pecans) for topping - Sliced apple for garnish Each ingredient plays a key role in making your apple cinnamon overnight oats tasty and satisfying. The rolled oats serve as the base, soaking up flavors. Almond milk brings creaminess and a touch of sweetness. The grated apple adds natural sweetness and a fun texture. Cinnamon boosts warmth and aroma. Honey or maple syrup sweetens the dish, while a pinch of salt balances the flavors. If you want to add more nutrition, consider chia seeds. They add fiber and omega-3s. Greek yogurt makes your oats creamier and richer. Topping your oats with chopped nuts adds crunch. Sliced apple gives a fresh touch that looks great too. Feel free to mix and match these ingredients based on what you have. Personalizing your overnight oats makes each bowl a unique delight. {{ingredient_image_1}} 1. In a medium bowl, combine the rolled oats, almond milk, grated apple, chia seeds, honey or maple syrup, cinnamon, and a pinch of salt. 2. If you want creamier oats, stir in the Greek yogurt now. Mix well until everything is blended. 1. Transfer the mixture into individual jars or containers with lids. This makes it easy to grab when you’re in a hurry. 2. Cover the jars tightly and place them in the fridge overnight. Letting them soak helps the oats become soft. 1. When you're ready to eat, give the oats a good stir. If it seems too thick, add a splash of milk to loosen it up. 2. Top your oats with chopped nuts and sliced apple. If you like it sweeter, drizzle a bit more honey or syrup on top. To make your oatmeal just right, you can adjust the thickness. If you like thicker oats, use less milk. If you prefer them thin, add a little more milk. Stir well after adding milk to blend it nicely. Blending flavors is key for great taste. Mix oats and milk first. Then, add the grated apple and cinnamon. This way, the apple and spice spread evenly throughout the oats. Want to save time in the morning? Make these oats the night before. It only takes 10 minutes to prepare. You can even make a few jars at once. This is perfect for busy days. When storing, use jars with tight lids. This keeps them fresh. You can store them in the fridge for up to five days. Just remember to stir before eating. Finding the right sweetness can make a big difference. If you want it sweeter, add more honey or maple syrup. You can also taste as you mix to find your perfect level. If you're looking for alternatives, try agave syrup or stevia. These options can give you the sweetness you want without extra calories. Pro Tips Use Fresh Apples: For the best flavor and texture, use fresh, crisp apples. Varieties like Honeycrisp or Fuji work wonderfully. Adjust Sweetness to Taste: Depending on your apple's sweetness, you may want to adjust the amount of honey or maple syrup for your preference. Try Different Milk Alternatives: Experiment with various milk alternatives like oat milk or coconut milk to find your favorite combination. Make It Ahead: These overnight oats can be prepared up to 3 days in advance, making them a great meal prep option for busy mornings. {{image_2}} You can switch up the fruit in your oats. Try bananas, berries, or peaches. Each fruit has its own taste and can change the dish. You can also add nut butters like almond or peanut. They add creaminess and flavor. Spices like nutmeg or ginger work well too. Experiment with what you like best! If you want a vegan option, skip the Greek yogurt. Use plant-based milk instead of dairy. You can also leave out honey and use maple syrup or agave. For those needing gluten-free meals, choose certified gluten-free oats. This keeps your dish safe and tasty! Pair your oats with yogurt for extra creaminess. You can also serve them with fruit cocktails for a fresh touch. Another fun idea is to blend your oats into a smoothie bowl. Just add more milk and blend until smooth. Top with fruits and nuts for a beautiful breakfast! To keep your Apple Cinnamon Overnight Oats fresh, store them in the fridge. They last about 3 to 5 days. Use airtight containers to avoid spills and odors. Check for any changes in smell or color. If they smell sour or look off, throw them away. You can freeze overnight oats if you want to save them for later. Use freezer-safe jars or bags. Leave some space at the top, as oats expand when frozen. To thaw, move them to the fridge overnight. You can also microwave them for a few minutes until soft. You can enjoy your oats cold or warm. If you prefer them warm, microwave them for about 30 seconds. Stir and check the temperature. Add a splash of milk to help heat evenly. If you like them cold, just stir and add your toppings. Enjoy your meal your way! Overnight oats stay fresh for about 4 to 5 days in the fridge. This is perfect for meal prep! To keep them fresh, store them in airtight containers. Make sure to check for any signs of spoilage before eating. Yes, you can make overnight oats without yogurt. If you skip it, your oats will still be tasty. For creaminess, you can add a bit more milk or use nut butter. This keeps the texture smooth and enjoyable. You can use many types of milk for overnight oats. Almond milk is a great choice, but you can also try oat milk, soy milk, or coconut milk. Each type will change the flavor a little. Just choose what you like best! In this post, I shared how to make easy and tasty overnight oats. You learned about the main ingredients, tips for great texture, and ways to customize your oats. Remember, these oats are perfect for busy mornings or a healthy snack. By trying different flavors and add-ins, you can make this simple dish your own. So grab your oats, milk, and favorite toppings to enjoy a delicious meal any time!

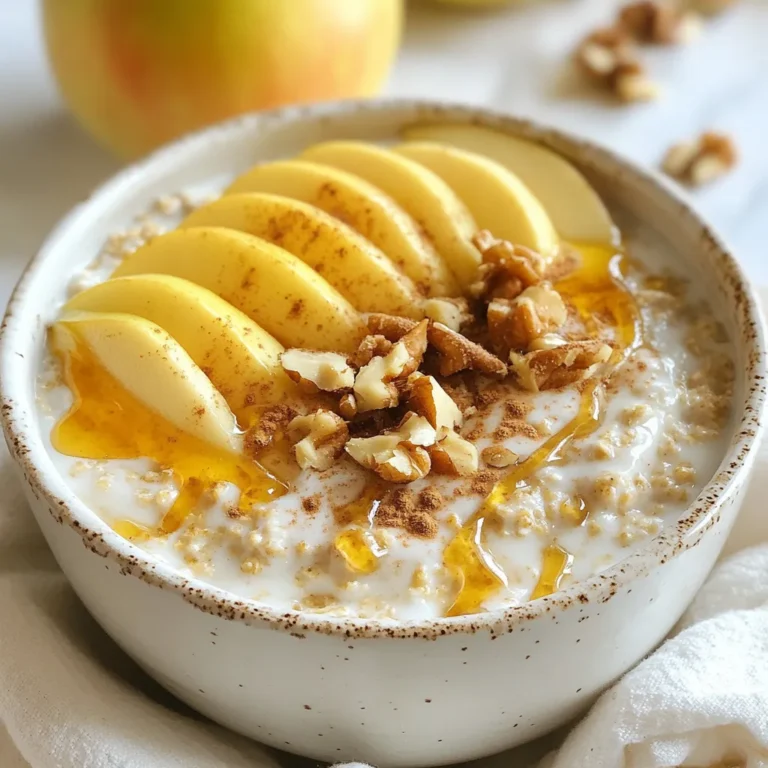
Apple Cinnamon Overnight Oats Delicious and Easy Meal

To make Garlic Parmesan Zucchini Chips, you need these key items: - 2 medium zucchinis, thinly sliced - 1 tablespoon olive oil - 2 cloves garlic, minced - 1/2 cup grated Parmesan cheese - 1 teaspoon dried oregano - 1 teaspoon paprika - Salt and pepper to taste You can add a little extra flair with these optional items: - Fresh parsley for garnish If you lack any key items, here are some good swaps: - Zucchini: Use yellow squash for a different taste. - Olive oil: Avocado oil works well too. - Parmesan cheese: Try nutritional yeast for a vegan option. - Dried oregano: Basil or Italian seasoning can be a nice change. - Paprika: Use cayenne for a spicy kick. These ingredients help create a tasty snack that is both crunchy and satisfying. When you mix them well, you get a flavor that everyone will love. Enjoy experimenting with your own twists! {{ingredient_image_1}} Start by preheating your oven to 225°F (110°C). I like to line a baking sheet with parchment paper. This helps with clean-up later. Next, grab two medium zucchinis. Slice them thinly, about 1/8 inch thick. Thin slices help create crunchy chips. In a large bowl, mix the sliced zucchini with one tablespoon of olive oil. Make sure each slice gets a light coat. Now, add two cloves of minced garlic to the bowl. Then, sprinkle in one teaspoon of dried oregano and one teaspoon of paprika. Add salt and pepper to taste. Toss everything well until the zucchinis are evenly coated with the seasonings. This step is key to ensuring every bite is flavorful. I recommend baking for a healthier option. Baking also gives the zucchini a nice crunch without the added oil from frying. Spread the seasoned zucchini slices in a single layer on the prepared baking sheet. Avoid overlapping them. This ensures they bake evenly and get crispy. Once arranged, generously sprinkle half a cup of grated Parmesan cheese over the top. Bake in your preheated oven for about two hours. Check them halfway through, and flip the slices for even cooking. Your goal is crispy, golden-brown chips. If you prefer frying, use hot oil in a pan. Fry until golden but watch carefully to avoid burning. To achieve even cooking, follow these steps. Always slice your zucchinis uniformly. Thin slices cook better and crisp up nicely. Make sure to space the slices apart on the baking sheet. Overcrowding leads to soggy chips. If you notice some chips are browning faster, you can rotate the baking sheet halfway through. This simple trick helps every chip get even heat and crispiness. For the best crunch, slice your zucchinis thinly. Aim for even slices about 1/8 inch thick. This helps them cook evenly. After slicing, soak them in salt for 10-15 minutes. This draws out moisture. Pat them dry with a clean towel before adding oil and seasonings. Bake them at a low temperature, around 225°F (110°C). This slow cooking allows for crispiness without burning. Flipping them halfway through helps, too. While garlic and Parmesan are key, feel free to get creative. Add herbs like thyme or basil for freshness. A sprinkle of chili flakes gives a nice kick. If you love a smoky taste, substitute paprika with smoked paprika. You can also try different cheeses. Grated cheddar or nutritional yeast can work well. Experiment with your favorite spices to find your perfect blend. One common mistake is overlapping zucchini slices. This traps moisture and makes them soggy. Always lay them out in a single layer. Another mistake is not drying the slices well after salting. Excess moisture leads to less crispiness. Lastly, resist the urge to add too much oil or cheese. A light coating is best for optimal crunch. Pro Tips Slice Evenly: Make sure to slice the zucchinis uniformly to ensure they bake evenly and reach the same level of crispiness. Use Fresh Garlic: Freshly minced garlic will provide a more robust flavor compared to pre-minced garlic, enhancing the overall taste of the chips. Check for Doneness: Keep an eye on the zucchini chips during the last few minutes of baking; they can go from perfectly crispy to burnt very quickly. Storage Tips: Store any leftover zucchini chips in an airtight container at room temperature to maintain their crunchiness for a couple of days. {{image_2}} You can use different cheeses to change the flavor. Try cheddar for a sharp taste. Feta adds a creamy, salty kick. If you love Italian flavors, use Pecorino Romano. Each cheese gives a unique twist to the chips. Mix and match to find your favorite! Experiment with seasonings for a new taste. Instead of oregano, try basil or thyme. If you want heat, add cayenne pepper or chili powder. For a zesty touch, use lemon zest or a dash of lemon juice. Each combination offers a fun, fresh bite. Add herbs and spices to make your chips special. Chopped fresh rosemary or thyme adds nice flavor. Garlic powder can boost the garlic taste. You can even sprinkle on nutritional yeast for a cheesy kick. These add-ins make your zucchini chips even better! Store your Garlic Parmesan Zucchini Chips in an airtight container. This keeps them fresh. Place a paper towel inside to absorb moisture. This simple step helps keep them crispy. Make sure to store them in a cool, dry place. Leftover chips can last up to three days this way. To get your chips crunchy again, preheat your oven to 350°F (175°C). Spread the chips on a baking sheet in a single layer. Heat them for about 5-10 minutes. You can also use an air fryer at 350°F for about 3-5 minutes. This method brings back their crispiness without making them soggy. Freezing zucchini chips is easy. First, let the chips cool completely. Then, place them in a single layer on a baking sheet and freeze for about an hour. Once frozen, transfer them to a freezer bag. Squeeze out excess air before sealing. They can stay fresh for up to three months. When you crave a snack, just reheat them right from the freezer! Yes, you can make Garlic Parmesan Zucchini Chips in an air fryer. Just slice the zucchinis thinly. Toss them with olive oil, garlic, and spices as in the oven method. Place the slices in a single layer in the air fryer basket. Cook at 350°F for about 10-15 minutes. Check them often to avoid burning. The air fryer gives a nice crunch, just like the oven. To keep the zucchini crispy, start by slicing it thinly. A thickness of about 1/4 inch works best. Before seasoning, sprinkle the slices with salt and let them sit for 10-15 minutes. This draws out excess moisture. After that, pat them dry with a paper towel. When you bake them, arrange the slices in a single layer and avoid overlapping. This helps them crisp up nicely. Garlic Parmesan Zucchini Chips pair well with many dips. Try serving them with marinara sauce, ranch dressing, or a creamy garlic dip. They also make a great side for sandwiches or burgers. For a fun twist, use them as a topping for salads, adding crunch and flavor. You can even serve them as a snack at parties! In this guide, we explored the ingredients needed for Garlic Parmesan Zucchini Chips. I shared useful cooking steps, great tips for crispiness, and fun variations. You now know how to store leftovers and reheat them perfectly. Remember to experiment with flavors and seasonings to find your favorite. Don't worry about mistakes; cooking is all about learning. Enjoy your tasty chips, and share them with friends or family for a delightful snack!

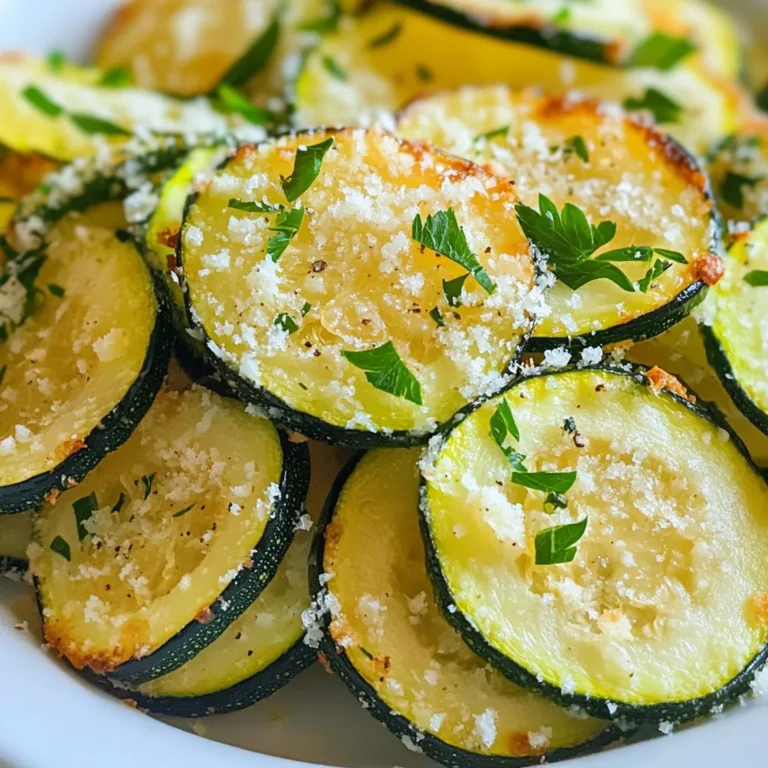
Garlic Parmesan Zucchini Chips Crunchy and Tasty Snack

To make Sweet Chili Tofu Buddha Bowls, you need a few key items. Here’s what to gather: - 1 block (14 oz) firm tofu, drained and pressed - 3 tablespoons sweet chili sauce - 1 tablespoon soy sauce - 1 tablespoon sesame oil - 2 cups cooked quinoa (or brown rice) - 1 cup broccoli florets - 1 red bell pepper, sliced - 1 carrot, shredded - 1 avocado, sliced - 1/4 cup green onions, chopped - 1 tablespoon sesame seeds - Salt and pepper to taste These ingredients give the bowl its great taste and texture. The tofu gets crispy, while the veggies add color and crunch. You can customize your Buddha bowl with extra toppings. Here are some ideas: - Sliced radishes for a peppery bite - Cucumber slices for freshness - Fresh cilantro for a herbaceous note - A drizzle of extra sweet chili sauce for more flavor Feel free to mix and match these toppings to fit your taste. Each option adds its own twist. Sweet Chili Tofu Buddha Bowls are not just tasty; they are also good for you. Here’s a breakdown of what’s in them: - Protein: Tofu and quinoa provide a solid protein boost. - Fiber: The veggies and quinoa help keep you full. - Healthy Fats: Avocado adds healthy fats for heart health. - Vitamins and Minerals: You’ll find vitamins A, C, and K in the veggies. This bowl is a balanced meal. It fuels your body and satisfies your hunger. {{ingredient_image_1}} First, preheat your oven to 400°F (200°C). This step ensures your tofu gets nice and crispy. Next, drain and press your block of firm tofu. This helps remove excess moisture. Cut the tofu into small cubes and place them in a mixing bowl. In a separate small bowl, whisk together the sweet chili sauce, soy sauce, and sesame oil. Pour this mixture over the tofu cubes. Gently toss to coat each piece well. Spread the marinated tofu on a lined baking sheet. Season with a pinch of salt and pepper. Bake for 25-30 minutes, flipping halfway through. You want the tofu to turn golden and crispy. While the tofu bakes, steam your broccoli florets until tender. This should take about 5-7 minutes. Set the broccoli aside once it's ready. Now, cook your quinoa or brown rice if you haven't already. This will be the base of your bowl. Once cooked, fluff it with a fork to keep it light and airy. Prepare your other veggies too. Slice the red bell pepper and shred the carrot. These fresh veggies add color and crunch to your bowl. To assemble your Buddha bowl, start with a scoop of cooked quinoa at the base. This grain adds a hearty texture. Next, arrange the baked tofu on top of the quinoa. Follow this with the steamed broccoli, sliced bell pepper, and shredded carrot. Finally, add the sliced avocado for creaminess. For a finishing touch, sprinkle chopped green onions and sesame seeds on top. If you like, drizzle a bit of extra sweet chili sauce over the bowl. This adds extra flavor and makes it look beautiful. Enjoy your colorful and tasty Sweet Chili Tofu Buddha Bowl! To get that perfect crunch on your tofu, start with firm tofu. Press it well to drain excess water. I recommend using a clean kitchen towel or a tofu press. Cut the tofu into small cubes for even cooking. Marinate it in sweet chili sauce, soy sauce, and sesame oil. This not only adds flavor but also helps to crisp it up. Bake the tofu at 400°F (200°C) on a parchment-lined tray. Spread the cubes out in a single layer. Don’t overcrowd them. Flip the tofu halfway through baking. This ensures they cook evenly and turn golden brown. Trust me, crispy tofu makes all the difference in your Buddha bowl! Meal prepping can save you time. Cook a larger batch of quinoa or brown rice. Store it in airtight containers in the fridge. This makes assembly quick during busy days. You can also bake extra tofu. Keep it in the fridge for up to three days. For the veggies, chop them ahead of time. Store them separately to keep them fresh. Avocado can brown quickly, so add that just before serving. This keeps your bowl looking and tasting fresh. Pair your Sweet Chili Tofu Buddha Bowl with simple side dishes. A light cucumber salad adds a refreshing crunch. You can also serve it with edamame for a protein boost. Another good side is a tangy slaw. This adds flavor and texture to your meal. Feel free to mix and match your sides. The goal is to complement the bold flavors in your Buddha bowl. Enjoy experimenting with different combinations! Pro Tips Press Tofu Well: Make sure to press the tofu thoroughly to remove excess moisture. This helps in achieving a crispy texture when baked. Customize Your Veggies: Feel free to add or substitute any seasonal vegetables you have on hand, like snap peas or zucchini, for a colorful and nutritious bowl. Avocado Ripeness: Use ripe avocados for the best flavor and creaminess. If they’re not ripe yet, you can speed up the process by placing them in a brown paper bag with an apple. Extra Sauce: If you love flavor, drizzle some extra sweet chili sauce over the assembled bowl just before serving for a delicious finishing touch. {{image_2}} You can swap tofu for other proteins in your Buddha bowl. Here are some great choices: - Tempeh: This fermented soy product adds a nutty flavor. - Chickpeas: Roasted chickpeas give a nice crunch and protein boost. - Grilled chicken: A classic choice for meat lovers. - Shrimp: Cooked shrimp adds seafood flair. Each option changes the taste and texture, letting you explore new flavors. Feel free to get creative with your veggies. Try these options: - Spinach: Fresh or sautéed, it adds a nutrient boost. - Zucchini: Roasted or spiralized, it brings a light crunch. - Edamame: These green soybeans add protein and texture. - Cucumber: Fresh slices add a refreshing crunch. Mix and match veggies to find your favorite combinations. You can easily change the recipe for dietary needs. Here are some ideas: - Gluten-free: Use tamari instead of soy sauce. - Vegan: The recipe is already vegan with tofu and no animal products. - Low-carb: Swap quinoa for cauliflower rice. These simple swaps let everyone enjoy a tasty meal. To keep your Sweet Chili Tofu Buddha Bowls fresh, store them in airtight containers. This will help lock in flavor and moisture. Separate the tofu and veggies from the quinoa. This keeps everything crisp. You can store leftovers in the fridge for up to three days. Make sure to label your containers with the date. When you reheat, aim for even warmth without overcooking. The best way is to use a microwave. Heat the quinoa and veggies on medium power for 1-2 minutes. Stir halfway through to ensure even heating. For the tofu, you can use an oven or an air fryer. Heat it at 350°F (175°C) for about 10 minutes. This will help it stay crispy. Freezing is a smart choice for meal prep. You can freeze cooked quinoa and tofu separately. Place them in freezer-safe bags or containers. Make sure to remove as much air as possible. For tofu, freeze it before marinating. This gives it a spongy texture, making it soak up flavors better. You can keep these in the freezer for up to three months. When you’re ready, just thaw in the fridge overnight before reheating. Yes, Sweet Chili Tofu Buddha Bowls can easily be vegan. The main ingredients are already plant-based. Tofu is a great source of protein, and using quinoa or brown rice makes it filling. Just ensure that your sweet chili sauce does not contain any animal products. Most brands offer vegan options. You can store leftovers in the fridge for about three days. Make sure to keep the tofu and veggies in an airtight container. This helps keep them fresh. When you’re ready to eat, just reheat in the microwave or on the stove until warm. If you need a substitute for sweet chili sauce, try mixing equal parts of honey and soy sauce. You can also use a mix of sriracha and sugar for a similar flavor. Adjust the sweetness to your taste. Another option is to blend red pepper flakes with a little maple syrup. This gives a nice kick while keeping it sweet. Tofu Buddha bowls are simple and fun to make. You learned about main ingredients, cooking methods, and tips for perfect tofu. I shared ideas for variations and storage tips to keep your bowl fresh. Remember, you can mix and match as you like. This dish is all about what you enjoy. Use this guide to create a meal full of flavor and nutrients. Enjoy making bowls that fit your taste and needs!

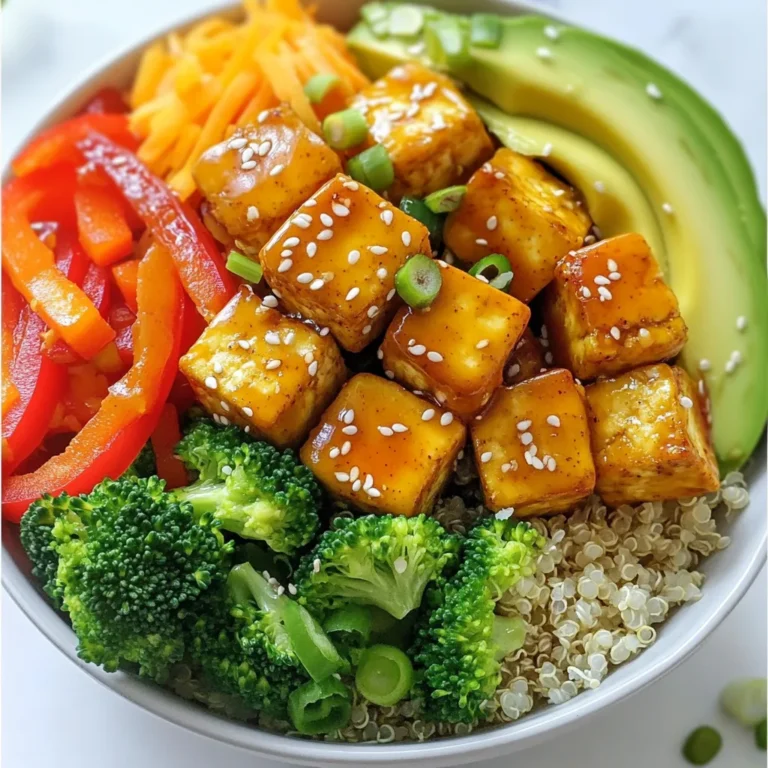
Sweet Chili Tofu Buddha Bowls Flavorful and Satisfying

PREV 1 … 42 43 44 … 52 NEXT
cozy citrus kitchen

explore

DessertsDinnerAppetizersDrinks

Our Policies

  • Cookie Policy
  • Copyright Policy
  • Disclaimer
  • GDPR Policy
  • Terms Of Use
Back to Top
  • About
  • Contact Us
  • Privacy Policy
© 2025 cozy citrus kitchen