FREE DINNER EBOOK! Get your copy!
  • Cookie Policy
  • GDPR Policy
  • Disclaimer
  • Terms Of Use
  • Visit my other site: Fun Cookie Recipes
cozy citrus kitchen
  • Home
  • Dinner
  • Desserts
  • Drinks
  • Appetizers
  • Contact
  • About
  • Privacy Policy
  • Home
  • Dinner
  • Desserts
  • Drinks
  • Appetizers
  • Contact
  • About
  • Privacy Policy
  • Cookie Policy
  • GDPR Policy
  • Disclaimer
  • Terms Of Use
Visit my other site: Fun Cookie Recipes

HOME / CATEGORIES /

Latest

- Chicken thighs - Fresh cilantro - Limes - Garlic - Spices (Cumin, Chili Powder, Smoked Paprika) - Salt and pepper - Tortillas - Toppings (Avocado, Red Onion, Sour Cream) - Tomatoes - Jalapeños For these cilantro lime chicken tacos, you need key ingredients. First, use chicken thighs for their juiciness. Fresh cilantro adds a bright flavor that ties everything together. Limes bring a zesty punch, while garlic gives depth. The spices, including cumin, chili powder, and smoked paprika, create a warm and smoky taste. Salt and pepper are essential for seasoning. You can use either corn or flour tortillas to wrap your tacos. For toppings, sliced avocado, diced red onion, and a dollop of sour cream work great together. If you want to add extra flair, include optional ingredients like diced tomatoes and jalapeños. These bring freshness and a bit of heat. Enjoy your cooking adventure with these simple yet bold flavors! {{ingredient_image_1}} To start, you need to make the marinade. In a medium bowl, combine the following: - 1/4 cup fresh cilantro, chopped - Juice and zest from 2 limes - 2 cloves garlic, minced - 1 teaspoon cumin - 1 teaspoon chili powder - 1 teaspoon smoked paprika - Salt and pepper to taste Mix all the ingredients well. Next, add 1 lb of boneless, skinless chicken thighs to the marinade. Ensure the chicken is well coated. Cover the bowl and refrigerate for at least 30 minutes. If you want more flavor, refrigerate for up to 2 hours. Now it’s time to cook the chicken. Preheat your grill or skillet over medium-high heat. Once hot, take the chicken out of the marinade and discard the leftover marinade. Cook the chicken for about 5-7 minutes on each side. You want the chicken fully cooked and no longer pink. The internal temperature should reach 165°F (75°C). After cooking, let the chicken rest for a few minutes. Then, slice it into strips. To warm the tortillas, place them in a dry skillet. Heat for about 30 seconds on each side until they are pliable. Now, it’s time to assemble the tacos! Place a few strips of chicken onto each tortilla. Top with sliced avocado, diced red onion, and a dollop of sour cream or Greek yogurt. Don’t forget to garnish with fresh cilantro. If you like, add diced tomatoes or jalapeños for extra flavor. Enjoy your tasty tacos! - Achieving the right temperature: Cook the chicken until it reaches 165°F (75°C). Use a meat thermometer for accuracy. This ensures the chicken is safe to eat and tender. - Preventing dryness: Marinate the chicken for at least 30 minutes. This step adds flavor and moisture. When cooking, avoid overcooking. Let the chicken rest after cooking for juiciness. - Best side dishes to pair: Serve with rice, beans, or a fresh salad. These sides complement the flavors of the tacos well. - Garnishing ideas: Top your tacos with extra cilantro, diced tomatoes, or jalapeños. These add color and a burst of flavor. Consider adding lime wedges for a zesty finish. Pro Tips Marinate for Maximum Flavor: Allow the chicken to marinate for at least 2 hours for deeper flavor penetration. Overnight is even better! Choose the Right Chicken: Boneless, skinless chicken thighs are preferred for their juiciness and tenderness compared to chicken breasts. Tortilla Warming Technique: Warm tortillas on a dry skillet to enhance their flavor and flexibility, making them easier to fold without tearing. Freshness Matters: Use fresh cilantro and ripe avocados for the best taste and presentation. Quality ingredients elevate your tacos! {{image_2}} To make these tacos gluten-free, use corn tortillas instead of flour. Corn tortillas are naturally gluten-free and add great flavor. Always check the label for any hidden gluten in pre-packaged tortillas. For low-carb options, try using lettuce wraps. Instead of tortillas, use large lettuce leaves like romaine or butter lettuce. This keeps the dish fresh and light, perfect for a low-carb diet. You can switch up the seasonings in the marinade. Try adding oregano or coriander for different flavors. You could also add cayenne pepper if you like a spicy kick. Experiment with smoked salt for a deeper taste. Adding fruits or vegetables can also enhance these tacos. Pineapple or mango chunks add sweetness. You can mix in bell peppers or zucchini for extra crunch and color. These small changes can elevate your dish to new heights! To keep your tacos fresh, place leftovers in an airtight container. Refrigerate them within two hours of cooking. They will last up to three days in the fridge. For longer storage, you can freeze the chicken. Wrap the chicken in plastic wrap, then place it in a freezer bag. It can last up to three months in the freezer. When ready to eat, thaw it in the fridge overnight before reheating. For the best taste, reheat the chicken in a skillet over medium heat. This method keeps the chicken juicy and warm. You can also use a microwave. Place the chicken on a microwave-safe plate and cover it with a damp paper towel. Heat in short bursts, checking often to avoid overcooking. Warm the tortillas in a dry skillet for about 30 seconds on each side. This way, you maintain their texture and flavor. Enjoy those tacos just like the first time! Can I use chicken breasts instead of thighs? Yes, you can use chicken breasts. They will cook faster. The flavor will be less rich. Thighs have more fat, making them juicier. If using breasts, watch the cooking time closely. How spicy is this recipe? This recipe is mild to medium spicy. The chili powder adds a bit of heat, but not much. If you like it spicier, add jalapeños or more chili powder. Can I make the tacos ahead of time? Yes, you can prep the chicken and toppings ahead of time. Marinate the chicken and store it in the fridge. You can also chop the veggies in advance. Just warm the tortillas right before serving. - Caloric content and nutritional breakdown Each serving has about 400 calories. This includes protein from chicken and healthy fats from avocado. The tortillas add carbs, making it a balanced meal. - Health benefits of ingredients Cilantro is rich in vitamins A, C, and K. Limes add vitamin C, which helps your immune system. Avocado provides healthy fats that are good for your heart. Overall, these tacos are a tasty way to eat healthy. In this blog post, I shared how to make tasty cilantro lime chicken tacos. I covered the essential and optional ingredients, ensuring your dish is full of flavor. I laid out step-by-step instructions for marinating, cooking, and assembling the tacos. Remember, making these tacos is easy and fun! Use my tips for perfect chicken and explore variations that fit your diet. Store leftovers well and reheat correctly. Enjoy a delicious meal that everyone will love!

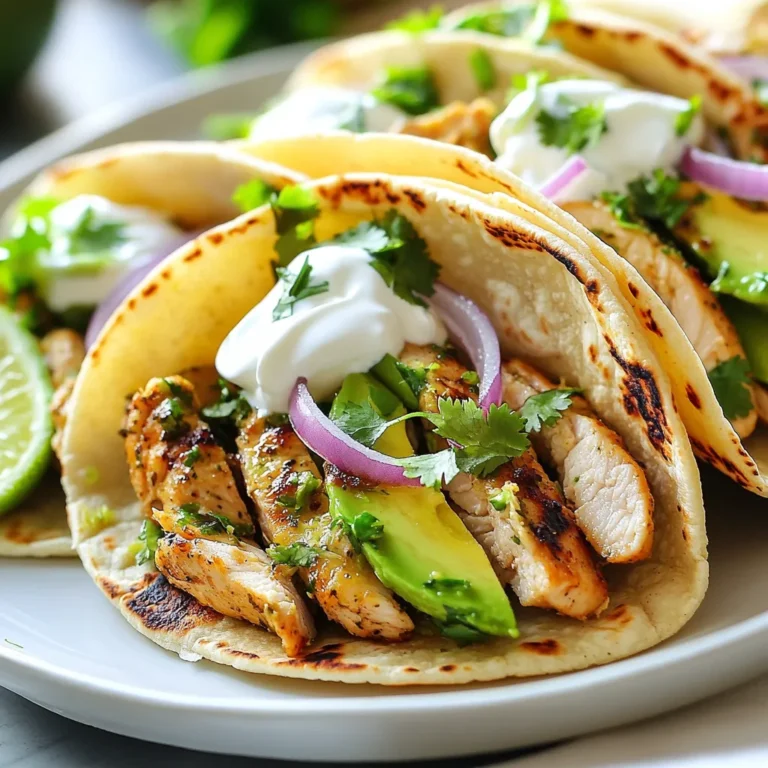
Cilantro Lime Chicken Tacos Flavorful and Easy Dish

- 1 lb (450g) shrimp, peeled and deveined - 2 cups jasmine rice - 4 tablespoons unsalted butter - 5 garlic cloves, minced - 1 cup chicken broth - 1 cup water - 1 tablespoon lemon juice - 1 teaspoon paprika - Salt and pepper to taste - 1 cup green peas (fresh or frozen) - Fresh parsley, chopped (for garnish) This dish stands out for its simple yet rich flavors. The shrimp give a sweet taste, and garlic adds a savory kick. The jasmine rice is fluffy and fragrant. It acts as the perfect base to soak up all the delicious garlic butter. Using fresh shrimp is key for the best flavor. You can choose large or medium shrimp. Just make sure they are peeled and deveined. I love using jasmine rice. Its soft texture pairs well with the buttery shrimp. For added depth, I use chicken broth instead of water. This small swap makes a big difference in taste. A splash of lemon juice brightens the dish and adds a nice zing. Don’t forget the peas! They add a pop of color and a slight sweetness. Fresh parsley on top makes the dish look great and tastes amazing too. Gather these ingredients, and you’re ready to create a delightful meal that everyone will love. {{ingredient_image_1}} Start by rinsing the jasmine rice under cold water. This step is key. It removes extra starch. The result is fluffy rice. Keep rinsing until the water runs clear. Next, grab a medium saucepan. Combine the rinsed rice with chicken broth, water, and a pinch of salt. Bring this mix to a boil over medium-high heat. Once it boils, reduce the heat to low. Cover the pan and let it simmer for 15 minutes. The rice should become tender, and the liquid will absorb. After that, remove it from heat but keep it covered. Now, let’s cook the shrimp. In a large skillet, melt the unsalted butter over medium heat. Add the minced garlic and sauté it for 1-2 minutes. You want it fragrant but not burned. Then, add the peeled and deveined shrimp to the skillet. Sprinkle with paprika, salt, and pepper. Cook for about 2-3 minutes on each side. The shrimp should turn pink and be fully cooked. Once the shrimp is ready, stir in the green peas. Cook for another 2 minutes until they heat through. Now, remove the skillet from heat. Drizzle the lemon juice over the shrimp and peas. Next, fluff the cooked rice with a fork. Divide it among serving plates. Top each plate with the garlic butter shrimp and peas mix. Finally, garnish with freshly chopped parsley. This adds color and flavor to your dish. Enjoy your meal! Rinsing the rice is key to fluffy grains. It removes extra starch. This step keeps the rice from being sticky. I rinse jasmine rice until the water is clear. To cook rice perfectly, use the right water-to-rice ratio. For jasmine rice, a 1:1 ratio of water and broth works well. Bring it to a boil, then cover and simmer. This keeps the steam in and cooks the rice evenly. How do you check if shrimp are done? Cook shrimp until they turn pink. They should curl slightly but not be rubbery. It usually takes about 2-3 minutes per side. Adjust the seasonings based on your taste. You can add more salt, pepper, or paprika. A splash of lemon juice brightens the dish and balances the flavors. Want to add more flavor? You can try garlic powder or onion powder. These spices deepen the taste. Fresh herbs like thyme or basil can also add a nice touch. For garnish, chopped parsley adds color and freshness. You can also use lemon wedges for an extra zesty kick. Both options enhance the dish and make it look appealing. Pro Tips Rinse the Rice: Rinsing the jasmine rice not only removes excess starch but also helps achieve a fluffier texture after cooking. Watch the Garlic: When sautéing garlic, keep a close eye on it. It can go from perfectly fragrant to burnt in a matter of seconds, affecting the dish's flavor. Perfectly Cooked Shrimp: Cook the shrimp just until they turn pink and opaque. Overcooking can make them tough and rubbery. Add Freshness: For an extra burst of flavor, consider adding a sprinkle of lemon zest along with the lemon juice before serving. {{image_2}} You can easily change the shrimp in this dish. Try using scallops or chicken instead. If you prefer a plant-based meal, use tofu or chickpeas. Both options give you great flavor. For those who need gluten-free meals, switch to gluten-free soy sauce or coconut aminos. You can also make this dish dairy-free. Just swap the butter for olive oil or vegan butter. This way, everyone can enjoy it. Adding vegetables can make this dish even better. Try bell peppers, broccoli, or spinach. These veggies add color and nutrients. You can also toss in some corn. It gives a sweet crunch. Spices can also change the taste. Try adding red pepper flakes for heat. Fresh herbs like basil or cilantro can brighten the dish. You could even use a dash of curry powder for a unique twist. You can serve garlic butter shrimp rice with many sides. A simple green salad pairs well and adds freshness. Garlic bread is another tasty option that complements the rich flavors. This dish is great for meal prep, too. Just pack it in containers for quick lunches. It reheats well and keeps its flavor. You can enjoy this dish any day of the week! To store your garlic butter shrimp rice, let it cool first. Use an airtight container. This keeps the flavors fresh. You can store it in the fridge for up to three days. If you want to keep it longer, freeze it. In the freezer, it can last for up to three months. Just make sure to label your container with the date. To reheat leftovers, the best method is the stovetop. Add a splash of water or broth to the skillet. Heat it on low, stirring gently. This helps prevent drying out. You can also use the microwave. Place the rice in a bowl, cover it with a damp paper towel, and heat in short bursts. If you have extra shrimp rice, try adding it to a salad or a wrap. You can also mix it into an omelet for a tasty breakfast. The possibilities are endless! You can tell shrimp are done when they turn pink and opaque. They should curl into a C shape. If they form an O shape, they are overcooked. Cooking time is usually about 2-3 minutes per side. It's crucial to avoid overcooking shrimp, as they can become rubbery. Always check the center for a firm texture. Yes, frozen shrimp work great! Thaw them in the fridge overnight for best results. If you're short on time, you can run them under cold water for several minutes. Once thawed, pat them dry with a paper towel. This helps the shrimp cook evenly and prevents excess water in your dish. Garlic butter shrimp rice pairs well with many sides. Here are some tasty options: - Steamed broccoli for a crunchy contrast - A fresh green salad with lemon vinaigrette - Garlic bread for a delightful twist - Roasted asparagus drizzled with olive oil Adding a side of fresh fruit can also lighten your meal. Enjoy experimenting with flavors that complement the shrimp! This blog post shows you how to make garlic butter shrimp rice with ease. You learned about the main ingredients, like shrimp and jasmine rice, and tasty seasonings. I covered detailed steps for cooking, tips for perfect rice, and variations to fit your needs. Remember, adding fresh flavors can make this dish even better. Cooking can be fun and rewarding, so enjoy your time in the kitchen. Your meals can be simple yet full of flavor!

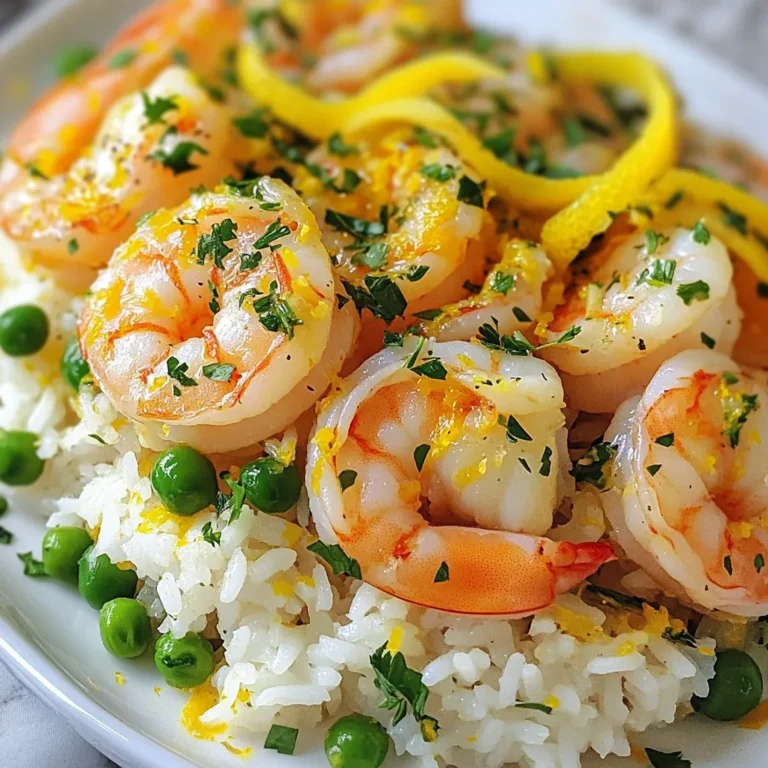
Garlic Butter Shrimp Rice Delightful Weeknight Meal

To make this tasty dish, gather these main ingredients: - 1 lb potato gnocchi - 1 tablespoon olive oil - 1 small onion, finely chopped - 2 cloves garlic, minced - 1 bell pepper (red or yellow), diced - 1 teaspoon Cajun seasoning - 1/2 teaspoon smoked paprika - 1 cup heavy cream - 1 cup shredded Cajun spiced chicken (or cooked shrimp) - 1/2 cup grated Parmesan cheese - Salt and black pepper to taste - Fresh parsley, chopped (for garnish) You can change this dish by adding extra ingredients. Consider: - Spinach or kale for more greens - Cherry tomatoes for sweetness - Different proteins like sausage or tofu - Use half-and-half instead of heavy cream for less richness Garnishes make a dish look and taste great. I suggest: - Fresh parsley for color and flavor - Extra grated Parmesan for creaminess - A sprinkle of Cajun seasoning for a pop These ingredients and tweaks will help you create the best creamy Cajun gnocchi. Enjoy! {{ingredient_image_1}} In this article, we explored creamy Cajun gnocchi. We discussed main ingredients, variations, and tasty garnishes. You learned step-by-step cooking instructions and helpful tips for the best results. Remember, you can easily adjust spice levels or use seafood. Storing and reheating leftovers will keep your dish fresh and delicious. These ideas will help you create a wonderful meal. Enjoy making this dish, and let your taste buds lead the way!

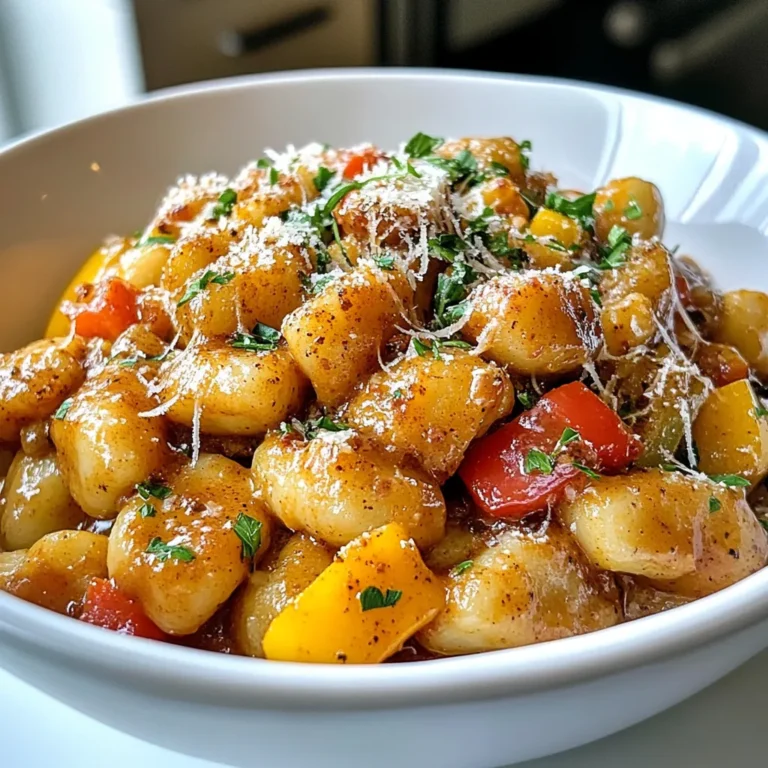
Creamy Cajun Gnocchi Rich and Flavorful Comfort Dish

- 1 cup all-purpose flour - 1/2 cup powdered sugar - 1/2 cup unsalted butter, softened - 1 cup Greek yogurt (plain) - 1 cup granulated sugar - 3 large eggs - Zest of 2 lemons - 1/2 cup fresh lemon juice (about 2-3 lemons) - 1 teaspoon baking powder - 1/4 teaspoon salt - Extra powdered sugar for dusting When I make Greek yogurt lemon bars, I focus on fresh and simple ingredients. Each item plays an important role in the dish. The all-purpose flour forms the base, giving the bars their structure. The powdered sugar adds a touch of sweetness, while the unsalted butter brings richness. Using plain Greek yogurt is key. It gives a creamy texture and tangy flavor. The granulated sugar balances the tartness of the lemon. The eggs help bind everything together. Lemon zest and fresh lemon juice shine in this recipe. They provide that bright, zesty flavor we love. Don’t forget the baking powder. It helps the filling rise slightly, making it light. The salt enhances all the flavors. Finally, I like to sprinkle extra powdered sugar on top before serving. It adds a lovely finish and a sweet touch. These ingredients combine to create a delicious treat. Each bite is a tangy and refreshing delight! {{ingredient_image_1}} Start by preheating your oven to 350°F (180°C). This helps your bars bake evenly. Grease an 8x8 inch baking dish. You can also line it with parchment paper. This makes it easy to lift out the bars later. In a medium bowl, combine 1 cup of all-purpose flour and 1/2 cup of powdered sugar. Using a fork or pastry cutter, cut in 1/2 cup of softened unsalted butter. Keep mixing until it looks like coarse crumbs. Press this mixture firmly into the bottom of your prepared baking dish. This forms the crust. In a large mixing bowl, whisk together 1 cup of plain Greek yogurt, 1 cup of granulated sugar, and 3 large eggs. Add the zest of 2 lemons and 1/2 cup of fresh lemon juice. Don’t forget to add 1 teaspoon of baking powder and 1/4 teaspoon of salt. Mix until everything is smooth and well combined. Pour the yogurt mixture over the pre-baked crust. Spread it evenly across the top. Bake the dish in the oven for 20-25 minutes. Look for the edges to turn golden, and the center can have a slight jiggle. This is fine! Once done, remove the dish and let it cool at room temperature. After that, refrigerate it for at least 1 hour. This helps the bars set. Before serving, dust the top with extra powdered sugar for a nice finish. Cut them into squares and enjoy! To make a great crust, use cold butter. Cold butter helps create a flaky texture. Mix the flour and powdered sugar first. This helps to blend them well. Cut the butter into small pieces. Then, use a fork or pastry cutter to mix. Aim for a crumbly texture. Press it down firmly in the dish. Bake until it's lightly golden. This takes about 15 to 20 minutes. Let it cool before adding the filling. Start with room temperature eggs for a smooth mix. Whisk the Greek yogurt well before adding other ingredients. This ensures a creamy filling. Add the lemon zest and juice for bright flavor. Make sure to mix until everything is smooth. Pour the filling over the cooled crust evenly. Bake until the edges are golden. A little jiggle in the center is fine. It will set as it cools. Let the bars cool completely before cutting. Chill them in the fridge for at least one hour. This helps the bars set nicely. Dust the top with powdered sugar for a nice touch. Serve the squares on a decorative plate. Add lemon slices or zest for color. This makes them look extra special. Enjoy the tangy and refreshing delight of Greek yogurt lemon bars! Pro Tips Use Fresh Lemons: For the best flavor, always use fresh lemons for both zest and juice. The vibrant taste of fresh citrus will elevate your lemon bars. Let Them Chill: Allowing the lemon bars to chill in the refrigerator for at least an hour after baking is crucial. This helps the filling set properly and enhances the texture. Adjust Sweetness: If you prefer a less sweet dessert, feel free to reduce the granulated sugar in the filling. The tartness of the lemon will still shine through. Perfect Cutting: For clean cuts, use a sharp knife and wipe it with a damp cloth between each slice. This prevents the filling from sticking to the knife. {{image_2}} You can make Greek yogurt lemon bars gluten-free. Use almond flour or coconut flour instead of all-purpose flour. Adjust the amount as these flours absorb moisture differently. Almond flour gives a nutty taste, while coconut flour adds a hint of sweetness. Choose the one you like best. Want to jazz up your lemon bars? Add fresh berries like blueberries or raspberries. They pair well with the tart lemon flavor. You can also mix in herbs like fresh mint or thyme for a surprise twist. These add-ins make each bite more exciting. If you prefer less sugar, try using honey or maple syrup. Both add a unique flavor while keeping it sweet. You can also use stevia or monk fruit for a no-calorie option. Adjust the quantity based on your taste. These swaps make the bars healthier without losing the deliciousness. To store your Greek yogurt lemon bars, first let them cool completely. Place them in an airtight container. You can keep them in the fridge for about five days. This keeps them fresh and tasty. If you want to serve them later, make sure to cover them well. You can also place parchment paper between layers to avoid sticking. If you want to save your lemon bars for later, freezing works great. First, cut the bars into squares. Wrap each square individually in plastic wrap. Then, place them in a freezer-safe bag. This way, they stay fresh for up to three months. When you're ready to enjoy, just thaw them in the fridge overnight. They will taste just as good! To keep your lemon bars fresh, avoid exposing them to air. Use a tight-sealing container. If you add powdered sugar on top, do it right before serving. This keeps the sugar from getting soggy. Also, try to store them away from strong-smelling foods. This way, they stay flavorful and bright! Yes, you can use flavored Greek yogurt. It will change the taste of your lemon bars. If you choose strawberry or vanilla, the bars will have a sweet twist. I recommend sticking to plain yogurt for the best lemon flavor. It keeps the bars light and tangy. Check the edges of the bars. They should be golden brown. The center can still jiggle slightly. It will firm up as the bars cool. A toothpick inserted in the center should come out mostly clean. This means your filling is set and ready. These lemon bars pair well with fresh fruit. Berries like strawberries or raspberries add color and taste. You can also serve them with whipped cream for a creamy touch. A scoop of vanilla ice cream makes a great dessert too. They last about five days in the fridge. Store them in an airtight container. This keeps them fresh and tasty. If you want to keep them longer, think about freezing. They can stay frozen for up to three months. You now know how to make delicious Greek yogurt lemon bars. We covered the key ingredients, easy steps, and tips for the perfect treat. I shared variations to suit your taste and smart ways to store them. Remember, fresh lemon juice and zest are vital for flavor. Enjoy making these lemon bars for yourself or to share with friends. They are refreshing and delightful any time.

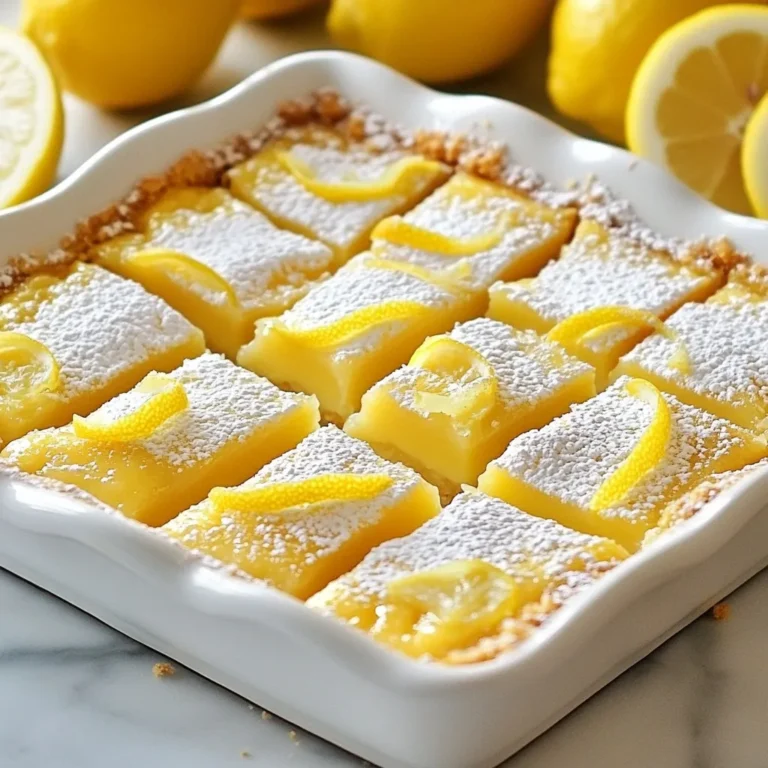
Greek Yogurt Lemon Bars Tangy and Refreshing Delight

To make a great Southwest Chicken Pasta Salad, gather these ingredients: - 2 cups rotini pasta - 1 lb cooked chicken breast, shredded - 1 can black beans, rinsed and drained - 1 cup corn (fresh or frozen) - 1 red bell pepper, diced - 1 cup cherry tomatoes, halved - 1 avocado, diced - 1/4 cup red onion, finely chopped - 1/3 cup cilantro, chopped - 1/2 cup Greek yogurt - 2 tablespoons lime juice - 1 teaspoon cumin - 1 teaspoon smoked paprika - Salt and pepper to taste - Optional: Crushed tortilla chips for topping Using fresh ingredients can enhance flavor and texture. Fresh corn and peppers taste brighter. Frozen corn works well too. It’s convenient and still tasty. Rinse and drain frozen corn before adding it. Use fresh tomatoes and avocado for the best taste. They add color and creaminess to the salad. If you have dietary needs or want some variety, swap out some ingredients. Try quinoa instead of rotini pasta. It adds protein and a nutty flavor. For a different protein, use shredded turkey or canned tuna. You can also use diced cucumber in place of avocado for a crunch. If you don’t have Greek yogurt, sour cream or a dairy-free option works. Get creative with spices too! Add chili powder for more heat or garlic powder for extra flavor. {{ingredient_image_1}} First, bring a large pot of salted water to a boil. Add 2 cups of rotini pasta. Cook until al dente, about 8-10 minutes. Once done, drain the pasta. Rinse it under cold water to stop the cooking. This keeps it firm and fresh. In a big bowl, mix the cooked pasta with 1 pound of shredded chicken. Add 1 can of black beans, rinsed and drained. Toss in 1 cup of corn, 1 diced red bell pepper, and 1 cup of halved cherry tomatoes. Next, add 1 diced avocado, 1/4 cup of finely chopped red onion, and 1/3 cup of chopped cilantro. Stir gently to combine all the ingredients well. In a separate bowl, whisk together 1/2 cup of Greek yogurt with 2 tablespoons of lime juice. Add 1 teaspoon of cumin and 1 teaspoon of smoked paprika to the mix. Season with salt and pepper to taste. Whisk until smooth and creamy. Pour the dressing over the pasta and chicken mixture. Gently toss everything together until all ingredients are coated. Taste the salad and adjust seasoning if needed. Cover the bowl and refrigerate for at least 30 minutes. This helps the flavors blend perfectly. Just before serving, you can sprinkle crushed tortilla chips on top for added crunch! To make your Southwest Chicken Pasta Salad shine, balance the flavors. Use fresh lime juice for a bright taste. Cumin adds warmth, while smoked paprika gives a nice depth. Taste the salad as you mix. Adjust salt and pepper to suit your liking. Add more lime juice for a zesty kick. Fresh cilantro brings a refreshing touch, so don’t skip it! Cook the rotini pasta until it's al dente. This ensures your pasta holds its shape. Rinse it under cold water to stop the cooking. For the chicken, use cooked breast for ease. Shred it or chop it into bite-sized pieces. This helps mix it well with other ingredients. If you want more flavor, marinate the chicken with lime juice and spices before cooking. Serve your salad in a large bowl for sharing. You can also plate it individually for a nice touch. Garnish with extra cilantro and lime wedges on the side. This adds color and invites your guests to dig in. For crunch, sprinkle crushed tortilla chips on top just before serving. This keeps them crispy and enhances the texture. Pro Tips Cook Pasta Al Dente: Ensure your rotini is cooked al dente to maintain a firm texture in the salad. Fresh Ingredients: Use fresh ingredients whenever possible for the best flavor, especially the avocado and cilantro. Customize the Dressing: Feel free to add a pinch of chili powder or hot sauce to the dressing for an extra kick. Chill Before Serving: Refrigerate the salad for at least 30 minutes to help the flavors meld together beautifully. {{image_2}} To make a vegetarian version, swap the chicken for more beans. You can use a mix of black beans and pinto beans. This keeps the protein high while making it meat-free. Also, feel free to add more veggies. Diced zucchini, bell peppers, or even grilled corn can add color and crunch. A sprinkle of feta cheese can give it a nice salty kick too. If you want more protein, try adding cooked quinoa or chickpeas. Both options blend well with the other flavors. You can also use shredded rotisserie chicken for a quick fix. If you like seafood, cooked shrimp or diced fish can work great. Just make sure to adjust the seasoning to match the added protein. While the yogurt dressing is creamy and tangy, you can switch it up. Try a vinaigrette made with olive oil, lemon juice, and a touch of honey. This gives a zesty vibe. For a kick, mix in some salsa or hot sauce. You could also use ranch dressing for a creamy, herby flavor. Just remember to mix it well with the ingredients to coat everything evenly. After making your Southwest Chicken Pasta Salad, store it in an airtight container. This helps keep the salad fresh. It will last about 3 to 5 days in the fridge. Always check for any off smells or changes in texture before eating. If you notice these signs, it's best to toss it. You can freeze the salad, but some ingredients do not freeze well. The avocado and tomatoes will get mushy when thawed. If you want to freeze it, skip adding fresh avocado and tomatoes. Store the salad in a freezer-safe container for up to 2 months. When ready, thaw it in the fridge overnight. If you stored the salad in the fridge, give it a good stir before serving. You can enjoy it cold or at room temperature. If you prefer it warm, microwave it for about 30 seconds. Stir it and check the temperature. Avoid reheating multiple times to keep it fresh and tasty. To make this salad, start by cooking rotini pasta. Cook it until it’s al dente, then drain and rinse it with cold water. In a big bowl, mix the pasta, shredded chicken, black beans, corn, red bell pepper, cherry tomatoes, avocado, red onion, and cilantro. In another bowl, whisk Greek yogurt, lime juice, cumin, smoked paprika, salt, and pepper. Pour this dressing over the pasta salad and toss everything together. Chill it in the fridge for at least 30 minutes. You can add crushed tortilla chips before serving for extra crunch. If you want a different option, try sour cream or cottage cheese. Both give a creamy texture. You can also use dairy-free yogurt if needed. Another choice is buttermilk, but it will change the salad's texture a bit. Just make sure whatever you choose has a similar creaminess. This salad stays fresh for about 3 to 4 days in the fridge. Keep it in an airtight container to maintain its taste and quality. If you notice any changes in color or smell, it’s best to throw it out. Yes, you can use any pasta shape you like! Penne, fusilli, or bow ties work well. Just adjust the cooking time based on the pasta type. Whole wheat or gluten-free pasta are also great choices for added nutrition. In this post, we covered how to create a delicious Southwest Chicken Pasta Salad. We went through the essential ingredients, cooking steps, and unique variations. You now have tips to enhance flavor and serving ideas. Don't forget about storage tips to keep it fresh. With this knowledge, you can make a tasty and colorful dish that everyone will enjoy. Dive into making your salad your way, and impress friends and family with your skills!

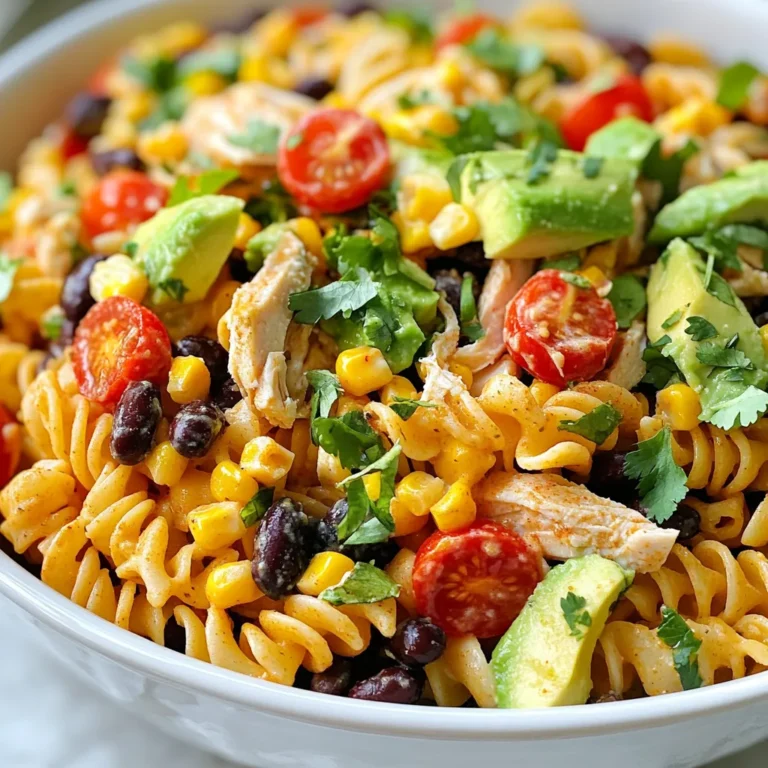
Savory Southwest Chicken Pasta Salad Fresh and Simple

- 2 cups cooked shredded chicken or black beans - 2 cups enchilada sauce (store-bought or homemade) - 1 can (15 oz) black beans, rinsed and drained - 1 can (15 oz) corn, drained - 3 cups tortillas, cut into strips - 2 cups shredded cheddar cheese - 1 cup diced bell peppers (red and green) - 1 cup diced onion - 1 teaspoon ground cumin - 1 teaspoon chili powder - Salt and pepper to taste - Fresh cilantro for garnish (optional) Gathering these ingredients makes your Cheesy Enchilada Casserole a breeze. You can choose cooked shredded chicken or black beans based on your taste. The black beans add a rich, earthy flavor. Using both enchilada sauce and the beans gives a nice depth of taste. I like to use a mix of red and green bell peppers. They add color and a sweet crunch. Diced onion brings a lovely aroma, making your kitchen smell amazing. The key spices, cumin and chili powder, boost the flavor. Don't forget salt and pepper! They help bring everything together. Lastly, fresh cilantro offers a pop of brightness when you serve. This dish is packed with flavor and feels like a warm hug on a plate. {{ingredient_image_1}} - Preheat oven to 350°F (175°C). - In a large bowl, combine 2 cups of cooked shredded chicken (or black beans), 1 can of black beans, 1 can of corn, 1 cup of diced bell peppers, 1 cup of diced onion, 1 teaspoon of ground cumin, 1 teaspoon of chili powder, and add salt and pepper to taste. Mix well. - Spread a thin layer of enchilada sauce across the bottom of a 9x13 inch baking dish. - Place a portion of tortilla strips over the sauce. Next, add half of the chicken and bean mixture and pour a third of the enchilada sauce over that. Sprinkle 1 cup of shredded cheese on top. - Repeat the layering: more tortilla strips, the rest of the chicken and bean mixture, more enchilada sauce, and the last cup of cheese. - Cover the casserole with aluminum foil and bake for 25 minutes. - After 25 minutes, remove the foil and bake for another 10-15 minutes. Bake until the cheese is bubbly and golden brown. Remove from the oven and let it cool for 5 minutes before serving. To get the best texture, cook your ingredients before layering. This step helps blend flavors and ensures tenderness. For example, sauté the onions and peppers to soften them. It makes a big difference! One common issue is soggy tortillas. To avoid this, make sure your tortillas are not too wet. If you use store-bought tortillas, let them dry out a bit. This keeps them from getting mushy in the oven. Cheesy Enchilada Casserole pairs well with sides like rice or a fresh salad. The rice adds a nice texture, while the salad brings a crisp bite. For garnishes, fresh cilantro is a great choice. It adds a pop of color and flavor. You can also top it with sour cream or sliced jalapeños for extra zing. One mistake is under or over seasoning your dish. Make sure to taste as you go and adjust salt and spices as needed. This ensures a well-balanced flavor. Another mistake is layering incorrectly. Always start with sauce, then tortillas, and finish with cheese on top. This helps everything cook evenly and keeps the cheese from burning. Getting these layers right will give you a delicious, cheesy casserole every time! Pro Tips Use Homemade Enchilada Sauce: Making your own enchilada sauce can elevate the flavor of the casserole significantly. Plus, you can control the spice level! Layering Technique: Ensure each layer is evenly distributed for consistent flavor and texture throughout the casserole. Don't skip the sauce between layers! Cheese Variations: Feel free to mix different types of cheese like Monterey Jack or pepper jack to add depth and a spicy kick to your casserole. Make Ahead: This casserole can be assembled ahead of time and stored in the refrigerator. Just add a few extra minutes to the baking time when you’re ready to cook it. {{image_2}} You can easily make this dish meat-free. Start by using black beans or lentils instead of chicken. Both options add protein and flavor. Adding extra vegetables like zucchini, spinach, or mushrooms can boost nutrition and taste. The more veggies, the better! If you prefer meat, consider using ground beef, turkey, or even shredded pork. Each option brings its own unique flavor. For a plant-based choice, you can substitute with tofu. Just crumble it into the filling mix for a hearty bite. Cheese lovers have many choices! While cheddar is a classic, you can try Monterey Jack or pepper jack for a twist. If you're lactose intolerant, there are great dairy-free cheese options available. Look for brands that melt well, so you still get that gooey goodness. After you enjoy your Cheesy Enchilada Casserole, store the leftovers properly. First, let the casserole cool completely. Then, place it in an airtight container. You can also cover it tightly with plastic wrap or aluminum foil. This keeps the flavors fresh. If you want to freeze the casserole, do it before baking. Assemble the layers as directed but skip the baking step. Cover the dish tightly with plastic wrap and then with foil. This prevents freezer burn. When you are ready to eat, let it thaw in the fridge overnight. Then, bake at 350°F (175°C) for about 35-40 minutes. In the fridge, the casserole lasts for about 3-4 days. If you freeze it, it can stay good for up to 3 months. Just remember to label your containers with the date. This way, you always know how long it has been stored. Yes, you can make this dish ahead of time. To do this, prepare the casserole as usual. Do not bake it right away. Instead, cover it with foil and place it in the fridge. This way, the flavors can blend overnight. When you're ready to bake, just add about 10 extra minutes to the baking time. This ensures everything heats up nicely. Making your own enchilada sauce is easy! Here’s a quick recipe: - 2 tablespoons olive oil - 2 tablespoons chili powder - 1 teaspoon ground cumin - 1 can (15 oz) tomato sauce - 1 cup water - Salt to taste 1. Heat olive oil in a pot over medium heat. 2. Add chili powder and cumin. Stir for 1 minute. 3. Pour in tomato sauce and water. Mix well. 4. Add salt to taste and let simmer for 10 minutes. This quick sauce adds a fresh touch to your casserole. If you need alternatives to tortillas, try these options: - Corn tortillas: A classic choice for flavor. - Zucchini slices: For a low-carb option, use thin slices of zucchini. - Cauliflower rice: This adds a nice base and is gluten-free. - Lettuce leaves: Use them for a fresh, crunchy layer. These options keep the dish tasty while meeting different dietary needs. This blog post covered how to make a tasty Cheesy Enchilada Casserole. We discussed the ingredients you'll need and the step-by-step process to prepare it. I shared tips to perfect the dish and offered variations for different tastes. Proper storage guidelines also help you enjoy leftovers. In closing, this casserole is easy and fun to make. It’s versatile, so you can change it to fit your needs. Enjoy your cooking adventure with this delicious meal!

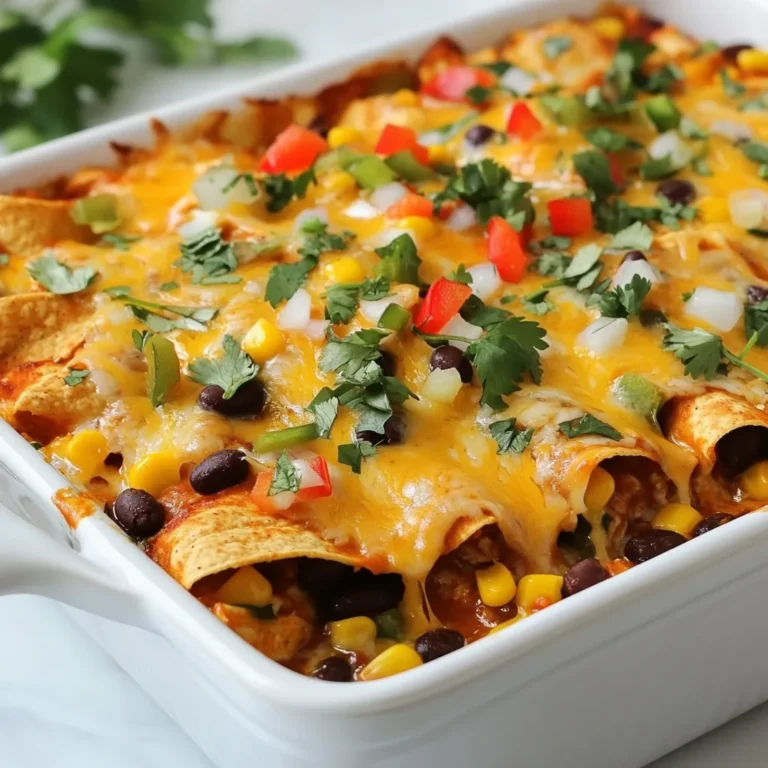
Cheesy Enchilada Casserole Flavorful Comfort Dish

- 2 cups all-purpose flour - 1/4 cup granulated sugar - 1 tablespoon baking powder - 1/2 teaspoon salt - 1/2 cup cold unsalted butter, cubed - 1/2 cup fresh blackberries, halved - Zest of 1 lime - 1/4 cup heavy cream - 1 large egg - 1 teaspoon vanilla extract - Juice of 1 lime - Extra cream for brushing - Coarse sugar for sprinkling When measuring flour, use the spoon and level method. This helps avoid packed flour. Spoon the flour into a measuring cup, then level it off. For sugar, make sure to pack it lightly in the cup. The butter should be cold to help create flaky layers in the scones. I recommend using fresh, ripe blackberries for the best flavor. Look for plump, firm berries. For butter, choose high-quality unsalted butter for better control over the salt in your scones. For heavy cream, use a brand that you trust. It makes a difference in richness. You can find coarse sugar at most grocery stores; it's great for that crunchy top. {{ingredient_image_1}} Start by preheating your oven to 400°F (200°C). This heat makes the scones rise nicely. Next, line a baking sheet with parchment paper. This helps the scones not stick while baking. In a large bowl, add 2 cups of all-purpose flour, 1/4 cup of granulated sugar, 1 tablespoon of baking powder, and 1/2 teaspoon of salt. Use a whisk to mix these together well. This step ensures even flavor in every bite. Now, take 1/2 cup of cold, cubed butter and add it to the flour mix. Use your fingers or a pastry cutter to blend the butter until it looks like coarse crumbs. Then, gently fold in the zest of 1 lime and 1/2 cup of halved blackberries. Be gentle here to keep the berries whole. In another bowl, whisk together 1/4 cup of heavy cream, 1 large egg, 1 teaspoon of vanilla extract, and the juice of 1 lime. Mix until smooth. This combination adds moisture and flavor to the scones. Pour the wet mix into the dry ingredients. Stir until just combined. Don’t overmix; the dough should feel slightly sticky. Turn the dough onto a lightly floured surface. Shape it into a circle about 1-inch thick. Cut the dough into wedges or use a round cutter for nice shapes. Transfer the scones to your prepared baking sheet. Brush the tops with extra cream and sprinkle coarse sugar on them. Bake for 15-20 minutes. Keep an eye on them, looking for a golden-brown color. Once done, let them cool on the baking sheet for a few minutes before moving them to a wire rack. Enjoy your warm, flavorful scones! To make great scones, use cold butter. Cold butter helps create a flaky texture. Cut the butter quickly into the flour. You want small crumbs. Mix gently to keep the blackberries whole. Overmixing can lead to tough scones. Shape the dough carefully, too. A gentle touch keeps the scones light. Brush with cream for a golden top. Sprinkle sugar to add a sweet crunch. One common mistake is overmixing the dough. This can make your scones hard. Another is using warm butter. Always ensure your butter is cold. Also, don’t skip the baking powder. It helps the scones rise. Finally, watch the baking time closely. Every oven is different. You want the scones golden but not burnt. Pair your scones with tea or coffee. A light herbal tea works well with the lime flavor. Try serving them with lemonade for a refreshing twist. If you like something stronger, a light sparkling wine can be nice. These drinks enhance the scone's fruity taste. Enjoy your scones warm for the best experience! Pro Tips Chill Your Ingredients: For the best texture, make sure your butter and cream are cold. This helps create flaky layers in your scones. Don’t Overmix: Mix the dough just until combined. Overmixing can lead to dense scones rather than light and fluffy ones. Use Fresh Blackberries: Fresh blackberries will provide the best flavor and texture. If using frozen, do not thaw them before adding to the dough. Experiment with Flavors: Feel free to substitute the lime with lemon or experiment with other berries for a unique twist on this classic recipe. {{image_2}} You can swap blackberries for other fruits. Raspberries bring a nice tart flavor. Strawberries add sweetness and color. Blueberries provide a juicy burst. Each fruit gives a unique taste to your scones. Try adding spices for extra flavor. A pinch of cinnamon can give warmth. Nutmeg adds a cozy touch. You can also mix in chopped nuts for crunch. Lemon zest brightens the flavors, too. To make gluten-free scones, use a gluten-free flour blend. Look for one that has xanthan gum for texture. You might need to add a bit more liquid. Always check the blend's instructions for best results. These adaptations keep your scones soft and tasty. After baking, let the scones cool on a wire rack. Once cool, place them in an airtight container. Store them at room temperature for up to three days. If you want them to last longer, you can refrigerate them, but this may change their texture. To enjoy leftover scones, preheat your oven to 350°F (175°C). Place the scones on a baking sheet. Heat them for about 5 to 10 minutes. This helps restore their fresh texture. You can also microwave them for about 15 seconds, but they may not be as crisp. If you want to freeze scones, wrap each one tightly in plastic wrap. Then, place them in a freezer bag. They can stay frozen for up to two months. To thaw, move them to the fridge overnight. Then, reheat as mentioned above for the best results. Yes, you can use frozen blackberries. They work well in scones. Just do not thaw them. Add them straight to the dough. This way, they keep their shape, and your scones stay light and fluffy. To make scones less crumbly, avoid overmixing the dough. Mix just until combined. Also, ensure your butter is cold. This helps create a nice texture. Adding a bit more cream can help, too. If you need a substitute for heavy cream, try using whole milk mixed with butter. Mix 1/4 cup of butter with 3/4 cup of whole milk. For a lighter option, use half and half. This gives a nice texture without heavy cream. To know if your scones are done, look for a golden-brown color. Insert a toothpick in the center. If it comes out clean, the scones are ready. They should also feel firm but spring back slightly when touched. This article covers how to make great scones step by step. We discussed key ingredients, measurements, and product tips. I shared easy methods to prepare the oven, mix ingredients, and check for doneness. Remember these tips to avoid common mistakes. Explore variations for added flavor, and learn storage and reheating methods. Baking scones can be fun and rewarding. With practice, you’ll master them in no time. Enjoy your baking journey!

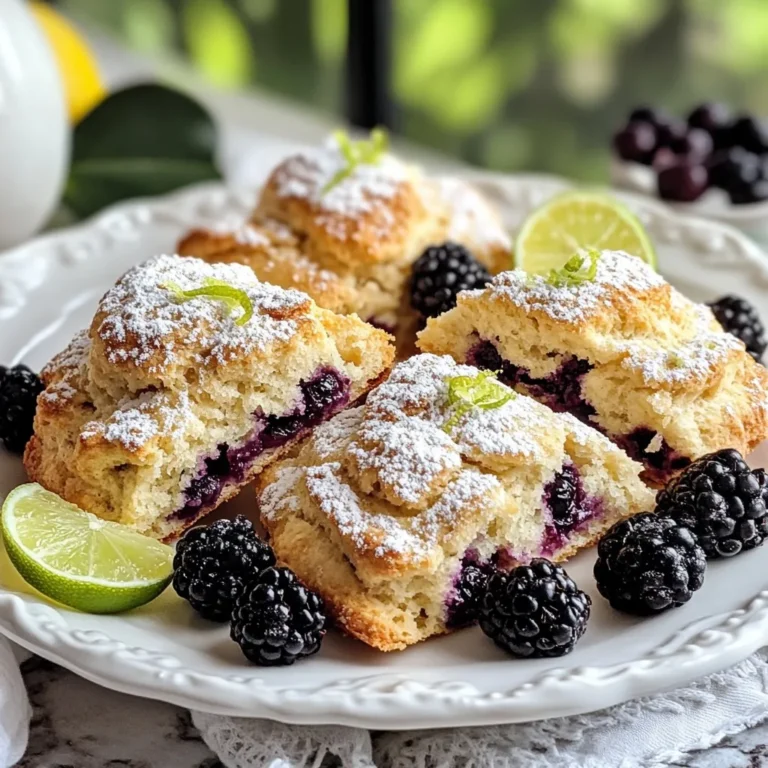
Blackberry Lime Scones Simple and Flavorful Treat

- 200g linguine pasta - 400g large shrimp, peeled and deveined - 4 tablespoons olive oil - 4 cloves garlic, minced - Juice and zest of 1 lemon - 1/2 teaspoon red pepper flakes (optional) - 1/2 cup cherry tomatoes, halved - 1/4 cup fresh parsley, chopped - Salt and pepper to taste - Grated Parmesan cheese for serving (optional) For this dish, you need a few key ingredients. Each one adds its own flavor. The linguine pasta serves as the base. The large shrimp brings a sweet taste and nice texture. Olive oil gives richness. Garlic adds a bold kick. Lemon brightens the dish with its zesty notes. Red pepper flakes can add a touch of heat, but you can skip them if you prefer a milder taste. Cherry tomatoes add a burst of sweetness and color. Fresh parsley brings freshness to the plate. Salt and pepper season everything to perfection. Lastly, Parmesan cheese is optional, but it can add a creamy finish. Gather these ingredients, and you’re ready for a flavorful dinner! {{ingredient_image_1}} To start, fill a large pot with water. Add a good amount of salt. Bring the water to a rolling boil. Once boiling, add 200g of linguine pasta. Cook it according to the package instructions. Aim for al dente, which usually takes about 8 to 10 minutes. When done, reserve 1/2 cup of pasta water. Drain the rest and set the linguine aside. Next, heat 2 tablespoons of olive oil in a large skillet over medium heat. Once hot, add 400g of large shrimp. Season the shrimp with salt, pepper, and red pepper flakes if you like spice. Cook the shrimp for about 2-3 minutes on each side. They should turn pink and opaque. Remove the shrimp from the skillet and set them aside. In the same skillet, add 2 more tablespoons of olive oil. Then, add 4 cloves of minced garlic. Sauté the garlic for about 1 minute until it smells great. After that, toss in 1/2 cup of halved cherry tomatoes. Cook the tomatoes for another 2-3 minutes until they soften. Now, return the shrimp to the skillet. Add the cooked linguine, juice, and zest of 1 lemon. Toss everything well to mix. If the dish seems dry, add some of the reserved pasta water. This helps to reach the right consistency. Remove the skillet from the heat. Stir in 1/4 cup of chopped fresh parsley. Taste the dish and adjust seasoning with salt and pepper if needed. To serve, plate the linguine in bowls. You can top it with grated Parmesan cheese if you want. A sprinkle of extra parsley adds a nice touch too. Enjoy your flavorful dinner delight! To boost the flavor of your Lemon Garlic Shrimp Linguine, consider adding spices. Try a touch of smoked paprika for a warm kick. You can also mix in a pinch of cayenne for extra heat. For herbs, fresh basil or dill works well. Both herbs add a lovely aroma and taste. If you want a twist, add some fresh thyme or oregano for depth. How do you know when shrimp is cooked? Look for a pink color and a firm texture. Shrimp should curl into a C shape when done. This means they are not overcooked. To prevent overcooking, cook shrimp quickly. They usually take about 2-3 minutes on each side. Don’t walk away while they cook. Shrimp cooks fast, so stay near! Achieving the right texture for your linguine is key. Cook it al dente, which means it should be firm but not hard. This gives the best bite with the sauce. If your sauce seems thick, add some reserved pasta water. This water has starch and helps thin the sauce nicely. Adjust little by little until you reach the desired consistency. Pro Tips Use Fresh Shrimp: Fresh shrimp will provide the best flavor and texture. If using frozen, ensure they are fully thawed and drained before cooking. Perfect Pasta Cooking: Always reserve some pasta water before draining. This starchy water helps to bind the sauce and pasta together for a creamier texture. Adjust the Heat: If you prefer a spicier dish, feel free to add more red pepper flakes or even a splash of hot sauce to amp up the flavor. Herb Substitutions: If fresh parsley isn't available, basil or cilantro can be a great alternative for a different flavor profile in this dish. {{image_2}} For a gluten-free option, swap linguine with gluten-free pasta. Many brands offer great alternatives. They work well with the same cooking method. If you want a dairy-free dish, skip the Parmesan cheese. Instead, garnish with extra parsley for flavor. You can also use nutritional yeast for a cheesy taste without dairy. You can substitute shrimp with chicken or scallops. Chicken needs a bit more cooking time. Scallops cook quickly and add a sweet flavor. Different pasta types are also great. Try fettuccine or spaghetti if you want a change. Each type will give a new twist to the dish. Incorporating other vegetables can boost nutrition. Spinach or zucchini adds color and texture. Sauté them briefly with garlic before adding shrimp. For different citrus flavors, try lime or orange juice. They add a unique taste to the dish. Just remember to adjust the amount to keep the balance. To keep your Lemon Garlic Shrimp Linguine fresh, place it in an airtight container. This helps to seal in flavor and moisture. You can store it in the fridge for up to three days. After that, the quality may decline. When reheating, you have two main choices: the microwave or the stovetop. If you use the microwave, heat in short bursts. Stir it in between to warm evenly. For stovetop, use low heat and add a splash of water. This prevents it from drying out. Stir often until warm. Yes, you can freeze this dish! However, it’s best to freeze it without the shrimp. Cook the shrimp fresh when you reheat. Store in a freezer-safe container for up to three months. When ready to eat, thaw in the fridge overnight. Reheat and enjoy! You can easily make this dish ahead of time. Start by cooking the linguine and shrimp as directed. After cooking, let them cool. Store them in separate containers in the fridge. This way, they won't get mushy. You can mix them together when you are ready to eat. Just reheat in a skillet with a bit of olive oil and garlic. This keeps the flavors bright. You can serve this dish with many sides. A fresh green salad pairs well. You might also enjoy garlic bread for some crunch. Roasted vegetables add healthy color. A light white wine can enhance your meal too. Choose sides that balance the rich flavors of the shrimp. Yes, frozen shrimp work great in this recipe. Just make sure to thaw them first. You can do this overnight in the fridge or quickly in cold water. Once thawed, peel and devein them if needed. Then, follow the recipe as usual. This makes it easy to enjoy the dish any time. Store any leftovers in an airtight container. Keep it in the fridge for up to three days. If you want to save it longer, you can freeze it. Just make sure to use a freezer-safe container. When reheating, add a splash of water or oil to keep it moist. Enjoy it again without losing taste. You learned to create a tasty Lemon Garlic Shrimp Linguine. We covered key ingredients, cooking steps, and storage tips. You can tweak flavors and make it your own with different herbs or veggies. Remember, cooking shrimp is about timing to keep it juicy. Enjoy this dish fresh, but know how to store leftovers for later. With these tips and tricks, you’re ready to impress anyone at the table. This meal is easy to make and delicious, so get cooking!

Lemon Garlic Shrimp Linguine Flavorful Dinner Delight

To make Cinnamon Sugar Apple Chips, you need: - 3 medium apples (like Honeycrisp or Fuji) - 1 tablespoon lemon juice The flavor comes from: - 1 teaspoon cinnamon - 2 tablespoons granulated sugar - A pinch of salt These ingredients create that sweet and warm taste we all love. You can switch things up by using different apples. Try Granny Smith for a tart flavor. You may also add nutmeg for a warm twist. If you want a healthier option, use honey or agave syrup instead of granulated sugar. Each choice brings a new taste to your chips. {{ingredient_image_1}} First, gather your ingredients. You need: - 3 medium apples (like Honeycrisp or Fuji) - 1 tablespoon lemon juice - 1 teaspoon cinnamon - 2 tablespoons granulated sugar - Pinch of salt Wash and dry the apples well. This step is key for good flavor. Use a sharp knife or a mandoline slicer to cut the apples into thin rounds. Aim for slices that are about 1/8-inch thick. Don’t forget to remove any seeds. Now, let's make that cinnamon sugar mix. In a small bowl, combine the cinnamon, sugar, and a pinch of salt. This mix adds a sweet and spicy kick to the chips. Next, toss the apple slices with lemon juice. This step helps keep the apples from turning brown. Now, lay the apple slices flat on a baking sheet lined with parchment paper. Make sure they don’t overlap. Sprinkle the cinnamon sugar mix evenly over the slices. Every chip should get some flavor. Preheat your oven to 225°F (110°C) and place the baking sheet inside. Bake for 1.5 to 2 hours. Flip the chips halfway through. They will turn crisp and light golden as they bake. Once baked, remove the chips from the oven. Allow them to cool completely on the baking sheet. This cooling time helps them get even crispier. For serving, present the apple chips in a nice bowl. Add a sprinkle of cinnamon on top for flair. You can also place a few fresh apple slices around the bowl. If you want to gift these chips, package them in cellophane bags. They make a sweet and crunchy treat! To get your apple chips nice and crispy, thin slices are key. Aim for 1/8-inch thick slices. Use a sharp knife or a mandoline slicer. Even thickness helps them cook evenly. Bake them slowly at 225°F. This low heat lets them dry out without burning. Flip the chips halfway through baking. This ensures both sides get crispy. Let them cool completely after baking. They will get crunchier as they cool. Apples can brown fast after cutting. To stop this, toss your slices in lemon juice right away. The acid in lemon juice slows down browning. You can also soak them in a lemon-water mix for a few minutes. This keeps your apple chips looking fresh and tasty. Remember, fresh ingredients make a big difference in flavor! If you have leftover apple chips, store them in an airtight container. This keeps them crispy longer. Make sure they are fully cool before sealing. If they are not, moisture builds up, and they will get soggy. You can keep them at room temperature for up to a week. For longer storage, try putting them in the fridge. They make a great snack anytime! Pro Tips Choose the Right Apples: Honeycrisp and Fuji are excellent choices due to their sweetness and crunch, but feel free to experiment with other varieties for different flavors. Uniform Slicing: Use a mandoline slicer for even thickness to ensure all chips bake at the same rate, resulting in a perfectly crisp texture. Storage Tips: Store your apple chips in an airtight container to maintain their crispness. Adding a silica gel packet can help absorb moisture. Flavor Variations: Experiment by adding other spices like nutmeg or ginger to the cinnamon sugar mixture for a unique twist on the classic flavor. {{image_2}} You can change the flavor of your apple chips. Try adding nutmeg for a warm, cozy taste. Just mix a pinch with the cinnamon and sugar. You can also add vanilla extract. Use a few drops in the lemon juice before tossing it with the apples. This gives a sweet, rich flavor. If you want a healthier option, use honey or maple syrup instead of sugar. Brush the sliced apples lightly with honey or drizzle the syrup on top. This adds a nice sweetness. You can also try stevia or agave syrup for a low-calorie choice. Adjust the amount to taste. Different apples can change the taste of your chips. Honeycrisp apples are sweet and crunchy. Fuji apples are also sweet but a bit softer. If you prefer tart flavors, try Granny Smith apples. They add a nice contrast to the sweet cinnamon sugar. Experiment to find your favorite apple for this snack! Cinnamon and apples pack a healthy punch. Apples are full of fiber, which helps digestion. They also have vitamins that support your heart. Cinnamon has antioxidants that help fight disease. It can help keep your blood sugar steady. Together, they make a tasty snack that is good for you. One serving of cinnamon sugar apple chips has about 120 calories. This comes from the apples and the sugar mix. Each apple you use adds about 80 calories. The sugar adds another 30 calories per serving. This snack is lower in calories than many store-bought options. Homemade apple chips are fresher and healthier. You control the ingredients. Store-bought chips often have added preservatives and more sugar. Homemade chips let you enjoy pure flavors without extra stuff. You also save money by making them at home. Plus, they taste better when they are fresh out of the oven. To make Cinnamon Sugar Apple Chips, start by preheating your oven to 225°F (110°C). Wash and dry three medium apples, like Honeycrisp or Fuji. Use a sharp knife or mandoline slicer to cut the apples into thin rounds, about 1/8-inch thick. Remove any seeds you find. In a bowl, mix 1 teaspoon of cinnamon, 2 tablespoons of sugar, and a pinch of salt. In another bowl, toss the apple slices with 1 tablespoon of lemon juice to stop browning. Lay the slices in a single layer on a baking sheet lined with parchment paper. Sprinkle the cinnamon sugar mix evenly over the apples. Bake for 1.5 to 2 hours, flipping halfway through. They are done when crisp and slightly golden. Let them cool completely to become extra crunchy. Yes, you can use other fruits for chips! Try pears, bananas, or even sweet potatoes. Each fruit has its own unique taste and texture. Slice them thinly, just like you do with apples. The baking time might change based on the fruit you choose. Always check for crispness as they bake. Homemade apple chips can last for about 1 to 2 weeks if stored properly. Keep them in an airtight container at room temperature. For longer storage, you can place them in the fridge. If they lose some crunch, you can bake them again for a few minutes to refresh them. This blog post covered how to create tasty cinnamon sugar apple chips. We explored key ingredients, preparation tips, and baking steps. I shared ways to enhance flavor and prevent browning, ensuring perfect crispiness. You learned about health benefits and compared homemade chips to store-bought options. Now, you can enjoy a fun snack that's both tasty and healthy. Try different apples and spices to make it your own. Happy baking!

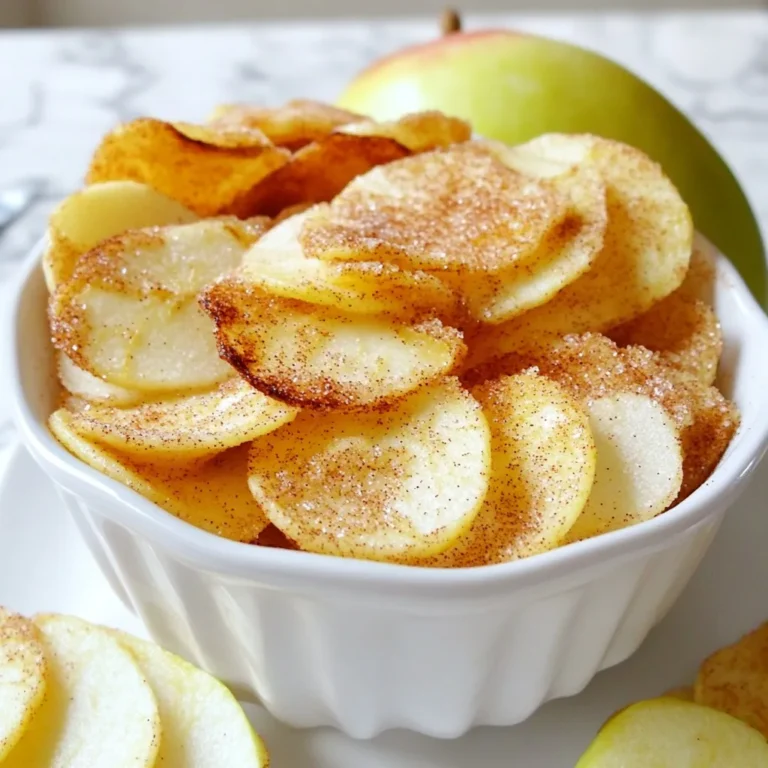
Cinnamon Sugar Apple Chips Crunchy and Delicious Snack

- 2 ripe mangoes, diced - 1 cup pineapple chunks (fresh or canned, drained) - 1 red bell pepper, diced - 1 small red onion, finely chopped - 1 jalapeño, deseeded and minced - 1 cup cucumber, diced - 1/4 cup fresh cilantro, chopped - Juice of 2 limes - 2 tablespoons honey (or agave syrup for a vegan option) - Salt and pepper to taste In this tropical mango salad, I focus on fresh and colorful ingredients. Each item plays a key role in flavor and texture. Mangoes bring sweetness, while pineapple adds a tropical zing. The red bell pepper and cucumber provide a nice crunch. Together, they create a salad that is both fresh and vibrant. To prepare the dressing, I always use fresh lime juice. It gives the salad a bright taste. Honey adds a touch of sweetness, balancing the tang of lime. I also add salt and pepper for flavor. Adjusting these can make a big difference in the final taste. I recommend using ripe, fragrant mangoes. They should yield slightly to gentle pressure. This ensures they are sweet and juicy. For the best salad, use fresh ingredients whenever possible. Quality matters, and it shows in the taste. {{ingredient_image_1}} To start, you need to dice the mangoes. First, slice off the top and bottom. This helps the mango stand steady. Then, use a sharp knife to cut down the sides of the pit. Make long cuts in the flesh without cutting through the skin. Finally, scoop out the mango cubes with a spoon. Next, prepare the other fruits. If you use fresh pineapple, cut off the skin and core. Then, chop it into small chunks. Dice the red bell pepper and cucumber into small pieces. For the red onion, chop it finely. Lastly, take the jalapeño. Cut it in half, remove the seeds, and mince it finely. Now it's time to combine the main ingredients. In a large mixing bowl, add the diced mangoes, pineapple chunks, red bell pepper, red onion, jalapeño, and cucumber. Use a spatula to gently mix them together. For the lime dressing, grab a small bowl. Whisk the juice of two limes with honey and a pinch of salt and pepper. Mix until smooth and well combined. Pour the lime dressing over the mixed fruits and vegetables. Add the chopped cilantro to the bowl. Gently toss everything together, so the dressing coats all the ingredients evenly. Let the salad sit for 10-15 minutes. This helps the flavors meld together. After that, taste the salad. Adjust the seasoning with more salt or lime juice if needed. Enjoy your fresh and colorful tropical mango salad! To pick ripe mangoes, look for a few signs. First, check the color. A ripe mango often has a mix of yellow and red. Next, gently squeeze the mango. It should feel slightly soft but not mushy. The sweet smell near the stem also indicates ripeness. For deeper flavor, try different mango varieties. Haden or Tommy Atkins mangoes work great for salads. They offer sweetness and a unique taste that pairs well with other fruity flavors. When serving tropical mango salad, presentation is key. A large bowl makes a vibrant centerpiece. You can also serve it in individual bowls for a personal touch. Garnish with extra cilantro leaves for color. A lime wedge adds a fresh pop. You can even sprinkle some chili flakes for a hint of heat. These simple tricks make your salad look as good as it tastes! If you want to prepare the salad in advance, it’s easy. Store the salad in an airtight container in the fridge. This keeps it fresh for about one day. To keep the mangoes from browning, add lime juice just before serving. For the best flavor, make the salad no more than four hours ahead. This way, it stays bright and flavorful! Pro Tips Choose Ripe Mangoes: Make sure your mangoes are ripe for the best flavor. They should yield slightly to pressure and have a sweet aroma. Fresh Ingredients Matter: Use fresh fruits and vegetables whenever possible for maximum flavor and nutrition in your salad. Customize Spice Level: Adjust the amount of jalapeño based on your spice preference. You can also omit it for a milder salad. Chill Before Serving: For an extra refreshing treat, chill the salad in the refrigerator for 30 minutes before serving to enhance the flavors. {{image_2}} You can add protein to your tropical mango salad for a complete meal. Shrimp, chicken, or tofu work well. For shrimp, grill or sauté them until pink. Dice the chicken after cooking and mix it in. If you choose tofu, use firm tofu. Press it to remove excess water, then cube it. This will boost your salad's nutritional value. For a vegan option, try chickpeas or lentils. They add protein and fiber without any animal products. Adding more fruits can brighten this salad. Try adding strawberries, kiwi, or oranges. These fruits will add color and sweetness. For a bit of spice, consider adding fresh mint or basil. Chopped mint gives a refreshing taste. You can also add a pinch of chili powder or cayenne for heat. This extra zing will make your salad pop. While the lime dressing is great, you can explore other flavors. A honey-lime vinaigrette adds sweetness and tang. Mix balsamic vinegar with olive oil for a rich taste. Creamy dressings can also be a fun twist. Try yogurt-based dressings for a smooth texture. For a vegan option, use cashew cream or tahini. These options will change the flavor and make the salad exciting. Store leftover tropical mango salad in an airtight container. This helps keep the salad fresh. Place it in the fridge right away. It stays good for about 1-2 days. The longer it sits, the softer the fruit gets. You may want to keep the dressing separate. This way, the salad stays crisp and bright. To maintain freshness, check the ingredients. Keep mangoes, pineapples, and cucumbers in the fridge. Store these fruits in a cool, dry spot. Avoid washing them until you are ready to use them. This helps prevent spoilage. Can you freeze tropical mango salad? No, it’s not ideal to freeze the whole salad. The texture of the fruits changes when thawed. However, you can freeze mangoes for future use. To freeze mangoes, first, peel and dice them. Spread the pieces on a baking sheet. Freeze them for a few hours until solid. Once frozen, transfer the mangoes to a freezer bag. Remove as much air as possible. They can stay fresh for about 6-12 months. Use the frozen mangoes in smoothies or desserts later. You can serve tropical mango salad with grilled chicken or fish. It pairs well with shrimp tacos. For a light meal, add it to a wrap or sandwich. This salad also goes great with rice dishes. Try it beside a bowl of quinoa for a healthy touch. Yes, tropical mango salad is very healthy. It contains fresh fruits and vegetables, which are low in calories. Mangoes are rich in vitamins A and C. The salad also has fiber from the cucumber and bell pepper. This mix helps with digestion and keeps you full longer. You can store tropical mango salad in the fridge for about 1 to 2 days. After that, the fruits may start to get soggy. To keep it fresh, store it in an airtight container. If you notice the veggies losing crunch, it's time to eat it! Yes, you can make tropical mango salad ahead of time. Prep it a few hours before your meal. Just keep the dressing separate until serving. This way, your salad stays fresh and crunchy. If you want to make it a day in advance, add lime juice to help preserve the flavors. This blog post outlined how to create a fresh tropical mango salad. We explored main and dressing ingredients, simple preparation steps, and smart tips for choosing and serving. Adding protein and flavor variations can enhance this dish further. You can even store leftovers properly to keep them fresh. This salad is a healthy choice and perfect for warm days, gatherings, or meal prep. Enjoy making it your own with different ingredients!

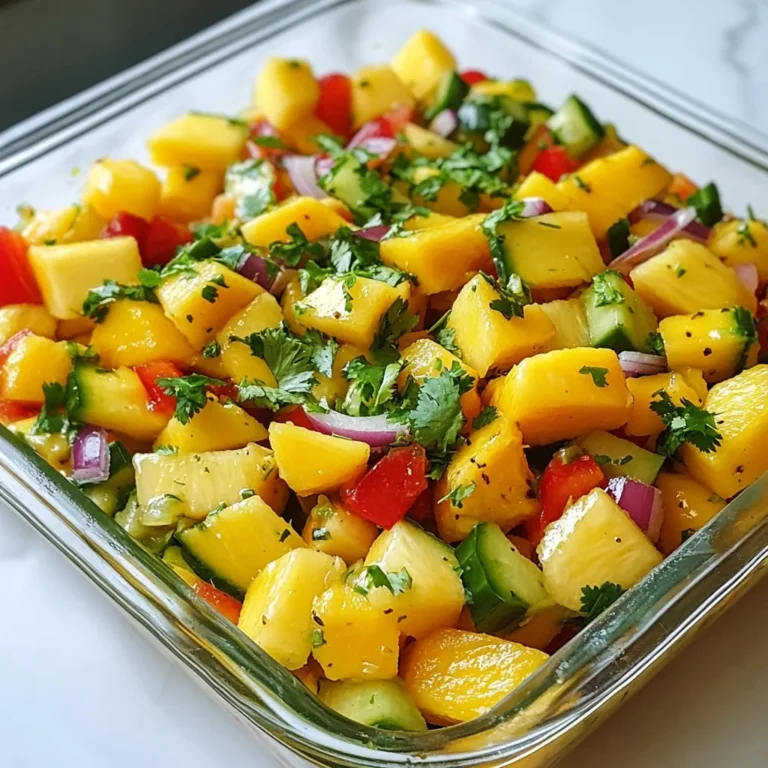
Tropical Mango Salad Fresh and Flavorful Delight

PREV 1 … 39 40 41 … 52 NEXT
cozy citrus kitchen

explore

DessertsDinnerAppetizersDrinks

Our Policies

  • Cookie Policy
  • Copyright Policy
  • Disclaimer
  • GDPR Policy
  • Terms Of Use
Back to Top
  • About
  • Contact Us
  • Privacy Policy
© 2025 cozy citrus kitchen