FREE DINNER EBOOK! Get your copy!
  • Cookie Policy
  • GDPR Policy
  • Disclaimer
  • Terms Of Use
  • Visit my other site: Fun Cookie Recipes
cozy citrus kitchen
  • Home
  • Dinner
  • Desserts
  • Drinks
  • Appetizers
  • Contact
  • About
  • Privacy Policy
  • Home
  • Dinner
  • Desserts
  • Drinks
  • Appetizers
  • Contact
  • About
  • Privacy Policy
  • Cookie Policy
  • GDPR Policy
  • Disclaimer
  • Terms Of Use
Visit my other site: Fun Cookie Recipes

HOME / CATEGORIES /

Latest

To make this Honey Mustard Brussels Sprouts Salad, you need: - 500g Brussels sprouts, trimmed and halved - 2 tablespoons olive oil - Salt and pepper to taste - 1/4 cup toasted walnuts, chopped - 1/4 cup dried cranberries - 1/4 cup feta cheese, crumbled - 3 tablespoons honey These ingredients bring together a mix of flavors and textures. The Brussels sprouts add crunch, while the walnuts give a nice nutty taste. The dried cranberries add sweetness, and the feta adds a creamy touch. For the dressing, gather these items: - 2 tablespoons Dijon mustard - 1 tablespoon apple cider vinegar - 1 teaspoon garlic powder - 1 teaspoon onion powder - Salt and pepper to taste This dressing is a blend of sweet and tangy. Honey and Dijon bring a zesty punch, while garlic and onion powder add depth. The apple cider vinegar brightens everything up. To finish your salad, consider these garnish options: - Fresh parsley - Additional nuts - More cheese Garnishing adds a pop of color and extra flavor. Fresh parsley gives a fresh taste, while extra nuts or cheese can make the dish even richer. {{ingredient_image_1}} 1. Preheat your oven to 200°C (400°F). This step is key to achieving crispy Brussels sprouts. 2. Trim and halve the Brussels sprouts. Remove any yellow leaves and cut each sprout in half. 3. In a large bowl, toss the halved Brussels sprouts with olive oil. Add salt, pepper, garlic powder, and onion powder. Make sure every sprout is coated well. 1. Spread the Brussels sprouts on a baking sheet. Arrange them in a single layer to ensure even cooking. 2. Roast in the oven for 20-25 minutes. Stir them halfway through for even browning. They should be crisp-tender and caramelized when done. 3. While they roast, prepare the honey mustard dressing. In a small bowl, whisk together honey, Dijon mustard, apple cider vinegar, salt, and pepper. Mix until smooth. 4. Once the Brussels sprouts are done, let them cool slightly. This takes about 5-10 minutes. It helps maintain their texture. 1. In a large serving bowl, combine roasted Brussels sprouts, toasted walnuts, dried cranberries, and feta cheese. This mix adds crunch and sweetness. 2. Drizzle the honey mustard dressing over the salad. Gently toss everything together to ensure all ingredients are coated. 3. Garnish with freshly chopped parsley. This adds a pop of color and freshness to your dish. Enjoy the vibrant flavors and textures of this Honey Mustard Brussels Sprouts Salad! To get the best flavor from your Brussels sprouts, start by cutting them in half. This helps them cook evenly. Toss them with olive oil, salt, and pepper before roasting. Spread them out on the baking sheet, so they don’t touch. This step ensures even roasting and caramelization. Roast them at 200°C (400°F) for 20-25 minutes. Stir them halfway through for the best results. You want them to be crisp-tender and golden brown. For the perfect honey mustard balance, mix three tablespoons of honey with two tablespoons of Dijon mustard. Add apple cider vinegar, salt, and pepper to taste. Whisk until smooth. If you want to make the dressing ahead, store it in the fridge. Use a sealed jar to keep it fresh. Just give it a good shake before serving. Make your salad stand out when serving. Use a large, colorful bowl to show off the layers. For a fun touch, add toasted walnuts and dried cranberries on top. Crumbled feta cheese adds a nice contrast too. You can even garnish with fresh parsley for a pop of color. This makes the salad look as good as it tastes, perfect for parties or gatherings. Pro Tips Choose Fresh Brussels Sprouts: Opt for firm, bright green Brussels sprouts for the best flavor and texture. Customize Your Nuts: Feel free to substitute walnuts with pecans or almonds for a different crunch and flavor. Enhance the Dressing: Add a pinch of cayenne pepper or a splash of lemon juice to the dressing for an extra kick. Serve Warm: This salad is best enjoyed warm; it allows the flavors to meld together beautifully. {{image_2}} You can change the nuts or cheese in this salad for a new taste. Instead of walnuts, try pecans or almonds. They add a crunchy texture and a different flavor. If you want a creamier taste, swap feta for goat cheese or blue cheese. Each option gives a unique twist to the dish. For honey and mustard, you have choices too. If you need a vegan option, use maple syrup instead of honey. For mustard, you could use whole grain mustard or even spicy brown mustard. Each choice changes the flavor, making it fun to experiment. Adding more vegetables or fruits can boost flavor and nutrition. Try adding thinly sliced radishes or roasted carrots for extra crunch. You can also toss in sliced apples or pears for sweetness. These additions keep the salad fresh and exciting. If you want a heartier salad, consider adding protein. Grilled chicken or chickpeas are great choices. They fill you up and make the salad a full meal. You can also try adding hard-boiled eggs for an extra boost of protein. You can adjust this salad based on what’s in season. In fall, add roasted squash or sweet potatoes for warmth. In spring, fresh peas or asparagus can brighten the salad. Summer allows for ripe tomatoes or cucumbers, which add a refreshing touch. Using seasonal ingredients keeps your salad vibrant and tasty all year round. To store leftover salad, place it in an airtight container. This keeps the salad fresh for up to three days. If you want to keep the Brussels sprouts crisp, store the dressing separately. This way, you avoid sogginess. When you're ready to eat, simply drizzle the dressing on top and toss. You may wonder, should you reheat roasted Brussels sprouts? I recommend not reheating them. Roasted Brussels sprouts taste best when served fresh. However, if you want to warm them, do so quickly in the oven for just a few minutes. For repurposing leftovers, add them to soups or omelets. This gives a new twist to your meal. To prepare salad for the week, roast a big batch of Brussels sprouts ahead of time. Store them in the fridge for easy access. Portion out the salad in containers. This makes it easy to grab a meal on busy days. You can mix the ingredients in advance but keep the dressing separate for the best taste. Trim the Brussels sprouts by cutting off the tough stem end. Remove any yellow or damaged leaves. Then, slice each sprout in half from top to bottom. This helps them cook evenly and allows for more surface area to caramelize, giving you a rich flavor. Yes, you can make this salad ahead of time. Roast the Brussels sprouts and let them cool. Store them in the fridge for up to two days. When ready to serve, toss them with the other ingredients and dressing. This keeps the salad fresh and tasty. Brussels sprouts are packed with nutrients. They are high in fiber, which aids digestion. They also have vitamins C and K, which support your immune system and bone health. Plus, they contain antioxidants that help fight inflammation. Enjoying this salad is a tasty way to boost your health. This blog post covered how to make a tasty Brussels sprouts salad. We discussed main ingredients like Brussels sprouts, walnuts, and feta cheese. I shared steps for preparing, cooking, and serving the salad. I also provided tips for roasting, dressing, and creative presentation. Variations included substitutions and seasonal options. Lastly, we touched on storage and reheating tips. Remember, experimenting with flavors can make your dish shine. Enjoy the process and share your delicious salad with others!

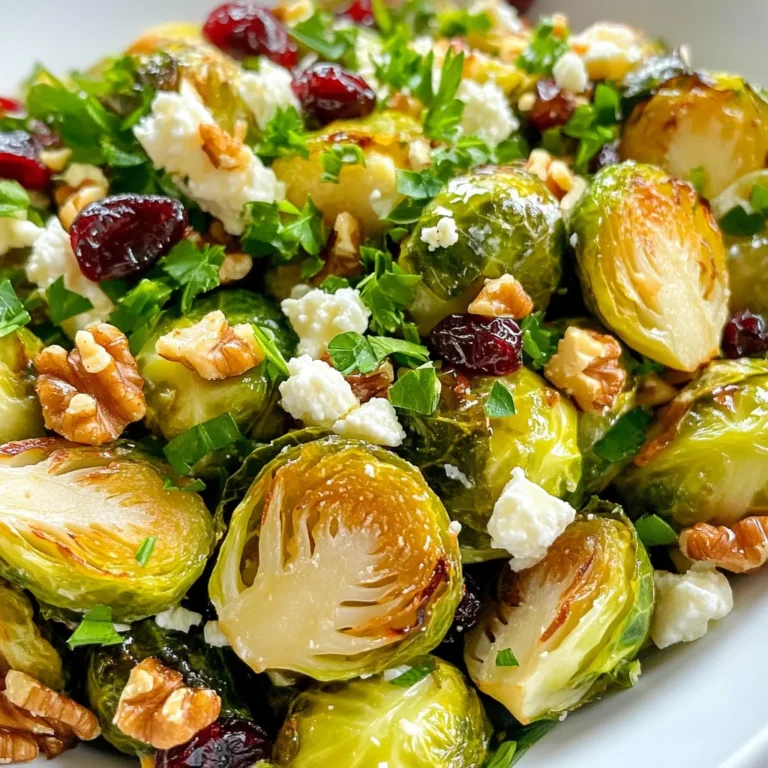
Honey Mustard Brussel Sprouts Salad Flavorful Delight

To make creamy tomato spinach gnocchi, gather these ingredients: - 1 pound gnocchi - 2 tablespoons olive oil - 3 cloves garlic, minced - 1 can (14 ounces) diced tomatoes - 1 cup heavy cream - 2 cups fresh spinach - 1 teaspoon Italian seasoning - Salt and pepper to taste - 1/2 cup grated Parmesan cheese - Fresh basil leaves for garnish You can add some fun extra ingredients for more flavor: - A pinch of red pepper flakes for heat - 1/2 cup mushrooms, sliced - 1/4 cup sun-dried tomatoes, chopped - A squeeze of lemon juice for brightness If you don’t have something on hand, you can swap some ingredients: - Use half-and-half instead of heavy cream for a lighter sauce. - Substitute fresh spinach with kale or Swiss chard. - Use any cheese you like instead of Parmesan, such as feta or mozzarella. - For a vegan option, replace cream with coconut milk and use vegan cheese. These tips help you make this dish your own! {{ingredient_image_1}} Start by boiling water in a large pot. Add a good amount of salt to the water. When it bubbles, add 1 pound of gnocchi. Cook it just until the gnocchi floats, about 2-4 minutes. This shows they are done. Drain the gnocchi and set it aside for later. In a large skillet, heat 2 tablespoons of olive oil over medium heat. Add 3 cloves of minced garlic and cook for about 1 minute. You want it fragrant, not burnt. Then, pour in a can of diced tomatoes, including the juice. Stir in 1 cup of heavy cream. Let this simmer for 3-4 minutes. Stir it occasionally to blend the flavors well. Next, add 2 cups of fresh spinach and 1 teaspoon of Italian seasoning. Cook until the spinach wilts, which takes about 2-3 minutes. Taste the sauce and season with salt and pepper as needed. Now it’s time to bring it all together. Gently fold the cooked gnocchi into the creamy sauce. Make sure each piece is well coated. Stir in 1/2 cup of grated Parmesan cheese until it melts into the sauce. Adjust the seasoning if you need to. Serve this dish hot, and don’t forget to garnish with fresh basil leaves for a touch of color and flavor. Enjoy your meal! To prevent soggy gnocchi, start with a big pot of boiling salted water. This helps keep the gnocchi firm. Cook the gnocchi just until they float. This usually takes 2-4 minutes. If they cook too long, they can become mushy. Drain them right away, and do not rinse. Rinsing washes away the starch that helps the sauce stick. For creamy sauces, always use medium heat. High heat can cause the cream to separate. Start by sautéing garlic in olive oil until it smells great. Then, add diced tomatoes and heavy cream together. Stir often and simmer for a few minutes. This lets the flavors blend well. To finish, fold in cheese for extra creaminess. Store leftover creamy tomato spinach gnocchi in an airtight container. Keep it in the fridge for up to three days. When ready to eat, reheat it gently on the stove. Add a splash of water or cream to help loosen the sauce. Heat until warm, and enjoy! Pro Tips Use Fresh Ingredients: Opt for fresh spinach and high-quality canned tomatoes for the best flavor in your dish. Don’t Overcook Gnocchi: Keep an eye on the gnocchi while cooking; they only need a few minutes until they float to the surface. Adjust Creaminess: For a lighter sauce, you can substitute half of the heavy cream with vegetable or chicken broth. Garnish for Flavor: Fresh basil not only adds a pop of color but also enhances the overall flavor of the dish. {{image_2}} If you want a vegetarian version, skip the cheese. Use plant-based cream instead of heavy cream. This keeps the dish creamy and tasty. You can add more veggies like bell peppers or zucchini. They add great flavor and texture. If you want a vegan option, use a dairy-free cheese. Nutritional yeast can also give a cheesy taste without dairy. For those who like protein, adding chicken or shrimp works well. Cook bite-sized pieces of chicken in the olive oil until brown. Then, follow the same steps for the sauce. If using shrimp, add them to the sauce when it’s simmering. They cook quickly and soak up the flavors. Both options add heartiness to the dish. If you like spice, add red pepper flakes to the sauce. You can also toss in fresh chili peppers for more heat. For added nutrition, consider mixing in broccoli or peas. They blend nicely with the creamy sauce. Adjust the seasonings to match your taste. After you make your creamy tomato spinach gnocchi, let it cool first. Store it in an airtight container. It will stay fresh for about 3 days in the fridge. To reheat, use a skillet over low heat. Add a splash of water or cream to keep it moist. If you want to save some for later, freezing is easy. First, let it cool completely. Then, place it in a freezer-safe container. You can freeze it for up to 3 months. When you're ready to eat, thaw it in the fridge overnight. Reheat it in a pan or the microwave. Use glass or plastic containers with tight lids for storing. They keep the flavors in and air out. Avoid metal containers, as they can alter the taste. If you freeze it, use freezer bags that seal well to save space. Cooking gnocchi takes about 2 to 4 minutes. You should add the gnocchi to boiling salted water. They will float when done. Floating means they are ready to drain. Yes, you can use store-bought gnocchi. It saves time and tastes great. Just follow the cooking instructions on the package. Fresh or frozen gnocchi work well for this recipe. Yes, this recipe is great for meal prep. You can cook the gnocchi and sauce ahead of time. Store them separately in the fridge. When ready to eat, just reheat them together in a skillet. This blog post covered how to make creamy tomato spinach gnocchi. We went through the key ingredients, cooking steps, and helpful tips. You learned about variations for different diets and how to store leftovers. Cooking does not need to be hard. With these methods, you can enjoy delicious meals easily. Try new flavors and make the dish your own. Cooking can be fun, and your taste buds will thank you!

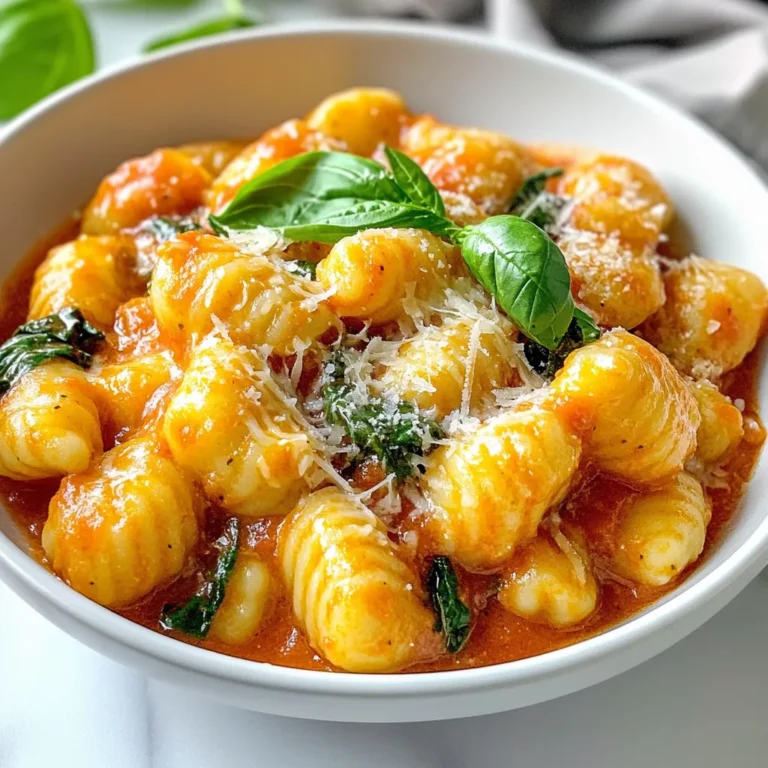
Creamy Tomato Spinach Gnocchi Flavorful Dinner Recipe

To make chocolate covered raspberry pretzels, gather these simple ingredients: - Pretzel rods - Dark chocolate chips - Freeze-dried raspberries - Coconut oil (optional) - Sea salt (optional) These ingredients create a sweet and salty delight. The pretzel rods give a crunchy base. Dark chocolate adds rich flavor. Freeze-dried raspberries add a fruity twist. Coconut oil helps smooth the chocolate if you choose to use it. Sea salt can enhance the taste, giving a nice balance. This recipe serves 12 pretzel rods, perfect for sharing. You can easily adjust the amounts if you want to make more. Just remember to keep the ratios similar for the best flavor. Enjoy the process of making this fun treat! {{ingredient_image_1}} - First, lay out your pretzel rods on a sheet of parchment paper. This step helps keep things neat. It also makes it easy to coat the pretzels later. - In a microwave-safe bowl, combine 1 cup of dark chocolate chips and 1 tablespoon of coconut oil. The coconut oil makes the chocolate smooth. - Microwave the mixture in 30-second increments. Stir the chocolate after each time. Keep doing this until the chocolate is fully melted and smooth. - Grab a pretzel rod and dip it into the melted chocolate. Make sure to coat about 2/3 of the pretzel. Let any extra chocolate drip back into the bowl. - Next, roll the chocolate-covered pretzel in 1/2 cup of crushed freeze-dried raspberries. Make sure to cover it evenly. - If you like, sprinkle a little sea salt on top. It adds a nice touch. - Place the coated pretzels back on the parchment paper. Put them in the fridge for about 15-20 minutes. This helps the chocolate harden. - Once the chocolate is set, serve them on a decorative plate or in a jar. This makes for a pretty presentation. - Avoiding chocolate seize: Always use dry bowls and utensils. Water can make the chocolate clump. If it does seize, add a tiny bit of coconut oil to rescue it. - Smoothing chocolate for better coating: Mix in one tablespoon of coconut oil. This will help the chocolate melt smooth and coat better. - Techniques for rolling and covering evenly: Dip the pretzel in chocolate, covering about two-thirds. Let the excess chocolate drip off. Quickly roll it in crushed raspberries for a nice finish. This helps keep the coating even and pretty. - Creative ways to present chocolate-covered pretzels: Use a decorative plate or a clear jar. You can stack them or tie with a ribbon. These make great gifts or party snacks. Add some fresh raspberries for color and a pop of flavor. Pro Tips Use Quality Chocolate: Opt for high-quality dark chocolate chips for a richer flavor and smoother texture. Crush Raspberries Finely: The finer the raspberry crush, the better they will adhere to the chocolate and provide an even coating. Chill for a Perfect Set: Allow the pretzels to chill in the fridge to ensure the chocolate sets perfectly without smudging. Add a Flavor Twist: Experiment with other toppings like chopped nuts or sprinkles for a unique flavor and texture. {{image_2}} You can switch up the chocolate to fit your taste. Milk chocolate gives a creamy, sweet flavor. Dark chocolate adds a rich, deep taste. Both choices work well with raspberries. White chocolate is another fun option. Its sweetness pairs nicely with the tartness of raspberries. You can also mix chocolates for a unique flavor. Try half dark and half white for a fun twist. Think about adding fun toppings to your pretzels. Chopped nuts can add crunch and flavor. Almonds or walnuts work well. You can also sprinkle colored sprinkles for a festive look. For an extra burst of flavor, mix different toppings. Try coconut flakes or mini chocolate chips. You can also pair flavors like lemon zest or mint with raspberries. These can make your pretzels even more special. You can adapt this recipe for any holiday. For Halloween, add orange sprinkles or edible eyes. For Christmas, use red and green toppings. For Valentine's Day, heart-shaped sprinkles or pink chocolate can be fun. You can make these treats for birthdays too. Add the birthday person's favorite colors or themes. These variations make your chocolate-covered pretzels perfect for any occasion. To keep your chocolate-covered raspberry pretzels fresh, choose the right container. I recommend an airtight container. This helps prevent moisture and keeps them crunchy. Line the bottom with parchment paper to avoid sticking. Store the container in a cool, dry place away from sunlight. Heat can melt the chocolate, ruining your treats. How long can they be stored? If kept properly, these pretzels last about two weeks. After that, they may lose their crunchiness or flavor. Always check for any signs of spoilage before enjoying them. If you notice any changes, don't eat them. Want to save some for later? You can freeze chocolate-covered pretzels! Place them in a single layer on a baking sheet. Freeze them for about an hour until solid. Then, transfer them to an airtight container or freezer bag. Make sure to separate layers with parchment paper to prevent sticking. They can stay in the freezer for up to three months. When you’re ready to enjoy them, just thaw them in the fridge overnight. Yes, you can use different pretzels. You might try pretzel twists or mini pretzels. Each type gives a unique crunch and flavor. Pretzel sticks work too! They are fun and easy to dip. Explore your favorite pretzel shapes and find what you love best. You have options here! Milk chocolate chips make a sweeter treat. White chocolate can add a creamy touch. If you want a richer flavor, try semi-sweet chocolate. You can also use vegan chocolate chips for a plant-based choice. Each type changes the taste, so choose what fits your mood! These treats have some benefits! Pretzels offer carbs for energy. Dark chocolate has antioxidants, which are good for your heart. Freeze-dried raspberries pack vitamins and fiber. While they are a sweet treat, enjoy them in moderation. They can fit into a balanced diet, especially when made with quality ingredients. This blog post covered how to make tasty chocolate-covered pretzels. We discussed the right ingredients, including pretzel rods, dark chocolate chips, and raspberries. You learned step-by-step how to prepare, melt chocolate, and coat the pretzels. We also shared tips for even coating and creative serving ideas. In the end, you can try different chocolates and toppings. Enjoy making these treats for yourself or to share. They are fun and simple to create, making any occasion sweeter. Happy snacking!

Chocolate Covered Raspberry Pretzels Delightful Treat

- 4 bone-in, skin-on chicken thighs - 1/4 cup honey - 1/4 cup Dijon mustard - 2 tablespoons olive oil - 2 cloves garlic, minced - 1 teaspoon dried thyme - 1 teaspoon smoked paprika - Salt and pepper to taste These main ingredients come together to create a tasty dish. The chicken thighs bring a juicy, rich flavor. Honey adds a sweet touch, while Dijon mustard adds a tangy edge. Olive oil helps the chicken cook evenly and keeps it moist. Garlic brings in a nice aroma and depth of flavor. Thyme and smoked paprika round out the taste, making each bite delightful. - Fresh parsley, chopped While optional, fresh parsley adds a pop of color and a fresh taste. It brightens the dish and makes it look more appealing. You can sprinkle it on right before serving for a nice touch. If you don’t have all the ingredients, you can swap some out. Here are a few ideas: - Use maple syrup instead of honey for a different sweetness. - If you lack Dijon mustard, yellow mustard can work, but the flavor will change. - Any oil can replace olive oil, like canola or avocado oil. - Fresh herbs can stand in for dried thyme if you have them on hand. These substitutions can help you make this dish with what you have. Enjoy the cooking process and make it your own! {{ingredient_image_1}} To start, gather your ingredients. You will need honey, Dijon mustard, olive oil, minced garlic, dried thyme, smoked paprika, salt, and pepper. In a medium bowl, whisk together these items. Mix until they blend well. This marinade gives the chicken a sweet and tangy flavor. Next, take your chicken thighs. Pat them dry with paper towels. This step helps the skin crisp up. Season both sides with salt and pepper. Place the thighs in a baking dish. Now, pour the honey mustard mixture over the chicken. Make sure to coat each piece well. Let the chicken marinate for at least 20 minutes. If you have time, longer marinating in the fridge adds even more flavor. Preheat your oven to 400°F (200°C). Once the chicken has marinated, place the baking dish in the oven. Bake for 35 to 40 minutes. The chicken is done when it reaches 165°F (75°C). For crispy skin, turn on the broiler for 2 to 3 minutes at the end. Watch it closely to avoid burning. After baking, let the chicken rest for 5 minutes. This helps keep it juicy. Finally, garnish with fresh parsley for color. Enjoy your tasty meal! To get crispy skin on your chicken, start by drying the thighs. Use paper towels to pat them dry well. Season both sides with salt and pepper. The salt helps draw out moisture. After marinating, bake the thighs at 400°F. For the last step, broil them for 2-3 minutes. Watch closely to prevent burning. This technique ensures a golden, crunchy skin. To boost the flavor, try adding some spices. A dash of cayenne pepper adds heat. You could also mix in some fresh herbs like rosemary or thyme. For a tangy kick, squeeze in lemon juice before baking. These small changes can make a big difference in taste. Feel free to experiment and find your favorite combination. Marinating your chicken thighs is key. I suggest at least 20 minutes for good flavor. If you have more time, let them sit in the fridge for up to 2 hours. This longer marinating time allows the flavors to soak in deeper. Just remember to cover them to keep them fresh. The result will be juicy, flavorful chicken ready to impress your guests. Pro Tips Marinate for Maximum Flavor: Let the chicken thighs marinate for at least 1 hour or overnight for deeper flavor absorption. Use Fresh Herbs: Fresh thyme can enhance the flavor profile even more than dried thyme; consider using it if available. Check for Doneness: Always use a meat thermometer to ensure the chicken reaches an internal temperature of 165°F (75°C) for safety. Serve with Accompaniments: Pair the chicken with sides like roasted vegetables or a fresh salad to create a balanced meal. {{image_2}} You can use boneless chicken thighs for a quicker meal. This cut cooks faster and stays juicy. Just follow the same marinade steps. Coat the chicken well and bake. You’ll cut down on cooking time by about 10 minutes. This option is great for busy nights when you want something tasty fast. Grilling adds a nice smoky flavor. Use the same marinade for your chicken. Let it soak for at least 20 minutes. Preheat your grill to medium-high heat. Grill the chicken thighs for about 6-7 minutes on each side. Look for nice grill marks and an internal temp of 165°F. The char will give a fantastic taste! Herbs can take your dish to the next level! Add fresh rosemary or thyme to the marinade. Just chop them fine and mix them in. You can also sprinkle some fresh herbs on top before serving. This adds a fresh, bright note to the sweet and tangy sauce. It makes your meal look even better too! After you enjoy your honey mustard chicken thighs, let them cool down. Place any leftover chicken in an airtight container. Store it in the fridge for up to 3 days. Make sure to keep the sauce separate if you can. This keeps the chicken skin crispy. To reheat your chicken, preheat the oven to 350°F (175°C). Place the chicken on a baking sheet. Cover it with foil to keep moisture in. Heat for about 15-20 minutes. Check that the chicken is warm all the way through. You can also use a microwave, but it may not keep the skin crispy. If you want to freeze your chicken, wrap each piece in plastic wrap. Then, put them in a freezer bag. This way, they can last up to 3 months. When ready to eat, thaw them in the fridge overnight. Then, reheat as mentioned above. Yes, you can use boneless chicken thighs. They will cook faster than bone-in thighs. Adjust the baking time to about 25-30 minutes. Always check for an internal temperature of 165°F. This will ensure they are safe to eat. Boneless thighs will still soak up the honey mustard flavor well. Many sides go great with honey mustard chicken thighs. Here are some ideas: - Roasted vegetables like carrots or broccoli - A fresh garden salad with mixed greens - Creamy mashed potatoes - Quinoa or rice for a heartier option - Sweet potato fries for a tasty crunch These sides will balance the sweet and tangy flavors of the chicken. To ensure chicken thighs are fully cooked, check the internal temperature. Use a meat thermometer for best results. The safe temperature is 165°F (75°C). Another way to check is by cutting into the meat. The juices should run clear, and there should be no pink meat. If you see pink, keep cooking for a few more minutes. Always prioritize food safety! In this blog post, we covered how to make honey mustard chicken thighs. We talked about key ingredients, marinating tips, and different cooking methods. You learned how to bake for crispy skin and how to store leftovers properly. Remember, you can customize this dish with different variations as you like. Cooking should be fun, so experiment and make it your own. Enjoy your tasty chicken thighs with loved ones!

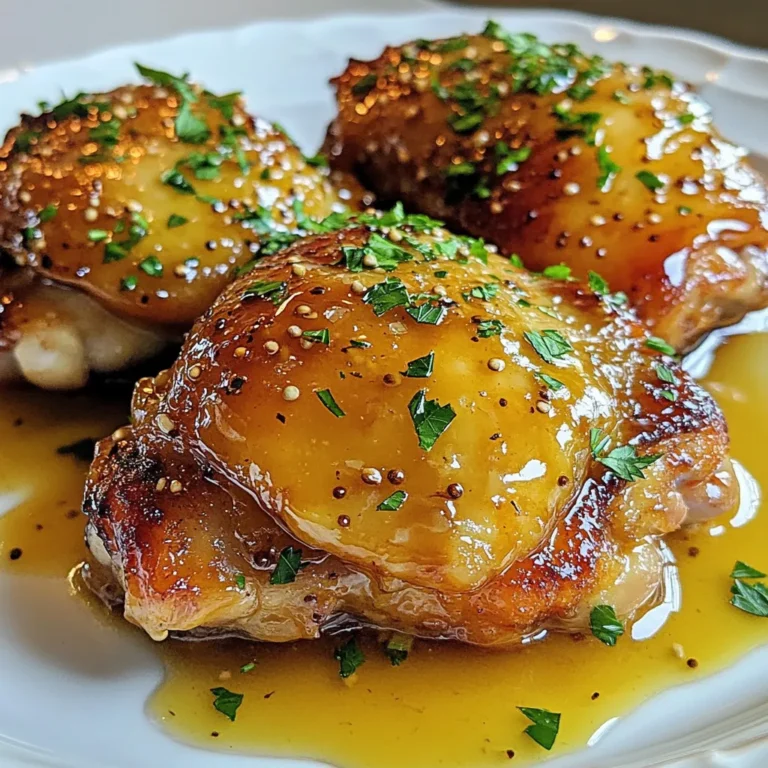
Honey Mustard Chicken Thighs Easy and Tasty Recipe

- 1 lb boneless, skinless chicken thighs - 4 cups chicken broth - 1/2 cup orzo pasta - 1 medium onion, finely chopped - 2 cloves garlic, minced - 2 medium carrots, diced - 2 celery stalks, diced - 3 tablespoons fresh dill, chopped - 3 tablespoons fresh parsley, chopped - Juice of 2 lemons Greek Lemon Chicken Soup is simple yet packed with flavor. Each ingredient plays a key role. The boneless, skinless chicken thighs give the soup a rich taste and tender texture. I love using chicken broth as the base. It adds depth and warmth to the soup. The orzo pasta adds a nice bite. Next, we have the vegetables. The onion brings sweetness when sautéed. Garlic gives a lovely aroma and flavor. Carrots and celery add a crunchy texture and vibrant color. Finally, the fresh herbs and seasonings are essential. Dill and parsley bring freshness. They balance the richness of the chicken. The lemon juice brightens the dish with a zesty kick. Each ingredient works together to create a dish that warms the soul. Enjoy the process of gathering these ingredients! {{ingredient_image_1}} To start, heat 2 tablespoons of olive oil in a large pot over medium heat. Add the finely chopped onion. Cook it for about 5 minutes until it is soft and clear. Next, add 2 minced garlic cloves, 2 diced carrots, and 2 diced celery stalks to the pot. Sauté these veggies for 3 to 4 minutes until they are tender. This step builds a solid base for your soup, adding flavor and texture. Now, it's time to add flavor with the chicken. Pour in 4 cups of chicken broth and bring it to a gentle simmer. Add 1 pound of boneless, skinless chicken thighs. Cook the chicken for about 20 minutes or until fully cooked. Once done, take the chicken out of the pot and let it cool. Use two forks to shred the chicken into bite-sized pieces. This shredded chicken will make your soup hearty and satisfying. Next, add 1/2 cup of orzo pasta to the broth. Cook it according to the package’s instructions, which usually takes about 8 to 10 minutes. While the orzo cooks, whisk together 2 large eggs, the juice of 2 lemons, and 3 tablespoons of fresh dill in a separate bowl. This mixture adds creaminess and a fresh, tangy flavor. Once the orzo is cooked, lower the heat. Gradually add a ladle of hot broth to the egg mixture while whisking. This step is called tempering. It helps prevent the eggs from cooking too fast. Slowly pour the tempered mixture back into the pot while stirring constantly. Finally, return the shredded chicken to the pot. Add 3 tablespoons of chopped parsley and season with salt and pepper to taste. Allow the soup to heat through for another 5 minutes. Just remember, do not let it boil. This final step combines all the flavors into a delicious, warm soup. To make your Greek lemon chicken soup even better, consider these tips: - Using homemade broth: Homemade broth adds deep flavor. It takes time, but the taste is worth it. You can use bones, veggies, and herbs to make a rich base. - Adjusting acidity with lemon: The right amount of lemon juice brightens the soup. Taste as you go. More lemon can enhance the flavor without overpowering it. Creaminess makes this dish feel rich and comforting. Here’s how to get it just right: - Proper tempering of the egg mixture: To avoid scrambled eggs, whisk a ladle of hot broth into the egg mix slowly. This warms up the eggs without cooking them. - Using egg yolks for a richer texture: Adding more egg yolks boosts creaminess. They create a silky feel in the soup, making each spoonful delightful. Good cooking techniques make a big difference in the final dish. Here are my best tips: - Shredding chicken efficiently: After cooking, let the chicken cool for a bit. Use two forks to shred it quickly. This method gives you nice, even pieces. - Sautéing vegetables for depth of flavor: Take your time when sautéing the onion, garlic, carrots, and celery. Cooking them well brings out their natural sweetness and adds layers of flavor. Pro Tips Use Fresh Ingredients: Fresh herbs and quality chicken will greatly enhance the flavor of your soup. Tempering the Eggs: Make sure to temper the egg mixture with hot broth slowly to avoid scrambling the eggs in the soup. Adjusting Thickness: If you prefer a thicker soup, reduce the amount of broth or add a bit more orzo. Serving Suggestions: Serve the soup with crusty bread or a side salad for a complete meal. {{image_2}} If you want a low-carb version of this soup, try using zucchini noodles instead of orzo. Zucchini noodles are light, healthy, and soak up flavors well. Just spiralize the zucchini and add it to the soup during the last few minutes of cooking. This keeps them tender but not mushy. You can change the protein in this soup easily. Using chicken breast instead of thighs gives you a leaner option. The soup will still taste great. For a vegetarian version, add chickpeas instead of chicken. Chickpeas are packed with protein and will make the soup hearty. To add a flavor twist, infuse the soup with fresh herbs like thyme or oregano. These herbs bring extra depth to your dish. You can also make it spicy by adding red pepper flakes. Just a pinch can give your soup a nice kick without overpowering it. To store leftovers, let the soup cool first. Use an airtight container. This keeps the soup fresh. You can refrigerate it for up to three days. When you reheat, stir well to mix the flavors. Freezing is a great way to keep this soup longer. Pour the cooled soup into freezer-safe containers. Leave some space at the top for expansion. It can last up to three months in the freezer. To reheat, thaw overnight in the fridge. Heat it on the stove until warm. Add a splash of broth for creaminess if needed. In the fridge, Greek lemon chicken soup stays fresh for about three days. If you notice any off smells or colors, it's best to discard it. Always check for freshness before enjoying. You can use many types of pasta instead of orzo. Here are some great choices: - Small shells - Ditalini - Rice - Quinoa - Couscous These options give you a different shape and texture. They will still work well in your Greek lemon chicken soup. Yes, you can make this soup vegan with a few changes. Here are some tips: - Swap the chicken for firm tofu or chickpeas. - Use vegetable broth instead of chicken broth. - Replace eggs with a mixture of cornstarch and water for creaminess. - Add more herbs for extra flavor. These swaps keep the soup tasty and satisfying while making it vegan-friendly. To keep the eggs smooth, you need to temper them. Here’s how: - In a bowl, whisk the eggs with lemon juice and dill. - Gradually add a ladle of hot broth to the egg mix. - Stir constantly while adding broth. - Slowly pour this tempered mixture back into the pot. This method ensures the eggs blend well without cooking too fast and scrambling. This blog post covers all you need for a tasty chicken soup. We explored the key ingredients, such as juicy chicken thighs, fresh veggies, and zesty herbs. I outlined simple steps for preparation and cooking. You learned useful tips for flavor and texture. We also discussed tasty variations and safe storage methods. Keep experimenting and adjust the soup to your taste. Enjoy sharing this warm dish with family and friends! You’ll find joy in every bowl you serve.

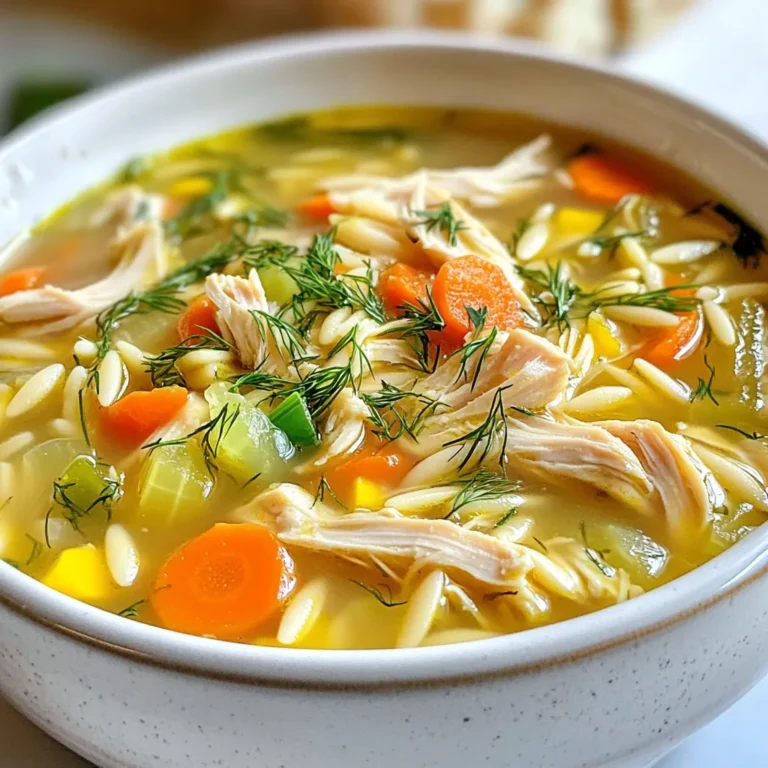
Greek Lemon Chicken Soup Simple and Flavorful Dish

To make creamy garlic Parmesan quinoa, you will need: - 1 cup quinoa, rinsed - 2 cups vegetable broth - 1 tablespoon olive oil - 4 cloves garlic, minced - 1/2 cup heavy cream (coconut cream for vegan) - 1/2 cup grated Parmesan cheese (nutritional yeast for vegan) - 1/4 teaspoon black pepper - 1/4 cup fresh parsley, chopped - Salt to taste These main ingredients create a rich and tasty dish. The quinoa gives you a nice base, while the garlic and cheese add flavor. You can also add these optional ingredients for more flavor: - 1/4 teaspoon red pepper flakes - Extra parsley for garnish Red pepper flakes bring some heat. They add a nice kick if you enjoy spice. If you need to swap ingredients, here are some ideas: - Use brown rice instead of quinoa for a different grain. - Swap heavy cream with coconut cream or any plant-based milk for a lighter dish. - Replace Parmesan cheese with nutritional yeast for a vegan option. These substitutions keep the dish tasty while meeting your needs. Feel free to get creative with what you have on hand! {{ingredient_image_1}} First, grab a medium saucepan. Pour in 2 cups of vegetable broth and bring it to a boil. Next, add 1 cup of rinsed quinoa. This helps to remove any bitterness. Reduce the heat to low. Cover the pot and let it simmer for about 15 minutes. You want the quinoa to be fluffy and for all the liquid to absorb. After 15 minutes, take it off the heat but keep it covered for another 5 minutes. This resting time makes a big difference! While the quinoa cooks, take a large skillet. Add 1 tablespoon of olive oil and heat it over medium heat. Once hot, add 4 cloves of minced garlic. Sauté it for 1-2 minutes until it smells great. Be careful! Garlic burns easily. After it’s fragrant, pour in 1/2 cup of heavy cream. Stir well to mix it with the garlic. Let it warm through but don’t let it boil. Now, it’s time to bring it all together! Add the cooked quinoa to the skillet. Mix it well so that the quinoa is coated in the creamy garlic mixture. Next, stir in 1/2 cup of grated Parmesan cheese. Sprinkle in 1/4 teaspoon of black pepper and 1/4 teaspoon of red pepper flakes if you want some heat. Mix everything until well combined. Cook it for an extra 2-3 minutes, stirring occasionally. This helps everything to heat up and become creamy. Finally, remove it from the heat and fold in 1/4 cup of chopped fresh parsley. It adds a nice splash of color and flavor! To keep garlic from burning, watch it closely. Cook it over medium heat. Stir it often. Garlic turns brown quickly. If it burns, it gets bitter. Remove it from the heat as soon as it smells good. You want it golden, not dark. This will give your dish a lovely flavor. The key to creamy quinoa is the right mix of cream and cheese. Use heavy cream for richness. Coconut cream works great for a vegan twist. Stir it well with the garlic before adding quinoa. This helps coat every grain. If you want it creamier, add more cream or cheese. Just remember to adjust the salt if you do. Serve your creamy garlic Parmesan quinoa in nice bowls. Top it with extra parsley for color. A sprinkle of Parmesan cheese adds a nice touch too. Pair it with grilled veggies or a salad. This dish also goes well with roasted chicken or fish. It’s a perfect meal for any night. Pro Tips Rinse the Quinoa: Always rinse quinoa under cold water before cooking to remove its natural coating, called saponin, which can impart a bitter taste. Perfect Creaminess: For an extra creamy texture, consider adding a bit more heavy cream or a splash of pasta water when mixing in the quinoa. Herb Variations: Feel free to experiment with different herbs like basil or thyme to customize the flavor profile of your dish. Leftover Storage: Store any leftovers in an airtight container in the fridge for up to 3 days. Reheat gently on the stove, adding a splash of broth to restore creaminess. {{image_2}} You can make a vegan version of creamy garlic Parmesan quinoa. Just swap heavy cream for coconut cream. It gives the same richness but is plant-based. For cheese, use nutritional yeast instead of Parmesan. This change keeps it creamy and delicious without dairy. The dish remains full of flavor and is perfect for everyone. Want to add more protein? You have great options! Chickpeas work well; they add a nice texture. Cooked lentils are another good choice. You can also add grilled chicken or shrimp if you prefer meat. Just mix them in when you combine the quinoa with the creamy sauce. This makes the dish heartier and more filling. To make this dish a one-pot meal, start by cooking the quinoa in the same pot. Use the vegetable broth to cook it. Once the quinoa is fluffy, add olive oil, garlic, and cream straight into the pot. Stir in the cheese and spices right after. This method saves time and makes cleanup a breeze! You can store leftover creamy garlic Parmesan quinoa in the fridge. Place it in an airtight container. It stays fresh for up to three days. When ready to eat, check for any off smells or changes in texture before warming it up. Freezing is a great option if you want to keep your dish longer. Place the cooled quinoa in a freezer-safe container. It can last for about three months in the freezer. When you’re ready to use it, remember to label the container with the date. To reheat, you can use the microwave or the stovetop. If using the microwave, add a splash of water or broth to keep it moist. Heat in short bursts, stirring in between. On the stovetop, warm it in a skillet over low heat. Stir often to ensure even heating. Enjoy your creamy garlic Parmesan quinoa warm and creamy! Yes, you can make this dish ahead of time. Cook the quinoa and garlic mixture. Then, store them separately in airtight containers. When ready to serve, just reheat them together on the stove. This makes the meal quick and easy. If you want a lighter option, use coconut cream instead of heavy cream. It adds a rich flavor too. For a vegan option, you can use cashew cream or any plant-based cream. These keep the dish creamy without dairy. To spice things up, add more red pepper flakes. You can also sprinkle in some cayenne pepper for extra heat. For more flavor, try adding lemon juice, fresh herbs, or even sautéed mushrooms. Adjust the flavors to what you enjoy. This blog post covered key ingredients, step-by-step cooking, and helpful tips for making quinoa. We explored variations to suit different diets, plus storage advice to keep your dish fresh. Remember, creativity in your cooking can lead to great meals. Use these ideas to enjoy a tasty, creamy dish that's easy to make. Happy cooking!

Creamy Garlic Parmesan Quinoa Easy and Flavorful Meal

To make delicious apple cinnamon baked oatmeal, gather these ingredients: - 2 cups rolled oats - 2 cups almond milk (or any milk of your choice) - 2 medium apples, peeled and chopped - 1/4 cup maple syrup or honey - 1 teaspoon vanilla extract - 1 teaspoon ground cinnamon - 1/2 teaspoon nutmeg - 1/2 teaspoon baking powder - 1/4 teaspoon salt - 1/4 cup chopped walnuts or pecans (optional) - 1/4 cup raisins or dried cranberries (optional) You can swap some ingredients based on what you have: - Use any milk, like cow's milk or oat milk, instead of almond milk. - If you prefer, use brown sugar or agave syrup instead of maple syrup. - Try different apples like Honeycrisp or Fuji for a sweeter taste. - If you're nut-free, skip the nuts or use seeds like pumpkin seeds. - You can also use fresh or frozen berries instead of raisins or cranberries. This recipe serves six. Each serving has: - Calories: 190 - Protein: 4g - Fat: 5g - Carbohydrates: 33g - Fiber: 4g - Sugars: 8g This meal is filling and offers good nutrients. It’s perfect for breakfast or a cozy snack. {{ingredient_image_1}} 1. Start by preheating your oven to 350°F (175°C). This helps the oatmeal bake evenly. 2. In a large mixing bowl, combine 2 cups of rolled oats, 1 teaspoon of ground cinnamon, 1/2 teaspoon of nutmeg, 1/2 teaspoon of baking powder, and 1/4 teaspoon of salt. Mix these dry ingredients well. 3. In another bowl, whisk together 2 cups of almond milk, 1/4 cup of maple syrup (or honey), and 1 teaspoon of vanilla extract. This will be your wet mixture. 4. Peel and chop 2 medium apples. I suggest using Granny Smith apples for their tartness. Add the apples to the dry mixture. 5. Pour the wet mixture into the dry ingredients. Stir until everything is well combined. 6. If you like, fold in 1/4 cup of chopped walnuts or pecans and 1/4 cup of raisins or dried cranberries for extra flavor. 1. Grease a 9x9 inch baking dish with a little oil or cooking spray. 2. Pour the oatmeal mixture into the dish. Spread it evenly. 3. Place the baking dish in the preheated oven. Bake for 30 to 35 minutes. The top should be golden and firm to the touch when done. 1. Once baked, remove the dish from the oven. Let it cool slightly for about 5 minutes. 2. Slice the baked oatmeal into squares. Serve warm for the best taste. 3. Drizzle a little extra maple syrup on top and sprinkle with more cinnamon if you wish. 4. For an extra treat, add fresh apple slices and a dollop of yogurt or whipped cream. Enjoy your cozy meal! To make the best baked oatmeal, use rolled oats. They absorb moisture well and create a nice texture. I recommend Granny Smith apples for a tart bite that balances sweetness. Make sure to chop the apples into small pieces for even cooking. Also, grease your baking dish well; this helps the oatmeal release easily once baked. One common mistake is using instant oats. Instant oats can make your dish mushy. Another mistake is not measuring the milk correctly. Too much milk can lead to a watery oatmeal. If you skip the baking powder, the oatmeal will not rise properly. Lastly, don’t skip the resting time after baking. It allows the flavors to meld together. You can enhance your baked oatmeal by adding spices. Try adding a pinch of ginger or allspice for warmth. For extra crunch, fold in chopped nuts like walnuts or pecans. Dried fruits like raisins or cranberries add a sweet touch. I love drizzling a bit of maple syrup on top right before serving. It adds a lovely shine and extra sweetness. Pro Tips Choosing the Right Apples: For a perfect balance of sweetness and tartness, Granny Smith apples are ideal, but feel free to mix in some sweeter varieties like Honeycrisp or Fuji for added flavor. Make It Vegan: Substitute the honey with maple syrup or agave nectar to keep this dish vegan-friendly, ensuring everyone can enjoy it! Storage Tips: Store leftovers in an airtight container in the fridge for up to 5 days. It also freezes well, so consider making a double batch for easy breakfasts! Customize Your Toppings: Top your baked oatmeal with your favorite nuts, seeds, or a dollop of yogurt for added protein and texture. Fresh berries also make a delightful addition! {{image_2}} You can change up the flavors in your baked oatmeal. Try adding different fruits like bananas, blueberries, or peaches. Each fruit brings its own taste. You can also switch the spices. Instead of cinnamon, consider ginger or cardamom for a new twist. Adding a splash of orange juice can brighten the dish too. For a gluten-free option, use gluten-free oats. They work just as well as regular oats. If you're vegan, swap almond milk for any plant-based milk. Replace honey with maple syrup for sweetness. You can also skip the eggs entirely, as this recipe does not need them. Serve your oatmeal warm for the best taste. Drizzle with extra maple syrup for sweetness. Top with fresh apple slices for a nice crunch. You can also add yogurt or whipped cream for creaminess. A sprinkle of nuts will give it a delightful texture. Enjoy it as part of a cozy breakfast or a sweet snack! After you enjoy your apple cinnamon baked oatmeal, store leftovers in a tight container. Let it cool first. This helps keep it fresh. Place it in the fridge. It will stay good for about five days. If you want, you can also cover it with plastic wrap. When you are ready to eat your leftovers, take them out of the fridge. You can reheat the oatmeal in the microwave. Warm it for about one to two minutes. Stir halfway for even heating. If you prefer, you can also heat it in the oven. Preheat the oven to 350°F (175°C). Place it in an oven-safe dish and heat for about 10-15 minutes. You can freeze baked oatmeal if you have extra. Cut it into squares and wrap each piece in plastic wrap. Then, place them in a freezer bag. Make sure you remove as much air as possible. This way, it stays fresh for up to three months. When you want to eat it, thaw in the fridge overnight. Then, reheat it as mentioned before. Yes, you can use quick oats. They will cook faster and change the texture. Quick oats make the dish softer and less chewy. If you prefer a firmer bite, stick to rolled oats. Baked oatmeal lasts about five days in the fridge. Store it in an airtight container. This helps keep it fresh and tasty. Just reheat the portions you want to eat. Yes, you can prepare it ahead. Mix the dry and wet ingredients and store them separately. Combine them the night before baking. This saves you time in the morning and gives you warm oatmeal fast. We covered everything about baked oatmeal. You learned the key ingredients, useful substitutions, and serving ideas. I shared step-by-step instructions for preparation and baking. You now know tips and tricks to avoid common mistakes and enhance flavor. Variations let you switch things up for different diets and tastes. I also explained how to store your leftovers and answer your most common questions. Now, you can confidently bake oatmeal that suits your style and needs. Enjoy every bite!

Apple Cinnamon Baked Oatmeal Simple and Cozy Meal

- 1 pound ground chicken - 1/2 cup breadcrumbs - 1/4 cup minced green onions - 2 cloves garlic, minced - 1 teaspoon ginger paste - 1 egg, beaten - Salt and pepper to taste - 1 tablespoon sesame oil To make the meatballs, I mix ground chicken with breadcrumbs. The breadcrumbs help bind the meatballs together. I add minced green onions for a fresh taste. Garlic gives a strong flavor, while ginger adds warmth. The beaten egg helps hold everything together. Season with salt and pepper for taste. Finally, sesame oil gives a nice nutty essence. - 1/2 cup pineapple juice - 1/4 cup rice vinegar - 1/4 cup ketchup - 1/4 cup brown sugar - 1 tablespoon soy sauce - 1 teaspoon cornstarch mixed with 2 tablespoons water (slurry) For the sweet and sour sauce, I start with pineapple juice. It adds sweetness and tang. Rice vinegar provides acidity, balancing the flavors. Ketchup brings in extra sweetness, while brown sugar deepens the flavor. Soy sauce adds a savory touch. Finally, I use cornstarch mixed with water to thicken the sauce. - Extra green onions - Sesame seeds For garnishes, I suggest extra green onions. They add color and freshness. Sesame seeds give a nice crunch and look appealing. {{ingredient_image_1}} - Preheating the oven and prepping the baking sheet: First, set your oven to 400°F (200°C). Line a baking sheet with parchment paper. This helps prevent sticking and makes cleanup easy. - Mixing the ingredients: In a large bowl, combine 1 pound of ground chicken, 1/2 cup of breadcrumbs, 1/4 cup of minced green onions, and 2 cloves of minced garlic. Add 1 teaspoon of ginger paste, 1 beaten egg, and 1 tablespoon of sesame oil. Season with salt and pepper to taste. Mix everything well until it’s fully combined. - Shaping the meatballs: Now, use your hands to shape the mixture into 1-inch meatballs. Place them on the prepared baking sheet, leaving space between each ball to allow for even cooking. - Setting the baking time and temperature: Place the baking sheet in the preheated oven. Bake the meatballs for about 20 minutes. They should be golden brown and cooked through. - Checking for doneness: To check if the meatballs are done, cut one open. The center should be white and hot. If not, bake for a few more minutes. - Combining sauce ingredients in a saucepan: While the meatballs bake, prepare the sweet and sour sauce. In a saucepan over medium heat, mix together 1/2 cup of pineapple juice, 1/4 cup of rice vinegar, 1/4 cup of ketchup, 1/4 cup of brown sugar, and 1 tablespoon of soy sauce. Stir well and bring to a gentle boil. - Thickening the sauce with cornstarch slurry: Once the sauce boils, reduce the heat. Stir in 1 teaspoon of cornstarch mixed with 2 tablespoons of water. Cook for 2-3 minutes until the sauce thickens slightly. This makes it rich and sticky, perfect for coating the meatballs. To avoid dryness in meatballs, use ground chicken that has some fat. Fat keeps the meatballs moist and tender. Mixing in breadcrumbs also helps lock in moisture. When shaping your meatballs, be gentle. Overworking the meat can make them tough. To cook evenly and get that golden brown color, bake your meatballs at 400°F (200°C). This high heat helps them brown nicely. Place them on a parchment-lined baking sheet. Space them out to allow heat to circulate. Balancing sweetness and acidity is key to a great sauce. Start with pineapple juice and rice vinegar for a bright flavor. If the sauce is too sweet, add more vinegar. If it’s too sour, increase the brown sugar. Taste as you go to find your perfect balance. Substituting ingredients can create new flavors. Try orange juice instead of pineapple for a citrus twist. You can also use apple cider vinegar instead of rice vinegar for a different acidity. For the best side dishes, serve steamed rice or fried rice with the meatballs. Both pair well with the sweet and sour flavors. You might also enjoy a fresh salad for a nice crunch. For a beautiful serving platter, layer the meatballs in the center. Drizzle the sweet and sour sauce on top for an eye-catching look. Garnish with extra green onions or sesame seeds for a pop of color. Pro Tips Use Fresh Ingredients: Fresh ground chicken and vegetables will enhance the flavor of your meatballs significantly. Adjust Sweetness: Feel free to adjust the amount of brown sugar in the sauce according to your taste preference. Experiment with Spices: Adding a pinch of red pepper flakes can give your meatballs an extra kick of heat! Make Ahead: You can prepare the meatballs and sauce in advance, refrigerate them, and just heat them up before serving! {{image_2}} You can swap ground chicken for other meats. Ground turkey works well and keeps it light. Ground pork brings a richer taste and pairs nicely with the sauce. If you want a meat-free option, try using plant-based meats. Lentils or chickpeas also make great choices. They add flavor and texture that everyone will enjoy. Want to spice things up? Add chili sauce or fresh peppers to the meat mixture. Just a little can bring heat to your meal. You can also mix in vegetables like bell peppers or carrots. This not only boosts nutrition but adds crunch and color to your meatballs. If you want a twist on flavor, try teriyaki sauce. It gives a sweet and savory taste that complements the meatballs. Sweet chili sauce is another tasty option. It adds a bit of heat and sweetness for a delightful change. Mixing sauces can take your dish to a whole new level! To keep your sweet and sour chicken meatballs fresh, follow these tips: - Let the meatballs cool completely before storing. - Place them in airtight containers. - Use glass or plastic containers with tight lids. - For longer storage, wrap them in plastic wrap first. - Label containers with the date. When you're ready to enjoy leftovers, use these reheating methods: - Microwave: Place meatballs on a plate and cover with a damp paper towel. Heat in 30-second intervals until warm. - Oven: Preheat to 350°F (175°C). Place meatballs on a baking sheet and cover with foil. Heat for about 15 minutes. - Skillet: Heat a little oil in a pan, then add meatballs. Cook over medium heat, turning until warm. To keep the flavor and texture, avoid overheating. Your sweet and sour chicken meatballs can last: - In the fridge for up to 3 days. - In the freezer for up to 3 months. Signs of spoilage include: - Off smells. - Changes in color or texture. - Excess moisture in the container. Always check before eating. Yes, you can make sweet and sour chicken meatballs ahead of time. Prepare the meatballs and bake them. Let them cool completely, then store them in an airtight container. They will stay fresh in the fridge for about two days. You can also freeze them for up to three months. Just thaw in the fridge before reheating. You can serve sweet and sour chicken meatballs with many sides. Here are some tasty options: - Steamed rice - Fried rice - Noodles - A fresh salad - Stir-fried vegetables These sides help balance the sweet and sour flavors. To check if meatballs are fully cooked, use a meat thermometer. Insert it into the center of a meatball. The safe cooking temperature is 165°F (74°C). If you don't have a thermometer, cut one open. The meat should be white with no pink inside. Yes, you can freeze sweet and sour chicken meatballs. After baking, let them cool completely. Place them in a single layer on a baking sheet to freeze for about an hour. Then transfer to a freezer bag or container. They can stay frozen for up to three months. You can play with the sweet and sour sauce in many ways. Try these ideas: - Add chili sauce for some heat. - Use apple juice instead of pineapple juice. - Swap brown sugar for honey for a different sweetness. - Mix in diced bell peppers for extra texture. These variations can change the flavor and make it fun! In this blog post, I shared how to make tasty sweet and sour chicken meatballs. You learned about the main ingredients, step-by-step instructions, and helpful tips. I also covered variations, storage info, and answered common questions. These meatballs are easy to make and perfect for any meal. Enjoy experimenting with flavors and sauces to find what you love most. This dish brings fun and flavor to your table, making every bite a delight!

Sweet and Sour Chicken Meatballs Flavorful Delight

- 2 cups cooked chicken, shredded - ½ cup basil pesto - 1 cup mozzarella cheese, shredded - ½ cup sun-dried tomatoes, chopped - 4 slices of sourdough bread - 2 tablespoons olive oil - Salt and pepper to taste - Fresh basil leaves for garnish These main ingredients come together to create a tasty sandwich melt. I love using cooked chicken because it is quick and easy. Shredding the chicken helps it mix well with the pesto and other flavors. The basil pesto gives the dish a fresh and vibrant taste. Mozzarella cheese adds a creamy texture and melts beautifully. Sun-dried tomatoes provide a sweet and tangy kick. I pick sourdough bread for its crusty texture, which holds up well against the filling. Olive oil adds a rich flavor and helps the bread crisp up when cooking. - Additional cheese varieties - Avocado slices - Spinach or arugula You can customize this sandwich melt with optional ingredients. Adding different cheese can enhance the flavor profile. Avocado slices bring creaminess and healthy fats. Fresh greens like spinach or arugula add a nice crunch and freshness. Feel free to mix and match these options to suit your taste! {{ingredient_image_1}} 1. In a medium bowl, combine 2 cups of shredded chicken, ½ cup of basil pesto, ½ cup of chopped sun-dried tomatoes, and ½ cup of shredded mozzarella. Mix well until everything is combined. 2. Season the mixture with salt and pepper to taste. This adds flavor to your chicken filling. 1. Heat a non-stick skillet over medium heat. Add 1 tablespoon of olive oil to the pan. 2. Place two slices of sourdough bread in the skillet. 3. Spoon equal amounts of the chicken and pesto mixture onto each slice of bread in the skillet. 4. Sprinkle the remaining mozzarella cheese on top of the chicken mixture. Then, cover with the other two slices of sourdough bread. 5. Drizzle the top of the sandwiches with the remaining olive oil to help them crisp up. 6. Cook for 3-4 minutes on one side until golden brown. Then, carefully flip and cook for another 3-4 minutes until the other side is also golden and the cheese has melted. 1. Remove the sandwiches from the skillet. Let them cool for a minute before slicing. 2. Garnish with fresh basil leaves for a bright finish. Serve while warm for the best taste. You can enjoy your Basil Pesto Chicken Sandwich Melt with a side salad or some crispy chips for a complete meal. To adjust seasoning, taste your mixture before cooking. Add salt or pepper as needed. You can also try adding garlic powder or red pepper flakes for extra flavor. Fresh herbs like thyme or oregano add depth too. Simply chop them finely and mix into your chicken blend. For crispy bread, heat your skillet well. Use medium heat and let the bread toast until golden. Drizzle olive oil on the bread to help it crisp. When it comes to cheese, use the right melting technique. Cover the sandwich with a lid while cooking. This traps heat and helps the cheese melt evenly. You can prepare the chicken mixture a day in advance. Just store it in an airtight container. This saves time on busy days. If you have leftovers, store them in the fridge. Wrap the sandwich tightly in foil to keep it fresh. Enjoy your delicious meal later! Pro Tips Use Fresh Ingredients: Fresh basil and high-quality mozzarella will elevate the flavor of your sandwich, making it more vibrant and delicious. Grill for Extra Crispiness: Consider using a panini press for grilling your sandwiches to achieve a perfectly crispy exterior and evenly melted cheese. Customize Your Pesto: Feel free to add nuts like pine nuts or walnuts to your pesto for added texture and flavor, or even use a store-bought variety for convenience. Let It Rest: After cooking, allow the sandwiches to rest for a minute. This helps the cheese set slightly, making the sandwiches easier to slice and eat. {{image_2}} You can switch up the chicken for different flavors. Grilled chicken adds a smoky touch, while rotisserie chicken offers ease. Both work well in this recipe. For the bread, try using ciabatta or whole wheat. These options give your sandwich a unique taste and texture. Ciabatta’s crust offers a nice crunch, while whole wheat adds a nutty flavor. Want to spice things up? Add some red pepper flakes or hot sauce to the chicken mix. This gives your sandwich a fun kick. You can also explore different pesto flavors. Try sun-dried tomato or roasted red pepper pesto. Each brings its own twist to the sandwich. Looking for vegetarian options? You can replace the chicken with grilled veggies or chickpeas. This makes the sandwich hearty and flavorful. If you need gluten-free options, use gluten-free bread. Many brands offer tasty choices that work well for this recipe. Enjoy your Basil Pesto Chicken Sandwich Melt in a way that suits your diet! After enjoying your Basil Pesto Chicken Sandwich Melt, store any leftovers in the fridge. Place the sandwich in an airtight container. This keeps it fresh and tasty. Consume the leftovers within three days for the best flavor. If you want to freeze the sandwiches, wrap each one tightly in plastic wrap. Then, place them in a freezer bag. This helps to avoid freezer burn. You can freeze them for up to two months. When you are ready to enjoy your sandwich again, reheating is key. Use the oven for the best results. Preheat your oven to 350°F (175°C). Place the sandwich on a baking sheet. Heat for about 10-15 minutes. This keeps the bread crispy and the cheese melty. If you prefer the microwave, use it for a quick fix. Place the sandwich on a microwave-safe plate. Heat it for 30 seconds to 1 minute. However, this may make the bread soft. So, the oven is the better choice. Can I use raw chicken in this recipe? No, using raw chicken is not safe. Always use cooked chicken for this sandwich. It can be shredded rotisserie chicken, grilled chicken, or even leftovers. This makes prep easy and quick. How long can I keep leftovers in the fridge? You can keep leftovers for up to three days. Store them in an airtight container. Just remember, the bread might get a bit soggy. What can I serve with a Basil Pesto Chicken Sandwich Melt? This sandwich pairs well with a simple side salad. You can also serve it with crunchy chips or a bowl of soup. How to customize sides based on dietary preferences For a healthier option, choose a green salad with lemon vinaigrette. If you're gluten-free, try veggie sticks with hummus as a side. Can I make this sandwich in an oven or sandwich press? Yes, you can! Use a sandwich press for an even cook and crispy bread. In the oven, bake at 375°F for about 15 minutes, flipping halfway. What’s the best cheese for melting? Mozzarella is great for melting, but you can also use provolone or gouda. They all give a nice gooey texture that complements the pesto. This post detailed how to make a Basil Pesto Chicken Sandwich Melt. You learned about the main and optional ingredients, step-by-step preparation, cooking tips, and variations to enhance flavor. Remember, you can swap ingredients to suit your taste and dietary needs. Keep your leftovers fresh and know the best reheating methods. This sandwich is easy to make and perfect for any meal. Now, get creative in your kitchen and enjoy your tasty creation!

Basil Pesto Chicken Sandwich Melt Savory and Simple

To make these tasty peanut butter cup brownies, gather the following ingredients: - 1 cup unsalted butter, melted - 1 cup granulated sugar - 1 cup packed brown sugar - 4 large eggs - 1 teaspoon vanilla extract - 1 cup all-purpose flour - 1/2 cup unsweetened cocoa powder - 1/2 teaspoon salt - 1 cup creamy peanut butter - 1 cup mini peanut butter cups, chopped - 1/2 cup chocolate chips You can swap some ingredients if needed. Here are a few ideas: - Use coconut oil instead of unsalted butter for a dairy-free option. - Replace granulated sugar with coconut sugar for a lower glycemic index. - If you want gluten-free brownies, use almond flour instead of all-purpose flour. - You can use natural peanut butter, but it may change the texture slightly. - Want a nut-free version? Use sun butter in place of peanut butter. Quality matters in baking. Here are some tips to ensure the best results: - Use fresh eggs for better rise and texture. - Opt for high-quality cocoa powder for a richer chocolate flavor. - Choose creamy peanut butter that has no added sugar for a pure taste. - Buy mini peanut butter cups that are fresh and soft for easy mixing. - Check the expiration date on your ingredients to ensure freshness. {{ingredient_image_1}} First, you'll want to prepare your baking pan. Preheat your oven to 350°F (175°C). Grease a 9x13 inch baking pan. You can also line it with parchment paper. This makes it easier to remove the brownies later. In a large bowl, add the melted butter. Mix in both the granulated and brown sugar. Whisk these together until smooth. Then, add the eggs one by one. Beat well after each egg. Finally, stir in the vanilla extract. This adds great flavor to your brownies. Now, take another bowl. Sift together the flour, cocoa powder, and salt. Gradually fold this dry mix into your wet mix. Stir until just combined. Be careful not to overmix. This step is key for soft, chewy brownies. Next, gently fold in the creamy peanut butter. Ensure it mixes well without overdoing it. After that, add the chopped mini peanut butter cups and chocolate chips. Fold them in carefully to keep your brownie batter chunky and delicious. Pour the brownie batter into the prepared pan. Spread it out evenly. Bake for 25-30 minutes. Use a toothpick to check if they are done. It should come out with a few moist crumbs. Once baked, let the brownies cool in the pan on a wire rack for at least 15 minutes. This cooling time helps them set perfectly before slicing. To get the best brownie texture, focus on mixing. First, mix the wet ingredients well. Combine melted butter, granulated sugar, and brown sugar until smooth. Then, add eggs one by one. Beat each egg in before adding the next. This step helps create a rich and fluffy base. When mixing the dry ingredients, be gentle. Overmixing can lead to tough brownies. Fold in the flour and cocoa until just combined. The batter should be thick but not dry. If your brownies turn out too dry, you may have baked them too long. Keep a close eye on them. The toothpick test is key. If it comes out with a few moist crumbs, they are done. If brownies are too gooey, they need more baking time. Always let them cool before cutting. This helps them set. If brownies stick to the pan, try using parchment paper. It makes removal easy and keeps them intact. To make your brownies look extra special, serve them on a nice platter. After slicing, sprinkle extra mini peanut butter cups on top. A drizzle of melted chocolate adds a fancy touch. For a bit of flair, sprinkle sea salt on top. This contrast enhances the flavors. Consider serving with a scoop of vanilla ice cream on the side. It pairs well and adds a creamy element. These simple tips elevate your brownie game! Pro Tips Use Room Temperature Eggs: Ensuring your eggs are at room temperature can help create a smoother batter and improve the texture of your brownies. Don’t Overmix the Batter: When combining the dry ingredients with the wet, mix just until combined to keep the brownies fudgy and dense. Check for Doneness Carefully: Insert a toothpick into the center; it should come out with a few moist crumbs, not wet batter, for perfectly baked brownies. Customize Your Toppings: Feel free to add chopped nuts, caramel sauce, or even a scoop of ice cream on top for a delicious twist. {{image_2}} You can make gluten-free peanut butter cup brownies easily. Just swap all-purpose flour for a gluten-free blend. Look for a blend that contains xanthan gum to help with texture. This change keeps the brownies rich and tasty without gluten. They will still have that gooey center and rich peanut butter flavor you love. To make vegan peanut butter cup brownies, replace eggs with flaxseed meal. Mix 1 tablespoon of flaxseed with 2.5 tablespoons of water for each egg. Let it sit for five minutes. Use a vegan butter substitute instead of regular butter. Also, choose dairy-free chocolate chips and peanut butter cups. This way, you get all the flavor without animal products. You can get creative with mix-ins in these brownies. Try adding chopped nuts like walnuts or pecans for crunch. Or, mix in some shredded coconut for a tropical twist. If you want a mint flavor, add mint chocolate chips. You can even swirl in caramel or fudge for extra indulgence. Experiment and find your favorite combination! To keep your peanut butter cup brownies fresh, store them in an airtight container. Place parchment paper between layers to prevent sticking. These brownies stay good at room temperature for up to three days. If you want them to last longer, consider refrigerating them. This can keep them fresh for up to a week. Just let them come to room temp before enjoying. Freezing brownies is a great option. First, let the brownies cool completely. Cut them into squares and wrap each piece in plastic wrap. Then, place the wrapped brownies in a freezer-safe bag. They can stay frozen for up to three months. When you want to eat one, just take it out and let it thaw on the counter. To enjoy your brownies warm, preheat your oven to 350°F. Place the brownies on an oven-safe dish and cover them with foil. Heat for about 10 minutes. You can also use a microwave for quick reheating. Just place a brownie on a microwave-safe plate and heat for about 15-20 seconds. Enjoy the gooey goodness! You can check your brownies by using a toothpick. Insert it into the center of the brownies. If it comes out with a few moist crumbs, they are done. If there is wet batter, bake for a few more minutes. Keep an eye on them to avoid overbaking. Yes, you can use natural peanut butter. However, it may change the texture slightly. Natural peanut butter is thinner and may make your brownies less rich. Creamy peanut butter gives a smoother and more consistent flavor. If you need an egg substitute, try using applesauce. Use 1/4 cup of applesauce for each egg. You can also use mashed banana or a flaxseed meal. Mix 1 tablespoon of flaxseed meal with 2.5 tablespoons of water for each egg. Yes, you can make these brownies ahead of time. They store well for a few days. Just keep them in an airtight container at room temperature. You can also freeze them for up to three months for longer storage. To cut brownies nicely, first cool them for at least 15 minutes. Use a sharp knife for clean cuts. Wipe the knife with a damp cloth between cuts to keep the edges neat. This way, your brownies will look great on the plate! You now have everything needed to make delicious peanut butter cup brownies. We covered the key ingredients and how to choose the best ones. You learned step-by-step instructions for mixing and baking. I shared tips for the perfect texture and ways to present your brownies nicely. We explored variations to suit different diets and provided storage tips for freshness. With this knowledge, you can bake tasty brownies with ease. Enjoy the process and the treats that follow!

Peanut Butter Cup Brownies Decadent and Easy Recipe

PREV 1 … 38 39 40 … 52 NEXT
cozy citrus kitchen

explore

DessertsDinnerAppetizersDrinks

Our Policies

  • Cookie Policy
  • Copyright Policy
  • Disclaimer
  • GDPR Policy
  • Terms Of Use
Back to Top
  • About
  • Contact Us
  • Privacy Policy
© 2025 cozy citrus kitchen