FREE DINNER EBOOK! Get your copy!
  • Cookie Policy
  • GDPR Policy
  • Disclaimer
  • Terms Of Use
  • Visit my other site: Fun Cookie Recipes
cozy citrus kitchen
  • Home
  • Dinner
  • Desserts
  • Drinks
  • Appetizers
  • Contact
  • About
  • Privacy Policy
  • Home
  • Dinner
  • Desserts
  • Drinks
  • Appetizers
  • Contact
  • About
  • Privacy Policy
  • Cookie Policy
  • GDPR Policy
  • Disclaimer
  • Terms Of Use
Visit my other site: Fun Cookie Recipes

HOME / CATEGORIES /

Latest

To make this tasty dish, gather these key ingredients: - 1 loaf of challah or brioche bread, cut into cubes - 4 large eggs - 2 cups whole milk - 1/2 cup granulated sugar - 1 teaspoon vanilla extract - 1 teaspoon ground cinnamon - 1/4 teaspoon ground nutmeg - 2 apples, peeled, cored, and sliced thin (Granny Smith or Honeycrisp work well) - 1/2 cup apple pie filling (store-bought or homemade) These ingredients mix well to create a warm, cozy flavor. The bread absorbs the egg mixture, making it soft and delicious. You can add some fun touches with these optional ingredients: - 1/4 cup chopped pecans - Powdered sugar for serving - Maple syrup for drizzling These extras give your casserole added flavor and texture. Feel free to mix and match based on your taste. For the best results, choose bread that is rich and fluffy. I suggest using: - Challah - Brioche Both types soak up the egg mixture nicely. They also add a lovely sweetness to your casserole. You can even try other bread types, like sourdough or French bread, but consider the texture and flavor. {{ingredient_image_1}} 1. First, preheat your oven to 350°F (175°C). This helps the casserole cook evenly. 2. Next, grease a 9x13-inch baking dish with butter or non-stick spray. This keeps the casserole from sticking. 3. In a large bowl, whisk together the eggs, whole milk, granulated sugar, vanilla extract, ground cinnamon, and ground nutmeg. Mix until smooth. 4. Cut your challah or brioche bread into cubes. Add these pieces to the egg mixture. Make sure each piece is coated well. Let it soak for about 10-15 minutes. This step adds flavor and moisture. 5. Peel, core, and slice your apples thinly. Fold these slices and the apple pie filling into the bread mixture. If you like, add chopped pecans for crunch. 6. Pour the mixture into your baking dish. Spread it out evenly so it cooks properly. 1. Place the baking dish in the oven. Bake for 45-50 minutes. 2. Keep an eye on it. You want a nice golden brown top. 3. To check if it’s done, insert a knife into the center. It should come out clean. If it’s not clean, give it a few more minutes. When the casserole is ready, it will look golden brown on top. The center should feel firm, not jiggly. A clean knife test means it's done. Let it cool for a few minutes before serving. This helps the flavors settle and makes it easier to slice. Enjoy your tasty Apple Pie French Toast Casserole! To get the best flavor, use fresh apples. Granny Smith adds a nice tartness. Honeycrisp gives a sweet crunch. You want a mix of tastes. Use good bread like challah or brioche. These breads soak up the egg mixture well. Let the bread sit in the mix for 10-15 minutes. This helps it absorb all the flavors. Don't skip the spices! Cinnamon and nutmeg make a big difference. One common mistake is not cutting the bread into even cubes. This can lead to uneven cooking. Another mistake is skipping the resting time. This step ensures all the bread absorbs the egg mix. If you overbake, the casserole can turn dry. Keep an eye on the time and use a knife to check doneness. If it comes out clean, you’re good to go! Serve warm with powdered sugar on top. This adds a sweet touch. Drizzle maple syrup over each slice for extra flavor. You can also add more apple slices for a fresh look. For a crunch, sprinkle some chopped pecans before serving. This adds texture and richness. Enjoy with a hot cup of coffee or tea! Pro Tips Use Stale Bread: For the best texture, use bread that is a day or two old. It will absorb the custard mixture better without becoming mushy. Experiment with Apples: While Granny Smith and Honeycrisp are great, feel free to mix in other varieties like Fuji or Braeburn for a unique flavor profile. Make Ahead: Assemble the casserole the night before and refrigerate. In the morning, simply bake it straight from the fridge, adding an extra 10-15 minutes to the baking time. Add a Crunch: For a delightful crunch, top the casserole with a mixture of oats, butter, and brown sugar before baking. {{image_2}} You can easily make this casserole gluten-free. Just swap the challah or brioche with gluten-free bread. Look for a brand that has a similar texture and taste. Make sure all other ingredients are also gluten-free, like the apple pie filling. This way, everyone can enjoy this tasty dish. While apples are great, try other fruits too! Pears add a nice sweetness. Berries bring a burst of color and flavor. You can use peaches in summer or cranberries in fall. Mix and match your favorite fruits for fun flavors. Just remember, each fruit has its own cook time, so adjust if needed. Toppings can make this dish even better. You can sprinkle chopped nuts on top for crunch. Try adding a swirl of caramel sauce for extra sweetness. If you prefer something lighter, dust with powdered sugar. For a classic touch, drizzle maple syrup before serving. Get creative and find what you like best! To store your Apple Pie French Toast Casserole, let it cool first. Once it cools, cover it tightly with plastic wrap or aluminum foil. You can also use an airtight container. Store it in the fridge for up to three days. This keeps it fresh and ready for breakfast or dessert. If you want to freeze leftovers, let the casserole cool completely. Cut it into pieces for easy serving later. Wrap each piece tightly in plastic wrap, then place them in a freezer-safe bag. Label the bag with the date. You can freeze it for up to three months. This way, you can enjoy this tasty dish anytime! To reheat, take out the portion you want. Preheat your oven to 350°F (175°C). Place the casserole in an oven-safe dish and cover it with foil. Heat it for about 20-25 minutes, or until it's warm. You can also microwave it on a plate for 1-2 minutes, checking every 30 seconds. Enjoy your delicious casserole just like new! Yes, you can make this casserole ahead of time. To do this, prepare the casserole up to the baking stage. Cover it well and store it in the fridge overnight. This lets the bread soak up the egg mixture. In the morning, take it out and let it sit for about 15 minutes. Then, bake it as usual. This makes breakfast easy and quick. If you need to replace eggs, use unsweetened applesauce. You can use 1/4 cup of applesauce for each egg. This adds moisture and keeps the casserole fluffy. Another option is to use flaxseed meal. Mix 1 tablespoon of flaxseed meal with 2.5 tablespoons of water. Let it sit for a few minutes until it thickens. Both options work well in this recipe. You can tell the casserole is done by checking the center. Insert a knife into the middle. If it comes out clean, it is ready! The top should be golden brown and firm to touch. Bake for 45-50 minutes, but keep an eye on it. Every oven is a bit different. This blog post covered how to make apple pie French toast casserole. We explored key ingredients, preparation steps, and baking tips. I shared ideas for baked perfection and ways to avoid common mistakes. You learned about tasty variations and clever storage methods. In the end, this dish is easy and fun to make. You can delight your family with each bite and enjoy the unique flavors. Happy cooking!

Apple Pie French Toast Casserole Tasty and Easy Recipe

- 4 boneless, skinless chicken breasts - 1 can diced tomatoes - Fresh basil leaves - Olive oil - Dried oregano - Red pepper flakes - Heavy cream - Parmesan cheese - Salt and pepper For this creamy tomato basil chicken, I focus on a few key ingredients. First, the chicken breasts are your main protein source. I love using boneless and skinless chicken for this dish. It cooks quickly and stays juicy. Next, I use a can of diced tomatoes. They bring a sweet and tangy flavor that blends perfectly. Fresh basil is a must. Its bright taste adds freshness to the creamy sauce. Now, let’s talk about pantry staples. Olive oil is my go-to for cooking. It helps to sear the chicken and adds flavor. Dried oregano brings an earthy note, while red pepper flakes give a hint of heat. You can skip them if you want a milder dish. For the creamy part, I use heavy cream. It makes the sauce rich and smooth. Grated Parmesan cheese adds a nutty flavor and thickens the sauce. Don’t forget to season with salt and pepper to taste. These ingredients come together to make a dish that is rich and full of flavor. Each element plays a role in creating a delicious meal you will love. {{ingredient_image_1}} 1. Seasoning the chicken breasts: Start by sprinkling salt and pepper on both sides of each chicken breast. This adds flavor to the meat. 2. Searing the chicken in olive oil: Heat 2 tablespoons of olive oil in a large skillet over medium heat. Once hot, add the chicken breasts. Cook for about 6-7 minutes on each side. Look for a golden-brown color. When done, remove the chicken and set it aside. 1. Sautéing the onions and garlic: In the same skillet, add 1 small chopped onion. Cook for about 3-4 minutes until it turns clear. Then, add 3 minced garlic cloves. Cook for 1 more minute until it smells great. 2. Adding tomatoes and spices to create flavor: Stir in a 14 oz can of diced tomatoes, including the juices. Add 1 teaspoon of dried oregano and red pepper flakes if you want some heat. Let it simmer for about 5 minutes. This helps combine the flavors. 1. Making the sauce creamy with heavy cream and cheese: Lower the heat and pour in 1 cup of heavy cream. Stir well to mix. Let it cook for another 3-4 minutes. Now, mix in 1 cup of chopped fresh basil and ½ cup of grated Parmesan cheese. This makes the sauce rich and smooth. 2. Final steps to combine chicken with sauce and serve: Return the seared chicken to the skillet. Spoon the creamy sauce over the chicken. Cook for another 2-3 minutes to warm it up. Serve the chicken on top of cooked pasta like fettuccine or penne. Pour extra sauce over the top for a delicious finish. To get that creamy texture, simmering is key. Simmering helps blend flavors and thicken the sauce. After adding the heavy cream, let it simmer for three to four minutes. This is how you get that rich taste. For melting Parmesan cheese smoothly, add it at the end. Turn down the heat to low so it doesn't clump. Stir it in slowly. This way, the cheese blends nicely into the sauce. You can boost the flavor with more spices and herbs. Try adding a pinch of Italian seasoning or fresh herbs like thyme. For a kick, red pepper flakes add heat. You can adjust this based on your taste. Marinating the chicken before cooking adds extra flavor. Use salt, pepper, and olive oil. Let it marinate for at least 30 minutes. This step makes the chicken juicy and tasty. If you want to switch things up, try grilling or baking the chicken. Grilling gives a smoky flavor. Baking keeps the chicken moist. Both methods work well with this recipe. When serving, pasta is a great choice. Fettuccine or penne pairs well with the sauce. If you want something lighter, serve the chicken without pasta. It’s delicious either way! Pro Tips Use Fresh Basil: Fresh basil adds a vibrant flavor that dried basil cannot replicate; add it at the end of cooking for the best taste. Choose the Right Pasta: Fettuccine or penne works great with this sauce, but feel free to use your favorite type of pasta for a personal touch. Adjust the Spice Level: If you love heat, increase the red pepper flakes; for a milder dish, skip them altogether or use less. Perfectly Cooked Chicken: Use a meat thermometer to ensure the chicken reaches an internal temperature of 165°F for juicy and safe results. {{image_2}} Making it dairy-free You can make this dish dairy-free easily. Instead of heavy cream, use coconut milk or cashew cream. Both options give a rich texture. They add a slight sweetness too. This makes the dish creamy without dairy. Substituting chicken with tofu or vegetables If you want a plant-based option, try tofu or veggies. Firm tofu works well. Press it first to remove extra water. You can also use mushrooms or zucchini. These add flavor and texture. Cook them until they are golden brown for the best result. Adding sun-dried tomatoes for additional depth Sun-dried tomatoes can enhance the flavor. They bring a sweet and tangy taste. Chop them up and add them when you mix in the diced tomatoes. This gives a nice depth to the sauce. Incorporating other herbs like thyme or parsley You can mix other herbs into your dish. Thyme adds an earthy flavor. Parsley gives freshness. Add them at the same time as the basil. This will give your dish a new twist. Ideas for side dishes Serve this dish with simple sides. Garlic bread is a classic choice. A light salad can balance the meal too. Steamed vegetables add nice color and nutrients. Serving over different pasta types You can serve this chicken dish over many pasta types. Fettuccine is great, but penne works well too. Even spaghetti can be a fun option. Pick your favorite pasta to match your taste. To store leftover chicken, place it in an airtight container. Make sure it cools down first. Store it in the fridge for up to three days. When reheating, use the stove or microwave. Add a splash of cream or broth to keep it moist. Heat until hot, but don’t overcook it. To freeze the dish, let it cool completely. Then, scoop it into freezer-safe bags or containers. Press out as much air as you can. Label the bags with the date. Freeze for up to three months. When ready to eat, thaw it overnight in the fridge. For the best taste, reheat gently on the stove. In the fridge, Creamy Tomato Basil Chicken lasts for about three days. If it has an off smell or odd color, it’s time to toss it. Always check for any mold or changes in texture before eating. Enjoy it fresh for the best flavor! It takes about 30 minutes to make this dish. - Prep time is 10 minutes. - Cook time is 20 minutes. This quick time makes it perfect for busy nights. You can easily whip it up after a long day. Yes, you can use chicken thighs. They add a richer flavor. Thighs also stay moist during cooking. If you prefer dark meat, thighs are a great choice. Just follow the same cooking steps. This dish pairs well with many sides. Here are a few ideas: - Pasta: Serve over fettuccine or penne. - Salad: A fresh green salad adds crunch. - Bread: Garlic bread or a crusty loaf is great for scooping up sauce. Each option complements the creamy flavors. Enjoy mixing and matching! In this article, we covered how to make Creamy Tomato Basil Chicken. You learned about key ingredients like chicken, tomatoes, and spices. I shared step-by-step instructions for cooking the chicken and sauce. Plus, we discussed tips for a creamy finish and various serving ideas. Final thoughts: This dish is versatile and simple, perfect for any meal. You can easily adapt it to fit your taste. Enjoy experimenting and make it your own!

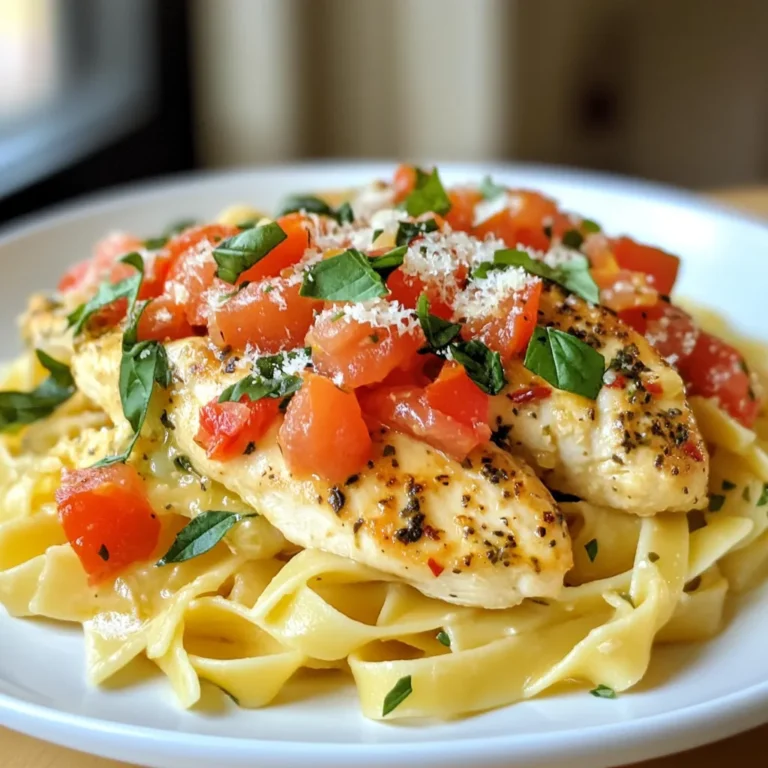
Creamy Tomato Basil Chicken Rich and Flavorful Recipe

- 1 lb ground beef (or turkey) - 1/2 cup breadcrumbs - 1/4 cup grated Parmesan cheese - 1/4 cup chopped fresh parsley - 1 large egg - 1 teaspoon garlic powder - 1 teaspoon onion powder - Salt and pepper to taste - 1 cup pineapple chunks - 1 red bell pepper, chopped - 1/2 cup onion, chopped - 1/2 cup sugar - 1/2 cup apple cider vinegar - 1/4 cup soy sauce - 1 tablespoon cornstarch mixed with 2 tablespoons water To make sweet and sour meatballs, we need a few key ingredients. First, we start with the main protein. You can use ground beef for a rich flavor or turkey for a lighter dish. Next, we need breadcrumbs and cheese. Breadcrumbs help hold the meatballs together. The grated Parmesan cheese adds a nice touch of flavor. Don't forget the fresh parsley, egg, garlic powder, and onion powder. These enhance taste and help bind the meatballs. Salt and pepper will round out the flavors. For the sweet and sour sauce, we have fruit and vegetables. Pineapple chunks give a sweet burst, while chopped red bell pepper and onion add crunch. Finally, we mix sugar, apple cider vinegar, and soy sauce for that signature sweet and sour taste. The cornstarch and water will help thicken the sauce, making it perfect for coating the meatballs. Gather these items, and you will be ready to create a delicious dish! {{ingredient_image_1}} To start, gather your ingredients. In a large mixing bowl, combine 1 pound of ground beef, ½ cup of breadcrumbs, and ¼ cup of grated Parmesan cheese. Add in ¼ cup of chopped fresh parsley, 1 large egg, 1 teaspoon of garlic powder, and 1 teaspoon of onion powder. Don’t forget to add salt and pepper to taste. Mix all these ingredients together until they become one nice mixture. It should feel sticky but hold together. Next, form the mixture into small meatballs, about 1 inch in diameter. Place them on a baking sheet lined with parchment paper. This helps with cleanup and keeps the meatballs from sticking. Now, it’s time to bake! Preheat your oven to 400°F (200°C). This step is very important. It makes sure the meatballs cook evenly. Place the baking sheet in the oven and bake for 20 to 25 minutes. Keep an eye on them and check for doneness. The meatballs should be browned and cooked through. You can cut one in half to check if it's fully cooked inside. While the meatballs are baking, you can make the sweet and sour sauce. In a medium saucepan, combine ½ cup of sugar, ½ cup of apple cider vinegar, and ¼ cup of soy sauce. Mix in 1 tablespoon of cornstarch that is mixed with 2 tablespoons of water. This will help thicken the sauce. Bring the mixture to a boil over medium heat. Stir it often to prevent sticking. After a few minutes, it will thicken up nicely. This should take about 3 to 5 minutes. Once thickened, add in 1 cup of pineapple chunks, 1 chopped red bell pepper, and ½ cup of chopped onion. Cook this for an additional 5 to 7 minutes until the veggies soften a bit. When the meatballs are ready, carefully add them to the saucepan with the sweet and sour sauce. Gently stir to coat the meatballs in the sauce. This is where the magic happens! Cook everything together for another 2 to 3 minutes. This allows all the flavors to meld together beautifully. Mixing meatball ingredients well is key. If you overmix, the meatballs can be tough. Use your hands to gently combine the ground meat, breadcrumbs, cheese, and spices. This keeps them light and tender. You can bake or fry meatballs. Baking is easier and less messy. Just preheat your oven to 400°F (200°C). Arrange the meatballs on a lined sheet and bake for 20-25 minutes. Frying gives a nice crisp. Heat oil in a pan and cook until browned on all sides. If your sauce is too thin, add more cornstarch mixed with water. Stir it in while the sauce simmers. If it's too thick, slowly add water or more vinegar until you reach your desired texture. To boost flavor, consider adding fresh ginger or a splash of pineapple juice. These add a nice twist to the sweet and sour taste. Serve sweet and sour meatballs over a bed of steamed rice. This absorbs the sauce and makes the dish filling. For a pop of color, sprinkle chopped green onions or parsley on top. Arrange the meatballs in a bowl with sauce around them. This creates a nice visual appeal. You can also add slices of red pepper and pineapple on the side for extra color. Pro Tips Use Fresh Ingredients: Fresh parsley and quality ground meat can significantly enhance the flavor of your meatballs, making them more delicious and aromatic. Experiment with Sauces: Try adding different ingredients to the sauce, such as ginger or chili flakes, for an extra kick and customization to suit your taste preferences. Make Ahead: These meatballs can be made in advance and frozen. Simply reheat in the sauce before serving for a quick meal option. Serve with Sides: Pair the meatballs with steamed rice, noodles, or a fresh salad to create a balanced and satisfying meal. {{image_2}} You can switch the meat in sweet and sour meatballs. Ground chicken or turkey works great. These options are lighter and still tasty. You can find them in most stores. If you want a vegetarian meal, use lentils or chickpeas. There are many recipes for vegetarian meatballs online. They use beans, quinoa, or veggies. You can change the sauce too. Try adding fruits like mango or peach. They give a unique taste. You can also use different veggies. Carrots or broccoli can make the dish colorful. If you want a low-sugar option, use a sugar substitute. Look for gluten-free soy sauce if needed. This keeps your dish friendly for all diets. Sweet and sour meatballs can pair with many sides. Serve them over rice or noodles for a filling meal. You can also add steamed veggies for color and nutrition. If you have leftovers, use them in a sandwich or salad. They can add a fun twist to your meal. You can even put them in a wrap for lunch! To keep your sweet and sour meatballs fresh, store them in the fridge right away. Use airtight containers to prevent moisture loss. You can separate the meatballs from the sauce if you prefer. This helps keep them from getting too soggy. - Best practices for refrigeration: Store leftovers within two hours of cooking. This keeps them safe to eat. - Recommended storage containers: Glass or plastic containers with tight lids work best. Make sure they are clean and dry before putting in the meatballs. When you're ready to enjoy those leftovers, you have a few options. You can use the microwave, oven, or stovetop. - Methods for reheating: - Microwave: Place meatballs on a microwave-safe plate. Cover with a damp paper towel to keep them moist. Heat in short intervals until warm. - Oven: Preheat to 350°F. Place meatballs on a baking sheet and cover with foil. Heat for about 15-20 minutes. - Stovetop: Use a skillet. Add a little sauce to the pan. Heat on medium, stirring gently until warmed through. - Tips to maintain flavor and texture: Add a splash of water or sauce when reheating. This keeps the meatballs juicy and tasty. If you've made too many meatballs or want to save some for later, freezing is a great option. - How to freeze meatballs and sauce separately: Let them cool completely first. Place meatballs in a single layer on a baking sheet and freeze for a couple of hours. Once frozen, transfer them to a freezer bag. For the sauce, put it in a separate container. - Thawing and reheating frozen meatballs: When you're ready, thaw in the fridge overnight. For quick thawing, use the microwave. Then follow the reheating tips above to enjoy them again. You can use crushed crackers or oats instead of breadcrumbs. Both options work well. They give your meatballs a nice texture. If you need a gluten-free option, try almond flour or ground flaxseed. These will keep your meatballs moist and tasty. Yes, you can prepare the meatballs ahead of time. Form them and bake them. Let them cool and store them in the fridge for up to three days. You can also freeze them for up to three months. Just reheat them in the oven or microwave when you are ready to serve. Steamed rice is a classic choice. It soaks up the sauce well. You can also serve them with noodles or a fresh salad. Both options add great flavor and balance to the meal. For a twist, try serving them with quinoa or cauliflower rice. Add crushed red pepper flakes to the meat mixture for heat. You can also mix in some sriracha or hot sauce into the sweet and sour sauce. For extra spice, chop up jalapeños and add them to the sauce. Adjust the heat to match your taste! In this post, I covered how to make delicious sweet and sour meatballs. We started by listing the key ingredients, including meat, breadcrumbs, and sauce components. I then shared step-by-step instructions, from mixing ingredients to baking meatballs and making the sauce. To finish, I offered cooking tips, variations, and storage advice. Now you can impress your family with this easy dish. Enjoy the process and have fun experimenting with flavors. Your sweet and sour meatballs will be a hit!

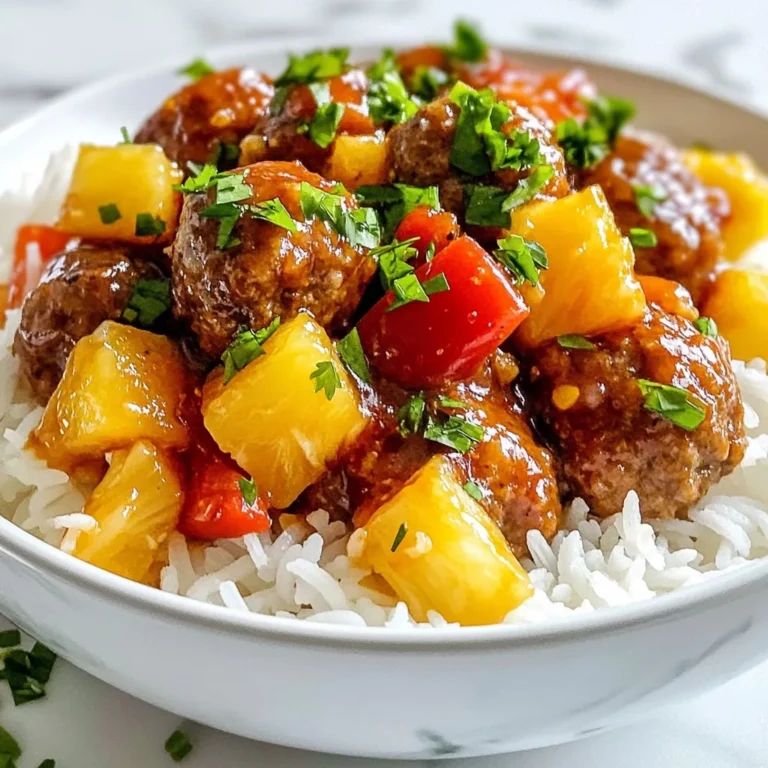
Sweet and Sour Meatballs Flavorful and Easy Recipe

- Pasta varieties: You can use 200g of penne or rigatoni for this dish. Both shapes hold sauces well and add to the meal's texture. - Feta cheese details: The recipe calls for 200g of feta cheese. Look for a block of feta, as it melts nicely and adds creaminess to the sauce. - Cherry tomatoes information: Use 300g of cherry tomatoes, halved. They burst in the oven, adding sweetness and flavor to the dish. - Olive oil selection: Choose a good-quality olive oil, about 4 tablespoons. It enhances the taste and helps the feta and tomatoes roast perfectly. - Garlic types and preparation: Use 3 cloves of garlic, minced. Fresh garlic gives a strong flavor that balances the creamy feta. - Herbs and spices: Add 1 teaspoon of dried oregano. It adds an earthy flavor that pairs well with the feta and tomatoes. Don’t forget salt and pepper to taste! - Red pepper flakes usage: If you like some heat, add 1/2 teaspoon of red pepper flakes. This optional ingredient gives a nice kick to the dish. - Grated Parmesan cheese: For serving, you can sprinkle some grated Parmesan cheese. It adds a savory touch that many enjoy. - Fresh basil for garnish: Fresh basil leaves are perfect for garnishing the dish. They add color and a fresh flavor that brightens the meal. {{ingredient_image_1}} 1. Start by preheating your oven to 200°C (400°F). This temp is perfect for roasting. 2. Grab a baking dish. Place the feta cheese right in the center. Surround it with halved cherry tomatoes. 3. Next, drizzle about 4 tablespoons of olive oil over the feta and tomatoes. This oil adds flavor and helps with browning. 1. Place the dish in your preheated oven. Bake it for about 25-30 minutes. 2. Keep an eye on it. You want the tomatoes to blister and the feta to turn golden and soft. This means it's ready. 1. While your feta bakes, cook 200g of pasta. Choose penne or rigatoni for best results. 2. Boil water in a pot and add salt. Cook the pasta according to the package. Aim for al dente texture; it should be firm but not hard. 3. When done, drain the pasta and set it aside until the feta is ready. This simple process makes a delicious dish. Enjoy every bite! To achieve creaminess in your pasta, mash the baked feta and tomatoes well. This creates a rich sauce. Stir in the pasta while it’s hot. The heat helps blend the flavors. If you like a bit of tang, use a good quality feta. It melts beautifully. When using herbs, fresh basil adds a nice touch. You can also use dried oregano. Dried herbs pack a punch, but fresh herbs give a bright flavor. If you have fresh basil, chop it and sprinkle over the dish after serving. If you want a basil alternative, try parsley or arugula. Both add a fresh taste. For an extra kick, consider adding some chili flakes on top. Grated Parmesan cheese really enhances the dish. Serve it on the side for guests who want to add more. A light sprinkle on top before serving looks great too. A common mistake is overcooking the pasta. Cook it al dente, so it stays firm. This gives the dish a nice texture. Choosing the right feta is key. Look for a block of feta, not crumbled. Crumbled feta doesn’t melt well. A good quality feta makes a huge difference in taste. Pro Tips Choose the Right Pasta: Use a pasta shape that can hold onto the creamy sauce, like penne or rigatoni. These shapes trap the sauce in their ridges, ensuring every bite is flavorful. Quality Feta Matters: Opt for a good quality feta cheese for the best flavor. Greek feta is typically creamier and more flavorful than others, enhancing the overall dish. Customize the Veggies: Feel free to add other vegetables like spinach, bell peppers, or zucchini to the baking dish for added nutrition and flavor. Just be mindful of the cooking time so they don’t overcook. Don’t Skip the Garnish: Fresh basil and grated Parmesan cheese elevate this dish. The aroma of fresh herbs and the nutty flavor of Parmesan add an extra layer of taste you won’t want to miss. {{image_2}} You can switch up the pasta shape for fun. Penne and rigatoni work great, but you can also use fusilli or farfalle. Each shape will change the look and texture. Try a whole grain or chickpea pasta for added nutrition. If you can’t find cherry tomatoes, use grape tomatoes or even diced bell peppers. These options add sweetness and color. Canned tomatoes also work in a pinch, just drain them well before using. Add protein to make this dish heartier. Cooked chicken, shrimp, or even chickpeas blend well with the feta and tomatoes. Just toss them in before baking. For extra veggies, consider spinach, zucchini, or bell peppers. You can add them to the baking dish or sauté them first. This helps to boost the flavors and nutrients in your meal. If you need gluten-free options, look for gluten-free pasta. Many brands offer great alternatives that cook well. Just follow the package instructions for best results. For dairy-free needs, swap the feta for a dairy-free cheese. There are many brands that mimic feta's taste and texture. This way, everyone can enjoy this tasty dish. To store leftovers, let the pasta cool first. Place it in an airtight container. This helps keep it fresh. The pasta lasts about 3 to 4 days in the fridge. Make sure to keep it refrigerated at all times. Yes, you can freeze baked pasta. First, let it cool completely. Then, transfer it to a freezer-safe container. It can stay in the freezer for up to 2 months. To reheat frozen pasta, take it out of the freezer the night before. Let it thaw in the fridge. You can also heat it straight from the freezer. Just add extra time when baking. The best method for reheating is in the oven. Preheat it to 180°C (350°F). Place the pasta in an oven-safe dish and cover it with foil. This helps keep the moisture in. Bake for about 20 minutes. You can also reheat it on the stove. Add a splash of water or olive oil to help with the texture. Stir it gently over low heat. This keeps the creaminess and flavor intact. Baked Feta TikTok Pasta became a hit on social media. It features creamy feta cheese and sweet cherry tomatoes. The mix creates a rich and tasty sauce. You bake the feta with tomatoes, garlic, and herbs. Then, you mix it with pasta for a quick meal. This dish's ease and taste make it popular for busy cooks. Yes, you can prepare this dish ahead of time. Cook the pasta and bake the feta and tomatoes. Let them cool, then store them in the fridge. When ready to eat, you can reheat the pasta and sauce together. This method saves time during busy days. Just follow the original steps when you reheat. You can easily change the serving size of this recipe. To make more, double the ingredients. For fewer servings, cut the amounts in half. Adjusting the pasta and feta ensures everyone gets enough. Keep the cooking time the same for the sauce. This way, you can enjoy this dish any time. Baked Feta TikTok Pasta is easy and fun to make. We covered main ingredients like pasta, feta, and tomatoes. You learned how to bake it perfectly and add your favorite flavors. Don’t forget tips to avoid common mistakes, like overcooking pasta. Variations help you customize the dish to your taste. Lastly, proper storage keeps leftovers fresh. Enjoy creating your own delicious version of this popular dish!

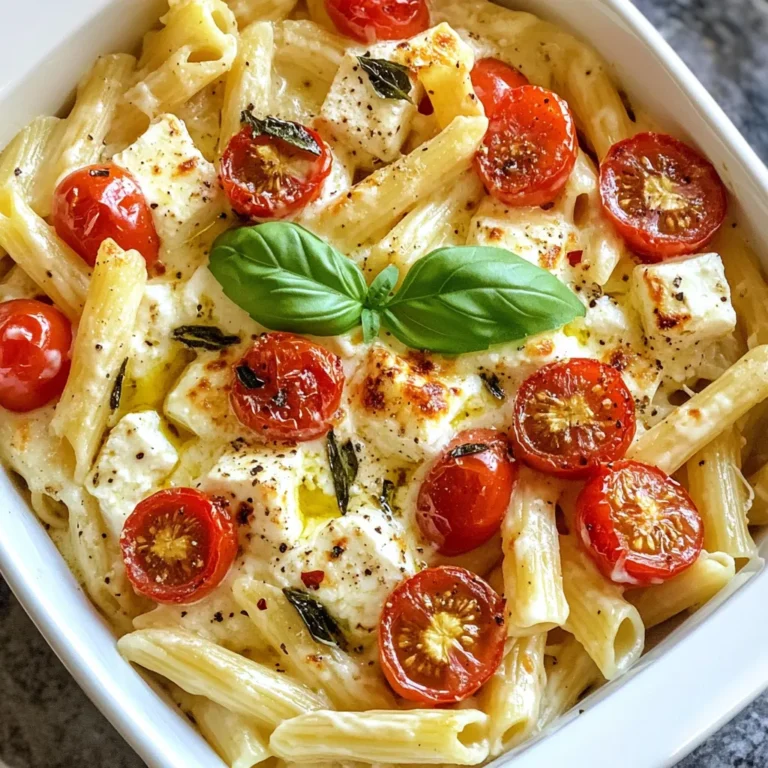
Baked Feta TikTok Pasta Quick and Tasty Recipe

- 1 lb ground turkey - 2 tablespoons Cajun seasoning - 1 small red onion, finely chopped - 2 cloves garlic, minced - 1 jalapeño, deseeded and finely chopped - 1/4 cup breadcrumbs - 1 large egg - Salt and pepper to taste - 4 burger buns - Lettuce leaves, for garnish - Sliced tomatoes, for garnish - Avocado slices, for garnish - Hot sauce, for serving In this recipe, I use ground turkey as the base. It is lean and absorbs flavors well. The Cajun seasoning gives the burger that spicy kick. I add red onion, garlic, and jalapeño for extra flavor. Each ingredient adds a unique taste. For binding, breadcrumbs and an egg help hold the patties together. I always add salt and pepper to enhance the taste. When it comes to garnishes, I love using fresh lettuce, ripe tomatoes, and creamy avocado. These toppings balance the spice and add freshness. Don’t forget the hot sauce! It brings everything together with a flavorful kick. {{ingredient_image_1}} Start by mixing ground turkey with spices and vegetables. In a large bowl, combine: - 1 lb ground turkey - 2 tablespoons Cajun seasoning - 1 small red onion, finely chopped - 2 cloves garlic, minced - 1 jalapeño, deseeded and finely chopped Next, add the breadcrumbs and egg. Season the mixture with salt and pepper. Mix well, but don’t overwork it. You want a nice, tender patty. Now, divide the turkey mixture into 4 equal portions. Shape each portion into a patty. You can cook these patties on a grill or in a skillet. Preheat your grill or skillet over medium-high heat. Lightly grease it with cooking spray or oil. Cook the turkey patties for about 5-6 minutes on each side. They should reach an internal temperature of 165°F (74°C). While the patties cook, toast the burger buns. In the last minute of cooking, place the buns on the grill or skillet to toast them lightly. Once the patties are cooked, let them rest for a minute. To assemble, place a turkey patty on each bun. Top with fresh lettuce, sliced tomatoes, and avocado. If you like heat, add a few drops of hot sauce. Finally, place the top bun on and serve right away. Enjoy your spicy Cajun turkey burgers with a side of sweet potato fries and extra hot sauce for dipping! To avoid dry turkey patties, do not overmix the meat. Combine the ground turkey with spices, onions, garlic, and jalapeños until just mixed. This keeps the patties moist. For grilling or pan-frying, preheat the grill or skillet to medium-high heat. Lightly grease it to prevent sticking. Cook each patty for 5-6 minutes on each side. Ensure the internal temperature reaches 165°F (74°C) for safety. You can add more spices to boost flavor. Consider mixing in smoked paprika or cayenne pepper for a twist. If you want fewer spicy notes, cut back on the jalapeño or use milder peppers. Adjust the heat level by changing the amount of Cajun seasoning. Start with less if you prefer a milder taste. You can always add more hot sauce when serving! Garnishing your burgers makes them look great. Use fresh lettuce leaves, sliced tomatoes, and avocado for color and texture. For plating, serve your burgers on a colorful plate with sweet potato fries on the side. Add a small bowl of hot sauce for dipping. This adds flair to your meal and impresses your guests! Pro Tips Keep the Mixture Moist: Make sure not to overwork the turkey mixture when combining ingredients. This helps keep the patties tender and juicy. Control the Heat: Adjust the amount of jalapeño or hot sauce based on your spice preference. You can always add more heat later, but it’s hard to take it out! Rest the Patties: Allow the cooked patties to rest for a minute before assembling the burgers. This helps retain their juices for a more flavorful bite. Experiment with Toppings: Don’t hesitate to try different toppings like pickles, cheese, or aioli to personalize your spicy turkey burgers! {{image_2}} You can swap turkey for other meats. Chicken works well and keeps it light. Ground beef is richer and gives a different taste. For a plant-based option, use black beans or lentils. These options are tasty and add protein. Spice mixes can change the taste of your burger. Try adding smoked paprika for a smoky flavor. You can also use chili powder for more heat. Toppings can also make a big difference. Think about adding cheese, sautéed onions, or even pineapple. Each choice gives a fresh twist. Pair your burgers with fun sides. Sweet potato fries are a perfect match. You can also serve a crisp salad with mixed greens. Homemade coleslaw adds crunch and flavor, too. For a unique touch, try making zucchini fries. They are easy and tasty. Store your spicy Cajun turkey burgers in the fridge. Use an airtight container for best results. They can stay fresh for up to three days. For longer storage, freeze the patties. Wrap each patty in plastic wrap, then put them in a freezer bag. They last up to three months in the freezer. Reheat the turkey burgers in a skillet over low heat. Add a splash of water to keep them moist. Cover the skillet with a lid. This method helps prevent drying out. You can also use a microwave. Heat on medium power for about one minute. For leftover patties, try slicing them for salads or wraps. They add a spicy kick to many dishes. Prep the turkey mixture a day in advance. Store it in the fridge until you're ready to cook. You can chop the vegetables ahead of time too. Keep them in separate containers. This way, you can quickly mix and cook during the week. Assemble your burgers right before serving for the best taste and texture. You can use several spices if you don't have Cajun seasoning. Here are some great alternatives: - Creole seasoning: This gives a similar kick. - Chili powder: It adds heat and flavor. - Paprika: Use smoked paprika for a deeper taste. - Garlic powder and onion powder: These add nice depth. Mix and match these spices to find a blend you like. You can also add some cayenne for heat. Check the internal temperature to know if turkey burgers are done. Cook them until they reach 165°F (74°C). Here are some tips: - Use a meat thermometer for accuracy. - The juices should run clear, not pink. - The patties should feel firm when you press them. Always let them rest for a minute after cooking. This helps keep them juicy. Yes, grilling adds great flavor! Here are some tips for grilling: - Preheat your grill to medium-high heat. - Lightly oil the grill grates to prevent sticking. - Grill patties for about 5-6 minutes on each side. - Toast the buns on the grill for a minute. Grilling gives a smoky taste that pairs well with the spices. Enjoy the delicious flavors! In this blog post, we explored how to make flavorful turkey burgers. We detailed the main ingredients like ground turkey and spices, and the crucial binding elements. You learned effective cooking methods, tips for keeping patties moist, and ideas for creative variations. Finally, we covered storage and reheating options for leftovers. These tips will help you create delicious turkey burgers for any meal. Embrace the flavors and enjoy your cooking journey!

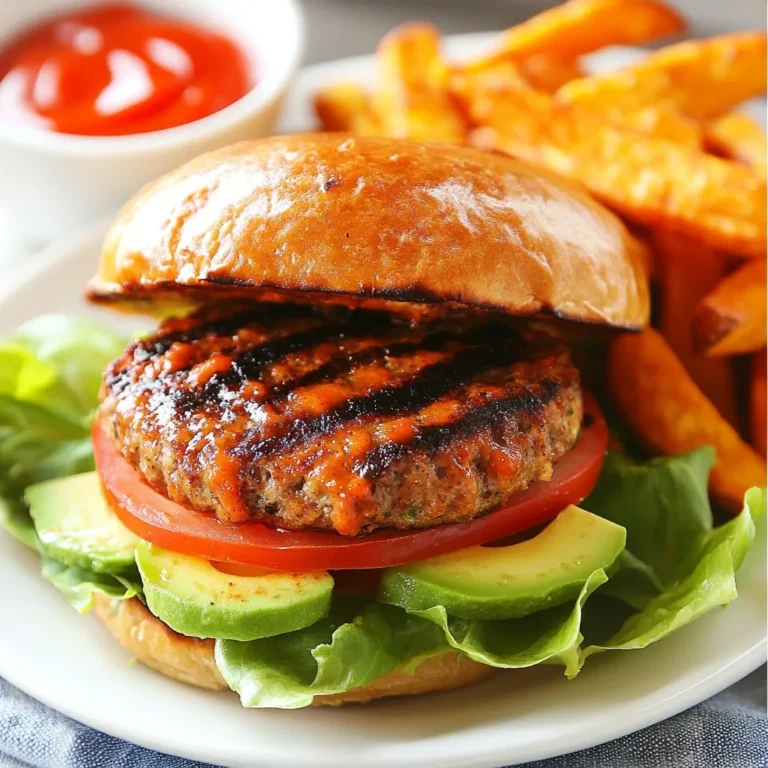
Spicy Cajun Turkey Burgers Tasty and Juicy Treat

To make Korean Beef Bowls, you need a few key ingredients: - 1 lb ground beef - 3 tablespoons soy sauce - 2 tablespoons brown sugar - 1 tablespoon sesame oil - 2 cloves garlic, minced - 1 teaspoon ginger, grated - 1 cup cooked jasmine rice - 1/2 cup carrots, julienned - 1/2 cup cucumbers, thinly sliced - 1/4 cup green onions, sliced - 1/4 cup kimchi (for serving) - Sesame seeds for garnish - Salt and pepper to taste These ingredients create a tasty and balanced dish that is both filling and flavorful. You can add a personal touch with optional garnishes: - Extra green onions for crunch - Sliced radishes for a peppery bite - Chopped cilantro for freshness - A drizzle of sriracha for heat These toppings make the dish look vibrant and add extra flavor. If you need to swap out ingredients, here are some ideas: - Use ground turkey or chicken instead of beef. - Swap jasmine rice for brown rice or quinoa. - Try coconut aminos in place of soy sauce for a gluten-free option. - Replace sesame oil with olive oil for a lighter taste. These substitutions help you customize the dish to your liking or dietary needs. {{ingredient_image_1}} Start with a large skillet over medium-high heat. Add 1 pound of ground beef to the pan. Cook it until it turns brown, about 5 to 6 minutes. Use a spatula to break the meat apart as it cooks. If there is too much fat, drain it off. This keeps your dish from being too greasy. Once the beef is browned, add 2 minced cloves of garlic and 1 teaspoon of grated ginger. Stir these into the beef for about 1 to 2 minutes. You want to smell the fragrant garlic and ginger. This step gives your dish a great depth of flavor. In a small bowl, mix together 3 tablespoons of soy sauce, 2 tablespoons of brown sugar, and 1 tablespoon of sesame oil. Whisk until blended. Pour this sauce over the beef in the skillet. Stir well to coat the beef. Let it simmer for 2 to 3 minutes. This allows all the flavors to come together nicely. To cook ground beef well, start with a hot skillet. Add the beef and let it sit. This helps it brown nicely. Break it up with a spatula as it cooks. Aim for about 5-6 minutes until it's brown. If you see too much fat, drain it off. This keeps the dish light and tasty. When you assemble your bowls, begin with the rice. Use cooked jasmine rice for a great base. Scoop it into each bowl evenly. Next, layer the beef mixture on top. Then, add the julienned carrots and sliced cucumbers. Finish with fresh green onions for a pop of color. This method keeps the flavors separate and fresh. To serve these bowls authentically, add a side of kimchi. Kimchi brings a tangy crunch that complements the beef. You can also sprinkle sesame seeds on top for extra flavor. For a touch of heat, consider adding sliced chili peppers. Serve with chopsticks for a fun dining experience. Pro Tips Use Fresh Ingredients: Fresh garlic and ginger will enhance the flavor of your dish significantly compared to pre-minced options. Adjust the Sweetness: Depending on your taste, you can increase or decrease the brown sugar for a sweeter or more savory profile. Add Extra Veggies: Feel free to add other vegetables like bell peppers or snap peas to increase the nutritional value and color of your bowl. Marinate for More Flavor: If time allows, marinating the ground beef in soy sauce and sesame oil for 30 minutes before cooking can deepen the flavors. {{image_2}} You can make Korean beef bowls without meat. Try using ground mushrooms or lentils instead. Both options give you a hearty texture. You can also use tempeh or tofu for protein. Make sure to season them well with soy sauce and spices to keep the flavors bright. While the basic sauce is tasty, you can mix it up. Try adding gochujang for heat. This Korean chili paste adds a sweet and spicy kick. You can also use hoisin sauce for a sweeter flavor. Mixing soy sauce with rice vinegar can give a tangy twist. Experiment with different sauces to find your favorite. Toppings make your bowls exciting and flavorful. Try adding avocado for creaminess. You can also sprinkle crushed peanuts or cashews for crunch. Fresh herbs like cilantro or mint can add a bright note. Pickled vegetables can give a nice tang, too. Consider adding sesame oil drizzled on top for extra depth. To store your Korean beef bowls, let them cool first. Use airtight containers for storage. Place the beef and rice in separate containers. This helps keep the rice fluffy. Store in the fridge for best results. When ready to eat, take out the leftovers. For the best taste, use a skillet. Warm the beef over medium heat. Stir it to heat evenly. You can also microwave it. Place the beef in a bowl, cover it, and heat for 1-2 minutes. Make sure it’s hot all the way through. Korean beef bowls stay fresh in the fridge for about 3-4 days. If you want to keep them longer, freeze them. They last up to 3 months in the freezer. Just remember to thaw them in the fridge before reheating. Enjoy your tasty meal without waste! You can serve Korean Beef Bowls with several sides. Here are some great options: - Steamed broccoli: Adds a nice crunch. - Kimchi: A classic Korean side with bold flavors. - Pickled radishes: They add a tangy kick. - Sliced avocado: For a creamy texture. - Edamame: A healthy protein boost. These sides make the meal vibrant and tasty. Yes, you can make Korean Beef Bowls ahead of time. Cook the beef mixture and let it cool. Store it in an airtight container in the fridge. It lasts about three days. Cook the rice fresh when you’re ready to serve. This keeps the texture nice. Korean Beef Bowls are not very spicy. The main flavors come from the soy sauce and sesame oil. If you like heat, you can add red pepper flakes or sriracha. Adjust the spice to match your taste. Absolutely! You can use various meats for Korean Beef Bowls. Ground turkey or chicken are great substitutes. You can even use tofu for a vegetarian option. Adjust cooking times if you use larger pieces of meat. Enjoy experimenting with flavors! Korean beef bowls are easy to make and full of flavor. We covered essential ingredients, substitutes, and perfect cooking tips. Also, we explored tasty variations and proper storage methods. Enjoy these bowls with your favorite sides, or try them with different meats. Remember, cooking can be fun and creative. Make these bowls your own with unique toppings and flavors. Dive into this tasty dish, and have a great meal!

Korean Beef Bowls Flavorful and Easy Dinner Idea

- 2 cups rolled oats - 1 cup pecans, roughly chopped - 1/2 cup almonds, sliced - 1/2 cup unsweetened shredded coconut - 1/3 cup maple syrup - 1/4 cup coconut oil, melted - 1 teaspoon vanilla extract - 1/2 teaspoon cinnamon - 1/4 teaspoon salt - 1/2 cup dried cranberries or raisins (optional) To make this Maple Pecan Granola, gather these key ingredients. You need rolled oats for a great base. The pecans add a nice crunch. Almonds boost flavor and nutrition. Shredded coconut gives a subtle sweetness. Maple syrup sweetens the mix naturally. Melted coconut oil helps bind it all together. Vanilla extract adds depth to the taste. Cinnamon brings warmth, while salt balances the flavors. If you want, add dried cranberries or raisins for extra sweetness. Each ingredient plays a role, making this granola both tasty and healthy. {{ingredient_image_1}} 1. Preheat your oven to 325°F (165°C). This step is key for even baking. 2. Prepare the baking sheet by lining it with parchment paper. This helps with easy cleanup later. 3. Combine dry ingredients in a large bowl. Mix together the rolled oats, chopped pecans, sliced almonds, shredded coconut, cinnamon, and salt. Stir well to get everything evenly mixed. 4. Mix wet ingredients in a separate bowl. Combine the maple syrup, melted coconut oil, and vanilla extract. Stir until they blend smoothly. 1. Spread the mixture onto the lined baking sheet. Use a spatula to press it down. Make a nice even layer for the best crunch. 2. Cook for 20-25 minutes. Stir halfway through the baking time. This helps it brown evenly. Watch it closely, as all ovens work a bit differently. You want it golden brown and fragrant. 3. Cool the granola on the baking sheet after removing it from the oven. Let it sit until completely cool. It will crisp up as it cools. Once cooled, break it into clusters. Add dried cranberries or raisins if you like. Enjoy your homemade granola! Mixing your granola well is key. It helps all the flavors blend together. When you stir the dry and wet ingredients, make sure every piece gets coated. This way, every bite tastes great. Monitor your baking time closely. Ovens can vary a lot. Start checking your granola at 20 minutes. It should be golden brown and smell amazing. Stir it halfway for even cooking. If it looks light, give it more time. Achieving the right texture is important. You want it crunchy but not too hard. Let the granola cool completely on the baking sheet. It will crisp up as it cools. Breaking it into clusters makes it fun to eat. Pair your granola with yogurt and fresh fruit. This adds creaminess and sweetness. Try it with berries or bananas for a tasty breakfast. You can also use granola as a topping for smoothies. It adds a nice crunch. Just sprinkle it on top after blending your smoothie. For a beautiful presentation, store granola in clear jars. This shows off its lovely colors and textures. It makes a great gift or snack to share. Pro Tips Use Fresh Ingredients: Always opt for fresh nuts and spices to enhance the flavor of your granola. Stale ingredients can dull the taste. Customize Your Nuts: Feel free to substitute pecans with walnuts or hazelnuts based on your preference for a unique flavor profile. Adjust Sweetness: If you prefer a sweeter granola, you can increase the amount of maple syrup or add a touch of brown sugar. Store Properly: Keep your granola in an airtight container at room temperature to maintain its crunch and freshness for up to two weeks. {{image_2}} You can change the nuts in this recipe. Try walnuts or hazelnuts instead of pecans. Each nut gives a unique taste and texture. You can also mix in other dried fruits. Apricots or pineapple add a sweet twist. The more flavors you add, the more fun your granola will be! Want a different sweetness? You can use honey or agave syrup instead of maple syrup. Both options bring a nice flavor. If you need to cut sugar, try using a sugar-free syrup. Your granola will still taste great! Experimenting with these options can help you find your perfect balance. To keep your maple pecan granola fresh, use airtight containers. Glass jars or plastic bins work well. Make sure they have tight lids. This prevents air from getting in. You can also use resealable bags if you want. Label your containers with the date. This will help you track freshness. To maintain crunchiness, store granola in a cool, dry place. Avoid places with heat or moisture, like near the stove. If you live in a humid area, consider keeping it in the fridge. Just make sure it’s sealed tightly to avoid moisture. When stored properly, granola stays fresh for about two weeks. You can extend its shelf life by freezing it. If you freeze it, it can last up to three months. Just remember to thaw it before eating. Watch for signs of spoilage. If your granola smells off or has a strange taste, it’s time to toss it. Also, check for any changes in texture. If it feels soft or chewy instead of crunchy, it may not be good anymore. Can I substitute coconut oil? Yes, you can use butter or another oil. Olive oil works well too. Each option adds a unique flavor. Just melt it the same way you would coconut oil. Is granola healthy? Granola can be very healthy. It offers fiber from oats and healthy fats from nuts. Just watch your portions. Some store-bought granola has added sugars. Can I bake granola in advance? Absolutely! You can bake granola ahead of time. Just store it in an airtight container. It stays fresh for about two weeks. Can I use quick oats instead of rolled oats? I suggest sticking with rolled oats. Quick oats may make the granola too soft. Rolled oats give the best crunch and texture. What if I don’t have pecans? No problem! You can use any nut you like. Almonds, walnuts, or even cashews work great. Each nut brings its own flavor and crunch. You can now make your own granola by following the outlined steps. You learned what ingredients to use, how to prepare them, and the best tips for perfecting your batch. Remember to experiment with flavors and store your granola properly to keep it fresh. Enjoy it with yogurt or as a topping. Homemade granola is both tasty and healthy. It’s fun to create your own mix. You have all the tools to make something great. Dive in and get started!

Maple Pecan Granola Crunchy and Delicious Recipe

For a tasty Tomato Basil Mozzarella Flatbread, you need: - 1 store-bought flatbread or pizza base - 2 medium ripe tomatoes, sliced - 1 cup fresh mozzarella cheese, sliced or torn - 1 cup fresh basil leaves - 2 tablespoons olive oil - 1 teaspoon balsamic glaze - Salt and pepper to taste These ingredients create a simple yet delicious flatbread. The ripe tomatoes give a sweet flavor. Fresh mozzarella melts beautifully, adding creaminess. Basil brings a bright note that ties everything together. To enhance your flatbread, consider adding: - 1 clove garlic, minced - 1 tablespoon fresh oregano Garlic adds a nice kick. Oregano gives a robust taste that complements the other flavors. Use these ingredients if you want a bit more depth in your dish. They can make your flatbread even more special without much effort. What goes well with your flatbread? Here are some ideas: - A fresh green salad with a light vinaigrette - A glass of crisp white wine or sparkling water - Some olives or charcuterie for a savory snack These pairings help balance the flavors. A salad adds crunch, while wine can enhance the overall meal experience. Try these suggestions to elevate your flatbread night! {{ingredient_image_1}} Start by gathering all your ingredients. You need: - 1 store-bought flatbread or pizza base - 2 medium ripe tomatoes, sliced - 1 cup fresh mozzarella cheese, sliced or torn - 1 cup fresh basil leaves - 2 tablespoons olive oil - 1 teaspoon balsamic glaze - Salt and pepper to taste - 1 clove garlic, minced (optional) - 1 tablespoon fresh oregano (optional) Next, preheat your oven to 425°F (220°C). This step is key for a crispy flatbread. If you like garlic, mix it with olive oil, salt, and pepper in a small bowl. This mixture adds a nice flavor. Now, place your flatbread on a baking sheet with parchment paper. Brush the garlic oil evenly over the flatbread. This gives it a tasty base. Arrange the tomato slices across the flatbread. Make sure to spread them out well. Then, scatter the mozzarella pieces over the tomatoes. Ensure the cheese covers the tomatoes for a gooey texture. Next, add the fresh basil leaves on top. Reserve a few for later. If you choose to use fresh oregano, sprinkle it over the flatbread now. Slide your flatbread into the preheated oven. Bake for about 10-12 minutes. You want the cheese to bubble and the edges to turn golden brown. When it’s done, take it out and drizzle the balsamic glaze on top. Let it cool for a couple of minutes. Then, slice it into pieces. Serve it warm and top with the reserved basil leaves for a fresh touch. Enjoy your Tomato Basil Mozzarella Flatbread! Selecting the right tomatoes is key. Look for tomatoes that feel heavy for their size. Ripe tomatoes should have a smooth skin and a deep color. Smell them; they should have a sweet aroma. Avoid any tomatoes with bruises or soft spots. Heirloom tomatoes add a unique taste, but Roma tomatoes work well too. Use fresh, ripe tomatoes for the best flavor in your flatbread. To get the best melt from mozzarella, choose fresh mozzarella. It should feel soft and moist. If using sliced mozzarella, ensure it is not too thick. Thin slices melt better and distribute heat evenly. Let the mozzarella sit at room temperature for about 30 minutes before baking. This helps it melt faster and more evenly. Avoid pre-shredded mozzarella as it often contains anti-caking agents that affect melting. One common mistake is overloading the flatbread with toppings. This can make it soggy. Keep a balance with your toppings for best results. Another mistake is not preheating the oven. Always preheat to 425°F (220°C) before baking. This ensures a crispy crust. Lastly, don’t forget to watch the baking time. Remove the flatbread when the cheese is bubbly and golden to avoid burning. Pro Tips Use Fresh Ingredients: Always opt for fresh tomatoes and basil for the best flavor. The quality of your ingredients directly affects the taste of the flatbread. Experiment with Cheese: While fresh mozzarella is classic, you can try adding a sprinkle of goat cheese or feta for a tangy twist. Prepare Ahead: You can prepare the flatbread in advance and just bake it when you’re ready to serve, making it a great option for gatherings. Garnish Wisely: Adding a sprinkle of fresh herbs or a drizzle of extra balsamic glaze just before serving can elevate the dish and make it visually appealing. {{image_2}} You can easily change this flatbread. Try adding sliced bell peppers for crunch. Mushrooms give a nice earthy flavor. You can also use spinach for added nutrients. For a spicy kick, add red pepper flakes. Think about adding meats like prosciutto or salami. These options let you mix flavors and textures. If you need gluten-free, many stores sell gluten-free flatbreads. You can also make your own using gluten-free flour. Almond flour or rice flour works well. Just follow the package directions for baking times. This way, everyone can enjoy this tasty meal. To make this flatbread vegan, swap the mozzarella for vegan cheese. There are great brands that melt nicely. You can also add olives or artichokes for flavor. Use a nut-based cheese for creaminess. This keeps the dish fresh and plant-based. Enjoy this flatbread with friends while staying true to your diet. To keep your flatbread fresh, let it cool first. Then, wrap it in plastic wrap or foil. You can also place it in an airtight container. Store it in the fridge for up to three days. This way, it stays soft and tasty. When you’re ready to eat your leftover flatbread, preheat your oven to 350°F (175°C). Place the flatbread on a baking sheet. Heat it for about 8-10 minutes. This will make the cheese melt again and warm the bread. You can also use a toaster oven for this. It keeps the crust crispier. If you want to save your flatbread for later, freezing is easy. Wrap the cooled flatbread tightly in plastic wrap. Then, place it in a freezer bag. It lasts for up to three months in the freezer. To enjoy it later, thaw it in the fridge overnight. Reheat it as described above for tasty results. Yes, you can use store-bought sauce. It saves time and works well. However, fresh ingredients add better flavor. I prefer making my own mix with olive oil, garlic, and herbs. This mix enhances the taste of the flatbread. If you choose store-bought sauce, pick one with quality ingredients. Look for a sauce with no added sugars or preservatives. You can prepare the flatbread ahead in a few easy steps. First, follow the recipe but don't bake it. Assemble the flatbread with tomatoes and cheese, then store it in the fridge. Cover it tightly with plastic wrap or foil. When ready to eat, just bake it as directed. This method keeps the flavors fresh and delicious. You can also freeze the unbaked flatbread for up to a month. Just remember to thaw it in the fridge before baking. If you can't find fresh basil, don't worry. You can use dried basil instead. Use one teaspoon of dried basil for every tablespoon of fresh. Another option is to try fresh parsley or arugula. These herbs add a different but tasty flavor. You could also use spinach for a milder taste. Each substitute gives a unique twist to your flatbread. This blog post covers everything you need for delicious Tomato Basil Mozzarella Flatbread. We went through essential and optional ingredients, plus how to pair them. I shared clear, easy instructions for prepping, assembling, and baking. You learned tips on choosing tomatoes and getting perfect cheese melt. I also explored tasty variations and how to store leftovers. In the end, this flatbread is fun to make and enjoy. You can play with flavors to fit your taste. Dive in, and have a great time creating your own flatbread!

Tomato Basil Mozzarella Flatbread Tasty and Simple

For this honey lime fruit salad, you need a mix of fresh fruits. They add bright colors and flavors. Here’s what you’ll need: - 2 cups strawberries, hulled and halved - 2 cups pineapple, diced - 2 cups blueberries - 2 cups kiwi, peeled and sliced - 1 orange, segmented These fruits bring sweetness and a bit of tang. You can mix and match based on what you love. The dressing is key to bringing all the flavors together. You’ll need: - 1/4 cup honey - 2 tablespoons fresh lime juice - Zest of 1 lime These ingredients create a sweet and tangy mix. The honey adds sweetness, while the lime juice gives a fresh kick. The zest enhances the citrus flavor. To make your fruit salad look even better, consider adding: - Fresh mint leaves These leaves not only look nice but also add a refreshing taste. Just sprinkle them on top before serving. {{ingredient_image_1}} Start with fresh fruit. I like to use strawberries, pineapple, blueberries, kiwi, and orange. Here’s how to prepare them: - Hull and halve 2 cups of strawberries. - Dice 2 cups of pineapple. - Rinse 2 cups of blueberries. - Peel and slice 2 cups of kiwi. - Segment 1 orange. Once you have prepped all the fruit, place them in a large mixing bowl. This colorful mix will make your salad pop! Now, let’s make the dressing. This adds a sweet and tangy flavor. Here’s what you need: - 1/4 cup honey - 2 tablespoons fresh lime juice - Zest of 1 lime In a small bowl, whisk together the honey, lime juice, and lime zest. Mix until smooth. This dressing is quick to make and tastes amazing! Next, it’s time to combine everything. Drizzle the honey-lime dressing over the fruit. Gently toss the fruit to coat it well. Be careful not to mash the fruit. Let the salad chill in the fridge for about 15 minutes. This helps the flavors blend together. Just before serving, give it one last toss and add fresh mint leaves for garnish. Enjoy your refreshing honey lime fruit salad! Pick ripe, fresh fruits for the best taste. Look for strawberries that are bright red. Choose pineapples that smell sweet and feel firm. Select blueberries that are plump and smooth. For kiwi, the skin should be slightly soft. Oranges should be heavy for their size and firm. This ensures a sweet and juicy salad. Add a pinch of salt to boost the sweetness. Try a splash of vanilla extract for extra flavor. You can also mix in a bit of coconut for a tropical twist. Fresh herbs like basil or mint add a fun taste. Zesting the lime adds a nice zing to the dish. Don’t skip chilling the salad; it makes a big difference. Serve the salad in clear bowls for a beautiful view. Garnish with mint leaves for a pop of color. You can also use skewers for fun fruit kabobs. This dish is great for picnics or barbecues. Pair it with yogurt for a tasty breakfast option. You can even use it as a topping for pancakes. Pro Tips Use Fresh Fruits: Always opt for the freshest fruits available for the best flavor and texture in your salad. Chill Before Serving: Allowing the salad to chill for at least 15 minutes helps the flavors meld and enhances the overall taste. Customize with Seasonal Fruits: Feel free to swap in seasonal fruits to keep the salad fresh and exciting throughout the year. Garnish for Presentation: Adding fresh mint leaves not only enhances the flavor but also makes your fruit salad visually appealing. {{image_2}} You can easily adapt this honey lime fruit salad. If you want a vegan option, replace honey with maple syrup or agave nectar. This keeps the sweet taste without using animal products. For those who need a low-sugar option, try using a sugar substitute like stevia. You can still enjoy a tasty salad while meeting your dietary needs. Fruits change with the seasons, and you can use them to your advantage. In summer, add ripe peaches or juicy cherries. In fall, you might enjoy diced apples or pears. Feel free to mix in seasonal berries, like raspberries or blackberries, for a fun twist. The salad will taste fresh and vibrant with each season's best fruits. Want to shake things up? Try adding a handful of nuts like almonds or walnuts for crunch. You can also mix in yogurt to make it creamier. For a spicy kick, add a pinch of chili powder or cayenne pepper to the honey-lime dressing. Each twist can make this dish truly yours while keeping it fun and delicious! To keep your honey lime fruit salad fresh, store it in a sealed container. Use an airtight container to block out air and moisture. If you plan to serve it later, don’t mix the dressing in until you are ready. This way, the fruit stays crisp and bright. If stored properly, your fruit salad lasts about 3 days in the fridge. After that, the fruit may start to lose its texture. Check for any signs of spoilage, like browning or mushiness. If the fruit looks or smells off, it’s best to toss it. If you have leftover fruit salad, get creative! You can blend it into smoothies for a refreshing drink. You can also use it in yogurt or oatmeal for breakfast. Another idea is to make a fruit parfait with layers of yogurt and granola. Enjoying leftovers can help reduce waste and add flavor to other meals. Yes, you can use many fruits in this salad. Think about your favorites! You can add mango, grapes, or peaches. Just chop them up and mix them in. The more colors, the better it looks! To make this dish vegan, skip the honey. You can use agave syrup or maple syrup instead. Both sweeteners work well with the lime and fruit. They will keep the same yummy taste! If you want to avoid honey, try these sweeteners: - Agave syrup - Maple syrup - Coconut nectar All of these options will add a nice sweetness. Just remember to adjust the amount to your taste. Make sure you enjoy the flavors! This blog post showed you how to make a tasty fruit salad. We covered the ingredients, like fresh fruits and a simple honey lime dressing. You learned how to prepare, combine, and serve the salad. We also shared tips on choosing fruits and ideas for variations. Fruit salad is easy to customize and perfect for any meal. Enjoy creating your own mix!

Honey Lime Fruit Salad Refreshing and Tasty Dish

To make your Salted Caramel Pretzel Brownies, gather these ingredients: - 1 cup unsalted butter (2 sticks) - 2 cups granulated sugar - 4 large eggs - 1 teaspoon vanilla extract - 1 cup all-purpose flour - 1 cup unsweetened cocoa powder - 1 teaspoon baking powder - 1/2 teaspoon salt - 1 cup chocolate chips - 1 cup pretzel pieces - 1 cup homemade or store-bought salted caramel sauce These ingredients blend to create a rich, sweet, and salty treat. You will need a few tools to bake these brownies: - 9x13 inch baking pan - Medium saucepan - Mixing bowls - Whisk - Spatula - Toothpick for testing doneness - Wire rack for cooling Having these items ready will help make your baking smooth and fun. You can swap some ingredients if needed: - Use salted butter if you like a saltier taste. - Swap granulated sugar for brown sugar for more moisture. - Try gluten-free flour for a gluten-free version. - Use a different chocolate type, like dark or white chocolate chips. These substitutions can add new flavors and textures to your brownies. {{ingredient_image_1}} Start by preheating your oven to 350°F (175°C). This step is key for even baking. While the oven heats, grease a 9x13 inch baking pan. You can also use parchment paper for easy removal. This way, your brownies won’t stick to the pan. Next, melt 1 cup of unsalted butter in a medium saucepan over low heat. Once the butter is melted, take it off the heat. Stir in 2 cups of granulated sugar until it blends well. Then, add 4 large eggs one by one. Mix well after each egg. Now, stir in 1 teaspoon of vanilla extract for flavor. In another bowl, whisk together 1 cup of all-purpose flour, 1 cup of unsweetened cocoa powder, 1 teaspoon of baking powder, and 1/2 teaspoon of salt. Slowly fold this dry mix into the wet mix. Be gentle here; you don’t want to overmix. Finally, fold in 1 cup of chocolate chips and 1 cup of pretzel pieces. This adds great texture and contrast. Pour half of the brownie batter into the greased pan. Smooth it out with a spatula. Now, drizzle half of your salted caramel sauce over this layer. Use a knife to swirl it lightly for a marbled look. Next, add the rest of the brownie batter on top. Drizzle the remaining caramel sauce over this layer. You can create another swirl if you want. Bake in your preheated oven for 25-30 minutes. Check with a toothpick in the center. It should come out with a few moist crumbs, not wet batter. Let your brownies cool in the pan for about 15 minutes. Then, lift them out using the parchment paper. Cool completely on a wire rack. Finally, cut into squares and sprinkle a pinch of sea salt on top just before serving. Enjoy your delicious creation! To get the best brownie texture, use the right ingredients. Start with room temperature eggs. This helps mix better. Make sure you melt the butter gently. If it gets too hot, your brownies can turn out dry. Mix your wet and dry ingredients just until combined. Overmixing can make them tough. For a fudgy brownie, add more chocolate chips. They create a rich, moist texture. Swirling caramel can be tricky. To make it easier, heat the caramel sauce slightly. This makes it runny and easier to drizzle. Use a knife or a toothpick to create swirls. Don't overdo it; you want to see layers, not a full blend. Swirling too much will mix the flavors. Remember to save some caramel for the top. It adds a nice look and flavor. You can boost flavor with a few simple tricks. Try using dark chocolate chips for a richer taste. You can also add a pinch of espresso powder to the batter. It brings out the chocolate flavor. For a twist, mix in some chopped nuts or coconut. You can even sprinkle some sea salt on top to enhance the sweet and salty mix. These small changes can make your brownies even more delightful. Pro Tips Use Room Temperature Eggs: Allow your eggs to come to room temperature before adding them to the batter. This helps them blend more easily and creates a smoother brownie texture. Don’t Overmix the Batter: When combining the dry and wet ingredients, mix until just combined. Overmixing can lead to dense brownies instead of the desired fudgy texture. Customize Your Toppings: Feel free to add additional toppings such as crushed pretzels, nuts, or extra chocolate chips to enhance the flavor and texture of your brownies. Check for Doneness Carefully: To ensure perfectly baked brownies, use a toothpick to check for doneness. It should come out with a few moist crumbs, but not wet batter. {{image_2}} You can easily change up the flavor of these brownies. Try adding nuts like walnuts, pecans, or almonds. Each nut gives a nice crunch. You can also mix in candies like peanut butter cups or toffee bits. These options make the brownies fun and unique. They’ll add different flavors and textures. Switching the chocolate type can change the taste. If you love dark chocolate, go for dark chocolate chips. They add a rich, bold flavor. White chocolate brings a sweet and creamy touch. It pairs well with the salty pretzels too. Experiment with both to see which you enjoy more. Homemade caramel sauce is great, but store-bought works just as well. If you want a twist, use flavors like butterscotch or chocolate caramel. Each sauce brings its own sweetness. You can also try flavored syrups, like vanilla or hazelnut. These options add a fun surprise to every bite. To keep your salted caramel pretzel brownies fresh, store them in an airtight container. This helps prevent them from drying out. Place parchment paper between layers to keep them from sticking together. You can store them at room temperature for up to three days. If you want them to last longer, consider refrigeration. Freezing is a great option for longer storage. First, cut the brownies into squares. Wrap each square tightly in plastic wrap. Then, place them in a freezer-safe bag or container. They can stay frozen for up to three months. When you want to enjoy them, just take them out and let them thaw at room temperature. If you prefer warm brownies, reheating is easy. Preheat your oven to 350°F (175°C). Place the brownies on a baking sheet and cover them with foil to keep them moist. Heat for about 10-15 minutes. You can also microwave a single square for about 10-15 seconds. This warms them up nicely and makes the caramel gooey again. Enjoy your delicious treat! You can tell when brownies are done by using a toothpick. Insert it in the center of the brownies. If it comes out with a few moist crumbs, they are ready. If the toothpick has wet batter, they need more time. Bake for 25-30 minutes. Ovens can vary, so keep an eye on them. Yes, you can use salted butter. However, it will change the flavor a bit. You should reduce the added salt in the recipe to balance it. If using salted butter, try skipping the added half teaspoon of salt. This keeps the brownies from being too salty. These brownies pair well with vanilla ice cream or whipped cream. A drizzle of extra salted caramel sauce on top makes them even better. You can also serve them with fresh berries for a fruity contrast. Each option adds a nice touch to this decadent treat. This blog post covered all you need to bake salted caramel pretzel brownies. We shared the essential ingredients and equipment to get started. You learned step-by-step instructions for creating the perfect brownie. I included tips on achieving the right texture and flavor. We also explored fun variations and storage methods. Baking can be fun and rewarding. With these tricks, you can make delicious treats that impress. Enjoy your brownie journey!

Salted Caramel Pretzel Brownies Irresistible Treat

PREV 1 … 36 37 38 … 53 NEXT
cozy citrus kitchen

explore

DessertsDinnerAppetizersDrinks

Our Policies

  • Cookie Policy
  • Copyright Policy
  • Disclaimer
  • GDPR Policy
  • Terms Of Use
Back to Top
  • About
  • Contact Us
  • Privacy Policy
© 2025 cozy citrus kitchen