FREE DINNER EBOOK! Get your copy!
  • Cookie Policy
  • GDPR Policy
  • Disclaimer
  • Terms Of Use
  • Visit my other site: Fun Cookie Recipes
cozy citrus kitchen
  • Home
  • Dinner
  • Desserts
  • Drinks
  • Appetizers
  • Contact
  • About
  • Privacy Policy
  • Home
  • Dinner
  • Desserts
  • Drinks
  • Appetizers
  • Contact
  • About
  • Privacy Policy
  • Cookie Policy
  • GDPR Policy
  • Disclaimer
  • Terms Of Use
Visit my other site: Fun Cookie Recipes

HOME / CATEGORIES /

Latest

- 1 package (16 oz) potato gnocchi - 4 tablespoons unsalted butter - 4 cloves garlic, minced - 4 cups fresh spinach - 1/2 teaspoon red pepper flakes (optional) - Salt and pepper to taste - 1/4 cup grated Parmesan cheese - Zest of 1 lemon - Fresh parsley, chopped for garnish To make your garlic butter gnocchi with spinach, gather these ingredients first. The potato gnocchi gives a soft, pillowy bite. Unsalted butter adds rich flavor. Minced garlic provides a strong taste that lifts the dish. Fresh spinach adds color and nutrients. Red pepper flakes give a kick if you like spice. Salt and pepper will enhance every flavor. Grated Parmesan cheese brings a salty, nutty touch. Lemon zest adds brightness. Lastly, chopped parsley gives a fresh finish. - Additional vegetables (e.g., cherry tomatoes) - Protein options (e.g., chicken, shrimp) - Alternative cheeses You can also personalize this dish with optional additions. Cherry tomatoes can add sweetness and juiciness. You might want to add protein like chicken or shrimp for a heartier meal. If you prefer a different cheese, feel free to swap it out. These options let you make this dish your own. {{ingredient_image_1}} - Bring a large pot of salted water to boil. - Add gnocchi and cook until floating, about 2-3 minutes. The gnocchi will float to the top when ready. This means they are soft and cooked. Drain them well and set aside. - Melt butter in a skillet over medium heat. - Sauté minced garlic until fragrant, about 1-2 minutes. Watch the garlic closely. You want it to smell good but not burn. This step infuses the butter with a rich flavor. - Add cooked gnocchi and sauté until golden brown, about 2-3 minutes. - Stir in spinach and optional red pepper flakes. The gnocchi will soak up the garlic butter. Sauté until they get a nice color. The spinach will wilt quickly, adding both flavor and color. - Season with salt, pepper, Parmesan cheese, and lemon zest. - Garnish and serve immediately. The lemon zest adds a bright taste. The fresh parsley on top makes it look lovely. Enjoy your meal right away for the best flavor! To know when your gnocchi is done, watch for them floating. Once they rise to the top, they are ready. This usually takes just 2-3 minutes. If they sit at the bottom, give them a little more time. To get a golden color on your gnocchi, use medium heat. After adding them to the skillet, let them sit for a minute before stirring. This helps them brown nicely. Make sure not to crowd the pan, as this can cause steaming instead of browning. Herbs and spices can take your dish to the next level. Try adding fresh basil or thyme for a nice touch. A pinch of nutmeg can also enhance the flavor of the garlic. For pairings, consider serving garlic butter gnocchi with a light salad. A side of roasted vegetables works well too. You can even add grilled chicken for extra protein. Preparing ingredients in advance can save you time. You can chop the garlic and wash the spinach ahead of time. Store them in airtight containers in the fridge. When reheating leftovers, use low heat on the stove. This helps keep the gnocchi's texture. Add a little butter or olive oil if they seem dry. Avoid using the microwave, as it can make them tough. Pro Tips Use Fresh Ingredients: Fresh spinach and high-quality gnocchi will elevate the flavor and texture of your dish. Don’t Overcook the Gnocchi: Cook the gnocchi just until they float; overcooking can make them mushy. Customize the Spice Level: Adjust the amount of red pepper flakes to your taste for a milder or spicier dish. Experiment with Cheese: Try adding different cheeses like feta or goat cheese for a unique twist on the dish. {{image_2}} You can change garlic butter gnocchi with spinach in many fun ways. These variations keep the dish fresh and exciting. You can add different greens for more flavor. For example, kale or arugula work well. They add a nice crunch and taste. You can also include roasted vegetables. Bell peppers and zucchini are great choices. Roasting brings out their sweet, rich flavors. You can mix and match to suit your taste! Adding protein boosts the meal. You can integrate chicken or shrimp for a heartier dish. Cook the meat separately and then mix it in. If you want plant-based options, tofu or chickpeas are great. They soak up the garlic butter flavor nicely. The sauce can change your gnocchi game. You might try Alfredo or pesto for a creamy twist. These sauces pair well with the garlic butter. If you prefer dairy-free or vegan options, look for sauces made with cashews or nutritional yeast. These keep the dish rich while meeting dietary needs. To keep your garlic butter gnocchi fresh, use airtight containers. Glass or plastic containers work well. Store the gnocchi in the fridge for up to three days. If you want to save it longer, freezing is a great option. To freeze cooked gnocchi, let it cool completely first. Spread it out on a baking sheet in a single layer. This prevents it from sticking together. After an hour, transfer the gnocchi to a freezer bag. Make sure to remove as much air as possible. When you’re ready to eat, thaw the gnocchi in the fridge overnight. For quick reheating, you can put it straight in a skillet. Add a little butter or oil and heat on low until warm. Most ingredients used in this dish stay fresh for a while. Fresh spinach lasts about 5-7 days in the fridge. Store it in a bag with air holes. Garlic can last for weeks in a cool, dry place. Watch for signs of spoilage. If your spinach wilts or turns brown, it’s time to toss it. Garlic that’s soft or sprouted should also be discarded. Enjoy your meal while everything is still fresh! Making homemade gnocchi is fun and easy. Start with potatoes. Boil them until soft. Then, mash the potatoes in a bowl. Mix in flour, an egg, and salt until smooth. Shape the dough into small pieces. Roll each piece into a rope and cut it into small chunks. Press each piece with a fork for texture. Finally, cook them in boiling water. They are ready when they float! Yes, you can use frozen gnocchi! It is a great time-saver. Just boil them straight from the freezer. Follow the package's cooking time, usually around 3-5 minutes. You can also sauté them in garlic butter after boiling. This gives them a nice, golden color. Garlic butter gnocchi pairs well with many sides. Here are some tasty options: - Simple salad: A fresh green salad with lemon vinaigrette. - Roasted vegetables: Carrots, zucchini, or asparagus work great. - Grilled chicken or shrimp: Adds a protein boost. - Crusty bread: Perfect for soaking up extra garlic butter. Try these sides to make your meal complete! You now have a clear guide for making delicious garlic butter gnocchi. We covered the necessary ingredients, cooking steps, and tips for perfecting your dish. You can easily customize it with optional veggies or proteins to suit your taste. Store leftovers wisely, or try freezing them for later use. Experiment with new flavors and variations to make each meal unique. Enjoy cooking and sharing this comforting dish!

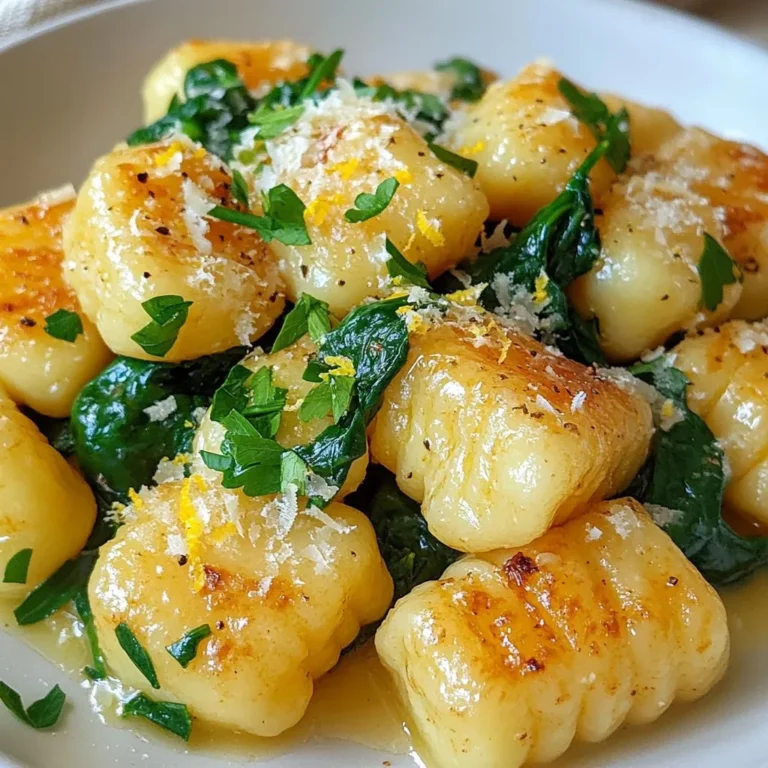
Garlic Butter Gnocchi with Spinach Rich Flavor Dish

- 1 cup all-purpose flour - 1/2 cup unsweetened cocoa powder - 1 cup granulated sugar - 1 teaspoon baking powder - 1/2 teaspoon baking soda - 1/4 teaspoon salt - 1/2 cup unsalted butter, melted - 2 large eggs - 1/2 cup whole milk - 1 teaspoon vanilla extract - 1/2 cup creamy peanut butter - 1/2 cup powdered sugar - 1/4 cup heavy cream To make these delightful cupcakes, I focus on each ingredient's role. The dry ingredients form the base of the batter. They give structure and flavor. The flour and cocoa powder mix to create that rich chocolate taste. Sugar adds sweetness, while baking powder and baking soda help the cupcakes rise. A pinch of salt balances out the flavors. Next, we have the wet ingredients. The melted butter adds moisture and richness. Eggs bind everything together and help with the rise. Whole milk contributes creaminess, while vanilla extract brings warmth and depth to the flavor. Finally, the frosting ingredients make the cupcakes even more special. Creamy peanut butter gives a nutty flavor that pairs perfectly with chocolate. Powdered sugar sweetens the frosting, while heavy cream makes it smooth and spreadable. Each ingredient plays a vital role, ensuring these cupcakes are an irresistible treat! {{ingredient_image_1}} - Preheat your oven to 350°F (175°C). - Line a muffin tin with cupcake liners. This helps with easy removal later. - In a large bowl, combine: - 1 cup all-purpose flour - 1/2 cup unsweetened cocoa powder - 1 cup granulated sugar - 1 teaspoon baking powder - 1/2 teaspoon baking soda - 1/4 teaspoon salt - Whisk these together until they blend well. This mix gives cupcakes a rich taste. - In another bowl, mix: - 1/2 cup unsalted butter, melted - 2 large eggs - 1/2 cup whole milk - 1 teaspoon vanilla extract - Stir until smooth. This mixture adds moisture to the cupcakes. - Gradually add it to the dry ingredients, stirring gently. Stop mixing once you see no dry flour. - Divide the batter evenly into the muffin tin, filling each liner about 2/3 full. - Bake in the preheated oven for 18-20 minutes. - Check for doneness by inserting a toothpick. If it comes out clean, they’re ready! - In a medium bowl, beat together: - 1/2 cup creamy peanut butter - 1/2 cup powdered sugar - Gradually add 1/4 cup heavy cream. Keep beating until you reach a smooth, creamy texture. - Once the cupcakes are completely cooled, it’s time to frost them. - Generously pipe or spread the peanut butter frosting on each cupcake. - For extra flair, consider garnishing with chocolate shavings or crushed peanuts. Enjoy your delightful treat! - Don't overmix the batter. Mix until just combined. This keeps the cupcakes light and fluffy. - Checking for doneness is key. Insert a toothpick in the center. If it comes out clean, they are ready. - Achieving perfect frosting consistency is important. Start with creamy peanut butter and powdered sugar. Add heavy cream slowly. Stop when it is smooth and spreadable. - Best tools for frosting include a piping bag or a simple spatula. A piping bag gives a nice look. A spatula is great for easy spreading. - Pairing ideas for these cupcakes include a glass of cold milk or a scoop of vanilla ice cream. Both enhance the flavors of chocolate and peanut butter. - Sourcing ingredients is simple. Most can be found at any grocery store. Look for fresh eggs and high-quality cocoa powder for the best taste. Pro Tips Use Room Temperature Ingredients: Make sure your eggs and milk are at room temperature for a smoother batter and better rise. Don’t Overmix the Batter: Gently fold the wet ingredients into the dry ingredients to avoid dense cupcakes. A few lumps are okay! Cool Completely Before Frosting: Allow your cupcakes to cool completely before adding frosting to prevent it from melting and sliding off. Experiment with Toppings: Feel free to get creative with your toppings! Consider adding mini chocolate chips or drizzling with chocolate ganache for an extra treat. {{image_2}} You can make these cupcakes gluten-free. Use a gluten-free flour blend instead of all-purpose flour. This swap keeps the texture light and fluffy. Whole wheat flour is another great option. It adds a nutty flavor and extra fiber to your cupcakes. Want to change up the taste? Add chocolate chips to the batter. They melt and create gooey pockets of chocolate. You can also try different nut butters. Almond or cashew butter can replace peanut butter for a unique flavor twist. If you're not a fan of peanut butter frosting, chocolate frosting is a great option. It pairs beautifully with the cupcakes’ rich chocolate base. For a vegan choice, try coconut cream. Whip it up with cocoa powder and a sweetener like maple syrup for a tasty treat. To keep your chocolate peanut butter cupcakes fresh, store them in an airtight container. This keeps moisture out and flavor in. You can leave them at room temperature for up to three days. If you want them to last longer, place them in the fridge. They will stay fresh for about a week in the fridge. If you want to freeze your cupcakes, start by cooling them completely. Wrap each cupcake in plastic wrap, then place them in a freezer bag. This prevents freezer burn. The cupcakes can be frozen for up to three months. When you're ready to enjoy them, take them out and let them thaw in the fridge overnight. If you have leftover frosting, store it in an airtight container. It can stay fresh in the fridge for about a week. To use it again, simply re-whip it before spreading. If you want to freeze the frosting, place it in a freezer-safe container. It can last for up to three months in the freezer. You can use gluten-free flour blends. Look for a mix that has xanthan gum. This helps mimic the texture of regular flour. Popular options include almond flour or coconut flour. Adjust the liquid in your recipe since these flours absorb more moisture. Yes, you can make the batter ahead of time. Store it in the fridge for up to 24 hours. Just remember to bring it back to room temperature before baking. This helps the cupcakes rise better. If you need an egg substitute, use applesauce or mashed banana. You can also use flaxseed meal mixed with water. Mix 1 tablespoon of flaxseed meal with 2.5 tablespoons of water. Let it sit for five minutes until it thickens. These cupcakes last for about three days at room temperature. Store them in an airtight container to keep them fresh. If you want them to last longer, you can freeze them for up to three months. Just thaw them in the fridge before serving. You learned how to bake delicious cupcakes with simple ingredients. We covered steps from mixing dry and wet ingredients to making a tasty frosting. Remember, keep an eye on baking times and don’t overmix the batter. Explore variations and store your treats properly for freshness. These tips will help you create delightful cupcakes every time. Enjoy your baking journey and share your creations with friends and family!

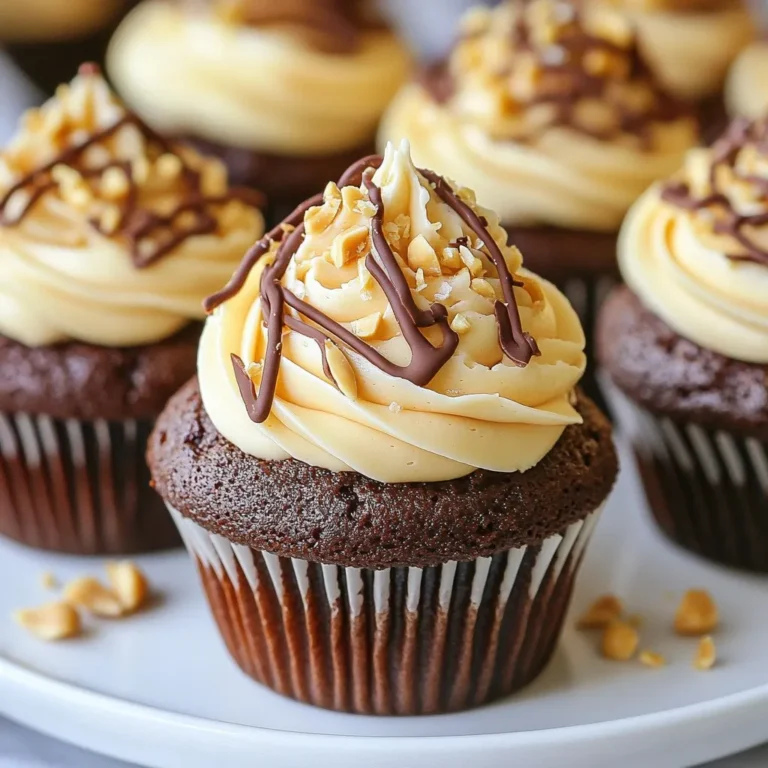
Chocolate Peanut Butter Cupcakes Irresistible Treat

- 1.5 lbs baby potatoes, halved - 4 tablespoons unsalted butter, melted - 4 cloves garlic, minced - 2 tablespoons fresh rosemary, chopped - 2 tablespoons fresh parsley, chopped - 1 teaspoon dried thyme - Zest of 1 lemon - 1 tablespoon lemon juice - Salt and pepper to taste Garlic Herb Butter Roasted Potatoes are simple yet tasty. First, you need baby potatoes. These small gems become tender and creamy inside. I choose to halve them for even cooking. Next, unsalted butter adds richness. Melting it with minced garlic gives a fragrant base. The garlic brings a bold and savory punch. Adding fresh herbs like rosemary and parsley brings bright flavors. I love to chop them finely for the best taste. Dried thyme adds depth without overpowering the dish. The zest and juice of lemon brighten everything up. It gives a lovely zing that balances the butter. Finally, seasoning with salt and pepper enhances all the flavors. These ingredients work together to create a delicious side dish. Feel free to adjust the herbs based on your taste. Each element plays a key role in making these potatoes a flavorful delight. {{ingredient_image_1}} First, you need to preheat your oven to 425°F (220°C). This step is key for getting those potatoes crispy. While the oven heats up, prepare your baking sheet. Line it with parchment paper. This makes cleanup so easy and keeps your potatoes from sticking. Next, we will make our garlic herb butter. In a large bowl, combine melted butter, minced garlic, chopped rosemary, chopped parsley, dried thyme, lemon zest, and lemon juice. Use a whisk to mix everything well. This blend gives the potatoes a rich, tasty flavor. Now, it’s time to add the halved baby potatoes to the bowl. Sprinkle salt and pepper over them. Toss the potatoes in the garlic herb butter mixture. Make sure each potato is evenly coated. This helps them soak up all that flavor. Spread the coated potatoes on your lined baking sheet in a single layer. Do not overcrowd them; this ensures they get crispy. Roast in your preheated oven for 25 to 30 minutes. Flip them halfway through to get even browning. You want them golden brown on the outside and tender inside. Once they are done, remove the pan from the oven. Let them cool for a couple of minutes before serving. To get those perfect crispy edges, spacing matters. When you place the potatoes on the baking sheet, spread them out. If they crowd each other, they will steam instead of roast. Flip the potatoes halfway through cooking. This helps all sides get crispy and brown. After roasting, take a moment to taste the potatoes. You might want more salt or pepper. You can also add more fresh herbs if you like. This step ensures the flavors shine just right. Always trust your taste buds to guide you. Serving matters just as much as taste. Transfer the roasted potatoes to a nice platter. Garnish with extra chopped herbs. A sprinkle of sea salt adds a lovely touch. For a pop of color, serve lemon wedges on the side. This makes the dish look vibrant and inviting. Pro Tips Choose the Right Potatoes: For the best texture, use waxy baby potatoes like Yukon Gold or red potatoes, which hold their shape while roasting. Even Coating: Ensure all potatoes are evenly coated with the herb butter mixture to achieve a uniform flavor and crispy texture. Don't Overcrowd the Pan: Spread the potatoes out in a single layer on the baking sheet to allow for proper air circulation, which helps them crisp up nicely. Adjust Seasoning to Taste: Before serving, taste the potatoes and adjust seasoning as needed. A sprinkle of fresh herbs or additional lemon juice can enhance the flavor. {{image_2}} You can mix and match herbs to find your perfect flavor. Try using thyme or basil instead of rosemary and parsley. Thyme adds a warm depth, while basil brings a fresh, sweet note. You can even combine these herbs for a unique twist. Experiment with your favorites to make the dish truly yours! Roasted potatoes taste great with other veggies. Carrots, bell peppers, or Brussels sprouts work well. Cut them into similar sizes as the potatoes to ensure even cooking. Toss them in the garlic herb butter mix, just like the potatoes. This adds color and flavor to your dish, making it more exciting. Want to add some heat? Consider adding spices like paprika or cayenne pepper. These spices enhance the flavor and give the potatoes a kick. You can also sprinkle some black pepper for extra zest. Adjust the spice level based on your taste. This simple change can elevate your Garlic Herb Butter Roasted Potatoes to a whole new level! To keep your Garlic Herb Butter Roasted Potatoes fresh, store them in the fridge. Use an airtight container to prevent moisture. This way, they stay tasty for up to three days. Make sure they cool to room temperature before sealing. If you want to keep them longer, you can freeze them. Place the cooled potatoes in a freezer-safe bag. They will last for up to three months in the freezer. When reheating, you want to keep the potatoes crispy. The best way is to use the oven. Preheat it to 400°F (200°C). Spread the potatoes on a baking sheet in one layer. Heat them for about 10-15 minutes. This helps restore their crunch. You can also use an air fryer. Set it to 350°F (175°C) and cook for about 5-7 minutes. Avoid the microwave, as it makes them soggy. Enjoy your delicious leftovers just like the first time! Garlic Herb Butter Roasted Potatoes last about 3 to 5 days in the fridge. Store them in an airtight container. Make sure they are completely cool before sealing. This keeps them fresh and tasty. When you're ready to eat, just reheat them. Yes, you can use olive oil instead of butter. Olive oil gives a nice flavor and makes the dish a bit lighter. Use the same amount of olive oil as butter. It will still coat the potatoes well and help them roast nicely. Garlic Herb Butter Roasted Potatoes pair well with many dishes. Here are some tasty ideas: - Grilled chicken or steak - Roasted or steamed vegetables - Fresh salad with a light dressing - Baked fish with lemon - A hearty soup, like tomato or minestrone These sides make a great meal and balance the rich flavor of the potatoes. Feel free to mix and match! We explored how to make Garlic Herb Butter Roasted Potatoes using simple ingredients. You learned how to prepare, mix, toss, and roast. I shared tips for achieving crispiness and adjusting seasoning. We discussed variations, storage, and reheating. These potatoes can be a hit on your table. Enjoy experimenting with flavors and serving them with your favorite meals. I'm excited for you to try this recipe. Happy cooking!

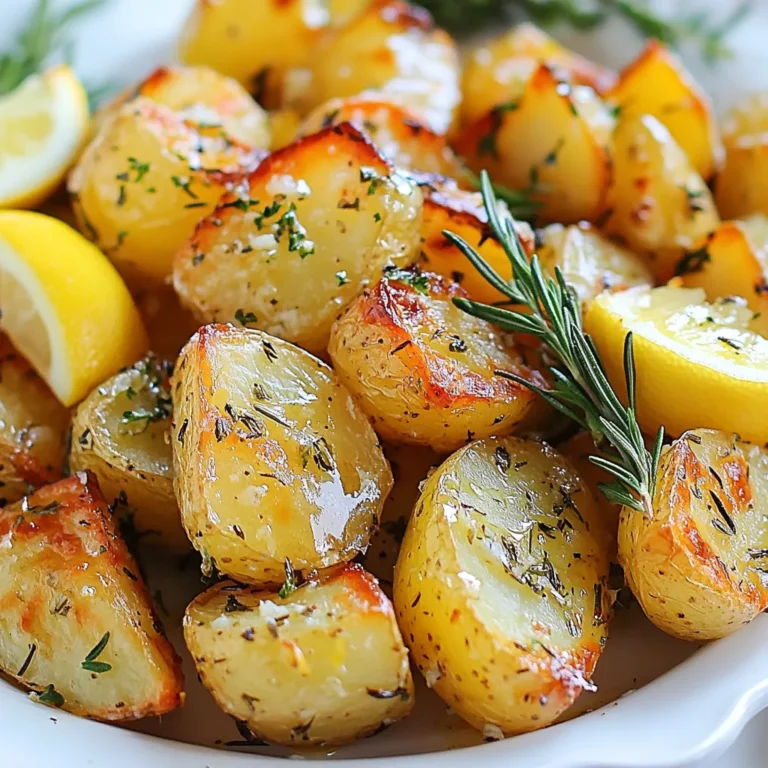
Garlic Herb Butter Roasted Potatoes Flavorful Delight

To make this tasty flatbread, you need the following ingredients: - 1 cup sun-dried tomatoes in oil, drained and chopped - 1 cup fresh basil leaves - 1/2 cup pine nuts (toasted) - 1/2 cup grated Parmesan cheese - 2 garlic cloves, minced - 1/2 cup olive oil - Salt and pepper to taste - 4 pieces of store-bought flatbread or naan - 1 cup fresh mozzarella cheese, sliced - 1 cup arugula (for topping, optional) You can swap some ingredients if needed. Here are a few ideas: - Sun-dried tomatoes: Use roasted red peppers for a different flavor. - Basil: Try spinach or arugula for a fresh taste. - Pine nuts: Walnuts or almonds work well if you have them. - Parmesan cheese: Grana Padano or nutritional yeast for a vegan option. - Fresh mozzarella: Go for goat cheese or feta for a tangy twist. Having the right tools makes cooking easier. For this recipe, gather: - A food processor for making pesto - A baking sheet for the flatbreads - Parchment paper to line the baking sheet - A sharp knife for slicing cheese - Measuring cups for accurate amounts With these ingredients and tools, you are ready to create a delicious sun-dried tomato pesto flatbread. Enjoy the cooking process! {{ingredient_image_1}} First, grab your food processor. Add 1 cup of sun-dried tomatoes in oil, drained and chopped. Then, toss in 1 cup of fresh basil leaves, 1/2 cup of toasted pine nuts, 1/2 cup of grated Parmesan cheese, and 2 minced garlic cloves. Pulse everything until blended well. Slowly pour in 1/2 cup of olive oil while processing. Keep blending until your pesto is smooth and creamy. Add salt and pepper to taste. This pesto packs a punch of flavor! Now, preheat your oven to 400°F (200°C). While it heats, lay out 4 pieces of store-bought flatbread or naan on a baking sheet lined with parchment paper. Spread a generous layer of your sun-dried tomato pesto on each flatbread. Don’t be shy! Next, place slices of fresh mozzarella cheese on top of the pesto. Each bite will be cheesy and delicious. Bake your flatbreads in the oven for about 10-12 minutes. Watch for the cheese to melt and bubble. Once done, take them out and let them cool slightly. For a fresh touch, top with arugula for a peppery flavor and vibrant color. Enjoy your savory sun-dried tomato pesto flatbread warm, and share with friends or family! To get the most flavor from your sun-dried tomatoes, use ones packed in oil. The oil adds richness. You can also add a splash of balsamic vinegar for some tang. Mixing in fresh herbs, like parsley or oregano, brightens the taste. Feel free to adjust the seasoning. Tasting as you go helps find the perfect balance. For a smooth pesto, process the ingredients well. Start with the sun-dried tomatoes, basil, and nuts. Then, add the cheese and garlic. Slowly pour in the olive oil while mixing. This method creates a creamy texture. If your pesto is too thick, add more oil. If it’s too thin, add more nuts or cheese. One common mistake is overprocessing the pesto. This can turn it into a paste. Keep it slightly chunky for better texture. Another mistake is not tasting while cooking. Always taste your pesto before spreading it on the flatbread. Also, be careful not to burn the cheese in the oven. Check it regularly for a perfect melt. Pro Tips Use Quality Ingredients: Choose high-quality sun-dried tomatoes and fresh basil for the best flavor in your pesto. Toast the Pine Nuts: Toasting the pine nuts enhances their flavor, making your pesto even more delicious. Experiment with Cheese: Try substituting Parmesan with Pecorino Romano for a sharper taste or add a mix of cheeses for depth. Serve Fresh: Enjoy the flatbreads immediately after baking for the best texture and flavor, topped with fresh arugula. {{image_2}} You can easily make this flatbread vegetarian or vegan. For a vegetarian version, just use your favorite cheese. I love using mozzarella or ricotta for a creamy touch. To make it vegan, swap out the cheese for a plant-based alternative. Nutritional yeast adds a cheesy flavor without dairy. You can also use a little cashew cream for richness. If you need gluten-free flatbread, look for gluten-free naan or pita bread. There are many brands available today. You can also make your own flatbread using almond flour or other gluten-free flours. Just be sure to check the labels to keep it safe. Feel free to mix up the toppings. Try adding sliced olives, roasted red peppers, or fresh spinach. You can also use different cheeses, like feta or goat cheese, for a unique taste. For a spicy kick, sprinkle some red pepper flakes on top. Each topping will give a new twist to the flatbread and keep it exciting! To keep your Sun-Dried Tomato Pesto Flatbread fresh, store it in an airtight container. Make sure the flatbread is completely cool before sealing. This helps prevent moisture buildup. You can also wrap each flatbread in plastic wrap before placing them in the container. This keeps them nice and tasty. Properly stored, your leftovers can last up to three days in the fridge. Reheating your flatbread is easy and quick. Preheat your oven to 350°F (175°C). Place the flatbread on a baking sheet. Heat for about 5-7 minutes or until warm. This keeps the flatbread crispy. You can also use a skillet on low heat. Cook each side for about 2-3 minutes. Avoid using the microwave, as it can make the flatbread soggy. Freezing is a great way to save your Sun-Dried Tomato Pesto Flatbread for later. First, let the flatbread cool completely. Wrap each piece tightly in plastic wrap. Then, place them in a freezer-safe bag or container. Label the bag with the date. You can freeze them for up to three months. To enjoy, thaw in the fridge overnight and reheat as mentioned above. You can use roasted red peppers. They add a sweet flavor. You can also try fresh tomatoes. Just dry them in the oven for a few hours. This gives a similar taste. Yes, you can. Make the pesto a day before. Store it in a jar in the fridge. Just cover it with olive oil to keep it fresh. Serve the flatbread with a side salad. A mix of greens works great. You can also add grilled chicken or shrimp. This makes it a hearty meal. Pair the flatbread with a light wine. A crisp white wine complements it well. You can also serve it with olives or a cheese platter. This adds more flavor and fun to your meal. You now have all you need to create delicious Sun-Dried Tomato Pesto Flatbread. We covered the key ingredients and their substitutions, plus the tools and steps for preparation. Don’t forget the tips that help build flavor and texture. Whether you prefer vegetarian, vegan, or gluten-free, there’s a version for you. Store leftovers properly and enjoy them later. This flatbread can impress anyone at your table. Make it fun and tasty for you and your family. Enjoy every bite!

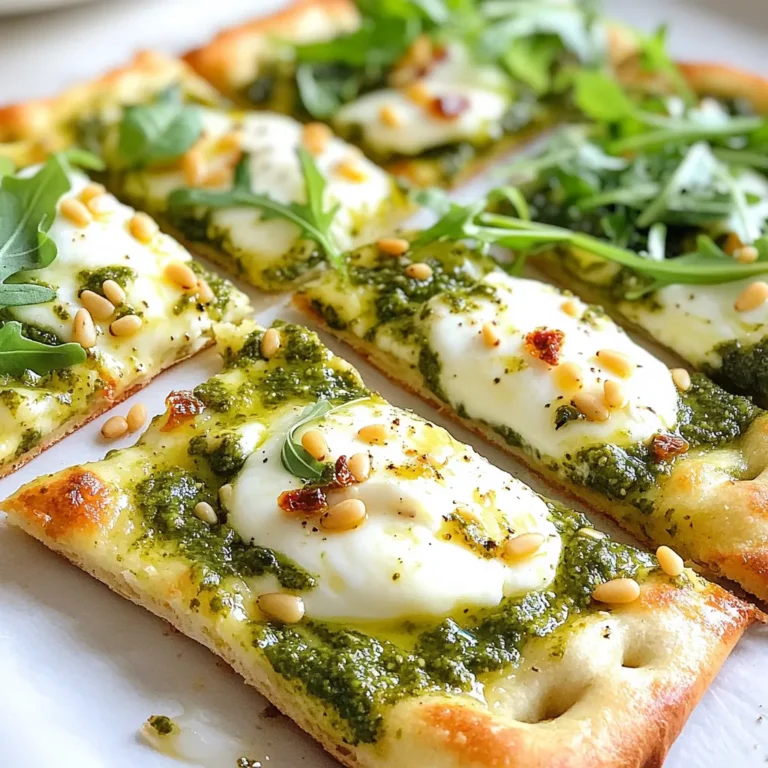
Savory Sun-Dried Tomato Pesto Flatbread Recipe

To make Cajun Chicken Caesar Wraps, you need fresh and tasty ingredients. Here’s what you will need: - 2 chicken breasts, boneless and skinless - 1 tablespoon Cajun seasoning - 1 tablespoon olive oil - 4 large flour tortillas - 2 cups romaine lettuce, chopped - 1/2 cup Caesar dressing (store-bought or homemade) - 1/2 cup grated Parmesan cheese - 1/4 cup cherry tomatoes, halved - Salt and pepper to taste - Optional: Fresh herb sprigs (parsley or cilantro) for garnish Each ingredient adds flavor and texture. The chicken gives protein, while the Cajun seasoning adds spice. Olive oil helps cook the chicken and keep it moist. Flour tortillas are the perfect wrap for all your fillings. Romaine lettuce provides crunch, and Caesar dressing gives a creamy taste. Parmesan cheese adds richness, while cherry tomatoes offer freshness. You can add salt and pepper for extra flavor. Finally, herbs make your dish look beautiful. Gather these items, and you're ready to start cooking! {{ingredient_image_1}} First, let's season the chicken. Take the two chicken breasts and rub them with one tablespoon of Cajun seasoning. Make sure to cover every side. Add salt and pepper to taste. This step builds a great flavor base. Next, heat a skillet over medium-high heat. Pour in one tablespoon of olive oil. Once the oil is hot, add the chicken breasts. Cook them for 5 to 7 minutes on each side. You want them golden brown and fully cooked. The chicken should reach an internal temperature of 165°F. After cooking, let the chicken rest for 5 minutes. This helps keep the juices in. Now, slice the chicken into strips. This makes it easy to layer in the wraps. Now, let’s lay out the tortillas. Place them on a clean surface. In the center of each tortilla, start layering your ingredients. First, add 2 cups of chopped romaine lettuce. Then, place the sliced chicken over the lettuce. Next, add 1/4 cup of halved cherry tomatoes. Finally, sprinkle 1/2 cup of grated Parmesan cheese on top. Now, it’s time to dress the wraps. Drizzle 1/2 cup of Caesar dressing over the layered ingredients. You can adjust the amount based on your taste. To wrap the tortillas, fold the sides over the filling. Then, roll it from the bottom up. This keeps everything secure inside. For serving, slice the wraps in half. This makes them easier to eat. Arrange the halves on a serving platter. If you want a colorful touch, garnish with fresh herb sprigs like parsley or cilantro. Your Cajun Chicken Caesar Wraps are now ready to enjoy! - Achieving a perfect chicken sear: Start with a hot skillet. Heat your olive oil until it shimmers. This helps the chicken brown nicely. Place the chicken in the skillet without crowding. This way, it sears well and does not steam. - Tips for slicing chicken: After cooking, let the chicken rest for five minutes. This keeps the juices inside. Use a sharp knife to slice the chicken. Cut against the grain for tender strips. This makes each bite easy to chew. - Dressing adjustments for personal preference: Store-bought Caesar dressing works well. But, you can make it your own. Start with a small amount. Taste and add more if needed. You can also mix in some lemon juice for extra zing. - Creative plating ideas: Use a large platter for serving. Arrange the wraps in a circle for a fun look. You can also stack them for height. This adds interest to your table. - Garnishing for visual appeal: Fresh herbs, like parsley or cilantro, add color. Sprinkle them on top of the wraps. You can also add a few cherry tomato halves on the side. This makes your dish look fresh and inviting. Pro Tips Choose the Right Tortillas: Opt for large flour tortillas for easy wrapping and a satisfying bite. Whole wheat or spinach tortillas can add extra flavor and nutrients. Marinate for More Flavor: If time allows, marinate the chicken in Cajun seasoning and olive oil for at least 30 minutes before cooking to enhance the flavors. Customize Your Greens: Feel free to mix in other greens like spinach or arugula for added texture and flavor. Make Ahead: Prepare the chicken and chop the vegetables in advance. These wraps can be assembled quickly for a delicious lunch or dinner on busy days. {{image_2}} You can switch the proteins in this wrap. Try shrimp or tofu for a tasty twist. Both options add unique flavors. If you want to change the dressing, go for ranch or blue cheese. These will give your wrap a new taste. You can also use feta cheese instead of Parmesan. It adds a nice saltiness. Spice things up with extra seasonings. Add cayenne pepper for heat or smoked paprika for depth. Garlic powder is a great option too. For veggies, consider adding bell peppers or spinach. They bring color and crunch. You might also like diced avocados for creaminess. These add-ins make your wrap even better! To keep your Cajun Chicken Caesar Wraps fresh, store them in the fridge. Use an airtight container to prevent moisture loss. They can last for up to three days. When you are ready to eat, reheat in a skillet over medium heat. This method keeps the wrap crispy. Heat for about 3-5 minutes on each side. You can also microwave them for 30-60 seconds if you're in a hurry. But be careful, as microwaving may make the tortilla soft. If you want to save some wraps for later, freezing is a great option. First, wrap each one tightly in plastic wrap. Then, place them in a freezer-safe bag. This helps prevent freezer burn. You can safely store them for up to three months. To thaw, move them to the fridge for a few hours or overnight. For a quick option, use the microwave on defrost. After thawing, you can reheat in a skillet or microwave as mentioned above. How do I make homemade Caesar dressing? To make Caesar dressing, you need these simple ingredients: - 1/2 cup mayonnaise - 2 tablespoons lemon juice - 2 teaspoons Dijon mustard - 2 cloves garlic, minced - 1/4 cup grated Parmesan cheese - Salt and pepper to taste Mix all the ingredients in a bowl. Adjust the taste by adding more lemon juice or cheese. This dressing is creamy and tasty! Can I make these wraps ahead of time? Yes, you can make these wraps ahead. Prepare the chicken and the dressing first. Assemble the wraps, but do not add the dressing until you're ready to eat. This keeps the tortillas from getting soggy. You can store the wraps wrapped in plastic in the fridge for up to 2 days. What sides pair well with Cajun Chicken Caesar Wraps? These wraps go great with: - Sweet potato fries - Coleslaw - Fresh fruit salad - Mixed green salad These sides add color and taste to your meal! Caloric content per serving Each wrap has about 450 calories. This number may vary based on the dressing and other ingredients you use. Dietary considerations These wraps can be gluten-free if you use gluten-free tortillas. You can also use grilled shrimp or tofu for a different protein option. In this post, we explored how to make tasty Cajun Chicken Caesar Wraps. We covered the needed ingredients and step-by-step cooking tips. You learned how to cook chicken, assemble the wraps, and serve them well. The tips for presentation and storage help keep your meal fresh. Remember, you can adjust ingredients to suit your taste. Enjoy crafting these wraps for a fun meal or snack! They will impress your friends and family. Try them out and savor the bold flavors!

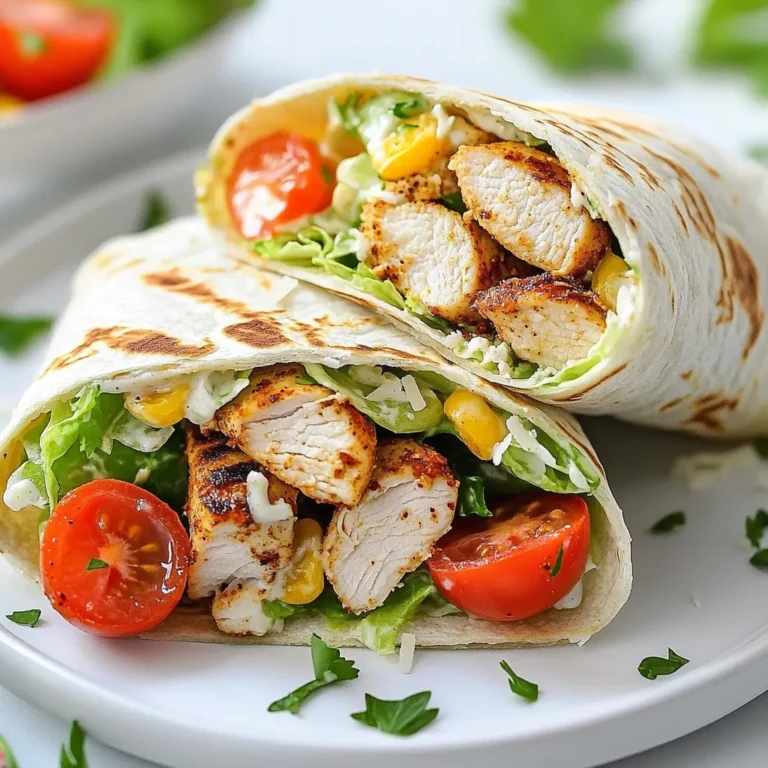
Cajun Chicken Caesar Wraps Quick and Tasty Meal

- 1 cup unsalted butter, melted - 2 cups granulated sugar - 4 large eggs - 1 teaspoon pure vanilla extract - 1 cup all-purpose flour - 1 cup unsweetened cocoa powder - 1/2 teaspoon salt - 1 cup chocolate chips (semi-sweet or dark) - 1 cup pretzel sticks, chopped (plus extra for topping) - 1 cup store-bought salted caramel sauce (or homemade) - Sea salt flakes for garnish These ingredients create a perfect balance of sweet and salty. The butter adds rich flavor. Sugar gives the brownies the sweet touch we love. Eggs bind everything together for a soft texture. If you want to make this recipe dairy-free, you can swap the butter with coconut oil. For a gluten-free option, use a gluten-free flour blend instead of all-purpose flour. These swaps let you enjoy the brownies while meeting dietary needs. - Extra pretzel pieces for crunch - Drizzle of chocolate or caramel sauce - Ice cream for serving Adding toppings can boost the flavor of your brownies. Extra pretzel pieces on top add crunch and texture. A drizzle of chocolate sauce makes it look fancy. Serve these brownies with a scoop of vanilla ice cream for a delicious treat. {{ingredient_image_1}} Start by preheating your oven to 350°F (175°C). A proper temperature ensures your brownies bake evenly. Greasing the pan is one option, but I prefer using parchment paper. It helps remove the brownies easily and keeps the bottom from sticking. In a large bowl, mix melted butter and granulated sugar until smooth. Then, add the eggs one by one. Mix well after each egg. This helps create a rich texture. Next, stir in vanilla extract for flavor. In another bowl, whisk together the flour, cocoa powder, and salt. Gradually add this mix to the wet ingredients. Stir until just mixed. Overmixing can lead to dry brownies, which we want to avoid! Finally, gently fold in chocolate chips and chopped pretzels. These add sweetness and crunch to each bite. Pour half of the brownie batter into your prepared pan. Spread it evenly across the bottom. Next, drizzle half of the salted caramel sauce over the batter. This creates a sweet layer. Now, add the remaining brownie batter on top. Smooth it out carefully. Drizzle the rest of the caramel sauce on top and sprinkle with extra chopped pretzels. This adds a nice touch! Before baking, sprinkle sea salt flakes over the caramel layer. This enhances the flavor. Bake the brownies for 25 to 30 minutes. Check for doneness by inserting a toothpick. It should come out with a few moist crumbs, not wet batter. To get that perfect fudgy texture, follow these key techniques: - Use melted butter: It adds moisture and richness. - Don’t overmix: Mix just until combined. Overmixing can make brownies tough. - Add chocolate chips: They melt and make the brownies extra gooey. Common mistakes to avoid include: - Wrong oven temperature: Always preheat your oven to 350°F. - Not checking for doneness: Use a toothpick; it should come out with a few moist crumbs. You have two great choices for caramel. Store-bought is quick and easy. Homemade gives you control over flavor. Pros of store-bought: - Saves time. - Consistent taste. Cons of store-bought: - Can contain additives. - May not match your flavor. Pros of homemade: - You can customize it. - No preservatives. Cons of homemade: - Takes more effort. - Requires practice to perfect. If you want to make your own caramel, here’s a quick recipe: 1. Ingredients: - 1 cup sugar - 1/4 cup water - 1/2 cup heavy cream - 2 tablespoons butter 2. Steps: - In a pot, combine sugar and water. - Cook over medium heat until sugar dissolves. - Increase heat until it turns golden. - Remove from heat and stir in cream and butter. Serve your brownies warm for the best taste. Cut them into squares for easy serving. - Garnish: Drizzle more caramel on top and sprinkle with sea salt. - Pairing ideas: Enjoy with vanilla ice cream or a dollop of whipped cream. - Beverage pairing: These brownies go well with coffee or a glass of milk. These tips will help you create and enjoy Salted Caramel Pretzel Brownies like a pro! Pro Tips Use Quality Chocolate: Opt for high-quality semi-sweet or dark chocolate chips for richer flavor. Chill Before Cutting: For cleaner cuts, chill the brownies in the refrigerator for about an hour before slicing. Homemade Caramel Option: If you have time, make your own salted caramel for an extra special touch. Don’t Overbake: Keep an eye on the baking time; remove the brownies when a toothpick comes out with a few moist crumbs. {{image_2}} You can easily switch up the flavors in these brownies. Try adding nuts like walnuts or pecans. They add crunch and taste. You can also use different types of chocolate chips. Dark chocolate gives a rich flavor, while milk chocolate adds sweetness. For seasonal twists, think about adding pumpkin spice in fall or crushed peppermint in winter. You can even mix in dried fruits like cherries or cranberries for a fun twist. Each change will make your brownies unique and special. You can adapt this recipe for gluten-free needs. Simply swap out all-purpose flour for gluten-free flour. Make sure it has a good binding agent, like xanthan gum, to keep the texture right. For a vegan version, replace the eggs with flax eggs. Mix one tablespoon of ground flaxseed with three tablespoons of water for each egg. Use a vegan butter or coconut oil in place of regular butter. For the caramel, choose a vegan brand or make your own with coconut cream and sugar. These changes keep the flavor while meeting dietary needs. To keep your salted caramel pretzel brownies fresh, store them in an airtight container. This will help avoid drying out. You can layer parchment paper between the brownies to prevent sticking. Keep the container in a cool, dry place, away from direct sunlight. For best taste, enjoy them within a week. If you want to save some brownies for later, freezing works great! First, let the brownies cool completely. Then, cut them into squares. Wrap each square tightly in plastic wrap. Place them in a freezer-safe bag or container. Make sure to remove as much air as possible. You can freeze the brownies for up to three months. When you’re ready to enjoy them, take the brownies out of the freezer. Let them sit at room temperature for about an hour. For a quicker thaw, you can microwave them for a few seconds. This keeps the texture nice and fudgy. Yes, you can choose other types of caramel. You might try homemade caramel if you want a richer flavor. Just melt sugar until it turns golden, then add cream and butter. You can also use butterscotch sauce for a different taste. Keep in mind that it may change the flavor slightly. To check if your brownies are done, look for a few key signs. The edges should pull away from the pan. When you insert a toothpick, it should come out with some moist crumbs, not wet batter. You can also gently press the top; it should spring back. If it sinks, they need more time. Yes, you can use other types of chocolate. Dark chocolate gives a nice rich flavor. Milk chocolate works well too if you prefer it sweeter. You can even mix different kinds for a unique taste. Just make sure to adjust the amount of sugar if needed. In this post, you learned about making delicious brownies. We covered key ingredients and helpful substitutions. You can enhance flavor with toppings and garnishes. I shared tips for baking the perfect fudgy texture. We explored variations for dietary needs and how to store brownies. Remember, experimenting with flavors can lead to your best creation. Enjoy your baking journey and share your tasty brownies with others!

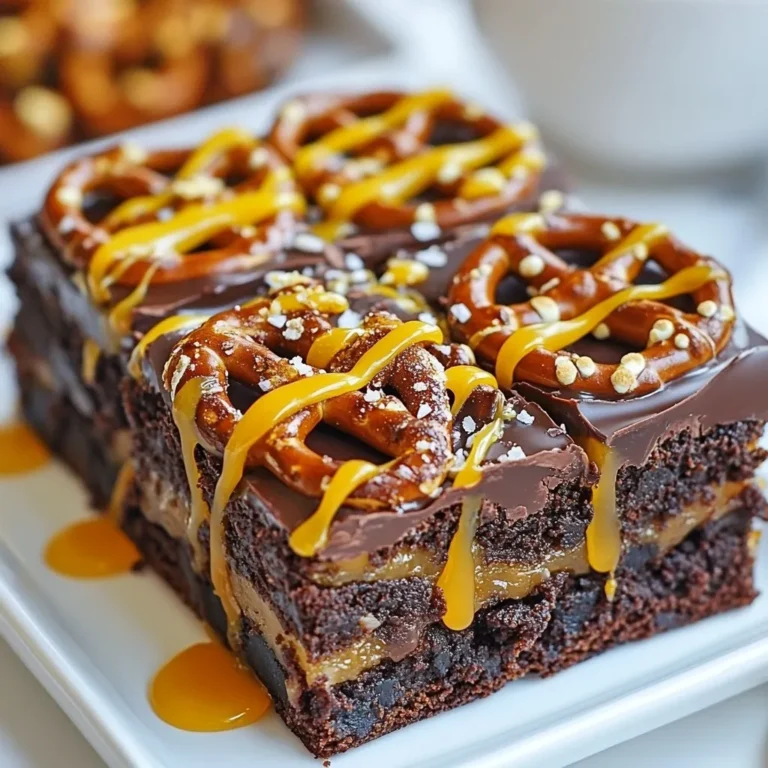
Salted Caramel Pretzel Brownies Irresistible Treat

- 1 cup orzo pasta - 1 1/2 cups cherry tomatoes, halved - 1 cucumber, diced - 1 cup Kalamata olives, pitted and halved - 1/2 red onion, finely chopped - 1 cup feta cheese, crumbled - 1/3 cup extra virgin olive oil - 2 tablespoons red wine vinegar (or lemon juice for a twist) - 1 tablespoon fresh oregano, chopped (or 1 teaspoon dried) - 1 tablespoon fresh parsley, chopped - Salt and pepper to taste - Zest of 1 lemon Now, let’s dive into the tasty ingredients that make this salad a hit. First, I use orzo pasta, which is small and rice-like. It soaks up all the flavors well. Cherry tomatoes add a sweet burst. I slice them in half for easy eating. Then, I dice a fresh cucumber. It gives a nice crunch and freshness. Kalamata olives bring a briny bite. I always pit and halve them for a perfect mix. Next, I chop a half red onion finely. This step makes sure the onion flavor isn’t too strong. Feta cheese is must-have in this dish. I crumble it on top for a creamy finish. For the dressing, I whisk together extra virgin olive oil and red wine vinegar. You can also swap the vinegar for lemon juice if you want. I add lemon zest for a bright touch. Fresh herbs like oregano and parsley are key. They add depth and aroma. Finally, I season with salt and pepper to taste. Each ingredient plays a part in making this salad fresh and flavorful. {{ingredient_image_1}} To start, bring a large pot of salted water to a boil. Add one cup of orzo pasta. Cook it according to the package instructions until it is al dente. This usually takes about 8 to 10 minutes. When done, drain the orzo. Rinse it under cold water to stop the cooking process. This helps keep the orzo firm. Set it aside to cool completely. Now, let’s chop some fresh veggies. Take 1 and 1/2 cups of cherry tomatoes and slice them in half. Next, dice one cucumber into small pieces. Then, grab one cup of Kalamata olives, pit them, and cut them in half. Finally, finely chop half of a red onion. In a large mixing bowl, combine all these veggies and stir well. For the dressing, whisk together 1/3 cup of extra virgin olive oil and 2 tablespoons of red wine vinegar (or use lemon juice for a twist). Next, add the zest of one lemon, 1 tablespoon of fresh oregano, and 1 tablespoon of fresh parsley. Season the mix with salt and pepper. Keep whisking until everything is well combined. This dressing adds a bright, zesty flavor to your salad. Now it's time to bring everything together. Add the cooled orzo to the bowl with the fresh vegetables. Pour the zesty dressing over the salad. Toss gently until all ingredients are well coated. Then, carefully fold in one cup of crumbled feta cheese. Be gentle so the feta stays in nice chunks. Chilling is key for great flavor. Allow the salad to chill in the fridge for at least 30 minutes. This helps the flavors meld together. Toss the salad once more before serving. Enjoy the fresh, vibrant taste of your Zesty Greek Orzo Salad! To boost the flavor, try adjusting the salt and pepper. A pinch of smoked paprika adds a nice kick. You can also swap red wine vinegar for lemon juice for a fresher taste. If you like heat, a dash of red pepper flakes works well. This salad pairs beautifully with grilled chicken or fish. You can serve it alongside pita bread and hummus for a complete meal. For a lovely presentation, use a large, shallow dish. Sprinkle fresh herbs like parsley on top for color. If you want to prep in advance, cook the orzo and chop the veggies a day before. Store them separately in the fridge. Mix them right before serving to keep everything fresh. The salad stays good for up to three days in the fridge if you keep it covered. Pro Tips Cook Orzo Al Dente: Ensure the orzo is cooked al dente for a firm texture that holds up well in the salad. Use Fresh Herbs: Fresh oregano and parsley will elevate the flavor of the salad, making it more aromatic and vibrant. Chill for Flavor: Letting the salad chill for at least 30 minutes allows the flavors to meld beautifully, enhancing the overall taste. Customize Ingredients: Feel free to add other vegetables or proteins, like bell peppers or grilled chicken, to make it your own. {{image_2}} You can boost your Zesty Greek Orzo Salad by adding protein. Grilled chicken adds flavor and heartiness. Shrimp also works well and brings a nice touch. If you prefer plant-based options, chickpeas are an excellent choice. They add protein and fiber without meat. Make your salad shine with seasonal veggies. In summer, try bright bell peppers or fresh zucchini. In fall, roasted root vegetables add depth. You can also tweak the dressing. Use fresh herbs like basil in summer or thyme in spring. This keeps your salad fresh and exciting all year round. If you need a gluten-free option, seek gluten-free orzo. Many brands now offer rice-based or corn-based varieties. For vegan diets, swap feta cheese with crumbled tofu or a plant-based cheese. This keeps the salad creamy while fitting your dietary needs. To store your Zesty Greek Orzo Salad, use an airtight container. Glass or plastic containers work well. Make sure to seal the lid tightly. This keeps the salad fresh and prevents strong odors from other foods in the fridge. You can store the salad in the fridge for up to three days. After that, the veggies may start to get mushy. You can freeze orzo salad, but it may change a bit. To freeze, place it in a freezer-safe container. Leave some space at the top since it will expand. When you want to eat it, thaw the salad in the fridge overnight. This helps keep the flavors. Be aware that freezing may make the veggies softer. The feta cheese might also lose some of its creaminess. Zesty Greek Orzo Salad can last about 3 to 5 days in the fridge. To keep it fresh, store it in an airtight container. Make sure to seal it well to keep moisture out. If you notice any change in smell or color, it’s best to throw it away. To extend freshness, consider adding the feta cheese just before serving. This keeps it from becoming mushy and helps the salad taste bright and fresh. Yes, you can use other types of pasta! Orzo is a small rice-shaped pasta that absorbs flavors well. If you want to switch it up, try using small shapes like ditalini or farfalle. These shapes will still hold the dressing and mix well with the veggies. However, larger pasta shapes may not blend as nicely with the small ingredients. Keep in mind that cooking times may vary for different pasta types. No, traditional orzo is not gluten-free. However, there are gluten-free orzo options made from rice or corn. These can substitute regular orzo in your salad. Additionally, you can use gluten-free pasta shapes like quinoa or brown rice pasta. These options will taste great and keep your salad gluten-free without losing flavor or texture. Absolutely! To make the salad vegan, simply leave out the feta cheese. You can replace it with vegan feta or omit it altogether. For a creamy touch, you might add mashed avocado or a dollop of cashew cream. These options add richness without dairy. Ensure your dressing is also vegan by using lemon juice instead of red wine vinegar, if preferred. In this blog post, we explored the delicious Zesty Greek Orzo Salad. We covered the key ingredients, step-by-step instructions, and tips for making it perfect. You can enhance the salad with protein, use seasonal veggies, and adapt it for dietary needs. Remember to store leftovers properly and consider freezing for later. Enjoy this fresh, vibrant dish that’s easy to make and packed with flavor. Whether you serve it at dinner or bring it to a gathering, this salad is sure to impress. Dive in and enjoy every bite!

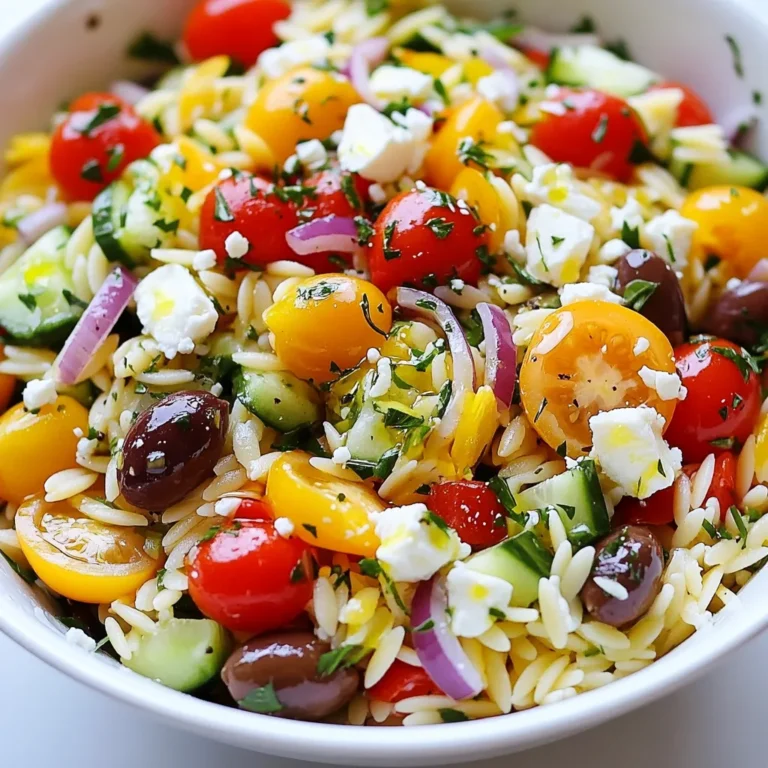
Zesty Greek Orzo Salad Fresh and Flavorful Delight

Here’s what you need to make Chocolate Hazelnut Stuffed French Toast: - 8 slices of thick brioche bread - 1/2 cup chocolate hazelnut spread - 2 large eggs - 1/2 cup whole milk - 1 teaspoon vanilla extract - 1 teaspoon ground cinnamon - 2 tablespoons butter (for cooking) - Powdered sugar (for dusting) - Optional: Fresh berries for serving - Optional: Maple syrup for drizzling Each ingredient plays a key role in this recipe. The brioche bread gives a rich, buttery base. The chocolate hazelnut spread adds sweetness and creaminess. Eggs and milk create a custard-like mixture. Vanilla and cinnamon bring warmth and depth. Butter ensures a golden, crispy crust. Finally, powdered sugar and optional toppings make it a treat. Get your ingredients ready, and let’s dive into the delicious world of chocolate hazelnut stuffed French toast! {{ingredient_image_1}} To start, lay out 4 slices of thick brioche bread. Grab your chocolate hazelnut spread and a butter knife. Spread about 2 tablespoons of the chocolate hazelnut spread on each slice. Make sure to cover the whole slice evenly. Once done, stack the remaining 4 slices on top of the spread-covered slices to make sandwiches. Press gently to help them stick together. Next, take a medium bowl and crack in 2 large eggs. Add 1/2 cup of whole milk, 1 teaspoon of vanilla extract, and 1 teaspoon of ground cinnamon. Use a whisk to mix these ingredients well. You want the mixture to look smooth and creamy. This will give your French toast a rich flavor. Now, it’s time to heat your skillet. Place a non-stick skillet or griddle on medium heat. Add 1 tablespoon of butter and let it melt. Once the butter is melted, it's time to dunk the sandwiches. Dip each sandwich into the egg mixture, making sure both sides are coated but not too soggy. Carefully place 2-3 stuffed sandwiches in the hot skillet. Cook each side for about 3-4 minutes. Look for a golden brown color and a crispy texture. If you need to, adjust the heat to get that perfect cook. Once done, keep the cooked sandwiches warm in a low oven while you finish the rest. Enjoy the sweet aroma filling your kitchen! To avoid soggy French toast, use thick slices of brioche. This bread holds up well. Dip each sandwich quickly in the egg mixture. Make sure both sides are coated, but don’t soak them. Cook them on medium heat for best results. This keeps the bread from getting too wet. To keep cooked French toast warm, use an oven. Set it to a low 200°F (93°C). Place the cooked slices on a baking sheet. Cover them loosely with foil. This keeps them warm without drying them out. You can add more spice to the egg mixture. Try a pinch of nutmeg or a bit of cardamom. These spices add warmth and depth to the flavor. You can also mix in some orange zest for a bright touch. For toppings, think beyond powdered sugar and berries. Chopped nuts add crunch. A drizzle of chocolate sauce makes it even more indulgent. Try whipped cream for a rich finish. You can even use yogurt for a fresh twist. Use a non-stick skillet or griddle for cooking. These surfaces help the French toast cook evenly. They also make flipping easier without sticking. A good spatula is key for flipping the sandwiches. Silicone spatulas work great since they are gentle on non-stick surfaces. This helps keep your French toast intact while cooking. Pro Tips Choose the Right Bread: Thick brioche or challah works best for this recipe, as it absorbs the egg mixture without falling apart. Don’t Over-soak: Dip the sandwiches quickly in the egg mixture to prevent them from becoming soggy; a light coating is sufficient. Maintain Heat: Keep your skillet at medium heat to ensure the French toast cooks evenly and develops a nice golden crust. Customize Your Fillings: Feel free to add slices of banana or strawberries along with the chocolate hazelnut spread for extra flavor and texture. {{image_2}} You can switch up the spread in your stuffed French toast. Try peanut butter or almond butter for a nutty twist. You can also mix in different flavors. A little banana or a few marshmallows can add fun. If you love crunch, add chopped nuts inside the toast. Walnuts or pecans work well, too. This way, every bite is a surprise! If you need a gluten-free version, use gluten-free bread. Many brands offer tasty options that work great in this recipe. For dairy-free needs, swap whole milk with almond or oat milk. You can also use a dairy-free chocolate hazelnut spread. This keeps the flavor rich while meeting your needs. Serve your French toast with crispy bacon or sausage for a hearty meal. They pair well and balance the sweet flavors. You can also get creative with how you plate it. Try stacking the French toast high and dusting with powdered sugar. Add fresh berries on top for color. Drizzle warm maple syrup for an added touch of sweetness. This makes the dish look as good as it tastes! To keep your chocolate hazelnut stuffed French toast fresh, follow these steps: - Refrigerate: Place any leftovers in an airtight container. - Freeze: If you want to keep them longer, wrap each piece in plastic wrap, then place in a freezer bag. For reheating, you can use a toaster oven or an air fryer. This method keeps the toast crispy. You can also heat them in a skillet over low heat. Just add a little butter to the pan for flavor. In the fridge, your leftovers can last about 3 to 4 days. If frozen, they can last up to 2 months. To enjoy them at their best, try to eat them within this time frame. You can prepare parts of this dish ahead of time. Here are a few ideas: - Make the Egg Mixture: Whisk the eggs, milk, vanilla, and cinnamon a day ahead. Store it in the fridge. - Assemble the Sandwiches: You can also make the sandwiches the night before. Just cover them well and keep them in the fridge. - Cook in Batches: If you are having guests, cook several sandwiches at once. This saves time and keeps everyone happy! Yes, you can make this dish ahead of time. Start by preparing the sandwiches and dunking them in the egg mixture. After cooking, let the French toast cool. Place the cooled pieces in an airtight container. Store them in the fridge for up to 2 days. When ready to eat, reheat them in a skillet over low heat. You can also use a toaster oven for a crispy finish. If you don't have brioche, you can use other breads. Thick slices of challah work well. You can also try Texas toast or even sourdough. The key is to use bread that can hold the filling and soak up the egg mix without falling apart. Look for a golden brown color on both sides. The edges should be slightly crispy. You can also check the inside. It should be warm and soft but not soggy. If you want to be sure, use a food thermometer. The inside should reach at least 160°F (71°C). This recipe for Chocolate Hazelnut Stuffed French Toast is both fun and tasty. With thick brioche, a rich filling, and helpful tips, you can impress anyone. Cook it to a golden brown and add your favorite toppings to elevate it. Don't forget about the variations and storage tips to make it your own. Whether for breakfast or brunch, you can enjoy this delightful treat any time. Happy cooking!

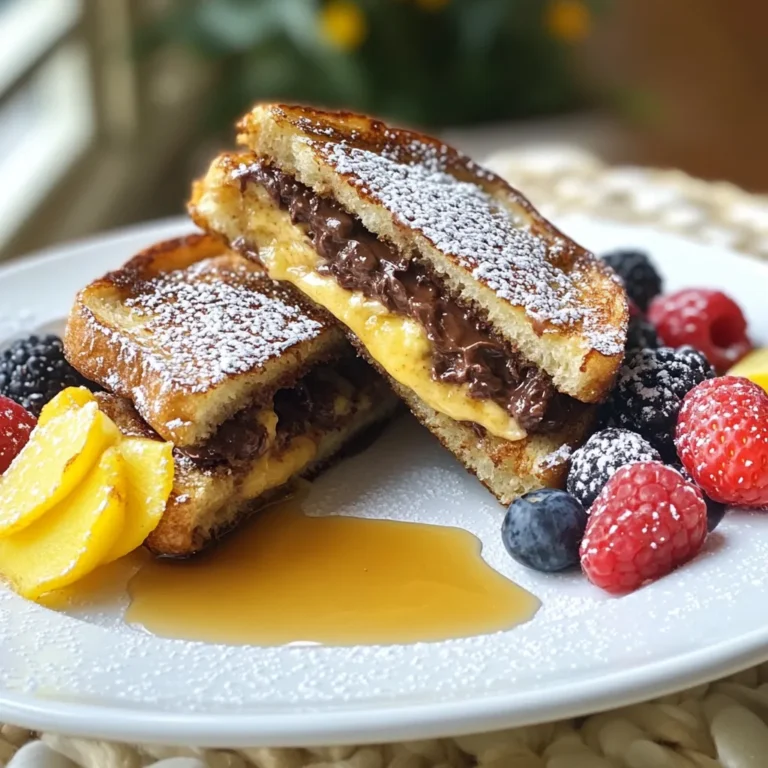
Chocolate Hazelnut Stuffed French Toast Delight

To make the Feta Tomato Orzo Bake, you need a few simple and fresh ingredients. Here’s what you’ll need: - 1 ½ cups orzo pasta - 3 cups cherry tomatoes, halved - 1 cup feta cheese, crumbled - 2 tablespoons olive oil - 3 cloves garlic, minced - 1 teaspoon dried oregano - 1 teaspoon dried basil - ½ teaspoon red pepper flakes (optional) - Salt and pepper to taste - Fresh basil leaves for garnish Each ingredient plays an important role in this dish. The orzo pasta gives a nice bite and texture. Cherry tomatoes add a burst of sweetness. Feta cheese brings creaminess and tang. Olive oil helps blend the flavors together, while garlic adds a kick. Dried oregano and basil give a nice herby taste. If you like heat, add red pepper flakes for a spicy touch. Don’t forget salt and pepper to enhance all the flavors. Finally, fresh basil leaves make a beautiful garnish that brightens the dish. Gather these ingredients, and you're ready to create a flavorful meal that is both simple and satisfying. {{ingredient_image_1}} Start by preheating your oven to 400°F (200°C). This step is key to cooking the dish right. While the oven heats, grab a large pot and fill it with water. Add salt to the water, then bring it to a boil. Once the water bubbles, add 1 ½ cups of orzo pasta. Cook it until it's al dente, following the package's instructions. Drain the orzo and set it aside. Make sure the orzo is not overcooked, as it will bake more in the oven. In a large mixing bowl, combine 3 cups of halved cherry tomatoes with 2 tablespoons of olive oil. Add in 3 minced garlic cloves, 1 teaspoon of dried oregano, and 1 teaspoon of dried basil. If you like some heat, toss in ½ teaspoon of red pepper flakes. Season the mix with salt and pepper to taste. Carefully toss everything together until the tomatoes are evenly coated. Next, add the cooked orzo and 1 cup of crumbled feta cheese. Gently mix until all the ingredients blend well. Now it's time to bake! Transfer your mixture into a greased 9x13 inch baking dish. Spread it evenly across the dish. Cover it with aluminum foil and place it in your preheated oven. Bake for 20 minutes. This helps the flavors meld together. After 20 minutes, carefully remove the foil. Bake for an additional 10 minutes. This is when the tomatoes will blister, and the feta will turn slightly golden. Once done, take it out of the oven and let it cool for a few minutes. Garnish with fresh basil leaves to add a nice touch. To get the best flavor in your Feta Tomato Orzo Bake, use ripe cherry tomatoes. Their natural sweetness boosts taste. Fresh garlic adds a strong, bold flavor, so don't skip it. I recommend using high-quality feta cheese for a rich, creamy texture. A drizzle of olive oil enhances all the flavors. Don’t forget the herbs! Dried oregano and basil bring warmth. For a bit of heat, add red pepper flakes. Mix everything well to blend the flavors. One common mistake is overcooking the orzo. Cook it just until al dente, so it remains firm. If you skip draining the orzo, it can make the dish watery. Be sure to mix the feta gently to avoid crumbling it too much. When baking, cover the dish with foil. This keeps moisture in and helps cook the tomatoes evenly. Remove the foil to get that nice, golden top at the end. Always taste before serving and adjust salt and pepper as needed. This dish pairs well with a simple green salad. A mix of greens with a light vinaigrette balances the richness. You can also serve it with crusty bread to soak up the delicious juices. For drinks, a chilled white wine is perfect. If you want a heartier meal, add grilled chicken or shrimp on the side. Fresh basil leaves on top add a pop of color and flavor. Enjoy your meal with family or friends for a cozy dinner. Pro Tips Use Fresh Ingredients: Fresh cherry tomatoes and high-quality feta cheese will elevate the flavor of your dish. Don’t Overcook the Orzo: Cook the orzo until al dente to ensure it maintains a good texture after baking. Customize Your Herbs: Feel free to experiment with different herbs like thyme or rosemary for a unique flavor profile. Let It Rest: Allow the dish to cool for a few minutes after baking; it helps the flavors meld together beautifully. {{image_2}} You can switch feta for other cheeses. Try goat cheese for a tangy twist. Mozzarella melts well and gives a creamy texture. Parmesan adds a nutty flavor. Each cheese brings its own taste. Experiment and find your favorite! Want to make this dish heartier? Add protein! Cooked chicken or shrimp works great. You could also use chickpeas or white beans for a veggie option. Just mix them in with the orzo and tomatoes. This adds protein and keeps it filling. Make this dish even more colorful! Add seasonal veggies like zucchini or bell peppers. Spinach or kale can give a nice green touch. Just chop them up and toss them in. This not only boosts flavor but also adds nutrition. Enjoy your creative spin on this recipe! After you enjoy your Feta Tomato Orzo Bake, store leftovers in an airtight container. This helps keep the flavors fresh and prevents drying out. Let the dish cool down before sealing it. You can keep it in the fridge for up to four days. When you’re ready to eat, just take it out and reheat. If you want to save some for later, freezing is a great option. First, let the Feta Tomato Orzo Bake cool completely. Then, place it in a freezer-safe container. You can also use freezer bags for easy storage. It will stay good in the freezer for about three months. To thaw, move it to the fridge a day before you plan to eat it. To reheat, you can use the oven or the microwave. For the oven, preheat it to 350°F (175°C). Place the dish in an oven-safe dish, cover it with foil, and heat for about 15 to 20 minutes. This keeps it moist. If using the microwave, put a serving on a plate and heat for 1 to 2 minutes. Stir halfway through to ensure even warming. Enjoy the great taste again! You can store Feta Tomato Orzo Bake in the fridge for up to five days. Make sure to place it in an airtight container. This keeps it fresh and tasty. The flavors can meld together over time, making it even better. When ready to eat, check for any signs of spoilage before reheating. Yes, you can make this dish ahead of time. Prepare the Feta Tomato Orzo Bake up to a day in advance. Just follow the recipe steps but stop before baking. Cover the dish tightly and place it in the fridge. When you're ready to eat, bake it straight from the fridge. You may need to add a few extra minutes to the baking time. If you need a substitute for feta cheese, try using goat cheese or ricotta. Goat cheese has a similar tangy flavor, while ricotta is creamier. You can also use cottage cheese for a lighter option. Keep in mind that these cheeses will change the dish's texture and taste, but they will still be delicious! This dish of Feta Tomato Orzo Bake uses simple ingredients to create great taste. We preheat, cook, and mix everything for perfect flavor. I shared tips to avoid mistakes and ways to add your twist. Always store leftovers properly and reheat with care. This recipe is fun to make and delicious to eat. Enjoy every bite and feel free to experiment! Happy cooking with your new favorite dish.

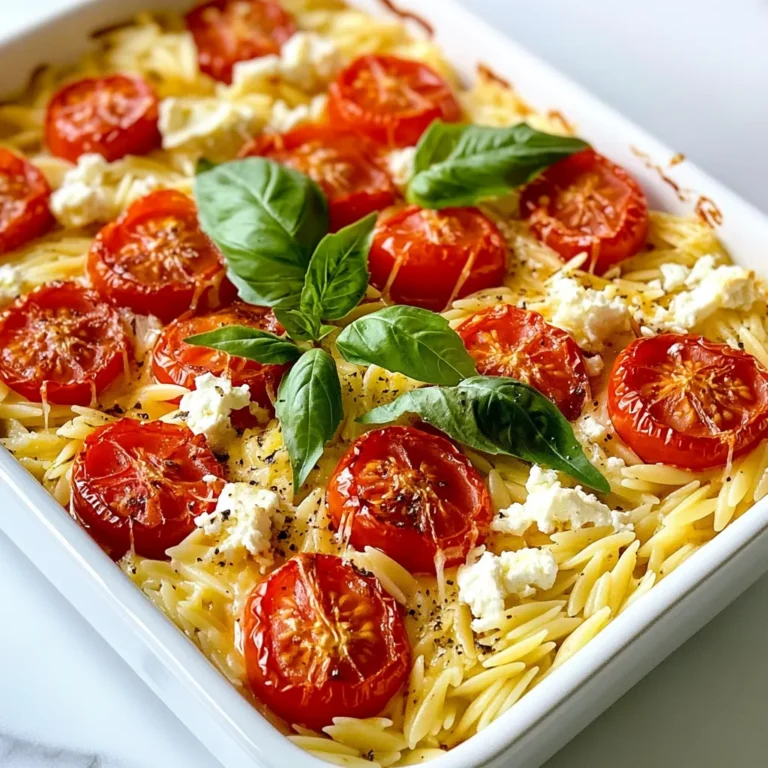
Feta Tomato Orzo Bake Flavorful and Simple Dish

- 1 ½ cups graham cracker crumbs - ½ cup unsalted butter, melted - 2 tablespoons sugar - 16 oz cream cheese, softened - 1 cup sugar - 2 large eggs - 1 teaspoon vanilla extract - Zest of 1 lemon - ½ cup fresh lemon juice - 1 cup fresh blueberries (or frozen, thawed) - 1 tablespoon cornstarch (for thickening) These ingredients come together for a delicious treat. First, the graham cracker crumbs form the crust. You need to melt the unsalted butter and mix it with the crumbs and sugar for great flavor. The cream cheese makes the filling rich and creamy. Next, the eggs add structure to the cheesecake. Vanilla extract gives it a warm, sweet note. Fresh lemon zest and juice bring a bright taste that pairs well with blueberries. Blueberries add natural sweetness and a burst of color. Cornstarch helps thicken the filling, ensuring it sets nicely. Each ingredient plays a vital role in crafting these tasty cheesecake bars. {{ingredient_image_1}} 1. Preheat your oven to 350°F (175°C). Line a 9x9 inch baking pan with parchment paper. Leave some paper hanging over the edges. This helps you lift the bars out later. 2. Mix the crust ingredients. In a bowl, combine 1 ½ cups of graham cracker crumbs, ½ cup of melted unsalted butter, and 2 tablespoons of sugar. Stir until the crumbs look wet and sandy. 3. Bake the crust. Press the crumb mixture into the bottom of the pan. Make it even and firm. Bake in the oven for 10 minutes. Let it cool slightly before adding the filling. 1. Beat the cream cheese. In a large bowl, use an electric mixer to beat 16 oz of softened cream cheese until smooth. 2. Add sugar. Gradually mix in 1 cup of sugar until well combined. 3. Incorporate eggs and flavors. Add 2 large eggs one at a time. Blend well after each addition. Mix in 1 teaspoon of vanilla extract, zest of 1 lemon, and ½ cup of fresh lemon juice. Blend until smooth. 4. Prepare the blueberries. In a small bowl, toss 1 cup of fresh blueberries with 1 tablespoon of cornstarch. This helps them stay suspended in the batter. Gently fold the blueberries into the cheesecake mixture. 1. Pour and smooth the mixture. Carefully pour the cheesecake mixture over the cooled crust. Use a spatula to smooth the top. 2. Bake the bars. Place the pan in the oven. Bake for 25-30 minutes. The center should be slightly set but still jiggle a bit. 3. Cool and refrigerate. Let the bars cool at room temperature for about an hour. Then place them in the fridge for at least 3-4 hours, or overnight if you can wait! This helps them firm up nicely. To achieve the right cheesecake consistency, make sure your cream cheese is soft. This helps mix in smoothly. Beat the cream cheese until it is creamy, with no lumps. Add the sugar gradually to avoid clumps. To prevent blueberries from sinking, toss them in cornstarch before adding them to the batter. This coats them lightly and helps them stay suspended as they bake. For the best texture, chill the cheesecake bars for at least 3-4 hours. If you can wait overnight, that’s even better! This allows them to set fully and makes them easier to cut. Garnishing the bars adds a nice touch. Dust them lightly with powdered sugar and scatter a few blueberries on top. This not only looks nice but also adds flavor. For serving, add lemon slices on the side. The bright color and fresh taste of lemon will enhance your dessert. It makes your cheesecake bars look fancy and inviting! Pro Tips Use Room Temperature Ingredients: Ensure your cream cheese is softened to room temperature for a smooth and creamy filling. This helps to prevent lumps in the cheesecake mixture. Don't Overmix: Once you've added the eggs, mix just until combined. Overmixing can incorporate too much air, leading to cracks in your cheesecake bars as they bake. Cool Gradually: Allowing the cheesecake to cool slowly at room temperature before refrigerating helps to prevent cracking. Avoid placing it directly into the fridge while it's still hot. Chill Overnight: For the best texture and flavor, let your cheesecake bars chill in the refrigerator overnight. This gives the flavors time to meld and the filling to set properly. {{image_2}} You can switch up the flavors in your blueberry lemon cheesecake bars. Here are some ideas: - Alternative fruit options: Try using strawberries or raspberries instead of blueberries. Both fruits add a fresh taste. - Adding unique spices: A pinch of ginger or cinnamon can add warmth. Just a small amount will enhance the flavor. - Swapping lemon for other citrus fruits: Use lime or orange for a different twist. Each fruit brings its own unique brightness. If you need to change the recipe for dietary needs, here are some great options: - Gluten-free crust options: Use gluten-free graham cracker crumbs or almond flour. These will hold the bars together nicely. - Vegan substitutes for cream cheese and eggs: Use vegan cream cheese and flax eggs. They work well and keep it creamy. - Sugar alternatives for a healthier version: Replace sugar with honey or a sugar substitute. This can help reduce calories while keeping it sweet. These variations and modifications let you enjoy the bars in your own way! To keep your Blueberry Lemon Cheesecake Bars fresh, store them in the fridge. Place them in an airtight container. This way, they stay cool and tasty for up to five days. If you have leftovers, this method works great. Just make sure they are fully chilled first. If you want to save some for later, you can freeze them. Wrap each bar in plastic wrap, then place them in a freezer-safe bag. They can last for up to three months in the freezer. When you want to enjoy them again, just take them out and let them thaw in the fridge overnight. Leftover cheesecake bars are delicious cold, but you can warm them up too. To do this, preheat your oven to 300°F (150°C). Place the bars on a baking sheet and heat for about 10 minutes. This will make them soft and creamy again. If you froze the bars, thaw them in the fridge first. This keeps the texture nice. After they are thawed, you can follow the same reheating steps for a warm treat. Enjoy the sweet and tangy flavors with each bite! Can I use frozen blueberries? Yes, you can use frozen blueberries. Just make sure to thaw and drain them first. This helps avoid extra moisture in the bars. How can I make the bars more or less sweet? To make the bars sweeter, add more sugar to the cheesecake mix. If you want less sweetness, cut back on the sugar in the filling. Taste as you go to find the right balance. How do I know when the cheesecake bars are done baking? Look for a slight jiggle in the center of the bars. They should puff up a little but remain soft. This means they are set but not overcooked. Can I make these bars ahead of time? Yes, these bars are great for making ahead. You can prepare them a day in advance. Just remember to chill them for at least four hours before serving. What can I serve alongside cheesecake bars? Serve these bars with fresh fruit, whipped cream, or a drizzle of lemon glaze. A slice of lemon on the plate adds a nice touch too! You now have a complete guide to making delicious Blueberry Lemon Cheesecake Bars. We covered all the key ingredients, from the crust to the creamy filling. You learned safe baking steps to ensure your bars turn out perfect. Remember to try the tips for texture and presentation for the best results. Feel free to explore variations and make it your own. Proper storage will keep leftovers fresh for later, so you can enjoy more after the first bite. Happy baking!

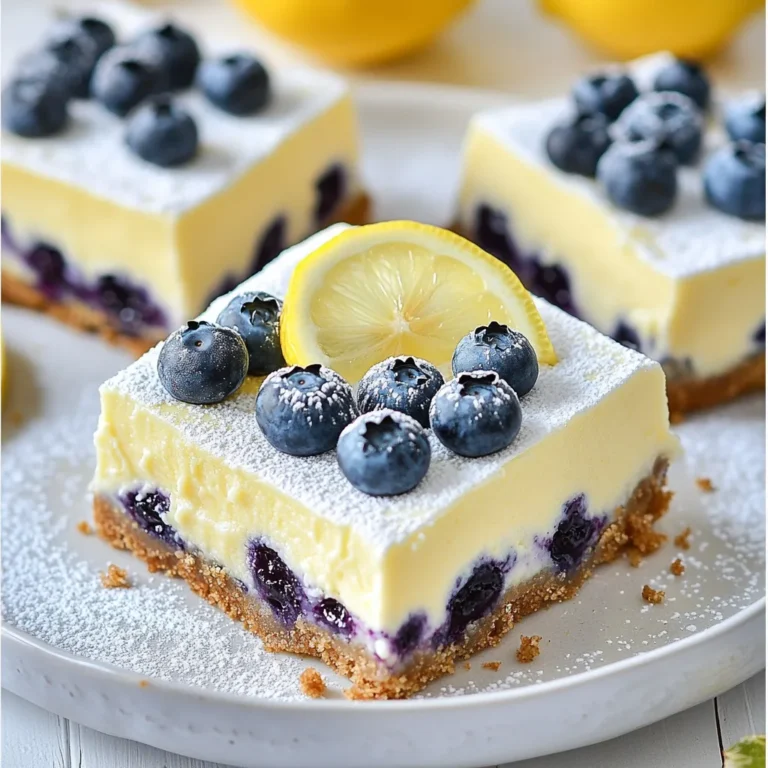
Blueberry Lemon Cheesecake Bars Simple and Tasty Treat

PREV 1 … 35 36 37 … 53 NEXT
cozy citrus kitchen

explore

DessertsDinnerAppetizersDrinks

Our Policies

  • Cookie Policy
  • Copyright Policy
  • Disclaimer
  • GDPR Policy
  • Terms Of Use
Back to Top
  • About
  • Contact Us
  • Privacy Policy
© 2025 cozy citrus kitchen