FREE DINNER EBOOK! Get your copy!
  • Cookie Policy
  • GDPR Policy
  • Disclaimer
  • Terms Of Use
  • Visit my other site: Fun Cookie Recipes
cozy citrus kitchen
  • Home
  • Dinner
  • Desserts
  • Drinks
  • Appetizers
  • Contact
  • About
  • Privacy Policy
  • Home
  • Dinner
  • Desserts
  • Drinks
  • Appetizers
  • Contact
  • About
  • Privacy Policy
  • Cookie Policy
  • GDPR Policy
  • Disclaimer
  • Terms Of Use
Visit my other site: Fun Cookie Recipes

HOME / CATEGORIES /

Latest

To make Coconut Mango Overnight Oats, you will need the following ingredients: - 1 cup rolled oats - 1 cup coconut milk (canned or carton) - 1 ripe mango, diced - 1 tablespoon chia seeds - 1 tablespoon maple syrup (adjust to taste) - 1/2 teaspoon vanilla extract - A pinch of salt - Unsweetened shredded coconut, for topping - Fresh mint leaves, for garnish Each ingredient plays a key role in creating this dish. The rolled oats provide a hearty base. Coconut milk gives it a creamy texture and tropical flavor. Diced mango adds sweetness and freshness. Chia seeds thicken the oats and pack in nutrients. Maple syrup sweetens the dish, while vanilla extract enhances the overall taste with warmth. A pinch of salt balances the flavors. Finally, shredded coconut and mint leaves add a beautiful finish. You can find these ingredients at your local grocery store. Choose ripe mangoes for the best flavor. {{ingredient_image_1}} To make Coconut Mango Overnight Oats, first gather your supplies. You need a bowl, a spoon, and jars for serving. This recipe takes only 10 minutes to prep. It’s fun and easy, perfect for busy mornings. Start by mixing dry ingredients. In a medium bowl, combine: - 1 cup rolled oats - 1 tablespoon chia seeds - A pinch of salt - 1 tablespoon maple syrup Next, add the wet ingredients. Pour in: - 1 cup coconut milk - 1/2 teaspoon vanilla extract Stir everything well until combined. Then, fold in half of the diced mango. This adds a burst of flavor. Set aside the rest of the mango for later. Now, transfer the mixture into jars or a large container. Seal them tightly. Refrigerate overnight or at least four hours. This allows the oats to soak up the coconut milk. In the morning, check the consistency. If it’s too thick, add a splash of coconut milk. Now you are ready to serve! Enjoy your tasty Coconut Mango Overnight Oats topped with the remaining mango, shredded coconut, and fresh mint leaves. You can change the sweetness to fit your taste. Start with one tablespoon of maple syrup. After mixing, taste your oats. If you want it sweeter, add a little more syrup. You can also use honey or agave syrup if you prefer. Remember, the mango adds natural sweetness too. To get the right texture, use one cup of coconut milk for every cup of oats. If your oats are too thick after chilling, just stir in a splash of coconut milk. This will help you reach the creaminess you like. The chia seeds also help thicken the mix, so don’t skip them! Add more flavors to make your oats exciting. Try adding spices like cinnamon or nutmeg to the mix. You can also include lime juice for a zesty kick. For a nutty taste, mix in some chopped nuts or seeds. Top with fresh fruit, shredded coconut, or yogurt for extra flavor and fun! Pro Tips Choose Ripe Mangoes: For the best flavor and sweetness, make sure to use ripe mangoes that are slightly soft to the touch and have a fragrant aroma. Customize the Sweetness: Adjust the amount of maple syrup to your taste preference. You can also substitute it with honey or agave syrup if desired. Experiment with Toppings: Feel free to add other toppings like nuts, seeds, or additional fruits such as berries or bananas for extra texture and flavor. Make It Vegan: Ensure the coconut milk you use is labeled as vegan if you want to keep this recipe plant-based. Canned coconut milk usually provides a creamier texture. {{image_2}} You can change up the fruit in your oats. Try adding pineapple or banana. You can also mix in berries like strawberries or blueberries. Each fruit adds a new taste. This keeps breakfast fun and exciting. If you want a dairy-free option, use coconut milk. You can also try almond or oat milk. These choices work well and keep the oats creamy. They add unique flavors too. Make it how you like it! Toppings can really make your oats pop. Try adding nuts like almonds or walnuts for crunch. A drizzle of honey or agave syrup gives extra sweetness. You can also sprinkle cinnamon for a warm flavor. Fresh fruit on top looks pretty and tastes great! To keep your coconut mango overnight oats fresh, store them in an airtight container. Jars with tight lids work best. Place the jars in the fridge right after you make them. This keeps the oats soft and tasty. If you add toppings like mango or coconut, wait until serving time. This keeps them fresh and prevents sogginess. You can freeze your oats for later use. Portion them into freezer-safe containers or bags. Make sure to leave some space for expansion. When you’re ready to eat, thaw them in the fridge overnight. You can also heat them in the microwave. Add a little coconut milk to bring back the creaminess. Coconut mango overnight oats last up to five days in the fridge. If you freeze them, they can stay good for about three months. Just remember to check for any signs of spoilage. If they smell off or look strange, it’s best to throw them away. Enjoy your easy and tasty breakfast! Overnight oats stay fresh for up to five days in the fridge. Store them in an airtight container. I love making a batch at the start of the week. This way, I have breakfast ready for busy mornings. You can use quick oats, but the texture will change. Quick oats absorb liquid faster and become softer. I recommend sticking to rolled oats for a heartier bite. They give a nice chewiness that pairs well with coconut and mango. To make this recipe vegan, simply use maple syrup and coconut milk. Both are plant-based and perfect for a vegan diet. This recipe already fits well within vegan guidelines, so you're all set. Yes, adding nuts or seeds is a great idea! Almonds, walnuts, or pumpkin seeds add crunch and nutrition. Just sprinkle them on top before serving. It brings a nice texture contrast to the creamy oats. If you don’t have coconut milk, you can use almond milk or oat milk. These alternatives will still give a nice flavor but will change the creamy texture a bit. Coconut milk gives that tropical vibe, but other milks work well too. Absolutely! You can prepare these oats up to five days ahead. Just keep them sealed in the fridge. This makes it easy to grab and go. Perfect for busy mornings when time is short. This blog post covers a simple and tasty overnight oats recipe. We explored the key ingredients like rolled oats and ripe mango. I shared step-by-step instructions to make your oats easy to prepare. Tips helped you adjust sweetness and enhance flavor. We also discussed fun variations and storage methods. Enjoy this nourishing dish and make it your own. I hope you try it and find new ways to love overnight oats!

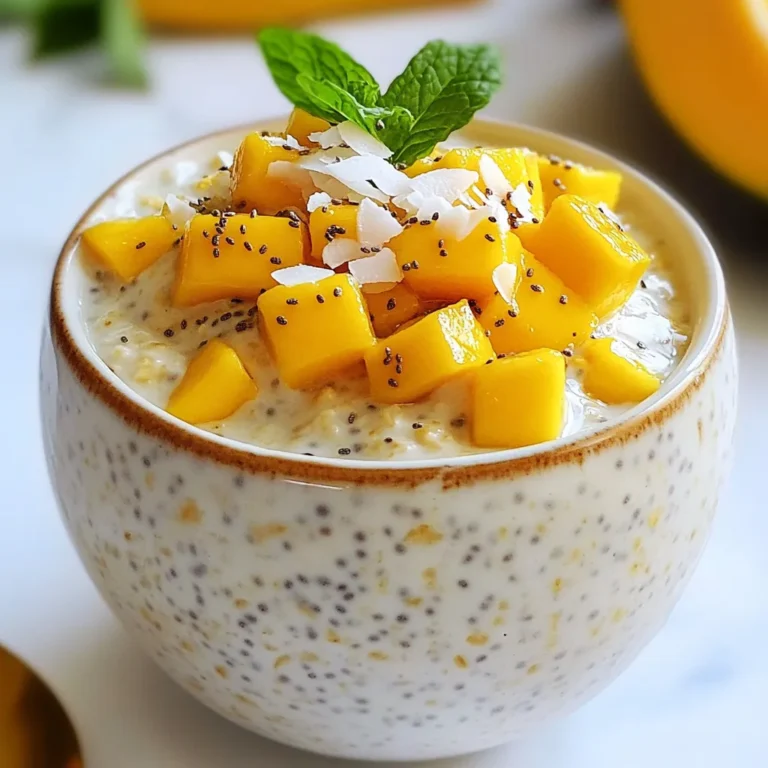
Coconut Mango Overnight Oats Tasty and Easy Recipe

The ingredients for Lemon Herb Quinoa Pilaf are simple and fresh. Here is what you will need: - 1 cup quinoa, rinsed - 2 cups vegetable broth (or water) - 1 small onion, finely chopped - 2 cloves garlic, minced - 1 medium carrot, diced - 1 red bell pepper, diced - ½ cup frozen peas - 2 tablespoons olive oil - Juice and zest of 1 lemon - 1 teaspoon dried thyme - 1 teaspoon dried oregano - Salt and pepper to taste - Fresh parsley, chopped (for garnish) Each ingredient plays a key role in the dish. Quinoa is the star, bringing a nutty flavor and fluffy texture. The vegetable broth adds depth. Onions and garlic give a savory base. Carrots and bell peppers add color and crunch. The peas bring sweetness. Lemon juice and zest brighten the dish. Thyme and oregano add earthy notes. Salt and pepper enhance all these flavors. Fresh parsley is the perfect finishing touch, making the dish look vibrant and inviting. Enjoying this pilaf is not just a meal; it is a burst of flavor on your plate! {{ingredient_image_1}} First, heat the olive oil in a medium saucepan over medium heat. Add the finely chopped onion. Sauté the onion for about 3-4 minutes until it is soft and clear. Next, add the minced garlic. Stir in the diced carrot at this point. Cook these together for about 2 minutes. The carrot should start to soften now. After that, add the diced red bell pepper. Cook for another 2-3 minutes until the pepper softens a bit. Now, it’s time to add the rinsed quinoa to the pan. Mix it well with the sautéed vegetables. Pour in the vegetable broth or water next. Add the lemon juice and lemon zest. Toss in the dried thyme and dried oregano too. Bring everything to a boil. Once it boils, lower the heat and cover the pan. Let it simmer for about 15 minutes. The quinoa should absorb all the liquid and become fluffy. During the last 5 minutes of cooking, stir in the frozen peas. This will warm them up nicely. After cooking, remove the pan from heat. Let it sit covered for an extra 5 minutes. Then, fluff the quinoa with a fork. Season with salt and pepper to your liking. Finally, garnish with fresh parsley before serving. Enjoy your bright and tasty Lemon Herb Quinoa Pilaf! Rinsing quinoa is key. It washes away the bitter coating called saponin. This step improves the taste and texture. To rinse, place quinoa in a fine mesh strainer. Run cold water over it for a minute. You’ll notice how clean and fresh it looks. This small step makes a big difference! Using vegetable broth enhances flavor. It adds depth that water cannot provide. Broth gives the dish a savory touch. If you want a lighter taste, you can use water. But I always recommend broth for the best results. It makes every bite more enjoyable. You can boost the flavor with more herbs or spices. Try adding fresh basil or cilantro for a twist. A pinch of red pepper flakes adds heat. Experiment with different combinations. You can even mix in some nuts or dried fruits for extra texture. The options are endless, so have fun with it! Pro Tips Rinse Your Quinoa: Always rinse quinoa under cold water before cooking to remove its natural coating, saponin, which can make it taste bitter. Enhance Flavor: For added depth, toast the quinoa in the olive oil for 2-3 minutes before adding the broth. This brings out a nutty flavor. Vegetable Variations: Feel free to mix in other vegetables like zucchini or spinach for extra nutrition and vibrant color. Let It Rest: After cooking, let the quinoa sit covered for a few minutes. This helps the grains firm up and improves texture. {{image_2}} You can add many vegetables to your Lemon Herb Quinoa Pilaf. Try zucchini, spinach, or broccoli. Each brings a new flavor and makes the dish colorful. Dice them small so they cook evenly. You can use fresh or frozen veggies. Just remember to adjust cooking times for freshness. You can boost the protein in your pilaf with easy additions. Chickpeas, black beans, or lentils work well. Simply add them in the last few minutes of cooking. For a meat option, try diced grilled chicken or shrimp. Just make sure to cook them before adding to the quinoa. If you want to switch from quinoa, try other grains. Brown rice or farro are great choices. They have different textures and flavors. Adjust the cooking time based on the grain you choose. Rice usually takes longer, so keep an eye on it. This way, you can enjoy the same bright taste with a new twist. To store Lemon Herb Quinoa Pilaf in the fridge, let it cool first. Place it in an airtight container. It will last for about 3 to 5 days. When ready to eat, just reheat it in the microwave or on the stove. Add a splash of broth or water if it seems dry. You can freeze this quinoa pilaf if you want to save it for later. First, let it cool completely. Then, put it in a freezer-safe container. It can last for up to 3 months in the freezer. To reheat, just thaw it overnight in the fridge. Then heat it on the stove or microwave. Again, add some broth or water if needed. This Lemon Herb Quinoa Pilaf pairs well with many dishes. Try it with grilled chicken or fish for a complete meal. You can also serve it alongside a fresh salad. Add some feta or avocado for extra taste. It makes a lovely side dish for any dinner. Yes, you can make Lemon Herb Quinoa Pilaf ahead of time. This dish stores well. Cook it, let it cool, and place it in an airtight container. You can keep it in the fridge for up to five days. Reheat it on the stovetop or in the microwave when you are ready to eat. Yes, this recipe is gluten-free. Quinoa is a gluten-free grain. It is a great choice for those with gluten sensitivities or celiac disease. Always double-check the labels of any broth you use to ensure it is also gluten-free. This recipe is already vegan! It uses vegetable broth and no animal products. You can enjoy it as is. If you want, you can add plant-based proteins, like chickpeas or tofu, to make it heartier. Absolutely! You can toss in more veggies like spinach, zucchini, or mushrooms. Just sauté them with the onions for a tasty mix. Store any leftovers in an airtight container in the fridge. It stays fresh for about five days. Yes, feel free to swap quinoa for other grains like rice or bulgur. Just adjust the cooking time and liquid amounts as needed. This pilaf pairs well with grilled chicken, fish, or a fresh salad. You can also serve it as a side dish at a gathering. In this blog post, we explored a delicious quinoa dish. We covered the main ingredients, like quinoa and fresh veggies. I shared step-by-step instructions, tips for better flavor, and ways to customize the dish. We also talked about how to store and serve it. Quinoa is versatile and easy to make. Feel free to try new veggies or proteins. Enjoy cooking, and have fun making it your own!

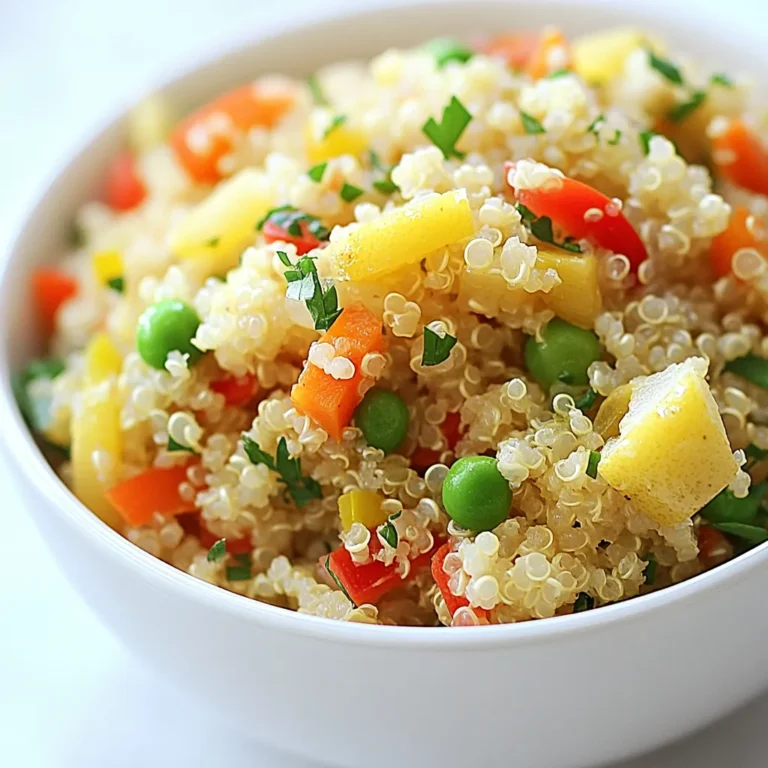
Lemon Herb Quinoa Pilaf Fresh and Flavorful Recipe

To make chocolate dipped coconut macaroons, you will need: - 2 ¼ cups shredded sweetened coconut - 1 cup sweetened condensed milk - 1 teaspoon vanilla extract - ½ teaspoon almond extract - 2 large egg whites - ¼ teaspoon salt - 1 cup semisweet chocolate chips - 1 tablespoon coconut oil These ingredients come together to create a chewy, sweet treat. The shredded coconut gives a great texture, while the sweetened condensed milk binds everything together. You can play with the flavors in your macaroons. Try adding: - A splash of mint extract for a fresh twist. - Zest from an orange for a citrus touch. - Chopped nuts like almonds or pecans for extra crunch. These add-ins can elevate your macaroons and make them unique. To prepare these macaroons, gather the following tools: - A large mixing bowl - A separate bowl for whipping egg whites - An electric mixer - A baking sheet lined with parchment paper - A microwave-safe bowl for melting chocolate - A small ice cream scoop or tablespoon Having the right tools makes the process easier and more enjoyable. {{ingredient_image_1}} First, gather your ingredients. You need shredded coconut, sweetened condensed milk, and extracts. Also, grab two large egg whites, salt, chocolate chips, and coconut oil. Next, preheat your oven to 325°F (160°C). This ensures even baking. Line a baking sheet with parchment paper. This step keeps the macaroons from sticking. In a large bowl, mix the shredded coconut, sweetened condensed milk, vanilla, and almond extracts. Stir until everything blends well. In another bowl, beat the egg whites and salt. Use an electric mixer on medium speed. Keep mixing until stiff peaks form. This usually takes about 2-3 minutes. Gently fold the beaten egg whites into the coconut mixture. Do this carefully to keep the fluffiness. You want no white streaks left. Now it’s time to shape the macaroons. Use a tablespoon or a small ice cream scoop to portion the mixture. Place them on the baking sheet, about 1 inch apart. Bake the macaroons in the oven for 20-25 minutes. Look for a light golden color on the edges. This is your sign that they are ready. After baking, let them cool on the sheet for 10 minutes. Then, transfer them to a wire rack to cool completely. While the macaroons cool, prepare for the chocolate dip. In a microwave-safe bowl, combine the semisweet chocolate chips and coconut oil. Microwave this mixture in 30-second intervals. Stir in between until it becomes smooth. Once the macaroons are cool, dip the bottom of each one into the melted chocolate. Let any extra chocolate drip off. Place the dipped macaroons back on the parchment paper. Finally, refrigerate the macaroons for about 30 minutes to set the chocolate. This makes the chocolate firm and ready to enjoy. Folding egg whites is key to light and airy macaroons. Use a rubber spatula for this. First, scoop a bit of the coconut mix into the egg whites. This helps to lighten the mix. Then, gently lift the egg whites from the bottom and fold over the coconut. You want to keep as much air as possible. Keep folding until no white streaks show. This should take about 30 seconds. Baking temperature matters. Preheat your oven to 325°F (160°C). Line your baking sheet with parchment paper. This helps the macaroons not stick. Space each scoop about 1 inch apart. This gives them room to rise. Bake until they are lightly golden, about 20-25 minutes. Watch closely during the last few minutes. Overbaking can dry them out. Melting chocolate can be tricky. Use a microwave-safe bowl for the chocolate chips. Add 1 tablespoon of coconut oil to help it melt smoothly. Microwave in 30-second bursts. Stir between each burst to avoid burning. Once melted, let it cool a bit. This helps when dipping the macaroons. Dip only the bottom and let the excess drip off. Place them back on parchment paper to set. Pro Tips Use Fresh Coconut: For an enhanced flavor, consider using fresh shredded coconut instead of packaged. It will give your macaroons a more authentic taste. Perfect Egg Whites: Make sure your mixing bowl is completely clean and dry before beating the egg whites. Any fat or moisture can prevent them from reaching stiff peaks. Chocolate Dipping: For a smooth chocolate dip, ensure that the chocolate is fully melted and incorporated with the coconut oil to create a glossy finish. Storing Macaroons: Store your chocolate dipped macaroons in an airtight container in the fridge to keep them fresh and maintain their texture for up to a week. {{image_2}} You can change the flavor of your chocolate dipped coconut macaroons easily. Adding mint gives a fresh touch. Just mix in 1 teaspoon of mint extract when combining the coconut and sweetened condensed milk. For a zesty twist, add the zest of one orange. This brightens the flavor and adds a nice aroma. You can also try using different extracts, like coconut or lemon. Each choice adds a new layer of taste. If you follow a vegan diet, you can still enjoy these treats. Replace sweetened condensed milk with coconut cream or a vegan alternative. Use aquafaba, the liquid from canned chickpeas, instead of egg whites. Just whip it until it forms stiff peaks like egg whites do. Make sure your chocolate chips are dairy-free, and you’re good to go! This way, everyone can enjoy these delicious macaroons. Presentation adds joy to your treats. After dipping in chocolate, sprinkle a bit of sea salt on top for a sweet-salty flavor. You can also drizzle white chocolate over the dark chocolate for a fun look. For colors, use colored sprinkles or edible glitter. Place the macaroons in cupcake liners for a festive touch. These small changes make your macaroons stand out and look more inviting. To keep your chocolate dipped coconut macaroons fresh, store them in an airtight container. Place parchment paper between layers to avoid sticking. This method helps maintain their chewy texture and rich taste. Keep the container in a cool, dry place, away from heat and sunlight. You can freeze macaroons for later enjoyment. First, let them cool completely. Then, place them on a baking sheet in a single layer. Freeze for about one hour. Once frozen, transfer them to a freezer-safe bag or container. They can stay frozen for up to three months. When ready to eat, thaw them in the fridge overnight. Chocolate dipped coconut macaroons last for about one week when stored properly. If you keep them in the fridge, they may last up to ten days. However, for the best flavor and texture, enjoy them fresh! Yes, you can use unsweetened coconut. However, your macaroons will be less sweet. To balance the flavor, you might want to add a little more sweetened condensed milk. This will help keep the texture nice and chewy. Unsweetened coconut can give you a richer coconut taste. Just remember, the sweetness might not be as strong. This recipe is naturally gluten-free! The main ingredients, coconut and condensed milk, contain no gluten. Always check your labels. Some brands may add fillers that include gluten. If you want extra assurance, use certified gluten-free coconut. That way, you can enjoy these treats without worry. Serving and presenting macaroons can be fun! Here are some tips: - Arrange them on a nice platter for a beautiful display. - Use colorful liners to add a pop of color. - Drizzle extra melted chocolate on top for flair. - Pair them with fresh fruit or ice cream for a tasty treat. These ideas will make your macaroons look as good as they taste! This article covers the essentials for making delicious chocolate dipped coconut macaroons. You learned about key ingredients, clear steps for baking, and helpful tips for great results. I shared flavor variations and storage tips to keep your treats fresh. Remember, these macaroons can easily fit your taste and diet. Enjoy the fun of creating your own treats, and don’t be afraid to try new flavors. Happy baking!

Chocolate Dipped Coconut Macaroons Delicious Treat

- 4 bone-in, skin-on chicken thighs - 1/4 cup pure maple syrup - 2 tablespoons Dijon mustard - 1 tablespoon olive oil - 3 cloves garlic, minced - 1 teaspoon fresh rosemary, chopped (or 1/2 teaspoon dried) - 1 teaspoon thyme leaves - Salt and pepper to taste - 1/2 cup low-sodium chicken broth I love using fresh, simple ingredients for my Maple Dijon Chicken Thighs. Each ingredient plays a key role in creating a tasty dish. The chicken thighs are juicy and packed with flavor. The skin gets crispy, which adds a nice crunch. Maple syrup provides a sweet touch that pairs well with the tangy Dijon mustard. Olive oil keeps the chicken moist while adding richness. Garlic gives a strong base flavor, and fresh herbs like rosemary and thyme bring a wonderful aroma. Using low-sodium chicken broth keeps the dish balanced. Salt and pepper round out the flavors. When you combine all these ingredients, you create a delicious marinade that coats the chicken perfectly. This dish is simple yet full of flavor, making it a staple in my kitchen. {{ingredient_image_1}} 1. Preheat your oven to 400°F (200°C). This helps to cook the chicken evenly. 2. In a small bowl, whisk together: - 1/4 cup pure maple syrup - 2 tablespoons Dijon mustard - 1 tablespoon olive oil - 3 cloves garlic, minced - 1 teaspoon fresh rosemary, chopped (or 1/2 teaspoon dried) - 1 teaspoon thyme leaves - Salt and pepper to taste This creates a tasty marinade for the chicken. 3. Pat the chicken thighs dry with paper towels. This helps the skin crisp up. Season lightly with salt and pepper. 1. In a large oven-safe skillet, add a drizzle of olive oil over medium-high heat. 2. Once the oil is hot, place the chicken thighs skin-side down in the skillet. Sear for about 5 minutes until the skin is golden brown and crispy. 3. Flip the chicken thighs over. Pour the maple Dijon marinade over the top. Then, add 1/2 cup low-sodium chicken broth to the pan. This adds extra flavor. 4. Transfer the skillet to the preheated oven. Bake for 25-30 minutes. Check that the chicken reaches an internal temperature of 165°F (75°C). 1. Remove the skillet from the oven. Let the chicken rest for 5 minutes. This allows the juices to redistribute. 2. Serve the chicken thighs drizzled with the pan sauce. This makes the dish even more delicious. To achieve crispy skin on chicken thighs, start by patting them dry. Moisture will make the skin soggy. Use a hot skillet for searing. This helps lock in flavor and creates a beautiful golden brown color. When choosing between bone-in and boneless chicken thighs, consider flavor and moisture. Bone-in thighs often taste better and stay juicy. Boneless thighs cook faster but may dry out. Choose based on your time and taste. Adding spices can take your dish to the next level. Try paprika for a smoky touch. A pinch of cayenne gives it heat. For a sweet twist, add a bit of cinnamon. If you want to switch herbs, use sage or parsley instead of rosemary and thyme. These herbs will add a fresh taste to the dish. Feel free to mix and match your favorite flavors. For side dishes, roasted vegetables work well. Carrots, green beans, or Brussels sprouts are great choices. A simple salad with greens and nuts adds color and crunch. For garnishing, serve the chicken on a white platter. Add fresh rosemary sprigs on top for a nice pop of green. Drizzle the pan sauce over the chicken for a shiny finish. This makes the dish look as good as it tastes! Pro Tips Use Fresh Herbs: Fresh herbs like rosemary and thyme can elevate the flavor profile of your dish. If you have access to fresh, use them for a more vibrant taste. Let the Chicken Rest: Allowing the chicken to rest for a few minutes after baking helps retain its juices, making it more tender and flavorful. Check for Doneness: Always use a meat thermometer to ensure your chicken reaches an internal temperature of 165°F (75°C) for safe consumption. Customize the Marinade: Feel free to experiment with the marinade by adding other ingredients like apple cider vinegar or a splash of soy sauce for an extra kick. {{image_2}} You can change the protein in Maple Dijon Chicken Thighs. Try using chicken breasts or pork chops. Each protein will soak up the marinade well. If you need gluten-free options, use gluten-free mustard. Check the chicken broth for gluten-free labels. This way, everyone can enjoy the dish. Adding veggies makes the meal even better. You can toss in green beans, carrots, or bell peppers. Add them to the skillet when you sear the chicken. They will cook nicely in the sauce. For a sweet and spicy twist, add chili flakes to the marinade. This will give your chicken a kick. You can also mix in some honey for extra sweetness. If you want different glazing options, try balsamic vinegar. It adds a tangy flavor that pairs well with maple. You can also use apple cider for a fruity touch. To store your Maple Dijon chicken thighs, let them cool first. Place them in an airtight container. This keeps them fresh and safe to eat. You can also wrap them tightly in foil or plastic wrap. How long can you keep leftovers? You can store cooked chicken thighs in the fridge for up to four days. If you want to keep them longer, freeze them. Frozen chicken can last up to three months. Just remember to label the container with the date. For reheating chicken thighs, the best method is baking. Preheat your oven to 350°F (175°C). Place the chicken on a baking sheet and cover with foil. Bake for about 15-20 minutes. This keeps the meat juicy. To keep the skin crispy, remove the foil for the last five minutes. You can also use an air fryer. Set it to 375°F (190°C) and reheat for about 5-7 minutes. This method revives the crispiness. Always check that the chicken's internal temperature reaches 165°F (75°C) before serving. What is the best temperature to cook chicken thighs? The best temperature is 400°F (200°C). This heat helps the chicken cook evenly and stay juicy. Cooking at this temperature usually takes 25-30 minutes. Use a meat thermometer to check for an internal temp of 165°F (75°C) for safety. Can I make the marinade ahead of time? Yes, you can make the marinade a day in advance. Just store it in the fridge. This lets the flavors mix well, making the chicken even tastier. When you're ready, marinate the chicken for at least 30 minutes. Is it necessary to sear chicken thighs before baking? Searing is not strictly necessary, but it adds great flavor and texture. The golden, crispy skin makes the dish more appealing. If you skip this step, the chicken will still cook well. Can I use maple-flavored syrup instead of pure maple syrup? You can, but pure maple syrup gives the best flavor. Maple-flavored syrup may be sweeter and less rich. If you want a balanced taste, stick with the pure stuff. What to do if chicken thighs are not cooked through? If the chicken isn't cooked through, return it to the oven. Bake for an additional 5-10 minutes. Check the internal temperature again. It should reach 165°F (75°C) before serving. This guide covered everything you need for delicious maple Dijon chicken thighs. We explored essential ingredients, preparation steps, and cooking methods. I shared tips for crisp skin and suggested variations for extra flavor. You can also store leftovers properly and reheat them without losing texture. Enjoy this tasty dish with your favorite sides. Try new twists and share your results. Happy cooking!

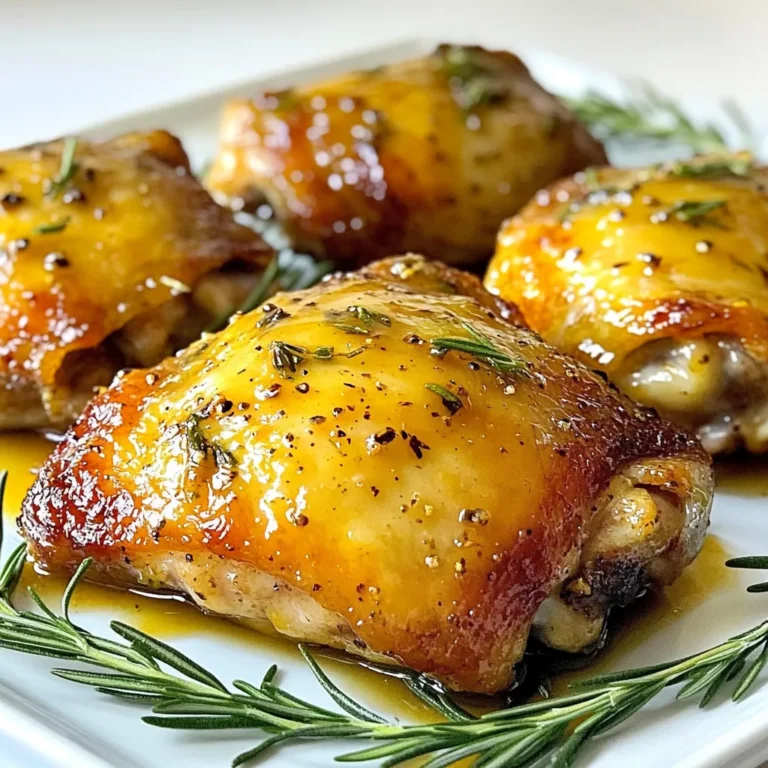
Maple Dijon Chicken Thighs Flavorful and Simple Dish

To make Chocolate Covered Date Turtles, you need a few simple items. Each ingredient plays a key role in flavor and texture. Here’s what you will need: - 12 large Medjool dates, pitted - 1 cup pecan halves - 1 cup semi-sweet chocolate chips - 2 tablespoons coconut oil - Sea salt for sprinkling Medjool dates are sweet and chewy. They work well as a base. Pecan halves add a nice crunch and nutty flavor. Semi-sweet chocolate chips give you that rich chocolate taste. Coconut oil helps the chocolate melt smoothly and adds a slight coconut flavor. A sprinkle of sea salt at the end brings out the sweetness and makes each bite special. Choose high-quality ingredients for the best results. Fresh Medjool dates make a big difference. Look for pecan halves that are crunchy and flavorful. Use good semi-sweet chocolate chips for creamy chocolate. This combination will make your turtles truly irresistible. {{ingredient_image_1}} To start, preheat your oven to 350°F (175°C). This step helps warm the dates and makes them easier to slice. Next, take your Medjool dates and slice each one lengthwise. Be careful not to cut all the way through. You want to make a pocket for the filling. Now, gently open each sliced date. Take 2-3 pecan halves and place them inside the pocket. Press them together slightly to keep them secure. This adds a lovely crunch and nutty flavor to your treat. In a microwave-safe bowl, combine 1 cup of semi-sweet chocolate chips and 2 tablespoons of coconut oil. Microwave this mixture in 30-second intervals. Stir in between each interval until it becomes smooth and fully melted. This step is key for a nice, shiny chocolate coating. Next, line a baking sheet with parchment paper. Using a fork or toothpick, dip each stuffed date into the melted chocolate. Make sure to coat it completely. Allow any extra chocolate to drip off before placing it on the baking sheet. After dipping, place the chocolate-covered dates on the prepared baking sheet. While the chocolate is still warm, sprinkle a touch of sea salt over each date. This will enhance the flavor with a sweet and salty contrast. Now, refrigerate the dates for about 20-30 minutes. This time allows the chocolate to set properly. Once they are set, transfer the turtles to a serving platter. You can enjoy them right away or store them in an airtight container in the fridge for up to a week. These treats are sure to impress anyone who tries them! When making Chocolate Covered Date Turtles, I always choose Medjool dates. They are large, soft, and sweet. Other dates can be dry or small. Medjool dates have a rich flavor, perfect for this dessert. Look for dates that feel plump and have a shiny surface. Avoid any that are hard or shriveled. The right date makes all the difference. Melting chocolate can be tricky. I recommend using a microwave-safe bowl. Start by adding chocolate chips and coconut oil. Heat in 30-second bursts. Stir after each burst to keep the heat even. This helps avoid burning the chocolate. If you notice any small lumps, keep stirring. The heat will melt them. You want a smooth, shiny chocolate for dipping. For a delightful treat, serve your Chocolate Covered Date Turtles with coffee or tea. The warm drinks enhance the sweet taste of the dates. You can also pair them with vanilla ice cream. The cold ice cream contrasts well with the chocolate. If you're feeling adventurous, try adding a sprinkle of chili powder. It adds a kick that surprises your taste buds. Pro Tips Choose the Right Dates: Opt for large Medjool dates for their rich flavor and chewy texture, which hold up well when stuffed and coated in chocolate. Coconut Oil Magic: Adding coconut oil to the chocolate not only helps it melt smoothly but also gives the chocolate a beautiful gloss and improves the texture. Experiment with Nuts: While pecans are traditional, feel free to mix it up with walnuts or almonds for a different flavor profile. Storing Tips: Keep the chocolate-covered dates in an airtight container in the fridge to maintain their freshness and prevent them from sticking together. {{image_2}} You can switch out pecans for almonds or walnuts. Both nuts add a nice crunch. Almonds bring a light, sweet flavor. Walnuts have a rich, earthy taste. Try using what you like best. Just make sure to chop them if they are too big. This makes stuffing the dates easier. You can use dark or milk chocolate. Dark chocolate gives a bold taste. It has less sugar and more cocoa. This makes it a bit healthier. On the other hand, milk chocolate is sweeter and creamier. It may appeal to kids and those with a sweet tooth. Choose what matches your taste. Add spices or extracts to boost flavor. A dash of cinnamon can add warmth. Vanilla extract gives a sweet aroma. Sea salt enhances the rich chocolate flavor. It creates a great sweet-salty combo. You can even try a pinch of cayenne for a little heat. Experiment with different flavors to find your favorite mix! To keep your chocolate turtles fresh, store them in the fridge. Place them in an airtight container. This prevents moisture from ruining the chocolate. They will stay good for up to a week. The cool temperature helps keep the chocolate firm. You can enjoy them whenever you crave a sweet treat! If you want to save your turtles for later, freezing is a great option. First, place them in a single layer on a baking sheet. Freeze them for about an hour. Once they are solid, transfer them to a freezer-safe bag. Remove as much air as possible. They can last for up to three months in the freezer. When you’re ready to eat, just thaw them in the fridge overnight. Understanding shelf life helps you enjoy your chocolate turtles at their best. When stored in the fridge, they last about a week. Frozen turtles will remain fresh for three months. The chocolate may lose some shine over time, but the taste remains great. Always check for any signs of spoilage before eating. Enjoy your delicious creations while they are fresh! To make Chocolate Covered Date Turtles vegan, you need to change the chocolate and some ingredients. Use dairy-free chocolate chips. Many brands offer great vegan options. For the coconut oil, you can keep it as it is since it’s already plant-based. You can also add some nut butter inside the dates. Almond butter or cashew butter works well. It adds creaminess and boosts flavor. Remember to check labels for any hidden dairy ingredients in your chocolate. Yes, you can use other nuts in your turtles! Almonds and walnuts are great choices. Almonds give a nice crunch and a lighter taste. Walnuts have a richer flavor, which pairs well with chocolate. Try mixing different nuts for a fun twist. Each nut adds a unique taste and texture. You can even roast the nuts lightly to enhance their flavor before stuffing them in the dates. Chocolate Covered Date Turtles have many health benefits. Dates are high in fiber, which helps digestion. They also provide natural sweetness without refined sugar. The nuts add protein and healthy fats to keep you full. Plus, dark chocolate is rich in antioxidants. These help fight free radicals in your body. Enjoying these treats can satisfy your sweet tooth while giving you some nutrition too! In this post, we explored making delicious Chocolate Covered Date Turtles. We detailed the key ingredients like Medjool dates, pecans, and chocolate. We covered easy steps for preparation, stuffing, and melting chocolate. We also shared tips for choosing dates and suggested tasty variations. Remember, these treats are fun to make and enjoy. Each bite offers a sweet joy and a health boost. So, grab your ingredients, and start creating your Chocolate Covered Date Turtles today!

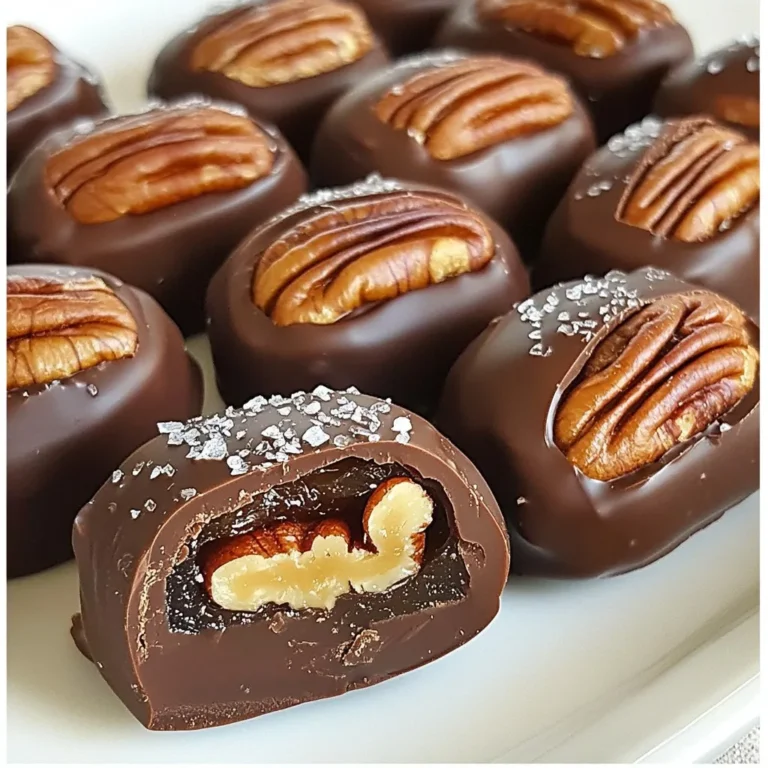
Chocolate Covered Date Turtles Irresistible Dessert Treat

For this creamy tomato spinach orzo, you’ll need: - 1 cup orzo pasta - 2 tablespoons olive oil - 4 cloves garlic, minced - 1 can (14 ounces) crushed tomatoes - 1 cup vegetable broth - 1 teaspoon dried basil - 1 teaspoon dried oregano - Salt and pepper to taste - 2 cups fresh spinach, roughly chopped - ½ cup heavy cream or coconut cream - ¼ cup grated Parmesan cheese (optional) - Fresh basil leaves for garnish You can boost the dish's flavor with these options: - A pinch of red pepper flakes for heat - Lemon zest for a fresh twist - Chopped sun-dried tomatoes for extra depth - A dash of balsamic vinegar for richness If you need to switch things up, try these substitutes: - Use quinoa or rice instead of orzo for a different grain. - Swap heavy cream for Greek yogurt for a lighter option. - Replace Parmesan with nutritional yeast for a vegan touch. - Use fresh herbs like thyme or parsley instead of dried herbs. These ingredients give the dish its rich, creamy taste and texture. Feel free to play around with options to make it your own! {{ingredient_image_1}} First, we need to cook the orzo. Grab a large pot and fill it with water. Add salt to the water and bring it to a boil. Once boiling, add 1 cup of orzo pasta. Cook the orzo for about 8 to 10 minutes. Check the package for exact times. You want it al dente, which means it should be firm but not hard. After cooking, drain the orzo and set it aside. Next, let’s make the sauce. Use the same pot to keep flavors rich. Heat 2 tablespoons of olive oil over medium heat. Add 4 minced garlic cloves to the pot. Sauté the garlic for about 1 to 2 minutes. You want it fragrant but not burnt. Then, stir in a can of crushed tomatoes and 1 cup of vegetable broth. Mix in 1 teaspoon of dried basil, 1 teaspoon of oregano, and season with salt and pepper. Bring the mixture to a simmer and cook for 5 minutes. Now, we’ll make it creamy. Gradually add 2 cups of roughly chopped fresh spinach into the sauce. Cook until the spinach wilts, which takes about 2 to 3 minutes. After that, reduce the heat to low. Stir in ½ cup of heavy cream or coconut cream if you prefer dairy-free. Let it heat for about 2 minutes, ensuring everything blends well. Finally, it’s time to serve! Add the cooked orzo to the creamy tomato-spinach mixture. Stir it all together until the orzo is well-coated with sauce. You can adjust the seasoning if you like. Plate the creamy tomato spinach orzo in bowls. For a finishing touch, sprinkle some grated Parmesan cheese or fresh basil leaves on top. Enjoy your delicious meal! To cook orzo just right, start with a large pot. Bring salted water to a boil. Add the orzo and stir it. Cook until it is al dente, which takes about 8-10 minutes. Stir often to prevent sticking. After cooking, drain the orzo and set it aside. This keeps it from soaking up too much sauce later. For a creamy sauce, use heavy cream or coconut cream. After adding it, reduce the heat to low. Stir well to mix everything together. Let it heat for about 2 minutes. This helps the flavors blend. If you want extra creaminess, add more cream to taste. Fresh herbs boost the taste of your dish. Adding fresh basil at the end gives a bright flavor. You can also try parsley or thyme for more depth. Chop the herbs finely before adding them. This makes sure the flavors spread evenly throughout the dish. You can also sprinkle some on top as a garnish for a fresh look. Pro Tips Use Fresh Ingredients: Fresh spinach and high-quality tomatoes can elevate the flavor of your dish significantly. Perfectly Cooked Orzo: Make sure to cook the orzo al dente, as it will continue to absorb moisture when combined with the sauce. Adjust Creaminess: If you prefer a lighter dish, you can reduce the amount of cream or substitute with a plant-based option. Garnish Wisely: Fresh basil and grated Parmesan not only add flavor but also enhance the visual appeal of your dish. {{image_2}} You can keep this dish vegetarian by using vegetable broth. This adds depth without meat. Add more veggies for flavor. Try bell peppers or mushrooms for a hearty twist. You can also toss in some peas or zucchini. They will cook quickly and blend nicely with the sauce. To make it vegan, switch the heavy cream for coconut cream. This keeps the dish rich and creamy. Just use a dairy-free cheese option or skip the cheese altogether. You won’t lose flavor; the tomatoes and spices will shine through. Want to add protein? Cooked chicken or shrimp works great. Toss them in at the end to heat through. For a vegetarian option, try chickpeas or lentils. They add protein and fiber. You can also add tofu for a nice texture. After you enjoy your creamy tomato spinach orzo, store any leftovers in an airtight container. Make sure to let it cool to room temperature first. This helps keep the dish fresh. You can keep it in the fridge for up to three days. If you want to enjoy it later, freezing is a great option. To freeze your orzo, follow these simple steps. First, pack the orzo tightly in a freezer-safe container. Leave a little space at the top for expansion. The orzo will stay good for about three months. When you're ready to eat it, just thaw it in the fridge overnight. When reheating your creamy tomato spinach orzo, do it gently. You can use a microwave or a stovetop. If using a microwave, heat in short bursts, stirring in between. If on the stovetop, add a splash of water or broth to keep it moist. Heat until warm throughout, and enjoy! Yes, you can use other small pasta types. Options include ditalini, acini di pepe, or even small shells. Make sure to adjust the cooking time based on the pasta you choose. This dish is not gluten-free if you use regular orzo. However, you can find gluten-free orzo made from rice or corn. Always check the package to ensure it meets your needs. Creamy tomato spinach orzo pairs well with many sides. You can serve it with a fresh green salad, garlic bread, or steamed veggies. For protein, grilled chicken or shrimp also works great. Yes, you can prepare this dish ahead of time. Cook the orzo and sauce separately, then combine them before serving. Store them in the fridge for up to three days. Reheat gently on the stove or in the microwave. This blog post covered how to make creamy tomato spinach orzo. We discussed ingredients, cooking steps, and tips for success. You learned about flavorful variations, as well as storage options. Remember, you can swap ingredients or add your favorite proteins. With a few simple tips, you'll create a dish people will love. Enjoy your cooking and the tasty results!

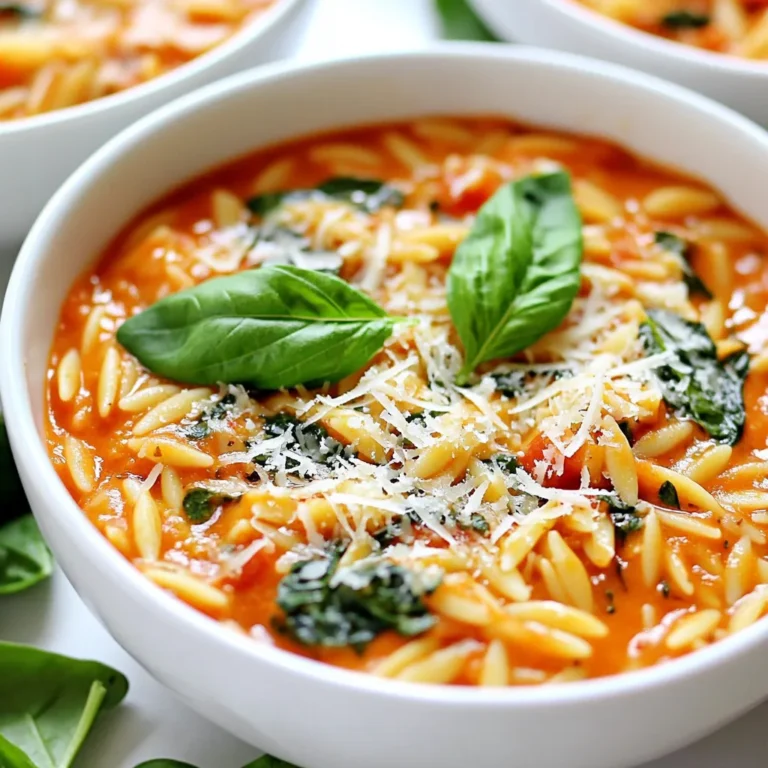
Creamy Tomato Spinach Orzo Flavorful and Simple Dish

To make this Coconut Curry Noodle Soup, you need a few key items. Here’s what you should gather: - 1 tablespoon coconut oil - 1 onion, finely chopped - 2 garlic cloves, minced - 1-inch piece of ginger, grated - 2 tablespoons red curry paste - 1 can (400ml) coconut milk - 4 cups vegetable broth - 2 tablespoons soy sauce - 1 tablespoon lime juice - 1 tablespoon brown sugar - 200g rice noodles - 1 cup snap peas, trimmed - 1 red bell pepper, thinly sliced - 1 cup baby spinach - Fresh cilantro, for garnish - Lime wedges, for serving These ingredients create the rich and creamy base for the soup. The blend of coconut milk and red curry paste gives it a warm, spicy taste. You can elevate your soup with some fun toppings. Here are a few ideas: - Chopped green onions - Sliced jalapeños - Chopped peanuts - Extra lime wedges These toppings add extra flavor and texture. You can mix and match to find your favorite combo. If you don’t have all the ingredients, don’t worry! Here are some easy swaps: - Use vegetable oil instead of coconut oil. - Swap the rice noodles for any other noodle you like. - If you can’t find red curry paste, try yellow curry paste instead. - For a nut-free option, skip the garnishes with peanuts. These substitutions keep the dish tasty while making it easier to cook with what you have at home. {{ingredient_image_1}} To start, grab a large pot and heat 1 tablespoon of coconut oil over medium heat. Once hot, add 1 finely chopped onion. Sauté it for about 5 minutes until it turns soft and clear. Next, stir in 2 minced garlic cloves and a 1-inch piece of grated ginger. Cook this mix for 1 minute until it smells great. Now, add 2 tablespoons of red curry paste. Stir it for 2 minutes. This step boosts the flavor of the curry. Then, pour in 1 can of coconut milk and 4 cups of vegetable broth. Add 2 tablespoons of soy sauce, 1 tablespoon of lime juice, and 1 tablespoon of brown sugar. Mix it all well. Bring this mixture to a gentle simmer. Add 200g of rice noodles and cook them according to package directions, which takes about 4-6 minutes. In the last 2 minutes, toss in 1 cup of trimmed snap peas, 1 thinly sliced red bell pepper, and 1 cup of baby spinach. Stir everything together until the veggies are just tender. 1. Sauté onion: 5 minutes until soft. 2. Add garlic and ginger: 1 minute for aroma. 3. Cook curry paste: 2 minutes to deepen flavor. 4. Simmer broth: Until combined and heated. 5. Cook noodles: 4-6 minutes, follow package instructions. 6. Add veggies: Last 2 minutes for perfect tenderness. Following these times helps to keep flavors bright and fresh. - When sautéing, stir often to avoid burning. - Taste the broth before adding more spices. Adjust it according to your liking. - For a thicker soup, let it simmer a bit longer before adding noodles. - Fresh cilantro adds a nice touch at the end, so don’t skip it! These simple tips will help you create a Coconut Curry Noodle Soup that shines with flavor and warmth. To make your Coconut Curry Noodle Soup even better, try these tips: - Use fresh ingredients. Fresh herbs and spices boost flavor. Fresh ginger and garlic shine in this dish. - Adjust spice levels. If you want more heat, add a pinch of red pepper flakes. You can also use more red curry paste. - Add lime juice last. Squeeze fresh lime juice before serving. It brightens the soup and enhances the taste. - Experiment with toppings. Top your soup with chopped peanuts or sliced jalapeños. These add crunch and extra flavor. Here are some mistakes to watch for: - Overcooking noodles. Rice noodles cook fast. Follow package instructions to avoid mushy noodles. - Skipping the simmer. Let the soup simmer gently. This helps flavors blend well. - Not tasting as you go. Always taste your soup. Adjust the soy sauce or lime juice to your liking. Having the right tools makes cooking easier: - Large pot. Use a sturdy pot for cooking the soup. A heavy bottom helps with even heat. - Wooden spoon. This is great for stirring and mixing ingredients without scratching your pot. - Measuring cups and spoons. Accurate measurements help you create the best flavors. - Knife and cutting board. A good knife makes chopping easy and safe. A sturdy cutting board is essential for prep work. Pro Tips Use Fresh Ingredients: Fresh vegetables and herbs will enhance the flavor of your soup significantly. Look for vibrant snap peas and fresh cilantro for the best results. Adjust Spice Levels: If you prefer a spicier soup, add more red curry paste or a pinch of chili flakes to suit your taste. Make It Creamier: For an even creamier soup, you can add an extra can of coconut milk or a splash of heavy cream just before serving. Customize Your Veggies: Feel free to substitute or add any vegetables you have on hand, such as carrots, zucchini, or broccoli, to make the soup your own. {{image_2}} You can easily make Coconut Curry Noodle Soup vegan. Just skip the animal products. Replace the broth with vegetable broth. Use a plant-based red curry paste. This keeps all the flavors while being kind to animals. You can add more veggies like mushrooms or carrots for extra texture. For a heartier dish, add protein. Chicken works great. Just cook it in the pot before adding other ingredients. Shrimp cooks fast, so add it with the noodles. Tofu is a nice option, too. Use firm tofu for the best results. Cut it into cubes and add it with the veggies. This makes the soup filling and tasty. Rice noodles are classic, but you have choices. Try udon or egg noodles for a change. If you want gluten-free, use rice noodles or zucchini noodles. Each type brings a unique texture to the soup. Experiment to find your favorite combination! To keep Coconut Curry Noodle Soup fresh, let it cool first. Then, transfer it to an airtight container. Store it in the fridge for up to three days. Make sure to label the container with the date. This way, you know when to eat it. You can freeze your soup for later. Use a freezer-safe container or a zip-top bag. Leave some space at the top for expansion. Label it with the date. It can stay good in the freezer for up to three months. When you're ready to eat, thaw it in the fridge overnight. To reheat, pour the soup into a pot. Heat it on low to medium heat. Stir often to avoid burning. If the soup seems thick, add a splash of water or broth. You can also microwave it in a bowl. Cover it with a paper towel. Heat in short bursts until hot. Enjoy your warm and tasty soup! Coconut Curry Noodle Soup comes from Southeast Asia. It blends flavors from Thai and Malaysian foods. This dish uses coconut milk, curry paste, and fresh herbs. It is warm, creamy, and rich in taste. Many cultures have their own versions. Each version adds unique ingredients and spices. Yes, you can make this soup gluten-free. Use gluten-free soy sauce or tamari instead of regular soy sauce. Also, ensure the rice noodles are gluten-free. Most rice noodles are safe, but check the package. This way, you keep all the great flavors without gluten. To change the spice level, you have a few options. If you want it milder, reduce the amount of red curry paste. Start with one tablespoon and add more if needed. For more heat, add fresh chili or extra curry paste. Taste as you go to find your perfect level. You can enjoy this soup on its own or with sides. Fresh spring rolls make a great pair. You can also serve it with a light salad. A squeeze of lime on top adds a nice touch. Consider adding crusty bread for dipping too. Coconut Curry Noodle Soup lasts about 3 to 4 days in the fridge. Store it in an airtight container to keep it fresh. The noodles may soak up the broth over time. If this happens, just add a bit of broth when reheating. Coconut Curry Noodle Soup brings together essential flavors and textures. We covered ingredients, step-by-step cooking, and ways to customize your dish. Remember to watch for common mistakes and to choose the right tools. You can adapt this soup to fit any diet. Proper storage keeps leftovers tasty, and reheating is easy. Enjoy exploring this recipe and make it your own! Your kitchen is a place for fun and flavor.

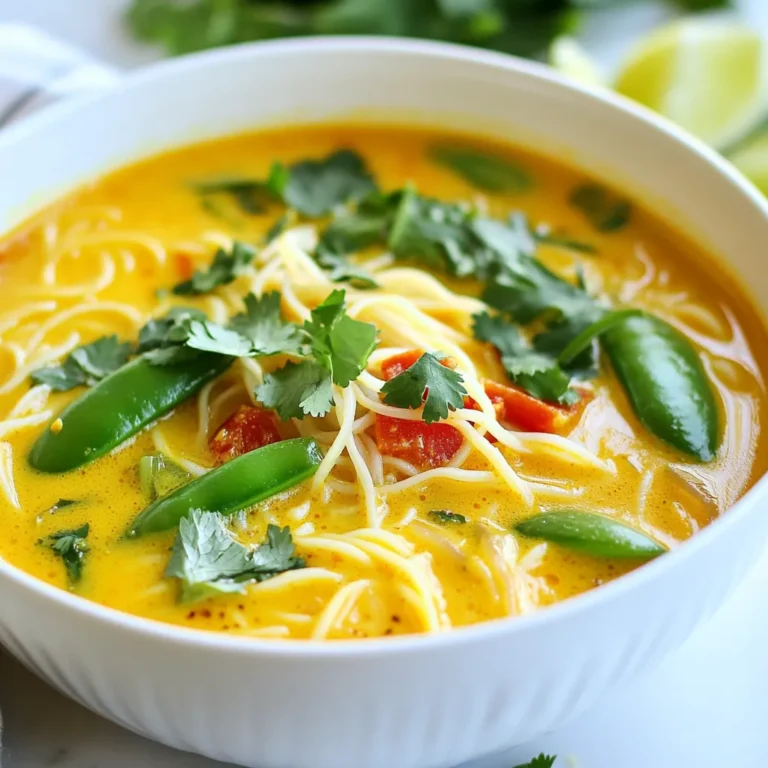
Coconut Curry Noodle Soup Flavorful Comfort Dish

- 1 cup orzo pasta - 2 cups water - 1 cup cherry tomatoes, halved - 1 cucumber, diced - 1/2 red onion, finely chopped - 1/2 cup Kalamata olives, pitted and sliced - 1/2 cup feta cheese, crumbled - 1/4 cup fresh parsley, chopped - 1/4 cup olive oil - 2 tablespoons red wine vinegar (or lemon juice for a twist) - 1 teaspoon dried oregano - Salt and pepper to taste For this Greek orzo salad, you can easily adjust the measurements. If you need more salad, just double the recipe. If you are short on ingredients, here are some quick swaps: - Use penne or farro instead of orzo for a different pasta. - Swap cherry tomatoes for diced bell peppers for added crunch. - Instead of red onion, use green onions for a milder taste. - If you don’t have Kalamata olives, regular black olives work fine. - For a vegan option, skip the feta or use a plant-based cheese. This salad is not just tasty; it’s also healthy. Here’s a breakdown per serving: - Calories: 300 - Protein: 10g - Fat: 18g - Carbohydrates: 30g - Fiber: 2g - Sodium: 400mg This Greek orzo salad is full of fresh flavors and nutrients. It’s a perfect side dish for any meal, and you can feel good serving it. {{ingredient_image_1}} Start by boiling 2 cups of water in a medium pot. Add 1 cup of orzo pasta and a pinch of salt. Cook the orzo for about 8 to 10 minutes. You want it to be al dente, which means firm to the bite. After cooking, drain the orzo and rinse it with cold water. This stops the cooking and cools it down. In a large mixing bowl, add the halved cherry tomatoes, diced cucumber, and chopped red onion. Next, slice the Kalamata olives and toss them in. Finally, add 1/4 cup of chopped fresh parsley. This mix brings a fresh taste and bright colors to your salad. In a small bowl, whisk together 1/4 cup of olive oil and 2 tablespoons of red wine vinegar. If you want a twist, use lemon juice instead. Add 1 teaspoon of dried oregano, salt, and pepper to taste. This dressing adds a rich flavor to your salad. Add the cooled orzo to the vegetable mixture in the bowl. Pour the dressing over the top. Gently toss everything together. You want all the ingredients to be evenly coated. This step blends the flavors well. Before serving, sprinkle crumbled feta cheese on top. Give it one last gentle toss. Let the salad sit at room temperature for 10 to 15 minutes. This time helps the flavors mix and deepen. Serve it in a large bowl, with extra parsley and feta on top for a lovely presentation. To make perfect orzo, start with boiling water. Use two cups of water for one cup of orzo. Add a pinch of salt before cooking. This helps the orzo absorb flavor. Stir the orzo gently while it cooks. This prevents it from sticking together. Cook until it is al dente, usually 8-10 minutes. Drain and rinse it with cold water. This stops the cooking process and keeps it firm. Fresh herbs make this salad pop. I love using parsley for its bright taste. Chopped parsley adds color and freshness. You can also add fresh dill or mint for a unique twist. Try mixing different herbs to find your favorite blend. The more fresh herbs you use, the more flavor you get. Don’t be shy to experiment with your herb choices. When serving, choose a large bowl or platter. This allows you to show off the colorful ingredients. Garnish with extra parsley and crumbled feta on top. This makes the dish look inviting. For added flair, add lemon wedges on the side. They give a nice burst of flavor when squeezed over the salad. Let the salad sit for 10-15 minutes before serving. This helps the flavors blend beautifully. Enjoy your vibrant Greek Orzo Salad with Feta! Pro Tips Cooking Orzo Perfectly: Ensure you cook the orzo in well-salted boiling water and stir occasionally to prevent sticking. Drain it before it becomes too soft for the best texture. Fresh Ingredients Matter: Use the freshest vegetables and herbs you can find for a burst of flavor. This salad shines with vibrant produce! Let It Rest: Allow the salad to sit at room temperature for 10-15 minutes before serving. This resting time helps the flavors meld beautifully. Customization Options: Feel free to customize this salad by adding grilled chicken, chickpeas, or other favorite vegetables to enhance its heartiness. {{image_2}} You can easily change this salad to fit your taste. Adding protein makes it more filling. Grilled chicken or shrimp can be great choices. You might also try chickpeas for a vegetarian option. Just toss them in when you mix the veggies. Switching up the dressing can add a fun twist. Instead of red wine vinegar, try balsamic for a sweeter taste. You can also mix in some honey for a touch of sweetness. If you want a zestier flavor, use lime juice instead of lemon. Each change brings a new flavor to your salad. This salad shines in every season. In summer, add fresh corn or bell peppers for crunch. In fall, include roasted butternut squash for warmth. Winter can bring in hearty greens like spinach or kale. Each season offers new tastes to explore in your Greek Orzo Salad with Feta. To keep your Greek Orzo Salad fresh, store it in an airtight container. This keeps out air and moisture. I like to portion it into smaller containers. This way, you can grab a quick bite later. Make sure to use the salad within three days for the best taste. Keep the salad in the fridge. The cool temperature helps maintain the crunch of the veggies. If you plan to store it for longer, add the feta just before serving. This keeps it from getting too soggy. You can also add more dressing if needed, to revive the flavor. You can enjoy this salad cold or at room temperature. I recommend not reheating it in the microwave. The orzo may become mushy. Instead, let it sit out for a bit before eating. If you want some warmth, try adding the leftovers to a skillet for a quick sauté. This gives it a fresh taste again! Yes, you can make this salad ahead of time. It tastes better after sitting. The flavors blend nicely when stored. Just keep it in the fridge. If you want a substitute for feta cheese, try goat cheese. You can also use ricotta or a dairy-free option. These will still give a nice taste. This salad lasts about 3 to 5 days in the fridge. Make sure to store it in an airtight container. If it gets watery, just drain some liquid before eating. Yes, whole grain orzo works well in this salad. It adds more fiber and nutrients. The taste will be a bit nuttier, but it’s delicious! In this post, we explored the ingredients needed for Greek Orzo Salad and their measurements. I shared step-by-step instructions on cooking orzo and making a tasty dressing. You learned helpful tips and variations to customize your dish. We also covered the best ways to store leftovers. Overall, this salad is easy to make and packed with flavor. Enjoy experimenting with different ingredients to make it your own!

Greek Orzo Salad with Feta Flavorful Side Dish

- 2 cups fresh cherries, pitted and halved - 1 tablespoon lemon juice You start with fresh cherries. Choose ripe, juicy cherries for the best flavor. Pitting them is key, so you enjoy every bite. Halve the cherries to release their sweet juice. The lemon juice added helps balance the sweetness and brightens the flavor. - 1 cup heavy cream - 1 cup whole milk Next, gather your dairy. Heavy cream gives the ice cream its rich texture. Whole milk adds smoothness. Together, they create a creamy base that makes your ice cream delightful. The cream and milk work together to make each scoop luscious. - 3/4 cup granulated sugar - 1/2 cup semi-sweet chocolate chips - 1 teaspoon vanilla extract For sweetness, you’ll use granulated sugar. It helps bring out the cherry flavor. Semi-sweet chocolate chips add a nice contrast to the cherries. The vanilla extract enhances the overall taste, making it even more delicious. This blend of flavors is what makes cherry chocolate chip ice cream so special. {{ingredient_image_1}} To start, you need to cook the cherries. In a medium saucepan, combine 2 cups of fresh cherries, 1/2 cup of sugar, and 1 tablespoon of lemon juice. Heat this mixture over medium heat for about 5 to 7 minutes. You want the cherries to soften and release their juices. Once done, remove the saucepan from the heat and let it cool. This cooling step is key. It helps keep the cream from curdling later. Next, grab a separate bowl. In this bowl, whisk together 1 cup of heavy cream, 1 cup of whole milk, and the remaining 1/4 cup of sugar. Add 1 teaspoon of vanilla extract for extra flavor. Mix well until the sugar dissolves completely. Once your cherry mixture has cooled, fold it into the cream mixture. Stir gently, so you don’t break the cherries. This step combines the sweet cherry flavor with the creamy base. Now it’s time to chill the mixture. Place it in the refrigerator for at least 2 hours. This step keeps the ice cream creamy when you churn it. Once it’s cold, pour the mixture into your ice cream maker. Follow the manufacturer’s instructions and churn it until it reaches a soft-serve consistency. During the last few minutes, add in 1/2 cup of semi-sweet chocolate chips. Make sure they mix in well. Finally, transfer the mixture to an airtight container. Freeze it for at least 4 hours or until it becomes firm. Enjoy your homemade cherry chocolate chip ice cream! To get the best texture, chill your mixture well. This helps keep the ice cream creamy. After mixing the cream and cherry blend, place it in the fridge for at least two hours. This step is key to a smooth final product. Churning is also important. When using the ice cream maker, follow the instructions carefully. It’s best to churn until the mix looks like soft-serve. This keeps it fluffy and light. Taste is personal, so feel free to adjust the sweetness. If you like it sweeter, add more sugar. You can also reduce the sugar if you prefer a tart flavor. For the chocolate, you can play around too. If you love chocolate, toss in more chips. If you want a lighter taste, cut back a bit. Find the balance that makes your taste buds happy. Serve your ice cream at the right temperature. Let it sit out for 5-10 minutes before scooping. This makes it easier to serve. You can enjoy cherry chocolate chip ice cream on its own or pair it with other treats. Try it with brownies or a slice of pie. The mix of flavors will delight your guests. Pro Tips Use Fresh Cherries: For the best flavor and texture, always use fresh, ripe cherries when making your ice cream. Chill Your Mixture: Ensure the cherry and cream mixture is thoroughly chilled before churning for a smoother ice cream texture. Experiment with Chocolate: Try using dark chocolate chips or even white chocolate for a different flavor profile in your ice cream. Let It Soften: Allow the ice cream to sit at room temperature for a few minutes before scooping to make serving easier. {{image_2}} You can change the fruit in this recipe if you want. Strawberries or raspberries work well. They add their own sweet taste and color. Just make sure to adjust the sugar based on the fruit's natural sweetness. You can also play with the chocolate. Dark chocolate gives a rich flavor, while milk chocolate is sweeter. Mix and match to find your favorite combo! If you want a vegan version, swap heavy cream and milk for coconut cream or almond milk. For sugar-free options, use a sugar replacement like stevia or erythritol. These changes keep the taste without the extra calories. Always check the labels to ensure the substitutes fit your diet. Get creative with how you serve your ice cream! Try making ice cream sandwiches using cookies. Just scoop the cherry chocolate chip ice cream between two cookies. You can also make sundaes. Add whipped cream, nuts, or more cherries on top. This makes each scoop extra special. To store homemade ice cream right, use airtight containers. These keep air out. Air can cause ice crystals to form. Regular containers let air in, making your ice cream icy. - Use a clean, dry container. - Fill it to the top to limit air space. - Seal it tightly. You can keep cherry chocolate chip ice cream in the freezer for about 2-3 weeks. After that, it may lose flavor and texture. Look for signs of spoilage: - Ice crystals on the surface - A grainy texture - Changes in color If you see these, it’s time to toss it. You can re-freeze ice cream after thawing. Be careful, though. Each time you thaw and refreeze, ice crystals can form. This can change the texture. To minimize this, only take out what you need. Return the rest to the freezer right away. Enjoy your homemade treat while it’s still fresh! It takes about 15 minutes to prep the ice cream. After that, you need to chill it for 2 hours. Then, churn it in your ice cream maker. Finally, freeze the ice cream for at least 4 hours. So, the total time is around 6 hours. Most of this is hands-off time, making it easy to fit into your day. Yes, you can use frozen cherries. They work well, but fresh cherries give a better taste. Frozen cherries may also change the texture a bit. If you use frozen cherries, let them thaw and drain any extra liquid before cooking. This helps keep your ice cream creamy. I recommend using a compressor ice cream maker for this recipe. They chill quickly and make smooth ice cream. If you want a more budget-friendly option, a freezing bowl maker works too. Just remember to freeze the bowl overnight before using it. Brands like Cuisinart and Breville offer reliable options. In this post, we explored how to make cherry chocolate chip ice cream from scratch. We started with fresh cherries and dairy, then moved to sweeteners and flavors. I shared step-by-step instructions for preparing, churning, and freezing your ice cream. Tips can help you get the best texture and taste. Try the different variations to keep it fun. Remember to store it properly to enjoy longer. Making ice cream is simple and rewarding. I hope you enjoy every scoop!

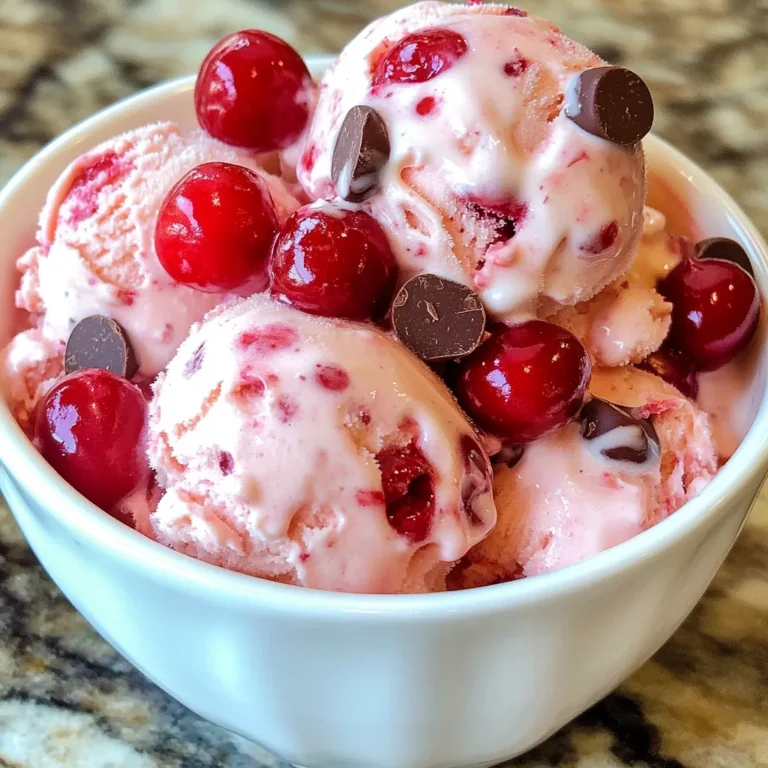
Cherry Chocolate Chip Ice Cream Delightful Homemade Treat

- 8 oz rice noodles - 2 cups shredded carrots - 1 cup cucumber, julienned - 1 red bell pepper, thinly sliced - 1 cup snap peas, trimmed and halved - 4 green onions, chopped - 1/4 cup fresh cilantro, chopped - 1/4 cup sesame seeds, toasted For the Dressing: - 3 tablespoons soy sauce - 2 tablespoons sesame oil - 1 tablespoon fresh ginger, grated - 2 tablespoons lime juice - 1 tablespoon honey or maple syrup - Salt and pepper to taste To get the right amounts, measure your rice noodles carefully. Use a kitchen scale for precision. If you don’t have a scale, one bundle of noodles is about 8 oz. For vegetables, use a measuring cup. Pack them lightly for the best results. Fresh ingredients make a big difference. Wash and chop your veggies right before mixing. This keeps them crisp and bright. Sesame oil adds a rich, nutty flavor. It enhances the taste of the salad. Always use pure sesame oil, not a blend. Fresh ginger is key in the dressing. It gives a warm, spicy kick. Grate it finely to release the most flavor. Both ingredients transform this dish into something special. They make every bite exciting and full of zest. {{ingredient_image_1}} To cook rice noodles, start by boiling water in a large pot. Once the water boils, add 8 oz of rice noodles. Stir them gently and let them cook for about 4-5 minutes, or until soft. Check the package for exact times, as they may vary. After cooking, drain the noodles in a colander. Rinse them under cold water to stop the cooking process. This step keeps the noodles from becoming mushy. Once cooled, set them aside for later use. In a large mixing bowl, combine the following fresh vegetables: - 2 cups shredded carrots - 1 cup julienned cucumber - 1 red bell pepper, thinly sliced - 1 cup snap peas, trimmed and halved - 4 chopped green onions - 1/4 cup chopped fresh cilantro Toss the vegetables gently. This way, you ensure even distribution. Mixing well helps each bite be full of flavor. In a separate bowl, whisk together these dressing ingredients: - 3 tablespoons soy sauce - 2 tablespoons sesame oil - 1 tablespoon grated fresh ginger - 2 tablespoons lime juice - 1 tablespoon honey or maple syrup Mix these ingredients until they are well combined. Taste the dressing and adjust the seasoning with salt and pepper if needed. This step is key to balancing the flavors in your salad. Once the dressing is ready, pour it over the vegetable mixture. Toss everything together until the vegetables are well-coated. Then, add the cooled rice noodles and gently mix until they blend nicely. This ensures you get the best flavors in every bite. Finally, top the salad with toasted sesame seeds for extra crunch. Let the salad sit for about 10 minutes. This allows the flavors to meld and enhances the taste. Enjoy your vibrant and tasty sesame ginger noodle salad! To make this salad shine, use fresh ingredients. Fresh carrots and crisp cucumbers add great taste. Check for bright colors and firm textures when you shop. Balancing the dressing is key. The soy sauce brings saltiness, while lime juice adds brightness. Ginger gives a warm kick, and honey or maple syrup adds sweet notes. Taste as you mix. Adjust these flavors to your liking for the best result. Serving this salad well makes it more tempting. Use a big bowl or a large plate. Layer the noodles before adding veggies. For garnishing, sprinkle toasted sesame seeds on top. Fresh cilantro adds a pop of green. Color matters too! The bright orange carrots, green snap peas, and red bell pepper create a feast for the eyes. Texture also plays a role. The crunch of veggies contrasts nicely with soft noodles. This makes each bite more enjoyable. Watch out when cooking rice noodles. Overcooked noodles turn mushy and lose their texture. Follow the package instructions closely to avoid this. Do not skip the marinating time. Letting the salad sit for about 10 minutes allows the flavors to blend well. This extra time makes a big difference in taste. Pro Tips Cook Noodles Al Dente: For the best texture, cook the rice noodles just until al dente. They will continue to soften as they absorb the dressing. Fresh Herbs Matter: Use fresh cilantro and green onions for the most vibrant flavor. Dried herbs won’t give the same freshness. Customize Your Veggies: Feel free to add or substitute with your favorite vegetables, such as bell peppers or zucchini, to suit your taste. Let It Rest: Allow the salad to sit for at least 10 minutes before serving. This resting time helps the flavors meld beautifully. {{image_2}} You can customize this salad with different proteins and veggies. For protein, try adding: - Grilled chicken - Crispy tofu - Juicy shrimp These choices will make your salad heartier. For vegetables, feel free to swap in: - Bell peppers (any color) - Broccoli florets - Shredded cabbage - Radishes These add color and crunch. You can also change the dressing ingredients for a new taste. If you like some heat, add chili flakes or sriracha to the dressing. This spice brings a kick to the salad. You can also try different oils for unique flavors: - Avocado oil for a smooth taste - Olive oil for a richer flavor Experimenting with oils can change the whole dish! For gluten-free options, use rice noodles or quinoa. These choices keep the dish light and tasty. If you want a vegan option, swap honey with maple syrup. This keeps it sweet without using animal products. Enjoy these variations to make the salad fit your needs! To keep your Sesame Ginger Noodle Salad fresh, store leftovers correctly. Use airtight containers to prevent air and moisture from getting in. Glass or BPA-free plastic containers work best. Make sure to let the salad cool before sealing it. This step avoids condensation, which can make the salad soggy. You can enjoy this salad cold or warm. If you prefer it warm, heat it gently in a pan. Use low heat and stir often to avoid burning. If you want to keep it cold, simply take it straight from the fridge. This salad tastes great chilled and retains its crunch. Your salad will last about three days in the fridge. Keep an eye on it. If the vegetables look mushy or smell off, it’s time to toss it. Fresh ingredients keep the flavors bright, so always check for spoilage. Enjoy your meal prep and savor those tasty leftovers! If you don’t have rice noodles, you can use other types of noodles. Good options include soba noodles, udon noodles, or even spaghetti. Each type will change the taste and texture a bit, but they will still work well. To spice up the salad, add some chili flakes or a splash of sriracha to the dressing. You can also mix in sliced jalapeños or serrano peppers. This will give your salad a nice kick without overpowering the other flavors. Yes, you can prepare this salad in advance! Just keep the dressing separate until you are ready to serve. This keeps the veggies fresh and crisp. - Tips for pre-preparing ingredients without compromising freshness: - Chop the veggies and store them in an airtight container. - Cook the noodles and let them cool before storing. - Mix the dressing and keep it refrigerated. - Combine everything just before serving for the best taste. This salad blog gave you key steps to create a fresh dish. You learned about main ingredients like rice noodles, vegetables, and the all-important dressing. I shared cooking tips to ensure perfect noodles and even mixing of flavors. Remember, freshness matters for the best taste. You can also explore variations to suit your taste and dietary needs. With proper storage, your salad stays tasty longer. Enjoy crafting your delicious salad masterpiece, and don’t hesitate to get creative!

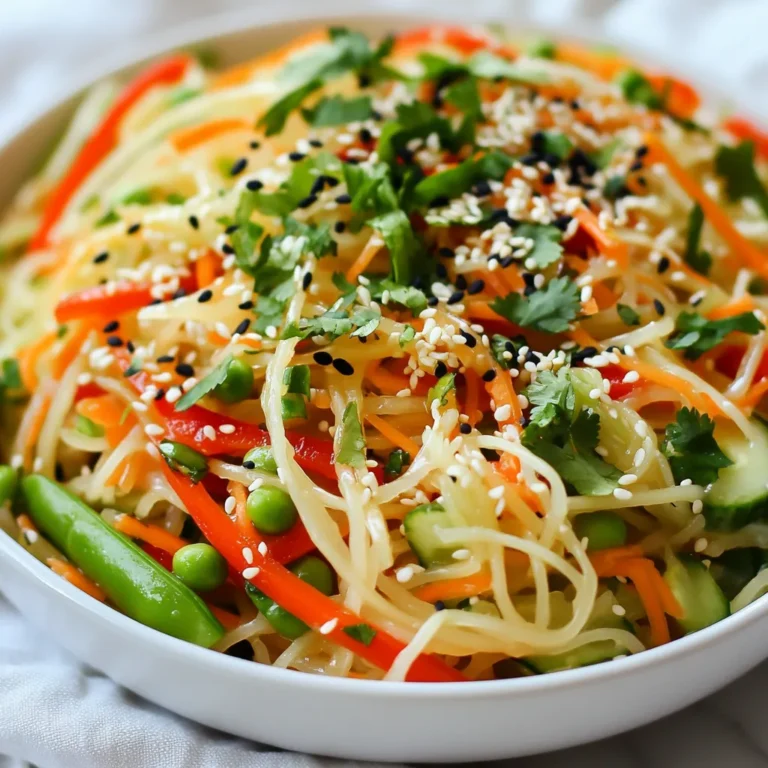
Sesame Ginger Noodle Salad Simple and Flavorful Meal

PREV 1 … 34 35 36 … 53 NEXT
cozy citrus kitchen

explore

DessertsDinnerAppetizersDrinks

Our Policies

  • Cookie Policy
  • Copyright Policy
  • Disclaimer
  • GDPR Policy
  • Terms Of Use
Back to Top
  • About
  • Contact Us
  • Privacy Policy
© 2025 cozy citrus kitchen