FREE DINNER EBOOK! Get your copy!
  • Cookie Policy
  • GDPR Policy
  • Disclaimer
  • Terms Of Use
  • Visit my other site: Fun Cookie Recipes
cozy citrus kitchen
  • Home
  • Dinner
  • Desserts
  • Drinks
  • Appetizers
  • Contact
  • About
  • Privacy Policy
  • Home
  • Dinner
  • Desserts
  • Drinks
  • Appetizers
  • Contact
  • About
  • Privacy Policy
  • Cookie Policy
  • GDPR Policy
  • Disclaimer
  • Terms Of Use
Visit my other site: Fun Cookie Recipes

HOME / CATEGORIES /

Latest

- 8 oz fettuccine or linguine - 1 lb large shrimp, peeled and deveined - 2 tablespoons Cajun seasoning - 2 tablespoons olive oil - 1 medium onion, finely chopped - 3 cloves garlic, minced The main ingredients set the stage for flavor. Pasta like fettuccine or linguine makes a great base. I love using large shrimp, as they offer a nice bite. The Cajun seasoning packs a punch, with spices that awaken the dish. Olive oil is key for cooking and adds richness. Onion and garlic give a savory aroma when sautéed. - 1 red bell pepper, sliced - 1 cup heavy cream - 1 cup cherry tomatoes, halved - Salt and black pepper to taste - Fresh parsley, chopped (for garnish) - Grated Parmesan cheese (for serving) The additional ingredients bring life to the plate. Sliced red bell pepper adds sweetness and color. Heavy cream creates a luscious sauce that ties everything together. Cherry tomatoes add a burst of freshness. Season with salt and black pepper for balance. Finally, parsley and Parmesan cheese give a beautiful finish. This mix of ingredients makes every bite of Spicy Cajun Shrimp Pasta a delight. Each adds a special touch that you won't forget. To start, fill a large pot with water and add a good pinch of salt. Bring the water to a boil over high heat. Add 8 ounces of fettuccine or linguine to the pot. Cook the pasta according to the package instructions. Aim for an al dente texture, which means it should be firm but not hard when bitten. This usually takes about 8 to 10 minutes. As the pasta cooks, don't forget to save some pasta water. Reserve about half a cup before you drain the pasta. This starchy water helps the sauce stick later. While the pasta cooks, you can prepare the shrimp. Take 1 pound of large shrimp, peeled and deveined. Place the shrimp in a large bowl. Sprinkle 2 tablespoons of Cajun seasoning over the shrimp. Toss them until they are well coated. This seasoning gives the shrimp its bold flavor. Next, heat 2 tablespoons of olive oil in a large skillet over medium-high heat. Once hot, add the shrimp to the skillet. Cook them for about 2 to 3 minutes. You'll know they are done when they turn pink and opaque. Remove the shrimp from the skillet and set them aside. In the same skillet, add a finely chopped medium onion and 3 minced garlic cloves. Sauté them for about 2 to 3 minutes until they smell great. Then, add a sliced red bell pepper. Cook this mix until the pepper softens, which should take another 3 minutes. Now, pour in 1 cup of heavy cream and bring it to a low simmer. Stir in 1 cup of halved cherry tomatoes. Season the sauce with salt and black pepper to taste. Let it simmer for about 5 minutes. This will help thicken the sauce a bit. Now it’s time to bring it all together. Add the cooked shrimp back into the skillet. Then, add the drained pasta. Toss everything well so the pasta and shrimp are coated in the creamy sauce. If the sauce seems too thick, add a little of the reserved pasta water to reach your desired consistency. When you're ready to serve, plate the pasta. Garnish with freshly chopped parsley and a sprinkle of grated Parmesan cheese. This adds a nice touch and extra flavor. Enjoy your Spicy Cajun Shrimp Pasta! - How to prevent shrimp from overcooking: To keep shrimp tender, cook them for just 2-3 minutes. They turn pink and opaque when done. Remove them from the heat right away. Overcooked shrimp can become rubbery and tough. - Adjusting spice levels for taste: If you prefer less heat, use less Cajun seasoning. You can always add more later. Taste the sauce as you cook, and adjust to your liking. Add a touch of cream for a milder flavor if needed. - Best side dishes to accompany: Serve your Spicy Cajun Shrimp Pasta with a side salad. A fresh garden salad with a light vinaigrette works well. Garlic bread is another great option, adding crunch to your meal. - Wine pairings for Spicy Cajun Shrimp Pasta: Pair this dish with a crisp white wine, like Sauvignon Blanc. Its bright acidity will balance the spicy flavors. A light Pinot Grigio also complements the creaminess of the sauce well. {{image_2}} For a fun twist on this dish, consider changing the pasta type. You can use whole wheat pasta for added fiber or even zoodles (zucchini noodles) for a lighter option. Both work well with the spicy sauce. If you want to swap proteins, try chicken or fish. Chicken breast, seasoned with Cajun spice, makes a great option. For fish, shrimp can be replaced by salmon or tilapia. Just adjust cooking times to ensure the protein is perfectly cooked. Making this dish gluten-free is easy. Simply choose gluten-free pasta. Many brands offer tasty options that cook well. Always check the package instructions for cooking times. If you need a dairy-free version, try coconut cream or cashew cream instead of heavy cream. These alternatives add a rich flavor and keep the sauce creamy. You can find these options in most grocery stores. To keep your Spicy Cajun Shrimp Pasta fresh, follow these steps: - Storing in the refrigerator: Allow the pasta to cool down to room temperature. Place it in an airtight container. Your dish will last up to 3 days in the fridge. - Best containers for storage: Use glass or plastic containers with tight-fitting lids. This helps to prevent air from getting in, which keeps your meal fresh longer. Avoid using metal containers, as they can affect the taste. To enjoy your pasta again, reheating is simple. Here’s how: - Best methods for reheating pasta dishes: The microwave is quick and easy. Place your pasta in a microwave-safe dish. Heat in short bursts, stirring in between. You can also use a skillet on low heat with a splash of water to help steam it back to life. - Tips for maintaining texture and flavor: Add a bit of olive oil or butter while reheating. This keeps the pasta moist and enhances the rich flavors. If the sauce seems thick, add a splash of reserved pasta water to loosen it up. What can I serve with Spicy Cajun Shrimp Pasta? You can pair this dish with garlic bread or a fresh salad. A crisp Caesar salad adds crunch. For a heartier side, serve roasted vegetables. These sides balance the richness of the creamy sauce. Can I prepare this recipe in advance? Yes, you can prep some parts ahead. Cook the pasta and shrimp separately. Store them in the fridge. Mix everything together just before serving for the best flavor. How can I adjust the recipe for more servings? To make more servings, simply double the ingredients. Use 16 oz of pasta and 2 lbs of shrimp. Keep the same cooking times, but watch the shrimp closely. How do I know when shrimp is cooked properly? Shrimp is cooked when it turns pink and opaque. It should curl into a "C" shape. Avoid overcooking, as it gets tough. Can I use frozen shrimp for this recipe? Yes, frozen shrimp works well. Just thaw them first. You can soak them in cold water for a quick thaw. Pat them dry before seasoning. Is Cajun seasoning spicy for everyone? Cajun seasoning can vary in heat. Some mixes pack a punch, while others are milder. Taste a little first. You can adjust the amount to suit your spice level. You learned how to make Spicy Cajun Shrimp Pasta from scratch. We covered main ingredients, cooking tips, and variations to suit your taste. Remember to avoid overcooking the shrimp for the best flavor. Adjust the spices as needed. This dish is perfect for any meal, and leftovers heat up well! Use the tips for storage and reheating to enjoy it again. Dive into this tasty recipe and impress your friends and family!

Spicy Cajun Shrimp Pasta Flavors That Delight Every Bite

For this vibrant salad, you will need: - 2 medium-sized beets, roasted and diced - 4 cups fresh arugula - 1/2 cup goat cheese, crumbled - 1/4 cup walnuts, toasted and chopped - 1 small shallot, thinly sliced Using fresh and organic produce makes a big difference. Organic beets and arugula taste better and are healthier. They have more nutrients and no harmful chemicals. Choose bright, firm beets and crisp arugula for the best flavor. To dress your salad, gather: - 2 tablespoons olive oil - 1 tablespoon balsamic vinegar - Salt and pepper to taste - 1 tablespoon honey (optional, for a touch of sweetness) The dressing brings everything together. You can adjust these ingredients to suit your taste. Add more honey for sweetness or use lemon juice for a tangy twist. This salad is not just pretty; it’s good for you too! Beets are high in fiber and help your heart. Arugula is low in calories and packed with vitamins. A serving has about 250 calories. Enjoy this salad for a healthy meal or side. To roast the beets, start by preheating your oven to 400°F (200°C). This temperature ensures even roasting. Next, wash the beets well to remove any dirt. Wrap each beet in aluminum foil. Place the wrapped beets on a baking sheet to catch any drips. Roast them for about 45 to 60 minutes. You can check if they are tender by inserting a fork. If it goes in easily, they are ready. Once cool, peel the skin off and dice the beets into small cubes. While the beets roast, you can make the dressing. In a small bowl, add 2 tablespoons of olive oil. Next, pour in 1 tablespoon of balsamic vinegar. If you want a touch of sweetness, add 1 tablespoon of honey. Season with salt and pepper to your taste. Whisk all the ingredients together until smooth. If you like a tangier flavor, add more vinegar or less oil. Now it’s time to put everything together. In a large salad bowl, start with 4 cups of fresh arugula as your base. This leafy green adds a nice peppery flavor. Then, add your roasted and diced beets on top. Sprinkle 1/2 cup of crumbled goat cheese over the beets for creaminess. Next, add 1/4 cup of toasted and chopped walnuts for crunch. Finally, add 1 small thinly sliced shallot for a bit of bite. Drizzle your dressing over the salad. Gently toss all the ingredients together to coat them evenly. Be careful not to break the beets or cheese too much. Serve immediately to enjoy the fresh flavors, or let it sit for about 10 minutes to let the flavors mix well. When choosing beets, look for firm, smooth skin. Avoid any soft spots. Fresh beets have a rich color, too. For best flavor, roast beets until tender. This usually takes 45 to 60 minutes at 400°F (200°C). You can check their doneness by piercing them with a fork. If it slides in easily, they are ready! To add protein, try grilled chicken or chickpeas. They work well with the salad's flavors. If you want a crunch, swap walnuts with pecans or pumpkin seeds. Both add unique tastes. You can even toast seeds or nuts for extra flavor. For a beautiful plate, arrange the salad in layers. Start with arugula, then add beets, goat cheese, and shallots. Top with nuts for a nice finish. You can serve it on a large platter or in bowls. Pair this salad with a light white wine, like Sauvignon Blanc. It complements the salad's taste perfectly! {{image_2}} You can switch up the greens in this salad. Arugula is great, but spinach or kale can work too. Spinach adds a mild taste, while kale gives a nice crunch. You might also try romaine for a crisp bite. These options can bring different flavors and textures to your dish. If you're looking to make this salad vegan, you can easily swap out the goat cheese. Try using a cashew cheese or a tofu-based cheese. Both options can mimic the creaminess of goat cheese. For the dressing, skip the honey. Instead, use maple syrup or leave it out altogether. This will keep your salad sweet without any animal products. Incorporating seasonal fruits or veggies can bring new life to your salad. Think about adding sliced strawberries in spring or roasted butternut squash in fall. Both can enhance the color and taste of your dish. Fresh herbs like basil or mint can also add a bright flavor. Toss them in just before serving for a fresh kick. To store your beet goat cheese arugula salad, place it in an airtight container. This keeps the flavors fresh. You can store it in the fridge for up to three days. If you see any wilting or browning, it’s best to toss those parts. Always check for freshness before eating. This salad is best served cold. It keeps all the crunchy textures and flavors when cold. If you want to warm it up, heat the beets separately. Then, add them back to the salad just before serving. This way, the arugula and cheese stay fresh and tasty. You can make parts of this salad ahead of time. Roast the beets and store them in the fridge. You can also prepare the dressing in advance. Keep the arugula, cheese, and nuts separate until you're ready to eat. When it's time to serve, mix everything together for a quick meal. You can roast beets without foil by using a baking dish. First, wash the beets well. Place them in the dish and add a little water. Cover the dish tightly with a lid or parchment paper. Bake at 400°F (200°C) for about 45-60 minutes. Check for tenderness with a fork. This method keeps the beets moist and flavorful. Yes, you can use pre-packaged beets for convenience. These beets are often already cooked and ready to eat. They save time and effort. However, fresh beets have a bolder flavor and better texture. If you want the best taste, opt for fresh beets when possible. You can enjoy the ease of pre-packaged beets if you need a quick meal. If you need a substitute for goat cheese, try feta or cream cheese. Feta adds a salty and tangy flavor, while cream cheese offers a smooth texture. You can also use ricotta for a milder taste. Each cheese brings its unique touch to the salad. Choose based on what you enjoy and have on hand. This blog post covers how to create a delicious salad with roasted beets and fresh ingredients. I highlighted the importance of using organic produce and detailed each step, from roasting beets to assembling the salad. Nutritional benefits emphasize why this meal is good for you. Try variations like vegan options and seasonal additions for new flavors. Remember, fresh ingredients make all the difference. Be confident in your ability to assemble a beautiful, tasty salad that fits your needs. Enjoy the process and savor every bite!

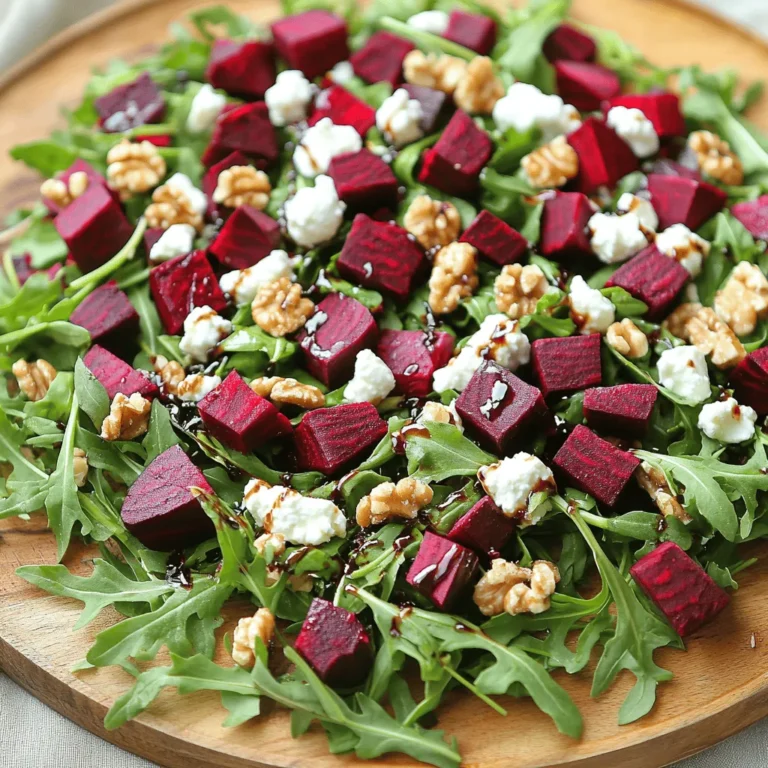
Beet Goat Cheese Arugula Salad Colorful and Fresh Dish

For this dish, you need: - 4 bone-in chicken thighs, skin-on - 1/3 cup soy sauce, low sodium preferred - 1/4 cup honey - 2 tablespoons rice vinegar - 1 tablespoon sesame oil These main ingredients give the chicken its rich, sweet, and salty flavor. The chicken thighs are juicy and full of taste, thanks to the skin. The marinade adds depth to the chicken. You will also need: - 3 cloves garlic, minced - 1 teaspoon fresh ginger, grated - 1 teaspoon black pepper - 1 tablespoon cornstarch (optional, for thickening) Garlic and ginger bring warmth and aroma. Black pepper gives a slight kick. If you want a thick glaze, use cornstarch to enhance the sauce. To make your dish pop, consider garnishing with: - Sliced green onions - Sesame seeds These toppings add color and crunch. The green onions provide freshness, while sesame seeds add a nutty flavor. Together, they elevate the dish's presentation and taste! To create the marinade, take a medium bowl. In this bowl, whisk together soy sauce, honey, rice vinegar, sesame oil, minced garlic, grated ginger, and black pepper. Mix until the ingredients blend well. This sweet and savory mix brings out great flavor. Next, place four bone-in chicken thighs in a large resealable bag or a shallow dish. Pour the marinade over the chicken. Make sure each piece is well-coated. Seal the bag tightly or cover the dish. Refrigerate for at least 30 minutes. For a deeper flavor, you can marinate the chicken overnight. Preheat your oven to 425°F (220°C). Line a baking sheet with parchment paper or foil to make cleanup easy. Take the chicken thighs out of the marinade. Let the excess marinade drip off. Place the chicken skin-side up on the prepared baking sheet. If you want a thicker glaze, heat the remaining marinade in a small saucepan over medium heat. If you’re using cornstarch, stir it in now. Simmer until it thickens slightly, about 3-5 minutes. Brush some of this thickened marinade over the chicken thighs before baking. Now, bake the chicken in the preheated oven for 25-30 minutes. Make sure the chicken reaches an internal temperature of 165°F (74°C) and that the skin is crispy. If you want even crispier skin, broil the chicken for an extra 2-3 minutes. After cooking, let the chicken rest for a few minutes. Then, garnish with sliced green onions and sesame seeds. Serve warm with steamed rice or your favorite side vegetables. Enjoy the delicious taste of honey soy glazed chicken thighs! For great flavor, use low-sodium soy sauce. It keeps the dish tasty without being too salty. Honey adds a nice sweetness. You can adjust the amount based on how sweet you want it. Add rice vinegar for a bit of tang. Fresh garlic and ginger give the marinade a pop. Mix all ingredients well before adding the chicken. Letting it marinate overnight creates deep flavor. To get that golden, crispy skin, start with bone-in, skin-on chicken thighs. Bake them at 425°F (220°C) to allow the fat to render. Place the thighs skin-side up on the baking sheet. This helps the skin crisp up nicely. For extra crunch, broil them for a few minutes at the end. Keep an eye on them to avoid burning. You can also grill these chicken thighs for a smoky flavor. Preheat your grill to medium-high heat. Cook the thighs skin-side down first for about 5-7 minutes. Flip them over and grill for another 5-7 minutes. Make sure the internal temperature hits 165°F (74°C). Grilling adds a unique taste and keeps the chicken juicy. {{image_2}} You can swap chicken thighs for other proteins. Try using chicken breasts for a leaner option. Pork chops also work well with this marinade. For a twist, use salmon fillets. This glaze adds a sweet and salty touch to any meat. If you want a veggie dish, use tofu or tempeh. These options soak up the marinade nicely. Cut the tofu into thick slices for better flavor. You can also use mushrooms, like portobello, for a hearty bite. Just marinate as you would with chicken. You can boost the flavor with spices and herbs. Add crushed red pepper flakes for heat. Fresh herbs like cilantro or basil can add a fresh taste. Try a splash of lime juice for acidity. These tweaks make the dish exciting and unique. After enjoying your honey soy glazed chicken thighs, store any leftovers in a safe way. Let the chicken cool down first. Place it in an airtight container. It can last in the fridge for up to four days. If you have extra glaze, keep that in a separate container. This keeps the chicken flavorful for your next meal. To reheat your chicken, you have a few good options. The oven is best for keeping the skin crispy. Preheat the oven to 350°F (175°C). Place the chicken on a baking sheet and heat for about 15-20 minutes. If you prefer the microwave, use it for a quick option. Heat on medium power for about 2-3 minutes. Check if it's warm all the way through before serving. If you want to save your chicken for later, freezing works well. Wrap each thigh tightly in plastic wrap. Then place them in a freezer bag. Remove as much air as you can. This helps prevent freezer burn. You can freeze them for up to three months. When ready to eat, thaw in the fridge overnight. Then, reheat as mentioned above. You should marinate chicken thighs for at least 30 minutes. This will let the flavors soak in. For even better taste, try marinating them overnight. This gives a deeper, richer flavor. Just remember to keep them in the fridge while they marinate. Yes, you can use boneless chicken thighs. They will cook faster than bone-in thighs. Just check their internal temperature to ensure they reach 165°F. Boneless thighs will still soak up the honey soy flavor nicely. Honey soy glazed chicken goes well with many sides. Here are a few ideas: - Steamed rice - Stir-fried vegetables - Simple green salad - Quinoa or couscous - Mashed potatoes These sides will balance the sweet and savory flavors of the chicken. Enjoy mixing and matching to find your favorite! In this guide, I shared how to make honey soy glazed chicken thighs. We covered key ingredients, step-by-step cooking instructions, and tips for the best flavor. I also included variations and storage tips to help you enjoy this dish longer. Cooking should be fun and easy. With practice, you will impress your friends and family. Don’t forget, you can play with ingredients to make this meal your own. Enjoy your delicious creation!

Honey Soy Glazed Chicken Thighs Flavorful Appeal

- 4 tablespoons all-purpose flour - 4 tablespoons granulated sugar - 2 tablespoons cocoa powder - 1/8 teaspoon baking powder - 1/8 teaspoon salt - 3 tablespoons milk - 2 tablespoons peanut butter - 1 tablespoon vegetable oil - 1/4 teaspoon vanilla extract - Optional: chocolate chips for extra indulgence Gathering the right ingredients for your chocolate peanut butter mug cake is key. You want to use fresh items for the best flavor. Start with all-purpose flour, sugar, and cocoa powder. These give the cake its soft texture and rich taste. Next, add a pinch of baking powder and salt. The baking powder helps the cake rise, while salt brings out the sweetness. For the wet ingredients, grab milk, peanut butter, vegetable oil, and vanilla extract. The milk keeps the cake moist. Peanut butter adds creaminess and flavor. Oil helps with texture, and vanilla gives a warm note. Lastly, if you want an extra treat, consider adding chocolate chips. They melt and create little pockets of chocolate in your cake, making each bite even better. By using these ingredients, you create a quick and easy dessert that tastes amazing! Start by gathering your mug and a fork. In your 12 oz microwave-safe mug, mix these dry ingredients: - 4 tablespoons all-purpose flour - 4 tablespoons granulated sugar - 2 tablespoons cocoa powder - 1/8 teaspoon baking powder - 1/8 teaspoon salt Use the fork to mix them well. Make sure the flour, sugar, cocoa, baking powder, and salt blend evenly. An even blend is key to a delicious cake. Next, you will add the wet ingredients. Pour in: - 3 tablespoons milk - 2 tablespoons peanut butter - 1 tablespoon vegetable oil - 1/4 teaspoon vanilla extract Stir these ingredients into the dry mix. Use the fork to make a smooth batter. You want it free of lumps. If you like, add some chocolate chips for an extra treat. Now it’s time to cook your cake. Place the mug in the microwave. Set it on high for about 1 minute and 20 seconds. Keep an eye on it. The cooking time can change based on your microwave. When it’s done, the cake should rise and look set. It might be a bit moist in the center. Let it cool for a minute or two. This will help it set up better before you dig in. To keep your cake moist, mix the dry and wet ingredients well. Use a fork to blend them until smooth. This helps the batter come together nicely. If you see lumps, keep stirring until all the ingredients are mixed. Next, watch the microwave time closely. Start with 1 minute and 20 seconds. Every microwave is different, so check the cake as it cooks. The cake should rise and look set. It might seem a bit moist in the middle, but that's okay! It will firm up as it cools. Serving your mug cake right in the mug gives it a cozy feel. It looks cute and makes it easy to enjoy. For a fun touch, sprinkle cocoa powder or add extra chocolate chips on top. You can also add a dollop of whipped cream to make it even better. A spoon beside the mug makes it ready for you to dig in! For this recipe, use a 12 oz microwave-safe mug. This size helps the cake rise without overflowing. You'll also need a fork for mixing. A measuring spoon will help you get the right amounts of each ingredient. Keep it simple, and you will enjoy this easy treat! {{image_2}} You can make this mug cake even better with fun flavors. Adding nuts like chopped peanuts will give it a nice crunch. You can also try using different chocolate types. Dark chocolate chips or white chocolate chunks can change the taste. Each option adds a unique flavor twist that makes your mug cake special. If you need a gluten-free option, swap out all-purpose flour with almond or coconut flour. Both work well and keep the cake tasty. For a dairy-free version, use almond milk or oat milk instead of regular milk. These swaps will not change the mug cake's yumminess. Top your mug cake with a scoop of ice cream or some fresh berries for a treat. The cold ice cream pairs well with the warm cake. You can also make it a full dessert by adding whipped cream on top. This makes it feel more festive and fun. Don't forget to place a spoon beside the mug for easy enjoyment! To keep your chocolate peanut butter mug cake fresh, store it in an airtight container. Avoid letting air in, as this can dry it out. Place the cake in the fridge if you do not eat it right away. This helps to keep it moist for up to two days. When you want to reheat it, use the microwave. Place the mug in the microwave for about 10 to 15 seconds. Check it often to make sure it does not overheat. Yes, you can prepare the batter in advance. Mix the dry ingredients and wet ingredients separately. Store each in a sealed container in the fridge. When you are ready to eat, combine them in your mug. For next-day enjoyment, simply microwave the mug for about 1 minute and 20 seconds. Let it sit for a minute to cool. This way, you can enjoy a warm treat that tastes fresh! To make a chocolate peanut butter mug cake, start by mixing dry ingredients in a microwave-safe mug. Combine 4 tablespoons of all-purpose flour, 4 tablespoons of granulated sugar, 2 tablespoons of cocoa powder, 1/8 teaspoon of baking powder, and 1/8 teaspoon of salt. Stir well with a fork. Next, add 3 tablespoons of milk, 2 tablespoons of peanut butter, 1 tablespoon of vegetable oil, and 1/4 teaspoon of vanilla extract. Mix until smooth. If you love chocolate, fold in some chocolate chips. Microwave the mug for about 1 minute and 20 seconds. Watch closely, as times may vary. The cake should rise and look set. Let it cool for a minute before digging in. Yes, you can use different nut butters. Almond butter or cashew butter works well. Each nut butter adds its own unique flavor. Almond butter will give a nutty taste, while cashew butter is creamier. Just keep in mind that the taste will change, but it will still be delicious! This recipe makes one serving. It’s perfect for a quick treat. If you want more, simply double the ingredients. Make sure you use a bigger mug or separate mugs for each serving. Enjoy! This blog post shared a simple recipe for a chocolate peanut butter mug cake. You learned the key ingredients, step-by-step instructions, and helpful tips for a moist cake. Plus, we covered fun variations and storage tips for later enjoyment. Making this mug cake is easy and satisfying. You can impress friends or enjoy it yourself. Remember to keep experimenting with flavors and presentations. A quick mug cake can be a sweet delight any time you want! Enjoy your baking adventure!

Chocolate Peanut Butter Mug Cake Quick and Easy Treat

- 1 lb white fish fillets (tilapia, snapper, etc.) - 2 tablespoons paprika - 1 tablespoon cayenne pepper - 1 tablespoon garlic powder - 1 tablespoon onion powder - 1 teaspoon dried oregano - 1 teaspoon salt - 1/2 teaspoon black pepper - 2 tablespoons olive oil - 8 small corn tortillas - 1 cup shredded cabbage For the fish tacos, I love using white fish. Tilapia and snapper work great. They are mild and flaky. The blackening spice mix gives the fish a bold flavor. You will need paprika, cayenne pepper, garlic powder, onion powder, oregano, salt, and black pepper. This blend adds a nice kick. Olive oil helps the fish cook well and keeps it moist. Corn tortillas are my top choice. They add a lovely texture. - 1 cup fresh pineapple, diced - 1/2 red onion, finely chopped - 1 jalapeño, deseeded and minced - 1/4 cup cilantro, chopped - Juice of 1 lime - Salt to taste For the pineapple salsa, fresh pineapple is key. It brings a sweet and tangy taste. I chop it into small pieces for easy bites. Red onion adds crunch and a bit of sharpness. Jalapeño gives it heat, but you can adjust that. I always add cilantro for a nice herb flavor. Lime juice brightens everything up. A pinch of salt ties it all together. This salsa pairs perfectly with the blackened fish. To make the blackening spice, start by mixing the spices in a bowl. Use paprika, cayenne pepper, garlic powder, onion powder, oregano, salt, and black pepper. This spice mix is key to flavor. It gives the fish a rich, robust taste that makes the tacos pop. Seasoning is vital, as it brings out the best in your fish. First, dry the fish fillets with paper towels. This step helps the spices stick better. Next, rub the spice mixture all over the fillets. Make sure to coat both sides well. In a large skillet, heat olive oil over medium-high heat. Once hot, add the fish. Cook for 3-4 minutes on each side. You want a blackened crust that adds a nice crunch. After cooking, let the fish rest for a few minutes. Then, flake it into bite-sized pieces with a fork. For the salsa, combine diced pineapple, chopped red onion, minced jalapeño, and cilantro in a medium bowl. Squeeze in the lime juice and add a pinch of salt. Mix well to blend the flavors. Let it sit for a bit so the flavors meld. Fresh salsa brightens up the dish and adds a sweet zing. To assemble your tacos, warm the corn tortillas in a dry skillet. Do this for about 30 seconds on each side. It makes them soft and easy to fold. On each tortilla, layer a handful of shredded cabbage. Then, add a generous portion of flaked blackened fish. Top it off with a spoonful of pineapple salsa. For presentation, serve the tacos on a large platter. Add lime wedges and garnish with extra cilantro for a colorful touch. To make great blackened fish, focus on the cooking temperature. Heat your skillet to medium-high. This helps create that tasty crust. If the pan isn’t hot enough, the fish won’t blacken well. After cooking, let the fish rest for a couple of minutes. This step improves texture. It allows the juices to settle, making the fish moist and flaky. For the best flavor, let your pineapple salsa marinate. A short time, about 15 minutes, allows the ingredients to mix well. You can also switch up the ingredients. Try mango or peach instead of pineapple. If you like more heat, add extra jalapeño. This keeps your salsa fresh and exciting. Pair your tacos with sides like rice or black beans. A cool drink, such as a lime soda, also works well. To elevate the presentation, add garnishes. Lime wedges and extra cilantro add color and flavor. A sprinkle of chili flakes can also make your dish pop. {{image_2}} You can use many types of fish for this recipe. While tilapia and snapper are great choices, you can also try mahi-mahi or catfish. These fish have firm textures and soak up flavors well. If you want a sustainable option, look for fish marked with eco-labels. This helps protect our oceans and keeps fish stocks healthy. Besides pineapple salsa, many fruit salsas work well here. Mango salsa adds a sweet twist, while peach salsa brings a summer vibe. You can also mix in avocado for creaminess or use diced tomatoes for a fresh taste. The key is to balance sweetness and spice to make your tacos pop. Corn tortillas are perfect for these tacos. They are sturdy and full of flavor. If you prefer flour, they can work too but might change the taste. For those who need gluten-free options, look for corn tortillas or special gluten-free varieties. This way, everyone can enjoy tasty tacos. To keep your leftover tacos fresh, wrap them tightly in foil or place them in an airtight container. This method helps keep the fish and tortillas from drying out. Store them in the fridge for up to two days for the best flavor. When it’s time to enjoy your tacos again, reheat them on a skillet. Heat them over low to medium heat for about 2-3 minutes on each side. This warms the fish and keeps the tortillas soft. For a quicker option, you can use the microwave. Just place them on a microwave-safe plate and heat for 30-60 seconds. To keep your pineapple salsa fresh, store it in an airtight container in the fridge. It will stay good for about 3 days. The flavors will blend more over time, which can enhance its taste. For long-term storage, you can freeze the salsa. Use a freezer-safe container and leave some space at the top, as it will expand when frozen. It’s best to use the frozen salsa within 2-3 months. When you are ready to use it, thaw it in the fridge overnight. Stir well before serving to bring back its fresh taste. Yes, you can prep the fish and salsa ahead of time. First, rub the fish with spices and store it in the fridge. This helps the flavors blend. You can also make the pineapple salsa a day early. Just keep it in a sealed container in the fridge. When you are ready to eat, cook the fish quickly. Warm the tortillas right before serving. This keeps everything fresh and tasty. If you want a vegetarian option, use grilled portobello mushrooms or tofu. Both soak up flavors well. For a different protein, try shrimp or chicken. Season them like the fish for a similar taste. These options make the dish fun and keep it tasty. The spice level depends on the cayenne pepper. If you like it spicy, use the full amount. For less heat, cut the cayenne in half. You can also add more toppings like avocado or sour cream to cool it down. Adjust the spices to suit your taste. Enjoy finding the right level for you. Fish tacos are a tasty choice for any meal. You learned about the key ingredients, like white fish and fresh pineapple salsa. The step-by-step instructions guide you through preparing blackening spice, cooking fish, and making salsa. I shared tips for perfect fish and salsa flavor, plus creative variations and storage advice. With these ideas, you can impress your family and friends. Enjoy making these delicious tacos at home!

Blackened Fish Tacos with Pineapple Salsa Delight

- 4 boneless, skinless chicken thighs - 2 tablespoons olive oil - 1 red bell pepper, sliced - 1 zucchini, sliced - 1 red onion, cut into wedges - 1 cup cherry tomatoes In this dish, chicken thighs provide a juicy base. Olive oil adds richness and helps cook the veggies. The fresh vegetables bring color and crunch, making the meal bright and lively. - 2 teaspoons dried oregano - 1 teaspoon garlic powder - 1 teaspoon paprika - Salt and pepper to taste The marinade is key to flavor. Dried oregano adds a classic Mediterranean taste. Garlic powder gives a punch of flavor, while paprika adds a touch of warmth. Salt and pepper balance everything out. - Fresh parsley - 1 lemon, juiced Fresh parsley brightens the dish and adds a pop of color. Lemon juice gives a zesty finish. Together, they enhance the flavors and make the meal look stunning. {{ingredient_image_1}} To start, we need to marinate the chicken thighs. This adds great flavor. In a large bowl, mix 2 tablespoons of olive oil, 2 teaspoons of dried oregano, 1 teaspoon of garlic powder, 1 teaspoon of paprika, salt, and pepper. This will be your marinade. Next, add the chicken thighs to the bowl. Make sure each thigh gets a good coat of the mix. This step is key for tasty chicken. If you have time, let the chicken sit in the marinade for at least 15 minutes. For even more flavor, marinate it in the fridge for up to 2 hours. While the chicken soaks up the flavor, let's prepare the veggies. In another bowl, combine 1 sliced red bell pepper, 1 sliced zucchini, 1 cut red onion, and 1 cup of cherry tomatoes. These colorful veggies will add crunch and taste to your dish. Drizzle a little olive oil over them. Then, sprinkle in a pinch of salt and pepper. Toss everything together well. This helps the veggies soak up the seasoning. Now it's time to assemble everything on the sheet pan. Take a large baking sheet and line it with parchment paper. Place the marinated chicken thighs in the center. Spread the seasoned veggies around the chicken. Squeeze the juice of one lemon over the whole pan. This adds a nice zest to the meal. Preheat your oven to 425°F (220°C) and slide the baking sheet inside. Roast for about 25-30 minutes. Check that the chicken reaches an internal temperature of 165°F (75°C) and the veggies are tender. When it's done, take the pan out and let it rest for a few minutes. This keeps the chicken juicy. Finally, garnish your dish with freshly chopped parsley before serving. Enjoy your delicious, healthy meal! To achieve tender chicken, use chicken thighs. They stay juicy and cook well. Marinate them for at least 15 minutes. This helps the flavors soak in. If you have time, let them marinate for up to 2 hours. This gives the chicken even more taste. For perfectly roasted vegetables, cut them into even sizes. This helps them cook at the same rate. Mix them with olive oil, salt, and pepper. Don't overcrowd the pan; give them space to roast. This way, they get crispy and tasty. Short marination times work if you’re in a hurry. Just 15 minutes gives good flavor. For deeper flavor, longer marination is better. Try to marinate for 1-2 hours if you can. You can also add lemon juice to the marinade. The acid helps tenderize the chicken. To enhance flavors, think about adding fresh herbs. You could use thyme or rosemary. They add a nice touch. You can also sprinkle some feta cheese on top before serving. It adds creaminess and a salty bite. For side dishes, consider serving with rice or couscous. Both soak up the juices well. A light salad with greens and lemon dressing pairs nicely too. You can enhance the meal with sauces. Tzatziki sauce is a great choice. It adds a coolness that complements the warm chicken. Hummus is another tasty option. It brings a rich, creamy flavor to the plate. Pro Tips Marinate for Maximum Flavor: Allow the chicken to marinate for at least 2 hours in the refrigerator to enhance the flavors. If you're short on time, even 15 minutes will help, but longer is better! Choose Seasonal Veggies: Feel free to substitute or add in seasonal vegetables like asparagus or eggplant for variety and freshness. This dish is versatile! Watch the Oven Time: Oven temperatures can vary, so keep an eye on the chicken and veggies as they cook. Use a meat thermometer to ensure the chicken is cooked to 165°F (75°C). Serve with a Side: Pair this dish with a side of couscous, quinoa, or a refreshing Greek salad to complete your Mediterranean meal! {{image_2}} You can swap out chicken for other proteins. Try using boneless pork chops or firm tofu. Both options will soak up the tasty marinade. You can also use shrimp if you want a quick-cooking option. When it comes to veggies, be creative! Zucchini can be replaced with yellow squash or asparagus. You can use broccoli or carrots for a nice crunch. Just keep the cooking time in mind, as some veggies cook faster than others. To change the flavor, consider using different spices. You can add cumin for a warm taste or sumac for a tangy twist. A dash of red pepper flakes will give your dish a nice kick. Adding cheese is another great way to enhance flavor. Feta cheese is a classic choice, but goat cheese works well too. If you love olives, toss in some Kalamata olives for a briny touch. If you want to try grilling, marinate the chicken as you would for baking. Grill it over medium heat for about 6-7 minutes per side. This gives you a nice char and smoky flavor. For a stovetop option, heat a large skillet over medium-high heat. Sear the chicken for about 5 minutes on each side, then add the veggies. Cover and cook for about 10 minutes until everything is done. If you own an Instant Pot, you can cook this dish quickly. Use the sauté function first to brown the chicken. Then add the veggies and a splash of broth. Cook on high pressure for 8 minutes for a fast, tasty meal. To keep your Sheet Pan Greek Chicken and Veggies fresh, store leftovers in airtight containers. Refrigerate them within two hours of cooking. This helps prevent bacteria growth. Leftovers can last up to four days in the fridge. For longer storage, freeze them. Place the chicken and veggies in freezer-safe bags or containers. Remove as much air as possible. This will help prevent freezer burn. You can freeze them for up to three months. When you're ready to enjoy your leftovers, reheating them correctly is key. The best way is to use the oven. Preheat the oven to 350°F (175°C). Place the chicken and veggies on a baking sheet. Heat for about 15-20 minutes. This method keeps the texture nice and helps the flavors come back. You can also use the microwave for a quicker option. Heat in short bursts of 1-2 minutes, stirring in between. This helps keep the chicken moist. Your Sheet Pan Greek Chicken and Veggies will stay fresh in the fridge for about four days. In the freezer, they can last up to three months. Check for signs of spoilage before eating. If the chicken smells off or the veggies look mushy or discolored, it’s best to toss them. Always trust your senses to ensure food safety. Marinating the chicken is key for great flavor. You should marinate it for at least 15 minutes. This gives the chicken time to soak up the marinade. For even better results, marinate for up to 2 hours in the fridge. The longer you marinate, the more the flavors blend into the chicken. Yes, you can use skin-on chicken thighs if you prefer. They will add more fat and flavor. However, cooking time may need to increase a bit. Skin-on thighs may take longer to reach the right temperature. Make sure to check their doneness with a meat thermometer. You can use many vegetables in this dish. The recipe calls for red bell pepper, zucchini, red onion, and cherry tomatoes. These veggies roast well and taste great with the chicken. Feel free to swap in seasonal veggies like asparagus or broccoli. Get creative with your favorites for a fun twist! This blog post covered a delicious chicken thigh recipe using fresh veggies and spices. You learned about the key ingredients, marinating tips, and cooking methods. I shared ways to enhance flavors and offered storage tips for leftovers. Try the suggested variations to keep the dish exciting. Remember, cooking should be fun and creative! Making adjustments lets you enjoy new flavors each time you cook. Get ready to share your tasty results with family and friends. Happy cooking!

Flavorful Sheet Pan Greek Chicken and Veggies Recipe

For a delightful bowl of Veggie Packed Minestrone, gather these fresh ingredients: - 1 tablespoon olive oil - 1 medium onion, diced - 2 cloves garlic, minced - 2 carrots, diced - 2 celery stalks, diced - 1 medium zucchini, diced - 1 cup green beans, chopped - 1 can (14 oz) diced tomatoes, with juices - 4 cups vegetable broth - 1 can (15 oz) kidney beans, rinsed and drained - 1 cup uncooked pasta (such as ditalini or penne) - 1 teaspoon dried oregano - 1 teaspoon dried basil - 1 bay leaf - Salt and pepper, to taste - 2 cups baby spinach or kale - Fresh parsley or basil for garnish You can swap ingredients based on what you have. Here are some easy swaps: - Olive oil: Use avocado oil or coconut oil. - Vegetable broth: Chicken broth works well too. - Kidney beans: Any canned beans like cannellini or black beans are great. - Pasta: Use gluten-free pasta if needed. - Spinach or kale: Try Swiss chard or arugula for a twist. This soup is not just tasty; it's also packed with health benefits: - Olive oil: Rich in healthy fats and good for your heart. - Vegetables: High in vitamins, minerals, and fiber for digestion. - Kidney beans: Great source of protein and iron. - Spinach or kale: Loaded with antioxidants and helps with bone health. - Tomatoes: Provide lycopene, which is good for your skin and heart. With these ingredients, you create a warm, filling soup that nourishes both body and soul. Enjoy every hearty spoonful of this veggie-packed delight! 1. Heat the Olive Oil: Start by pouring one tablespoon of olive oil into a large pot. Turn the heat to medium. 2. Sauté the Onion: Add the diced onion. Cook for about 3-4 minutes. The onion should look translucent. 3. Add Garlic: Stir in two minced garlic cloves. Cook for another minute until you smell the garlic. 4. Mix in Carrots and Celery: Add two diced carrots and two diced celery stalks. Sauté for another 5 minutes until they start to soften. 5. Incorporate Zucchini and Green Beans: Toss in the diced zucchini and chopped green beans. Sauté for an additional 3-4 minutes. 6. Pour in Tomatoes and Broth: Add one can of diced tomatoes, juices included, along with four cups of vegetable broth. Stir until mixed well. 7. Season the Soup: Add the rinsed kidney beans, one teaspoon each of dried oregano and basil, a bay leaf, salt, and pepper. Bring the soup to a boil. 8. Simmer the Soup: Lower the heat and let it simmer for about 15 minutes. This helps the flavors mix. 9. Cook the Pasta: Stir in one cup of uncooked pasta. Follow the package instructions, usually around 7-10 minutes, until it is al dente. 10. Add Greens: In the last minute, stir in two cups of baby spinach or kale. This helps them wilt nicely. 11. Finish Up: Remove the bay leaf. Taste the soup and adjust the seasoning if needed. - Use fresh herbs like parsley or basil for garnish. This elevates the taste and looks great! - Sauté the vegetables until they are soft but not mushy. This keeps the soup hearty. - Don’t rush the simmering stage. Letting the soup cook longer helps the flavors blend better. - Add the pasta toward the end of cooking. This prevents it from getting too soft. - Check the pasta a minute before the time on the package. It should be firm but cooked through. - If you have leftovers, store the pasta separately. This keeps it from soaking up too much broth. To make a great minestrone, start with fresh veggies. Fresh produce gives your soup better taste. Dice the onion small for even cooking. Sauté it until it looks clear, about 3-4 minutes. This step builds a nice base for your soup. Always add garlic after the onion. Cook it for just one minute to avoid burning. When adding vegetables, think about their cooking times. Carrots and celery need more time to soften. Add them first, then add softer veggies like zucchini and green beans later. This way, every bite is perfect. To boost flavors, use dried herbs like oregano and basil. They add depth and warmth. Make sure to add them early in the cooking process. The longer they cook, the more flavor they release. Don’t forget about salt and pepper. Season as you go. This helps build layers of taste. A bay leaf adds a subtle aroma. Just remember to take it out before serving! If you want a heartier soup, you can add more beans or pasta. Kidney beans are great, but chickpeas or lentils work too. They add protein and fiber, making your meal more filling. Another tip is to add more broth. This keeps the soup rich and flavorful. If you want extra greens, toss in some kale or spinach at the end. They'll wilt right into the soup and give it a nice color. These tips can help you create a delicious, veggie-packed minestrone that warms your soul! {{image_2}} You can swap or add many veggies to your minestrone. Try sweet bell peppers for a pop of color. Corn adds sweetness and crunch. You can also use butternut squash for a creamy texture. Broccoli and cauliflower bring a nice bite. Don't forget leafy greens like Swiss chard or collard greens. The more colors, the better your soup will look and taste. To boost protein, add cooked chicken, turkey, or sausage. Lentils or chickpeas also work well and keep it plant-based. For a heartier soup, toss in cubed tofu or tempeh. These options will keep you full and add a new flavor twist. They can also help round out your meal and make it more satisfying. You can easily adapt this soup for different diets. For a vegan option, just use vegetable broth and skip any meat. To make it gluten-free, choose gluten-free pasta. You can also use rice or quinoa as a base. These small changes let everyone enjoy this tasty soup. Always check labels for hidden gluten in canned goods. To keep your veggie packed minestrone fresh, let it cool first. Pour the soup into an airtight container. Make sure to seal it well. Place it in the fridge if you plan to eat it within three days. If you need it longer, consider freezing it. When you are ready to enjoy your soup, heat it on the stove. Start with medium heat and stir often. If you find it too thick, add a little water or broth. You can also microwave it in a bowl. Cover the bowl to avoid spills and heat in short bursts. To freeze your minestrone, use freezer-safe containers or bags. Leave some space at the top of the container. This allows for expansion as it freezes. Label the container with the date. It will keep well for up to three months. When you’re ready to eat it, thaw it in the fridge overnight. Then reheat it as mentioned above. To make your Veggie Packed Minestrone richer, add more broth or a splash of wine. You can also stir in some grated cheese like Parmesan. This adds depth and a nice salty flavor. Using fresh herbs, like basil or parsley, can boost the taste too. Try adding a tablespoon of pesto for a burst of flavor. It enhances the soup and makes it creamier. Yes, you can use fresh vegetables instead of canned ones! Fresh veggies add a vibrant taste and texture. Dice up fresh tomatoes instead of canned ones. Use fresh green beans and zucchini for crunch. Just make sure to adjust cooking times. Fresh veggies may take a bit longer to soften. Always taste as you go to find the perfect texture. To know when the pasta is done, taste it for doneness. You want it to be al dente, meaning it has a slight bite. Check the package directions for cooking time. Usually, it cooks in about 7-10 minutes. Make sure to stir it occasionally to prevent sticking. If you notice it getting too soft, remove the pot from heat right away. This blog post covered how to make a delicious veggie-packed minestrone soup. We discussed the ingredients, their benefits, and tips for better flavor. You learned how to cook your pasta just right. I shared variations for more nutrients and dietary needs. In closing, minestrone is not just good for you; it’s fun to make. Enjoy experimenting with flavors and textures to create your perfect bowl.

Veggie Packed Minestrone Flavorful and Healthy Soup

- 1 pound ground chicken or turkey - 1/2 cup panko breadcrumbs - 1/4 cup green onions, finely chopped - 1/4 cup grated carrot - 1 egg, beaten - 2 cloves garlic, minced - 1 teaspoon fresh ginger, grated - Salt and pepper to taste - 1/2 cup teriyaki sauce (low sodium preferred) - 1 tablespoon sesame seeds (for garnish) - 1 tablespoon cooking oil (for frying) - Mixing bowl - Skillet - Measuring cups and spoons The main ingredients for teriyaki glazed meatballs are simple yet packed with flavor. Ground chicken or turkey serves as a lean base. Panko breadcrumbs add a nice crunch. Green onions and grated carrot bring freshness and color. For seasoning, garlic and ginger add warmth and depth. Salt and pepper balance the taste. The star of the show is the teriyaki sauce, which gives the meatballs their sweet and savory glaze. Garnishing with sesame seeds adds a lovely finish. You'll need a mixing bowl to combine the ingredients, a skillet for cooking, and measuring tools for accuracy. These tools make the process easy and fun. Enjoy the cooking adventure! - In a large bowl, combine: - 1 pound ground chicken or turkey - 1/2 cup panko breadcrumbs - 1/4 cup finely chopped green onions - 1/4 cup grated carrot - 1 beaten egg - 2 minced cloves of garlic - 1 teaspoon grated fresh ginger - Salt and pepper to taste Mix everything until well combined. You want a uniform texture for the meatballs. This step is key for flavor and binding. - Preheat a skillet over medium heat. Add 1 tablespoon of cooking oil to the pan. - Using your hands, form the meat mixture into small balls, about 1 inch wide. - Once the skillet is hot, carefully place the meatballs in the pan. Brown the meatballs on all sides. This should take about 5-7 minutes. Make sure to turn them gently. You want a nice golden color on the outside. - After browning, pour 1/2 cup of teriyaki sauce over the meatballs in the skillet. - Reduce the heat to low. Let the meatballs simmer in the sauce for about 10 minutes. This helps them cook through and soak up the flavor. Check that the meatballs are cooked all the way. You can serve them right after simmering for a tasty meal. Mixing the meatball ingredients well is key. Use your hands for a good blend. This helps create a nice texture. Don’t overmix, or the meatballs can become tough. When browning meatballs, heat the oil until it's hot. Place the meatballs in the skillet without crowding. This helps them brown evenly. Turn them gently to get a nice crust. Aim for a golden-brown color, which adds flavor. To make the teriyaki sauce shine, taste as you go. If it’s too sweet, add a splash of soy sauce or vinegar. This balances the flavors well. You can also add extras like pineapple chunks or red pepper flakes. These give a fun twist to the sauce. Try sesame oil for a richer flavor. Garnishing makes the dish look inviting. Use sesame seeds and chopped green onions on top. This adds color and crunch. For serving, place the meatballs on a platter. Drizzle with extra teriyaki sauce for a glossy finish. Pair them with steamed rice or sautéed veggies for a full meal. {{image_2}} You can switch the ground chicken or turkey for beef or pork. These meats add a richer flavor. Just remember to adjust the cooking time. For a vegan option, use lentils or chickpeas. You can mash them and mix with breadcrumbs. This creates a tasty plant-based meatball. You can make a homemade teriyaki sauce with simple ingredients. Mix soy sauce, brown sugar, garlic, and ginger in a pot. Heat until thick. If you like heat, add red pepper flakes or sriracha. This will give your sauce a spicy kick. Feel free to adjust the sweetness and saltiness to your taste. These meatballs shine when served with rice or steamed veggies. You could also serve them on noodles for a fun twist. Another idea is to make mini meatball appetizers. Just use toothpicks and serve with extra teriyaki sauce. This makes a great snack for parties. To store your leftover teriyaki glazed meatballs, let them cool first. Place them in an airtight container. This keeps them fresh. They will last in the fridge for about 3 to 4 days. Always check for any off smells before eating. You can freeze these meatballs for later use. To do this, cool them completely first. Place them in a single layer on a baking sheet. Freeze until solid, then transfer to a freezer bag. This way, they won’t stick together. They can stay in the freezer for up to 3 months. When you want to eat them, thaw in the fridge overnight. Reheat in the oven or skillet until hot. Preparing teriyaki glazed meatballs in advance is smart. You can make a big batch and store them. They work great for quick meals during the week. Pair them with rice or veggies for a fast dinner. Create a weekly meal plan that includes these meatballs. This can save you time and effort. To make teriyaki glazed meatballs, start by mixing ground chicken or turkey with panko breadcrumbs, green onions, grated carrot, beaten egg, minced garlic, grated ginger, salt, and pepper. Form the mixture into small meatballs, about one inch across. Preheat a skillet and add cooking oil. Brown the meatballs on all sides. Pour teriyaki sauce over them and let simmer until cooked through. For the detailed recipe, click [here](#). Yes, you can use different meats! Ground beef or pork works well. You can also try ground lamb for a unique flavor. If you prefer a lighter option, ground turkey or chicken is great too. For a vegan twist, try using lentils or chickpeas. Each meat brings its flavor, so feel free to experiment! Teriyaki glazed meatballs can last in the fridge for about three to four days. Make sure to store them in an airtight container. If you want to enjoy them later, freeze them for up to three months. Always reheat them until they are hot all the way through before serving. Safety first! In this post, we explored making teriyaki glazed meatballs from scratch. We started with key ingredients like ground chicken, panko, and teriyaki sauce. I outlined simple, step-by-step instructions to prepare, cook, and serve your meatballs. You also learned handy tips for perfecting flavors and presentation. Remember, you can switch proteins and sauces for fun variations. Store leftovers properly to enjoy later. With these tips, you can create a delicious meal everyone will love. Happy cooking!

Teriyaki Glazed Meatballs Easy and Flavorful Recipe

For the Southwest Sweet Potato Skillet, you will need: - 2 medium sweet potatoes, peeled and diced - 1 can (15 oz) black beans, rinsed and drained - 1 cup corn kernels (fresh, frozen, or canned) - 1 red bell pepper, diced - 1 jalapeño, seeded and minced - 1 small red onion, chopped - 2 cloves garlic, minced - 1 teaspoon ground cumin - 1 teaspoon smoked paprika - 1/2 teaspoon chili powder - Salt and pepper to taste - 2 tablespoons olive oil - Fresh cilantro, chopped, for garnish - Avocado slices, for serving (optional) You can swap ingredients if you need to. Use butternut squash if you can't find sweet potatoes. Canned beans work great, but you can use cooked dried beans too. If you don’t like jalapeños, try a milder pepper like a green bell pepper. Frozen corn is a good choice if fresh corn is not in season. For oils, avocado oil or vegetable oil can replace olive oil. Sweet potatoes are full of vitamins A and C. They help keep your eyes and skin healthy. Black beans offer protein and fiber, which help with digestion. Corn adds sweetness and is a good source of carbs for energy. Bell peppers are rich in antioxidants and vitamins. Garlic not only adds flavor but also has health benefits, including boosting your immune system. Using fresh cilantro gives you added vitamins and a fresh taste. Overall, this dish is a balanced meal that supports health and wellness. To start, gather all your ingredients. You will need: - 2 medium sweet potatoes, peeled and diced - 1 can (15 oz) black beans, rinsed and drained - 1 cup corn kernels (fresh, frozen, or canned) - 1 red bell pepper, diced - 1 jalapeño, seeded and minced - 1 small red onion, chopped - 2 cloves garlic, minced - 1 teaspoon ground cumin - 1 teaspoon smoked paprika - 1/2 teaspoon chili powder - Salt and pepper to taste - 2 tablespoons olive oil - Fresh cilantro, chopped, for garnish - Avocado slices, for serving (optional) Peel and dice the sweet potatoes. Chop the onion and bell pepper. Mince the garlic and jalapeño. Rinse and drain the black beans. This prep helps the dish cook evenly. Heat two tablespoons of olive oil in a large skillet over medium heat. Add the chopped red onion. Sauté for about 3-4 minutes until the onion turns clear. Next, add the minced garlic and jalapeño. Cook for another 1-2 minutes until they smell good. Now, stir in the diced sweet potatoes. Add the cumin, smoked paprika, chili powder, salt, and pepper. Mix everything well so the sweet potatoes get coated with spices. Cover the skillet and cook for about 10 minutes. Stir every now and then until the sweet potatoes get tender. Once they are soft, add the black beans and corn. Cook for an extra 5 minutes until everything heats up. Finally, add the diced bell pepper and cook for 2 more minutes. This gives time for the flavors to mix. Taste your dish and add more seasoning if you want. To make the best Southwest Sweet Potato Skillet, use fresh ingredients. Fresh veggies make the meal pop with flavor. Always stir your dish while it cooks. This helps it cook evenly. For added freshness, use lime juice on top before serving. It brightens the taste. Enjoy this dish hot, garnished with chopped cilantro and avocado slices if you like. Many home cooks rush when prepping sweet potatoes. Make sure to dice them small. Larger pieces take longer to cook. Another mistake is not rinsing black beans. Rinsing removes excess salt and helps with flavor. Lastly, don't skip the spices. They add depth and make your dish pop. To boost flavors, try adding lime juice. A splash at the end brightens the dish. Fresh herbs like cilantro also add freshness. If you like heat, toss in more jalapeño. For a smoky flavor, consider using chipotle powder instead of chili powder. Experiment with these tips to find your favorite mix. You need a large skillet for this recipe. A sturdy spatula helps stir without breaking sweet potatoes. Use a sharp knife for easy dicing. A cutting board is essential for prep work. If you have a lid for your skillet, use it to trap steam. This helps cook sweet potatoes faster. {{image_2}} This dish is already vegetarian. To make it vegan, skip the avocado slices. You can add more veggies for flavor. Try adding spinach or zucchini for extra nutrients. Both pair well with sweet potatoes. You can also use vegan cheese if you like a cheesy taste. If you want protein, add cooked chicken or turkey. You can also use tofu for a plant-based option. Just cube the tofu and sauté it with vegetables. Canned chickpeas are another great choice. They add texture and protein without much fuss. Use seasonal veggies for fresh flavors. In summer, add diced tomatoes or bell peppers. In fall, consider adding kale or butternut squash. These swaps keep your dish exciting all year. You can even use different beans like pinto or kidney beans. They change the taste while adding nutrition. To keep your Southwest Sweet Potato Skillet fresh, let it cool first. Then, place it in an airtight container. You can store it in the fridge for up to four days. This way, you can enjoy it again without losing flavor. When you’re ready to eat your leftovers, reheat them in a skillet over medium heat. Stir occasionally to ensure even heating. You can also use the microwave. Heat in a bowl for about 1-2 minutes, stirring halfway through. Make sure it’s hot all the way through. If you have more than you can eat, freeze it! Portion the skillet into freezer-safe containers. Use them within three months for the best taste. When you’re ready to eat, thaw it in the fridge overnight. Then, reheat as mentioned above. This keeps the meal tasty and easy for busy days. You can serve this dish with many sides. A simple green salad pairs well. You can also serve it with rice or quinoa for extra carbs. If you like, add sliced avocado on top for creaminess. Tortillas make a great addition too. They can be used to scoop up the skillet mix. Yes, you can prepare this dish ahead of time. Cook it fully and let it cool. Once cooled, store it in an airtight container. It will stay fresh in the fridge for up to three days. When you’re ready to eat, just reheat it on the stove. Stir it gently to warm it through. To make it spicier, add more jalapeño or some hot sauce. You can also use a hotter pepper, like serrano. For a milder taste, skip the jalapeño. You can use bell pepper instead for sweetness. Adjust the spices too; less chili powder will help tone it down. In this post, I shared the key ingredients, steps, and tips for the dish. I covered substitutions, nutritional benefits, and how to avoid common mistakes. You learned how to enhance flavors and explore variations like vegetarian options. Storing leftovers and reheating them was also explained. Remember, cooking is about fun and creativity. Use these tips to make the dish your own! Enjoy every bite and share it with friends!

Southwest Sweet Potato Skillet Flavorful and Easy Meal

- 1 can (15 oz) chickpeas, drained and rinsed - 1 cup cherry tomatoes, halved - 1 cucumber, diced - 1/2 red onion, finely chopped - 1/4 cup Kalamata olives, pitted and sliced - 1/2 cup feta cheese, crumbled - 2 tablespoons fresh parsley, chopped - 1 tablespoon fresh mint, chopped Canned chickpeas are the star of this dish. They add protein and fiber. Rinse and drain them for the best flavor and texture. Next, fresh vegetables bring crunch and color. Cherry tomatoes burst with sweetness. The cucumber adds coolness, while the red onion offers a sharp bite. Kalamata olives add a briny depth, perfect for this salad. Feta cheese brings creaminess and tang. Use crumbled feta for a nice touch. Fresh parsley and mint add bright and fragrant notes. Their freshness lifts the whole salad. - 3 tablespoons olive oil - 2 tablespoons lemon juice - 1 teaspoon dried oregano - Salt and pepper to taste The dressing is simple yet powerful. Olive oil adds richness, while lemon juice brings acidity. This blend brightens the salad. Dried oregano adds an earthy flavor. Season with salt and pepper for balance. Mix these together in a bowl for the perfect dressing. This Mediterranean chickpea salad is fresh, easy, and full of flavor. Each ingredient plays a role in making this dish delicious. Enjoy! {{ingredient_image_1}} Rinsing and Draining Chickpeas Start by opening a can of chickpeas. Pour the chickpeas into a strainer. Rinse them under cold water. This removes extra sodium and any canning liquid. Let them drain well. You want them dry to help the salad stay fresh. Chopping Vegetables Next, grab a cutting board. Dice one cucumber into small pieces. Cut the cherry tomatoes in half. Use a sharp knife to finely chop half a red onion. Slice a quarter cup of Kalamata olives. Make sure all pieces are similar in size. This helps everything mix well. Combining Main Ingredients In a big bowl, add the drained chickpeas, chopped cucumber, halved tomatoes, chopped onion, and sliced olives. Gently fold in half a cup of crumbled feta cheese. Add two tablespoons of chopped parsley and one tablespoon of chopped mint. Mix carefully so you don’t mash the chickpeas. Preparing the Dressing In a small bowl, whisk together three tablespoons of olive oil and two tablespoons of fresh lemon juice. Add one teaspoon of dried oregano. Season with salt and pepper to your taste. This dressing will bring all the flavors together. Tossing Everything Together Now, pour the dressing over the salad. Toss everything gently to coat the ingredients evenly. Ensure the dressing covers all parts of the salad. This step makes every bite flavorful. Recommended Rest Time Let the salad sit for about ten minutes. This resting time allows the flavors to blend. You can serve it chilled or at room temperature. Enjoy the fresh and vibrant taste! To make your Mediterranean chickpea salad pop, think about seasoning variations. You can try adding smoked paprika for a warm touch. If you like heat, a pinch of red pepper flakes works well. For fresh herbs, I recommend parsley and mint. They add bright flavors. You can also use basil or dill for a different twist. Serving your salad is key. Use a large bowl or platter. This makes it look inviting. You can garnish with extra olives or a sprinkle of feta cheese. A sprig of fresh mint on top adds color. Another idea is to serve it in individual cups. This makes it easy for guests to grab. Chickpeas are packed with protein and fiber. They help keep you full and satisfied. They also provide vitamins and minerals like iron and folate. Fresh vegetables in the salad add crunch and nutrients. Tomatoes are rich in vitamins A and C. Cucumbers are hydrating and low in calories. Red onions contain antioxidants that are good for your health. Pro Tips Use Fresh Herbs: Fresh parsley and mint elevate the flavor of the salad. Make sure to use them for the best results. Chill for Flavor: Letting the salad sit for at least 10 minutes allows the flavors to meld together beautifully. Customize Your Veggies: Feel free to add or substitute other vegetables like bell peppers or radishes for added crunch and color. Quality Olives Matter: Choose high-quality Kalamata olives for a more intense flavor that enhances the overall taste of the salad. {{image_2}} You can easily make this salad gluten-free. Chickpeas are naturally gluten-free. If you want more texture, try adding gluten-free grains like quinoa or rice. These grains will add a nice bite. Just cook them separately and mix them in. This salad can also fit a vegan diet. Simply leave out the feta cheese. You can add avocado for creaminess instead. For dressing, use a mix of tahini and lemon juice. This will keep it tasty and fresh. Using seasonal vegetables makes this salad even better. In summer, add bell peppers or zucchini. In fall, try roasted sweet potatoes. Fresh herbs also change with the season. Use basil in summer or parsley in winter. These swaps keep your salad vibrant and delicious. To keep your Mediterranean chickpea salad fresh, store it in the fridge. Use an airtight container. This keeps air out and helps maintain flavor. If you don’t have an airtight container, a regular bowl with plastic wrap works too. Just make sure to press the wrap down onto the salad. This method also helps keep it fresh. In the fridge, your salad lasts about three days. The flavors improve as it sits, so it’s great for leftovers! If you want to freeze it, I don’t recommend it. Freezing can change the texture of the veggies and feta. Instead, enjoy your salad fresh. You can always make a new batch later! Yes, you can make Mediterranean Chickpea Salad ahead of time. It actually tastes better after sitting. The flavors mix together well when you chill it. Prepare it a few hours before serving. Store it in the fridge in an airtight container. Just remember to add fresh herbs right before serving for the best taste. This salad pairs well with many dishes. You can serve it with grilled chicken or fish for protein. It also works great as a side with pita bread or hummus. For a light meal, enjoy it with a bowl of soup. The salad complements roasted vegetables nicely, too. You can easily change this salad to fit dietary needs. For gluten-free diets, it’s already safe! If you have dairy allergies, simply skip the feta cheese. Add more veggies like bell peppers or carrots for crunch. For a vegan option, you can use avocado instead of cheese. Mediterranean Chickpea Salad is vibrant and packed with nutrients. We covered main ingredients like chickpeas, vegetables, feta, and olives. I shared easy steps for preparation and mixing, plus tips to enhance flavor. You can customize the salad for dietary needs, and I explained how to store leftovers properly. This salad is fun to make and healthy to eat. Enjoy making it your own and share it with family and friends for a tasty meal!

Mediterranean Chickpea Salad Flavorful and Fresh Dish

PREV 1 … 32 33 34 … 53 NEXT
cozy citrus kitchen

explore

DessertsDinnerAppetizersDrinks

Our Policies

  • Cookie Policy
  • Copyright Policy
  • Disclaimer
  • GDPR Policy
  • Terms Of Use
Back to Top
  • About
  • Contact Us
  • Privacy Policy
© 2025 cozy citrus kitchen