FREE DINNER EBOOK! Get your copy!
  • Cookie Policy
  • GDPR Policy
  • Disclaimer
  • Terms Of Use
  • Visit my other site: Fun Cookie Recipes
cozy citrus kitchen
  • Home
  • Dinner
  • Desserts
  • Drinks
  • Appetizers
  • Contact
  • About
  • Privacy Policy
  • Home
  • Dinner
  • Desserts
  • Drinks
  • Appetizers
  • Contact
  • About
  • Privacy Policy
  • Cookie Policy
  • GDPR Policy
  • Disclaimer
  • Terms Of Use
Visit my other site: Fun Cookie Recipes

HOME / CATEGORIES /

Latest

To make Taco Seasoned Roasted Chickpeas, you need these main items: - 1 can (15 oz) chickpeas, rinsed and drained - 2 tablespoons olive oil - 1 teaspoon chili powder - 1 teaspoon cumin - 1/2 teaspoon smoked paprika - 1/2 teaspoon garlic powder - 1/2 teaspoon onion powder - 1/4 teaspoon cayenne pepper (adjust to taste) - Salt, to taste These ingredients come together to create a crunchy snack full of flavor. Chickpeas are packed with protein and fiber, making them a great choice. For an extra cheesy kick, try adding: - 1 tablespoon nutritional yeast This ingredient gives the chickpeas a nutty, cheese-like flavor without dairy. It adds depth and makes the snack even more enjoyable. If you can’t find chickpeas, you can use other beans, like black beans or kidney beans. However, chickpeas work best for this recipe due to their texture. You can also use dried chickpeas. Just soak and cook them first. Adjust cooking times based on which beans you choose. First, gather your ingredients. You need one can of chickpeas. Rinse and drain the chickpeas well. This step removes extra sodium and improves taste. Next, dry the chickpeas with a clean towel. Removing moisture helps them get crispy. In a big bowl, pour in the olive oil. Add the rinsed chickpeas and mix well. You want them fully coated. In a small bowl, combine the chili powder, cumin, smoked paprika, garlic powder, onion powder, cayenne pepper, and salt. If you like a cheesy taste, add nutritional yeast. Sprinkle this spice mix over the chickpeas. Toss them again until they are all covered with spices. Preheat your oven to 400°F (200°C). Line a baking sheet with parchment paper. Spread the seasoned chickpeas in a single layer on the sheet. Place it in the oven and roast for 25 to 30 minutes. Halfway through, shake the pan to help them cook evenly. Watch them closely to prevent burning. When they are golden brown and crispy, they are done. Let them cool slightly before serving. To get the best crunch, start with dry chickpeas. Drain and rinse them well. After rinsing, pat them dry with a clean towel. Moisture can prevent crispiness. Use a good amount of olive oil to coat the chickpeas. This helps the spices stick and adds flavor. Spread the chickpeas out in a single layer on your baking sheet. Avoid crowding them to allow air to circulate. Shake the pan halfway through roasting. This ensures even cooking and a crispy texture. One common error is not drying the chickpeas well. If they are wet, they will steam instead of roast. Another mistake is using too few spices. Make sure to coat them well for a bold flavor. Also, do not skip preheating your oven. A hot oven helps achieve that perfect crunch. Finally, keep an eye on them as they roast. They can go from golden brown to burnt quickly. Serve your roasted chickpeas in a colorful bowl. Add a garnish of chopped fresh cilantro for a nice touch. Lime wedges can also add a zesty kick. These chickpeas make a great snack or topping. Try adding them to salads or tacos for an extra crunch. You can also pair them with yogurt or guacamole for dipping. {{image_2}} You can easily add heat to your taco seasoned roasted chickpeas. Try adding more cayenne pepper for extra spice. You can also use hot chili powder instead of regular. For a smoky kick, add a dash of chipotle powder. If you love heat, try mixing in some diced jalapeños before roasting. This will make your snack sizzle! To switch up the taste, consider other spice blends. For a zesty twist, try taco seasoning. You can also use curry powder for a warm flavor. Italian herbs like oregano and basil give a fresh taste. If you want a sweet touch, add cinnamon or paprika. Each blend can completely change your roasted chickpeas! Roasted chickpeas are great in many meals. Toss them in salads for a crunchy bite. Add them to wraps for extra protein. You can also use them as a topping for soups or chili. They make a perfect snack on their own too! Try serving them with dips like hummus or guacamole. Enjoy their crunch and flavor however you like! To keep your roasted chickpeas fresh, store them in an airtight container. Glass jars work great. Make sure the chickpeas are completely cool before sealing. This step helps prevent moisture, which can make them soggy. Roasted chickpeas stay fresh for about a week in the pantry. If you place them in the fridge, they can last up to ten days. However, they may lose some crunch in the fridge. For the best taste and crunch, eat them sooner. If your chickpeas lose their crunch, don’t worry! Simply spread them out on a baking sheet and reheat them in the oven at 350°F for about 10 minutes. This method revives their crispiness. You can also use an air fryer for faster results. Enjoy them hot and crunchy! Yes, you can use dried chickpeas. Start by soaking them overnight in water. After soaking, cook them until they are tender. This may take about an hour. Once cooked, rinse and drain them. Then, follow the same steps to season and roast. This recipe is naturally gluten-free! The spices used, like chili powder and cumin, do not contain gluten. Just make sure your olive oil and any added ingredients, like nutritional yeast, are also gluten-free. Always check labels to confirm. Chickpeas are packed with protein and fiber. They help you feel full and satisfied. They also support heart health and can lower cholesterol levels. Plus, they are rich in vitamins and minerals, like iron and magnesium. Eating chickpeas can boost your overall health while enjoying tasty snacks! In this post, we covered how to make tasty Taco Seasoned Roasted Chickpeas. You learned about the main ingredients, preparation steps, and tips for achieving the perfect crunch. We explored variations and shared storage tips to keep them fresh. In the end, roasted chickpeas are a fun and healthy snack. Try different spices to find your favorite flavor. Enjoy experimenting with this easy recipe!

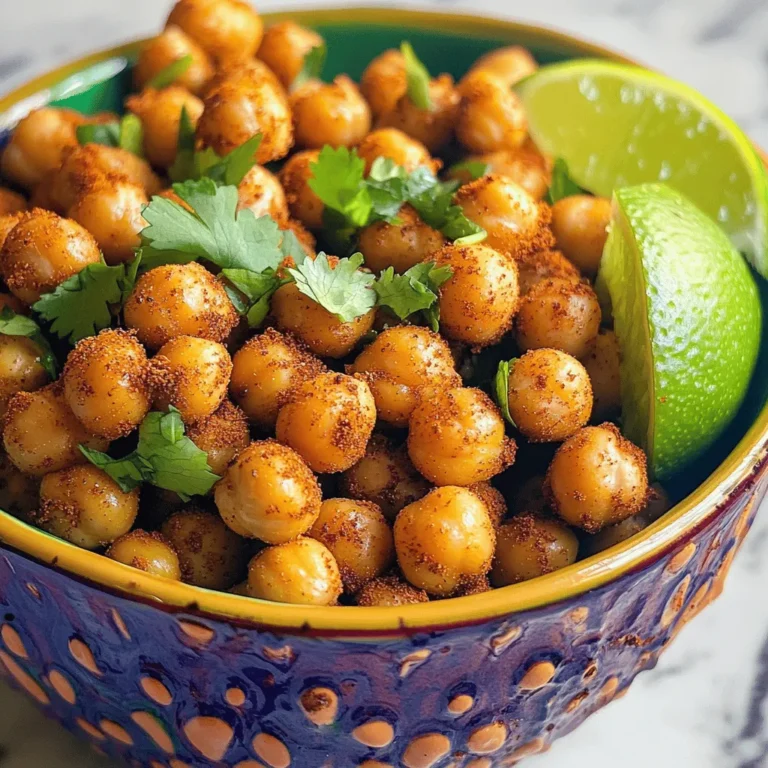
Taco Seasoned Roasted Chickpeas Crunchy and Flavorful

To make chocolate coconut protein balls, you need these key ingredients: - 1 cup rolled oats - 1/2 cup unsweetened cocoa powder - 1/2 cup protein powder (chocolate or vanilla) - 1/2 cup almond butter or peanut butter - 1/4 cup honey or maple syrup - 1/3 cup shredded unsweetened coconut - 1/4 cup dark chocolate chips (dairy-free if preferred) - 1/4 teaspoon sea salt - 1 teaspoon vanilla extract These ingredients work together to create a tasty and healthy snack. Feel free to customize your protein balls with optional add-ins. Here are some fun ideas: - Chopped nuts for crunch - Dried fruit for sweetness - Seeds like chia or flax for added nutrition - A scoop of nutmeg or cinnamon for extra flavor Adding these can change the taste and boost nutrition. You can swap ingredients based on your needs or what you have at home. Here are some options: - Use sunflower seed butter if you need a nut-free option. - Swap honey for agave or a sugar-free sweetener. - Replace rolled oats with almond flour for a gluten-free version. - Use a different flavor of protein powder if you prefer. These substitutions can help fit your diet and taste preferences. Making these chocolate coconut protein balls is easy and fun. First, gather all your ingredients. You will need rolled oats, cocoa powder, protein powder, almond or peanut butter, honey or maple syrup, shredded coconut, dark chocolate chips, sea salt, and vanilla extract. This recipe is quick, taking only 15 minutes of prep. Start with a large mixing bowl. Add 1 cup of rolled oats, 1/2 cup of unsweetened cocoa powder, and 1/2 cup of protein powder. Sprinkle in 1/4 teaspoon of sea salt. Stir these dry ingredients well. Make sure they mix evenly. This step sets a great base for your protein balls. In another bowl, add 1/2 cup of almond or peanut butter. Pour in 1/4 cup of honey or maple syrup and 1 teaspoon of vanilla extract. Mix these until smooth. This wet mixture brings sweetness and richness. Once it's well blended, pour it over the dry ingredients. Stir until fully combined. The mix will be thick. Finally, fold in 1/3 cup of shredded coconut and 1/4 cup of dark chocolate chips. This adds crunch and flavor. Now, you're ready to shape the balls! To get the right texture, balance dry and wet ingredients. Use rolled oats for chewiness. The almond or peanut butter adds creaminess. If the mix is too dry, add a touch of honey or maple syrup. If it is too wet, add more oats or protein powder. The goal is a thick, moldable dough. When rolling, use clean hands to keep the mixture from sticking. Scoop a tablespoon of the mix and roll it into a ball. Aim for about one inch in size. This keeps them bite-sized and easy to eat. Place them on parchment paper to avoid sticking, and give them space to set. You can boost flavor with add-ins. Try adding chopped nuts for a crunch. You can also mix in dried fruit for sweetness. For a tropical twist, add some pineapple or mango bits. To switch it up, mix in different extracts like almond or coconut. Experiment and find your favorite flavor combo! {{image_2}} You can easily make these protein balls vegan. Just swap honey for maple syrup. Use almond butter or any nut butter that fits your diet. Choose dairy-free chocolate chips to keep it vegan. This way, everyone can enjoy them! These protein balls are like a blank canvas. Add different flavors to suit your taste. Try adding a pinch of cinnamon for warmth. You can mix in chopped nuts for crunch. If you want a tropical twist, include dried fruit like pineapple or mango. The options are endless! Not all protein powders are the same. You can use plant-based protein powder if you prefer. If you want to avoid protein powder, use more oats. You can also try adding ground chia seeds or flaxseeds for extra nutrition. Each option changes the taste, making it fun to experiment! To keep your chocolate coconut protein balls fresh, use an airtight container. Glass or plastic containers work well. Avoid leaving them out on the counter. They can dry out quickly if exposed to air. These protein balls last up to a week in the fridge. If you want them longer, freeze them. They can stay fresh for up to three months in the freezer. Just place them in a freezer-safe bag. Make sure to label the bag with the date. For meal prep, divide the protein balls into portions. Use small containers or snack bags. This makes it easy to grab a healthy snack on the go. You can also keep some in the fridge and some in the freezer. This way, you always have a tasty treat ready! Chocolate coconut protein balls are packed with nutrients. Each ball has protein, fiber, and healthy fats. They contain rolled oats, cocoa powder, and nut butter. A serving has about 100 calories, 4 grams of protein, and 6 grams of carbs. The shredded coconut adds healthy fats and a nice texture. These protein balls can last in the fridge for up to one week. Store them in an airtight container. Keep them away from strong smells in the fridge. If you want them to last longer, you can freeze them. Yes, you can customize these protein balls easily! You can swap out nut butter for sun butter or cashew butter. You can also change the protein powder flavor. Add in nuts, seeds, or dried fruit for extra flavor and crunch. Be creative! Absolutely! These protein balls are a great snack for kids. They are tasty and full of energy. The chocolate and coconut flavors make them fun to eat. Just keep an eye on any nut allergies before serving. If you want to avoid honey or maple syrup, use agave syrup or brown rice syrup. You can also use mashed bananas or unsweetened applesauce. These options will keep the mixture moist and sweet. This article explored how to make chocolate coconut protein balls. We covered ingredients, step-by-step instructions, tips, and variations. You learned about optional add-ins and helpful substitutions. Remember, the fresh texture and rich flavor come from using the right methods. Store your protein balls properly to keep them tasty longer. You can tweak recipes to match your needs. Keep experimenting and have fun making these healthy snacks! Enjoy them yourself or share with others!

Chocolate Coconut Protein Balls Healthy Snack Recipe

To make a delicious cherry cheesecake dip, gather these key items: - 1 package (8 oz) cream cheese, softened - 1 cup powdered sugar - 1 teaspoon vanilla extract - 1 cup sour cream - 1/2 cup cherry pie filling - 1/2 cup crushed graham crackers Each ingredient plays a vital role. The cream cheese gives the dip its rich, creamy base. Powdered sugar adds sweetness without the graininess of granulated sugar. Vanilla extract deepens the flavor. Sour cream brings a tangy note that balances the sweetness. Cherry pie filling adds fruity flavor and color, while crushed graham crackers give a nice crunch. For a lovely finish, consider these garnishes: - Fresh cherries - Mint leaves Fresh cherries add a pop of color and freshness. Mint leaves give a refreshing aroma and a touch of green. These simple toppings make the dip look and taste even better. They elevate your dip from tasty to stunning. 1. Start with your cream cheese. Place the softened cream cheese in a medium bowl. 2. Use an electric mixer to beat the cream cheese. Mix until it is smooth and creamy. 3. Next, gradually add the powdered sugar. Keep mixing until it is fully combined. 1. Now, add the vanilla extract and sour cream. Mix until everything is smooth and fluffy. 2. Gently fold in the cherry pie filling. This adds texture and bursts of flavor. 3. Transfer your dip into a serving bowl. Top it with crushed graham crackers for a nice crunch. 1. Place the dip in the fridge for about 30 minutes. This lets the flavors blend well. 2. Chilling also makes the dip cool and refreshing when you serve it. To make your dip smooth, beat the cream cheese well. This step is key to a creamy base. Use an electric mixer for the best results. Mix until no lumps remain in the cream cheese. Next, when adding the cherry pie filling, fold it in gently. This way, you keep some cherry chunks. The chunks add great texture to the dip. You can enhance the flavor with different extracts. Almond extract gives a nice twist. Try adding a splash of lemon juice for brightness. You can also top the dip with more fresh cherries or a sprinkle of chocolate shavings. These extra touches can make your dip stand out even more. For dippers, graham crackers work great. Their sweetness pairs well with the creamy dip. You can also use pretzel sticks for a salty crunch. Fresh fruit like apple slices or strawberries adds a fresh touch. Pair your dip with sweet drinks like lemonade or iced tea. These drinks complement the rich flavors of the dip perfectly. {{image_2}} You can make this dip even better with some simple swaps. Try using Greek yogurt instead of sour cream. It makes the dip creamy and adds a bit of tang. You can also swap in different fruit toppings. Consider using blueberries or strawberries for a fresh twist. For a fun twist, try making a chocolate cheesecake dip. Just add cocoa powder for rich flavor. You can also make a mixed berry cheesecake dip. Blend in a mix of your favorite berries for a fruity explosion. Both variations bring a new taste to the table. If you want gluten-free options, use gluten-free graham crackers. Many brands make great choices that taste just as good. For vegan alternatives, try using plant-based cream cheese and yogurt. It keeps the dip creamy and delicious without dairy. To keep your cherry cheesecake dip fresh, store it in the fridge. Use an airtight container to seal in the flavor. This helps keep the dip creamy and tasty for later. Cherry cheesecake dip lasts about 3-5 days in the fridge. Check for any changes in smell or color. If it looks or smells off, it's best to toss it out. You can freeze cherry cheesecake dip for up to three months. When you are ready to enjoy it, thaw it in the fridge overnight. After thawing, stir well to restore its creamy texture before serving. Homemade cherry cheesecake dip lasts about 3 to 5 days in the fridge. Store it in an airtight container. This keeps it fresh and tasty. Yes, you can make cherry cheesecake dip ahead of time. It tastes even better after chilling. I suggest making it a day before. Just store it in the fridge until you are ready to serve. You can use other fruits like blueberries or strawberries. You could also try pie filling flavors like apple or raspberry. Just make sure to adjust the flavors to fit your taste. Yes, you can cut back on the powdered sugar. Start with half a cup and taste as you mix. You can always add a bit more if needed. You can use lite cream cheese in this dip. It will still be creamy but might taste a bit different. It’s a great option if you want less fat. This blog post covered how to make a delicious cherry cheesecake dip, from essential ingredients to serving tips. You learned about the main components like cream cheese and cherry pie filling, and how to perfect the texture. I shared ways to customize the dip, including swaps and dietary options. Finally, I provided storage and freshness tips. Enjoy creating your dip and feel free to explore different flavors. Your next snack or party will shine with this treat!

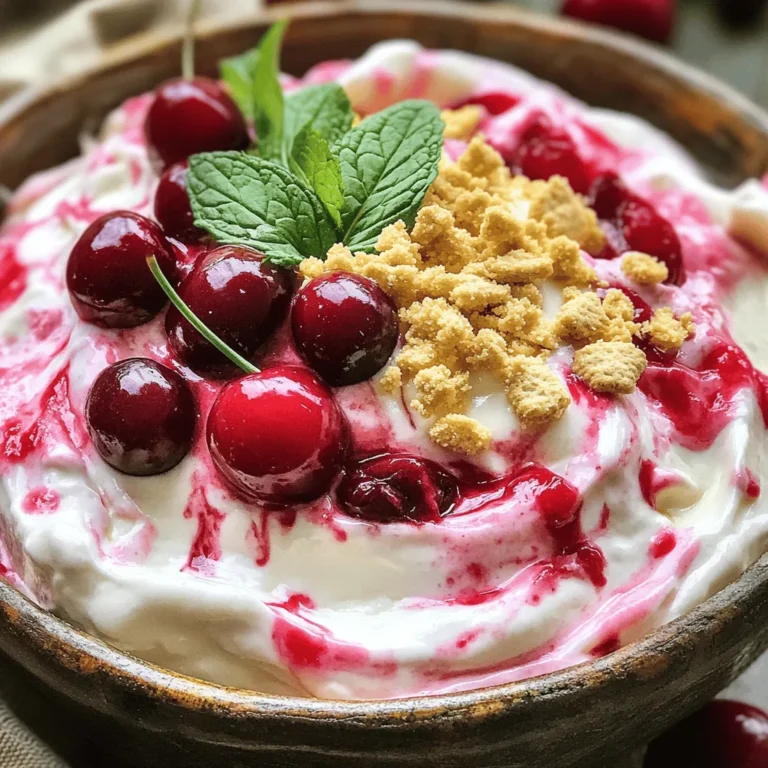
Cherry Cheesecake Dip Delightfully Creamy Treat

To make Lemon Garlic Quinoa, gather these key ingredients: - 1 cup quinoa - 2 cups vegetable broth (or water) - 3 cloves garlic, minced - Zest and juice of 1 large lemon - 2 tablespoons olive oil - 1/2 teaspoon salt - 1/4 teaspoon black pepper - 1/2 teaspoon red pepper flakes (optional for heat) - 1/4 cup fresh parsley, chopped These ingredients work together to create a light and flavorful dish. Quinoa gives you a nutty base. Garlic adds a savory punch, while lemon lifts the flavor with its bright zest and juice. Adding fresh herbs can bring more depth to your dish. I recommend using parsley. It adds a refreshing taste and bright color. You can also try using basil or cilantro. Both herbs can give a unique twist to the recipe. Just chop the herbs finely before mixing them in. To make your Lemon Garlic Quinoa even more special, consider these garnishes: - 1/4 cup toasted pine nuts - Additional lemon zest - A sprinkle of fresh parsley Toasted pine nuts add a nice crunch. Extra lemon zest can enhance the citrus flavor. These garnishes also make your dish look beautiful and appetizing. Start by rinsing 1 cup of quinoa. Use a fine-mesh strainer and cold water. This removes the bitter coating called saponin. After rinsing, put the quinoa in a medium pot. Add 2 cups of vegetable broth or water. Bring it to a boil over medium-high heat. Once boiling, lower the heat to simmer. Cover the pot and let it cook for about 15 minutes. When finished, the quinoa should be fluffy and absorb all the liquid. While the quinoa cooks, heat 2 tablespoons of olive oil in a small skillet. Use medium heat for this step. Add 3 cloves of minced garlic to the hot oil. If you like a bit of spice, toss in 1/2 teaspoon of red pepper flakes. Sauté for 1 to 2 minutes. You want the garlic to be fragrant but not brown. This step adds a rich flavor to the dish. Once the quinoa is fluffy, take it off the heat. Use a fork to fluff it gently. Stir in the garlic oil, along with the zest and juice of 1 large lemon. Season the mix with 1/2 teaspoon of salt and 1/4 teaspoon of black pepper. Finally, fold in 1/4 cup of chopped fresh parsley. This adds a fresh taste and bright color. Serve the quinoa warm, and top each serving with 1/4 cup of toasted pine nuts for extra crunch and flavor. To get the best texture, rinse the quinoa well. This step removes the bitter coating called saponin. Use a fine-mesh strainer for this task. After rinsing, cook the quinoa in vegetable broth or water. Bring it to a boil, then lower the heat and cover. Simmer for about 15 minutes until all the liquid is gone. Fluff the quinoa gently with a fork when it’s done. This helps keep it light and fluffy. You can boost the flavor with a few simple additions. Adding fresh herbs like basil or mint can brighten the dish. You might also try a dash of lemon zest for extra zing. If you like spice, mix in more red pepper flakes. For a richer taste, consider adding roasted garlic or sautéed onions. These extras make the dish even more delicious and unique. Serving matters, too! Use a large bowl or individual plates for a nice touch. Garnish each serving with a sprinkle of fresh parsley. Adding extra lemon zest on top brings color and freshness. Toasted pine nuts add crunch and flavor. This simple presentation makes the dish look gourmet and appealing. Enjoy sharing this tasty dish with family and friends! {{image_2}} You can make Lemon Garlic Quinoa even better by adding vegetables. Chopped spinach, bell peppers, or zucchini work well. These not only add color but also more nutrients. Just sauté them with the garlic. You can also mix in roasted veggies like broccoli or carrots after cooking. This gives a great flavor and texture. If you want extra protein, try adding beans or chickpeas. They blend well with quinoa. Use one can of drained beans for a quick option. You can also add cooked chicken or shrimp for a heartier meal. These options make the dish filling and balanced. You can cook quinoa in different ways. Try using a rice cooker or Instant Pot. Both methods save time and keep the quinoa fluffy. For a smoky flavor, cook it on a grill in a foil packet. Just add the broth, garlic, and lemon juice. This adds a fun twist to your dish. Store leftover quinoa in an airtight container. Make sure it cools to room temperature first. This keeps it fresh. Place the container in the fridge. Leftover quinoa lasts about 3 to 5 days. To reheat, use the microwave or a pot. For the microwave, place quinoa in a bowl. Add a splash of water to keep it moist. Heat for about 1-2 minutes. Stir halfway through. For the pot, add quinoa and a bit of water. Heat over low heat until warm, stirring often. Yes, you can freeze lemon garlic quinoa! First, let it cool completely. Then, scoop it into freezer-safe bags. Flatten the bags for easy storage. Label with the date. It will keep well for about 2-3 months. To eat, thaw in the fridge and reheat. Enjoy your tasty dish later! Yes, you can use brown rice. However, cooking times will change. Brown rice takes longer to cook, about 40 to 50 minutes. Quinoa cooks faster, in about 15 minutes. If you switch, adjust the water and time accordingly. Cooked quinoa lasts about 3 to 5 days in the fridge. Store it in an airtight container. Make sure it cools down before you seal it. This helps keep it fresh. You can pair Lemon Garlic Quinoa with various dishes. It goes well with grilled chicken, fish, or roasted veggies. Try it with a fresh salad or as a bed for stir-fried meals. The flavors balance nicely. Yes, Lemon Garlic Quinoa is gluten-free. Quinoa is a seed, not a grain. It is safe for those with gluten sensitivities. Enjoy this dish worry-free! Lemon garlic quinoa is easy and tasty. We covered key ingredients, like fresh herbs and optional garnishes. I shared step-by-step instructions for perfecting your dish. You learned tips for great texture and flavor enhancement. I also discussed fun variations to boost nutrition and protein. Lastly, we went over storage and reheating methods. With these insights, you can create a delicious meal every time. Enjoy making this simple, healthy dish that fits any table!

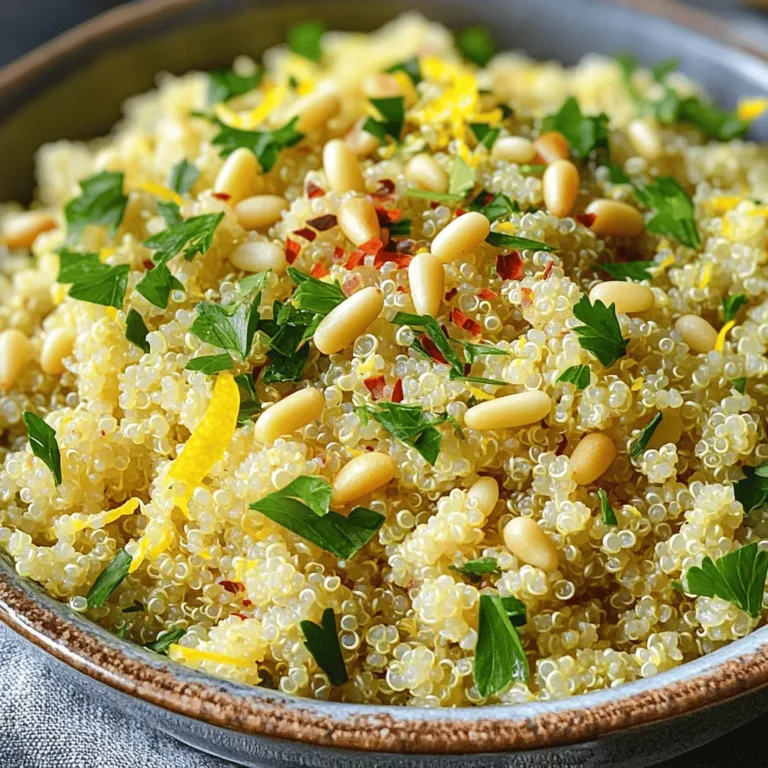
Lemon Garlic Quinoa Flavorful and Simple Recipe

For these tasty Matcha Vanilla Energy Balls, you will need: - 1 cup rolled oats - 1/2 cup almond butter - 1/4 cup honey or maple syrup - 2 tablespoons matcha powder - 1 teaspoon vanilla extract - 1/4 cup chia seeds - 1/2 cup shredded coconut (unsweetened) - Pinch of sea salt Here are some simple equivalents for your ingredients: - 1 cup equals 8 fluid ounces. - 1/2 cup is 4 fluid ounces. - 1/4 cup equals 2 fluid ounces. - 2 tablespoons equal 1 ounce. - 1 teaspoon is about 5 milliliters. These measurements help keep your energy balls consistent in taste and texture. Using high-quality ingredients makes a big difference. Here are some tips: - Organic matcha: Choose organic matcha for the best flavor and health benefits. It has a rich green color and strong taste. - Unsweetened coconut: Look for unsweetened shredded coconut. It adds texture without extra sugar. - Natural sweeteners: Honey or maple syrup should be pure. Avoid brands with added sugars or fillers. - Fresh chia seeds: Check for freshness to ensure they pack a nutritious punch. Using quality ingredients makes these energy balls not just tasty but also good for you. First, grab a mixing bowl. Add 1 cup of rolled oats. Then, include 2 tablespoons of matcha powder. Next, toss in 1/4 cup of chia seeds. Finally, add 1/2 cup of unsweetened shredded coconut. Use a spoon to mix everything until it looks well combined. This mix packs a punch of flavor and nutrients. In a second bowl, take 1/2 cup of almond butter. Add 1/4 cup of honey or maple syrup. Then, pour in 1 teaspoon of vanilla extract. Use a whisk to blend these ingredients until they create a smooth mixture. This step adds sweetness and creaminess to your energy balls. Now, pour the wet mixture into the dry mixture. Don't forget to add a pinch of sea salt for flavor. Stir it all together until it is evenly mixed. Once combined, put the mixture in the fridge for about 30 minutes. This helps it firm up. After chilling, use your hands to roll the mixture into small balls, about 1 inch wide. Place the energy balls on a parchment-lined tray. Freeze them for 15 to 20 minutes to set. After they harden, transfer them to an airtight container. Enjoy them as a quick snack or a boost before your workout! To get the right texture for your Matcha Vanilla Energy Balls, follow these tips. First, make sure to mix the dry and wet ingredients well. This helps evenly distribute the almond butter and honey, making your mixture sticky. If the mix feels too dry, add a little more almond butter or honey. If it’s too wet, add a few more oats or chia seeds. Aim for a thick, moldable dough. Chilling the mixture is key to forming the energy balls. I recommend chilling it for at least 30 minutes. This step helps the mixture firm up. If you have time, chilling for an hour works even better. After you roll the balls, freezing them for 15 to 20 minutes helps them hold their shape. Proper chilling makes them easier to eat and enjoyable! Using the right tools makes the process smoother. Here’s what I suggest: - Mixing bowls: Have two on hand for wet and dry ingredients. - Whisk: Use one to mix the wet ingredients smoothly. - Spoon or spatula: Perfect for combining everything. - Parchment paper: Line your tray to prevent sticking. - Measuring cups: These ensure your ratios are just right. With these tools, you can whip up your energy balls in no time! {{image_2}} You can easily change the flavor of your Matcha Vanilla Energy Balls. Adding nuts gives a nice crunch. Try walnuts, almonds, or pecans. You can also mix in dried fruits like cranberries, apricots, or raisins. These fruits add a sweet touch and extra nutrients. Just chop them up small before mixing in. This makes every bite exciting! If you have allergies, don't worry! You can swap ingredients to fit your needs. If you're allergic to nuts, use sunflower seed butter instead of almond butter. For a gluten-free option, make sure your oats are certified gluten-free. If you can’t have honey, try agave syrup or maple syrup. These swaps keep the energy balls tasty and safe. Seasonal changes can make your energy balls even better. In the fall, add a pinch of cinnamon or nutmeg for warmth. In winter, try adding a touch of ginger for a spicy kick. In spring, mix in fresh lemon zest for a bright flavor. These spices not only taste great, but they also bring new life to your snack! To keep your Matcha Vanilla Energy Balls fresh, store them in an airtight container. Use glass or plastic containers with a tight seal. Keep them in the fridge for the best taste and texture. This helps keep them from drying out. If you want to pack them for a snack, use small bags or containers. When stored in the fridge, these energy balls last about one week. You can also freeze them for longer storage. Place them in a single layer on a tray first. After they freeze, transfer them to an airtight container. They can last up to three months in the freezer. Just thaw them in the fridge before eating. Check your energy balls for any signs of spoilage. If they smell off or look dry, it's best to toss them. Fresh energy balls should feel firm yet soft. If they start to sweat or change color, they may not be safe to eat. Always trust your senses to decide if they are still good. Matcha is a special type of green tea. It comes from finely ground tea leaves. This bright green powder has many health benefits. It is rich in antioxidants, which help protect our cells. Matcha also boosts energy and focus without the jitters. It can improve heart health and aid in weight loss. Plus, matcha contains L-theanine, which helps keep you calm. Adding matcha to your diet can make your snacks even healthier. Yes, you can use different nut butters. Peanut butter or cashew butter works well too. Each nut butter adds its own flavor. Almond butter is creamy and mild, while peanut butter is richer. If you have nut allergies, try sunflower seed butter. It still gives a nice texture and taste. Just remember to use the same amount as the almond butter in the recipe. You can store Matcha Vanilla Energy Balls for a week in the fridge. Keep them in an airtight container. For longer storage, freeze them for up to three months. They will still taste great after freezing. Just thaw them in the fridge before enjoying. Make sure to check for any changes in smell or texture. This way, you will always have a tasty snack ready! We covered the main ingredients and detailed how to mix them for Matcha Vanilla Energy Balls. I shared tips for getting the perfect texture and storage advice to keep them fresh. Don't forget, you can play with flavors or make swaps for allergies. These energy balls are not just easy; they’re healthy too. Enjoy making them your own and keeping your snacks tasty and nutritious. You'll love having a quick, healthy treat on hand!

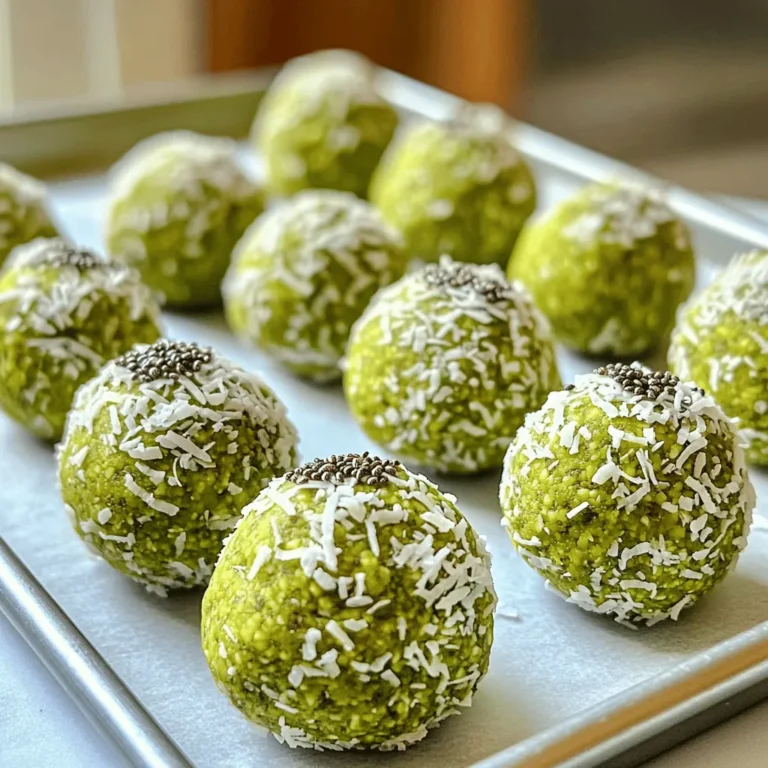
Matcha Vanilla Energy Balls Delicious and Nutritious Snack

For a rich and tasty Southwest Corn Chowder, you will need the following fresh ingredients: - Fresh corn kernels (or frozen corn) - Diced onion - Minced garlic - Diced red bell pepper - Finely chopped jalapeño - Diced potatoes - Vegetable broth - Coconut milk - Spices (smoked paprika, cumin, cayenne pepper) - Olive oil - Salt and pepper - Fresh cilantro (for garnish) - Lime wedges (for serving) Each ingredient adds its own flavor and texture. Fresh corn gives a sweet crunch. Onions and garlic provide a savory base. Red bell pepper adds sweetness and color. Jalapeños bring heat, but you can adjust as needed. Diced potatoes make the chowder filling and creamy once cooked. Vegetable broth provides depth. Coconut milk adds creaminess and a subtle sweetness. The spices—smoked paprika, cumin, and cayenne—bring warmth and complexity. Using these ingredients, you can create a dish that warms the soul. Feel free to experiment! Swap in your favorite veggies or adjust the spice level to suit your taste. Enjoy the process, and remember, cooking is about having fun! 1. First, heat 2 tablespoons of olive oil in a large pot over medium heat. 2. Next, add 1 medium diced onion. Sauté it for about 5 minutes until it turns soft and clear. 3. Now, add 2 minced cloves of garlic, 1 diced red bell pepper, and 1 finely chopped jalapeño (make sure to remove the seeds if you want less heat). Cook these for an additional 2 to 3 minutes until they soften. 1. Time to stir in 2 diced potatoes, 4 cups of corn kernels, 1 teaspoon of smoked paprika, 1 teaspoon of cumin, and 1/2 teaspoon of cayenne pepper. Cook this mix for another 2 minutes, stirring often. 2. Pour in 4 cups of vegetable broth. Bring everything to a boil, then lower the heat to let it simmer. Cook for about 15 to 20 minutes until the potatoes become tender. 1. Once the potatoes are soft, add 1 can (15 oz) of coconut milk. Stir it well and simmer for another 5 minutes to heat it through. 2. Season the chowder with salt and pepper to taste. Adjust the spices if needed. 3. Use an immersion blender to blend part of the chowder for a creamy texture. Leave some chunks for bite. 4. Serve the chowder hot. Garnish with fresh cilantro and a lime wedge on the side for extra flavor. Adjust spice levels to match your taste. For milder chowder, skip the jalapeño. If you crave heat, add more cayenne. Start with a small amount. You can always add more later. Soaking corn kernels can make a difference. If you use dried corn, soak them overnight. This helps them cook faster and makes them tender. For fresh or frozen corn, no soaking is needed. Just rinse them before use. Cutting vegetables uniformly is key. This ensures even cooking. Try to chop your onion, bell pepper, and potatoes into similar sizes. This way, they cook at the same rate and taste great together. Using an immersion blender is simple. It lets you blend the chowder right in the pot. You can control the texture better. If you don’t have one, a regular blender works too. Just blend half the chowder, then mix it back in. Garnishing adds flair to your chowder. Fresh cilantro brings color and flavor. Just sprinkle some on top before serving. A lime wedge on the side gives a nice pop of brightness. Squeeze it over your chowder for extra zing. {{image_2}} You can play around with different veggies in your chowder. Try adding: - Carrots for sweetness - Zucchini for a fresh taste - Green peas for color and texture If you prefer a dairy-free or vegan version, use nut milk instead of coconut milk. Almond or cashew milk can work well. You can also skip the coconut milk and add more vegetable broth. Adding spices can change the whole vibe of your chowder. Here are some ideas: - Add oregano or thyme for an earthy flavor. - Try cilantro for a fresh twist. - For a smoky kick, consider chipotle powder. You can also adjust the heat level. If you want more spice, keep some jalapeño seeds in the mix. For a milder chowder, remove all seeds and use less cayenne pepper. To make your chowder even better, think about sides and toppings. Here are some options: - Serve with warm cornbread for a cozy meal. - Pair with tortilla chips for crunch. - Top with avocado slices for creaminess. Garnish your chowder with: - Fresh cilantro for brightness - A squeeze of lime juice for zing - Crumbled tortilla chips for added texture These variations will not only enhance your chowder but also make it your own special dish! Store your Southwest corn chowder in the fridge. Use airtight containers to keep it fresh. It lasts up to three days. Keep it in a cool, dark spot in your fridge. To reheat, use the stove or microwave. If using the stove, place the chowder in a pot. Heat over low to medium, stirring often. For the microwave, heat in short bursts. Stir in between to keep it smooth. Watch for separation. If you notice it, stir well to blend the ingredients back together. You can freeze the chowder for later. First, let it cool to room temperature. Then, pour it into freezer-safe containers. Leave some space at the top for expansion. Seal tightly and label with the date. To thaw, place the container in the fridge overnight. For reheating, use the stove or microwave, just like before. Stir well to ensure a creamy texture. Enjoy your tasty chowder anytime! If you want a creamy texture, you can use heavy cream. It adds richness, but it's not dairy-free. For a non-dairy option, try almond milk or soy milk. Both can give a nice flavor, though they will be lighter than coconut milk. You can also use cashew cream for a thicker texture. Just blend soaked cashews with water until smooth. Yes, you can make this chowder ahead of time. Cook it fully, then let it cool. Store it in a tight container. It will keep well in the fridge for up to four days. When you are ready to eat, reheat it on the stove. Stir often to stop it from sticking. Southwest Corn Chowder is packed with nutrients. Corn is high in fiber and vitamins. The vegetables add more vitamins and minerals. To make it even healthier, use less coconut milk or cream. You can also swap regular potatoes for sweet potatoes. This adds more vitamins and flavor. This article detailed how to make a delicious Southwest Corn Chowder. We covered ingredients like fresh corn, spices, and creamy coconut milk. You learned easy steps for preparation and cooking, plus tips for perfecting your chowder. I shared ideas for ingredient swaps and storage. In closing, explore the many ways to customize this recipe. Enjoy making a dish that warms both your heart and your taste buds. Dive in, get creative, and savor each bite!

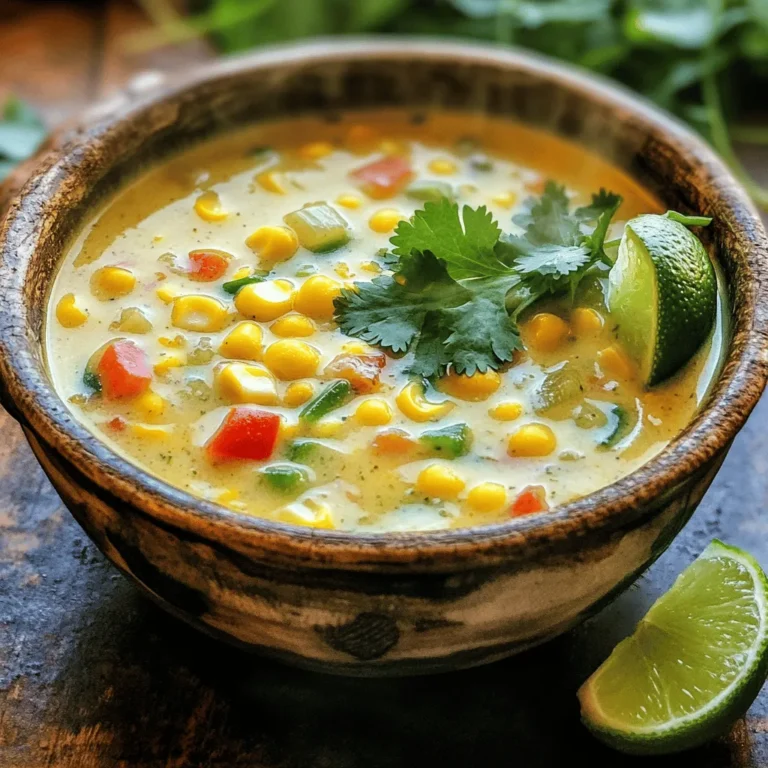
Southwest Corn Chowder Flavorful and Filling Dish

- 2 ribeye steaks (about 1 inch thick) - 2 tablespoons olive oil - 8 ounces mushrooms, sliced (cremini or button) - 4 cloves garlic, minced - 4 tablespoons unsalted butter The ribeye steaks are rich and flavorful, making them perfect for this dish. I love using olive oil to sear the steaks, as it adds a nice touch. You can choose between cremini or button mushrooms, both work well in this recipe. Garlic brings a wonderful aroma, while butter makes everything creamy and rich. - Salt - Pepper - 1 tablespoon fresh thyme leaves (or 1 teaspoon dried thyme) - 1 tablespoon fresh parsley, chopped (for garnish) Salt and pepper are key to bringing out the meat's natural taste. Fresh thyme adds a hint of earthiness, while parsley gives a fresh pop of color. This simple garnish brightens the dish and makes it look beautiful on the plate. Using these ingredients, you can create a quick and flavorful meal that impresses everyone. First, bring your steaks to room temperature. This takes about 30 minutes. It helps them cook evenly. Next, pat the steaks dry with paper towels. This step is key for a good sear. Now, season both sides well with salt and pepper. This adds flavor and brings out the meat's natural taste. Grab a large skillet, preferably cast iron. Heat 2 tablespoons of olive oil over medium-high heat. Wait until the oil shimmers; this means it’s hot enough. Now, add the steaks to the pan. Sear them for 4-5 minutes on each side for medium-rare. If you like your steak more done, adjust the time. Once cooked, transfer the steaks to a plate. Cover them with aluminum foil to keep warm. In the same skillet, lower the heat to medium. Add 8 ounces of sliced mushrooms. Cook them for about 3-4 minutes. You want them to soften and release their juices. Then, add 4 cloves of minced garlic. Cook for another 1-2 minutes until the garlic smells great. Now, stir in 4 tablespoons of unsalted butter and 1 tablespoon of fresh thyme. Allow the butter to melt and mix everything well. Return the steaks to the skillet. Spoon the garlic butter mushroom mixture over the steaks. Let them rest for an extra 2 minutes. This helps the flavors soak in. When ready, serve the steaks topped with the mushrooms and garlic butter. Sprinkle some fresh parsley on top for a pop of color. Enjoy your meal! Use a meat thermometer to check your steak. This tool helps you cook it just right. For medium-rare, aim for 130°F. For medium, go for 140°F. Here are some tips for different doneness levels: - Rare: 120°F, very red inside. - Medium-Rare: 130°F, warm red center. - Medium: 140°F, pink in the middle. - Medium-Well: 150°F, slightly pink. - Well-Done: 160°F or more, no pink. Letting the steak rest after cooking keeps it juicy. Cover with foil for a few minutes. To boost flavor, you can add more herbs. Fresh rosemary and oregano work well. You can also use dried versions if fresh isn’t available. For mushrooms, try different types. Cremini or button mushrooms are great, but shiitake or portobello can add depth. Mixing mushrooms gives a rich taste and texture. Each type offers unique flavors, so feel free to experiment! {{image_2}} If ribeye isn't your favorite, you have options. Here are some great alternatives: - Sirloin: A leaner cut, it cooks well and stays juicy. - Filet Mignon: Tender and buttery, this cut is perfect for special occasions. - Flank Steak: This cut has great flavor but needs to be sliced thinly against the grain. Cooking times vary by cut: - Sirloin: Cook for about 4-5 minutes per side for medium-rare. - Filet Mignon: Sear for 5-6 minutes per side. - Flank Steak: Cook for 3-4 minutes per side, then let it rest before slicing. If you need to change this dish for dietary needs, it’s easy! - Gluten-free options: All ingredients are naturally gluten-free. Just check any added sauces. - Dairy-free alternatives: Use olive oil or vegan butter instead of regular butter. This keeps the dish creamy without dairy. With these variations, you can make garlic butter mushroom steak fit your taste and needs! To store your garlic butter mushroom steak, first let it cool. Place the steak and mushrooms in an airtight container. Make sure to separate the mushrooms from the meat, if possible. This helps keep the flavors fresh. You can store the leftovers in the fridge for up to three days. When it's time to enjoy your leftovers, reheat gently. You can use the stovetop, oven, or microwave. If you use the stovetop, heat a skillet over medium-low heat. Add a splash of broth or water to keep the meat moist. Cover the skillet with a lid to trap steam. For the oven, preheat to 350°F (175°C). Place the steak and mushrooms in a dish. Cover with foil to keep them from drying out. Heat for about 10-15 minutes until warm. If you microwave, use a microwave-safe dish. Place a damp paper towel over the meat. Heat for about 1-2 minutes, checking often. This method helps keep the steak juicy and flavorful. Enjoy your meal again! You can check steak doneness by using a meat thermometer. For medium-rare, aim for 135°F. If you prefer medium, go for 145°F. Another way is to touch the steak. A soft feel means rare, while a firmer feel shows it’s well done. Practice makes perfect! Yes, you can prepare the mushrooms and garlic butter sauce ahead of time. Cook them, then store in the fridge. Reheat them in a pan before serving with the freshly cooked steak. Make sure not to cook the steak early; it tastes best fresh. Some great side dishes include: - Mashed potatoes - Roasted asparagus - Garlic bread - Creamy spinach These sides complement the rich flavors of the steak and mushrooms nicely. Absolutely! Pre-sliced mushrooms save time and work well in this recipe. Just make sure they are fresh. Both cremini and button mushrooms are great choices. In this blog post, we covered how to cook a delicious garlic butter mushroom steak. You learned about the key ingredients like ribeye steaks, garlic, and fresh herbs. We discussed step-by-step instructions to cook the perfect steak with sautéed mushrooms. I shared tips for doneness and flavor enhancements. Lastly, we explored variations and proper storage methods. Enjoy your cooking journey and impress your friends or family with this mouth-watering dish! Your kitchen will smell amazing, and the taste will be unforgettable.

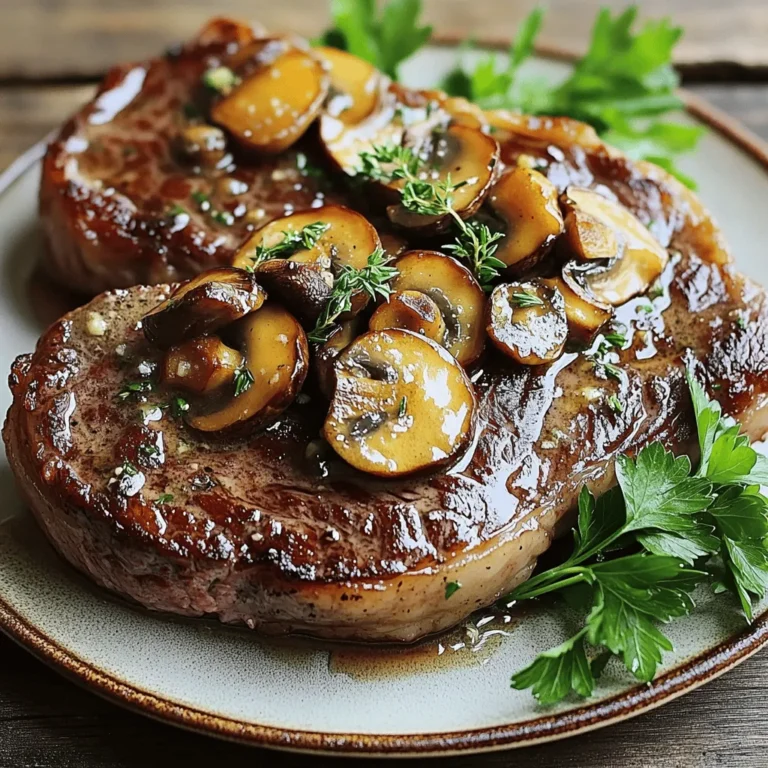
Garlic Butter Mushroom Steak Quick and Flavorful Meal

- 2 ripe avocados, pitted and peeled - 2 cloves garlic, minced - 1 cup fresh basil leaves - 2 tablespoons lemon juice - 1 cup vegetable broth - 1/4 cup extra-virgin olive oil - Salt and pepper to taste - 12 ounces pasta of choice (spaghetti, linguine, or penne) - Cherry tomatoes, halved (for garnish) - Grated Parmesan cheese (optional, for serving) You can swap out some ingredients if needed. - Instead of avocados, try ripe cashews for a nutty flavor. - Use garlic powder if you don’t have fresh garlic. - Swap basil with parsley for a different herb taste. - Lime juice works well if you are out of lemon juice. - For broth, use water or any stock you have. - If you want a lighter oil, use canola or sunflower oil. - For a dairy-free option, skip the Parmesan or use nutritional yeast. This dish offers a balance of nutrients. - Each serving contains about 400 calories. - It has healthy fats from avocados and olive oil. - You get fiber from both the pasta and avocados. - The garlic and basil add vitamins and flavor without extra calories. - If you add Parmesan, expect a slight increase in calories and protein. This creamy avocado pasta is a delightful dish that balances taste and health. Enjoy cooking! To start, gather your ingredients. You’ll need ripe avocados, garlic, basil, lemon juice, and vegetable broth. Place the avocados, minced garlic, fresh basil, lemon juice, and vegetable broth into a blender. Blend until smooth and creamy. This step creates a rich sauce. While blending, slowly pour in the olive oil. This adds flavor and richness. Season with salt and pepper to taste. Set this sauce aside for later. Next, grab a large pot and fill it with water. Add a generous amount of salt to the water and bring it to a boil. Once boiling, add your chosen pasta, like spaghetti or penne. Cook the pasta according to the package instructions until it is al dente. This means it should be firm but not hard. Before draining, reserve about 1/2 cup of the pasta water. This water helps adjust the sauce's creaminess later. After draining the pasta, return it to the pot. Now, add the creamy avocado sauce to the pasta. Toss the pasta well, making sure each piece is coated with the sauce. If the sauce seems too thick, add a splash of the reserved pasta water. This will help achieve the perfect creamy texture. Serve your creamy avocado pasta right away. Garnish with halved cherry tomatoes and, if you like, sprinkle some grated Parmesan cheese on top. Enjoy your meal! To make your avocado pasta super creamy, use ripe avocados. Ripe avocados blend smoothly. If your sauce is thick, add a splash of reserved pasta water. This helps mix everything well. You can also add more broth for a lighter texture. Use a high-speed blender for the best results. A food processor works, too, but might need more blending time. Serve the creamy avocado pasta in large, shallow bowls. Top with halved cherry tomatoes for color. Fresh basil leaves add a nice touch. A drizzle of olive oil gives shine and flavor. If you like cheese, sprinkle grated Parmesan on top. This dish pairs well with a light salad or garlic bread. Start with plenty of salted water for boiling. This adds flavor to your pasta. Cook the pasta until it’s al dente. This means it should still have a little bite. Reserve some pasta water before draining. This water helps adjust sauce thickness later. Toss the pasta quickly with the avocado sauce for even coating. Enjoy the creamy flavor right away for the best taste! {{image_2}} If you want a vegan version, skip the Parmesan cheese. The avocado sauce is creamy enough on its own. You can add nutritional yeast for a cheesy flavor without dairy. It gives a nice umami taste that pairs well with the avocado. To make this dish gluten-free, choose gluten-free pasta. Options like brown rice or chickpea pasta work great. They taste good and hold up well in the creamy sauce. Just cook them according to package instructions for the best results. For extra nutrition, consider adding proteins or vegetables. Cooked chicken or shrimp can boost flavor and fill you up. You can also toss in veggies like spinach, peas, or bell peppers. These add color and nutrients. Just sauté them lightly before mixing with the pasta. Store leftover creamy avocado pasta in an airtight container. Make sure it is cool before sealing. This keeps the flavors fresh and prevents drying. It can last in the fridge for up to three days. If you notice browning, just stir it in before serving. To reheat, place the pasta in a pot over low heat. Add a splash of vegetable broth or water to loosen the sauce. Stir gently until heated. You can also use a microwave. Heat in short bursts, stirring in between to prevent hot spots. You can freeze creamy avocado pasta, but the texture may change. To freeze, place the pasta in a freezer-safe bag. Press out as much air as possible before sealing. It can last up to three months in the freezer. Thaw in the fridge before reheating. Add a bit more broth to restore creaminess. Yes, you can make this dish in advance. However, the avocado sauce may brown. To keep it fresh, store the sauce in an airtight container. Add a layer of plastic wrap on top to reduce air exposure. Cook the pasta when you’re ready to serve. Mix the pasta and sauce just before eating. If you want a cheese-free option, try nutritional yeast. It adds a cheesy flavor without dairy. You can also use vegan cheese or a sprinkle of crushed nuts for texture. These options keep the dish tasty and enjoyable for everyone. Absolutely! Adding spices can enhance the flavor of the sauce. Try red pepper flakes for heat, or smoked paprika for depth. Fresh herbs like oregano or thyme work well too. Start with a small amount, then taste and adjust to your liking. This blog post covered how to make a delicious avocado pasta. You learned about the key ingredients and their substitutes, plus their nutrition facts. We shared step-by-step instructions for blending the sauce and cooking the pasta. Tips for creaminess and serving ideas ensured great results. You also found variations for vegan and gluten-free options. Lastly, we discussed how to store leftovers safely. In conclusion, enjoy experimenting with this dish and make it your own.

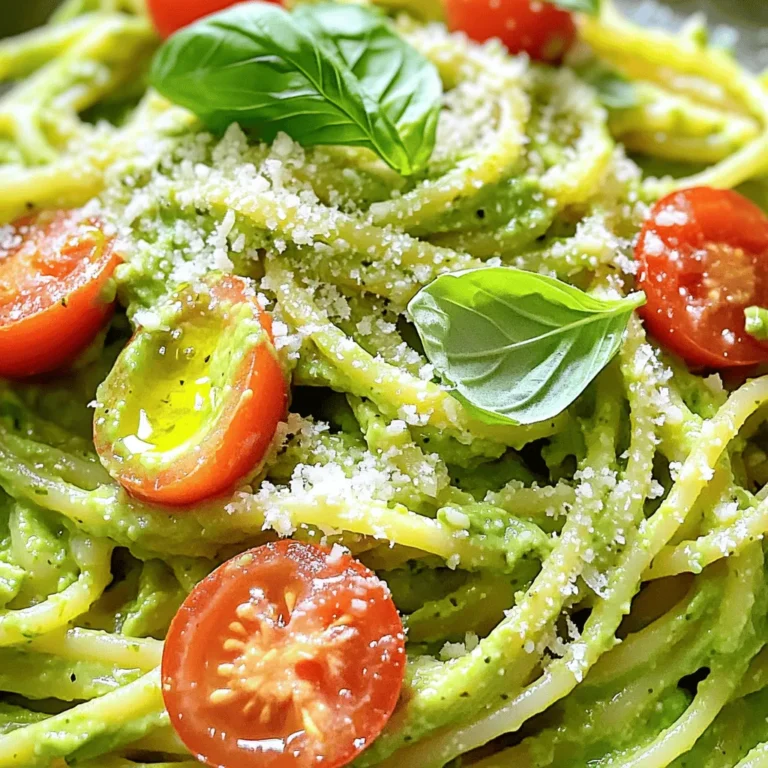
Creamy Avocado Pasta Recipe for Quick Dinner

To make Maple Cinnamon Granola Clusters, gather these simple items: - 3 cups rolled oats - 1 cup nuts (almonds, walnuts, or pecans), chopped - 1 cup shredded coconut (unsweetened) - 1/2 cup maple syrup - 1/4 cup coconut oil, melted - 1 teaspoon cinnamon - 1/2 teaspoon vanilla extract - 1/4 teaspoon salt - 1/2 cup dried fruits (raisins, cranberries, or apricots), chopped Choosing the right ingredients is key for great granola. Here are my tips: - Oats: Use old-fashioned rolled oats. They give the best crunch. - Nuts: Choose fresh nuts. Look for whole nuts that smell sweet and nutty. - Coconut: Pick unsweetened shredded coconut for a natural flavor. - Maple syrup: Go for pure maple syrup. It tastes better than imitation. - Coconut oil: Make sure it is refined for a light flavor. - Spices: Fresh spices give your granola more flavor. If you have allergies, here are some easy swaps: - Nuts: Use seeds like pumpkin or sunflower seeds for nut-free granola. - Coconut: If you can't eat coconut, try more oats instead. - Maple syrup: Honey or agave syrup works as a sweetener too. - Oil: You can use olive oil or canola oil if coconut oil is not an option. - Dried fruits: Any dried fruit can replace the ones listed. Just choose your favorite! Start by preheating your oven to 350°F (175°C). This temperature helps the granola cook evenly. Next, take a large baking sheet and line it with parchment paper. This step keeps the clusters from sticking to the pan. It also makes cleanup easy. In a big mixing bowl, add 3 cups of rolled oats, 1 cup of chopped nuts, and 1 cup of shredded coconut. Stir them gently to mix. In another bowl, combine 1/2 cup of maple syrup, 1/4 cup of melted coconut oil, 1 teaspoon of cinnamon, 1/2 teaspoon of vanilla extract, and 1/4 teaspoon of salt. Whisk these together until smooth. Pour this liquid mix over the dry ingredients. Stir until every piece is coated well. Spread the mixture evenly on your prepared baking sheet. Press it down gently to form a compact layer. Bake it in the oven for 20-25 minutes. Watch for the edges to turn golden brown. When done, remove the baking sheet and let it cool for about 10 minutes. After cooling, use your hands to break the granola into clusters. Finally, mix in your choice of 1/2 cup of chopped dried fruits. Allow the granola to cool completely before moving it to an airtight container. Enjoy your tasty snack! For crunchy granola clusters, use rolled oats. They give the best chew and crunch. Mix in chopped nuts for extra crunch and flavor. I love using almonds or walnuts, but you can choose your favorite. Make sure to pack the mixture tightly on the baking sheet. This helps form solid clusters. Press down gently with your hands. This small step makes a big difference. Bake until the edges turn golden brown. Watch closely, as baking times can vary. To keep your granola fresh, store it in an airtight container. Glass jars work well and look nice, too. Place the jar in a cool, dry place. Avoid the fridge, as it can add moisture. Granola can last for two weeks at room temperature. If you want it to last longer, freeze it. Use freezer-safe bags or containers. It can stay fresh for up to three months in the freezer. You can easily make this recipe gluten-free. Just use certified gluten-free oats. For nut-free options, swap nuts with seeds. Sunflower seeds or pumpkin seeds work great. If you need a nut-free version, skip the nuts and add more coconut or seeds. This way, you still get a tasty crunch. Adjusting ingredients helps everyone enjoy this snack. {{image_2}} You can change the nuts in your granola. Try using almonds, walnuts, or pecans. If you want more crunch, add seeds like sunflower or pumpkin seeds. These combinations give your granola fun textures and tastes. You can even mix different nuts for a unique flavor. Maple syrup is sweet, but you can use honey or agave syrup. Honey gives a nice floral taste, while agave is milder. Both options work well in this recipe. They keep your granola clusters sweet and chewy. If you want a lower sugar option, use mashed bananas or applesauce for sweetness. Adding spices can boost the flavor of your granola. Try nutmeg or ginger for a warm kick. You can also add a splash of almond or coconut extract for extra depth. These simple changes let you customize your granola to fit your taste. Feel free to experiment and find your favorite mix! To keep your maple cinnamon granola clusters fresh, use an airtight container. Glass jars or plastic bins work well. Store them in a cool, dry place. Avoid sunlight, as heat can make them go stale. If you want to enjoy them longer, consider refrigerating them. This method keeps the clusters crunchy and tasty. When stored properly, granola clusters last about two weeks at room temperature. If you want to extend their life, freeze them. They can stay fresh for up to three months in the freezer. Just make sure to seal them tightly to avoid freezer burn. When you're ready to eat them, let them thaw at room temperature. Check your clusters for any off smells or changes in color. If they smell rancid or look dull, it’s time to toss them. Also, if they feel soft or soggy instead of crunchy, they may be spoiled. Keeping an eye on these signs helps you enjoy only the best snacks. You can use quick oats, but it will change the texture. Quick oats will make the granola finer and less crunchy. Rolled oats give a nice chewiness, which adds to the clusters. For best results, I recommend sticking with rolled oats. To keep your granola soft, do not bake it too long. Bake it just until the edges are golden brown, about 20-25 minutes. Also, let it cool for only a short time before breaking it into clusters. If you want softer clusters, mix in more dried fruits or nuts. These granola clusters are great on their own. You can also serve them with yogurt for breakfast. I love adding fresh fruits like berries or banana slices on top. You can even sprinkle them on ice cream for a fun dessert. You learned about the key ingredients needed for tasty granola clusters. I shared tips for selecting the best items and offered substitutes for allergens. Then, we went through step-by-step instructions for baking and perfecting your clusters. Don’t forget the storage tips to keep them fresh. I also shared fun variations to try. Remember, cooking is about finding what works best for you. Enjoy your granola clusters, and feel free to experiment with ingredients and flavors!

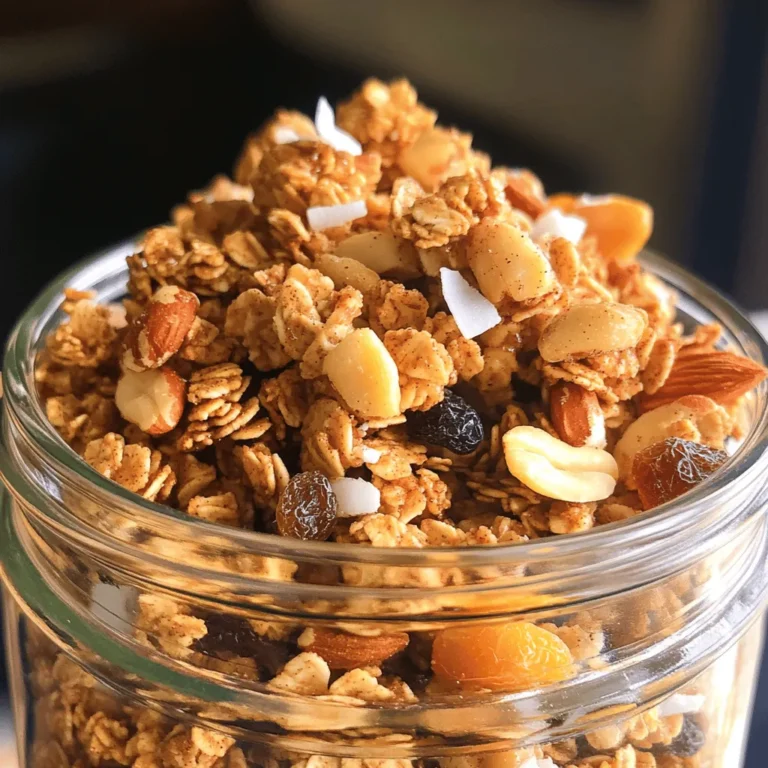
Maple Cinnamon Granola Clusters Tasty and Crunchy Snack

- 4 large bell peppers (any color) - 1 cup cooked quinoa - 1 can (15 oz) black beans, rinsed and drained - 1 cup corn (fresh, frozen, or canned) - 1 cup diced tomatoes (fresh or canned) - 1 small red onion, finely chopped - 2 cloves garlic, minced - 1 tablespoon chili powder - 1 teaspoon cumin - 1 teaspoon smoked paprika - Salt and pepper to taste - 1 cup shredded cheese (cheddar or a Mexican blend) - Fresh cilantro, for garnish - Lime wedges, for serving - Avocado slices - Sour cream or Greek yogurt - Hot sauce for extra heat When I make these Fiesta Stuffed Bell Peppers, I love gathering fresh ingredients. I pick vibrant bell peppers, which add color and flavor. The cooked quinoa gives a nice texture and fills you up. Black beans add protein and fiber, making this dish hearty. Corn brings sweetness, and diced tomatoes add freshness. I always chop a small red onion and mince garlic for a savory base. Spices are key. I use chili powder, cumin, and smoked paprika to build a warm flavor. Season with salt and pepper to taste. Don't forget the cheese! A mix of cheddar or a Mexican blend melts perfectly on top. For garnish, fresh cilantro brightens the dish, and lime wedges add a zesty finish. I also like to customize my peppers. Adding avocado slices gives a creamy touch. A dollop of sour cream or Greek yogurt adds coolness. For those who enjoy heat, a dash of hot sauce can really amp up the flavor. This recipe is all about making it your own! - Preheat your oven to 375°F (190°C). - Cut the tops off the bell peppers and remove the seeds and membranes. Preparing the bell peppers is simple. I like to use a sharp knife for this step. Just slice off the top and scoop out the seeds. This helps the peppers stand tall in the baking dish. You can use any color of bell pepper. Each color has a slightly different taste, so pick your favorite! - In a large mixing bowl, combine all filling ingredients. - Spoon the mixture into each bell pepper, packing it gently. Next, I mix the filling. Combine cooked quinoa, black beans, corn, diced tomatoes, red onion, garlic, chili powder, cumin, smoked paprika, salt, and pepper. I like to use a spatula to mix everything well. It should look colorful and smell great! Once mixed, I spoon the filling into each pepper. I pack it gently to fit it all in. This helps each bite be full of flavor. - Top with shredded cheese and prepare the baking dish with water. - Cover with foil and bake, then uncover for final browning. After filling the peppers, I sprinkle shredded cheese on top. This makes the peppers extra tasty! Then, I pour a little water into the bottom of the baking dish. This water helps steam the peppers while baking. I cover the dish with foil and bake for 30 minutes. After that, I take off the foil and bake for another 10 to 15 minutes. The cheese should be bubbly and golden. This gives a lovely finish to the dish. - Ensure the quinoa is thoroughly cooked before mixing. This step is key. - Adjust seasoning to taste before stuffing the peppers. Taste as you go! - Use vibrant bell pepper colors for an appealing dish. Red, yellow, and green look great! - Garnish just before serving for freshness. Fresh cilantro and lime add brightness. - Bake extra peppers separately if you have leftovers. This way, they stay fresh. - Allow peppers to cool slightly before serving for better handling. This prevents burns! {{image_2}} You can easily change the protein in your stuffed peppers. Substitute quinoa with rice or couscous for a different base. This change keeps the dish tasty and simple. If you want a heartier meal, add ground turkey or beef. This makes your peppers more filling and satisfying. For a vegan twist, swap cheese with a vegan alternative. There are many great options in stores today. You can also use lentils instead of black beans. This switch gives a nice texture and boosts protein. It’s a great way to enjoy this dish without animal products. Don’t be afraid to play with spices! You can experiment with oregano or cayenne for added depth. If you like heat, add diced jalapeños to the mix. This will give the peppers a spicy kick that many people enjoy. Trust me; these small changes can make a big difference in flavor. To keep your fiesta stuffed peppers fresh, refrigerate them in an airtight container. This helps them stay tasty for up to four days. When you're ready to enjoy them again, just take them out of the fridge. If you want to save time for a future meal, freeze unbaked stuffed peppers. Wrap them tightly in plastic wrap and then place them in a freezer bag. They can last for about three months in the freezer. Just remember to label the bag with the date! When it's time to eat your leftovers, you can microwave or bake them. If microwaving, heat them in short bursts to avoid overcooking. For baking, place them in the oven at 350°F (175°C) until they are heated through. Enjoy your flavorsome meal again! Yes, you can prepare and stuff the peppers in advance and store them. Just cover them and keep them in the fridge. When you're ready to eat, bake them straight from the fridge. This saves time on busy days. The cheese should be bubbly and golden, and the peppers should be tender. You can poke a fork into the peppers to check. If they feel soft, they are ready to enjoy! You can pair them with a side salad or tortilla chips for a complete meal. A fresh salad adds a nice crunch, and chips give you that extra flavor. Enjoy your meal! In this post, we explored the delicious world of stuffed bell peppers. We covered essential ingredients, preparation steps, and creative variations to make this dish your own. You learned how to store leftovers and even dish up an impressive meal ahead of time. I hope you feel inspired to try making these tasty peppers. Enjoy great flavors while keeping it healthy and fun! Your kitchen will smell amazing, and your taste buds will thank you.

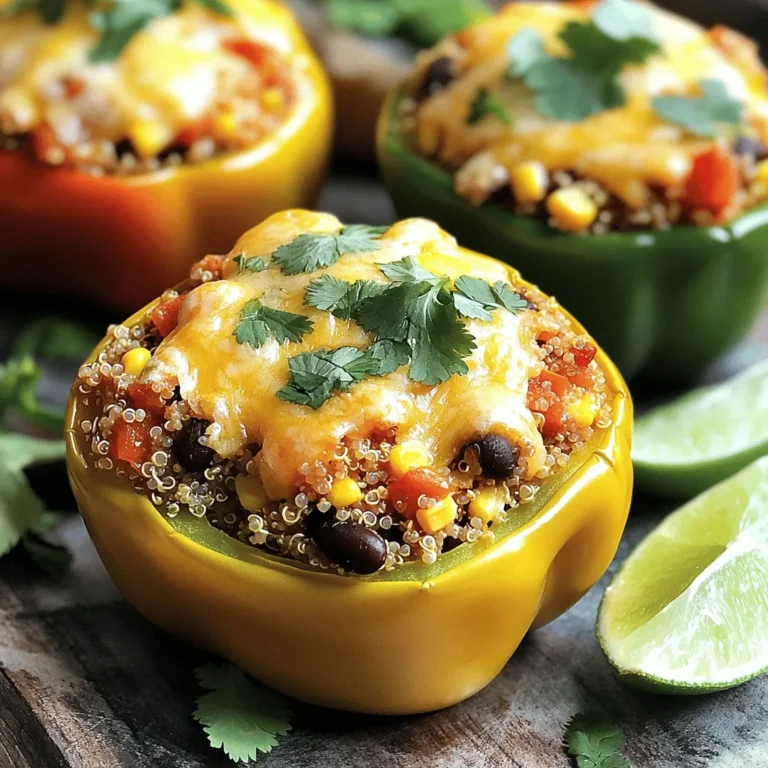
Fiesta Stuffed Bell Peppers Flavorful and Easy Meal

PREV 1 … 30 31 32 … 53 NEXT
cozy citrus kitchen

explore

DessertsDinnerAppetizersDrinks

Our Policies

  • Cookie Policy
  • Copyright Policy
  • Disclaimer
  • GDPR Policy
  • Terms Of Use
Back to Top
  • About
  • Contact Us
  • Privacy Policy
© 2025 cozy citrus kitchen