FREE DINNER EBOOK! Get your copy!
  • Cookie Policy
  • GDPR Policy
  • Disclaimer
  • Terms Of Use
  • Visit my other site: Fun Cookie Recipes
cozy citrus kitchen
  • Home
  • Dinner
  • Desserts
  • Drinks
  • Appetizers
  • Contact
  • About
  • Privacy Policy
  • Home
  • Dinner
  • Desserts
  • Drinks
  • Appetizers
  • Contact
  • About
  • Privacy Policy
  • Cookie Policy
  • GDPR Policy
  • Disclaimer
  • Terms Of Use
Visit my other site: Fun Cookie Recipes

HOME / CATEGORIES /

Latest

To make Cheesy Broccoli Rice Casserole, gather these items: - 1 cup uncooked brown rice - 2 cups fresh broccoli florets - 1 cup shredded cheddar cheese - 1 cup cream of mushroom soup (or homemade) - 1/2 cup milk - 1/2 cup grated Parmesan cheese - 1 small onion, diced - 2 cloves garlic, minced - 1 teaspoon olive oil - 1 teaspoon salt - 1/2 teaspoon black pepper - 1/2 teaspoon paprika (optional) - 1/2 cup breadcrumbs (for topping) I love using fresh ingredients for the best taste. Fresh broccoli gives a crisp bite and bright color. Use whole garlic cloves for stronger flavor. Choose a firm onion for sweetness. Fresh cheeses melt better and add richness. If you want to make the dish healthier, swap brown rice for quinoa. You can use a dairy-free cheese for a vegan option. Try coconut milk instead of regular milk for a creamy texture. Use gluten-free breadcrumbs if needed. Start by boiling 2 cups of water in a medium saucepan. Once it boils, add 1 cup of uncooked brown rice. Cover the pot and reduce the heat to low. Let it simmer for 40 to 45 minutes. Check the rice to ensure it is tender and the water is absorbed. This step is key for a great base in your casserole. While the rice cooks, heat 1 teaspoon of olive oil in a skillet over medium heat. Add 1 small diced onion and 2 minced garlic cloves to the skillet. Sauté them for about 4 to 5 minutes until the onion turns translucent. Next, toss in 2 cups of fresh broccoli florets. Sauté for another 2 to 3 minutes. You want the broccoli to be bright green and slightly tender. This mix adds great flavor and nutrition to your dish. In a large bowl, combine the cooked rice, sautéed broccoli, 1 cup of cream of mushroom soup, and 1/2 cup of milk. Add 1 cup of shredded cheddar cheese, 1/2 cup of grated Parmesan cheese, 1 teaspoon of salt, 1/2 teaspoon of black pepper, and optional 1/2 teaspoon of paprika. Mix everything until well combined. Transfer this mixture into a greased 9x13 inch baking dish. Spread it out evenly. In a small bowl, mix 1/2 cup of breadcrumbs with a drizzle of olive oil. Sprinkle this over the top. Bake in a preheated oven at 350°F (175°C) for 25 to 30 minutes. Look for a golden, bubbly top. Let it rest for 5 minutes before serving. Enjoy your hearty and cheesy casserole! To get the best texture, cook the rice well. Use brown rice for a hearty feel. It takes longer to cook, but the nutty taste is worth it. Ensure the broccoli is bright and slightly tender. This helps prevent mushiness in the final dish. Mix all ingredients well, but don’t over-mix. This keeps the casserole light and fluffy. Cheddar cheese is a classic choice for this dish. It melts nicely and adds a rich flavor. I also love using Parmesan cheese for a salty kick. You can mix different cheeses for more depth. Consider using Gruyère or Monterey Jack for a twist. Each cheese adds its own special taste to the casserole. For a beautiful, golden top, use breadcrumbs. Mix them with a little olive oil before sprinkling on top. This helps them crisp up in the oven. Bake it at 350°F for the perfect time. Keep an eye on it. If it browns too fast, cover it with foil. The goal is a crispy topping that contrasts with the creamy inside. {{image_2}} You can boost your casserole by adding protein. Cooked chicken or turkey works great. Just shred or cube it before mixing. If you prefer seafood, try adding shrimp or crab. For a tasty vegetarian option, you could use cooked lentils or chickpeas. These options add flavor and make the dish more filling. To make this dish vegetarian, use vegetable broth instead of chicken broth. You can swap out cheese for a dairy-free option made from nuts or soy. For the cream of mushroom soup, opt for a plant-based version or make it at home. This way, you keep the creamy texture while staying true to your diet. Spices can take your casserole to a new level. Try adding garlic powder or onion powder for extra depth. A pinch of red pepper flakes gives a nice kick. You can also use Italian seasoning for a herby touch. Experiment with the spices you love to create a unique dish every time. After you bake the cheesy broccoli rice casserole, let it cool. Cooling helps keep the food safe. Once it cools, cover it with plastic wrap or foil. Store it in the fridge. The casserole stays good for about 3 to 5 days. To reheat, first take the casserole out of the fridge. You can use the oven or microwave. If using the oven, preheat it to 350°F (175°C). Heat it for about 20 minutes. If using the microwave, heat in 1-minute bursts. Stir often to avoid hot spots. Make sure it gets hot all the way through. You can freeze the casserole for later meals. First, let it cool completely. Then, cut it into smaller portions. Wrap each portion tightly in foil or freezer bags. It can last for up to 3 months in the freezer. When you are ready to eat, thaw it in the fridge overnight before reheating. This way, you can enjoy your cheesy broccoli rice casserole anytime! To make this casserole gluten-free, swap the regular cream of mushroom soup for a gluten-free version. You can also use gluten-free breadcrumbs for the topping. Make sure the rice is certified gluten-free, which most brown rice is. This way, you keep all the great flavors without the gluten. Yes, you can use frozen broccoli! It saves time and is often just as nutritious. Just be sure to thaw and drain it well before adding it to the casserole. This helps prevent excess moisture, which can make the dish soggy. This casserole is great with many dishes. Here are some ideas: - Grilled chicken or fish for protein - A fresh garden salad for crunch - Roasted vegetables for extra flavor - Garlic bread for a comforting touch These pairings make the meal balanced and fun. Enjoy! This article covered how to prepare a cheesy broccoli rice casserole. We explored the best ingredients, including fresh options and alternatives for dietary needs. You learned the steps for cooking the rice, sautéing veggies, and baking the dish. I shared tips on texture, cheese choices, and achieving a perfect topping. In conclusion, this casserole is easy to adapt and store. Feel free to try different proteins and spices to suit your taste. Enjoy making this dish as a comforting meal for your family.

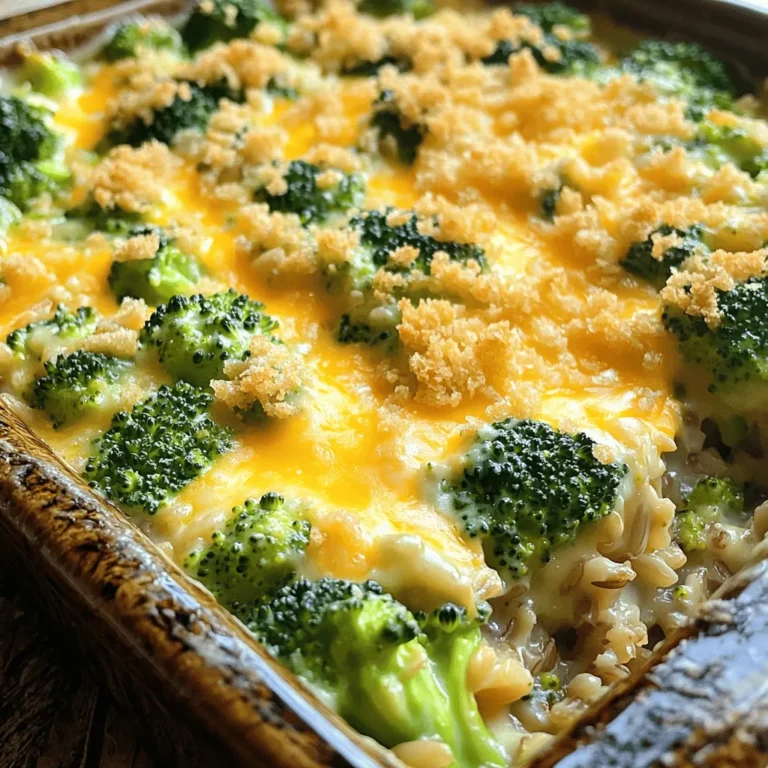
Cheesy Broccoli Rice Casserole Simple and Satisfying

- 1 cup fresh spinach leaves - 1 ripe banana - 1/2 cup diced mango (fresh or frozen) - 1/2 cup coconut water The fresh ingredients in this Tropical Green Smoothie make it both tasty and healthy. Spinach adds a lovely green color and lots of nutrients. Bananas give it a creamy texture and natural sweetness. Mango adds a tropical twist, making each sip feel like a vacation. Coconut water keeps the smoothie light and refreshing. - 1/2 cup Greek yogurt - 1 tablespoon honey or maple syrup - Ice cubes You can make this smoothie even creamier with Greek yogurt. It also adds protein, which is great if you're looking for a filling drink. If you like it sweeter, add honey or maple syrup. Ice cubes can chill the smoothie, making it perfect on hot days. - Blender - Measuring cups - Tall glass or bowl You will need a blender to mix everything smoothly. Measuring cups help you get the right amounts of each ingredient. A tall glass or bowl is perfect for serving your delicious Tropical Green Smoothie. 1. Start by rinsing your fresh spinach leaves. Use cold water to wash them well. This step gets rid of dirt and any tiny bugs. Dry them gently with a clean towel or let them air dry. 2. Measure all your ingredients. You will need 1 cup of spinach, 1 ripe banana, and 1/2 cup of diced mango. If you like creamy smoothies, add 1/2 cup of Greek yogurt. Also, get 1/2 cup of coconut water, 1 tablespoon of chia seeds, and 1 tablespoon of honey or maple syrup if you want it sweeter. 1. In your blender, combine spinach, banana, and diced mango. Pour in the coconut water and Greek yogurt if you chose to use it. 2. Add chia seeds and honey or maple syrup for some extra sweetness. If you want a colder drink, toss in a few ice cubes. 3. Blend everything on high for about 30 to 60 seconds. Stop and check if it's smooth and creamy. If it's too thick, add more coconut water. Blend again until it’s just right. 1. Pour your smoothie into a tall glass or a bowl. 2. For a fun touch, sprinkle some chia seeds on top. You can also add sliced fruit or nuts for extra crunch. Enjoy your refreshing Tropical Green Smoothie! To get the right consistency for your Tropical Green Smoothie, balance is key. Start with one cup of coconut water for a smooth base. Blend on high for 30 to 60 seconds. If it feels too thick, add more coconut water. This will help create a drink that's easy to sip and enjoy. To prevent browning of the banana, use it right away. If you must wait, store the cut banana in lemon juice. The acid in the juice slows browning. This way, your smoothie stays fresh and bright. Want to boost the protein in your smoothie? Add a scoop of protein powder. This not only adds nutrition but also makes your drink more filling. You can also try adding nut butter for a creamy texture and nutty flavor. Feel free to mix in other fruits, too. Pineapple or papaya can give your smoothie a tropical twist. Berries like strawberries or blueberries can add sweetness and color. Experiment to find your favorite blend! The ingredients in this smoothie offer great nutrition. Spinach provides iron and vitamins. Bananas add potassium and natural sweetness. Mango gives vitamin C and fiber, while chia seeds offer omega-3 fatty acids. Consuming leafy greens and fruits can improve digestion. They support your immune system and provide energy. This smoothie is not just tasty; it’s also a health boost in a glass! Enjoy the benefits while treating your taste buds. {{image_2}} You can switch up the fruits in your Tropical Green Smoothie. Try adding papaya for a creamy texture. Pineapple brings a sweet, tangy kick. You can also blend in berries like strawberries or blueberries. These add color and flavor. They also boost the smoothie with antioxidants. Mixing fruits keeps your smoothie exciting and fresh. If you want a creamier smoothie, Greek yogurt is a great choice. But you can use alternatives like silken tofu or coconut yogurt. Both options add creaminess without dairy. For a lighter drink, try plant-based milk. Almond milk or oat milk works well. They make the smoothie smooth and rich without overpowering the fruit flavors. Turning your smoothie into a bowl is a fun twist. Just pour it into a bowl instead of a glass. This gives you a thick base for toppings. Sprinkle on some nuts or seeds for crunch. You can also add granola for a sweet touch. Fresh fruit slices on top add color and extra nutrition. Enjoy it with a spoon for a delightful breakfast or snack! How long does the smoothie last in the fridge? Your Tropical Green Smoothie will stay fresh in the fridge for up to 24 hours. After that, the flavors may change, and it might not taste as good. How do I freeze the smoothie for meal prep? To freeze, pour the smoothie into ice cube trays or freezer-safe containers. Leave some space for expansion. It freezes well for up to three months. What containers should I use for storage? Use airtight glass or plastic containers. These keep the smoothie fresh and prevent spills. How do I thaw frozen smoothies? To thaw, place the container in the fridge overnight. You can also run it under warm water for a quick thaw. How can I refresh the smoothie after storage? To refresh your smoothie, pour it into a blender. Add a splash of coconut water or milk. What tips help achieve the desired consistency again? Blend on high until smooth. If it's too thick, add more liquid. If it's too thin, add ice or frozen fruit. Can I make this smoothie ahead of time? Yes, you can make this smoothie ahead of time. However, it tastes best when fresh. If you store it, keep it in an airtight container. It lasts in the fridge for up to 24 hours. Remember, some separation may occur. Just give it a good shake or stir before you drink. What if I don’t have coconut water? If you don’t have coconut water, use regular water or any fruit juice. You can try pineapple juice for a tropical twist. This change will still keep it tasty and refreshing. Just adjust the sweetness based on your choice. How many calories are in a Tropical Green Smoothie? A Tropical Green Smoothie has about 250 calories. This number can change based on ingredients, like yogurt or sweeteners. To get a more accurate count, adjust according to what you add. Is this smoothie vegan-friendly? Yes, this smoothie can be vegan-friendly. Just skip the Greek yogurt or use a plant-based yogurt instead. Also, choose maple syrup over honey for sweetness. This way, you keep it plant-based and delicious. Can I add supplements like spirulina or protein powder? Absolutely! You can add spirulina or protein powder easily. Just mix in a scoop with your ingredients. This boost adds nutrition without changing the flavor much. How do I make it less sweet? To make it less sweet, cut back on the banana and sweeteners. You can also add more spinach or a bit of lemon juice. This will balance the taste and keep it refreshing. Enjoy your customized smoothie! This blog post showed you how to make a delicious Tropical Green Smoothie. You learned about fresh and optional ingredients, tools you need, and easy steps to blend. I shared tips for extra flavor and health benefits, plus variations to try. Smoothies can be stored well, and I covered how to do that. Making smoothies is fun and healthy. Now, grab your blender and start creating! Enjoy your tasty and nutritious drink!

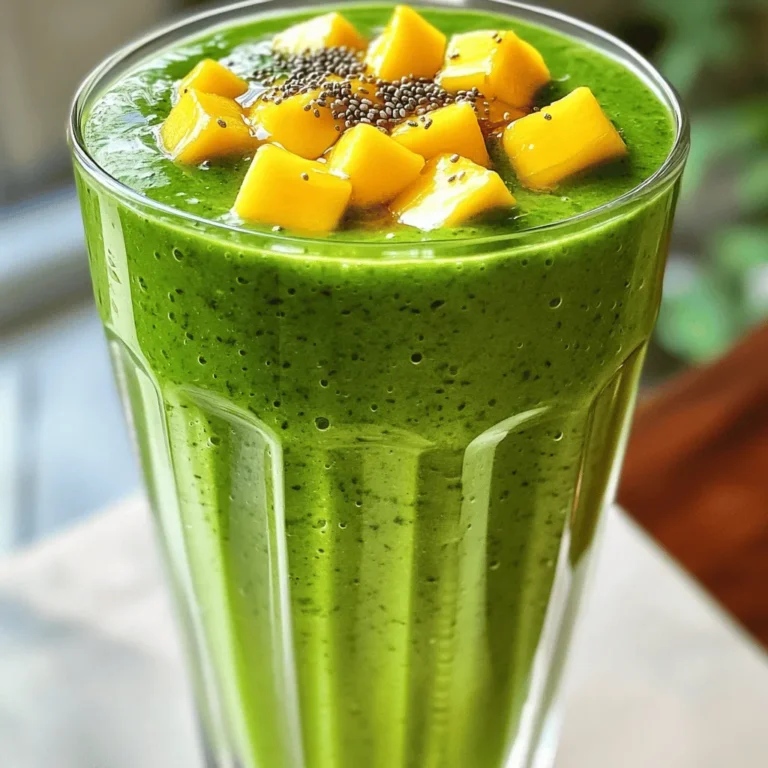
Tropical Green Smoothie Refreshing and Nutritious Drink

- Canned vs. dried chickpeas: You can use either canned or dried chickpeas. Canned chickpeas are easy and quick. Just rinse and dry them. Dried chickpeas need soaking and cooking first. If you choose dried, soak them overnight and boil until tender. - Sweetener options: Honey is the star here, adding sweet flavor. If you prefer, you can use maple syrup or agave nectar. Each sweetener brings its unique taste, but honey gives the best caramelization. - Essential seasonings and their roles: Each seasoning plays an important part. Olive oil helps the chickpeas crisp up. Garlic adds a strong, savory flavor. Smoked paprika gives warmth and depth. Cumin contributes a hint of earthiness. Salt and black pepper enhance all flavors. Fresh parsley adds a bright touch at the end. First, drain the canned chickpeas. Rinse them under cold water. This helps remove extra sodium. After rinsing, pat them dry with a clean kitchen towel. Drying is key for crispiness. Moisture can make them soggy when roasted. In a large bowl, combine olive oil, honey, and minced garlic. Add smoked paprika, cumin, salt, and black pepper. Mix well until all ingredients blend together. This mixture will coat the chickpeas and add flavor. Preheat your oven to 400°F (200°C). Line a baking sheet with parchment paper. Spread the chickpeas in a single layer on the sheet. Roast them for 25-30 minutes. Stir halfway through to ensure even cooking. Look for a golden brown color. This shows they are crispy and ready to enjoy! To make your chickpeas crispy, start by drying them well. After you rinse the canned chickpeas, use a clean kitchen towel. Pat the chickpeas until they are dry. This step is key. Moisture will make them soft. You want them crunchy, not soggy. Spread them out on the towel to dry for a few minutes. The drier they are, the crispier they will get in the oven. You can boost the taste of your chickpeas with spices. Try adding a pinch of cayenne for heat or mix in some Italian herbs. A dash of garlic powder can also enhance the flavor. If you like a smoky taste, add more smoked paprika. Feel free to experiment! This recipe is a blank canvas. You can use what you love and make it your own. Serve your honey garlic roasted chickpeas in a nice bowl. A small, colorful dish works great. For a fancy touch, drizzle some extra honey on top. Fresh parsley adds a nice green color. You can also serve them with dips. Hummus or yogurt dip pairs well. Mix and match as you like! This makes for a fun, tasty snack or appetizer. {{image_2}} You can change up the taste of honey garlic roasted chickpeas in fun ways. One idea is to make a sweet and spicy version. Just add some chili flakes to the honey garlic mixture. This gives the chickpeas a nice kick. It balances the sweet honey with heat. Another idea is to give them a Mediterranean twist. You can add dried herbs like oregano or thyme. Maybe even some lemon zest for freshness. This adds a whole new flavor and makes them feel light and bright. You have options for cooking honey garlic roasted chickpeas. The oven works great, but you can also try air frying. Air frying cooks them faster and can make them extra crispy. Both methods work, but air frying can cut down on cooking time. If you choose the oven, remember to preheat it to 400°F (200°C). This helps the chickpeas to roast evenly and become crunchy. These chickpeas can be a tasty snack on their own. But you can also pair them with dips or salads for a fun twist. Try serving them with hummus or tzatziki. They add a nice crunch to your favorite salads too. You can even sprinkle them on top of soups for added texture. Enjoy being creative with how you serve these delicious bites! To store your honey garlic roasted chickpeas, use airtight containers. Glass or plastic containers work well. Make sure to let them cool first. This helps keep them crispy. Store them at room temperature for short-term use. If you plan to keep them longer, consider the fridge. Cold storage can help them last a bit longer. Roasted chickpeas can stay fresh for up to a week at room temperature. To maintain their crunchiness, avoid moisture. Keep them away from humid areas. If stored in the fridge, they last about five days. Check for any signs of sogginess before eating. If they feel soft, they may need a re-crisp. To re-crisp your roasted chickpeas, use the oven. Preheat it to 375°F (190°C). Spread the chickpeas on a baking sheet in a single layer. Bake for about 10 minutes. Keep an eye on them to avoid burning. You can also use an air fryer for quick results. Set it to 350°F (175°C) and cook for around 5 minutes. Enjoy your crunchy snack! Yes, you can use dried chickpeas. First, soak them overnight in water. This helps soften them. Drain and rinse the chickpeas. Then, cook them in boiling water for about 1 to 1.5 hours. They should be tender but firm. After cooking, follow the same steps in the recipe. This way, you can enjoy fresh chickpeas with the honey garlic flavor. Honey garlic roasted chickpeas last about 3 to 4 days when stored properly. Keep them in an airtight container. Store them at room temperature to keep them crunchy. Avoid refrigeration, as it can make them soggy. If you want to keep them longer, consider freezing them. Just know that they may lose some crispiness after thawing. Yes, you can make this recipe vegan. Simply replace honey with maple syrup or agave nectar. Both options add sweetness without any animal products. Use the same amount as you would honey. This keeps the dish tasty and suitable for everyone. Enjoy the same great flavors while being vegan-friendly! Honey garlic roasted chickpeas are easy and fun to make. Start with the right ingredients like canned chickpeas and your choice of sweeteners. Follow simple steps to prepare, roast, and serve them perfectly. Use tips for crunch and flavor to enhance your dish. In summary, I hope this guide inspires you to try honey garlic roasted chickpeas. They are tasty and versatile, perfect for snacks or meals. Enjoy making this simple recipe and exploring different flavors!

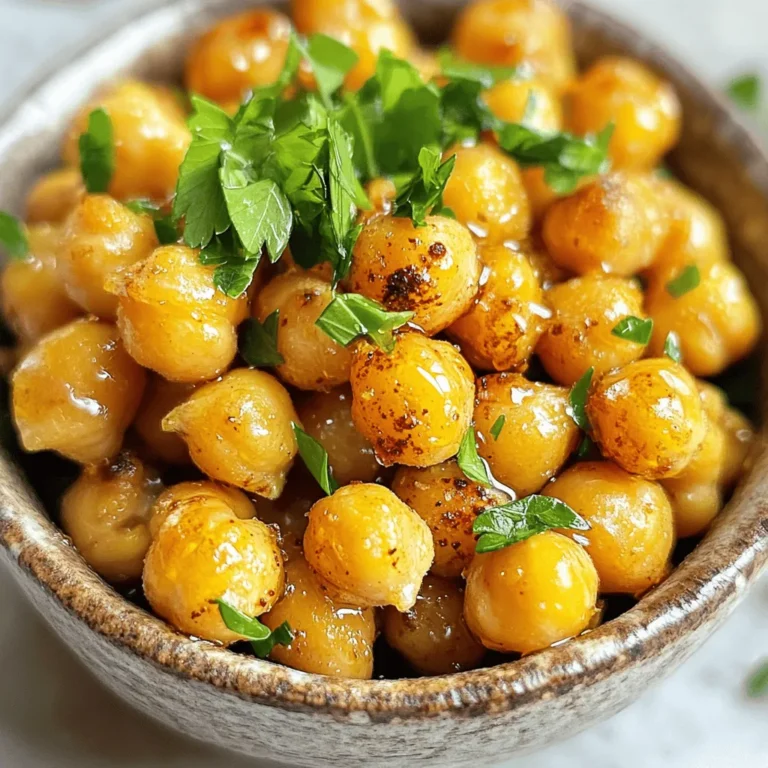
Honey Garlic Roasted Chickpeas Tasty Snack Idea

For this dish, you will need: - 4 large ripe tomatoes - 1 cup quinoa, rinsed - 2 cups vegetable broth - 1/2 cup feta cheese, crumbled - 1/2 cup Kalamata olives, pitted and chopped - 1/4 cup red onion, finely chopped - 1 cucumber, diced - 2 cloves garlic, minced - 1/4 cup fresh parsley, chopped - 2 tablespoons fresh lemon juice - 1 teaspoon dried oregano - Salt and pepper to taste - Olive oil for drizzling - Fresh mint for garnish (optional) These ingredients combine to create a fresh and vibrant meal. The quinoa adds protein and texture. The olives and feta give it that classic Greek flavor. To make your dish even better, consider these garnishes: - Fresh mint leaves - Extra crumbled feta cheese - A drizzle of olive oil - Lemon zest for brightness These garnishes enhance the dish’s look and taste. Mint adds a fresh kick, while lemon zest brings a bright finish. This recipe can fit many diets. Here are some notes: - Vegetarian: The dish is vegetarian due to the use of quinoa and vegetables. - Gluten-Free: Quinoa is naturally gluten-free, making this dish safe for those with gluten issues. - Dairy-Free Option: You can skip the feta cheese or use a dairy-free alternative. These options allow more people to enjoy this meal. It’s flexible and can fit various dietary needs. Start by rinsing 1 cup of quinoa under cold water. Rinsing helps remove bitter flavors. In a saucepan, combine the rinsed quinoa and 2 cups of vegetable broth. Bring the mix to a boil. After boiling, reduce the heat. Cover the pan and let it simmer for about 15 minutes. The quinoa will become fluffy when done. Make sure all the broth is absorbed. Next, take 4 large ripe tomatoes. Slice off the tops carefully. Use a spoon to scoop out the insides. Be gentle to keep the tomato shells intact. Save the pulp you remove. You will mix it with the filling later. This step makes space for the tasty quinoa mix. In a large mixing bowl, combine the cooked quinoa with 1/2 cup crumbled feta cheese. Add 1/2 cup chopped Kalamata olives, 1/4 cup finely chopped red onion, and 1 diced cucumber. Stir in 2 minced garlic cloves and 1/4 cup chopped parsley. Pour in 2 tablespoons of fresh lemon juice and sprinkle 1 teaspoon of dried oregano. Finally, add the pulp from the tomatoes. Mix everything well and season with salt and pepper to taste. Now it’s time to stuff the tomatoes. Carefully fill each hollowed tomato with the quinoa mixture. Pack it in lightly with a spoon. Place the stuffed tomatoes upright in a baking dish. Drizzle a little olive oil on top of each tomato. Cover the dish with foil and bake at 375°F (190°C) for 25 minutes. After that, remove the foil and bake for another 10 minutes. The tomatoes should be tender and slightly caramelized. Let them cool for a few minutes before serving. Enjoy your delicious Greek quinoa stuffed tomatoes! When picking tomatoes, look for large, ripe ones. They should feel heavy for their size. Check for smooth skin with no cracks. The color should be bright and even. Heirloom tomatoes are great for flavor. They add a unique taste to your dish. Always smell the tomato; it should smell fresh and sweet. Start with rinsing your quinoa. This removes the bitter taste. For every cup of quinoa, use two cups of broth. Bring it to a boil and then lower the heat. Cover the pot and let it simmer for about 15 minutes. The quinoa is ready when it looks fluffy and the liquid is gone. If it seems too hard, add a splash of water and cook a bit longer. Serve your stuffed tomatoes warm for the best flavor. They go well with a simple green salad. Add a drizzle of balsamic vinegar for a nice touch. A slice of crusty bread pairs well too. You can also enjoy them with a glass of white wine. If you want a fun twist, serve them with tzatziki sauce on the side. {{image_2}} To make your Greek quinoa stuffed tomatoes vegan, skip the feta cheese. Use a plant-based cheese instead. You can also add nutritional yeast for a cheesy flavor. This keeps the dish rich and tasty without dairy. This recipe is already gluten-free! Quinoa is a great choice since it’s a gluten-free grain. Just make sure that all your other ingredients, like vegetable broth and olives, are gluten-free too. You can add more ingredients to make the dish pop. Try adding pine nuts or walnuts for crunch. Chopped bell peppers bring a sweet taste. You can also mix in some sun-dried tomatoes for an extra layer of flavor. These additions make your stuffed tomatoes more exciting and delicious. To store leftover stuffed tomatoes, place them in an airtight container. Make sure they cool before sealing. Keep them in the fridge for up to three days. This keeps the flavors fresh and the tomatoes tender. You can freeze stuffed tomatoes for a longer shelf life. First, let the tomatoes cool completely. Wrap each tomato in plastic wrap or foil. Then, place them in a freezer-safe bag. They can stay frozen for up to three months. When you're ready to eat, just thaw them overnight in the fridge. To reheat stuffed tomatoes, preheat your oven to 350°F (175°C). Place the tomatoes in a baking dish. Cover them with foil to keep them moist. Heat for about 20-25 minutes, or until they are warmed through. You can also use a microwave for quicker reheating. Just be careful not to overcook them. Enjoy your tasty leftovers! You will know the stuffed tomatoes are done when they are soft and slightly caramelized. The cooking time is about 35 minutes total in the oven. The tomatoes should look tender but still hold their shape. If they seem too firm, bake them a bit longer. Yes, you can use other grains like rice or farro. Each grain has its own texture and flavor. Just adjust the cooking time based on the grain you choose. Make sure to cook the grains before mixing them with the filling. If you want to skip feta cheese, try using goat cheese or even vegan cheese. These options give you a different taste but still work well in the recipe. You can also use ricotta for a creamier texture. Absolutely! You can prepare the stuffing and hollow the tomatoes a day in advance. Just store the stuffing in the fridge. When you are ready, stuff the tomatoes and bake them. This makes for an easy and quick dinner. In this blog post, we covered how to make Greek quinoa stuffed tomatoes. You learned about the best ingredients, step-by-step instructions, and useful tips. We explored variations for special diets and how to store leftovers. Making these stuffed tomatoes is fun and easy. Remember, they can be a delicious meal for many diets. Enjoy creating this dish and sharing it with others!

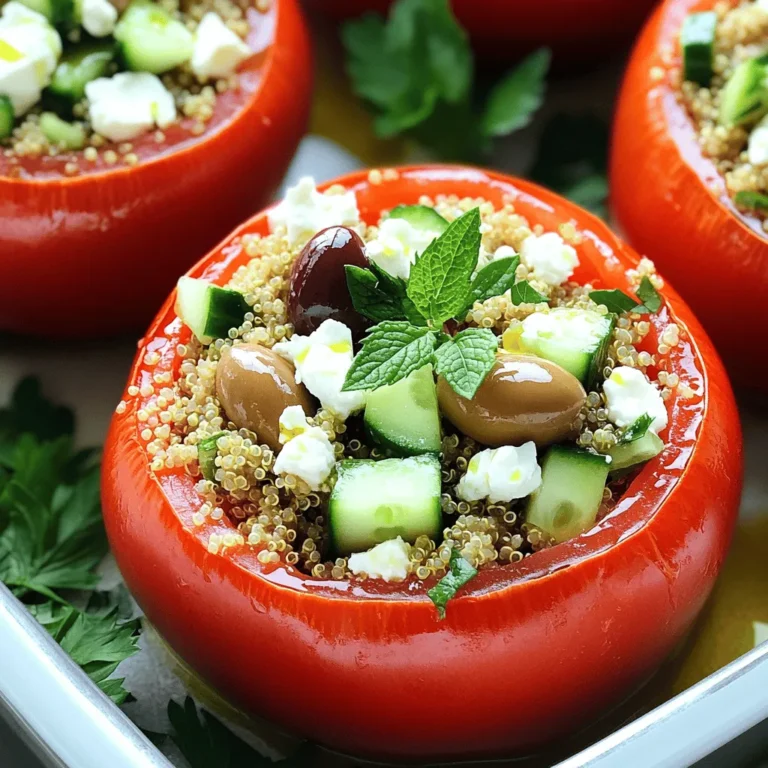
Greek Quinoa Stuffed Tomatoes Flavorful Dinner Idea

For a rich and tasty soup, gather the following key ingredients: - 1 package (16 oz) gnocchi - 1 tablespoon olive oil - 1 small onion, diced - 3 cloves garlic, minced - 1 medium carrot, diced - 1 medium zucchini, diced - 4 cups vegetable broth - 1 can (14 oz) diced tomatoes, undrained - 1 cup heavy cream - 3 cups fresh spinach, chopped - 1 teaspoon dried basil - 1 teaspoon Italian seasoning - Salt and pepper to taste - Grated Parmesan cheese for garnish These ingredients blend to create a warm and hearty dish. The gnocchi adds a soft texture, while the cream gives a lovely richness. You may already have some of these staples in your kitchen. Check for: - Olive oil - Salt - Pepper - Dried basil - Italian seasoning These items help build flavor and keep the soup simple yet delicious. When serving, consider these extra touches for a special flair: - Grated Parmesan cheese - Fresh basil leaves - A drizzle of olive oil These garnishes enhance the look and taste of your soup. Adding them can elevate your meal from good to great. Enjoy the creamy, comforting flavors! 1. Gather your ingredients. You need gnocchi, olive oil, onion, garlic, carrot, zucchini, vegetable broth, diced tomatoes, heavy cream, spinach, dried basil, Italian seasoning, salt, and pepper. 2. Dice the onion, carrot, and zucchini. Cut them into small, even pieces for even cooking. 3. Mince the garlic. This will bring out a strong flavor in your soup. 1. Heat a large pot. Add one tablespoon of olive oil over medium heat. 2. Add the diced onion and carrot. Sauté for about five minutes until they soften. 3. Stir in the minced garlic and zucchini. Cook for another two to three minutes until fragrant. 4. Pour in the vegetable broth. Add the undrained can of diced tomatoes and bring to a boil. 5. Add the gnocchi. Cook for three to five minutes until they float to the top. 6. Reduce the heat to low. Stir in the heavy cream, chopped spinach, dried basil, and Italian seasoning. 7. Let it simmer gently. Allow the soup to cook for another five minutes to meld the flavors. 8. Season to taste. Add salt and pepper as needed for flavor. 1. Serve hot. Ladle the soup into bowls. 2. Garnish with cheese. Add freshly grated Parmesan cheese on top of each bowl. 3. Enjoy your meal! This soup is perfect for a cozy night in. To make your soup extra creamy, start with heavy cream. This rich ingredient gives the best texture. Stir in the cream gently after cooking the gnocchi. Avoid boiling after adding the cream. This helps keep that lovely, smooth texture. For more flavor, add a dash of nutmeg. Just a pinch can elevate the soup. If you want it really creamy, blend a portion of the soup and mix it back in. Cook gnocchi in boiling water until they float. This shows they are done. For this soup, add them right to the pot. They soak up flavors as they cook. Don’t overcrowd the pot; work in batches if needed. After adding gnocchi to the soup, stir gently. This prevents them from breaking apart. One big mistake is overcooking the gnocchi. They turn mushy if cooked too long. Also, don’t rush adding the cream. Give time for the other ingredients to blend first. Forgetting to season can dull the flavor. Always taste and adjust with salt and pepper. Lastly, avoid using low-fat cream. It won't give the same rich, creamy finish. {{image_2}} If you want a vegetarian twist, skip the heavy cream. You can use coconut milk instead. It adds creaminess and a hint of sweetness. Another option is to use cashew cream for a nutty flavor. You can also replace the vegetable broth with a mushroom broth. This gives a deep, rich taste that enhances the soup. For those who want more protein, add cooked chicken or sausage. Just brown them in the pot before the veggies. You can also use beans like white beans or chickpeas. They add protein and make the soup heartier. If you prefer seafood, shrimp works great. Add it at the end to keep it tender. Feel free to mix in different veggies too. Bell peppers, kale, or broccoli can work well. Just chop them into small pieces so they cook evenly. You can also try adding sweet corn for a hint of sweetness. The more colorful your soup, the more fun it will be to eat. Each new ingredient brings its own unique taste. To store leftover soup, let it cool first. Pour it into an airtight container. This keeps the soup fresh. Label the container with the date. You can keep it in the fridge for up to three days. If you want to enjoy it later, freezing is a great option. For freezing, use freezer-safe containers. Leave some space at the top. The soup will expand as it freezes. You can freeze it for up to three months. When you are ready to eat, just thaw it in the fridge overnight. When reheating, pour the soup into a pot. Heat it over medium-low heat on the stove. Stir it often to avoid burning. If the soup is too thick, add a bit of broth or water. You can also use the microwave. Heat in short bursts, stirring in between. Enjoy your soup warm! To thicken your soup, you can add a few things. Try mixing in more heavy cream or a cornstarch slurry. A slurry is made by mixing equal parts cornstarch and water. You can also blend some of the soup using a blender. This will create a smooth texture and make it thicker. Yes, you can use frozen gnocchi in this recipe. There is no need to thaw them. Just add them straight to the pot when the soup is boiling. They will cook up just fine, adding that wonderful, soft texture. If you want a lighter option, you can use half-and-half or whole milk. For a dairy-free choice, try coconut milk or cashew cream. These will change the taste a bit but will still give you creaminess. This soup can last about 3 to 4 days in the fridge. Store it in an airtight container to keep it fresh. If you see any signs of spoilage, it’s best to toss it out. In this blog post, we explored how to make creamy Tuscan gnocchi soup. We covered the main ingredients, essential steps, and important tips. You learned how to achieve the perfect creamy texture, avoid common mistakes, and customize your soup. Remember to store leftovers properly for later enjoyment. This soup is easy to make and offers many tasty options. Dive in and create your own version today. You’ll enjoy every savory bite!

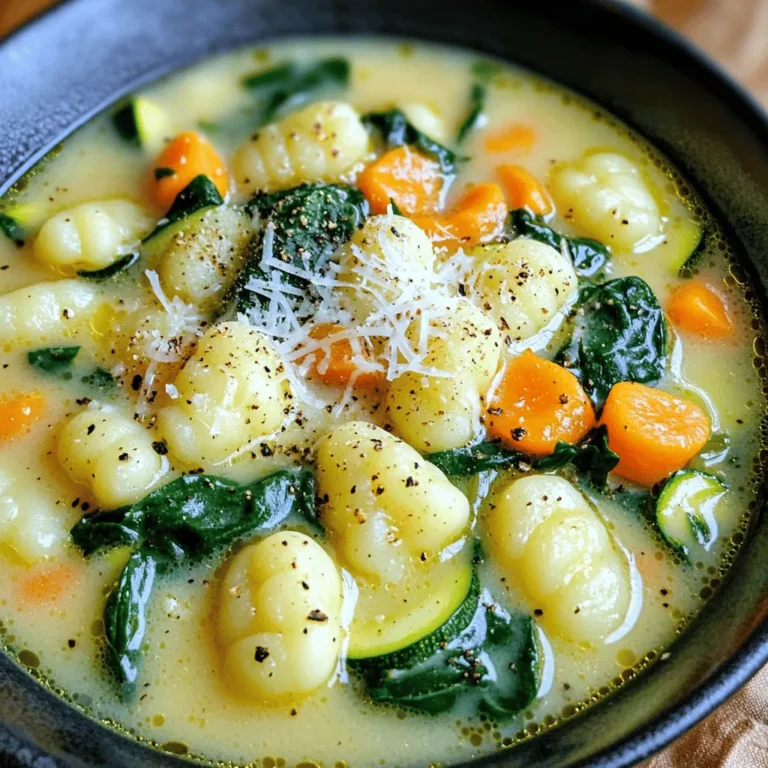
Creamy Tuscan Gnocchi Soup Flavorful and Hearty Dish

- 1 cup rolled oats - 1/2 cup creamy peanut butter - 1/4 cup honey or maple syrup - 1/2 cup almond flour - 1/4 cup chopped nuts (e.g., walnuts or almonds) - 1/4 cup dark chocolate chips or cacao nibs - 1/2 teaspoon cinnamon - 1/4 teaspoon salt - 2 tablespoons chia seeds (optional) - 1/4 cup shredded coconut (optional) These ingredients work together to give you tasty energy squares. The oats provide fiber, while peanut butter brings in protein. Honey or maple syrup gives the right sweetness. Almond flour adds a nice texture and nutrition. You can add extra ingredients to make your squares special. Here are some ideas: - 1/4 cup dried fruit like raisins or cranberries for sweetness - 1/4 cup seeds like pumpkin or sunflower for crunch - A scoop of protein powder for a protein boost These options let you change the flavor and health benefits. If you need to swap ingredients, here are some good choices: - Use sunflower seed butter instead of peanut butter for nut-free squares. - Replace honey with agave syrup if you want a vegan option. - Use coconut flour instead of almond flour for a different taste. These substitutions help you fit your diet needs while keeping the energy squares delicious. To make Peanut Butter Oatmeal Energy Squares, you start by gathering your ingredients. This recipe is easy and quick. You can whip it up in about 15 minutes. The first step is mixing your dry ingredients. This helps the flavors blend well. Next, you'll warm the peanut butter and honey together. This makes it easier to mix. Finally, you will press everything into a dish and chill it. 1. Grab a large mixing bowl. Add the rolled oats, almond flour, chia seeds, chopped nuts, dark chocolate chips, shredded coconut, cinnamon, and salt. 2. Use a spoon to stir these dry ingredients until they mix well. Make sure it's even. 3. In a microwave-safe bowl, warm the peanut butter and honey. Heat it for 20-30 seconds until it melts a bit. 4. Stir it until it's smooth. This step is key for good mixing. 5. Pour the warm peanut butter mixture over your dry mix. 6. Stir everything together until it becomes sticky and well combined. 1. Line an 8x8-inch baking dish with parchment paper. Leave some paper hanging over the sides. This helps you lift the squares out later. 2. Transfer the mixture into the dish. Press it down firmly and evenly. You can use a spatula or your hands for this. 3. Once it's packed tightly, place the dish in the refrigerator. Chill it for at least 1 hour. This helps the squares set. 4. After an hour, lift the mixture out using the parchment paper. Cut it into squares or bars as you like. Enjoy your Peanut Butter Oatmeal Energy Squares! To make your Peanut Butter Oatmeal Energy Squares, start with a large bowl. Mix the rolled oats, almond flour, chia seeds, chopped nuts, dark chocolate chips, shredded coconut, cinnamon, and salt. Stir well to combine these dry items. This step ensures even flavor in each bite. You want every piece to taste great. To get the right texture, warm the peanut butter and honey or maple syrup. Microwave them for about 20-30 seconds until they are slightly melted. This makes mixing easier. When you pour the warm mixture over the dry ingredients, it helps everything stick together. Press the mixture firmly into the baking dish. This step keeps the squares from crumbling. When it's time to serve, use a colorful plate. Arrange the energy squares neatly. Add a drizzle of peanut butter on top for a fun look. You can also sprinkle some shredded coconut over the squares. This adds a nice touch and makes them more appealing. Remember, we eat with our eyes first! {{image_2}} To make these energy squares vegan, swap honey for maple syrup. This change keeps the sweetness while fitting a vegan diet. Use smooth peanut butter or any nut butter you enjoy. You can also add more chia seeds to boost nutrition. This option makes a yummy treat for everyone! For gluten-free energy squares, use certified gluten-free rolled oats and almond flour. These swaps ensure you stay gluten-free without losing flavor or texture. You can also add gluten-free nuts and chocolate chips. Always check labels to avoid hidden gluten in products. Enjoy these tasty squares worry-free! Feel free to mix in fun flavors! Here are some ideas: - Fruits: Add dried cranberries, raisins, or chopped dates for sweetness. - Spices: A pinch of nutmeg or vanilla extract can add depth. - Seeds: Pumpkin seeds or sunflower seeds make great crunchy additions. - Nut Butters: Try almond or cashew butter for a twist. Experiment with these ideas to find your favorite combo. Each variation brings a new taste! You want to keep your Peanut Butter Oatmeal Energy Squares fresh and tasty. After cutting them, place the squares in a single layer in a container. If you stack them, use parchment paper between layers. This way, they won’t stick together. These energy squares last about a week in the fridge. If you want to store them longer, freeze them. Wrap each square in plastic wrap or aluminum foil, then place them in a freezer-safe bag. They can last up to three months in the freezer. The best containers for your energy squares are airtight ones. Glass containers work well, but plastic ones are fine too. Just ensure the lid seals tightly. This helps keep them fresh and prevents odors from other foods. Peanut Butter Oatmeal Energy Squares are tasty snacks packed with nutrients. They mix oats, peanut butter, and honey for a sweet treat. Each square gives you energy, making them perfect for busy days. You can eat them for breakfast, lunch, or a snack. They are easy to make and fun to share. You can swap peanut butter with sunflower seed butter or almond butter. Both options keep the squares creamy and tasty. You can also try tahini for a nut-free twist. Just follow the same steps in the recipe. The taste will change a bit, but they will still be great. Yes! You can use agave syrup or brown rice syrup as alternatives. Both will add sweetness and keep the texture nice. If you prefer, you can use stevia or monk fruit for a low-calorie option. Just remember to adjust the amount based on how sweet you like it. Peanut butter oatmeal energy squares are easy and fun to make. We explored the key ingredients, mixing steps, and baking tips for perfect texture. You can even customize them with your favorite flavors or dietary needs. Storing them right helps you enjoy these snacks longer. Try these squares for a tasty treat or quick energy boost. Remember, experimenting with flavors makes cooking enjoyable. Get creative and make them your own!

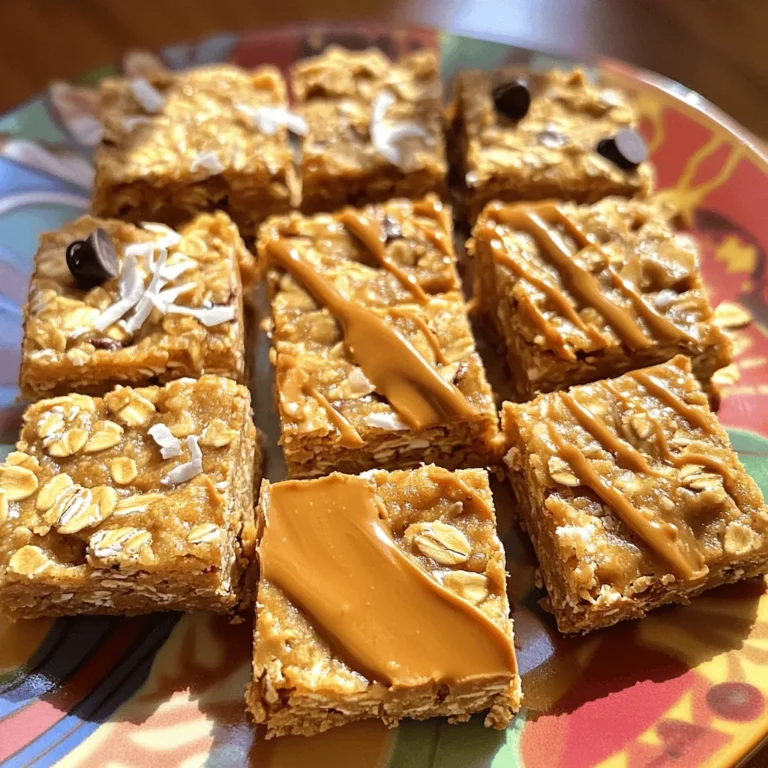
Peanut Butter Oatmeal Energy Squares Simple Recipe

- Flatbread options: You can use store-bought flatbread or make your own. Store-bought is quick and easy. Homemade flatbread can have a special touch. Naan also works great for this recipe. - Onions: I prefer using yellow onions for their sweet flavor. Sweet onions, like Vidalia, also work well. If you want a sharper taste, red onions can add a nice twist. - Olive oil: It helps to cook the onions evenly. The oil adds richness and depth to the dish. Use extra virgin olive oil for the best flavor. - Goat cheese overview: Goat cheese brings a creamy texture. It adds a tangy flavor that pairs well with sweet onions. Crumbled goat cheese melts beautifully on the flatbread. - The importance of arugula: Fresh arugula adds a peppery note. It balances the sweetness of the caramelized onions. Arugula also adds color and freshness to the dish. - Using balsamic glaze for flavor enhancement: Balsamic glaze adds a sweet and tangy kick. Drizzling it on top brings all the flavors together. It gives the flatbread an elegant finish. First, heat olive oil in a large skillet over medium heat. Add the sliced onions, salt, and sugar. Stir well to coat the onions. Cooking onions takes time. Stir them every few minutes. Let them cook for 20 to 25 minutes. You want them to turn golden brown. The sugar helps the onions become sweet. Salt pulls out moisture, making them soft. This step is key for great flavor. While the onions cook, preheat your oven to 400°F (200°C). This ensures even baking. Next, take your flatbread and place it on a baking sheet. After the onions are ready, spread them evenly over the flatbread. Make sure to cover it well. Crumble the goat cheese on top of the onions. This adds a creamy texture and tangy flavor. Now it's time to bake! Place the baking sheet in the preheated oven. Bake for about 10 to 12 minutes. Look for the edges to turn golden brown. The cheese should be soft and slightly melted. This shows that it’s ready. Once done, take it out and let it cool for a minute. You want to let the flavors settle before serving. To get the best caramelization, take your time. Cook the onions for 20-25 minutes. Stir them often to avoid burning. Keep the heat at medium. If it’s too high, the onions will cook too fast. They will not caramelize well. Common mistakes include rushing the cooking time. If you do not let the onions cook long enough, they won’t develop that rich, sweet flavor. Make sure you add the salt and sugar at the start. This helps draw out moisture and enhances sweetness. To add more flavor, consider spices like thyme or rosemary. Both herbs pair well with goat cheese. You may also sprinkle a bit of red pepper flakes for heat. Make your flatbread visually appealing. Use fresh arugula on top for a pop of green. Drizzle balsamic glaze for extra color and flavor. The contrast of colors makes your meal more inviting. {{image_2}} You can change up the cheese on your flatbread. Feta or ricotta can work well. For a sharper taste, try blue cheese. Each cheese brings a unique flavor. Consider extra toppings to add variety. Sautéed mushrooms or bell peppers add great taste. You can also add cooked chicken or prosciutto for protein. Fresh herbs like thyme or basil give a nice touch. If you need a gluten-free option, use gluten-free flatbread. Many stores offer good choices. You can also make your own with almond or coconut flour. For a vegan version, swap goat cheese for a nut-based cheese. Cashew cheese or a store-bought vegan cream cheese works well. Use maple syrup in place of balsamic glaze for a sweet touch. To keep your flatbread fresh, you should store leftovers in the fridge. Wrap it well in plastic wrap or place it in an airtight container. This helps to keep it dry and fresh. If you leave it uncovered, it can become hard or soggy. To avoid sogginess, place a paper towel in the container. This will soak up extra moisture. When you’re ready to enjoy leftovers, reheating is key. For the best texture, use the oven. Preheat your oven to 350°F (175°C). Place the flatbread on a baking sheet. Heat it for about 10 minutes. This will warm it through and keep the edges crispy. You can also use a skillet for reheating. Heat the skillet over medium heat, then place the flatbread in it for about 5 minutes on each side. This method also keeps the flatbread nice and crispy. To get a crispy flatbread, follow these tips: - Use a baking stone or a preheated baking sheet. - Bake at a higher temperature, around 400°F (200°C). - Brush the flatbread lightly with olive oil before baking. - Bake until the edges are golden brown. These steps help create a perfect crunch that everyone loves. The key is heat and a good surface. You can use pre-cooked onions, but there are pros and cons. - Pros: They save time and effort. - Cons: They may lack the deep flavor of caramelized onions. If you choose this shortcut, consider adding a bit of sugar. This can help mimic the sweetness of freshly cooked onions. Pair your flatbread with these tasty side dishes: - A fresh green salad with vinaigrette. - Roasted vegetables for a warm option. - A bowl of soup, like tomato or butternut squash. These sides complement the flatbread well. They add color and flavor to your meal, making it more enjoyable. This blog post covered how to create delicious flatbread. We explored essential ingredients, like different onions and the role of olive oil. You learned how to prepare and assemble flatbread, bake it perfectly, and enhance flavors with toppings. Remember, small changes can lead to big flavors. Try different cheeses or toppings to make your dish unique. You can store and reheat your leftovers with ease. Enjoy your culinary journey and happy cooking!

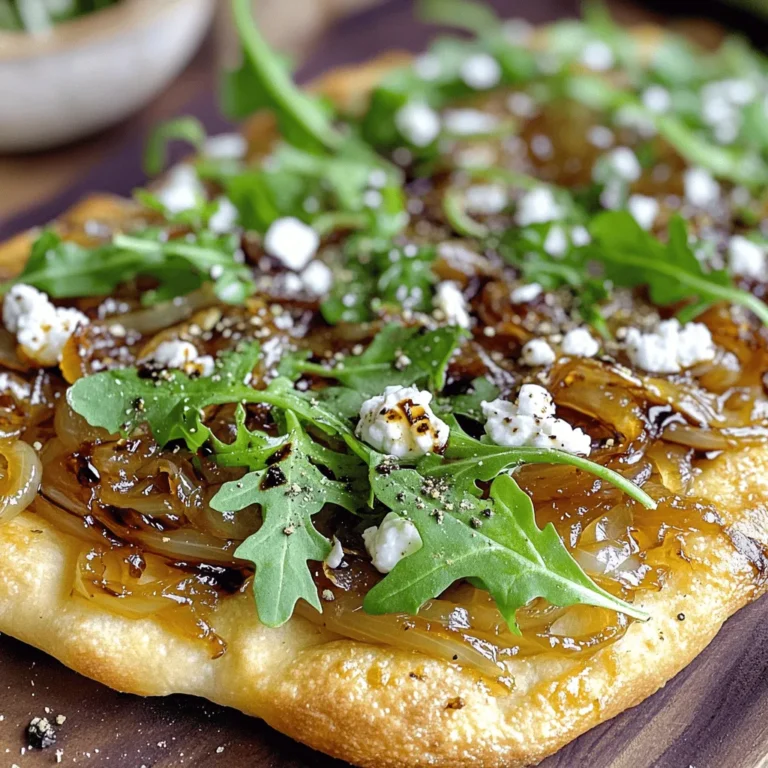
Caramelized Onion Goat Cheese Flatbread Delight

- 2 pounds chicken wings - 1/4 cup olive oil - 1 tablespoon garlic powder - 1 teaspoon onion powder - 1 teaspoon paprika - 1 teaspoon black pepper - 1 teaspoon salt - 1 cup grated Parmesan cheese - 1/4 cup fresh parsley, chopped - 2 tablespoons lemon juice - 1/2 teaspoon red pepper flakes (optional for heat) - Try adding 1 teaspoon of cayenne pepper for more heat. - Use fresh garlic instead of garlic powder for a bolder taste. - Mix in some Italian seasoning for an herby twist. - Large mixing bowl for combining ingredients. - Baking sheet lined with parchment paper or foil for easy cleanup. - Measuring cups and spoons to ensure accuracy. - A pair of tongs for flipping the wings while baking. - Small bowl for mixing the garlic Parmesan sauce. These tools make the cooking process smooth and fun. You can easily find these items in most kitchens. Using fresh ingredients elevates the flavor of your wings. Enjoy creating this tasty dish! Start by preheating your oven to 400°F (200°C). This step is key for crispy wings. Next, line a baking sheet with parchment paper or aluminum foil. This makes cleanup easy. Make sure to use a large sheet, so the wings have space. In a large bowl, combine the olive oil, garlic powder, onion powder, paprika, black pepper, and salt. Mix these ingredients well until combined. Then, add the chicken wings. Toss them gently until every wing is coated with the mixture. This ensures the wings will be packed with flavor. Spread the wings in a single layer on the prepared baking sheet. This step is crucial for even cooking. Bake the wings in the oven for 40-45 minutes. Flip them halfway through cooking for even crispiness. Watch for a golden brown color; that's when they are done. While the wings bake, prepare the garlic Parmesan sauce. In a small bowl, mix the grated Parmesan cheese, chopped parsley, lemon juice, and red pepper flakes if you like heat. This sauce adds a rich, tangy flavor. When the wings are out of the oven, toss them in this sauce until well coated. Return the wings to the oven for 5 more minutes. This allows the cheese to melt and stick. Enjoy your crispy, flavorful wings! To get crispy wings, use high heat. Baking at 400°F (200°C) works well. Make sure to coat the wings in olive oil. This keeps them moist while they cook. Spread them out on the baking sheet. Avoid stacking them. This helps air circulate and makes them crispy. Flip the wings halfway through cooking. This gives both sides a chance to brown. Most home ovens cook well at 400°F (200°C). If you have a convection oven, bake for 35-40 minutes. The fan helps cook the wings faster. For electric ovens, stick to 40-45 minutes. Always check for a golden brown color. The wings should look crispy and smell amazing. Use a meat thermometer if you want to be sure. The wings should reach an internal temperature of 165°F (74°C). One mistake is not drying the wings first. Pat them dry with paper towels. This helps them get crispier. Another mistake is overcrowding the baking sheet. Give the wings space. This helps them cook evenly. Don’t forget to toss the wings in the garlic Parmesan mix right after baking. If you wait too long, the cheese won’t stick well. Finally, always watch the wings closely. They can go from golden to burnt quickly! {{image_2}} To add some heat, try spicy garlic Parmesan wings. Start with the basic recipe. Then, mix in red pepper flakes. You can use one teaspoon for mild spice or up to one tablespoon for a big kick. This spicy twist adds an exciting flavor to your wings. You can also use hot sauce in the garlic Parmesan mixture if you want. Just remember to balance the heat with the cheese for a tasty treat. Herbs can make your wings even better. Add fresh herbs like rosemary or thyme in the garlic Parmesan sauce. You can mix in one tablespoon of either herb for a nice flavor. If you prefer dried herbs, use half a teaspoon instead. This will give your wings a lovely aroma and a fresh taste. You can also try a mix of herbs. Blend them with the cheese for a unique twist. While Parmesan is great, you can switch it up. Try using Asiago cheese for a sharper flavor. Grate it just like Parmesan. You can also mix mozzarella with Parmesan for a creamy texture. This will create a fun cheese pull when you take a bite. Experiment with different cheeses to find the perfect match for your taste. Each option brings a new and exciting flavor to the wings. After enjoying your baked garlic Parmesan wings, you may have some left. To store them, let the wings cool to room temperature. Place them in an airtight container. This way, they stay fresh and tasty. If you have a lot, consider separating layers with parchment paper. This helps prevent sticking. Store the container in the fridge for up to three days. When you're ready to eat the wings again, reheating is key. Preheat your oven to 375°F (190°C). Spread the wings in a single layer on a baking sheet. Bake for about 10-15 minutes. This will help them regain their crispiness. You can also use an air fryer for about 5-7 minutes. Both methods will keep your wings delicious! For long-term storage, freezing is a great option. First, let the wings cool completely. Then, place them in a freezer-safe bag. Remove as much air as possible before sealing. Label the bag with the date, so you remember when you froze them. They can last in the freezer for up to three months. When you’re ready to eat, thaw them in the fridge overnight before reheating. Yes, you can use frozen chicken wings. Just be sure to thaw them first. This helps with even cooking and crispiness. To thaw, place them in the fridge overnight or run them under cold water for a quick thaw. Once thawed, follow the recipe as usual. This way, you still get that tasty garlic and Parmesan flavor. Cook chicken wings at 400°F (200°C). This temperature makes them crispy on the outside and juicy inside. Preheating your oven is key. It ensures even cooking and a nice brown color. Line your baking sheet with parchment paper for easy cleanup and better results. Check the internal temperature of the wings. They should reach 165°F (74°C) when done. Use a meat thermometer to confirm this. The wings should also look golden brown and crispy. If you flip them halfway through baking, it helps them cook evenly. Enjoy your delicious wings! This blog shared how to make delicious chicken wings at home. You learned about key ingredients, optional flavors, and the right tools. The step-by-step guide ensured your wings come out crispy and tasty. I provided tips to avoid common mistakes, cooking time advice, and various flavor options to try. In the end, whether you store them or try a spicy twist, these wings make a great meal. Enjoy your cooking adventure!

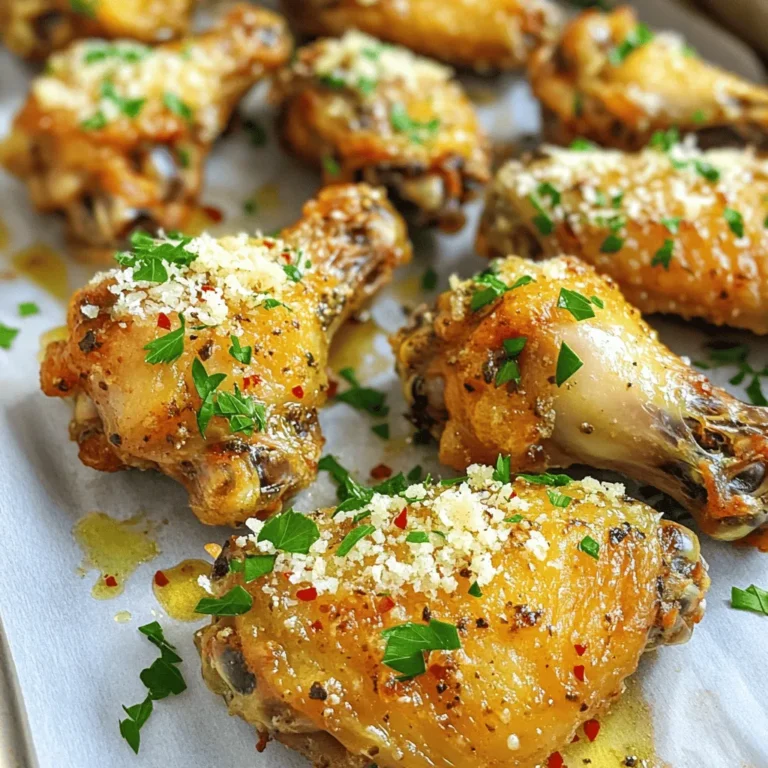
Baked Garlic Parmesan Wings Crispy and Flavorful Delight

- 2 large apples (Granny Smith or Honeycrisp) - 1 teaspoon lemon juice - 1 teaspoon ground cinnamon - 1/4 cup granulated sugar - 1 tablespoon all-purpose flour - 1 package refrigerated pie crusts (2 crusts) - 1 egg (for egg wash) - 1 tablespoon milk - Pinch of salt To make these tasty cinnamon apple hand pies, you need fresh ingredients. I love using Granny Smith or Honeycrisp apples. They bring the right balance of sweet and tart. You will also need lemon juice. This keeps the apples from browning. Ground cinnamon adds warmth and spice to the filling. Granulated sugar sweetens the pie, while flour helps thicken the mix. For the crust, I always grab a package of refrigerated pie crusts. They save time and taste great! You will also need an egg for the egg wash. This gives your pies a nice golden color when baked. A splash of milk adds richness to the wash. Finally, a pinch of salt balances the sweetness of the filling. Gathering these ingredients is the fun part. You can already imagine how tasty your hand pies will be! {{ingredient_image_1}} To start, grab a mixing bowl. Dice the apples into small pieces. I prefer Granny Smith or Honeycrisp for their tartness. Add 1 teaspoon of lemon juice to keep the apples fresh. Sprinkle in 1 teaspoon of ground cinnamon, 1/4 cup of granulated sugar, 1 tablespoon of flour, and a pinch of salt. Mix these ingredients gently until the apples are well-coated. Let this mixture sit for 10 to 15 minutes. This step allows the flavors to blend and the apples to release some juices. Next, preheat your oven to 400°F (200°C). Line a baking sheet with parchment paper to prevent sticking. Now, take your package of refrigerated pie crusts. Unroll them on a lightly floured surface. Roll them out gently if needed. Cut each crust into quarters. You will have eight squares ready to fill. Place a generous spoonful of the apple filling in the center of each pastry square. Be careful not to overfill, or they will burst while baking. Fold each square diagonally to create a triangle. Press the edges together firmly with your fingers. Then, crimp the edges with a fork to seal them securely. This ensures no filling escapes while baking. In a small bowl, whisk together 1 egg and 1 tablespoon of milk to make the egg wash. This will give your hand pies a lovely golden color. Place the filled and sealed hand pies on the prepared baking sheet. Brush the tops of each pie with the egg wash. For extra sweetness, sprinkle a little sugar on top. Bake your hand pies in the preheated oven for 20 to 25 minutes. Look for a golden brown color and bubbly filling to know they are done. Enjoy the delightful aroma as they bake! When making cinnamon apple hand pies, the type of apple matters. I love using Granny Smith apples. They are tart and hold their shape well when baked. This gives a nice contrast to the sweet filling. On the other hand, Honeycrisp apples are sweet and juicy. They add a great texture to the pies. Mixing both types can create a fun flavor burst. Using refrigerated pie crusts saves time. Make sure to let them sit at room temperature for a few minutes. This makes them easier to roll out. When rolling, keep a little flour on your surface to avoid sticking. A soggy bottom can ruin your hand pies. To prevent this, sprinkle a bit of flour on the filling before sealing. This absorbs extra moisture. Look for a golden-brown color when your hand pies are done. A nice shine means the egg wash worked well. If you see bubbling filling, that’s a good sign too! Once they are out of the oven, let them cool for a few minutes. This helps the filling set and keeps the crust crisp. Pro Tips Choose the Right Apples: For the best flavor and texture, opt for tart apples like Granny Smith or balanced varieties like Honeycrisp. Don’t Overfill the Pies: Ensure you leave enough space at the edges to seal the pies properly, preventing any filling from leaking out during baking. Experiment with Spices: Feel free to add nutmeg, allspice, or even a hint of vanilla extract to the apple filling for a unique flavor twist. Store Properly: To keep your hand pies fresh, store them in an airtight container at room temperature for up to 2 days or refrigerate for longer shelf life. {{image_2}} You can easily change the flavor of your hand pies. Adding nuts or raisins to the filling gives a nice crunch. Try walnuts or pecans for a rich taste. Raisins add a sweet twist that pairs well with apples. You can also mix in different spices. Nutmeg adds warmth, while ginger brings a bright kick. These spices can enhance the apple flavor and make your hand pies unique. Feel free to experiment and find your favorite mix. If you need gluten-free hand pies, use gluten-free pie crusts. Many brands offer great options that taste just like regular dough. You can also make your own crust using gluten-free flour. For a vegan option, skip the egg wash. Use a mix of plant milk and a bit of maple syrup instead. This will give your pies a lovely glaze without the egg. These swaps keep your hand pies delicious for everyone. Serving your hand pies warm is best. They taste amazing with a scoop of ice cream. Vanilla or caramel ice cream adds a sweet creaminess that balances the spices. You can also serve them with whipped cream. This adds lightness and a touch of sweetness. Another fun idea is to drizzle caramel or chocolate sauce over the top. This adds a rich touch that makes your hand pies feel extra special. Enjoy these delicious treats with your favorite sides! To keep your cinnamon apple hand pies fresh, store them properly. The best method for refrigeration is to let them cool completely. After cooling, place the pies in an airtight container. This helps keep them from getting soggy. You can also use plastic wrap to cover them tightly. Recommended storage containers include: - Airtight plastic containers - Glass containers with lids - Resealable plastic bags (remove as much air as possible) You can freeze hand pies before or after baking. For freezing before baking, prepare the pies as usual. Then, place them on a baking sheet. Put the sheet in the freezer until the pies are firm. After they freeze, transfer them to a freezer-safe bag. This makes it easy to pull out as many as you want later. If you want to freeze them after baking, let the pies cool first. Then, wrap them in plastic wrap and place them in a freezer-safe bag. For reheating frozen pies, follow these steps: 1. Preheat your oven to 375°F (190°C). 2. Remove the pies from the freezer and unwrap them. 3. Place the pies on a baking sheet. 4. Bake for 15-20 minutes or until heated through. This will help keep the crust crispy and the filling warm. Enjoy your delicious hand pies any time! For the best hand pies, I recommend using Granny Smith or Honeycrisp apples. Granny Smith apples offer a nice tartness that balances the sweet filling. Honeycrisp apples are sweet and juicy, adding great flavor and texture. The mix of these apples gives your hand pies a perfect taste and crunch. Yes, you can make the filling in advance! Just prepare the filling as directed and store it in an airtight container. Keep it in the fridge for up to two days. This lets the flavors develop and makes assembly faster when you're ready to bake. Just remember to let it come to room temperature before filling the pastry. To keep your hand pies crispy, avoid moisture. When storing, place them in a cool, dry spot. Use a paper towel in the container to absorb any moisture. For reheating, use an oven instead of a microwave. This helps keep the crust flaky and delicious. Bake them at 350°F for about 10 minutes to restore their crispiness. This guide shows you how to create delicious apple hand pies. You learned about the right ingredients and step-by-step instructions. Choosing the best apples and perfecting the dough are key. I also shared fun variations and storage tips to keep them fresh. Now, it’s time for you to enjoy making these treats. They are easy and so tasty! Happy baking!

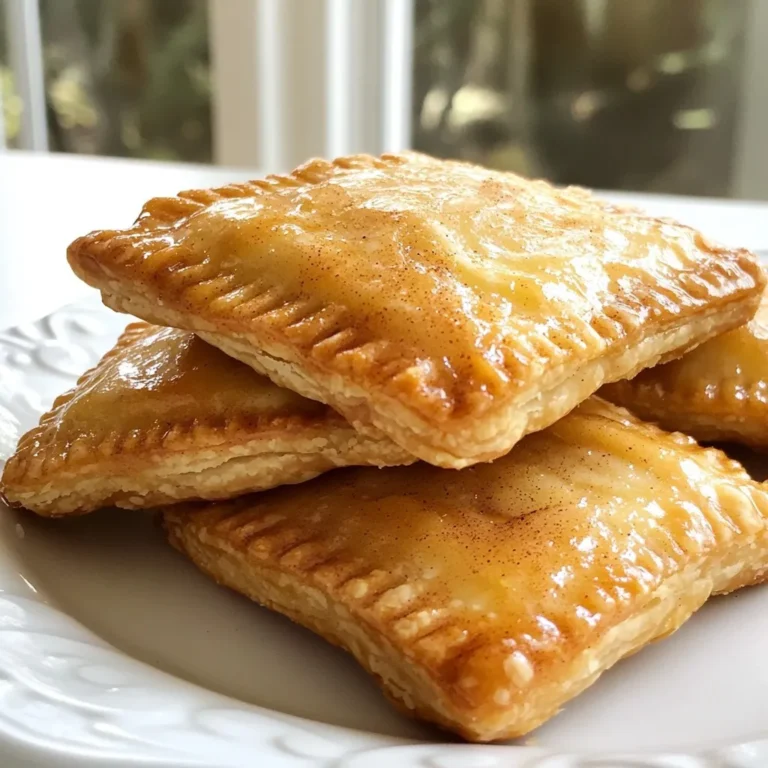
Cinnamon Apple Hand Pies Irresistible Homemade Delight

- 2 boneless, skinless chicken breasts - 1 cup fresh strawberries, sliced - 4 cups mixed greens - 1/4 cup balsamic vinegar - 2 tablespoons olive oil - 1 tablespoon honey - 1 teaspoon Dijon mustard - 1/3 cup feta cheese, crumbled - Toasted walnuts or pecans for garnish - Salt and pepper to taste For this salad, you need lean chicken, fresh strawberries, and mixed greens. The chicken gives protein, while strawberries add sweetness. Mixed greens offer a nice crunch and freshness. The dressing pulls it all together. Balsamic vinegar gives a tangy kick. Olive oil adds richness. Honey balances the tartness, and Dijon mustard gives a punch. If you want to enhance flavors, feta cheese adds creaminess. Nuts provide a crunchy finish. Salt and pepper bring everything to life. You can mix and match these ingredients as you like. Enjoy your cooking! First, season the chicken breasts with salt and pepper. This simple step adds flavor. Next, heat a skillet over medium heat. Add one tablespoon of olive oil to the skillet. Cook the chicken for about six to seven minutes on each side. You want it to be fully cooked and golden brown. After cooking, remove the chicken from the heat and let it cool. Slice the chicken into strips for easy mixing. To make the dressing, grab a small bowl. Whisk together balsamic vinegar, one tablespoon of olive oil, honey, and Dijon mustard. Mix until smooth and well combined. Emulsifying the dressing helps all the flavors blend together. This step is key for a tasty salad. Now it’s time to build your salad! Start with a large salad bowl. Place the mixed greens in the bowl as the base. Next, scatter the sliced strawberries over the greens. Then add the sliced chicken on top. Finally, sprinkle crumbled feta cheese across the salad. Drizzle the balsamic dressing over the salad. Use a spoon to ensure even coverage. Gently toss the salad to mix all the ingredients without bruising the strawberries. If you like, garnish with toasted walnuts or pecans for extra crunch. Enjoy your fresh and tasty treat! To cook chicken well, start by seasoning it with salt and pepper. This simple step adds great flavor. Use medium heat in your skillet. Add one tablespoon of olive oil. Cook the chicken for 6 to 7 minutes on each side. Look for a golden brown color, and make sure it is fully cooked. To avoid dry chicken, let it rest for a few minutes after cooking. This helps the juices stay inside the meat. You can boost the flavor of your dressing by adding herbs or spices. Try fresh basil, thyme, or oregano for a tasty twist. If you want a sweeter dressing, you can swap honey for maple syrup. For a zesty kick, use spicy mustard instead of Dijon. These small changes can create a new flavor profile for your salad. This salad pairs well with crusty bread or a light soup. If you want extra protein, serve it with a side of quinoa. For meal prep, you can make this salad ahead of time. Just keep the dressing separate until you are ready to eat. This keeps your greens fresh and crisp. {{image_2}} You can change this salad based on the season. Adding other fruits can bring new flavors. Try peaches or blueberries in summer. In fall, add apples for crunch. Each fruit adds its own sweet touch. For greens, you don’t have to stick to one type. Spinach works well, but so does arugula. You can even use kale for a hearty base. Mixing different greens adds color and taste. If you want to switch proteins, grilled shrimp makes a great option. Just cook them until they turn pink. Tofu is another choice for a plant-based twist. You can marinate it for extra flavor. Using rotisserie chicken is a smart time-saver. It’s already cooked, so just shred it and toss it in. This makes meal prep quick and easy. For gluten-free diners, ensure your dressing is safe. Check labels on vinegar and mustard. Most are gluten-free, but always verify. If you need a vegetarian or vegan option, skip the chicken and feta. Use chickpeas for protein instead. They add a nice texture and flavor. Swap honey for agave syrup to keep it vegan. To keep your Balsamic Strawberry Chicken Salad fresh, store it in an airtight container. This helps prevent air from making the greens wilt. If you have extra dressing, store it separately. This way, the salad stays crisp, and the flavors stay bright. When reheating leftover chicken, place it in a skillet over low heat. Add a splash of water to keep it moist. Cover the skillet to trap steam, which helps warm the chicken gently. Avoid microwaving as it can make the chicken tough. Always add the chicken back to the salad when you are ready to eat. This salad can last up to three days in the fridge. Make sure to check for any signs of spoilage. Look for a sour smell or slimy greens. If you see these signs, it’s best to throw it away. Enjoy your salad within the first two days for the best taste! You can use frozen strawberries in a pinch. However, they will change the salad's flavor and texture. Frozen strawberries lose some firmness when thawed. They can become mushy and may not taste as bright. I suggest using fresh strawberries for the best taste and crunch. To make this salad vegan, swap the chicken for grilled tofu or chickpeas. You can replace feta cheese with a vegan cheese or avocado. For the dressing, use maple syrup instead of honey. These swaps will keep the salad delicious and plant-based. This salad pairs well with crusty bread or a light soup. You can also serve it with a refreshing drink, like iced tea or lemonade. These options balance the salad’s sweet and savory flavors perfectly. You can prep this salad in advance. Cook the chicken and store it in the fridge. Keep the salad greens and strawberries separate until serving. Mix the dressing in a jar and shake it when you are ready to eat. This way, everything stays fresh and tasty. This blog shared a simple and tasty Balsamic Strawberry Chicken Salad recipe. We covered key ingredients, preparation steps, and helpful tips. Making this salad is easy and fun. You can change the flavors or ingredients based on what you have. Keep leftovers fresh by storing them right. Enjoy your healthy meal with friends or family. Whether you’re cooking for yourself or a group, this salad is sure to please. Get creative and have fun in the kitchen!

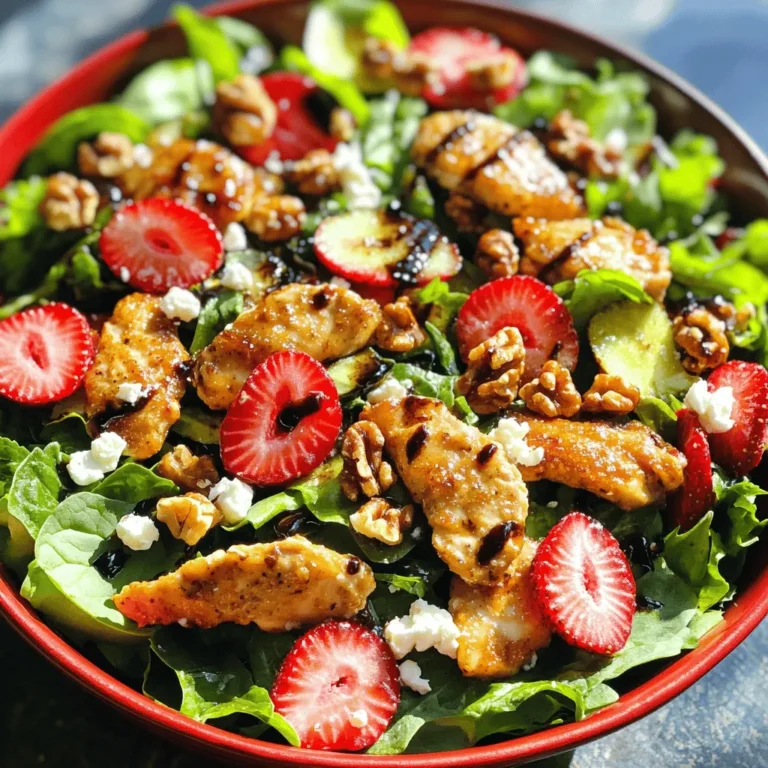
Balsamic Strawberry Chicken Salad Fresh and Tasty Treat

PREV 1 … 28 29 30 … 53 NEXT
cozy citrus kitchen

explore

DessertsDinnerAppetizersDrinks

Our Policies

  • Cookie Policy
  • Copyright Policy
  • Disclaimer
  • GDPR Policy
  • Terms Of Use
Back to Top
  • About
  • Contact Us
  • Privacy Policy
© 2025 cozy citrus kitchen