FREE DINNER EBOOK! Get your copy!
  • Cookie Policy
  • GDPR Policy
  • Disclaimer
  • Terms Of Use
  • Visit my other site: Fun Cookie Recipes
cozy citrus kitchen
  • Home
  • Dinner
  • Desserts
  • Drinks
  • Appetizers
  • Contact
  • About
  • Privacy Policy
  • Home
  • Dinner
  • Desserts
  • Drinks
  • Appetizers
  • Contact
  • About
  • Privacy Policy
  • Cookie Policy
  • GDPR Policy
  • Disclaimer
  • Terms Of Use
Visit my other site: Fun Cookie Recipes

HOME / CATEGORIES /

Latest

- 1 cup natural peanut butter (creamy or crunchy) - 1/2 cup honey or maple syrup - 1 cup rolled oats - 1/2 cup ground flaxseed - 1/2 cup dark chocolate chips - 1 teaspoon vanilla extract - A pinch of salt Each ingredient plays a key role in this no-bake treat. Peanut butter gives a rich taste and smooth texture. Honey or maple syrup adds the right amount of sweetness. Rolled oats bring fiber and help bind the mixture. Ground flaxseed is a great source of omega-3s and adds nutrition. Dark chocolate chips give a sweet, creamy layer on top. Vanilla extract boosts the flavor, while salt balances the sweetness. Together, these ingredients create a delicious and satisfying snack. You can easily adapt this recipe to fit your needs. For a vegan option, use maple syrup instead of honey. If you're nut-free, try sun butter or soy nut butter. You can swap rolled oats for gluten-free oats if needed. If you prefer a different sweetener, agave syrup works well too. Feel free to change the chocolate chips to white or milk chocolate, depending on your taste. Each swap can give you a new twist on this classic treat. Start by grabbing a medium bowl. Add 1 cup of natural peanut butter and 1/2 cup of honey or maple syrup. Mix them well until the blend is smooth. Next, include 1 cup of rolled oats, 1/2 cup of ground flaxseed, 1 teaspoon of vanilla extract, and a pinch of salt. Stir until everything forms a sticky dough. This dough is the base of your bars. For the topping, use a small microwave-safe bowl. Place 1/2 cup of dark chocolate chips in it. Heat the bowl in the microwave in 30-second bursts. Stir after each interval. Keep doing this until the chocolate melts and is smooth. This melted chocolate will give your bars a rich finish. Line an 8x8-inch baking pan with parchment paper. Make sure the paper hangs over the sides. This helps with easy removal later. Now, take your sticky mixture and transfer it into the pan. Press it down evenly using a spatula or your hands. It is key to pack it tightly. A firm base ensures your bars stay together. To get the right texture, combine the peanut butter and honey well. This mix should be smooth with no lumps. Adding rolled oats and flaxseed makes the bars chewy and hearty. Press the mixture tightly into the pan. This step helps the bars hold together. When you pour the melted chocolate on top, spread it evenly. This gives a nice finish. To keep your bars fresh, wrap them in plastic wrap or foil. You can also use an airtight container. Store them in the fridge for the best taste. They will stay good for about a week. For longer storage, freeze them. Just make sure to separate layers with parchment paper. This prevents sticking. These bars shine as a snack or dessert. Cut them into squares for easy serving. You can also drizzle extra chocolate on top for a treat. Try adding some chopped nuts or dried fruit for more flavor. Serve with a glass of milk or coffee for a perfect pairing. Enjoy sharing them with friends or family! {{image_2}} If you want a nut-free treat, swap peanut butter for sun butter. Sun butter tastes great and has a similar texture. You can also use soy nut butter or pumpkin seed butter. These swaps keep the bars safe for nut allergies. You can make these bars even more fun by adding mix-ins. Try adding chopped nuts, like almonds or walnuts, for crunch. Dried fruit, like cranberries or raisins, gives a nice sweet bite. Just fold in your chosen mix-ins after combining the main ingredients. You can change the chocolate type for a new flavor. Use milk chocolate chips for a sweeter taste. White chocolate adds a creamy touch and looks pretty too. Just melt and pour over the mixture as you would with dark chocolate. To keep your no-bake chocolate peanut butter bars fresh, store them in an airtight container. You can use a glass or plastic container with a tight lid. Parchment paper helps to separate the layers if you stack them. This way, they won’t stick together. These bars stay tasty in the fridge for about one week. The cool air helps keep them firm and fresh. If you see any signs of spoilage, like an off smell or change in color, it’s best to toss them out. You can freeze these bars for up to three months. To do this, cut them into squares. Wrap each piece in plastic wrap, then place them in a freezer bag. When you want a snack, just take one out and let it thaw in the fridge. Enjoy the deliciousness later! Yes, you can use other sweeteners. Maple syrup works well too. Honey adds a nice taste. You can also try agave syrup. Each sweetener gives a unique flavor. Just keep the amount the same. I prefer natural peanut butter for its taste. Creamy or crunchy is your choice. Creamy gives a smooth texture. Crunchy adds a fun bite. Look for a brand with no added sugar or oils. The bars will feel firm to the touch. They should not be sticky. After chilling for 1-2 hours, check them. If they hold their shape, they are ready. You can also use a knife to test the edges. Yes, these bars offer good nutrition. They have protein from peanut butter. Oats provide fiber, which is great for digestion. Flaxseed adds omega-3 fatty acids. Just watch your portion sizes, as they are still a treat. In this blog post, we explored key ingredients and their roles in your recipe. I provided step-by-step instructions for easy preparation, from melting chocolate to pressing the mixture. You now have tips for perfect texture and freshness, along with varied options for dietary needs. Remember, taste and texture can change with mix-ins. Finally, proper storage ensures your bars stay fresh. With this guide, you can create delicious bars that suit any preference. Enjoy experimenting with flavors and have fun!

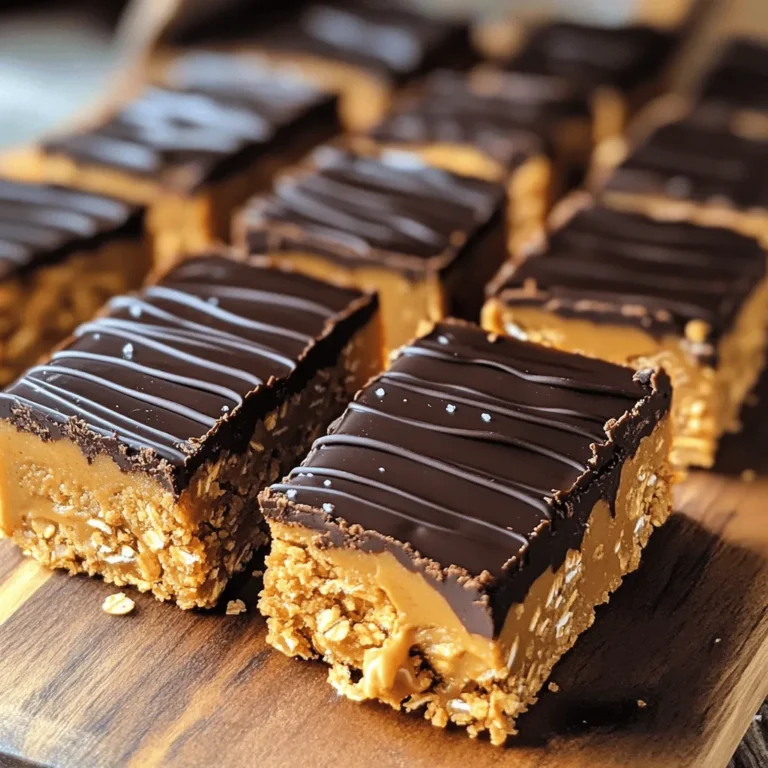
No-Bake Chocolate Peanut Butter Bars Easy Delight

- 8 oz elbow macaroni - 2 cups cooked chicken, shredded - 1 cup buffalo sauce (adjust to taste) Buffalo Chicken Mac and Cheese starts with elbow macaroni. This pasta shape holds the sauce well. Next, use shredded chicken. You can roast or boil it for this dish. The star of this recipe is buffalo sauce. It adds heat and zest. Adjust the amount to fit your taste. - 2 cups sharp cheddar cheese, shredded - 1 cup mozzarella cheese, shredded - 2 tablespoons cream cheese For the creamy base, we need cheeses. Sharp cheddar cheese gives a strong flavor. Mozzarella cheese adds a nice stretch. Cream cheese makes the sauce rich and smooth. Together, these cheeses create a great blend. The creaminess balances the spicy buffalo sauce. - 1/2 teaspoon garlic powder - 1/2 teaspoon onion powder - Chopped green onions for garnish Seasonings boost the flavor. Garlic powder adds depth. Onion powder gives a sweet taste. You can sprinkle chopped green onions on top. They add a pop of color and a fresh bite. This dish is not just tasty; it looks great too! - Bring a large pot of salted water to a boil. - Add 8 oz of elbow macaroni to the pot. - Cook the macaroni until it is al dente, about 7-9 minutes. - Drain the pasta and set it aside in a bowl. - In a medium saucepan, melt 1 tablespoon of butter over medium heat. - Add 2 tablespoons of cream cheese and stir until it melts and blends. - Gradually whisk in 1/2 cup of milk until the mixture is smooth. - Stir in 2 cups of shredded sharp cheddar cheese and 1 cup of shredded mozzarella cheese. - Keep stirring until the cheese melts and the sauce thickens. - In a large mixing bowl, combine the cooked macaroni and 2 cups of shredded chicken. - Pour the cheese sauce over the pasta and chicken. - Mix well to ensure everything is evenly coated. - If you want a crispy topping, preheat your oven to 350°F (175°C). - Transfer the mac and cheese to a baking dish and top with extra cheese. - Bake for 15-20 minutes until the top is golden and bubbly. - Perfecting pasta al dente: Cook the elbow macaroni in salted boiling water. Check the package for timing. Aim for a firm bite, known as al dente. This keeps the pasta from getting mushy when mixed with the sauce. - How to prevent cheese from clumping: To keep cheese from clumping, shred it fresh. Pre-shredded cheese has additives that cause clumps. Add the cheese slowly to the warm sauce. Stir constantly for a smooth blend. - Adjusting buffalo sauce to taste: Start with the suggested amount of buffalo sauce. Taste as you mix. If you want more heat, add a bit at a time. You can always add more, but it’s hard to take out. - Adding extra spices for depth: Besides garlic and onion powder, consider adding smoked paprika or cayenne pepper. These spices can enhance the dish's flavor. Just a pinch can make a big difference. - Garnishing ideas: After serving, sprinkle chopped green onions on top. This adds color and a fresh taste. You might also use crumbled blue cheese for a classic touch. - Serving suggestions: Serve Buffalo Chicken Mac and Cheese in bowls for a cozy feel. Pair it with a simple side salad for balance. This makes your meal feel complete and satisfying. {{image_2}} You can make this dish lighter without losing flavor. Use whole wheat elbow macaroni for extra fiber. Swap out regular cheese for low-fat cheese options. You can also use plain Greek yogurt instead of cream cheese for a creamy texture with less fat. For the chicken, consider using grilled or baked chicken instead of fried for a healthier choice. Want to spice things up? Add diced jalapeños for heat. You can also mix in buffalo seasoning for extra flavor. If you’re not a fan of buffalo sauce, try ranch dressing or BBQ sauce. They add a different twist but keep the dish delicious. For those who need gluten-free meals, use gluten-free pasta. There are many good brands available that cook the same as regular pasta. If you want to make it vegetarian, replace the chicken with sautéed mushrooms or chickpeas. These options keep the dish hearty and satisfying without meat. To store leftovers, let the Buffalo Chicken Mac and Cheese cool first. Then, place it in an airtight container. Make sure to use a container that seals well to keep the dish fresh. I recommend glass or BPA-free plastic containers. They help prevent any strong smells from mixing with other foods in your fridge. You can freeze Buffalo Chicken Mac and Cheese for later. Just portion it into freezer-safe containers. Make sure to leave some space at the top for expansion. When you want to eat it, thaw it overnight in the fridge. To reheat, place it in the oven at 350°F (175°C) until hot. You can also use the microwave. Just heat in short bursts, stirring in between. In the fridge, this dish lasts about 3 to 4 days. Always check for signs of spoilage. If it smells off or has a strange texture, it's best to toss it. Keeping it covered well helps maintain its taste and quality. Can I use rotisserie chicken? Yes, you can use rotisserie chicken. It saves time and adds great flavor. Just shred the chicken and mix it in. How can I make it spicier? To make it spicier, add more buffalo sauce. You can also mix in some hot sauce for an extra kick. Can I make it ahead of time? You can prepare it ahead of time. Just cook the pasta and make the sauce. Combine them and store in the fridge. When ready, bake it for a nice finish. What can I serve with Buffalo Chicken Mac and Cheese? You can serve it with a simple salad. A side of veggies works well, too. Some crusty bread would be perfect for dipping. Can I use different types of cheese? Yes, you can use different cheeses. Try gouda or pepper jack for a twist. Just keep the total cheese amount the same. What’s a good substitute for buffalo sauce? A good substitute for buffalo sauce is ranch dressing or BBQ sauce. These will change the flavor but still taste great in the dish. Buffalo Chicken Mac and Cheese is a fun dish to make. We covered the main ingredients, from elbow macaroni to creamy cheese. I shared step-by-step instructions for cooking and mixing everything perfectly. Along with tips to enhance flavor and presentation, you learned about healthier and varied versions. Lastly, we discussed storage tips to keep leftovers fresh. Now you have a delicious recipe to try. Enjoy cooking and sharing this tasty meal!

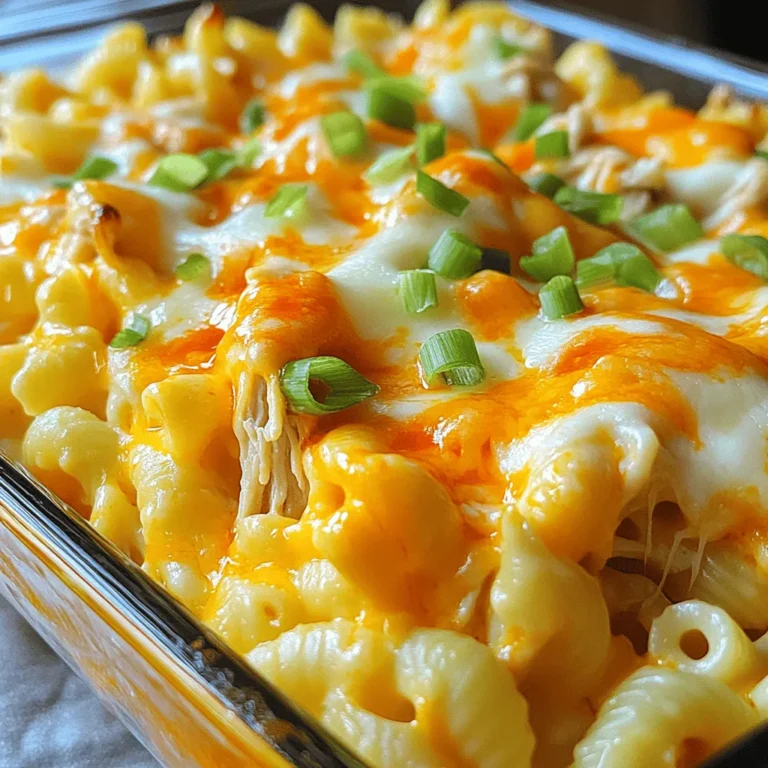
Buffalo Chicken Mac and Cheese Flavorful Comfort Food

- 1 ½ cups all-purpose flour - ½ cup granulated sugar - 1 tablespoon poppy seeds - 2 teaspoons baking powder - ½ teaspoon baking soda - ¼ teaspoon salt - ½ cup Greek yogurt - ¼ cup vegetable oil - 2 large eggs - Zest of 1 lemon - 3 tablespoons fresh lemon juice - ½ teaspoon vanilla extract - Glaze (1 cup powdered sugar + 2 tablespoons lemon juice) The key to great lemon poppy seed muffins lies in the balance of flavors. The main ingredients create a soft base. The flour provides structure while the sugar adds sweetness. Poppy seeds give a delightful crunch, and the baking powder and soda help them rise. The wet ingredients add moisture and tang. Greek yogurt keeps the muffins fluffy and adds protein. Vegetable oil keeps them tender, while the eggs bind everything together. The lemon zest and juice deliver a burst of fresh flavor. Lastly, vanilla extract rounds out the taste. You can also try adding a glaze for extra sweetness and shine. Mix powdered sugar with lemon juice for a simple, zesty finish. These ingredients create a delightful treat that you’ll want to enjoy again and again! - Preheat your oven to 350°F (175°C). Line a muffin tin with paper liners or grease it lightly. - In a large bowl, whisk together the flour, sugar, poppy seeds, baking powder, baking soda, and salt. Make sure it is well combined. - In another bowl, mix the Greek yogurt, vegetable oil, eggs, lemon zest, lemon juice, and vanilla extract until smooth. - Pour the wet ingredients into the dry ingredients. Gently fold them together until just combined. A few lumps are fine; do not overmix. - Fill each muffin cup about two-thirds full with the batter. This helps them rise nicely while baking. - Bake the muffins for 15-18 minutes. Check for doneness by inserting a toothpick into the center. It should come out clean. - Once baked, let the muffins cool in the tin for 5 minutes. After that, transfer them to a wire rack to cool completely. Feel free to add a glaze for extra flavor! Mix powdered sugar with lemon juice and drizzle it over the cooled muffins. Enjoy this fluffy delight! To make the best lemon poppy seed muffins, avoid overmixing the batter. Overmixing makes muffins dense and tough. Mix just until combined; a few lumps are fine. This keeps your muffins light and airy. To achieve fluffy muffins, use fresh baking powder and baking soda. These ingredients help the muffins rise well. Also, make sure your wet ingredients are at room temperature. This small tip can make a big difference in texture. You can enhance the flavor of your muffins with a few simple tricks. Try adding a teaspoon of almond extract for a nutty twist. You can also mix in some grated ginger for warmth. If you want more sweetness, add an extra tablespoon of sugar. This helps balance the tartness of the lemon. Feel free to get creative with your muffins! You can add fresh blueberries or cranberries for a fruity burst. These additions complement the lemon flavor beautifully. If you're in the mood for something different, consider making lemon poppy seed bread. Just pour the batter into a loaf pan and bake for about 50-60 minutes. Enjoy the different textures and flavors! {{image_2}} To keep your lemon poppy seed muffins fresh, store them at room temperature. Place them in an airtight container. Line the bottom with a paper towel to absorb moisture. This helps prevent sogginess. Enjoy them within three days for the best taste. If you want to save some muffins for later, freezing is a great option. Allow the muffins to cool completely first. Wrap each muffin tightly in plastic wrap. Then, place them in a freezer-safe bag. They can last up to three months in the freezer. When you're ready to eat them, just pull them out and thaw. To reheat your muffins without drying them out, use the oven or a microwave. In the oven, preheat it to 350°F (175°C). Place the muffins on a baking sheet and cover with foil. Heat for about 10 minutes. In the microwave, heat them for 10-15 seconds. Check to avoid overheating. This keeps the muffins soft and tasty. Each muffin has about 150 calories. Here’s a quick look at the macronutrients per muffin: - Carbohydrates: 24 grams - Protein: 4 grams - Fat: 6 grams These muffins provide a nice balance of energy from carbs, plus protein and healthy fats. Greek yogurt adds creaminess and protein. It helps keep the muffins moist and fluffy. Yogurt also contains probiotics, which are good for gut health. Lemon gives a bright flavor. It’s high in vitamin C, which boosts your immune system. The zest adds oils that enhance the lemon taste. Poppy seeds are small but powerful. They are rich in fiber, which aids digestion. They also provide healthy fats and a source of calcium. You can make these muffins gluten-free by using almond or coconut flour. Just remember to adjust the liquid as needed. For vegan muffins, replace eggs with flaxseed meal or applesauce. You can also use plant-based yogurt to keep the moisture. These adaptations will keep the flavor while meeting different dietary needs. Yes, you can! To make gluten-free lemon poppy seed muffins, use alternative flours. - Almond flour - Coconut flour - Gluten-free all-purpose flour These options work well, but you may need to adjust the liquid. Always check for a gluten-free label. To keep your muffins fresh, store them properly. - Place them in an airtight container. - Keep them at room temperature for up to three days. - For longer storage, refrigerate for up to a week. If you want to save them longer, freezing works great. Just wrap them tightly in plastic wrap and place in a freezer bag. If you don't have poppy seeds, don't worry! There are tasty alternatives. - Chia seeds add a nice crunch. - Sesame seeds offer a nutty flavor. - You can also skip seeds and add extra lemon zest. These swaps keep your muffins delicious and fun! This blog post covered all you need for perfect lemon poppy seed muffins. We explored key ingredients, step-by-step instructions, and storage tips. I shared flavor enhancements and variations, plus nutritional insights. Baking can be fun and easy with these tips. Enjoy making these tasty muffins your way. Happy baking!

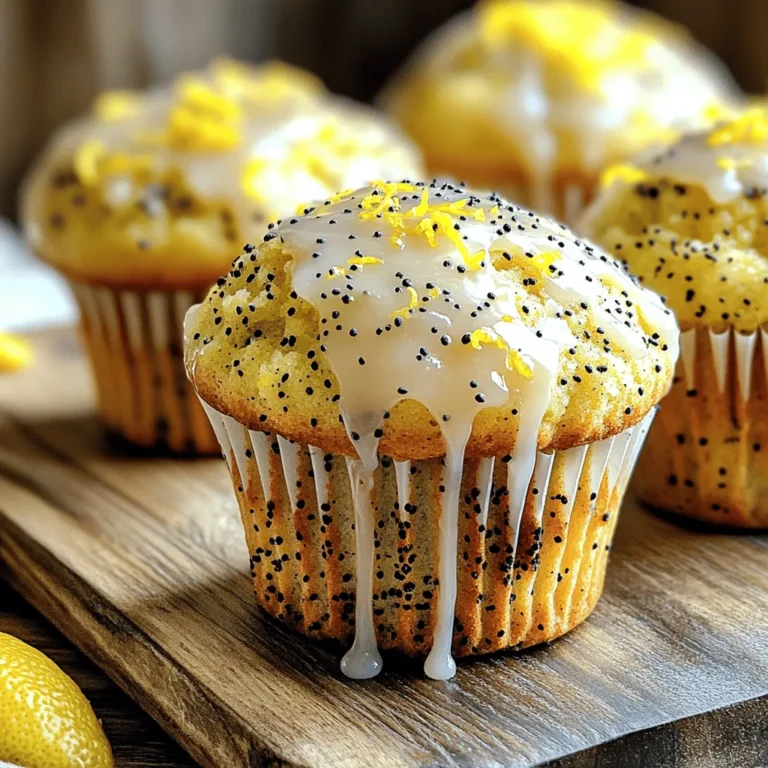
Lemon Poppy Seed Muffins Fresh and Fluffy Delight

- 1 cup grated zucchini (about 1 medium zucchini) - 1 cup all-purpose flour - ½ cup unsweetened cocoa powder - 1 teaspoon baking soda - ½ teaspoon baking powder - ¼ teaspoon salt - ½ cup granulated sugar - ½ cup brown sugar, packed - 2 large eggs - ½ cup vegetable oil - 1 teaspoon vanilla extract - 1 cup semi-sweet chocolate chips - Optional: ¼ cup chopped walnuts or pecans To create the best double chocolate zucchini bread, you need fresh ingredients. Start with one medium zucchini. Grate it finely. This zucchini gives moisture and helps the bread stay soft. Make sure to measure it after grating. Next, gather your dry ingredients. You will need all-purpose flour, unsweetened cocoa powder, baking soda, baking powder, and salt. These ingredients mix to give the bread its rich flavor and texture. For sweetness, use both granulated sugar and packed brown sugar. The brown sugar adds a nice depth to the taste. Now for the wet ingredients. You will need two large eggs, vegetable oil, and vanilla extract. The eggs add structure while the oil keeps it moist. Don’t forget the vanilla; it enhances the overall flavor. Finally, the best part: the add-ins! Use semi-sweet chocolate chips for extra chocolatey goodness. If you like a bit of crunch, add chopped walnuts or pecans. They give a lovely texture and nutty flavor. With all these ingredients ready, you are set to make a delicious double chocolate zucchini bread! First, you need to preheat your oven to 350°F (175°C). This step helps your bread bake evenly. Next, take a 9x5 inch loaf pan. You can either grease it with some oil or line it with parchment paper. This will stop the bread from sticking. In a medium bowl, combine the dry ingredients. You will need 1 cup of all-purpose flour, ½ cup of unsweetened cocoa powder, 1 teaspoon of baking soda, ½ teaspoon of baking powder, and ¼ teaspoon of salt. Whisk them together until they blend well. Set this mixture aside for later. Now, grab a large mixing bowl. Add ½ cup of granulated sugar, ½ cup of brown sugar, 2 large eggs, ½ cup of vegetable oil, and 1 teaspoon of vanilla extract. Mix these ingredients until they are smooth and well combined. This mixture adds moisture and sweetness to your bread. Take your dry mixture and slowly add it to the wet ingredients. Mix gently until everything just comes together. Do not overmix, as this can make the bread tough. Then, fold in 1 cup of grated zucchini and 1 cup of semi-sweet chocolate chips. If you like, you can also add ¼ cup of chopped walnuts or pecans for a little crunch. Pour the batter into your prepared loaf pan. Smooth the top with a spatula. Now, place it in the preheated oven. Bake for about 50 to 60 minutes. To check if it’s done, use a toothpick. Insert it in the center; it should come out clean when the bread is ready. After baking, let it cool in the pan for about 10 minutes before moving it to a wire rack. To keep your bread moist, do not overmix the batter. Overmixing leads to dense bread. Mix just until combined. This keeps the bread light and fluffy. Incorporating zucchini correctly is key. Grate the zucchini finely. Squeeze out excess liquid using a clean cloth. This helps keep the batter balanced. Fold the zucchini in gently. This way, you distribute it without losing air in the mix. Slice the bread only after it has cooled completely. This helps maintain its shape. Serve the slices on a wooden board for a rustic appeal. You can dust the top with powdered sugar for a sweet finish. For extra indulgence, add a dollop of whipped cream. Placing a few chocolate chips on top adds a nice touch. You can switch up your chocolate types. Use dark chocolate chips for a richer taste. Milk chocolate gives a sweeter flavor. Both work well in this recipe. If you need gluten-free options, try almond flour instead of all-purpose flour. For a vegan version, replace eggs with mashed bananas or flaxseed meal. Adjust your baking time as needed for the best results. {{image_2}} You can change the taste of the Double Chocolate Zucchini Bread easily. Adding spices like cinnamon or nutmeg can give it a warm flavor. Just a teaspoon of either can change everything. You can also add different nuts or dried fruits. Chopped walnuts or pecans add crunch. Dried cherries or raisins bring sweetness. Experiment with what you like! Chocolate is key in this recipe. You can choose between milk chocolate and dark chocolate. Milk chocolate makes the bread sweeter, while dark chocolate adds richness. You can even swap cocoa powder for chocolate syrup. This makes the bread extra moist. Just use less sugar if you do this! If you want a healthier version, you can reduce the sugar. Try using half the amount of granulated sugar. Another great option is using applesauce or yogurt instead of some oil. Both add moisture without extra fat. This keeps the bread soft and delicious. You can enjoy a treat that feels a bit lighter! To keep your Double Chocolate Zucchini Bread fresh, you have a few easy options: - Room temperature storage: Wrap the bread in plastic wrap or foil. Place it in a cool, dry spot. This keeps the bread moist. It lasts about 2-3 days at room temperature. - Refrigeration and freezing options: If you want it to last longer, store the bread in the fridge. It can stay fresh for a week. For even longer storage, freeze it. Slice the bread first, then wrap each slice tightly in plastic wrap, followed by foil. It will stay tasty for up to 3 months in the freezer. To enjoy the best flavor, follow these tips: - When to wrap or cover: Wrap the bread only after it has cooled completely. This prevents sogginess and keeps the texture just right. - Shelf life details for optimal taste: For the best taste, eat the bread within 2-3 days if stored at room temperature. If you refrigerate it, enjoy it within a week. If frozen, thaw it overnight in the fridge for the best results. Yes, you can use frozen zucchini. First, thaw it completely. Then, drain any excess water. Measure one cup of the grated zucchini after draining. This step helps keep your bread from becoming too wet. Look for a few signs. The bread should have a nice dome shape. The edges may pull away from the pan slightly. Use a toothpick. Insert it into the center. If it comes out clean or with a few crumbs, your bread is ready. Yes, you can use mini loaf pans. Adjust the baking time to 25-30 minutes. Check for doneness with a toothpick, just like with the larger loaf. This way, you can enjoy smaller portions. You can replace eggs with several options. Use 1/4 cup unsweetened applesauce for each egg. Another option is 1/4 cup mashed banana. For a vegan choice, mix 1 tablespoon ground flaxseed with 2.5 tablespoons water. Let it sit until it thickens. Double Chocolate Zucchini Bread is easy and fun to make. We covered the ingredients, step-by-step instructions, and useful tips. Remember to mix well but not too much. You can try new flavors or healthy swaps too. For storage, keep it fresh at room temperature or freeze it for later. Enjoy your tasty treat with confidence, knowing you made something delightful and nutritious. Happy baking!

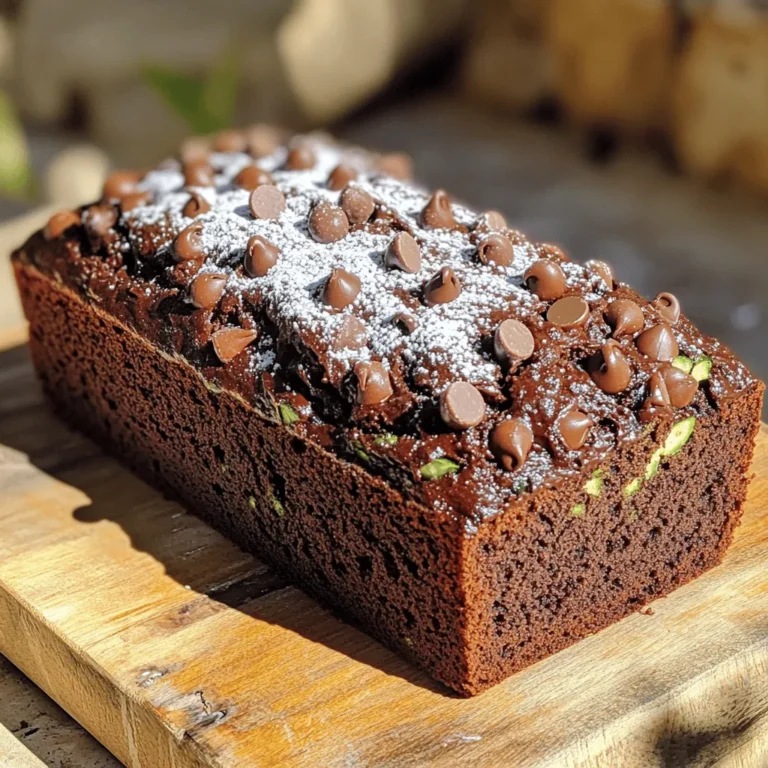
Delicious Double Chocolate Zucchini Bread Recipe

- 2 boneless, skinless chicken breasts - 2 tablespoons olive oil - 2 tablespoons Greek yogurt - 2 cloves garlic, minced - 1 teaspoon dried oregano - 1 teaspoon paprika - Salt and pepper to taste For the chicken, I like to use fresh breasts. They grill well and stay juicy. The marinade adds a lot of flavor. Olive oil gives moisture, while Greek yogurt makes it tender. Garlic, oregano, and paprika are key spices here. They bring out the best in the chicken. - 2 cups cooked quinoa - 1 cucumber, diced - 1 cup cherry tomatoes, halved - 1/2 red onion, thinly sliced - 1/2 cup feta cheese, crumbled Quinoa is a great base for this dish. It's high in protein and very filling. I always cook it in vegetable broth for extra taste. The veggies add crunch and freshness. Diced cucumber cools the dish, while cherry tomatoes add sweetness. Red onion gives a sharp bite, and feta cheese brings creaminess. - Fresh parsley, chopped for garnish - Lemon wedges for serving Fresh parsley brightens the bowl. It adds color and flavor. Lemon wedges are perfect for squeezing over the top. They enhance the flavors of the chicken and veggies. You can serve this bowl warm or cold, and it stays delicious either way! Mixing the Marinade Ingredients Start by grabbing a bowl. Add 2 tablespoons of olive oil, 2 tablespoons of Greek yogurt, and 2 minced garlic cloves. Then, sprinkle in 1 teaspoon of dried oregano and 1 teaspoon of paprika. Finish with a pinch of salt and pepper. Mix everything until smooth. This marinade gives the chicken a rich, zesty flavor. Marinating the Chicken Take your 2 boneless, skinless chicken breasts and place them in the bowl with the marinade. Make sure the chicken is well coated. Cover the bowl and let it sit in the fridge for at least 30 minutes. If you have time, let it marinate for up to 2 hours. This step is key for a juicy, flavorful chicken. Grilling Instructions Preheat your grill or skillet over medium-high heat. Once hot, remove the chicken from the marinade and place it on the grill. Cook the chicken for about 6-7 minutes on each side. Keep an eye on it, as you want a nice char. Checking for Doneness To ensure your chicken is safe to eat, check the internal temperature. It should reach 165°F (75°C). This step is crucial for both safety and taste. Once done, take the chicken off the heat and let it rest for a few minutes before slicing it into strips. Layering Ingredients Now it’s time to build your gyro bowls! Start with 2 cups of cooked quinoa. Divide this quinoa among four bowls. Next, add the sliced chicken on top. Then, layer in diced cucumber, halved cherry tomatoes, and thinly sliced red onion. Finally, sprinkle 1/2 cup of crumbled feta cheese over each bowl. Garnishing Tips To finish, garnish each bowl with fresh chopped parsley. Serve with lemon wedges on the side for squeezing. This brightens the flavors and adds a fresh touch. Enjoy your Greek Chicken Gyro Bowls! Important Marinade Tips Marinate your chicken for at least 30 minutes. For better flavor, let it sit for up to 2 hours. This allows the spices to soak in deeply. Use Greek yogurt in your marinade. It makes the chicken tender and juicy. Temperature and Timing Considerations Grill your chicken over medium-high heat. Cook for about 6-7 minutes on each side. Always check the internal temperature. It should reach 165°F (75°C) for safety. Let the chicken rest for a few minutes after grilling. This helps keep the juices inside. Suggested Seasoning Adjustments Feel free to add more spices. If you like heat, try some cayenne pepper. For a fresh twist, add lemon zest to the marinade. This gives a bright taste that pairs well with chicken. Pairing Suggestions Pair your gyro bowls with fresh veggies. Try adding roasted red peppers or olives for extra flavor. A side of pita bread complements the meal nicely. You can also serve a simple Greek salad alongside. Plating Ideas Use wide, shallow bowls for a beautiful display. Start with a base of quinoa. Layer the chicken strips on top, then add the veggies. Scatter crumbled feta cheese over the top for a pop of color. Creative Serving Suggestions Garnish with fresh parsley for a touch of green. Serve lemon wedges on the side. This adds a bright burst when squeezed over the bowl. You can also create a DIY gyro station for fun. Let guests build their own bowls! {{image_2}} Alternative Meat Options You can swap chicken for other meats. Try lamb or beef for a richer flavor. Turkey can work too if you want a leaner option. Each meat has its own taste, so choose what you like best. Vegetarian and Vegan Adaptations For a meat-free meal, use grilled eggplant or zucchini. You can also use chickpeas or lentils for protein. These options keep the meal hearty and satisfying. Don't forget to season them well to add flavor. Mediterranean Flavors to Experiment With You can add different herbs and spices. Try dill, mint, or cumin for a new twist. Lemon zest can brighten the dish too. A pinch of red pepper flakes adds heat if you like spice. Additional Topping Suggestions Top your gyro bowls with olives or roasted red peppers. You can also add avocado or a drizzle of tahini for creaminess. Each topping gives a unique taste and texture. Mix and match to find your favorite combo. Bowl vs. Wrap If you prefer wraps, use pita bread instead of bowls. Simply fill the pita with quinoa and toppings. This makes a fun handheld meal. Gyro wraps are great for picnics or on-the-go lunches. Cold Salad Versions For a refreshing twist, make a salad. Use the same ingredients but skip the cooking. Toss cooked quinoa with fresh veggies and a light dressing. This version is perfect for hot days and still tastes great. To keep your Greek Chicken Gyro Bowls fresh, start with refrigeration. Place leftovers in airtight containers. Make sure to separate the chicken, quinoa, and veggies. This keeps everything fresh. You can store them in the fridge for up to three days. For freezing, use freezer-safe bags or containers. Divide the chicken and quinoa into portions. Remove as much air as possible to prevent freezer burn. You can freeze them for up to three months. Just label the bags with the date. To reheat chicken, use a skillet over medium heat. Add a splash of water to keep it moist. Heat for about five minutes or until warm. You can also use the microwave. Place the chicken in a bowl, cover it, and heat for one to two minutes. For quinoa, reheat in a saucepan with a little water. Stir it often until hot, which takes about three minutes. This method helps keep the quinoa fluffy. Maintain flavor and texture by avoiding high heat. It can dry out your chicken and quinoa. Always check the temperature. Chicken should be at least 165°F (75°C) when reheated. Enjoy your delicious meal again! You can use many proteins. Try grilled lamb, beef, or pork. For a plant-based option, use chickpeas or tofu. These options keep the dish flavorful and fun. Yes, you can! Cook the quinoa and grill the chicken in advance. Store them in the fridge. When ready to serve, just assemble the bowls. This saves time on busy days. To make tzatziki, mix 1 cup of Greek yogurt with 1 diced cucumber and 1 clove of minced garlic. Add 1 tablespoon of olive oil, 1 tablespoon of vinegar, and a pinch of salt. Stir well and chill before serving. This adds a cool touch to the bowls. Serve gyro bowls with Greek salad or roasted vegetables. Pita bread and hummus also pair well. These sides enhance the meal and add more flavors. This article covered how to make delicious gyro bowls with chicken and fresh ingredients. We looked at key components like marinating, grilling, and assembling. I shared tips for perfecting flavor and presentation. We also explored variations and storage best practices. Now, you can create tasty meals with ease. Enjoy the flavors and get creative with your own mix. Whether it’s for a meal prep or a quick dinner, these gyro bowls fit the bill. Happy cooking!

Greek Chicken Gyro Bowls Flavorful and Simple Meal

For this Creamy Cajun Shrimp Pasta, you will need: - 12 oz fettuccine pasta - 1 lb large shrimp, peeled and deveined - 2 tablespoons Cajun seasoning - 2 tablespoons olive oil - 3 cloves garlic, minced - 1 cup heavy cream - 1 cup chicken broth - 1 cup cherry tomatoes, halved - 1 cup fresh spinach - 1/2 cup grated Parmesan cheese - Salt and pepper to taste - Fresh parsley, chopped (for garnish) You can swap some ingredients if needed. If you can’t find fettuccine, try penne or spaghetti. For shrimp, chicken or tofu works well. If you want a lighter dish, use half-and-half instead of heavy cream. You can also use vegetable broth for a vegetarian option. If you don’t have cherry tomatoes, regular diced tomatoes will do. Cajun seasoning gives this dish a nice kick. If you like it milder, use less seasoning. You can start with just one tablespoon and taste as you go. To add more heat, toss in a pinch of cayenne pepper or red pepper flakes. This way, you can make it just the way you like it! {{ingredient_image_1}} First, get a big pot and fill it with water. Add salt to the water. Bring it to a boil. Once boiling, add 12 oz of fettuccine pasta. Cook it according to the package instructions. You want it to be al dente, which means it should still have a bit of bite. This usually takes about 8-10 minutes. When it's done, drain the pasta. Make sure to save 1/2 cup of the pasta water for later. In a bowl, take 1 lb of large shrimp, peeled and deveined. Sprinkle 2 tablespoons of Cajun seasoning over the shrimp. Mix it well until all the shrimp are coated. Now, heat a large skillet over medium heat and add 2 tablespoons of olive oil. When the oil is hot, add the shrimp to the skillet. Cook them for 2-3 minutes on each side. They should turn pink and opaque when they are done. Once cooked, take the shrimp out of the skillet and set them aside. In the same skillet, add 3 cloves of minced garlic. Sauté the garlic for about 1 minute until it smells great. Next, pour in 1 cup of chicken broth and let it simmer. After a few minutes, slowly stir in 1 cup of heavy cream and add 1 cup of halved cherry tomatoes. Let the sauce simmer for about 5 minutes. This helps it get a bit thicker. After that, toss in 1 cup of fresh spinach. Cook for another 2-3 minutes until the spinach wilts. Now, add the fettuccine and the shrimp back to the skillet. Mix everything gently. If the sauce seems too thick, add some of the reserved pasta water a little at a time. Finally, take the skillet off the heat and stir in 1/2 cup of grated Parmesan cheese. Add salt and pepper to taste. Your creamy Cajun shrimp pasta is now ready to serve! To make your pasta creamy, use heavy cream. It gives a rich texture that blends well. When you add the cream, stir slowly. This helps it mix evenly with the sauce. If the sauce is too thick, add a little of the reserved pasta water. This will help achieve the right consistency. Cajun seasoning is the star here. Use a good quality blend to get bold flavors. Feel free to add more if you like it spicy. Fresh herbs also boost the taste. Consider adding chopped parsley or green onions for an extra kick. They brighten the dish and add freshness. For juicy shrimp, do not overcook them. Cook until they turn pink and opaque. This usually takes just 2-3 minutes per side. Always use fresh shrimp if you can. Fresh shrimp taste better and have a firmer texture. If you use frozen shrimp, thaw them well before cooking. Pat them dry to remove excess moisture. This helps them sear nicely in the pan. Pro Tips Fresh Shrimp: Always use fresh or properly thawed shrimp for the best texture and flavor. Adjusting Spice: If you prefer a milder dish, reduce the Cajun seasoning or add it gradually to taste. Pasta Water Magic: Reserve pasta water is a great way to adjust the sauce consistency while adding flavor. Garnishing: For an extra pop of color and flavor, consider adding lemon zest or a squeeze of lemon juice before serving. {{image_2}} You can swap shrimp for other proteins easily. Chicken works well. Cut it into small pieces and cook it like shrimp. You can also use scallops or even crab. Each choice adds a unique taste to your dish. For tofu lovers, firm tofu can be cubed and sautéed. It absorbs flavors well, making your dish rich. Making a vegetarian version is simple. Skip the shrimp and add more vegetables. Bell peppers, zucchini, and mushrooms are great choices. You can also use plant-based shrimp. It gives you the same texture and taste without seafood. To keep it creamy, use vegan cream or cashew cream. This way, you enjoy the same flavors while staying meat-free. You can change the flavor profile easily. If you like heat, add more Cajun seasoning or some hot sauce. For a smoky taste, try adding smoked paprika. You can also experiment with herbs like thyme or oregano for a fresh twist. Adding lemon juice brightens the dish and gives it a zesty kick. Mix and match these options to find your favorite flavor! To store your creamy Cajun shrimp pasta, let it cool down first. Then, place it in an airtight container. You can keep it in the fridge for up to three days. Make sure to label the container with the date. This way, you’ll know when to eat it. When you're ready to eat your leftovers, you can reheat them easily. The best way is to use a skillet. Heat a little olive oil over low heat. Add the pasta and stir gently. If it's too thick, add a splash of chicken broth or water. You can also use a microwave. Place the pasta in a microwave-safe bowl. Heat for about one to two minutes, stirring halfway through. If you want to freeze your creamy Cajun shrimp pasta, it’s best to do this before adding the cheese. Let the pasta cool completely. Then, transfer it to a freezer-safe container. You can freeze it for up to two months. When you're ready to eat, thaw it in the fridge overnight. Reheat as mentioned above, and then stir in the cheese before serving. To make Creamy Cajun Shrimp Pasta, follow these steps: 1. Cook the Pasta: Boil salted water in a large pot. Cook 12 oz of fettuccine until al dente. Drain and save 1/2 cup of the pasta water. 2. Season the Shrimp: In a bowl, mix 1 lb of peeled shrimp with 2 tablespoons of Cajun seasoning. 3. Sauté Shrimp: Heat 2 tablespoons of olive oil in a skillet. Add the shrimp and cook for 2-3 minutes per side until pink. Remove them from the skillet. 4. Make the Sauce: Sauté 3 cloves of minced garlic in the same skillet for 1 minute. Add 1 cup of chicken broth and let it simmer. 5. Add Cream and Veggies: Stir in 1 cup of heavy cream and 1 cup of halved cherry tomatoes. Let it simmer for about 5 minutes. Add 1 cup of fresh spinach and cook until wilted. 6. Combine Everything: Add the cooked fettuccine and shrimp back to the skillet. Toss gently. If the sauce is thick, add reserved pasta water until you get the right consistency. 7. Finish and Serve: Stir in 1/2 cup of grated Parmesan cheese. Season with salt and pepper. Plate the pasta and garnish with chopped parsley. Yes, you can use any pasta you like. Penne, linguine, or even spaghetti work well. You can choose whole wheat or gluten-free pasta for a healthier option. Just follow the cooking time on the package to ensure it's cooked just right. If you need a substitute for heavy cream, you have options. You can use half-and-half or whole milk mixed with a bit of flour for thickness. Coconut milk is a good dairy-free option. Silken tofu blended with a little water can also work for a creamy texture. In this post, I covered how to make Creamy Cajun Shrimp Pasta. We talked about the ingredients, step-by-step cooking, and tips for a tasty dish. You learned about substitutions and how to adjust spice levels. I shared variations for added flavors and proteins. Finally, I provided storage tips for leftovers. Enjoying this dish is simple with the right steps and adjustments. Dive in, try it out, and have fun in the kitchen!

Creamy Cajun Shrimp Pasta Flavorful and Easy Recipe

- 1 cup pumpkin puree - 1/2 cup brown sugar - 1/2 cup granulated sugar - 1/3 cup vegetable oil - 2 large eggs - 1 teaspoon vanilla extract - 1 1/2 cups all-purpose flour - 1 teaspoon baking powder - 1 teaspoon baking soda - 1 teaspoon ground cinnamon - 1/2 teaspoon ground nutmeg - 1/4 teaspoon salt - 1 cup semi-sweet chocolate chips - 1/2 cup chopped walnuts To make these muffins, you need simple, fresh ingredients. First, pumpkin puree gives these muffins their rich flavor and moisture. Brown sugar and granulated sugar add perfect sweetness. You need vegetable oil to keep them soft and tender. The eggs help bind everything together, while vanilla extract gives a lovely aroma. For the dry mix, all-purpose flour is key for texture. Baking powder and baking soda help the muffins rise. Ground cinnamon and nutmeg add that cozy, warm spice. Lastly, a pinch of salt brings all the flavors together. You can make them even better with optional add-ins. Semi-sweet chocolate chips add a sweet touch. Chopped walnuts can give a nice crunch and extra flavor. Feel free to mix and match your favorites! - Preheat oven to 350°F (175°C). - Line muffin tin with paper liners. I start by heating the oven. This step is key to getting even baking. The muffins rise well when the oven is hot. Next, I prepare my muffin tin. Lining it with paper helps the muffins come out easily. It also makes clean-up a breeze. - Combine pumpkin puree, sugars, oil, eggs, and vanilla. - Whisk until smooth. In a big bowl, I mix pumpkin puree, brown sugar, and granulated sugar. Then, I add vegetable oil, eggs, and vanilla extract. I use a whisk to blend everything until smooth. This mixture is the base of my muffins. The pumpkin adds moistness, while the sugars give sweetness. - Whisk together dry ingredients in a separate bowl. - Gradually add dry mixture to wet ingredients. - Fold in chocolate chips and walnuts. In another bowl, I whisk the dry ingredients: flour, baking powder, baking soda, cinnamon, nutmeg, and salt. This mix brings the muffins together. I slowly add this dry mix to the wet mix. It’s important to stir gently, so I don’t over-mix. Finally, I fold in the chocolate chips and walnuts. This adds lovely texture and flavor. - Fill muffin cups and bake for 18-22 minutes. - Check for doneness with a toothpick. Next, I fill each muffin cup about two-thirds full. This gives them room to rise. Then, I bake them for 18 to 22 minutes. To check if they are done, I insert a toothpick into the center of a muffin. If it comes out clean, they are ready! To make perfect muffins, avoid over-mixing the batter. Stir just until the dry ingredients blend with the wet ones. This keeps the muffins light and fluffy. For even baking, use an ice cream scoop to fill the cups. This helps ensure each muffin is the same size. Also, rotate the muffin tin halfway through baking. This way, all muffins cook evenly. For a lovely presentation, serve the muffins warm. Dust them with powdered sugar for a sweet touch. A dollop of whipped cream on the side adds a nice flair too. Pair your muffins with warm drinks. Coffee or spiced chai works well. They bring out the pumpkin flavor nicely and make a cozy snack. To boost flavor, add more spices like ginger or cloves. These spices pair well with pumpkin and chocolate. You can also try adding a pinch of allspice for an extra kick. If you want a twist, use dark chocolate chips instead of semi-sweet. They add a rich taste that contrasts nicely with the sweetness of the muffins. You can even mix different types of chocolate for more depth. {{image_2}} You can make these muffins gluten-free. Use almond flour, oat flour, or a gluten-free blend. Each will give a different taste and texture. Almond flour adds a nutty flavor. Oat flour makes them soft and chewy. A gluten-free mix works well and is easy to find. Just replace the all-purpose flour with your choice. For a vegan version, replace the eggs and dairy. Use flaxseed meal or chia seeds for eggs. Mix 1 tablespoon of seeds with 3 tablespoons of water. Let it sit until it thickens. Use almond milk or soy milk instead of regular milk. Also, check your chocolate chips. Some may contain dairy. Look for vegan chocolate chips to keep them dairy-free. You can add fruits like blueberries or cranberries for a twist. These fruits pair well with pumpkin and chocolate. Dried fruits like raisins or apricots also add sweetness. If you want crunch, try different nuts. Pecans, hazelnuts, or even macadamia nuts work well. Each nut brings a unique flavor and texture to your muffins. This way, you can make your muffins even more fun and tasty! You can keep your chocolate chip pumpkin muffins at room temperature. Place them in an airtight container. This keeps them fresh for a few days. If you want them to last longer, store them in the fridge. This will help them stay good for about a week. Just remember, cold muffins may lose some of their soft texture. Freezing muffins is a great option. First, let them cool completely. Wrap each muffin tightly in plastic wrap. Then, place the wrapped muffins in a freezer bag. This method keeps them fresh for up to three months. When you want to eat one, take it out and let it thaw in the fridge overnight. You can also warm it up in the microwave for a quick treat. At room temperature, the muffins stay fresh for about three days. If stored in the fridge, they last up to a week. Frozen muffins can last much longer, around three months. Enjoy your muffins while they are fresh for the best taste! Yes, you can use fresh pumpkin. Start with a small pumpkin. Cut it in half, scoop out the seeds, and roast it at 350°F (175°C) for 40-50 minutes. Once it's soft, scoop the flesh and blend it until smooth. This fresh pumpkin puree is great for muffins. It may have a different taste and texture, which can enhance your muffins. If you want to make the muffins vegan, there are good egg substitutes. You can use 1/4 cup unsweetened applesauce or 1/4 cup mashed banana for each egg. Another option is to mix 1 tablespoon ground flaxseed with 2.5 tablespoons water. Let it sit until it thickens. These substitutes work well in baking and keep your muffins moist. You can check the muffins with a toothpick. Insert a toothpick into the center of a muffin. If it comes out clean or with a few crumbs, the muffins are done. This usually takes about 18-22 minutes. If the toothpick has wet batter, bake for a few more minutes. Keep an eye on them so they don’t overbake. Yes, you can make mini muffins. Just fill each mini muffin cup about 2/3 full. Bake them for 10-15 minutes instead of longer. Check for doneness with a toothpick as well. Mini muffins are great for snacks or lunch boxes. They are easy to grab and enjoy! You now have the tools to make delicious chocolate chip pumpkin muffins. We covered the key ingredients, from pumpkin puree to chocolate chips. You learned the simple steps to prepare and bake these treats. Tips and variations can help you customize them to your taste. Remember to store muffins properly to keep them fresh. Enjoy experimenting with flavors and sharing these yummy muffins with friends! Your perfect fall snack is just a bake away.

Chocolate Chip Pumpkin Muffins Tasty and Simple Recipe

Here’s what you need for Herb Parmesan Roasted Zucchini: - 4 medium zucchinis, sliced into half-moons - ¼ cup grated Parmesan cheese - 2 tablespoons olive oil - 1 teaspoon garlic powder - 1 teaspoon dried oregano - 1 teaspoon dried thyme - Salt and pepper to taste - Fresh parsley, chopped for garnish These ingredients come together to make a tasty side dish. Zucchini is light and absorbs flavors well. The Parmesan adds a rich, salty kick. Olive oil helps everything roast nicely. Garlic powder and dried herbs bring out the best in this dish. You can adjust the salt and pepper to fit your taste. When you prepare this dish, use fresh and high-quality ingredients. This makes a big difference in flavor. Fresh parsley at the end adds a pop of color and freshness. You can easily find all these ingredients at your local grocery store. - First, preheat your oven to 425°F (220°C). This helps your zucchini roast evenly. - Next, prepare the zucchinis. Slice four medium zucchinis into half-moons. Make them about half an inch thick. - In a large bowl, mix the sliced zucchinis with two tablespoons of olive oil. Ensure all pieces get a nice coat. - Now, add one teaspoon of garlic powder, one teaspoon of dried oregano, and one teaspoon of dried thyme. Sprinkle salt and pepper to taste. Toss well to mix all the seasonings. - Spread the zucchini slices in a single layer on a parchment-lined baking sheet. This helps them roast without sticking. - Generously sprinkle ¼ cup of grated Parmesan cheese over the zucchini. The cheese adds a delicious flavor. - Roast the zucchinis in the oven for about 20-25 minutes. Check them around 20 minutes. They should be tender, and the cheese should be golden brown. To make the best Herb Parmesan Roasted Zucchini, you need to focus on even seasoning. When you mix the zucchini with olive oil, garlic powder, oregano, thyme, salt, and pepper, toss them well. This ensures every slice gets flavor. Next, to achieve the ideal texture and color, spread the zucchini in a single layer on the baking sheet. If they overlap, some will steam, not roast. Roast them at 425°F for 20-25 minutes. This high heat makes them tender and caramelized. Keep an eye on them to avoid burning the cheese. Herb Parmesan Roasted Zucchini pairs well with grilled chicken or fish. You can also serve it with pasta dishes for a fresh side. If you want a light meal, pair it with a salad. For a fun twist, try adding it to tacos or wraps. The zucchini adds great flavor and texture to any dish. Enjoy experimenting with different pairings! {{image_2}} For a twist on flavor, try different cheeses. You can use feta for a tangy bite. Mozzarella gives a nice melt and creaminess. For a nutty taste, try using Gruyère. Each cheese brings its own unique flair. You can also add spices or herbs to change it up. A pinch of red pepper flakes adds heat. Try smoked paprika for a warm, earthy flavor. Fresh basil or thyme can freshen the dish. Mix and match to find your favorite combination. To make this dish gluten-free, check your cheese. Most cheeses are gluten-free. Just avoid any cheese blends that might have fillers. The rest of the ingredients are naturally gluten-free too. For vegan options, swap the Parmesan with nutritional yeast. It gives a cheese-like flavor. You can also use a vegan cheese that melts well. Just keep an eye on the cooking time. To keep your Herb Parmesan Roasted Zucchini fresh, place it in an airtight container. This helps prevent moisture loss and keeps the flavor intact. Store the leftovers in your fridge. They stay good for about 3 to 4 days. After that, the zucchini may lose its taste and texture. When you want to enjoy your leftovers, the best way to reheat zucchini is in the oven. Set your oven to 350°F (175°C). Place the zucchini on a baking sheet and heat for about 10 minutes. This method helps keep the zucchini soft and the cheese crispy. You can also use a microwave, but be careful. The microwave can make the zucchini mushy. If you must use it, heat in short bursts, about 30 seconds at a time. How do I know when zucchini is done roasting? Zucchini is done when it feels soft and tender. You should see a golden brown color on the cheese. A fork should easily pierce the slices. Can I use frozen zucchini for this recipe? You can use frozen zucchini, but fresh is best. Frozen zucchini may not crisp up. If you use frozen, thaw it first and drain excess water. What are some good sides to serve with Herb Parmesan Roasted Zucchini? Some great sides include grilled chicken, quinoa, or a fresh salad. You can also serve it with pasta dishes or a hearty grain like farro. Can I prepare this dish in advance? Yes, you can prep the zucchini a few hours ahead. Just store it in the fridge after seasoning. Roasting it right before serving keeps it fresh. How to make it spicier? To add heat, sprinkle red pepper flakes before baking. You can also mix in some cayenne pepper for a kick. Adjust the amount to suit your taste. Roasting zucchini with Parmesan is simple and rewarding. You gather fresh zucchinis, season them well, and roast them until golden. We covered delicious tips for great texture, tasty variations, and smart storage. Enjoy this dish with your favorite meals or add your twists. With these steps, you can make a healthy side that shines. Try it today, and make your meals more exciting!

Herb Parmesan Roasted Zucchini Tasty and Simple Dish

- 1 cup rolled oats - 1 cup unsweetened almond milk (or any milk of choice) - 1 medium apple, peeled and diced (preferably Granny Smith for tartness) - 1 tablespoon maple syrup (adjust based on sweetness preference) - 1 teaspoon ground cinnamon - 1/2 teaspoon vanilla extract - A pinch of salt These ingredients make your overnight oats taste just like apple pie! The rolled oats provide a hearty base. They soak up the almond milk, creating a creamy texture. I recommend using unsweetened almond milk to keep it healthy. Granny Smith apples work best. They add a nice tang to balance the sweetness. Maple syrup gives a warm flavor. You can adjust the amount to suit your taste. Ground cinnamon adds warmth and spice, making it feel cozy. The vanilla extract enhances the overall flavor, giving it that pie essence. - 1 tablespoon chia seeds - 2 tablespoons chopped walnuts (optional for added crunch) - Additional toppings and garnishes Chia seeds boost nutrition. They add fiber and omega-3s. Walnuts give a delightful crunch. If you want extra texture, add them in! You can also top your oats with more diced apples, a drizzle of maple syrup, or even a sprinkle of cinnamon for extra flair. These optional ingredients let you personalize your oats. They make each bite unique and satisfying. Experiment with different toppings to find your perfect match! Start by gathering your dry ingredients. In a medium bowl, combine: - 1 cup rolled oats - 1 tablespoon chia seeds - 1 medium apple, peeled and diced Mix these together well. The oats and chia seeds will soak up the liquid later. The diced apple adds a nice crunch and flavor. I prefer Granny Smith apples for their tartness. They balance the sweetness. Next, move to a new bowl for the wet ingredients. Mix together: - 1 cup unsweetened almond milk (or your choice of milk) - 1 tablespoon maple syrup (adjust to your sweetness taste) - 1 teaspoon ground cinnamon - 1/2 teaspoon vanilla extract - A pinch of salt Stir these together until they blend well. The spices and vanilla add warmth and depth to your oats. This mixture brings all the flavors together. Now, it’s time to combine the dry and wet mixtures. Pour the wet mixture over the dry ingredients. Stir until everything is evenly coated. If you like a bit of crunch, fold in: - 2 tablespoons chopped walnuts (optional) Next, divide the mixture into two jars or containers. Seal them tightly and refrigerate overnight. This allows the oats to soak and soften. Aim for at least 4 hours of chilling to absorb all the delicious flavors. In the morning, stir the oats. If they seem thick, add a splash of almond milk. Top with extra diced apple, maple syrup, and a sprinkle of cinnamon for a tasty finish. You can change the sweetness to fit your taste. If you like it sweeter, add more maple syrup. For less sweetness, use less syrup. You can also swap maple syrup for honey if you prefer. Adding spices like nutmeg or ginger can bring new flavors to the oats. Just a pinch can make a big difference. Experiment with different spice blends to find your favorite. Serving your overnight oats in clear jars makes them look great. You can see the layers of oats and apples. Top them with a thin apple slice for a fresh touch. A sprinkle of cinnamon adds color and flavor. You can also drizzle more maple syrup on top for extra sweetness. These little details make your dish fun and pretty. Chia seeds are tiny but mighty. They are rich in fiber and omega-3 fatty acids. This helps keep you feeling full longer. Walnuts add healthy fats and protein, which are good for your heart. Each serving of these oats has about 300 calories. This makes them a filling breakfast option. You get a mix of carbs, protein, and healthy fats in one jar. Enjoy the benefits while tasting something delicious! {{image_2}} You can change the flavor of your overnight oats easily. Try using other fruits like pears or peaches. They add a sweet twist. If you want to spice things up, use nutmeg or ginger. These spices give a warm taste, just like apple pie. You can mix and match to find your favorite flavor! To make this recipe vegan, swap almond milk with any plant-based milk. Use maple syrup for sweetness, which is already vegan. For gluten-free options, choose oats labeled gluten-free. This ensures you avoid any gluten cross-contamination. Always check the package to be sure. If you want to serve more people, double the recipe. This gives you four servings. You can also make a single serving if you prefer. Just divide all the ingredients by two. This way, you enjoy a fresh batch anytime without leftovers. Adjust as needed to fit your needs! How long can you keep overnight oats in the fridge? You can keep apple pie overnight oats in the fridge for up to five days. This makes them perfect for meal prep. Just make sure to check for any signs of spoilage before eating. Recommended storage containers are key. Use airtight jars or containers. Glass jars work well because you can see the layers. They also help keep the oats fresh longer. Can you freeze apple pie overnight oats? Yes, you can freeze them! This is a great option for longer storage. Just remember, the texture may change slightly after thawing. How to thaw and serve after freezing? Take the oats out of the freezer and put them in the fridge overnight. In the morning, stir them well. You can add a splash of almond milk to restore creaminess. Enjoy them cold or warm them up in the microwave. You can use several types of oats for overnight oats. Here's a quick guide: - Rolled oats: These are the best choice. They absorb liquid well and soften overnight. - Quick oats: These oats cook faster and have a finer texture. They also work well but may be mushy. - Steel-cut oats: These take longer to soften. They need more liquid and time. They may not work as well for overnight recipes. Rolled oats give the best mix of texture and flavor. To make your overnight oats creamier, try these tips: - Adjust the liquid: Add more almond milk to reach your desired creaminess. - Add yogurt: Mix in a spoonful of yogurt for extra creaminess and flavor. - Use nut butter: Stir in some almond or peanut butter for a rich texture. These changes can help you get the perfect consistency. Yes, you can eat overnight oats warm! Here are a few ways to warm them up: - Microwave: Place the jar in the microwave for 30-60 seconds. Stir well to heat evenly. - Stovetop: Transfer oats to a small pot. Heat over low heat, stirring often until warm. Warming them adds a cozy touch, especially in cooler months! Apple pie overnight oats are easy and tasty. You need rolled oats, almond milk, and fresh apples. Mix these with sweeteners and spices for great flavor. Remember to customize with optional ingredients like chia seeds and walnuts. You can serve them cold, but warming them is also an option. Store them in the fridge for a few days, or even freeze them. Have fun trying different fruits and flavors. Overnight oats let you enjoy a yummy breakfast daily. Enjoy creating your own version!

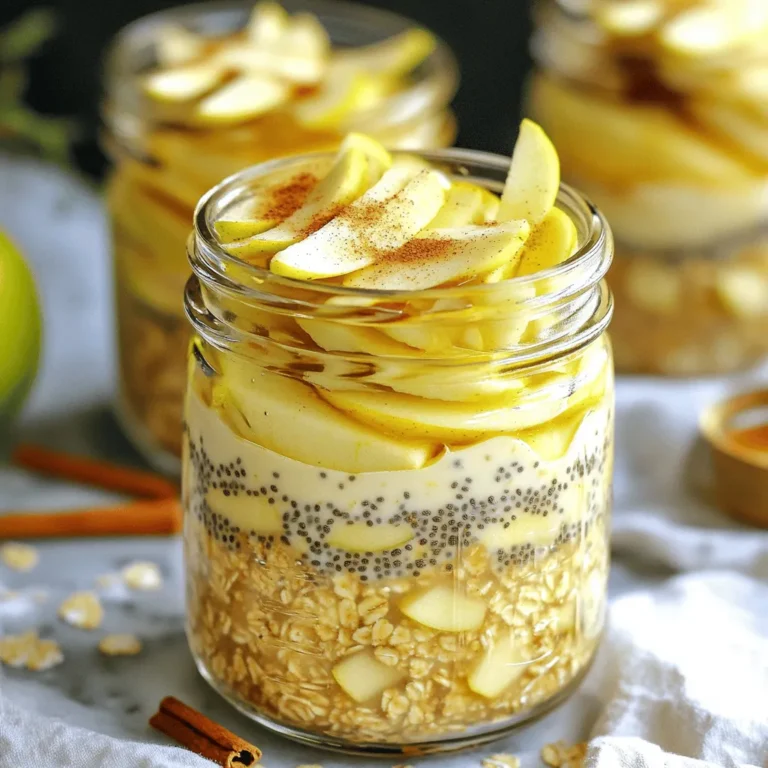
Satisfying Apple Pie Overnight Oats Quick and Easy Recipe

To make Spicy Thai Peanut Lettuce Wraps, gather these main ingredients: - 1 pound ground chicken (or tofu for a vegetarian option) - 1 tablespoon vegetable oil - 3 cloves garlic, minced - 1 tablespoon fresh ginger, minced - 1 red bell pepper, diced - 1 cup shredded carrots - ¼ cup green onions, sliced - 1 head of butter or romaine lettuce, leaves separated, washed, and dried - ½ cup roasted peanuts, chopped - Salt and pepper to taste These ingredients create a fresh and tasty filling. The ground chicken or tofu gives protein. The garlic and ginger add a warm flavor. The bell pepper and carrots bring crunch and color. The spicy peanut sauce makes these wraps special. Gather these ingredients: - ¼ cup creamy peanut butter - 2 tablespoons soy sauce (or tamari for gluten-free) - 1 tablespoon honey (or maple syrup) - 1 tablespoon rice vinegar - 1 tablespoon sriracha sauce (adjust to taste) - 2 tablespoons water (to thin if necessary) This sauce balances sweet, salty, and spicy. It adds depth to the wraps. Adding garnishes can make your dish pop. Consider these options: - Chopped cilantro - Lime wedges - Sliced cucumbers - Additional chopped peanuts These garnishes enhance the look and taste. They add freshness and zest to your wraps. Start by heating vegetable oil in a large skillet over medium heat. Add minced garlic and ginger. Sauté for about one minute until you smell the aroma. Next, add ground chicken or tofu. Break it apart with a spatula as it cooks. Cook for about 5 to 7 minutes until it's browned and fully cooked. Then, stir in diced red bell pepper and shredded carrots. Cook for another 3 to 4 minutes. This will soften the veggies just enough. Season with salt and pepper. Finally, add sliced green onions. Remove from heat and set aside. In a separate bowl, gather your ingredients for the spicy peanut sauce. Combine creamy peanut butter, soy sauce, honey, rice vinegar, and sriracha sauce. Whisk these together until smooth. If the sauce is too thick, add a little water to thin it out. Adjust the sriracha to meet your spice preference. This sauce is the heart of the dish, so make it just right. Now, it’s time to put everything together! Take a lettuce leaf and place a generous spoonful of the chicken mixture in the center. Drizzle the spicy peanut sauce on top. Sprinkle chopped peanuts for extra crunch. Fold the sides of the lettuce leaf over the filling, creating a wrap. Enjoy each bite of these fresh and spicy bites! To make the peanut sauce shine, use creamy peanut butter. It gives a nice texture. Mix in soy sauce to add saltiness. Honey brings sweetness, balancing the heat. Rice vinegar adds tang, brightening the flavor. Don’t forget the sriracha! Adjust the amount to match your spice level. If the sauce is too thick, add water. Whisk until smooth and creamy. This sauce can be made in advance. Store it in the fridge for up to a week. When cooking chicken or tofu, start with a hot skillet. This helps to brown the meat quickly. Use vegetable oil to prevent sticking. Mince the garlic and ginger finely. This lets their flavors spread throughout the dish. Cook the chicken until it is no longer pink. For tofu, press it first to remove excess water. This helps to get a nice texture. Stir in veggies like bell pepper and carrots for added crunch. This mix should be colorful and vibrant. Serve these wraps on a large platter. Arrange the lettuce leaves neatly. Place the chicken or tofu filling in a bowl nearby. This way, guests can build their own wraps. Drizzle the peanut sauce over the filling for a pop of color. Scatter chopped peanuts on top for crunch. Add fresh herbs like cilantro for a finishing touch. This makes the dish look fresh and inviting. Enjoying these wraps is as much about the taste as it is about the look! {{image_2}} You can easily make these wraps vegetarian or vegan. Simply swap the ground chicken for tofu. Tofu adds great texture and soaks up all the flavors. Use firm tofu for the best results. Just make sure to press it first to remove extra water. This helps it brown better when cooking. You can also add more veggies like mushrooms or zucchini for added nutrients and flavor. If you want to try different proteins, ground turkey or beef work well too. For a lighter option, use shrimp. They cook quickly and add a nice touch. You can also include beans for extra protein. Black beans or chickpeas are great choices. Feel free to mix in other crunchy veggies like cucumbers or radishes for a fun twist. To make these wraps gluten-free, use tamari instead of soy sauce in the peanut sauce. Most peanut butters are gluten-free, but always check the label just to be safe. You can also use lettuce leaves instead of tortillas. Romaine or butter lettuce are perfect for holding all the delicious filling. Enjoy these wraps with a clear mind knowing they fit your diet! To store leftover lettuce wraps, first, separate the filling from the lettuce leaves. This keeps the lettuce crisp. Place the filling in an airtight container. You can keep it in the fridge for up to three days. Wrap the lettuce leaves in a paper towel. Then, place them in a zip-top bag. This helps keep them fresh. When you want to enjoy the filling again, reheat it on the stove. Use a medium heat to warm it gently. Stir often to avoid burning. You can also microwave it in short bursts. Heat it for about 30 seconds at a time until warm. Add a splash of water if it seems dry. Store your peanut sauce in a clean, airtight container. It can last in the fridge for about a week. If the sauce thickens, add a bit of water to loosen it. Stir well before using. You can also freeze it for longer storage. Just remember to leave space in the container, as it may expand when frozen. Yes, you can make these wraps ahead. Prepare the filling and sauce separately. Store them in airtight containers in the fridge. This will keep the flavors fresh. When you are ready to eat, just assemble the wraps. The lettuce will stay crisp this way. If you need a substitute for peanut butter, try almond butter or sunflower seed butter. Both options work well in the sauce. They give a nice creamy texture. You can also use tahini for a different flavor. Just remember to adjust the amount based on taste. To adjust the spiciness, change the amount of sriracha in the sauce. Start with less if you prefer a milder taste. You can also add a dash of chili flakes for more heat. For a cooling effect, serve with cucumber slices or a yogurt dip. In this blog post, we covered how to make Spicy Thai Peanut Lettuce Wraps. You learned about the main ingredients, the step-by-step process, and tips to improve your dish. Remember, you can adjust the spice level and try different fillings. These wraps are tasty and easy to make. Don’t forget to store leftovers properly! Enjoy creating these wraps for your next meal. They are sure to impress anyone who tries them.

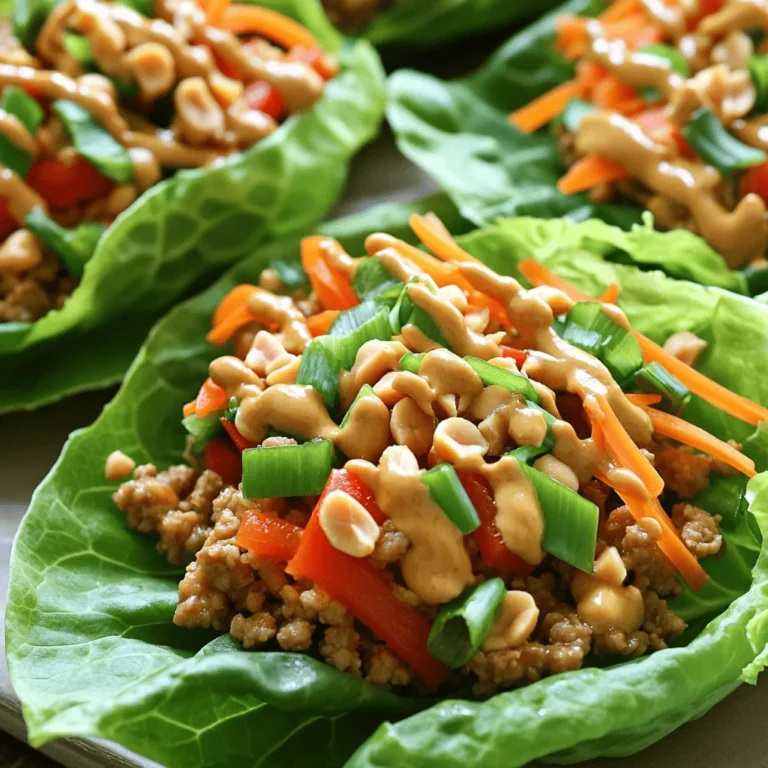
Spicy Thai Peanut Lettuce Wraps Flavorful Fresh Meal

PREV 1 … 27 28 29 … 53 NEXT
cozy citrus kitchen

explore

DessertsDinnerAppetizersDrinks

Our Policies

  • Cookie Policy
  • Copyright Policy
  • Disclaimer
  • GDPR Policy
  • Terms Of Use
Back to Top
  • About
  • Contact Us
  • Privacy Policy
© 2025 cozy citrus kitchen