FREE DINNER EBOOK! Get your copy!
  • Cookie Policy
  • GDPR Policy
  • Disclaimer
  • Terms Of Use
  • Visit my other site: Fun Cookie Recipes
cozy citrus kitchen
  • Home
  • Dinner
  • Desserts
  • Drinks
  • Appetizers
  • Contact
  • About
  • Privacy Policy
  • Home
  • Dinner
  • Desserts
  • Drinks
  • Appetizers
  • Contact
  • About
  • Privacy Policy
  • Cookie Policy
  • GDPR Policy
  • Disclaimer
  • Terms Of Use
Visit my other site: Fun Cookie Recipes

HOME / CATEGORIES /

Latest

- 1.5 lbs boneless, skinless chicken thighs - 1 ripe mango - 1 can coconut milk - 2 tablespoons red curry paste - 1 cup chicken broth - 1 medium onion - 3 cloves garlic - 1 tablespoon ginger - 1 tablespoon fish sauce (or soy sauce) - 1 tablespoon lime juice - 1 teaspoon brown sugar - 1 bell pepper (red or yellow) - Fresh cilantro - Salt and pepper For this savory dish, fresh ingredients matter. Start with chicken thighs. They cook well and stay juicy. Next, choose a ripe mango. A sweet mango makes all the difference. You’ll want a nice, creamy coconut milk. It adds richness to the curry. Red curry paste gives the dish its warm flavor. Chicken broth helps to create a lovely sauce. Aromatics are crucial too. The onion, garlic, and ginger blend beautifully. Fish sauce or soy sauce adds umami. Lime juice brightens the dish. Brown sugar balances the spice with a hint of sweetness. Lastly, garnish with bell pepper and fresh cilantro. They add color and crunch. Season with salt and pepper to taste. Each ingredient plays a key role in this delightful slow cooker mango chicken curry. Enjoy the process and have fun cooking! Start by placing the chicken thighs at the bottom of your slow cooker. Make sure they are in a single layer. Next, add the chopped onion, minced garlic, and grated ginger on top of the chicken. This layering helps the flavors mix well. In a mixing bowl, combine the diced mango, coconut milk, red curry paste, fish sauce, lime juice, and brown sugar. Stir until everything blends smoothly. This step adds a sweet and spicy touch to your dish. Pour the mango mixture over the chicken and onion in the slow cooker. Next, add the sliced bell pepper and chicken broth. Gently stir to combine all the ingredients. Cover the slow cooker and set it to cook. You can choose to cook on low for 6-8 hours or on high for 3-4 hours. The chicken will become tender and soak up all the flavors. About 30 minutes before serving, taste the curry. Adjust the seasoning with salt, pepper, or more lime juice if you want. Once the cooking time is up, gently shred the chicken with two forks right in the slow cooker. This makes the chicken mix well with the sauce. Serve your mango chicken curry hot over jasmine rice or with warm naan. For a bright finish, garnish with fresh cilantro. This adds a lovely color and flavor to your meal. To make a great mango chicken curry, start with ripe mangoes. Look for mangoes that give slightly when you press them. This means they are sweet and juicy. Avoid hard or overly soft ones. For chicken, choose boneless, skinless chicken thighs. They stay tender and juicy during cooking. Thighs work better than breasts in slow cooking. They absorb flavors well, giving you a rich taste. When using your slow cooker, you can choose low or high settings. Cooking on low for 6-8 hours is best. This gives the chicken time to become very tender. If you're short on time, cook on high for 3-4 hours. Timing is key for tender chicken. Check the chicken at the end of cooking. It should shred easily with two forks. If it’s tough, it needs more time. You can adjust spice levels to fit your taste. If you like it hotter, add more red curry paste. For a milder dish, use less. Balancing sweetness and acidity is important, too. The mango brings sweetness, while lime juice adds brightness. Taste your curry before serving. Add more lime juice or salt if needed to get the right balance. {{image_2}} You can easily make this dish vegetarian or vegan. Use tofu or chickpeas instead of chicken. These options keep the dish hearty and satisfying. For curry paste, look for plant-based versions. Many brands offer vegan red curry paste that uses no fish. Always check the label to ensure it fits your needs. If you like spice, boost the heat! Add fresh chilies to the mix. Slice them thin and toss them in with the other veggies. You can also use extra red curry paste. This adds more flavor and heat. Adjust to your taste, but start with a little. You can always add more later. Coconut milk is key for this recipe, but you have options. Almond or cashew milk can work in a pinch. They create a lighter version of the curry. Just keep in mind that the flavor will change slightly. If you want creaminess, look for unsweetened varieties. This way, you keep the dish smooth and tasty. To keep your mango chicken curry fresh, let it cool first. Use a clean spoon to scoop the curry into containers. I recommend using airtight containers. This helps prevent spills and keeps the curry tasty. Store it in the fridge for up to three days. If you want to enjoy it later, freezing is a great option. When it's time to enjoy your leftovers, there are a few great ways to reheat. I find that using the stove works best. Put the curry in a pan over low heat. Stir it often until it's hot. You can also use a microwave. Just cover the bowl with a lid or a paper towel. Heat it in short bursts, stirring in between. This keeps the chicken tender and the flavor bright. If you want to freeze your mango chicken curry, wait until it cools completely. Use freezer-safe containers or bags. Make sure to leave a little space for expansion. You can freeze it for up to three months. When you're ready to eat, take it out and thaw it in the fridge overnight. Reheat it on the stove or in the microwave. This way, you keep all the great taste and texture! Cooking time varies based on settings. On low, it takes 6 to 8 hours. On high, it takes just 3 to 4 hours. Always check the chicken for doneness before serving. It should be tender and easy to pull apart. Yes, you can use frozen chicken thighs. However, you need to adjust the cooking time. If using frozen chicken, cook on high for at least 4 to 5 hours. This helps ensure the chicken cooks evenly and thoroughly. Mango chicken curry pairs well with many sides. Here are a few great options: - Steamed jasmine rice - Warm naan bread - Quinoa for a healthy twist - A fresh green salad Each of these adds flavor and texture to your meal. Enjoy exploring different sides to find your favorite! This blog post covered how to make Slow Cooker Mango Chicken Curry. We explored the main ingredients, like chicken thighs and ripe mango, as well as key spices and aromatics. I provided step-by-step instructions to ensure your cooking process is smooth. You learned tips for choosing ingredients and enhancing flavors, along with several tasty variations. Remember to store leftovers properly and follow reheating tips for the best taste. Now, you can enjoy this flavorful dish with friends and family. Happy cooking!

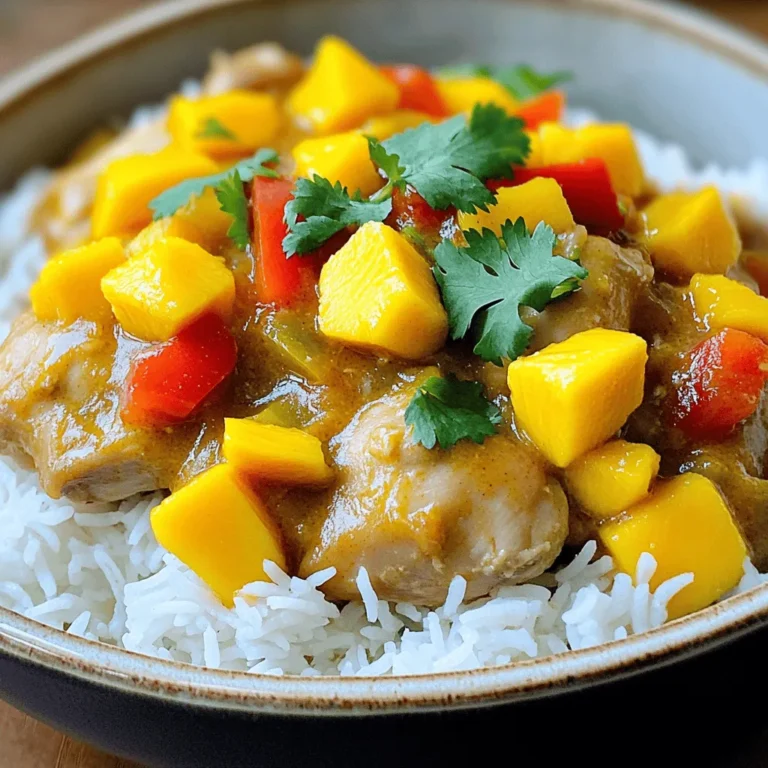
Savory Slow Cooker Mango Chicken Curry Recipe

- 1 pound gnocchi (store-bought or homemade) - 2 cups fresh spinach, chopped - 1 cup heavy cream The main ingredients bring life to this dish. Gnocchi adds a delightful chewiness. You can buy it or make it from scratch. Fresh spinach offers a vibrant green color and nutrients. Heavy cream provides a rich, silky texture. - ½ cup basil pesto - 1 cup cherry tomatoes, halved - 1 cup grated Parmesan cheese Basil pesto adds a burst of flavor. It blends well with the cream. Cherry tomatoes bring a juicy sweetness. They also add color and freshness. Parmesan cheese gives a salty, nutty taste. It melts beautifully into the sauce. - 2 tablespoons olive oil - 3 cloves garlic, minced - Salt and pepper to taste Olive oil helps cook the garlic. It adds a nice base flavor. Garlic brings aroma and depth. It makes the dish smell amazing. Salt and pepper are essential for enhancing flavors. Adjust these to your taste. These ingredients come together to create a delicious, creamy dish. Each one plays a vital role. Enjoy the process of cooking and tasting along the way! - Sautéing the garlic Start by heating olive oil in a large skillet over medium heat. Add minced garlic and sauté for about 30 seconds. You want the garlic to smell nice, but not burn. - Browning the gnocchi Next, add the gnocchi to the skillet. Sauté for 2-3 minutes until the gnocchi turns golden brown. This step gives the gnocchi a nice texture. - Adding cream and pesto Pour in the heavy cream and stir well. Bring the mixture to a simmer. This helps the cream thicken just a bit. Then, add the basil pesto and mix until the gnocchi is fully coated. - Incorporating spinach and tomatoes Stir in the chopped spinach and halved cherry tomatoes. Cook for 3-4 minutes. The spinach will wilt, and the tomatoes will soften. This adds color and flavor to your dish. - Melting Parmesan cheese Gradually sprinkle in the grated Parmesan cheese. Stir constantly until it melts. This creates a creamy sauce that binds everything together. - Seasoning and resting Season the dish with salt and pepper to taste. Remove it from the heat and let it rest for a few minutes. This helps all the flavors mix well before serving. To achieve the perfect creaminess, start with heavy cream. It gives your dish a rich texture. After adding the cream, let it simmer gently. This helps it thicken without curdling. Stir often to keep it smooth. For the best way to sauté gnocchi, use medium heat. This prevents sticking and allows even browning. Toss them gently in the pan for about 2-3 minutes. Look for a light golden color to know they're ready. If you want an alternative to heavy cream, consider using half-and-half. It’s lighter but still creamy. You can also try coconut milk for a dairy-free option. For vegan choices, use cashew cream instead of heavy cream. For pesto, look for brands made without cheese. Nutritional yeast can replace Parmesan for that cheesy flavor. Pair your creamy pesto gnocchi with a fresh side salad. A simple mix of greens and cherry tomatoes works well. You could also serve garlic bread for a hearty meal. For presentation, serve in individual bowls. Top each bowl with extra Parmesan and a sprinkle of black pepper. Add fresh basil leaves for color and aroma. This makes your dish look as good as it tastes! {{image_2}} You can easily change this dish by adding protein or veggies. Here are some ideas: - Protein add-ins: Adding grilled chicken or sautéed shrimp gives a nice boost. These add flavor and make the meal heartier. - Vegetable variations: Try adding bell peppers or zucchini. Both add color and extra nutrition to the dish. Switching up the flavors can make this dish feel new and exciting. Consider these options: - Different pesto flavors: Use sun-dried tomato pesto or arugula pesto for a twist. Each brings a unique taste to the creamy base. - Spicy options: If you like heat, add red pepper flakes. This simple addition can elevate the flavor and make it more exciting. You can prepare this dish in different ways to suit your needs: - Instant Pot method: This method saves time. Just add all ingredients to the pot and let it do the work. You’ll still get creamy, delicious gnocchi. - Oven-baked variations: For a crispy top, bake the dish in the oven. Transfer it to a baking dish, top with extra cheese, and bake until golden. These variations make the dish flexible and fun. You can create your own version every time you make it! To keep your creamy pesto gnocchi fresh, store leftovers in the fridge. Use airtight containers to keep moisture in. If you have a lot, divide it into smaller portions. This makes it easy to reheat just what you need. It's best to eat leftovers within three days for the best taste. When reheating, do it slowly on low heat. Add a splash of cream or water to help keep it moist. Stir often to avoid sticking. You want the texture to stay creamy, not dry. If you heat it too fast, the sauce can break or become clumpy. Yes, you can freeze creamy pesto gnocchi. To freeze it, let it cool completely first. Then place it in a freezer-safe container or bag. Make sure to remove as much air as possible. When you're ready to eat, thaw it in the fridge overnight before reheating. This helps keep the flavors bright and fresh. Can I make this dish vegan? Yes, you can make this dish vegan. Use plant-based cream instead of heavy cream. For cheese, opt for a vegan alternative. Also, use vegan pesto. What can I substitute for gnocchi? You can use pasta shapes like shells or penne. You can also try dumplings or even zucchini noodles for a lighter option. How long does it take to cook? This dish takes about 25 minutes to cook from start to finish. Prep time is around 10 minutes, with cooking taking the remaining 15 minutes. How many servings does the recipe yield? This recipe yields four servings. It’s perfect for a small family or a cozy dinner with friends. Is it necessary to use fresh spinach? Using fresh spinach is best for flavor and texture. You can use frozen spinach if fresh isn't available, but drain it well to avoid excess moisture. Can I use jarred pesto? Yes, jarred pesto works well in this recipe. It saves time and still delivers great flavor. Just choose a good quality brand for the best taste. This blog post covered how to make a delicious creamy pesto gnocchi. We shared the key ingredients like gnocchi, spinach, and cream. I explained the cooking steps, tips for perfecting your dish, and variations to try. Don't forget about storing and reheating your leftovers for later. In conclusion, enjoy experimenting with this easy recipe. Feel free to mix ingredients and make it your own! Your taste buds will thank you.

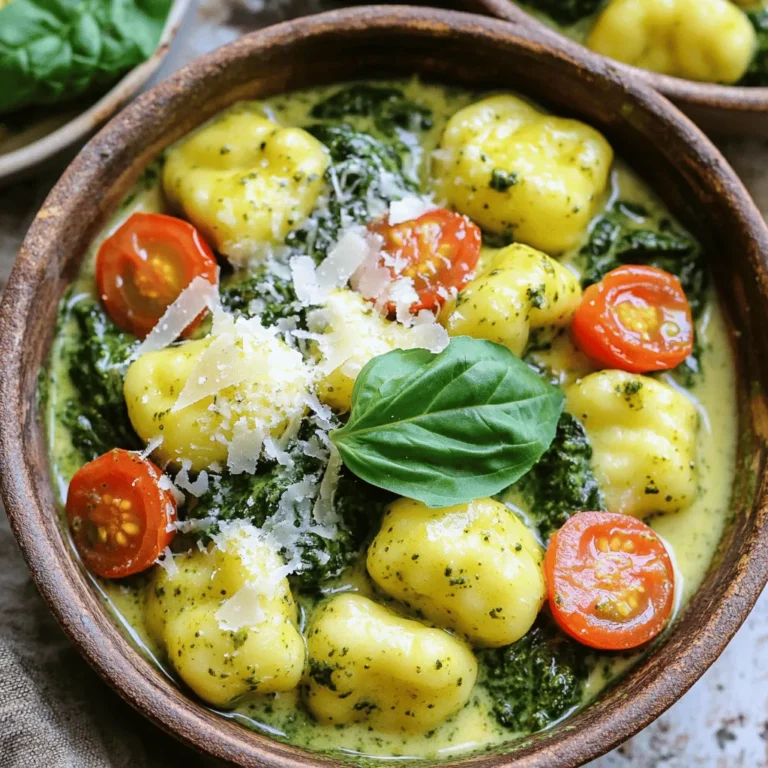
One-Pot Creamy Pesto Gnocchi With Spinach Delight

- 1 cup unsalted butter, softened - 1 cup brown sugar, packed - 1/2 cup granulated sugar - 1 large egg - 1 tablespoon vanilla extract - 1 cup pumpkin puree - 2 1/2 cups all-purpose flour - 1 teaspoon baking soda - 1 teaspoon baking powder - 1 teaspoon ground cinnamon - 1 teaspoon ground nutmeg - 1/2 teaspoon ground ginger - 1/2 teaspoon salt - 1 cup semi-sweet chocolate chips - 1/2 cup caramel sauce These ingredients create the perfect blend for Caramel Pumpkin Spice Latte Cookies. The unsalted butter gives a rich base, while the brown sugar adds depth. The pumpkin puree brings moisture and flavor, making these cookies soft and chewy. I love using spices like cinnamon, nutmeg, and ginger for that cozy taste. Together, they make these cookies feel like a warm hug on a chilly day. The semi-sweet chocolate chips add a nice touch of sweetness. Don't forget the caramel sauce; it brings everything together. - Optional mix-ins: Consider adding nuts or dried fruits for added texture. - Substitutions for dietary restrictions: You can use gluten-free flour or plant-based butter for a tailored treat. These variations let you customize your cookies. They can fit different diets while still tasting fantastic. I often experiment with different mix-ins, and you might find your new favorite flavor! 1. First, preheat your oven to 350°F (175°C). This step is key for perfect cookies. 2. Next, line two baking sheets with parchment paper. This keeps the cookies from sticking. 3. In a large bowl, cream together 1 cup of softened butter, 1 cup of brown sugar, and 1/2 cup of granulated sugar. Mix until it looks light and fluffy. 4. Then, add 1 large egg and 1 tablespoon of vanilla extract. Mix this in well. 1. Now, stir in 1 cup of pumpkin puree until it is all combined. This gives the cookies their unique flavor. 2. In another bowl, whisk together 2 1/2 cups of all-purpose flour, 1 teaspoon of baking soda, 1 teaspoon of baking powder, 1 teaspoon of ground cinnamon, 1 teaspoon of ground nutmeg, 1/2 teaspoon of ground ginger, and 1/2 teaspoon of salt. 3. Gradually add this dry mix to the wet mix. Stir gently until everything is just combined. 1. Using a cookie scoop or tablespoon, drop heaping tablespoons of dough onto the prepared baking sheets. Space them about 2 inches apart. 2. Drizzle a small amount of caramel sauce on each cookie dough scoop. This adds a sweet surprise. 3. Bake in your preheated oven for 10 to 12 minutes or until the edges are lightly golden. 4. After baking, let the cookies cool on the sheets for 5 minutes. Then, transfer them to wire racks to cool completely. 5. For extra sweetness, drizzle more caramel sauce over the cooled cookies if you like. - Always ensure your butter is at room temperature. This helps create a smooth dough. - Don't over-mix the dough. Mix until just combined to keep cookies soft. - Consider adding extra spices to the caramel for a unique twist. A pinch of nutmeg or allspice can elevate the flavor. - Using flavored chocolate chips, like pumpkin spice or toffee, adds depth to your cookies. This small change can make a big difference. - Dust your cookies with cinnamon or powdered sugar before serving. This adds a lovely touch. - Serve your cookies alongside a warm pumpkin spice latte. This pairing creates a cozy fall experience. {{image_2}} You can play with flavors in your cookies. Try adding nuts for crunch. Chopped walnuts or pecans work great. They add texture and flavor. This twist makes each bite even better. Another fun option is to swap in chocolate chips. Use white or dark chocolate for a rich taste. This change gives the cookies a sweet surprise. You can mix in your favorite candy bits too. Make your cookies festive with seasonal touches. For holidays, use fun decorations. Add sprinkles or icing to match the season. In winter, think about peppermint. Adding peppermint extract can create a minty twist. This flavor pairs well with pumpkin spice. You can enjoy a cozy cookie all winter long. You can choose how big you want your cookies. Mini cookies are great for bite-sized fun. They are perfect for sharing. Just remember to adjust the baking time. Bake mini cookies for about 8-10 minutes. If you prefer regular-sized cookies, follow the original recipe. These will be soft and chewy. Just keep an eye on them as they bake. The edges should turn light golden. Experiment with these variations and find your perfect treat! To keep your caramel pumpkin spice latte cookies fresh, store them in an airtight container at room temperature. This method keeps them soft and tasty for about a week. If you want your cookies to last longer, refrigerate them. Just make sure they are in a sealed container. This will help them stay fresh for up to two weeks. You can freeze your cookies both before and after baking. To freeze unbaked dough, scoop it onto a baking sheet, then place it in the freezer until firm. Once frozen, transfer the dough balls to a zip-top bag. For baked cookies, let them cool completely. Then, place them in a freezer-safe container. They can last up to three months in the freezer. To thaw, simply take the cookies out and place them in the fridge overnight. If you need them fast, let them sit at room temperature for a couple of hours. For the best flavor, eat your caramel pumpkin spice latte cookies within 3 to 5 days. After that, they might start to lose their yummy taste. Signs of stale cookies include a hard texture or dry taste. If this happens, you can refresh them by placing them in a sealed container with a slice of bread for a few hours. The moisture from the bread will help soften them up again. Can I make these cookies ahead of time? Yes, you can make the dough ahead of time. Just wrap it tight and chill it. You can also bake the cookies and store them in an airtight container. They stay fresh for days. How do I ensure my cookies are chewy? To get chewy cookies, do not over-bake them. Take them out when the edges are golden. The centers might look soft, but they will firm up as they cool. Can I use fresh pumpkin instead of puree? Yes, fresh pumpkin works! Just cook and puree it until smooth. Make sure to drain excess water so your dough stays thick. What is the best way to measure flour accurately? The best way is to use the spoon-and-level method. Scoop the flour with a spoon into a measuring cup. Then, level it off with a knife for the right amount. Can I substitute caramel sauce with something else? You can use butterscotch sauce or chocolate syrup if you want. Both add a sweet touch, but they change the flavor a bit. How do I know when the cookies are done baking? Check for lightly golden edges. The centers should look soft but not wet. They will continue to cook slightly after you take them out. Are these cookies gluten-free? No, these cookies are not gluten-free. They use all-purpose flour. You can use a gluten-free flour blend as a substitute. Can I use a sugar substitute in this recipe? Yes, you can use a sugar substitute like erythritol or stevia. Make sure to check the conversion ratio for the best results. What are some vegan alternatives for the ingredients? For a vegan version, use plant-based butter, a flax egg, and non-dairy milk. Make sure to choose a vegan caramel sauce too. You learned how to make tasty pumpkin cookies with simple steps. We covered all the key ingredients and helpful tips. Remember to store your cookies well to keep them fresh. With these variations, you can make the recipe your own. Enjoy your baking and share these cookies with friends! Happy baking and see you next time for more delicious ideas!

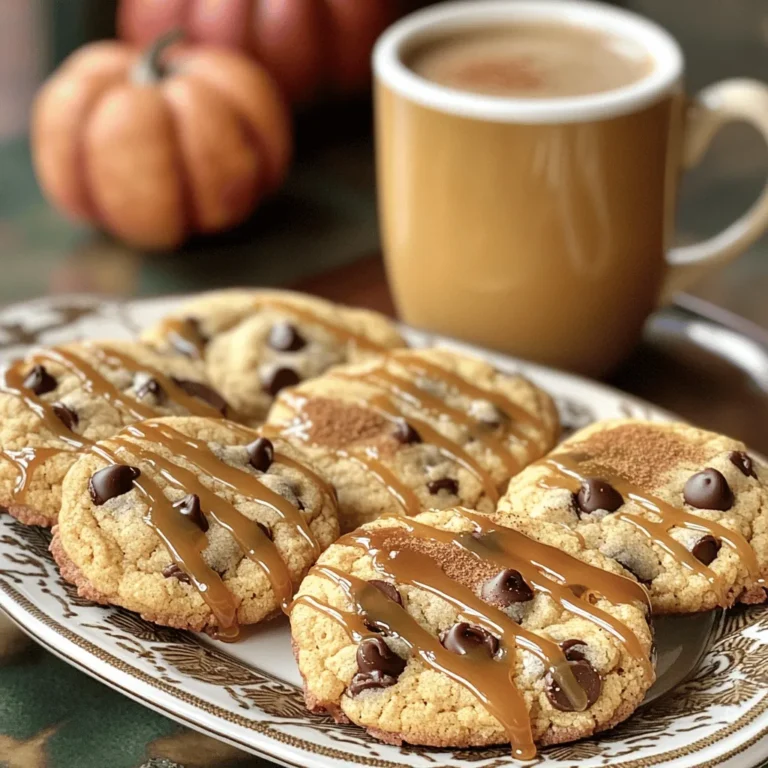
Caramel Pumpkin Spice Latte Cookies Delightful Treat

To make my Better-Than-Takeout Garlic Soy Udon Stir-Fry, you need some simple, fresh ingredients. Each one adds flavor and texture to the dish. Here’s what you will need: - Udon Noodles: 200g of thick, chewy udon noodles make the base. - Vegetables: Use colorful veggies like 1 bell pepper (red or yellow), 1 cup snap peas, and 1 medium carrot. These add crunch and color. - Aromatics: For bold flavor, include 4 cloves of minced garlic and 1 inch of grated ginger. - Sauces and Oils: You will need 3 tablespoons of soy sauce, 1 tablespoon of sesame oil, and 1 tablespoon of rice vinegar. If you like heat, add 1 teaspoon of chili paste. - Garnishes: Top your stir-fry with sesame seeds and fresh cilantro for added flavor and a pop of color. These ingredients come together to create a tasty, satisfying meal. You can easily find them at your local grocery store or farmer's market. First, boil water in a large pot. Add the udon noodles to the boiling water. Cook them for about 8-10 minutes, or until soft. Drain the noodles using a colander. Rinse them with cold water. This stops the cooking and keeps them from sticking. Set the noodles aside for later. Next, grab a large skillet or wok. Heat 2 tablespoons of vegetable oil over medium-high heat. Once hot, add 4 cloves of minced garlic and 1 inch of grated ginger. Stir these for about 30 seconds. You want them to smell great but not burn. Now, it’s time for the veggies. Toss in 1 bell pepper, 1 cup of snap peas, and 1 medium carrot, all cut into thin pieces. Stir-fry these for about 3-4 minutes. The goal is to keep them tender-crisp. You want bright colors and a bit of crunch. Add the cooked udon noodles to the skillet with the vegetables. Gently mix everything together. Now, pour in 3 tablespoons of soy sauce, 1 tablespoon of sesame oil, and 1 tablespoon of rice vinegar. If you like it spicy, add 1 teaspoon of chili paste. Toss everything for another 2-3 minutes. Make sure the noodles soak up all the tasty flavors. Once everything is well mixed, take the skillet off the heat. Stir in 3 chopped green onions for a fresh crunch. Transfer the stir-fry to a serving plate. For the final touch, sprinkle sesame seeds and fresh cilantro on top. This adds a beautiful look and extra flavor. Enjoy your homemade Better-Than-Takeout Garlic Soy Udon Stir-Fry! To get the best udon noodles, cook them just right. Boil the noodles for about 3-4 minutes. Drain them well and rinse with cold water. This keeps them from sticking together. If you want a firmer bite, cook them a minute less. To boost flavors, use fresh ingredients. The garlic and ginger should be minced and grated finely. This helps release their natural oils. Add soy sauce gradually. Taste as you go. For a hint of heat, include chili paste. You can also try adding a splash of lime juice for brightness. Serve your garlic soy udon in a deep bowl. This makes it look inviting. Top with sesame seeds and fresh cilantro for color. Add extra green onions for a fresh crunch. If you want, use chopsticks for a fun touch. This adds to the experience and makes the meal special. {{image_2}} You can easily boost your garlic soy udon stir-fry with protein. Tofu works great. Choose firm tofu and cut it into cubes. Sauté it in the oil until golden. Chicken is another tasty option. Use thin strips of chicken breast. Cook it first, then add vegetables. You can also use shrimp. Just toss them in for a quick cook. Each protein adds its own flavor. Feel free to swap out vegetables based on what you have. Broccoli florets are a great choice. They add crunch and color. Zucchini slices are another fun option. They cook fast and soak up flavors well. Mushrooms can add an earthy taste. Just slice them and toss them in. Remember, the goal is to use what you love. Do you like heat? Adjust the spice levels to match your taste. Add more chili paste for a kick. You can also use fresh chili peppers. Just slice them thin and mix in. If you want it mild, skip the chili altogether. You can also balance heat with a bit of sugar. It will make the flavors pop without making it too spicy. To keep your garlic soy udon stir-fry fresh, store it in an airtight container. This method prevents moisture loss and keeps flavors intact. Refrigerate within two hours after cooking. Your dish will last for 3 to 4 days in the fridge. Make sure to let it cool down before sealing. If you want to save some for later, freezing is a great option. Allow the stir-fry to cool completely before putting it in freezer-safe bags or containers. Make sure to remove as much air as possible to prevent freezer burn. It can last up to 2 months in the freezer. For best results, label the bags with the date. When you’re ready to enjoy your stir-fry, there are easy ways to reheat it. You can use a microwave. Place it in a microwave-safe dish and cover it. Heat in short intervals, stirring in between to get even warmth. You can also reheat on the stove. Add a splash of water or soy sauce to help keep it moist. Heat over medium-low until warmed through. This helps the flavors return to life! To store leftover udon stir-fry, place it in an airtight container. Keep it in the fridge. It stays fresh for about 3 to 4 days. When you are ready to eat, just reheat it in a pan or microwave. If you want to keep it for longer, you can freeze it. Thaw it in the fridge before reheating. Yes, you can use other noodles. Rice noodles, soba noodles, or even spaghetti work well. Just cook them according to the package instructions. Make sure to adjust the cooking time based on the noodle type. Each noodle will add a unique taste and texture to your stir-fry. To make this dish vegetarian or vegan, swap the soy sauce for a vegan brand. Use vegetable oil and check all ingredients for animal products. You can also add tofu or tempeh for protein. This adds a nice texture and makes the dish more filling. Garlic soy udon stir-fry pairs well with many dishes. You can serve it with edamame or a side salad. Spring rolls or dumplings also make great sides. For a full meal, try miso soup or a light broth. These complement the flavors and make your meal feel complete. In this post, we explored the key ingredients and steps to make a tasty udon stir-fry. We covered cooking noodles, sautéing aromatics, and adding your favorite veggies. I shared tips to perfect your dish, suggested variations for taste and texture, and explained storage and reheating. Cooking udon can be easy and fun. You can make it your own with many choices. Enjoy your stir-fry, and don't hesitate to experiment!

Better-Than-Takeout Garlic Soy Udon Stir-Fry Delight

- 1 lb ground chicken - 1/2 cup breadcrumbs - 1/4 cup grated Parmesan cheese - 1 egg - 2 cloves garlic, minced - 1 tablespoon fresh ginger, grated For the chicken meatballs, I use ground chicken as the base. It is lean and holds flavor well. Breadcrumbs help bind the meatballs and give them a nice texture. I add grated Parmesan cheese for a salty kick and richness. The egg acts as a binder, keeping everything together. Finally, I mix in minced garlic and fresh ginger for depth and zing. - 2 cups broccoli florets - 1 red bell pepper, sliced - 1 medium zucchini, sliced The veggies add color and nutrition. I love using broccoli florets for their crunch and health benefits. Red bell pepper brings sweetness and a pop of color. The zucchini adds a tender texture and absorbs flavors well. - 1/4 cup sweet chili sauce - 1 teaspoon soy sauce - 1 teaspoon sesame oil - 2 tablespoons olive oil - 1 teaspoon garlic powder - 1 teaspoon onion powder The sweet chili sauce is the star of this dish. It adds a sweet and spicy note. I add soy sauce for saltiness and umami. A hint of sesame oil gives a nutty flavor. I drizzle olive oil over the veggies to help them roast nicely. Finally, I sprinkle in garlic powder and onion powder for extra taste. With these ingredients, you create a dish that shines in flavor and nutrition. - Start by preheating your oven to 400°F (200°C). This heat level cooks the meatballs well while keeping the veggies crisp. - Next, line a large baking sheet with parchment paper. This step helps with easy cleanup and prevents sticking. - In a large bowl, combine the ground chicken, breadcrumbs, Parmesan cheese, egg, minced garlic, grated ginger, sweet chili sauce, soy sauce, sesame oil, salt, and pepper. Mix these ingredients thoroughly until they blend into a smooth mixture. - Now, form the mixture into meatballs about 1.5 inches in diameter. Place them on one side of the prepared baking sheet. This spacing allows even cooking. - In a separate bowl, toss the broccoli florets, red bell pepper slices, and zucchini rounds with olive oil, garlic powder, onion powder, salt, and pepper. Ensure every veggie gets coated well. - Spread the seasoned veggies on the other side of the baking sheet. Keep them separate from the meatballs for better cooking. - Place the sheet pan in the oven and bake for 20-25 minutes. The meatballs should reach an internal temperature of 165°F (74°C), and the veggies need to be tender. - After baking, remove the sheet pan from the oven. Sprinkle sesame seeds over the meatballs and veggies. This adds a nice crunch and flavor to your dish. To make great meatballs, you want a nice texture. Use ground chicken that is fresh. Mix it well with breadcrumbs, Parmesan cheese, and egg. This helps bind the meatballs together. Avoid overmixing. This keeps them tender. Aim for meatballs about 1.5 inches in size. They cook evenly this way. For cooking time, bake the meatballs for 20-25 minutes at 400°F (200°C). Check to make sure they reach 165°F (74°C). This ensures they are safe to eat. If you want extra crispiness, broil them for a minute or two at the end. You can change the veggies based on what you like. Try carrots, snap peas, or bell peppers. Each adds a unique flavor and crunch. Adjust the seasoning to fit the veggies you choose. For example, add a pinch of cayenne for more heat. When you use different veggies, remember to adjust the cooking time. Harder vegetables like carrots take longer than soft ones like zucchini. Keep an eye on everything to ensure perfect cooking. For side dishes, serve this meal with rice or quinoa. They soak up the sweet chili sauce well. You can also add a fresh salad for a crunchy contrast. To make your dish look great, arrange the meatballs and veggies artfully on the plate. Drizzle extra sweet chili sauce on top for a pop of color and flavor. Finish with sesame seeds for a nice touch. This makes your meal look and taste amazing! {{image_2}} You can make this dish low-carb by swapping out the veggies for cauliflower rice. Cauliflower rice is light and fluffy. It adds a nice texture without the carbs. You can simply sauté it in a pan for a few minutes. This way, you keep your meal tasty and healthy. If you want to change the meat, try ground turkey or pork. Both options work well and keep the flavor. You can even use plant-based meat for a vegetarian twist. Just ensure the plant-based option has good flavor and texture. To give your meatballs more kick, add some crushed red pepper flakes. This will spice up the sweet chili sauce and add a nice heat. You can also try adding sriracha or hot sauce to the mix for an extra kick. If you're looking for new flavors, explore different sauces. You can use teriyaki or hoisin sauce instead of sweet chili. These will change the taste while keeping it yummy. Marinades can also enhance the meatballs. Try marinating the chicken mix a few hours before cooking for deeper flavor. For busy days, you can prep these meatballs ahead of time. Make the meatballs and store them in the fridge for up to two days. This saves time on busy weeknights. If you want to freeze them, lay the meatballs on a baking sheet first. Freeze them for about an hour, then transfer them to a freezer bag. This keeps them from sticking together. When you’re ready to eat, thaw them overnight in the fridge. Reheat them in the oven or microwave until hot. Enjoy a quick meal without the fuss! To store leftovers, use airtight containers. Glass or plastic containers work well. Keep the meatballs and veggies separate if you can. This keeps everything fresh. You can store them in the fridge for up to three days. After that, the quality may drop. Reheat your leftovers in the oven for best results. Preheat the oven to 350°F (175°C). Place the meatballs and veggies on a baking sheet. Heat for about 10-15 minutes. You can also use a microwave. Just cover the dish to keep the moisture. This helps keep the texture and flavor intact. To freeze meatballs and veggies, let them cool first. Place them in freezer-safe bags or containers. Remove as much air as possible to prevent freezer burn. You can freeze them for up to three months. To thaw, place them in the fridge overnight. For quicker thawing, use the microwave on low power. It takes about 15 minutes to prep and 20-25 minutes to cook. You can have this dish ready in about 40 minutes. Preheating the oven and chopping the veggies will be part of your prep time. Yes, you can use ground turkey, beef, or pork instead of chicken. Each meat will add a unique flavor. Just remember to adjust cooking times if you switch to beef or pork. If you want a gluten-free option, use almond flour or crushed cornflakes. You can also use oats or ground flaxseed. These will help bind the meatballs without gluten. The meatballs have a sweet taste because of the sweet chili sauce. It adds a nice, mild kick without being too hot. You get a mix of sweet and savory in every bite. Yes, you can prepare the meatballs and veggies ahead of time. Store them in the fridge for up to two days. You can also freeze them for longer storage. Just thaw before cooking. Chicken meatballs with veggies on a sheet pan are simple and tasty. You learned key ingredients, easy steps, and ways to store leftovers. You can change flavors and make this dish your own. Experiment with spices and sauces to match your taste. Keep it in the fridge or freezer for later meals. Enjoy your cooking adventure and watch how fun it can be! Make these meatballs today and share with friends or family.

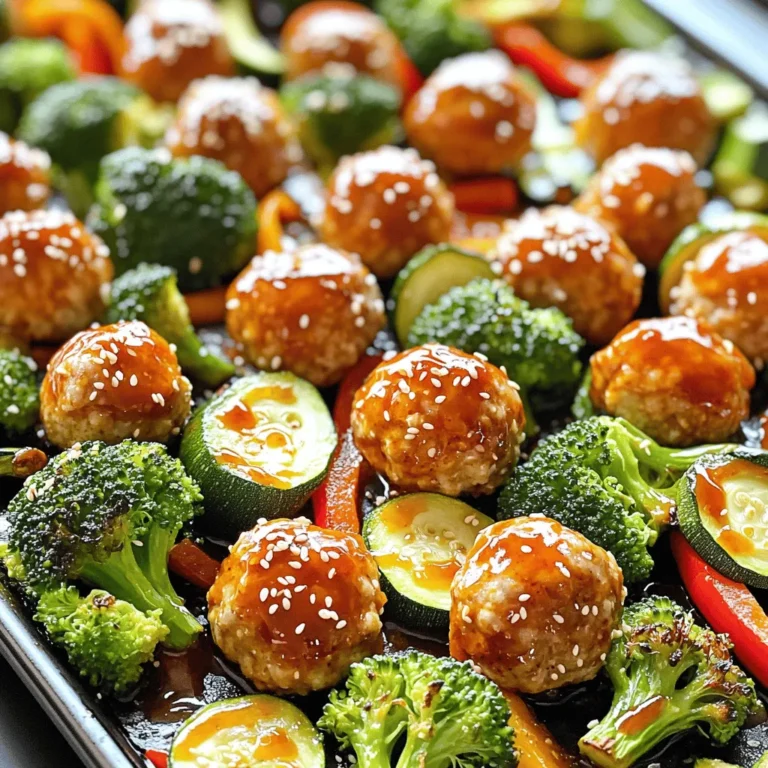
Sheet-Pan Sweet Chili Chicken Meatballs and Veggies Delight

- Zucchini - Parmesan Cheese - Breadcrumbs (Whole Wheat) - Herbs and Spices - Eggs - Olive Oil Spray To make Herb Parmesan Zucchini Chips, you need simple and fresh ingredients. First, grab 2 medium zucchinis. Choose firm ones with a shiny skin. This ensures they will be crunchy. Next, get 1 cup of grated Parmesan cheese. This cheese gives the chips a salty and nutty flavor. You can use fresh cheese for a richer taste. Then, you'll need 1 cup of breadcrumbs. Whole wheat breadcrumbs work best. They add a nice texture and a bit of fiber. Next, gather your herbs and spices. You will need: - 1 teaspoon of dried oregano - 1 teaspoon of dried basil - 1 teaspoon of garlic powder - ½ teaspoon of paprika - Salt and black pepper to taste These herbs and spices add a lot of flavor. Feel free to mix and match based on your taste. You will also need 2 large eggs, beaten. The eggs help the breadcrumbs stick to the zucchini slices. Lastly, have an olive oil spray on hand. This helps the chips become crispy and golden brown. With these ingredients, you’re ready to create a tasty and healthy snack. Enjoy the process! {{ingredient_image_1}} First, you need to preheat your oven to 425°F (220°C). This step is key to getting those chips crispy. While the oven heats, line a baking sheet with parchment paper. This makes cleanup easy and helps the chips not stick. Next, grab a large bowl. In it, combine the grated Parmesan cheese, breadcrumbs, oregano, basil, garlic powder, paprika, salt, and black pepper. Mix these dry ingredients well. You want every chip to have that tasty coating. Now, take two large eggs and beat them in another bowl. You want the eggs mixed well but not too frothy. Take each zucchini slice and dip it into the beaten eggs. Let the extra egg drip off. Next, coat the slice in the Parmesan breadcrumb mixture. Press gently to make sure the coating sticks well. This step is crucial for a crunchy texture. Once all the slices are coated, arrange them on the prepared baking sheet in a single layer. Make sure they don’t overlap. This helps them cook evenly. Before baking, spray the slices lightly with olive oil. This gives them a golden look and extra crispiness. Now, pop the baking sheet into the oven. Bake the zucchini chips for about 20 to 25 minutes. Flip them halfway through to ensure even cooking. Look for a golden brown color and crispy texture. When they’re done, take them out and let them cool slightly before serving. Enjoy your healthy snack! - Olive Oil Application: Using olive oil spray is key. It adds a light coat without soaking the chips. This helps achieve that crispy texture. A quick spray on both sides works wonders. You want just enough oil to help the breadcrumbs stick and brown. - Baking Times and Temperature: Set your oven to 425°F (220°C). This high heat helps the chips crisp up nicely. Bake them for 20 to 25 minutes. Flip the chips halfway through to ensure even cooking. Watch closely, as each oven varies slightly. - Additional Seasonings: Feel free to mix in more flavors. Try adding a pinch of cayenne for heat or lemon zest for brightness. You can also use fresh herbs if you have them on hand. Just remember, fresh herbs have a stronger flavor, so use less than dried. - Types of Dipping Sauce Suggestions: Pair your chips with tasty dips. Marinara sauce is a classic choice, but a spicy aioli can elevate the flavor. You can also serve them with ranch dressing or a yogurt dip for a cool contrast. Experiment with your favorites! Pro Tips Slice Uniformly: Ensure your zucchini slices are of even thickness for consistent cooking and crispiness. Use Fresh Herbs: For an extra burst of flavor, consider using fresh herbs instead of dried, adjusting the quantity as needed. Don’t Overcrowd: Bake in batches if necessary; overcrowding the baking sheet can lead to soggy chips. Experiment with Seasoning: Feel free to mix in other spices or cheese varieties to customize the flavor profile to your liking. {{image_2}} Cheese Substitutes If you want to change the cheese, try using nutritional yeast. It gives a cheesy flavor without dairy. You can also use vegan cheese for a plant-based option. This keeps the recipe tasty and friendly for different diets. Gluten-Free Options To make this recipe gluten-free, switch the breadcrumbs. Use crushed rice cereal or gluten-free panko. Both options add crunch without the gluten. Just make sure to check the labels for hidden gluten. Spicy Zucchini Chips For a kick, add chili powder or cayenne pepper to the seasoning mix. Start with a small amount and taste as you go. This adds heat and flavor to the chips that is sure to impress. Herbs Variations You can switch herbs based on your taste. Try thyme or rosemary for a new twist. Fresh herbs can work too. Just chop them finely and mix them into the breadcrumbs. Each herb brings its own flavor to the dish. After making these tasty zucchini chips, let them cool completely on a wire rack. This step keeps them crispy. Once cool, place the chips in an airtight container. Use parchment paper between layers to avoid sogginess. Store them in the fridge for up to three days. To enjoy your chips again, you can reheat them in two ways: the oven or the air fryer. - Oven: Preheat it to 350°F (175°C). Spread the chips on a baking sheet. Heat for about 10 minutes, or until crispy again. - Air Fryer: Set it to 350°F (175°C). Place the chips in the basket in a single layer. Heat for 5 minutes for a quick crunch. For both methods, avoid overheating. Too much heat can make the chips lose their nice crunch. Keeping them crispy is key to a great snack! How do I make zucchini chips without bread crumbs? You can skip the bread crumbs by using just cheese. Coat the zucchini slices in beaten eggs and then sprinkle them with Parmesan cheese. Bake as usual, and you will still enjoy a tasty snack. Can I use fresh herbs instead of dried? Yes, you can use fresh herbs! Just chop them finely. Use about three times more fresh herbs than dried ones. For example, if the recipe calls for 1 teaspoon of dried oregano, use 3 teaspoons of fresh oregano. How can I make these chips spicier? To add spice, mix in some red pepper flakes. You can also add a dash of cayenne pepper to the breadcrumb mixture. This will give your chips a nice kick! What is the best way to store zucchini chips? Let the chips cool completely before storing. Place them in an airtight container. Keep them in a cool, dry place. For extra crispiness, you can also store them in a paper bag. This post covered how to make tasty zucchini chips. You learned about the ingredients, steps, and tips for perfecting your dish. Remember, use fresh herbs or change up spices to suit your taste. You can also store leftovers well and reheat them without losing crispiness. Explore variations to give your chips new flavors. Enjoy creating your own zucchini snacks!

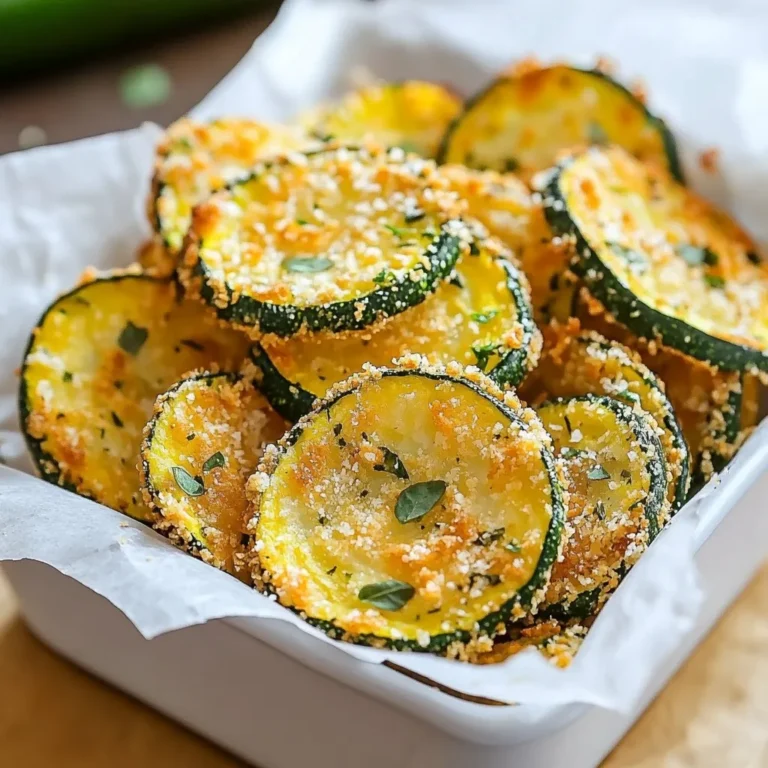
Herb Parmesan Zucchini Chips Crunchy Healthy Snack

Here are the ingredients for my creamy broccoli cheddar soup. Each one plays a big role in flavor and texture. - 4 cups fresh broccoli florets - 1 medium onion, diced - 2 cloves garlic, minced - 3 tablespoons unsalted butter - 4 cups vegetable broth - 1 cup heavy cream - 2 cups sharp cheddar cheese, shredded - 1 teaspoon Dijon mustard - Salt and pepper to taste - Croutons (for topping) Fresh broccoli florets make the soup bright and healthy. The diced onion adds sweetness and depth. Minced garlic gives a lovely aroma and flavor. Unsalted butter helps to sauté the onions, making them soft and inviting. Vegetable broth is key for a rich base. Heavy cream brings a smooth texture. Shredded cheddar cheese gives a sharp taste that pairs well with broccoli. Dijon mustard adds a hint of tang. Finally, salt and pepper balance all the flavors. Don't forget the croutons! They add a nice crunch on top. With these ingredients, you can create a warm and comforting meal that feels like a hug in a bowl. {{ingredient_image_1}} - Step 1: Sautéing the onions In a large pot, melt the butter over medium heat. Add the diced onion. Sauté it until it turns translucent, about 5 minutes. This step adds flavor and depth to your soup. - Step 2: Adding garlic and broccoli Next, add the minced garlic to the pot. Cook for one minute until you smell its rich aroma. Then, stir in the fresh broccoli florets. This bright green veggie brings color and health to your dish. - Step 3: Cooking with vegetable broth Pour in the vegetable broth, covering the broccoli completely. Bring the mixture to a boil. Then, lower the heat and let it simmer. Cook until the broccoli is tender, which takes about 10 minutes. - Step 4: Blending for creaminess Once the broccoli is soft, remove the pot from heat. Use an immersion blender to blend the soup until it is smooth and creamy. If you prefer, you can use a regular blender. Just remember to be careful with the hot liquid! - Step 5: Incorporating cream and cheese Return the blended soup to medium heat. Stir in the heavy cream, shredded cheddar cheese, and Dijon mustard. Mix until the cheese melts, creating a rich and creamy texture. This step makes the soup truly indulgent. - Step 6: Final seasoning and serving Add salt and pepper to taste. This will enhance all the flavors in your soup. Serve it hot, topped with crunchy croutons. They add a nice texture contrast to the creamy soup. Each step in this process builds layers of flavor, making your creamy broccoli cheddar soup a rich and comforting meal. Enjoy the warmth and comfort it brings! - How to achieve the best creamy texture To get a smooth, creamy soup, blend it well. Use an immersion blender for ease. If you prefer a regular blender, be careful with hot soup. Blend in small batches, leaving space for steam. Adding cream and cheese slowly helps keep it creamy. - Choosing the right broccoli florets Pick fresh, bright green broccoli. Avoid yellow or limp florets. The smaller the florets, the faster they cook. This helps them blend smoothly into the soup. You can also use stems; just peel and chop them finely. - Tips for sautéing onions properly Start with medium heat and melt the butter first. Add onions and stir until they turn translucent. This takes about five minutes. Stirring often helps them cook evenly. Don’t rush this step; it builds a rich flavor base. - Ideal toppings for extra flavor Croutons add a nice crunch. You can also sprinkle some extra cheese on top. Fresh herbs like parsley or chives make great garnishes. A drizzle of olive oil adds richness. - Best side dishes to accompany the soup Serve with a warm, crusty bread or a grilled cheese sandwich. A light salad balances the meal well. Try a simple green salad with a tangy dressing for a fresh contrast. Pro Tips Freshness Matters: Always use fresh broccoli for the best flavor and vibrant color. Frozen broccoli can work in a pinch, but fresh yields a superior texture. Cheese Selection: Opt for sharp cheddar cheese for a bolder flavor. You can also mix in other cheeses like Gruyère or Monterey Jack for a unique twist. Blending Tips: If using a stand blender, let the soup cool slightly before blending to avoid splattering. Blend in batches if necessary, and return to the pot to heat through. Seasoning Balance: Taste and adjust the seasoning after adding the cream and cheese. The cheese adds saltiness, so ensure you don’t over-salt initially. {{image_2}} You can switch out heavy cream for coconut milk. This makes the soup dairy-free. You can also use nutritional yeast instead of cheese for a cheesy flavor. If you want to add protein, try diced chicken or crispy bacon. Both add great taste and make the soup heartier. You can also experiment with different cheeses. Gruyère or Monterey Jack gives a nice twist to the classic cheddar. To boost flavor, add spices like paprika or thyme. These spices bring warmth and depth to the soup. Fresh herbs like parsley or chives can brighten the dish. You can also toss in other veggies, like carrots or spinach, for extra nutrition. These additions keep your soup healthy and colorful. Each variation adds a unique touch while keeping it comforting and rich. To keep your creamy broccoli cheddar soup fresh, you need to store it right. First, let the soup cool down to room temperature. Then, pour it into an airtight container. This helps keep out air and moisture. Place the container in the fridge. The soup will last for about 3 to 4 days. If you want to keep it longer, freezing is a great option. For long-term storage, use freezer-safe containers. Make sure to leave some space at the top. Soups expand when frozen. Label the container with the date to track how long it’s been in the freezer. You can freeze the soup for up to 3 months. When you are ready to enjoy the soup again, reheating it is simple. You can use the stove or microwave. If using the stove, pour the soup into a pot. Heat it over medium-low heat. Stir often to avoid sticking. If you use the microwave, heat in short bursts. Stir the soup between intervals to ensure even heating. To keep the soup creamy, add a splash of heavy cream while reheating. This helps restore its rich texture. If the soup seems too thick, add a bit of vegetable broth or water. Stir well before serving to make sure everything blends nicely. Enjoy your cozy bowl of soup! How long does creamy broccoli cheddar soup last in the fridge? Creamy broccoli cheddar soup lasts about 3 to 5 days in the fridge. Store it in an airtight container for best results. Can I make this soup ahead of time? Yes, you can make this soup ahead of time. Just store it in the fridge after it cools. Reheat when you're ready to enjoy. Is it possible to make this soup in a slow cooker? Yes, you can make this soup in a slow cooker. Add all the ingredients, except for cream and cheese, and cook on low for 4 to 6 hours. Blend and stir in cream and cheese before serving. How can I make this soup spicier? To make it spicier, add red pepper flakes or a dash of hot sauce. You can also mix in some diced jalapeños for an extra kick. What can I serve with creamy broccoli cheddar soup? I recommend pairing the soup with crusty bread or a fresh salad. Grilled cheese sandwiches also make a great side! This blog post shared an easy and tasty recipe for creamy broccoli cheddar soup. You learned about the key ingredients, step-by-step instructions, and tips for great results. I also covered variations and smart ways to store and reheat your soup. In all, enjoy cooking and experimenting with flavors. You can make this soup your own. It’s a warm dish perfect for any time. Happy cooking!

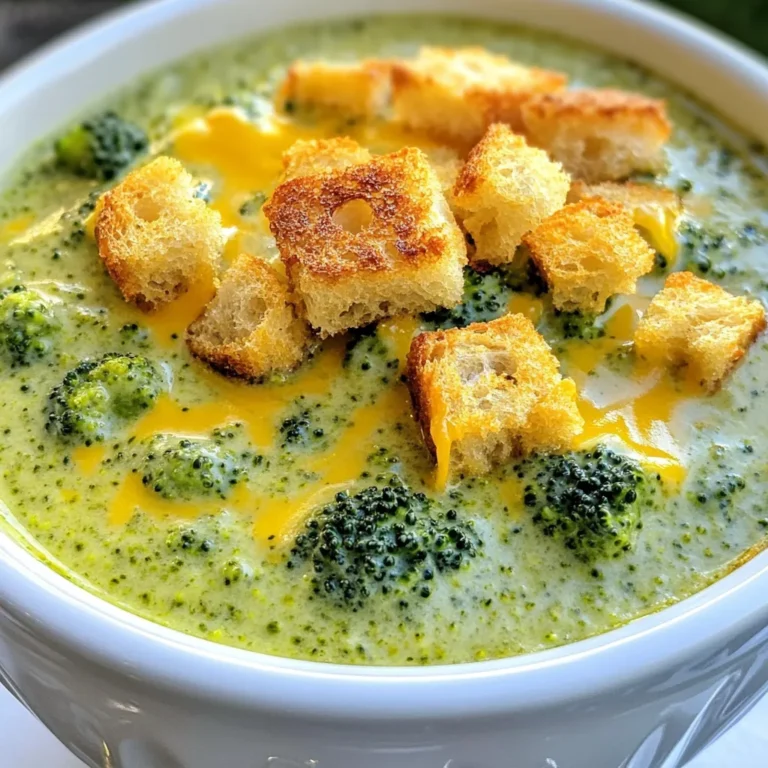
Creamy Broccoli Cheddar Soup Rich and Comforting Meal

- 1 pound large shrimp, peeled and deveined - 1 cup shredded coconut (sweetened or unsweetened) - 1/2 cup panko breadcrumbs - 1/2 cup all-purpose flour - 2 large eggs - 1 teaspoon garlic powder - 1 teaspoon paprika - Salt and pepper to taste Using cooking spray is key for crispiness. It helps the shrimp get that golden, crunchy crust. Without it, your shrimp may end up soggy. So, don’t skip this step! A light spray on both the basket and the shrimp makes a big difference. It’s simple but very effective. 1. Preparing the shrimp Start with 1 pound of large shrimp. Make sure they are peeled and deveined. Rinse them under cold water. Pat them dry with paper towels. This helps the coating stick better. 2. Setting up the dredging stations Get three shallow bowls ready. In the first bowl, add 1/2 cup of all-purpose flour. Season it with a pinch of salt and pepper. In the second bowl, beat 2 large eggs. In the third bowl, combine 1 cup of shredded coconut, 1/2 cup of panko breadcrumbs, 1 teaspoon of garlic powder, 1 teaspoon of paprika, salt, and pepper. Mix everything well. 1. Flour coating Take one shrimp and dip it into the flour. Make sure to shake off any extra flour. This step gives the shrimp a nice base. 2. Egg wash Next, dip the floured shrimp into the beaten eggs. Ensure it is fully coated. This step helps the coconut and panko stick. 3. Coconut-panko mixture Finally, roll the shrimp in the coconut-panko mix. Press gently to make sure it sticks well. Repeat this process for all the shrimp. 1. Preheating the air fryer Preheat your air fryer to 400°F (200°C). This should take about 5 minutes. Preheating ensures even cooking. 2. Cooking instructions and flipping technique Lightly spray the air fryer basket with cooking spray. Place the shrimp in a single layer, making sure not to overcrowd. Spray the tops of the shrimp with cooking spray to help them crisp up. Cook for 8-10 minutes, flipping halfway through. The shrimp should turn golden brown and crispy when done. Serve hot with your favorite dipping sauce. To get your shrimp extra crispy, use cooking spray. This helps the coating brown nicely. Spray the basket lightly before adding the shrimp. Also, place the shrimp in a single layer. This allows hot air to circulate around each piece, making them crispier. One common mistake is overcrowding the basket. If you put too many shrimp in, they won’t cook evenly. They need space to get that nice crunch. Another mistake is not preheating the air fryer. Always preheat it for about 5 minutes. This helps the shrimp cook correctly and become golden. For flavor, feel free to swap seasonings. Try adding chili powder for spice or lemon zest for freshness. When it comes to coconut, you can choose sweetened or unsweetened. Sweetened coconut gives a rich flavor, while unsweetened offers a more subtle taste. Both options work well, so pick what you like! {{image_2}} You can dip your crispy coconut shrimp in different sauces. - Sweet chili sauce adds a nice, tangy kick. - Zesty lime aioli gives a fresh, citrus flavor. These sauces make each bite even better. They complement the shrimp's crunch and sweetness well. You can also try mixing sauces to create your own flavor. You can make this dish even more friendly for different diets. - Gluten-free alternatives for flour and breadcrumbs work great. You can use almond flour or gluten-free panko. - Adding spices for heat can spice things up! Try cayenne pepper or chili powder. This will give your shrimp an extra kick. Feel free to get creative with what you have on hand. If you want to try different cooking methods, you have options. - Oven-baked version: Preheat your oven to 425°F (220°C). Place shrimp on a baking sheet and bake for 15-20 minutes. Flip halfway through for even cooking. - Deep-frying option: Heat oil to 350°F (175°C). Fry shrimp in batches for about 3-4 minutes until golden brown. Each method brings its own twist to the dish. Choose what fits your style and enjoy! To keep your shrimp fresh, let them cool first. Spread them on a plate. Once they are cool, place them in an airtight container. Make sure to layer parchment paper between layers if you stack them. This helps avoid sticking. They can stay in the fridge for up to three days. To warm up your shrimp, use the air fryer. Set it to 350°F (175°C) and cook for about 5 minutes. This keeps them crispy. You can also use the oven at the same temperature. Just place them on a baking sheet for 10 minutes. Avoid the microwave; it makes shrimp soggy. If you want to freeze your cooked shrimp, let them cool first. Place them on a baking sheet in a single layer. Freeze for about an hour until firm. Then, transfer them to a freezer bag. Be sure to press out the air. They can last in the freezer for up to three months. Cooking shrimp in the air fryer takes about 8 to 10 minutes. You will want to preheat the air fryer to 400°F (200°C) before adding the shrimp. Make sure to flip them halfway through to get even cooking. The shrimp should turn golden brown and crispy when done. Yes, you can use frozen shrimp, but I recommend thawing them first. Place the shrimp in a bowl of cold water for about 15 minutes. Once thawed, peel and devein them if needed. This step ensures that the shrimp cook evenly and get crispy in the air fryer. You can tell shrimp are done when they turn opaque and curl slightly. The color should change to a nice pink. If you have a meat thermometer, the internal temperature should reach 145°F (63°C). Enjoy your crispy coconut shrimp hot for the best taste! In this article, we discussed making crispy shrimp in the air fryer. We covered key ingredients, including shrimp, coconut, and breadcrumbs. Next, we outlined step-by-step cooking instructions. Tips and tricks helped you achieve maximum crispiness and avoid common mistakes. We explored variations, including sauces and ingredient swaps. Finally, we shared storage and reheating methods. Now, you can enjoy delicious, crunchy shrimp anytime. Use these tips to impress your friends and family with your cooking skills. Happy frying!

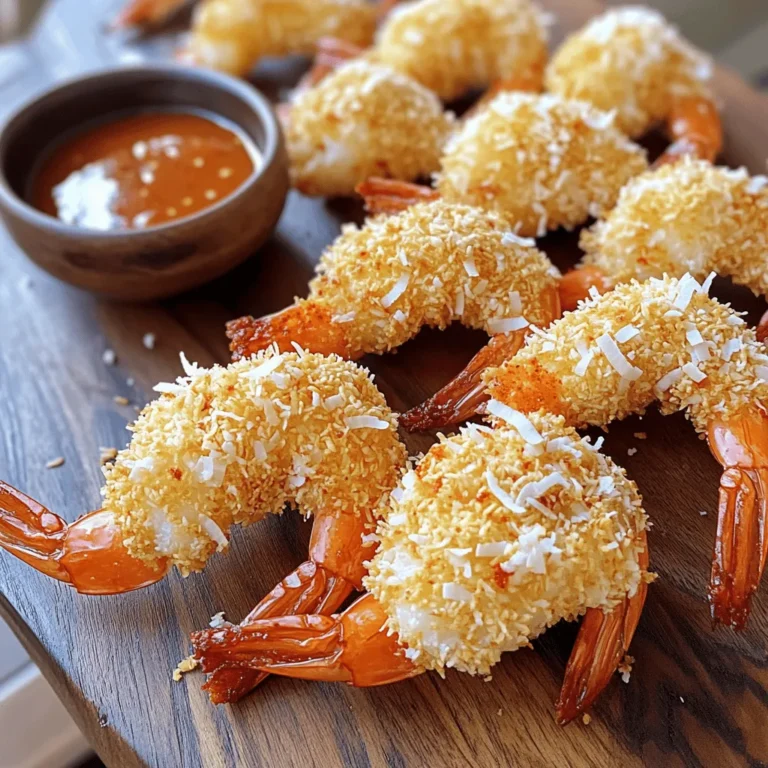
Air Fryer Crispy Coconut Shrimp Easy and Delicious Meal

- 1 cup pumpkin puree - 1 ripe banana, frozen - 1/2 cup Greek yogurt - 1 cup almond milk - 1 scoop protein powder - 1 teaspoon pumpkin spice blend - 1 tablespoon honey or maple syrup (optional) In this recipe, pumpkin puree gives a smooth base. It brings a rich flavor and a lovely orange color. The frozen banana adds sweetness and creaminess, making each bite feel indulgent. Greek yogurt packs in protein and a nice tang. Almond milk, or any milk you prefer, helps blend it all together. The protein powder boosts nutrition and keeps you full. The pumpkin spice blend adds warmth and that classic fall taste. You can sweeten it with honey or maple syrup, but it's totally up to you. - Granola - Sliced bananas - Chopped nuts - Chia seeds - Cinnamon Toppings make your smoothie bowl fun and tasty. Granola adds crunch and texture. Sliced bananas offer a fresh touch. Chopped nuts add healthy fats and more crunch. Chia seeds bring nutrition and a bit of chewiness. A sprinkle of cinnamon on top makes it extra special. Feel free to mix and match these toppings based on what you like! To make your Pumpkin Spice Protein Smoothie Bowl, start by blending the ingredients. 1. In a blender, add: - 1 cup pumpkin puree - 1 ripe frozen banana - 1/2 cup Greek yogurt - 1 cup almond milk - 1 scoop vanilla protein powder - 1 teaspoon pumpkin spice - 1 tablespoon honey or maple syrup (optional) 2. Blend on high until smooth and creamy. Stop to scrape down the sides if needed. 3. If the mix is too thick, add more almond milk to reach your desired thickness. Now it's time to create a beautiful presentation. Pour the smoothie into a bowl. For toppings, get creative! Use any of the following: - Granola - Sliced bananas - Chopped nuts - Chia seeds - Cinnamon sprinkle When adding toppings, arrange them in a fun pattern. This makes your bowl look inviting. A colorful mix of textures will catch the eye. Serve your bowl right away and enjoy this delicious, healthy treat! Choosing the right protein powder When picking a protein powder, look for one with simple ingredients. I prefer vanilla or vanilla spice for this bowl. These flavors blend well with pumpkin. They also add a nice sweetness without extra sugar. Frozen banana benefits Using a frozen banana gives the smoothie bowl a thick texture. It adds natural sweetness, too. If you don't have a frozen banana, you can freeze one overnight. Just peel it and place it in a bag first. Optimal blending techniques Start by adding the liquids and soft ingredients to the blender. This helps the blades move smoothly. Next, add the pumpkin puree and frozen banana. Blend on high until your mixture is creamy. If it’s too thick, add a splash more almond milk. Scrape down the sides if needed to mix everything well. Nutritional highlights of pumpkin Pumpkin is rich in vitamins A and C. It helps keep your skin healthy. It also contains fiber, which aids digestion. This makes your smoothie bowl not only tasty but also good for you. Advantages of Greek yogurt and protein Greek yogurt is packed with protein and probiotics. It supports your gut health and muscle growth. Adding protein powder boosts your protein intake even more, making this bowl a great meal option. {{image_2}} If you want a dairy-free treat, there are easy swaps. First, use almond milk or oat milk instead of regular milk. Both options add a nice flavor. You can also try coconut milk for a creamier base. For protein, look for vegan protein powder. Pea protein and brown rice protein are great choices. They mix well and keep the smoothie tasty. To change the flavor, think about adding spices. You can use nutmeg or cinnamon for a warm touch. A pinch of ginger adds a nice kick too. Another fun idea is to stir in nut butter. Almond or peanut butter makes the bowl more filling. You can also blend in fruits like berries or apples for extra flavor. They add sweetness and color to your bowl. To keep your leftover smoothie fresh, store it in a jar. Use a glass or plastic container with a tight lid. This will help reduce air exposure. The leftover smoothie can last in the fridge for up to 24 hours. Shake it well before drinking. If you want to store it longer, freeze the smoothie. Pour it into ice cube trays or freezer-safe bags. This way, you can save portions for later. When ready to enjoy, blend the cubes with a little milk for a quick treat. Prepping your ingredients ahead of time makes smoothie making easy. Measure out your pumpkin puree, banana, and yogurt. Put them in separate containers in the fridge. This way, you save time on busy mornings. For meal prepping, consider making multiple smoothie bowls at once. Blend enough for two or three bowls. Store them in jars and keep them in the fridge. Add your toppings right before eating for the best taste and texture. Yes, you can use fresh pumpkin. Just cook and puree it. Use the same amount as canned. You can use any plain yogurt. Coconut yogurt works well for a dairy-free option. Skip the honey or maple syrup. Use a low-calorie sweetener like stevia instead. Yes, you can make it ahead. Store it in the fridge for up to two days. It stays fresh for about 24 hours in the fridge. The toppings may get soggy over time. This post covered how to make a tasty smoothie bowl using simple steps and fresh ingredients. You learned about the main ingredients, topping ideas, and helpful tips for the perfect blend. Enjoy the health benefits of pumpkin, Greek yogurt, and more. Personalize your bowl with different flavors and toppings. Remember to store leftovers properly for later. I hope you’re ready to create your own delicious smoothie bowl today. It's a fun way to eat healthy!

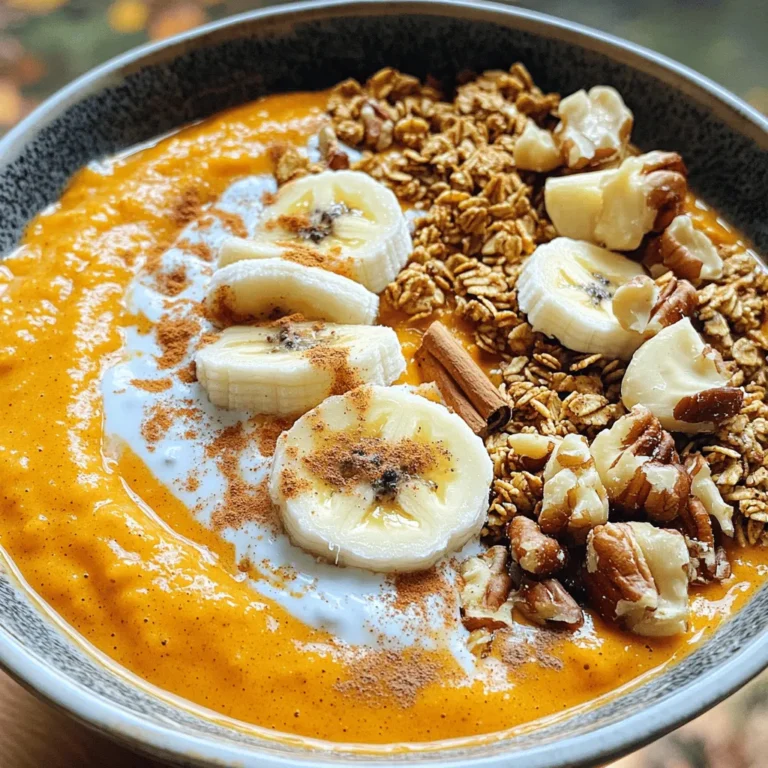
Pumpkin Spice Protein Smoothie Bowl Easy and Tasty Treat

- 1/2 cup chia seeds - 2 cups oat milk (unsweetened) - 2 tablespoons maple syrup or honey - 1 teaspoon vanilla extract - 1/4 teaspoon salt - 1/4 cup almond butter or peanut butter - Fresh fruits (e.g., berries, banana slices) for topping - Optional: nuts or seeds for added crunch To start making high-protein oat milk chia pudding, gather these ingredients. Chia seeds are tiny but mighty. They hold a lot of water and help thicken the pudding. Oat milk brings creaminess and a rich flavor. I prefer unsweetened oat milk for better control over sweetness. Next, you need a sweetener. Maple syrup or honey works great. Choose what you like best. A splash of vanilla extract adds nice flavor. Don’t forget the salt! It enhances all the tastes. For a protein boost, use almond butter or peanut butter. This makes the pudding creamy and rich. Fresh fruits are a must for topping. They add color and taste. You can also throw in some nuts or seeds for extra crunch. With these ingredients, you can make a delicious and healthy treat! 1. Combining ingredients in a mixing bowl Start by taking a mixing bowl. Add 1/2 cup of chia seeds. Pour in 2 cups of unsweetened oat milk. Add 2 tablespoons of maple syrup or honey next. Don’t forget to include 1 teaspoon of vanilla extract and 1/4 teaspoon of salt. 2. Whisking technique for clump-free mixture Use a whisk to mix everything well. Whisk for about 1 to 2 minutes. This will help avoid clumps of chia seeds. A smooth mix makes for a creamy pudding. 3. Chilling process for optimal texture Let the mixture sit for 5 minutes. This allows the chia seeds to absorb some liquid. Then stir it again to break up any clumps. Cover the bowl and place it in the fridge. Chill for at least 4 hours or overnight. This time helps the chia seeds swell and create a pudding-like texture. 1. Illustrative steps on waiting and stirring After chilling, check the pudding. It should be thick and smooth. Stir it again before serving to keep it creamy. 2. Timing for refrigerating chia pudding The longer you let it chill, the better the texture. I prefer leaving it overnight. This way, it’s ready for breakfast or a snack. 1. Techniques for mixing in nut butter When serving, mix in 1/4 cup of almond butter or peanut butter. This adds creaminess and a rich flavor. Adjust the sweetness if you like it sweeter. 2. Creative topping ideas with fresh fruits Serve the pudding in bowls. Top it with fresh fruits like berries or banana slices. You can also add nuts or seeds for extra crunch and nutrition. Enjoy your tasty, high-protein oat milk chia pudding! To make great chia pudding, avoid some common mistakes. First, don’t skip whisking the mixture. This step helps break clumps of chia seeds. If you see clumps, stir again after letting it sit for five minutes. Next, pay close attention to your chia-to-liquid ratio. Too much liquid makes a runny pudding. Use 1/4 cup chia seeds for every 2 cups of oat milk. This ratio gives you a nice, thick texture. You can change the flavors of your pudding easily. For sweeteners, use honey, maple syrup, or even agave nectar. Each option brings its own taste. You can also add spices or extracts. Try cinnamon for warmth. A drop of almond extract adds a nice twist. Cocoa powder can turn it into a chocolate treat. Store your leftovers in a sealed container. Glass jars work well for this. They keep the pudding fresh and let you see its layers. Chia pudding lasts for about 5 days in the fridge. Always check for any strange smells or colors before eating. If it looks off, toss it out for safety. {{image_2}} You can make your chia pudding fun with different flavors. Here are two ideas: - Chocolate Chia Pudding: Add 2 tablespoons of cocoa powder to the base mix. This gives a rich taste and is great for chocolate lovers. - Tropical Version: Swap oat milk for coconut milk. Add fresh mango or pineapple pieces for a sunny twist. Chia pudding is friendly for many diets. Here are some points to think about: - Vegan and Gluten-Free Options: All the ingredients are plant-based and gluten-free. Use maple syrup for sweetness to keep it vegan. - Protein-Boosting Add-Ins: Mix in a scoop of protein powder or more nut butter. This helps you reach your protein goals. You can change your chia pudding with the seasons: - Summer Berry Chia Pudding: Top with mixed berries like strawberries, blueberries, and raspberries. They add color and flavor. - Fall Spiced Pudding: Stir in pumpkin puree and a pinch of cinnamon. This gives a warm, cozy taste perfect for fall days. How long does it last in the fridge? Your high-protein oat milk chia pudding stays good for about 5 days in the fridge. Signs that the pudding has gone bad: Check for a sour smell or any change in color. If you see mold, toss it out. Can you freeze chia pudding? Yes, you can freeze chia pudding! It holds up well in the freezer. Best practices for thawing: Thaw it in the fridge overnight. Avoid microwaving, as it can change the texture. Types of containers for optimal freshness: Use airtight glass or plastic containers. They keep the pudding fresh and tasty. Avoiding spillage during storage: Fill containers only three-quarters full to leave space for expansion. This helps prevent spills. What can I substitute for oat milk? You can use almond milk, soy milk, or coconut milk. Each option adds a unique flavor. Almond milk gives a nutty taste, while soy milk boosts protein. Coconut milk adds creaminess, but it may change the pudding's flavor. How to increase protein content further? Add protein powder or Greek yogurt. You can mix in a scoop of vanilla protein powder for a protein boost. Greek yogurt also adds creaminess and protein. Nut butters like almond or peanut butter raise the protein level, too. Health benefits of chia seeds and oat milk Chia seeds are rich in fiber, omega-3s, and protein. They can help with digestion and heart health. Oat milk is low in calories and high in vitamins. It’s a great option for those who are lactose-free or vegan. Caloric content and serving size recommendations One serving is about 1/2 cup of pudding. This serving has around 200 calories, depending on the toppings. If you add nut butter or extra fruit, the calories will increase. Always check the labels for exact numbers. Why is my pudding too runny? If your pudding is runny, you may need more chia seeds. They absorb liquid to thicken the pudding. Stirring well and waiting longer can also help. If needed, let it sit in the fridge for a few more hours. What to do if it’s too thick? If your pudding is too thick, simply stir in more oat milk. Add a little at a time until you reach your desired consistency. This can make it creamier and easier to eat. Chia pudding is a simple, nutritious treat packed with options. You learned how to combine main ingredients like chia seeds and oat milk, along with tips for perfecting the texture. We explored ways to customize flavors and store your pudding for freshness. Remember, chia pudding can be versatile with toppings, sweeteners, and seasonal ingredients. By following these steps, you can enjoy a tasty and healthy snack again and again. Keep experimenting to find your favorite combinations!

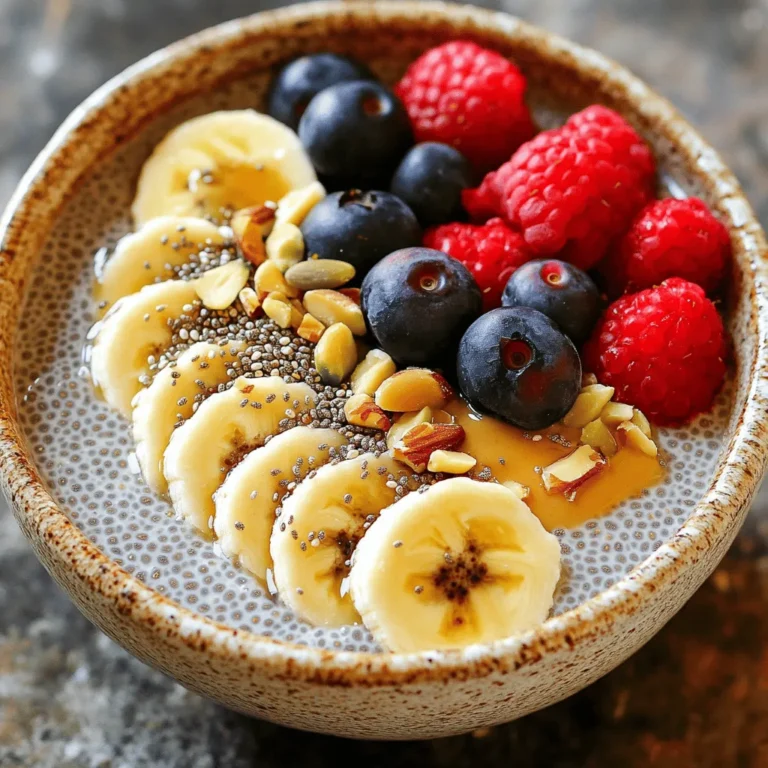
High-Protein Oat Milk Chia Pudding Simple Recipe

PREV 1 … 25 26 27 … 53 NEXT
cozy citrus kitchen

explore

DessertsDinnerAppetizersDrinks

Our Policies

  • Cookie Policy
  • Copyright Policy
  • Disclaimer
  • GDPR Policy
  • Terms Of Use
Back to Top
  • About
  • Contact Us
  • Privacy Policy
© 2025 cozy citrus kitchen