FREE DINNER EBOOK! Get your copy!
  • Cookie Policy
  • GDPR Policy
  • Disclaimer
  • Terms Of Use
  • Visit my other site: Fun Cookie Recipes
cozy citrus kitchen
  • Home
  • Dinner
  • Desserts
  • Drinks
  • Appetizers
  • Contact
  • About
  • Privacy Policy
  • Home
  • Dinner
  • Desserts
  • Drinks
  • Appetizers
  • Contact
  • About
  • Privacy Policy
  • Cookie Policy
  • GDPR Policy
  • Disclaimer
  • Terms Of Use
Visit my other site: Fun Cookie Recipes

HOME / CATEGORIES /

Latest

- 1.5 lbs chicken thighs, boneless and skinless - 1 cup teriyaki sauce (store-bought or homemade) - 1 cup fresh pineapple, cubed - 1 bell pepper (red or yellow), sliced - 1 medium red onion, cut into wedges - 2 cups broccoli florets - 2 tablespoons olive oil - 1 teaspoon grated ginger - 2 cloves garlic, minced - 1 tablespoon honey (for extra sweetness) - Sesame seeds and green onions, for garnish - 1 cup = 8 fluid ounces - 1 tablespoon = 15 milliliters - 1 teaspoon = 5 milliliters When you gather your ingredients, make sure everything is fresh. Fresh produce will boost flavor and nutrition. If you want a sweeter taste, add honey. The sesame seeds and green onions add a nice touch when you serve the dish. Use the right measurements for the best results. Cooking is all about balance, and getting the ingredients right sets the stage for your delicious meal. First, set your oven to 400°F (200°C). This step warms the oven for even cooking. In a bowl, mix the teriyaki sauce, honey, grated ginger, and minced garlic. Add the chicken thighs and coat them well. Let them sit for at least 15 minutes. For more flavor, you can marinate them for up to an hour in the fridge. Grab a large baking sheet. Line it with parchment paper or lightly oil it. This will stop the food from sticking and make cleanup easier. Place the marinated chicken thighs in the center of the pan. Surround them with cubed pineapple, sliced bell pepper, red onion wedges, and broccoli florets. Drizzle olive oil on the veggies and add salt and pepper to taste. Put the sheet pan in your preheated oven. Bake for 25 to 30 minutes. The chicken should reach an internal temperature of 165°F (75°C). The veggies will become tender and tasty. For a shiny finish, broil the dish for 2 to 3 minutes. Keep an eye on it to avoid burning. Once baked, take the pan out of the oven. Sprinkle sesame seeds and chopped green onions on top. Your dish is now ready to enjoy! Marinating your chicken is key. It adds flavor and makes it juicy. For best results, marinate for at least 15 minutes. If you have time, an hour in the fridge works wonders. Make sure to coat each piece well. You can use a zip-top bag. This helps spread the sauce evenly. Cooking time can vary. If your chicken thighs are thick, they may need more time. Use a meat thermometer to check doneness. The chicken should reach 165°F (75°C). If the veggies are not tender, bake for a few extra minutes. Watch closely, as they can overcook quickly. To ensure even cooking, cut your veggies into similar sizes. This helps them cook at the same rate. When arranging on the sheet pan, leave space between each item. This allows hot air to circulate. If using a crowded pan, the food may steam instead of bake, leading to uneven results. {{image_2}} You can switch up the chicken for other proteins. Try using shrimp, pork, or tofu. Shrimp cooks fast and soaks up flavor well. Pork adds a nice richness, and tofu is a great choice for plant-based meals. Adjust cooking times based on the protein. For shrimp, bake for 15-20 minutes. Pork may need 35-40 minutes. Tofu should bake for about 25-30 minutes for a crispy finish. Feel free to mix in different veggies! Carrots, snap peas, and zucchini work beautifully. They bring fresh colors and textures to your dish. You can also add mushrooms or baby corn for extra flavor. Just make sure to cut them into similar sizes for even cooking. Bake the veggies along with the chicken for the best results. Making your own teriyaki sauce is easy and fun! Here’s a simple recipe: - Ingredients: - 1/2 cup soy sauce - 1/4 cup honey or brown sugar - 1/4 cup rice vinegar - 1 teaspoon grated ginger - 1 clove of garlic, minced - 1 tablespoon cornstarch (optional for thickness) - Instructions: 1. In a small pot, mix the soy sauce, honey, rice vinegar, ginger, and garlic. 2. Heat over medium heat until warm. 3. If you want a thicker sauce, mix cornstarch with a little water. Add it to the pot and stir until it thickens. 4. Let it cool before using. This sauce is great for marinades or as a drizzle! Using homemade sauce gives you control over sweetness and flavors. Enjoy the fresh taste! Store any leftovers in an airtight container. Make sure to let the dish cool first. Place the container in the fridge. Use the leftovers within three to four days. This helps keep the flavors fresh. To reheat, place the leftovers in a microwave-safe dish. Cover it with a lid or microwave cover. Heat on medium power for about two to three minutes. Stir halfway through for even heating. You can also reheat in the oven. Preheat to 350°F (175°C) and bake for 10-15 minutes. If you want to freeze the teriyaki chicken, let it cool completely. Place it in a freezer-safe container. Be sure to remove as much air as possible. Label the container with the date. You can freeze it for up to three months. To eat, thaw in the fridge overnight before reheating. Yes, you can use chicken breasts. They will cook differently. Thighs are juicier. Breasts may dry out if overcooked. Adjust cooking time if you switch. You can use green beans, snap peas, or zucchini. These veggies cook well too. They add crunch and color to your dish. Feel free to mix and match your favorites. Check the internal temperature of the chicken. It should reach 165°F (75°C). You can use a meat thermometer for accuracy. The juices should run clear, not pink. Yes, you can prep the chicken and veggies in advance. Marinate the chicken and store it in the fridge. Bake it fresh when you're ready to eat. It keeps well for a few days. Serve it with rice or quinoa for a filling meal. You can also add a side salad. Steamed veggies or a fruit salad pair nicely too. Enjoy the balance of flavors! This blog covered all the key parts of making a great teriyaki chicken dish. We went over the main and optional ingredients, plus how to measure them. You learned about step-by-step cooking, tips for marinating, and ways to store leftovers. Variations help you customize your meal. I hope these insights inspire you to create your own version at home. Enjoy crafting a delicious dish that suits your taste!

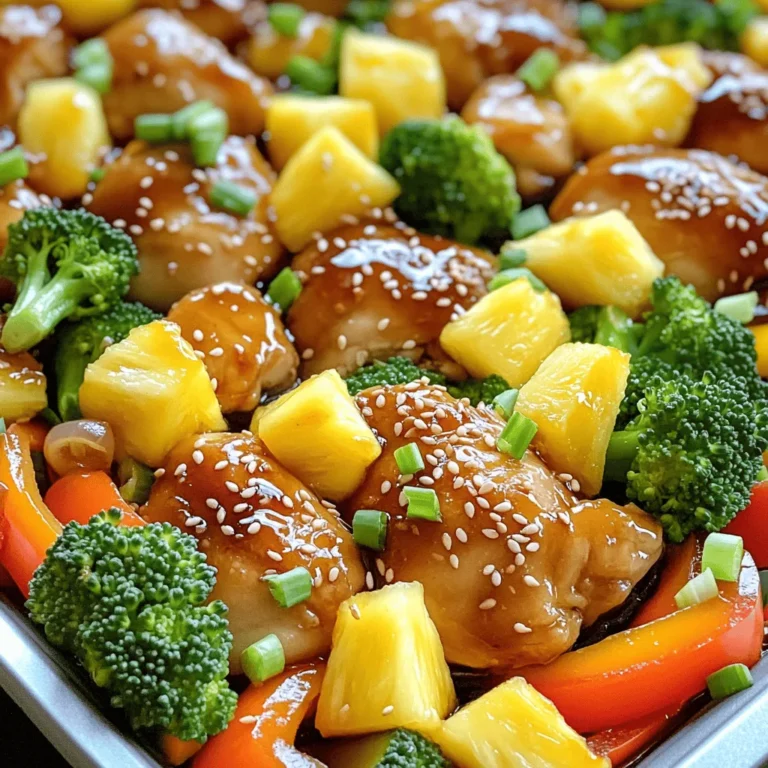
Sheet-Pan Teriyaki Chicken with Pineapple Delight

To start, we need three key ingredients that form the base of our bars: - 2 cups rolled oats - 1 cup canned pumpkin puree - 1/2 cup almond butter (or peanut butter) These rolled oats give our bars texture and fiber. The canned pumpkin adds moisture and a warm flavor. Almond butter, or peanut butter, offers healthy fats and binds everything together. Next, let’s sweeten and spice things up: - 1/4 cup honey or maple syrup - 1 teaspoon ground cinnamon - 1/2 teaspoon ground nutmeg Honey or maple syrup brings sweetness. Cinnamon and nutmeg add that cozy pumpkin spice flavor. These spices make each bite delightful. For extra crunch or sweetness, consider these optional ingredients: - 1/2 cup chopped walnuts or pecans - 1/2 cup dried cranberries or chocolate chips Chopped nuts provide a great crunch. Dried cranberries or chocolate chips add sweetness and fun. Feel free to mix and match based on your taste. This list of ingredients makes it easy to prepare your Pumpkin Spice Oatmeal Breakfast Bars. Each ingredient plays a key role in creating a delicious treat. First, preheat your oven to 350°F (175°C). This step is key to getting even baking. Next, line an 8x8 inch baking dish with parchment paper. Leave some paper hanging over the sides. This helps you lift the bars out later. In a large bowl, combine 2 cups of rolled oats, 1 teaspoon of ground cinnamon, 1/2 teaspoon of ground nutmeg, 1/2 teaspoon of ground ginger, and 1/4 teaspoon of salt. Mix these dry ingredients well. This blend brings a warm, fall flavor to your bars. In another bowl, blend together 1 cup of canned pumpkin puree, 1/2 cup of almond butter (or peanut butter), 1/4 cup of honey (or maple syrup), 1/2 cup of unsweetened applesauce, and 1 teaspoon of vanilla extract. Make sure this mixture is smooth. Once it is, pour it into the bowl with the dry ingredients. Stir well until all oats are coated. If you want, fold in 1/2 cup of chopped walnuts (or pecans) and 1/2 cup of dried cranberries (or chocolate chips) for extra flavor. Transfer this mixture to your lined baking dish. Press it down firmly and evenly into the corners. Use a spatula or your hands to pack it tight. Now, bake in the preheated oven for 25-30 minutes. Check if the edges turn golden brown and if the center feels set. Once done, let it cool for about 10-15 minutes in the pan. Lift the bars out using the parchment paper and cool them completely on a wire rack. After they cool, cut them into squares or bars. Enjoy this tasty, healthy treat! - Store your bars in an airtight container. This keeps them fresh and moist. - You can freeze these bars for longer storage. Wrap them tightly in plastic wrap, then place in a freezer bag. They can last up to three months. - For a beautiful presentation, serve on a rustic wooden board. - Drizzle with honey or maple syrup before serving. This adds extra sweetness and makes them look lovely. You can also sprinkle some cinnamon on top for a nice touch. - Make sure to pack the mixture down tightly in the baking dish. This helps your bars bake evenly. - If you like softer bars, check them at 25 minutes. For firmer bars, leave them in for the full 30 minutes. {{image_2}} To make these pumpkin spice oatmeal breakfast bars gluten-free, you need to use certified gluten-free oats. Regular oats may contain gluten due to cross-contamination. Always check the label to ensure they are safe. You can keep the rest of the ingredients the same. This simple swap allows everyone to enjoy these tasty bars without worry. If you want to make these bars vegan, you can swap out honey for maple syrup. This keeps the sweetness and maintains the flavor. For the nut butter, almond butter works well, but you can use sunflower seed butter if you have nut allergies. Both options give you great taste and texture without animal products. Feel free to get creative with mix-ins! You can add different nuts, like pecans or almonds, for crunch. Seeds like chia or pumpkin seeds also add a nice touch. If you want a fruity twist, try adding dried apples or raisins. Chocolate chips can make the bars more indulgent. The options are endless, so have fun with it! Each Pumpkin Spice Oatmeal Breakfast Bar contains about 130 calories. This count can vary based on optional add-ins. If you choose to add nuts or chocolate chips, the calorie count may rise. A serving size is one bar. For a full batch of 16 bars, you get a blend of flavors and nutrients that feel like a treat. Oats are the star of this recipe. They provide fiber, which aids digestion. Fiber helps keep you full longer. Pumpkin is low in calories but high in vitamins. It’s rich in vitamin A, which is good for your eyes. Nuts, like walnuts or pecans, add healthy fats and protein. They also give the bars a nice crunch. If you add cranberries or chocolate chips, you’ll get extra antioxidants. Each ingredient plays a role in making these bars both tasty and nutritious. These bars are great for many diets. They can fit into vegetarian and gluten-free plans. Just make sure to use certified gluten-free oats. If you have nut allergies, you can swap almond butter for sunflower seed butter. Honey can be replaced with maple syrup to make these bars vegan. Always check labels for allergens. This way, you can enjoy your breakfast safely. You can easily make these bars vegan by swapping some ingredients. Use maple syrup instead of honey. For the nut butter, almond butter works well. You can also replace the eggs with flaxseed meal. Mix one tablespoon of flaxseed meal with three tablespoons of water. Let it sit until it thickens. This mix acts like an egg. These bars stay fresh for about a week. Store them in an airtight container. Keep them at room temperature for best taste. You can also freeze them for longer life. Wrap each bar in plastic wrap. Then, place them in a freezer-safe bag. They can last for up to three months in the freezer. Yes, you can use fresh pumpkin. It will change the texture slightly. Fresh pumpkin can be more watery. To fix this, cook the pumpkin first. Roast it until soft, then mash it well. Drain any excess water before adding it to your mix. This way, you’ll keep the right consistency for your bars. These Pumpkin Spice Oatmeal Breakfast Bars blend simple ingredients for a tasty treat. I showed you how to mix oats, pumpkin, and spices into delicious bars. Follow the steps, and enjoy soft, chewy snacks. Keep them fresh with my storage tips and try the variations for new flavors. Remember, these bars are healthy and fun to make. They fit many diets, too. Enjoy baking and making these bars your own!

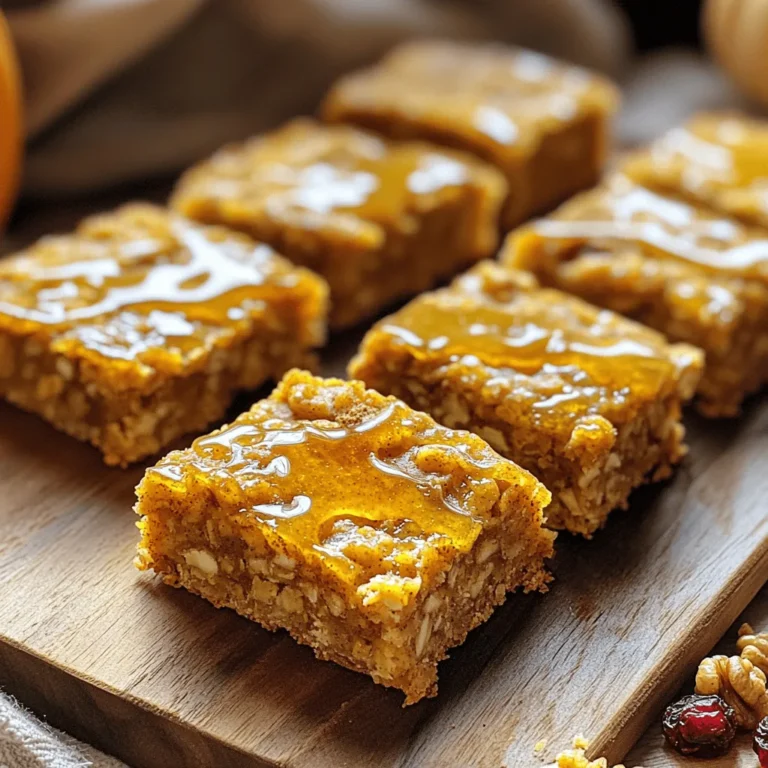
Pumpkin Spice Oatmeal Breakfast Bars Delightful and Easy

For this dish, you need fresh and simple ingredients. Here’s what you'll need: - 2 tablespoons olive oil - 1 pound boneless, skinless chicken breast, diced - 3 cloves garlic, minced - 1 cup cherry tomatoes, halved - 1 cup chicken broth - 1 cup heavy cream - 1 cup basil pesto - 12 ounces pasta (penne or fusilli) - Salt and pepper to taste - Fresh basil leaves, for garnish - Grated Parmesan cheese, for serving These ingredients come together to create a creamy and flavorful pasta dish. The chicken adds protein, while the basil pesto gives it a rich taste. The tomatoes add a pop of color and freshness. You don’t need fancy gear for this recipe. A few basic tools will work great: - Large pot or Dutch oven - Wooden spoon or spatula - Measuring cups and spoons - Knife and cutting board These tools help you cook everything in one pot, making clean-up easy. A large pot allows the pasta and sauce to mix perfectly. Seasoning is key to enhancing the flavors. Here are my top picks: - Salt - Black pepper - Fresh basil leaves - Grated Parmesan cheese Salt and pepper bring out the taste of the chicken and pasta. Fresh basil leaves add a lovely touch at the end. The grated Parmesan adds a creamy finish. Using these ingredients and equipment will help you make a delicious One-Pot Creamy Pesto Chicken Pasta. Enjoy the simple steps and the delightful taste! Start by heating 2 tablespoons of olive oil in a large pot over medium heat. Add 1 pound of diced chicken breast. Season it with salt and pepper. Cook the chicken for about 5 to 7 minutes. You want it to be browned and cooked all the way through. Once it looks good, add 3 cloves of minced garlic and sauté for 1 minute. This step adds a nice flavor. Next, stir in 1 cup of cherry tomatoes that you have halved. Cook this mix for 2 to 3 minutes. You want the tomatoes to soften a bit. After that, pour in 1 cup of chicken broth and let it simmer. Then, add 1 cup of heavy cream and 1 cup of basil pesto. Stir well until everything blends nicely. Now, it is time to add the pasta. Use 12 ounces of penne or fusilli. Make sure the pasta is submerged in the sauce. Cover the pot and cook on medium heat for about 12 to 15 minutes. Stir it occasionally. You want the pasta to be al dente and soak up most of the liquid. Once done, take it off the heat. Let it sit for a few minutes to thicken. Adjust the seasoning with salt and pepper if needed. Serve warm, garnished with fresh basil leaves and grated Parmesan cheese. Enjoy your creamy pesto chicken pasta! To make a rich and creamy sauce, start with heavy cream. This gives the dish a smooth texture. When you add the basil pesto, make sure to mix it well. This ensures every bite is packed with flavor. If you want a bit of tang, add a squeeze of lemon juice. It brightens the dish and balances the creaminess. Use a large pot for this recipe. It makes cooking and mixing easier. Dice the chicken into small, even pieces. This helps it cook faster. You can prep the garlic and tomatoes while the chicken cooks. This way, you save time and avoid extra dishes. If you want to save even more time, you can use pre-cooked chicken. Just add it in when you mix in the broth. You can swap out chicken for shrimp or tofu. Both options work well with the creamy sauce. If you don’t have heavy cream, use half-and-half or milk. Just remember, it may not be as thick. For pasta, penne and fusilli are great, but you can use any shape you like. Finally, if you need a dairy-free option, choose a dairy-free cream substitute. This keeps the dish creamy without the dairy. {{image_2}} You can easily boost the nutrition of your One-Pot Creamy Pesto Chicken Pasta by adding vegetables. Consider using spinach, broccoli, or zucchini. These veggies add color, taste, and health benefits. You can add spinach at the end of cooking. It wilts down quickly. For broccoli or zucchini, add them with the chicken. This way, they cook through and absorb all the flavors. Want to switch up the protein? You have options! Try shrimp, tofu, or turkey if you prefer. Shrimp cooks fast and adds a nice seafood touch. Tofu makes this dish plant-based, perfect for vegetarians. Just make sure to sauté it well. Turkey works great too and keeps it lean. Adjust the cooking times as needed for each protein type. Choosing the right pasta can change the dish. While penne or fusilli works best, you can try others. Bowtie, spaghetti, or even whole wheat pasta will work. Just remember to adjust the cooking time according to the pasta you select. Whole wheat pasta offers more fiber. You can also use gluten-free pasta for a different texture. Each option gives a unique twist to your creamy dish! To store leftovers, let the pasta cool completely. Then, transfer it to an airtight container. Make sure to seal it well. You can keep it in the fridge for up to three days. If you want to save it longer, consider freezing it. For reheating, you can use the microwave or the stovetop. If using the microwave, place the pasta in a bowl. Add a splash of water to keep it moist. Heat it for about one to two minutes, stirring halfway. On the stovetop, warm it in a pan over low heat. Stir often to avoid sticking. This helps bring back the creamy texture. To freeze the dish, pack the cooled pasta into freezer-safe bags or containers. Remove as much air as possible. It can last for up to three months in the freezer. When ready to eat, thaw it overnight in the fridge. Then, reheat as mentioned above. This method keeps the flavors intact while making meal prep easy. Yes, you can use store-bought pesto. It saves time and adds flavor. Just choose one without fillers. Look for fresh varieties in the fridge section. You can find many great brands that taste wonderful and make cooking easier. Absolutely! You can use gluten-free pasta. There are many brands that offer great taste and texture. Just check the cooking time, as it may differ from regular pasta. This way, everyone can enjoy this creamy dish. To spice it up, add red pepper flakes. Start with a pinch and taste. You can also add diced jalapeños for heat. If you prefer, mix in a hot sauce of your choice. This will give your pasta a fun kick! This blog covers the essential steps to make a one-pot creamy pesto chicken pasta. We discussed key ingredients, cooking equipment, and how to perfect the creamy sauce. I also shared tips on time-saving techniques and ingredient swaps. You can add veggies or try different proteins for variety. Remember to store leftovers properly and reheat them for best taste. Enjoy this simple yet delicious meal that's quick and satisfying!

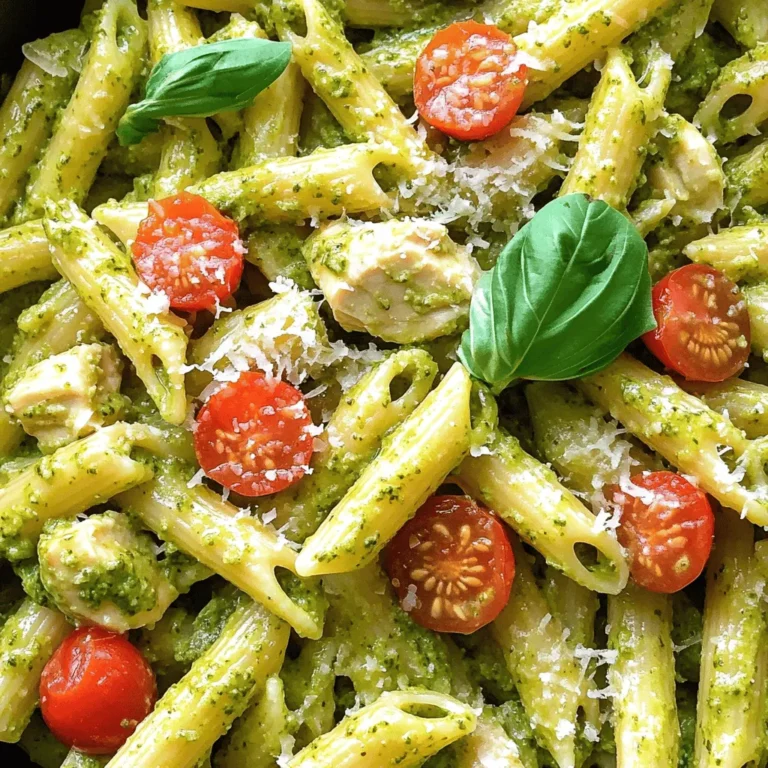
One-Pot Creamy Pesto Chicken Pasta Delightful Meal

- 2 cups graham cracker crumbs - ½ cup unsalted butter, melted - 16 oz cream cheese, softened - 1 cup granulated sugar - 2 tablespoons brown sugar - 1 teaspoon ground cinnamon - ½ teaspoon ground nutmeg - 1 tablespoon all-purpose flour - ½ cup apple cider - 3 large eggs - 1 cup caramel sauce (store-bought or homemade) - Sliced apples for garnish To make these apple cider caramel cheesecake bars, gather your ingredients first. Start with two cups of graham cracker crumbs. This will create a buttery crust that holds everything together. The butter, half a cup, should be melted to mix well with the crumbs. Next, you need sixteen ounces of softened cream cheese. This makes the filling rich and smooth. Add one cup of granulated sugar to sweeten it up. The taste needs a little kick, so you’ll want two tablespoons of brown sugar, one teaspoon of ground cinnamon, and half a teaspoon of nutmeg. These spices give the dessert a warm, cozy flavor. You also need one tablespoon of all-purpose flour. This helps to thicken the filling. Don't forget half a cup of apple cider. This adds a fruity note that pairs perfectly with the cream cheese. For the final touch, you’ll use three large eggs. They bind everything together nicely. Lastly, grab one cup of caramel sauce. You can use store-bought or make your own if you like. Sliced apples will be the garnish, making your bars even more appealing. Now you’re ready to create a dessert that everyone will love! - Preheat the oven to 350°F (175°C). - Grease and line a 9x13-inch baking dish with parchment paper. - Combine graham cracker crumbs, melted butter, brown sugar, and cinnamon. - Press the crumb mixture into the bottom of the prepared baking dish. - Beat cream cheese and granulated sugar until smooth. - Add apple cider, eggs, and vanilla, mixing well. - Sprinkle in flour and nutmeg, mixing until just combined. - Pour the filling over the cooled crust. - Drizzle half of the caramel sauce over the filling. - Swirl with a knife for a marbled effect. - Bake for 30-35 minutes until edges are set. - Allow to cool and refrigerate for at least 4 hours before serving. This process makes the bars creamy and sweet. You’ll love the blend of flavors! - Ensure the butter is fully melted for proper binding. This helps the crust hold together well. - Don’t overbake the crust to maintain freshness. A light golden color is ideal. - Use room temperature cream cheese for a smooth filling. Cold cream cheese can cause lumps. - Avoid overmixing to prevent cracks in the cheesecake. Mix just until combined for the best texture. - Use a light hand while swirling to maintain a marbled look. This keeps the caramel and cheesecake distinct. - Reserve extra caramel for garnishing before serving. A drizzle on top makes it look fancy and tasty. {{image_2}} You can make your cheesecake bars even more exciting. Add a pinch of cloves for a spiced flavor. Cloves give a warm taste that complements the apple cider. Another great idea is to incorporate lemon zest. This adds a bright, citrusy twist to the bars, balancing the sweetness perfectly. If you need a gluten-free version, simply substitute gluten-free graham crackers. This keeps the crust tasty while meeting dietary needs. For those looking for a vegan-friendly option, use dairy-free cream cheese. This keeps the creamy texture while making it suitable for everyone. For a truly indulgent treat, serve your bars with whipped cream or ice cream. This adds a lovely creaminess and richness. You can also top the bars with pecans or walnuts for a nice crunch. This contrast in texture makes every bite enjoyable and satisfying. Store your cheesecake bars in the fridge for up to 5 days. Use an airtight container to keep them fresh and tasty. This helps prevent drying out and keeps the flavors intact. You can freeze the bars if you need to keep them longer. Wrap each bar individually and freeze for up to 2 months. When you’re ready to enjoy, thaw them in the refrigerator before serving. This keeps the texture creamy and delicious. These cheesecake bars shine when served chilled. You can bring them to room temperature if you like. However, avoid reheating them, as cheesecake is best enjoyed cold. This keeps that smooth, creamy filling just right. Yes, homemade caramel sauce works great in this recipe. It can add a fresh taste. Just make sure it is smooth and not too thick. This way, it swirls nicely into the cheesecake. Look for set edges and a slightly jiggly center. The edges should look firm, while the center will have a gentle wiggle. This means it will set perfectly as it cools. You can adjust the sugar according to your taste, but it may affect the texture. Less sugar can make the bars less sweet, but it might also change how creamy they are. It is recommended to chill for at least 4 hours or overnight for best results. Chilling helps the flavors blend and makes cutting easier. The longer they chill, the better they taste! In this post, we explored how to make delicious cheesecake bars. You learned about the key ingredients, like graham cracker crumbs, cream cheese, and caramel sauce. I shared step-by-step instructions for perfecting your dessert. Remember the tips for great texture and flavor, like using room temperature cream cheese and a light hand when swirling caramel. You can also try different flavors or adapt the recipe for specific diets. With these ideas, you're ready to impress with cheesecake bars that everyone will enjoy!

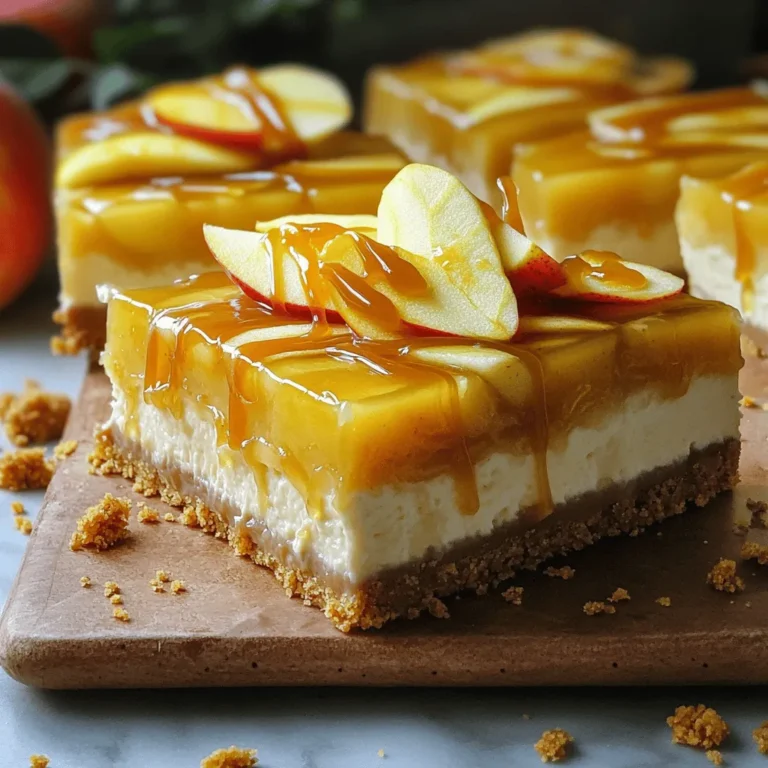
Apple Cider Caramel Cheesecake Bars Irresistible Treat

- 500g store-bought gnocchi - 1 cup ricotta cheese - 1 cup chicken or vegetable broth - 1 cup heavy cream - 1 lemon (zested and juiced) - 2 cloves garlic, minced - 1 cup baby spinach - 1/2 cup grated Parmesan cheese - Salt and pepper to taste Each ingredient plays a key role in this dish. The gnocchi provides a soft texture. Ricotta adds creaminess. Lemon brightens the flavor. Garlic gives a nice kick. Spinach adds color and nutrients. - Fresh basil leaves - Extra grated Parmesan Garnishes can elevate your dish. Fresh basil adds a touch of freshness. Extra Parmesan makes it even richer. - Large pot or deep skillet - Wooden spoon or spatula - Measuring cups and spoons - Zester or grater Using the right tools makes cooking easier. A large pot helps in mixing and cooking. A wooden spoon is great for stirring without scratching your pot. Start by grabbing a large pot or deep skillet. Place it on medium heat and add a drizzle of olive oil. Once the oil is warm, toss in the minced garlic. Sauté it for about one minute until it smells amazing. This step builds a strong flavor base for your dish. Next, pour in the chicken or vegetable broth. Bring it to a gentle simmer. This bubbling broth will be the heart of your creamy sauce. Now it’s time to add the star of the dish: the gnocchi. Toss in 500 grams of store-bought gnocchi. Cook according to the package instructions, usually for just 2 to 3 minutes. You will know they are ready when they rise to the surface. This is a fun part! As they cook, they soak up the broth's flavor and become fluffy little pillows. After the gnocchi are cooked, reduce the heat to low. Now, add one cup of ricotta cheese and one cup of heavy cream. Also, add the lemon zest and lemon juice. Stir gently until everything is creamy and well mixed. This is where the magic happens! Next, fold in one cup of baby spinach. Let it wilt for 1 to 2 minutes. Then, stir in half a cup of grated Parmesan cheese. Season with salt and pepper to taste. Cook for another minute or two until the sauce thickens slightly. If it looks too thick, add a bit more broth or cream. Finally, remove the pot from heat and garnish with fresh basil leaves. Enjoy your creamy lemon ricotta gnocchi! To get that creamy texture, use full-fat ricotta. It blends better than low-fat or skim. Mix the ricotta with heavy cream for richness. Stir gently to avoid lumps. If the sauce is too thick, add a splash of broth or cream. This keeps it smooth and easy to coat the gnocchi. Lemon zest adds brightness, but you can boost flavor even more. Try adding a pinch of red pepper flakes for heat. Fresh herbs like basil or parsley also work well. These add freshness and color. You might want to sprinkle some extra Parmesan on top before serving. It enhances taste and looks great. Don’t rush the cooking of the gnocchi. If you cook them too long, they become mushy. Also, avoid adding salt too early. The broth and cheese have salt already. Taste before seasoning. Lastly, don't skip the basil garnish. It adds a fresh touch to the dish. {{image_2}} You can easily add protein to your One-Pot Creamy Lemon Ricotta Gnocchi. Here are some options: - Cooked chicken: Add shredded or diced chicken for a hearty meal. - Shrimp: Toss in cooked shrimp for a seafood twist. - Bacon: Crispy bacon bits add a nice crunch and flavor. These additions can enhance the dish and make it more filling. Just cook the protein before adding it to the pot. Stir it in when you mix in the spinach. If you prefer a vegetarian or vegan dish, you can make a few simple changes: - Broth: Use vegetable broth instead of chicken broth. - Ricotta: Substitute with vegan ricotta or blended tofu for a creamy texture. - Cream: Use coconut cream or a cashew cream for a plant-based option. These swaps keep the dish rich and tasty while fitting your dietary needs. You won’t lose the delicious flavor! Adding herbs and spices can elevate the flavor of your gnocchi dish. Here are some ideas: - Fresh herbs: Basil, parsley, or thyme add freshness. - Chili flakes: A pinch can give it a spicy kick. - Lemon pepper: This adds a zesty flavor that pairs well with the lemon. Experiment with these additions to make the dish uniquely yours! Find the right balance that suits your taste buds. Store your One-Pot Creamy Lemon Ricotta Gnocchi in a sealed container. It stays fresh in the fridge for up to three days. Make sure it cools down before sealing to avoid steam build-up. This helps keep the gnocchi creamy and tasty. To freeze, place the gnocchi in a freezer-safe container. It can last up to two months in the freezer. I recommend dividing it into smaller portions. This way, you can thaw only what you need. Remember that the texture might change slightly after freezing. When reheating, add a splash of broth or cream to keep the gnocchi moist. Heat it on low in a skillet, stirring gently. You can also reheat it in the microwave. Just cover it and heat for short bursts. Stir in between to prevent hot spots. Enjoy it warm, like the first time you made it! Yes, you can use homemade gnocchi. It adds a personal touch. Just make sure they are the right size. Cook them until they float. This means they are ready. Homemade gnocchi may also need a bit more time to cook. Keep an eye on them as they simmer. If you need a substitute for ricotta cheese, try cottage cheese. It has a similar texture. You can blend it for a creamier feel. Cream cheese is another option. You can mix it with a bit of milk to soften it. Both options work well in this dish. You can store leftover gnocchi in the fridge for up to three days. Place them in an airtight container. This keeps them fresh for later use. If you want to store them longer, consider freezing. Frozen gnocchi can last up to two months. Just make sure to thaw them before reheating. In this post, we explored the main ingredients and tools needed to make gnocchi. We discussed how to prepare, cook, and combine everything, ensuring a creamy texture. I shared tips to enhance flavors and avoid common mistakes. You found variations for proteins, vegetarian options, and exciting twists with herbs. Lastly, I covered storage methods and answered key questions. Embrace your cooking journey and experiment with these ideas. Enjoy your tasty gnocchi creation!

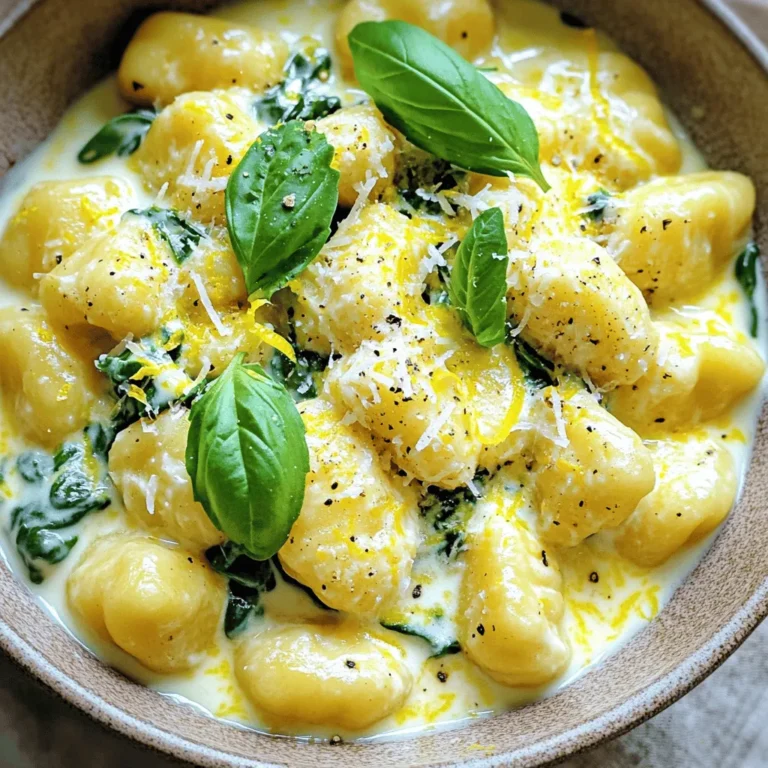
One-Pot Creamy Lemon Ricotta Gnocchi Delight

- 2 cups cottage cheese - 1 cup fresh strawberries, hulled and sliced - 1/2 cup granola (your choice) - 2 tablespoons honey or maple syrup - 1 teaspoon vanilla extract - 1/4 teaspoon cinnamon (optional) Cottage cheese is the star of this parfait. It packs protein and gives a creamy texture. Fresh strawberries add sweetness and a burst of flavor. Granola offers a nice crunch and balances the softness. You can sweeten the mix with honey or maple syrup. Vanilla extract makes the flavors pop, while cinnamon gives a warm touch. - Fresh mint leaves Mint leaves are a lovely touch. They add color and a fresh taste. You can place them on top for a beautiful look. - Mixing bowl - Parfait glasses or bowls - Measuring cups and spoons Having the right tools makes cooking fun. Use a mixing bowl to combine your ingredients. Clear parfait glasses help show off the layers. Measuring cups and spoons ensure you get the right amounts. - First, mix 2 cups of cottage cheese with 2 tablespoons of honey or maple syrup. - Add 1 teaspoon of vanilla extract and 1/4 teaspoon of cinnamon if you like. - Stir until the mixture is smooth and creamy. - Grab your parfait glasses or bowls. - Start with a layer of the cottage cheese mix at the bottom. - Next, add a layer of 1 cup of sliced strawberries on top. - Sprinkle 1/2 cup of granola over the strawberries for crunch. - Repeat the layers until you reach the top of the glasses. - Drizzle a little more honey or maple syrup on the last layer if you wish. - Finally, garnish with fresh mint leaves for a bright touch. To make your parfait look great, layer carefully. Start with cottage cheese at the bottom. This holds everything in place. Next, add sliced strawberries. Then sprinkle granola on top. Repeat these layers until you fill your glass. To keep granola crunchy, add it last. If you mix it in too early, it gets soggy. You can change the sweetness to fit your taste. Start with two tablespoons of honey or maple syrup. Taste it first. If you want it sweeter, add more. You can also try different flavors. Instead of vanilla, use almond extract. A pinch of cocoa powder can add a nice twist too. For more nutrients, try adding nuts or seeds. Chopped almonds or walnuts give a nice crunch. You can also add chia seeds or flaxseeds for extra fiber. To keep things fresh, mix in other fruits. Blueberries, raspberries, or bananas work well. This adds color and flavor to your parfait. {{image_2}} You can change the fruit in your parfait. Try blueberries, bananas, or even raspberries. Each fruit brings its own taste. You might also want to use seasonal fruits. Fresh peaches in summer or apples in fall can be delicious. If you follow a vegan diet, you can swap cottage cheese for plant-based yogurt. This keeps your parfait creamy and tasty. For those with gluten issues, look for gluten-free granola. Many brands offer tasty options that fit this need. You can modify the parfait to fit breakfast or a quick snack. For breakfast, add more protein. You might include nuts or seeds for extra crunch. For a fast snack, keep it simple. Layer fewer ingredients and enjoy it on the go. To keep your parfait fresh, cover it tightly. Use plastic wrap or a lid. Place the parfait in the fridge right away. This helps keep it cool and tasty. If you use granola, store it separately. This keeps it crunchy. When you're ready to eat, layer the granola back on top. You can prepare the ingredients ahead of time. Slice the strawberries and store them in a container. Mix the cottage cheese with sweeteners in a bowl. Keep everything in the fridge until you are ready to assemble. When you want to eat, layer the ingredients in parfait glasses. This makes it easy to enjoy a quick meal. Your parfait will stay fresh for about two days in the fridge. After that, the strawberries may get mushy. If you see any signs of mold or smell something off, throw it away. It’s better to be safe than sorry! A Cottage Cheese Strawberry Parfait has about 300 calories per serving. This can vary based on the ingredients you choose. Here’s the breakdown: - Cottage cheese (2 cups): 206 calories - Strawberries (1 cup): 50 calories - Granola (1/2 cup): 150 calories (depends on brand) - Honey or maple syrup (2 tablespoons): 120 calories By adjusting the granola or sweetener, you can manage the calorie count. This parfait is a nutritious choice, packed with protein and vitamins! Yes, you can use frozen strawberries! They are a great alternative. Here are some advantages and considerations: - Advantages: Frozen strawberries are often picked at peak ripeness. They stay fresh longer and are usually cheaper. They also save time on washing and hulling. - Considerations: Thaw the strawberries before use. This helps them mix well with the cottage cheese. Be aware that they may be mushy, which can affect texture. Using frozen strawberries can make this recipe quick and easy! Cottage cheese is a protein powerhouse! Here’s why it’s great for you: - High protein content: One cup has about 28 grams of protein. This helps build and repair muscles. - Low in fat: It has less fat than many other dairy products. This makes it a healthy choice for many diets. - Rich in calcium: Cottage cheese supports strong bones and teeth. It also aids in weight management. Adding cottage cheese to your diet can boost your protein intake and keep you feeling full! In this post, I shared how to make a tasty Cottage Cheese Strawberry Parfait. We covered the key ingredients like cottage cheese, strawberries, and granola. You learned layering steps and tips to perfect it. Adding personal touches with sweeteners and different fruits can make it unique. Remember to store your parfaits well for freshness. Enjoy this healthy treat for breakfast or a snack. You now have all you need to create your own delicious parfait!

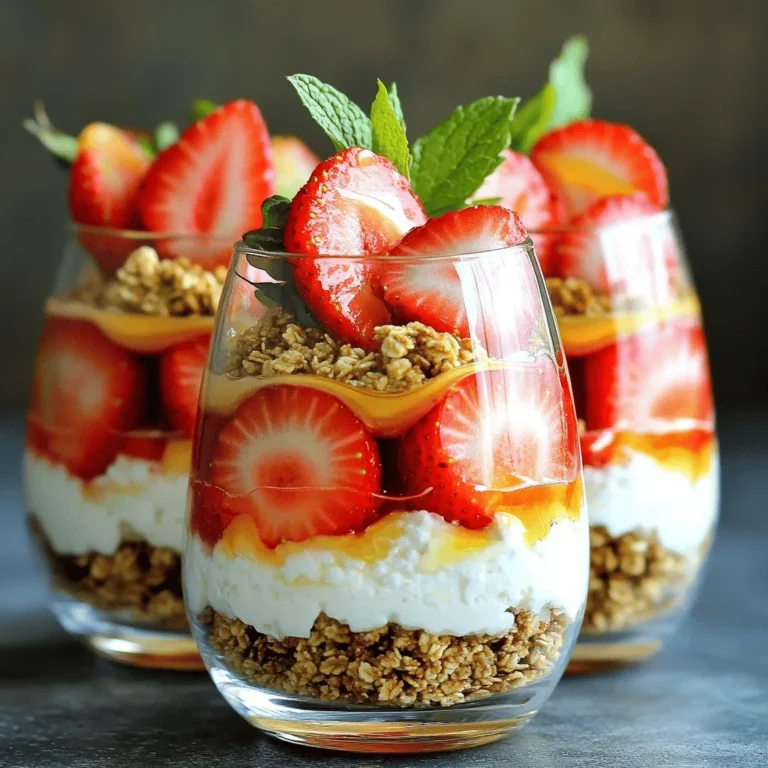
Cottage Cheese Strawberry Parfait Protein Packed Treat

- 1 lb shrimp, peeled and deveined - 1 cup orzo pasta - 1 tablespoon Cajun seasoning - 2 tablespoons olive oil - 1 cup cherry tomatoes, halved - 1 cup fresh spinach - 3 cloves garlic, minced - 1 cup chicken or vegetable broth - 1 cup heavy cream - Salt and pepper to taste - Fresh parsley, chopped (for garnish) - 1/2 cup grated Parmesan cheese This dish combines bold flavors and creamy textures to create a delightful meal. The shrimp provide protein, while the orzo adds heartiness. The Cajun seasoning brings a kick to the dish, making every bite exciting. When I cook this meal, I love to use fresh ingredients. Fresh spinach and cherry tomatoes not only taste better, but they also add color. The heavy cream makes the dish rich and creamy. I recommend using good-quality Parmesan cheese for the best flavor. Each ingredient plays a role. The shrimp absorbs the spices and becomes tender. The orzo soaks up the broth and cream, making each spoonful satisfying. You can easily adjust the salt and pepper for your taste. Remember to keep fresh parsley on hand. It adds a pop of color and freshness when you serve the dish. This meal is not just tasty; it looks great too! First, heat the olive oil in a large skillet over medium heat. I love using olive oil for its rich flavor. Next, add minced garlic and sauté it for about one minute. It should smell amazing! While the garlic cooks, season the shrimp with Cajun spice, salt, and pepper. Make sure to coat the shrimp well. Add the shrimp to the skillet and cook for about 2-3 minutes per side. They should turn pink and be fully cooked. Once done, remove the shrimp from the skillet and set them aside. In the same skillet, add the orzo and halved cherry tomatoes. Stir for a minute to let the orzo toast a bit. It adds a nice flavor! Then, pour in the chicken or vegetable broth and bring it to a gentle boil. Reduce the heat to a simmer, cover the skillet, and cook for about 10-12 minutes. Stir occasionally until the orzo is al dente, and most of the liquid is absorbed. This step is key for a perfect texture. Now it’s time for the creamy goodness! Stir in the heavy cream and fresh spinach. This will make the dish rich and colorful. Allow the spinach to wilt for about two minutes. Add the cooked shrimp back to the skillet along with the grated Parmesan cheese. Stir everything together until it’s creamy and well combined. Adjust the seasoning with salt and pepper as needed. Let it rest for a few minutes before serving. This helps thicken the dish just right. Enjoy your creamy Cajun shrimp orzo warm in shallow bowls. Garnish with fresh parsley and a sprinkle of extra Parmesan for that special touch! How to achieve perfectly cooked shrimp To cook shrimp just right, look for a bright pink color. This takes about 2-3 minutes per side. Don’t overcook them; they can become tough. Remove them from heat as soon as they are opaque. Best way to avoid mushy orzo To keep the orzo firm, cook it in broth. Stir occasionally to stop it from sticking. Remove it when it is al dente. This means it should have a slight bite when you chew it. Suggestions for additional spices You can spice things up with smoked paprika, cayenne, or garlic powder. These add warmth and depth. Adjust based on your taste. If you like it hot, add more Cajun seasoning. How to balance creaminess and seasoning For the best creaminess, use heavy cream. But be careful with salt. The Parmesan adds saltiness. Taste as you mix in the cream and adjust with pepper instead. Serving suggestions for a restaurant-style dish For a nice look, serve the orzo in shallow bowls. This helps show off the shrimp and veggies. Add a sprinkle of cheese on top. It makes the dish pop. Garnishing ideas with herbs and lemon wedges To finish, add fresh parsley on top. A few lemon wedges on the side give a fresh feel. This adds color and brightness to your dish. {{image_2}} You can switch shrimp for other proteins. Chicken works well. Simply cut it into small pieces. Cook it until browned, then add it to the mix. For a seafood twist, use scallops or crab meat. Both add great taste and texture. If you want a vegetarian option, try using mushrooms or firm tofu. They soak up flavors nicely. You can sauté them just like shrimp. This choice makes the dish hearty and satisfying. While orzo is perfect, you can try other pastas. Small shells or fusilli also work great. They hold the sauce well and offer a nice bite. For gluten-free choices, use rice pasta or quinoa pasta. Both options give a similar texture. Just be sure to adjust cooking times according to package instructions. Adjusting spice levels is easy. If you want less heat, reduce the Cajun seasoning. You can add more herbs like thyme or oregano for depth. Adding vegetables boosts nutrition. Peppers, zucchini, or peas are great picks. Just toss them in when you add the spinach. This adds color and makes the dish more filling. To keep your creamy Cajun shrimp orzo fresh, store leftovers in an airtight container. This helps to lock in flavor and moisture. It lasts in the fridge for about 3 to 4 days. If you plan to eat it later, make sure to let it cool before sealing it. Yes, you can freeze creamy Cajun shrimp orzo! Use a freezer-safe container or a heavy-duty freezer bag. Make sure to remove excess air to prevent freezer burn. It stays good for about 2 to 3 months. When you are ready to enjoy, simply thaw it in the fridge overnight. To reheat your orzo, use a skillet over low heat. Add a splash of broth or water to keep it creamy. Stir gently to prevent sticking. You can also use the microwave; just cover it loosely and heat in short bursts, stirring in between. For a flavor boost, add a little fresh parsley or a squeeze of lemon juice as you reheat. Orzo is a type of pasta that looks like rice. It is small and oval-shaped. You can use orzo in many dishes, like soups, salads, and casseroles. It cooks quickly and absorbs flavors well. In this recipe, orzo pairs perfectly with shrimp and creamy sauce, making it a great choice. Yes, you can make this recipe ahead of time. To prep in advance, cook the orzo and shrimp as directed. Let them cool, then store them in the fridge. You can combine them with the sauce later. When you’re ready to eat, heat everything gently. Add fresh spinach at the last minute for that vibrant color. You can serve many side dishes with creamy Cajun shrimp orzo. Here are some ideas: - A simple green salad with a light dressing - Garlic bread for a crunchy side - Steamed broccoli or green beans for extra veggies - A fresh fruit salad for a sweet touch These sides balance the rich flavors of the orzo and shrimp. Enjoy your meal! This article walks you through making creamy Cajun shrimp orzo. You learned about the main and additional ingredients to use. I shared simple steps to cook the dish and tips for perfecting flavors. You also discovered variations for different diets and how to store leftovers. In closing, this recipe offers easy ways to elevate your meal. It balances flavors well and brings joy to the table. Enjoy making it your own!

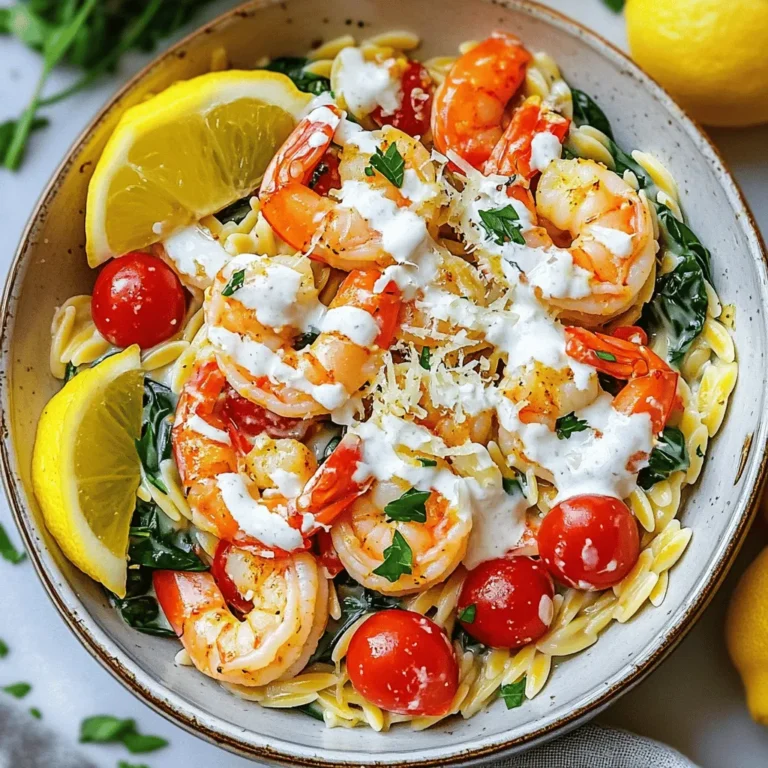
Creamy Cajun Shrimp Orzo One Pan Delight

To make Crispy Lemon Chicken, gather these key items: - 1 lb (450g) boneless, skinless chicken thighs, cut into bite-sized pieces - 1 cup all-purpose flour - 1 teaspoon garlic powder - 1 teaspoon onion powder - 1 teaspoon paprika - 1/2 teaspoon black pepper - 1/2 teaspoon salt - 2 large eggs - 1 cup breadcrumbs (panko for extra crunch) - 1/4 cup lemon juice (freshly squeezed) - Zest of 1 lemon - 2 tablespoons soy sauce - 1 teaspoon honey - 2 tablespoons sesame oil - Chopped green onions and lemon slices for garnish Each ingredient plays a role. The chicken thighs stay juicy inside, while the flour and breadcrumbs create a crispy coat. The lemon juice and zest add a bright, zesty flavor that lifts the dish. Feel free to add these items to enhance your dish: - Chopped green onions - Lemon slices - Steamed rice - Stir-fried vegetables These garnishes bring color and freshness to your plate. They also balance the rich flavors of the chicken. You can make some swaps if needed: - Use chicken breasts instead of thighs for a leaner option. - Replace all-purpose flour with gluten-free flour for a gluten-free dish. - Substitute honey with maple syrup for a vegan-friendly option. - Use olive oil instead of sesame oil for a different taste. These substitutions allow you to tailor the recipe to your diet or taste preferences. With these ingredients, you can create a dish that feels homemade and tastes better than takeout. Start by gathering your chicken. I like to use boneless, skinless chicken thighs. Cut them into bite-sized pieces. This size helps them cook evenly and stay juicy. Next, prepare your breading station. In one bowl, mix 1 cup of flour with garlic powder, onion powder, paprika, black pepper, and salt. This adds great flavor. In another bowl, beat 2 large eggs until smooth. In a third bowl, pour in 1 cup of breadcrumbs. Panko works best for that extra crunch. Heat 2 tablespoons of sesame oil in a large skillet over medium-high heat. Make sure the oil is hot before adding chicken. This keeps the chicken from getting soggy. Take a piece of chicken and dip it first in the flour mix, then in the eggs, and finally coat it in breadcrumbs. Place the coated chicken pieces in the skillet. Fry them in batches so they get crispy. Cook for about 5-7 minutes on each side. They should turn golden brown. Once cooked, put the chicken on a paper towel-lined plate. This helps absorb extra oil. While the chicken cooks, mix your lemon sauce. In a small bowl, combine 1/4 cup of lemon juice, the zest of 1 lemon, 2 tablespoons of soy sauce, and 1 teaspoon of honey. Whisk it all together until smooth. When the chicken is done, remove it from the skillet, but keep the heat on. Pour the lemon sauce into the same skillet. Scrape up any brown bits from the chicken. This adds flavor. Let it simmer for 2-3 minutes until it thickens slightly. Finally, add the crispy chicken back into the skillet. Toss it gently in the sauce until coated. To get your chicken super crispy, follow these steps: - Use panko breadcrumbs. They give a great crunch. - Make sure the oil is hot before adding chicken. This helps to seal in moisture. - Don’t overcrowd the skillet. This allows even cooking and crispiness. You can also double coat your chicken. Dip it in the flour, then eggs, and repeat the breadcrumbs. This adds even more crunch. Frying chicken can be tricky, but these tips help: - Use a deep skillet or pot. This gives enough space for chicken to cook. - Maintain the oil temperature. If it cools, the chicken absorbs more oil. - Flip the chicken only once. This keeps the coating intact and crispy. Cook in batches if needed. This way, every piece gets the perfect golden color. Want to boost your lemon sauce flavor? Try these ideas: - Add fresh herbs like thyme or basil. They bring a nice aroma. - Include a pinch of chili flakes for heat. This balances the lemon's tang. - Mix in a splash of chicken broth. It adds depth to the sauce. These enhancements make your lemon sauce bright and flavorful. Enjoy creating your own version! {{image_2}} Want to add a kick? Mix in some heat. You can add crushed red pepper flakes to the flour mix. Start with 1/2 teaspoon and adjust to taste. This gives your chicken a warm, spicy flavor that pairs well with the lemon. You can also try a dash of hot sauce in the lemon sauce for extra zing. Chicken is great, but other proteins can shine too. Try using shrimp or tofu for a fun twist. For shrimp, just peel, devein, and follow the same steps. Tofu needs to be pressed and cubed first. This gives it a better texture. Both options bring unique tastes while keeping the crispy lemon theme. If you're looking for a vegetarian dish, swap chicken for cauliflower. Cut a head of cauliflower into bite-sized florets. Follow the same coating steps for the crispy texture. You can also use eggplant for a different flavor. Slice it into thick rounds and coat just like the chicken. Both options are delicious and keep the recipe fun! To keep your crispy lemon chicken fresh, store it in an airtight container. Let it cool first, then place it in the fridge. It will last for about three days this way. This method helps maintain the flavor and texture. When you're ready to enjoy leftovers, reheat them in a skillet. Add a little oil to keep the chicken crispy. Heat over medium until warm, about 5-7 minutes. You can also use an oven. Preheat to 350°F (175°C) and bake for 10-15 minutes. Avoid microwaving, as it can make the chicken soggy. You can freeze crispy lemon chicken for later meals. Place cooled chicken in a freezer-safe bag before sealing. Remove as much air as possible to avoid freezer burn. It can stay in the freezer for up to three months. To reheat, let it thaw overnight in the fridge before reheating as mentioned above. This keeps the chicken tasty and crispy. To make this chicken gluten-free, swap the all-purpose flour and breadcrumbs. Use gluten-free flour and gluten-free breadcrumbs instead. These options work well in the recipe. You can often find them at local stores. This way, you can enjoy the same great taste without gluten. Yes, you can use chicken breasts instead of thighs. Chicken breasts will cook faster, so check them often. Cut them into similar bite-sized pieces for even cooking. The dish will still taste delicious, but thighs add more moisture and flavor. You can serve Crispy Lemon Chicken with various sides. Here are some tasty options: - Steamed rice - Stir-fried vegetables - Noodles - A fresh salad - Garlic bread These sides balance the flavors and make a complete meal. Choose what you enjoy most! This article explored how to make crispy lemon chicken. We covered essential ingredients, step-by-step cooking methods, and tips for extra crispiness. You learned about different variations, how to store leftovers, and common questions. Crispy lemon chicken can delight your taste buds. With simple steps and a few tweaks, you can create this dish just the way you like it. Enjoy experimenting with flavors and make it your own!

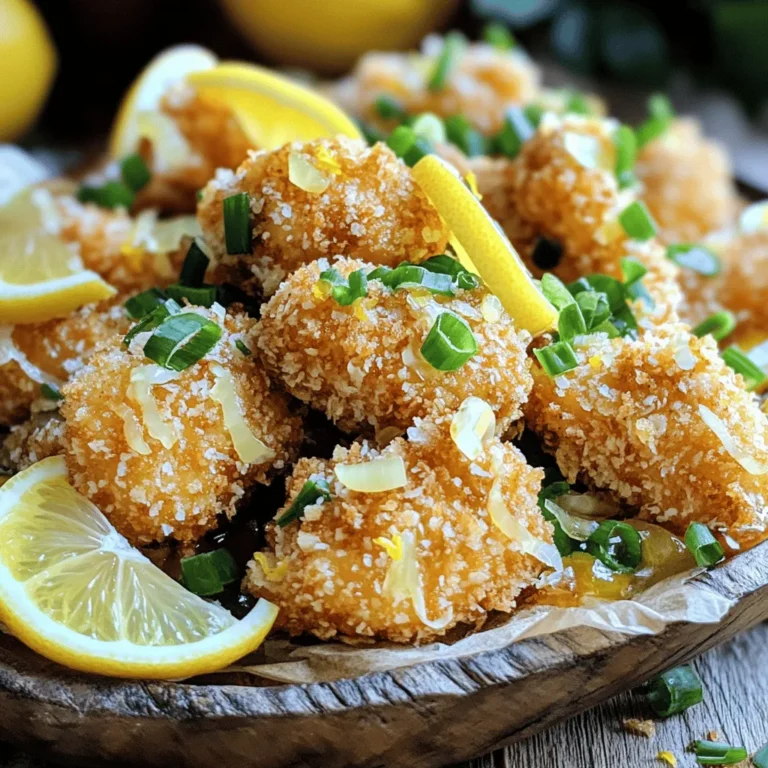
Crispy Lemon Chicken Better Than Takeout Delight

To make delicious blueberry almond muffins, you need fresh ingredients. Here’s what to gather: - 1 cup fresh blueberries (or frozen, if out of season) - 1/4 cup sliced almonds (for topping) Fresh blueberries add a burst of flavor and color. If they are out of season, frozen ones work just fine. Next, you need some key baking ingredients. These help shape the muffins and give them texture. Here’s a list: - 1 cup all-purpose flour - 1/2 cup almond flour - 1/2 cup granulated sugar - 1/4 cup brown sugar - 1/2 cup unsalted butter, melted - 2 large eggs - 1/2 cup milk (or almond milk for a dairy-free option) - 1 teaspoon vanilla extract - 1 tablespoon baking powder - 1/2 teaspoon salt - 1/2 teaspoon ground cinnamon These ingredients create a rich and fluffy muffin. The almond flour adds a nutty taste, while the sugars give sweetness. If you want the muffins to be dairy-free, there are simple swaps. You can use these options: - Almond milk instead of regular milk This swap keeps the muffins moist while making them suitable for those who avoid dairy. You still get all the yummy flavor without the milk. First, you need to prepare your oven. Set it to 375°F (190°C). This is the perfect temperature for baking muffins. Next, grab a muffin tin. You can use paper liners to make cleanup easy or grease the tin with cooking spray. This helps the muffins pop out easily when they are done. In a large mixing bowl, add melted butter, granulated sugar, and brown sugar. Use a whisk to mix them well. This will create a sweet base for your muffins. After that, crack in two large eggs. Pour in the milk and add the vanilla extract. Whisk all of this until it is smooth. This mixture is key for your muffin texture. Now, grab another bowl. In this bowl, mix all-purpose flour, almond flour, baking powder, salt, and cinnamon. Stir these dry ingredients together. This step is crucial for even flavor. Once mixed, gently fold the dry ingredients into the wet mixture. Be careful not to overmix; this keeps your muffins from getting tough. Finally, fold in the fresh blueberries. Make sure they are spread throughout the batter. Now, your muffin batter is ready to fill the tin! To get a great muffin texture, use fresh ingredients. Use fresh blueberries for the best taste. If you use frozen, let them thaw first. Mix the wet and dry ingredients gently. Do not overmix the batter. This keeps your muffins light and fluffy. Fill the muffin cups about two-thirds full. This allows room for rising without spilling over. Store your muffins in a sealed container. A plastic or glass container works well. Keep them at room temperature for up to three days. For longer storage, place them in the fridge. You can also freeze muffins for up to three months. Just wrap them in plastic wrap, then foil. This keeps them fresh and tasty. Serve your muffins warm for the best flavor. A sprinkle of powdered sugar adds a nice touch. You can also add a dollop of whipped cream. This makes for a delicious treat. Pair them with a cup of coffee or tea. Enjoy them as a snack or breakfast. They are great for sharing with friends too! {{image_2}} You can swap blueberries for other fruits. Raspberries, chopped apples, or diced peaches work great. Each fruit brings its own flavor. This can change the taste and feel of the muffins. Experiment with what you love! If you use frozen fruit, add it at the end. This keeps the batter from turning too purple. To make these muffins gluten-free, use a gluten-free flour blend. Almond flour is a good choice too. For a vegan version, replace the eggs with flax eggs. Mix one tablespoon of flaxseed meal with three tablespoons of water. Let it sit for a few minutes until it thickens. You can also use almond milk instead of regular milk. These changes keep the muffins tasty and friendly for all diets. Adding spices can give your muffins a warm, cozy taste. Try adding a pinch of nutmeg or ginger to the batter. For a twist, add a splash of almond extract along with vanilla. You can also mix in some lemon zest for a fresh kick. These little touches make each muffin unique and full of flavor. To keep your blueberry almond muffins fresh, store them in an airtight container. You can place them at room temperature for up to three days. If you want them to last longer, consider refrigerating them. Just remember to let them cool completely before sealing. This way, they will stay soft and yummy. Freezing muffins is a great way to save them for later. First, let the muffins cool down completely. Then, wrap each muffin in plastic wrap. After that, place them in a freezer-safe bag. This helps keep out air and moisture. You can keep them in the freezer for up to three months. When you want to enjoy them, just take out what you need. To reheat your blueberry almond muffins, you can use the microwave or an oven. If using a microwave, heat for about 15-20 seconds. Check if they’re warm enough; if not, add a few more seconds. For the oven, preheat it to 350°F (175°C). Place the muffins on a baking sheet and heat for about 10 minutes. This method helps keep them soft and fresh. Enjoy them warm for the best taste! Yes, you can use frozen blueberries. They work well in this recipe. Just add them straight from the freezer. This saves time and keeps the muffins colorful. They may make the batter a bit wet, but they still taste great. If you need a substitute for almond flour, try using oat flour or all-purpose flour. Both can replace almond flour in equal amounts. Oat flour has a nice flavor and keeps it gluten-free. All-purpose flour is a good choice if you don’t need it to be gluten-free. To check if the muffins are done, insert a toothpick into the center. If it comes out clean, the muffins are ready. It usually takes about 18 to 20 minutes to bake. Keep an eye on them, as ovens may vary. You want a golden brown top that looks inviting. You learned how to make delicious blueberry almond muffins using fresh and simple ingredients. We covered essential steps to ensure perfect texture and taste. Remember to explore variations, like using different fruits or making them gluten-free. Store your muffins properly to enjoy them longer. Baking can be fun and easy with the right tips. Enjoy your muffins fresh and share them with friends. Happy baking!

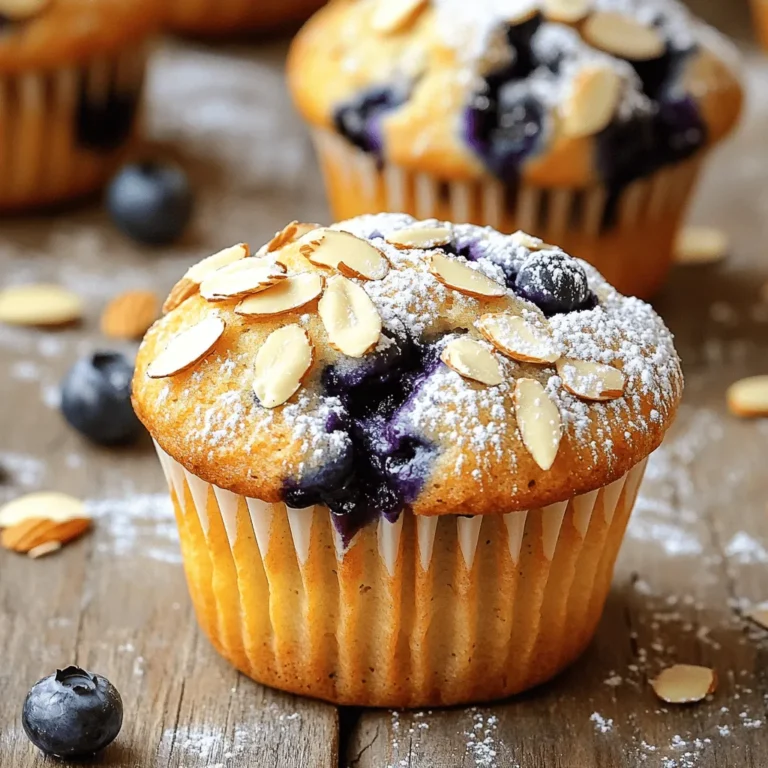
Blueberry Almond Muffins Bakery Fresh and Tasty Treat

- 1 cup rolled oats - 1 cup almond milk (or any milk of choice) - 1/2 cup canned pumpkin puree For the base of your pumpkin spice overnight oats, start with rolled oats. They soak in the milk well and create a nice texture. Next, pour in almond milk or any milk you like. Almond milk is light and creamy, but feel free to use cow's milk, oat milk, or soy milk if you prefer. Then, add canned pumpkin puree. This brings warm flavor and a beautiful color to your oats. - 1 tablespoon maple syrup (adjust for sweetness) - 1/2 teaspoon pumpkin pie spice - 1/4 teaspoon vanilla extract To make your oats taste amazing, mix in maple syrup. This sweetener can be adjusted based on how sweet you want it. Next, add pumpkin pie spice. It gives a cozy flavor that works well with pumpkin. Finally, pour in vanilla extract for a little extra depth. - Chopped pecans - Sliced banana - Coconut flakes - Greek yogurt You can make your oats even better by adding toppings. Chopped pecans give a nice crunch. Sliced banana adds sweetness and creaminess. Coconut flakes add a tropical touch. If you want more protein, a dollop of Greek yogurt works great too. Mix and match these toppings to make your oats perfect for you! 1. In a medium bowl, combine 1 cup rolled oats and 1 cup almond milk. Stir them well until mixed. This step is key for soft oats. 2. Next, add 1/2 cup canned pumpkin puree, 1 tablespoon maple syrup, 1/2 teaspoon pumpkin pie spice, 1/4 teaspoon vanilla extract, and a pinch of salt. Stir until everything is smooth. You want all the flavors to blend nicely. 1. Now, divide the mixture into two jars or airtight containers. This helps with portion control and makes it easy to grab in the morning. 2. Seal the jars and place them in the fridge overnight. This allows the oats to soak up the flavors and liquid. You can also do this for at least four hours if you are in a hurry. 1. In the morning, give your oats a good stir. If they are too thick, add a splash more almond milk. This makes them creamy and easy to eat. 2. Top with your favorite ingredients. Try chopped pecans for crunch, sliced banana for sweetness, or coconut flakes for texture. These toppings can make your oats even more delicious! Enjoy your Pumpkin Spice Overnight Oats cold or warm. They are a great breakfast that you can prepare in advance! To adjust sweetness, start with one tablespoon of maple syrup. Taste and add more if you like it sweeter. For spice, use half a teaspoon of pumpkin pie spice. If you want a bolder flavor, add a pinch more. The right consistency is key. If your oats are too thick in the morning, add a splash of milk. Stir well until creamy. You want it to be smooth, not runny. Using clear jars makes your oats look great. You can see the colors and layers. It adds to the fun of eating. For toppings, get creative! Try chopped pecans for crunch. Sliced banana adds sweetness. You can also use coconut flakes for a tropical twist. Greek yogurt gives a creamy finish. Overnight oats have many nutritional benefits. They are high in fiber, which helps digestion. They also keep you full longer. This helps with weight management. Pumpkin is packed with vitamins. It is high in vitamin A, which is good for your eyes. The spices in this recipe can boost your metabolism and add flavor without extra calories. {{image_2}} You can switch up the spices to create new flavors. Instead of pumpkin pie spice, try using cinnamon and nutmeg. You can also mix in a little ginger for a spicy kick. If you want a sweeter taste, consider adding vanilla or almond extract. For sweeteners, maple syrup is great, but honey or agave syrup also works well. Each sweetener gives a slightly different flavor, so feel free to experiment. Adjust the amount based on your taste. If you follow a plant-based diet, use almond milk or oat milk. These options keep the oats creamy without dairy. You can also use coconut milk for a richer taste. For gluten-free oats, make sure to choose certified gluten-free rolled oats. This way, you can enjoy your oats without worry. Check the labels to ensure they meet your needs. Adding seasonal fruits can enhance your oats. In the fall, diced apples or pears taste amazing. You can also mix in some chopped walnuts or pecans for extra crunch. During the holidays, try adding a splash of eggnog or some dried cranberries. These twists can make your oats festive and fun. Top with a sprinkle of cinnamon for a holiday touch. To keep your pumpkin spice overnight oats fresh, use airtight containers. Glass jars work well since they let you see the layers. You can also use plastic containers. Just make sure they seal tightly. Keeping them cold is key to maintaining flavor and quality. You can store these oats in the fridge for up to five days. If you want to keep them longer, try freezing them. Use freezer-safe jars or bags for freezing. Just remember to leave room for expansion. They can last a month in the freezer, but the texture may change a bit. If you prefer warm oats, the best way to reheat them is in the microwave. Start with one minute on high. If they need more heat, check every 15 seconds. Stir well to keep the texture smooth. If they seem too thick after heating, add a splash of milk to loosen them up. Enjoy them warm or cold, depending on your mood! I recommend using rolled oats for overnight oats. They soak up liquid well. They stay soft and chewy, making them perfect for this recipe. Quick oats can work too, but they may turn mushy. Steel-cut oats do not work well. They stay too hard unless cooked first. Yes, you can use any milk you like! Almond milk is my favorite, but try soy, oat, or regular cow's milk. Each type adds its own flavor. Just pick one that you enjoy. If you want a creamier texture, use whole milk or coconut milk. Overnight oats can last in the fridge for up to five days. Store them in airtight containers. Check for any odd smells or changes in texture before eating. If they look fine, they should be safe to enjoy. Absolutely! This recipe is vegan-friendly as long as you use plant-based milk and maple syrup. Both ingredients are naturally vegan. You can skip the yogurt or use a dairy-free version for toppings. Toppings can make your oats even better! Here are some tasty options: - Chopped pecans for crunch - Sliced banana for sweetness - Coconut flakes for texture - A dollop of Greek yogurt for creaminess Feel free to mix and match your favorites! Enjoy your delicious pumpkin spice overnight oats! This blog post covered how to make delicious pumpkin spice overnight oats. We started with essential ingredients like oats, almond milk, and pumpkin puree. Then, we mixed in flavor enhancers and added optional toppings. Each step guided you from preparation to serving. Remember, these oats are healthy, tasty, and easy to customize. Whether you add fruits, nuts, or spices, there is a version for everyone. Enjoy your delicious and nutritious breakfast any day!

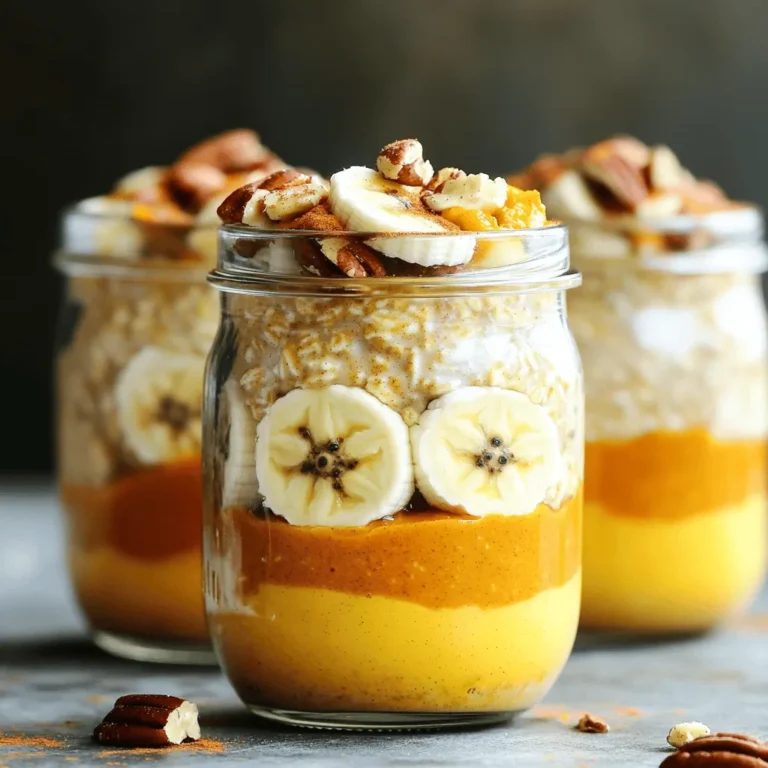
Flavorful Pumpkin Spice Overnight Oats Recipe

PREV 1 … 22 23 24 … 53 NEXT
cozy citrus kitchen

explore

DessertsDinnerAppetizersDrinks

Our Policies

  • Cookie Policy
  • Copyright Policy
  • Disclaimer
  • GDPR Policy
  • Terms Of Use
Back to Top
  • About
  • Contact Us
  • Privacy Policy
© 2025 cozy citrus kitchen