FREE DINNER EBOOK! Get your copy!
  • Cookie Policy
  • GDPR Policy
  • Disclaimer
  • Terms Of Use
  • Visit my other site: Fun Cookie Recipes
cozy citrus kitchen
  • Home
  • Dinner
  • Desserts
  • Drinks
  • Appetizers
  • Contact
  • About
  • Privacy Policy
  • Home
  • Dinner
  • Desserts
  • Drinks
  • Appetizers
  • Contact
  • About
  • Privacy Policy
  • Cookie Policy
  • GDPR Policy
  • Disclaimer
  • Terms Of Use
Visit my other site: Fun Cookie Recipes

HOME / CATEGORIES /

Latest

For a tasty bowl, gather these main ingredients: - 2 boneless, skinless chicken breasts - 1/4 cup honey - 2 tablespoons lime juice (freshly squeezed) - 1 teaspoon lime zest - 1 teaspoon chili powder - 1 teaspoon cumin - Salt and pepper to taste - 1 tablespoon olive oil - 1 cup cooked brown rice or quinoa - 1 cup black beans, rinsed and drained - 1 cup corn kernels (fresh, canned, or frozen) - 1 avocado, diced - 1 cup cherry tomatoes, halved - 1/4 cup red onion, finely chopped - Fresh cilantro, chopped (for garnish) - Lime wedges (for serving) These ingredients blend flavors well. The honey adds sweetness, while lime juice gives a fresh kick. The spices, like chili powder and cumin, create a warm, rich taste that makes the chicken shine. Feel free to personalize your taco bowls. Here are some fun options: - Sliced jalapeños for heat - Shredded cheese for creaminess - Sour cream for a tangy touch - Fresh corn salsa for crunch - Lime wedges for extra zest These toppings can change the flavor and texture. They let you customize each bowl to your liking. You can use either brown rice or quinoa as your base. - Brown Rice: It has a nutty flavor and chewy texture. It pairs well with the chicken. - Quinoa: This grain is lighter and packed with protein. It adds a nice fluffy feel. Choosing the right base can make your bowl more filling and satisfying. Both options are healthy and tasty! To start, I mix honey, lime juice, lime zest, chili powder, cumin, salt, and pepper in a bowl. This mix creates a tasty marinade. Next, I add the chicken breasts, making sure they are well-coated. Cover the bowl and put it in the fridge for at least 30 minutes. If you have time, let it marinate for up to 2 hours. This helps the chicken soak up all those flavors. Once the chicken is marinated, I heat olive oil in a skillet over medium heat. I take the chicken out of the marinade and place it in the hot skillet. I cook each side for about 6-7 minutes until the chicken is cooked through. The juices should run clear when it’s done. After cooking, I let it rest for 5 minutes before slicing it into strips. This keeps it juicy. Now comes the fun part! I grab serving bowls and start with a base of cooked brown rice or quinoa. I add a scoop of black beans next, followed by a scoop of corn. Then, I dice an avocado and sprinkle it on top, along with halved cherry tomatoes. This creates a colorful and tasty base for my taco bowls. After adding the base and toppings, I slice the cooked chicken into strips. I place the chicken right over the rice and veggies. To finish, I sprinkle chopped red onion and fresh cilantro on top. A squeeze of lime juice adds extra zing to each bowl. I love to serve these taco bowls warm. I place lime wedges on the side for a fresh burst of flavor. These bowls are great for family dinners or casual get-togethers. Everyone can build their own bowl with their favorite toppings. Enjoy! To make the best honey lime marinade, mix honey, lime juice, lime zest, chili powder, cumin, salt, and pepper. Whisk them well until smooth. This mix gives the chicken a sweet and tangy taste. Let the chicken soak in this marinade for at least 30 minutes. For more flavor, try to marinate it for up to 2 hours. This step makes a big difference in taste. When cooking the chicken, use medium heat and a bit of olive oil. This helps keep the chicken juicy. Cook each side for about 6-7 minutes. You will know it's ready when the juices run clear. After cooking, let the chicken rest for 5 minutes. This allows the juices to settle back in, giving you tender bites. Start with a base of cooked brown rice or quinoa in your bowl. Next, add black beans, corn, diced avocado, and halved cherry tomatoes. Slice the chicken and place it on top. For a pop of color, sprinkle chopped red onion and cilantro. Finish with a squeeze of fresh lime juice. This not only adds flavor but also makes your bowl look great! Enjoy your colorful and tasty taco bowls warm. {{image_2}} You can make a tasty vegetarian version using tofu or tempeh. Start by pressing firm tofu to remove extra water. Cut it into cubes and marinate with honey, lime juice, and spices. For tempeh, slice it thinly and soak in the same marinade. Cook them in a skillet until golden. Serve them just like the chicken. You’ll still get a delicious and hearty meal! If you enjoy a kick of heat, add jalapeños. You can slice fresh jalapeños and sprinkle them on top of your taco bowls. Another option is to add pickled jalapeños for a tangy flavor. Adjust the amount based on how spicy you want your meal. This simple addition elevates the flavor and adds excitement! You can switch up the protein to keep things fresh. Shrimp is a great choice. Just season and cook quickly in a hot skillet. For steak, use flank or sirloin. Cut it into strips and marinate like the chicken. Grill or pan-sear it for juicy bites. Each option brings a new taste to your taco bowls. Enjoy trying out different proteins for variety! To store your leftover taco bowls, first let them cool. Place each ingredient in separate airtight containers. This keeps them fresh longer. You can store the chicken, grains, beans, and veggies apart. Keep the toppings like avocado and cilantro in a separate container. This way, they stay fresh and don’t get mushy. When it's time to eat, reheat each part of the bowl. You can use the microwave or the stove. For the microwave, heat for about 1-2 minutes until warm. Stir halfway through to heat evenly. If using the stove, warm each ingredient in a pan over low heat. This keeps your chicken juicy and your grains fluffy. If you want to freeze the taco bowls, do it before adding fresh toppings. Place the cooled chicken and grains in freezer-safe bags or containers. They can last up to three months in the freezer. To thaw, put them in the fridge overnight. Reheat as mentioned above once they are fully thawed. This way, you can enjoy your meal anytime! Yes, you can use other proteins. Shrimp, steak, or turkey work well. Each protein can bring a new taste to the dish. For a vegetarian option, try tofu or tempeh. Just adjust cooking times to ensure everything cooks through. You can keep marinated chicken in the fridge for up to two days. Make sure it stays covered to avoid cross-contamination. If you marinate longer than two hours, it can lose its texture. If you need a honey substitute, try agave syrup or maple syrup. Both will give a sweet flavor. You could also use brown sugar mixed with a little water. Just adjust the amount to your taste. Yes, the taco bowls are gluten-free! The base ingredients like rice and beans do not contain gluten. Just be sure to check any additional toppings or sauces you may add. Absolutely! You can prepare the chicken and veggies ahead of time. Store them in separate containers. Just assemble the bowls when you’re ready to eat. This makes for a quick meal during busy days. This article covered how to make honey lime chicken taco bowls. We explored key ingredients like chicken, rice, and fun toppings. You learned step-by-step instructions, tips for perfect results, and tasty variations. Storing leftovers and answering common questions helped round it out. These taco bowls are fun to make and easy to enjoy any time. Get creative with the flavors and share them with friends! You now have all you need to impress at your next meal.

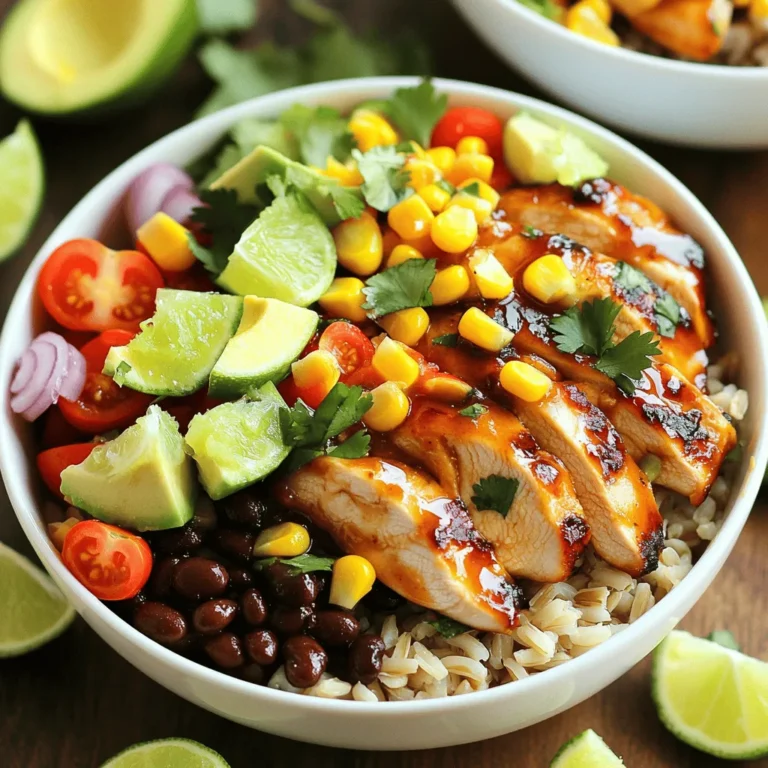
Honey Lime Chicken Taco Bowls Flavorful and Fun Meal

- 1 cup pumpkin puree - 1/2 cup unsalted butter, softened - 1 cup brown sugar - 1/2 cup granulated sugar - 1 large egg - 2 teaspoons vanilla extract - 2 cups all-purpose flour - 1 teaspoon baking soda - 1 teaspoon baking powder - 2 teaspoons pumpkin pie spice - 1/2 teaspoon salt - 1 cup semi-sweet chocolate chips - 1 tablespoon coconut oil (for melting chocolate) The key ingredients for these cookies bring together rich flavors. Pumpkin puree gives them a moist base. The sugars add sweetness and depth. Butter makes them soft and chewy. Pumpkin pie spice creates that warm, cozy taste we love. - Sprinkles - Crushed pecans You can make these cookies even better with toppings. Sprinkles add color and fun. Crushed pecans give a nice crunch and nutty flavor. Feel free to get creative with what you like! - Mixing bowls - Baking sheet - Parchment paper - Whisk - Spoon or spatula - Microwave-safe bowl Having the right tools makes baking easier. Mixing bowls help combine wet and dry ingredients. A baking sheet lined with parchment paper prevents sticking. A whisk mixes the dry ingredients well. Use a spoon or spatula to blend everything together. Lastly, a microwave-safe bowl is perfect for melting the chocolate smoothly. Start by preheating your oven to 350°F (175°C). Line a baking sheet with parchment paper. In a large bowl, cream together the softened butter, brown sugar, and granulated sugar. Mix until it becomes light and fluffy. Next, add in the pumpkin puree, egg, and vanilla extract. Beat this mixture until it is well combined. In another bowl, whisk together the flour, baking soda, baking powder, pumpkin pie spice, and salt. Gradually add the dry ingredients to the wet mixture. Mix until just combined, but don’t overmix. This keeps the cookies soft. Scoop out tablespoon-sized portions of dough. Place them on the prepared baking sheet, leaving about two inches of space between each scoop. Now it’s time to bake! Place the baking sheet in the oven. Bake your cookies for 10 to 12 minutes. They should be set and lightly golden at the edges. Once they’re ready, take them out and let them cool on the baking sheet for five minutes. After that, transfer the cookies to a wire rack to cool completely. While your cookies cool, melt the semi-sweet chocolate chips with coconut oil. Use a microwave-safe bowl. Heat the mixture in 30-second intervals until it becomes smooth. Once your cookies are cool, dip half of each cookie into the melted chocolate. Allow any excess chocolate to drip off. Place the chocolate-dipped cookies back on the parchment paper. If you want, sprinkle festive toppings like sprinkles or crushed pecans right away. Let the chocolate set at room temperature or speed up the process by putting them in the fridge for about 15 minutes. Enjoy your delicious treats! To get soft, chewy cookies, use room-temperature butter. Cream it well with sugars. This mix adds air and makes cookies light. Don’t overmix the dough; it can make cookies tough. Bake until the edges are golden. They will firm up as they cool. You can make the dough ahead of time. Chill the dough for at least an hour. This helps the flavors blend. You can also freeze dough. Scoop the dough onto a baking sheet and freeze until firm. Then, store it in a bag. When you’re ready, bake from frozen, adding a minute or two to the time. If your cookies spread too much, check your butter. It should be soft, not melted. Too much flour can also cause spreading. Make sure you measure accurately. If cookies are dry, they may have been overbaked. Always check them a minute before the time ends. If they stick, let them cool a bit longer on the pan. {{image_2}} You can switch the chocolate chips for white chocolate or milk chocolate. Each type gives a new taste. If you want a richer flavor, try dark chocolate. Just remember, the melt time might change a bit. Use the same method to melt your chocolate. This change lets you create a unique twist on classic flavors. Try adding a seasonal twist to your cookies. For a gingerbread flavor, mix in ground ginger and cinnamon. This change makes your cookies feel festive. You can even add a pinch of nutmeg for warmth. You can also use maple syrup instead of sugar for a richer taste. These small changes make a big difference! Making these cookies gluten-free is easy! Swap all-purpose flour for almond flour or a gluten-free blend. For vegan cookies, replace the butter with coconut oil or vegan butter. Use flax eggs instead of a regular egg. Just mix 1 tablespoon of ground flaxseed with 2.5 tablespoons of water. Let it sit for five minutes. These swaps keep the cookies tasty while meeting your needs. To keep your chocolate dipped pumpkin spice cookies fresh, use an airtight container. Layer the cookies with parchment paper to avoid sticking. Store them at room temperature for the best taste. If it’s warm in your kitchen, a cool spot works too. Avoid direct sunlight, as it can dry them out. Freezing these cookies is easy and keeps them fresh longer. First, let the cookies cool completely. Then, place them in a single layer on a baking sheet. Freeze them for about one hour. After that, transfer the cookies to a freezer-safe bag or container. They can last up to three months in the freezer. Remember to label your containers with the date. Chocolate dipped pumpkin spice cookies last about one week at room temperature. If stored properly in the fridge, they can last up to two weeks. Freezing extends their shelf life to about three months. Enjoy them fresh for the best flavor! Yes, you can use fresh pumpkin. Start by roasting a small pumpkin. Cut it in half, scoop out the seeds, and roast it until soft. Then, mash the pumpkin until smooth. This fresh pumpkin can add a nice flavor to your cookies. Just be aware that fresh pumpkin has more moisture than canned, so you may need to adjust your flour. To make thicker cookies, try a few simple steps. First, use less pumpkin puree. Reducing by a couple of tablespoons can help. Second, chill your dough for 30 minutes before baking. This helps firm up the dough. Lastly, add a bit more flour, like 1/4 cup. This small change can give you a thicker, chewier cookie. If you don't have coconut oil, you can use vegetable oil or butter. Both options work well for melting chocolate. Just remember to use the same amount as the coconut oil in the recipe. This will keep your chocolate smooth and shiny for dipping. These chocolate dipped pumpkin spice cookies are a fun treat for any occasion. We covered key ingredients, simple steps, and helpful tips to ensure perfect cookies. You can explore variations for different tastes and learn storage methods to keep them fresh. Baking should be enjoyable, so don't stress. Experiment with flavors and enjoy your delicious creations. Now, it’s your turn to bake and share these treats. Happy baking!

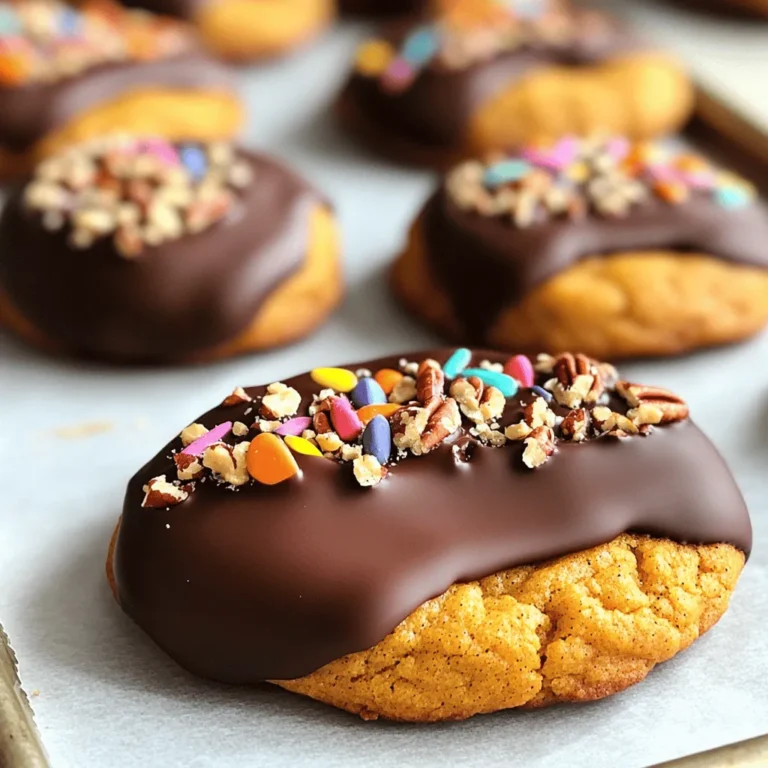
Chocolate Dipped Pumpkin Spice Cookies Delightful Treat

- 4 lobster tails - 1/2 cup unsalted butter - 4 garlic cloves, minced - 2 tablespoons fresh parsley, chopped - 1 tablespoon lemon juice - 1 teaspoon paprika - 1 teaspoon salt - 1/2 teaspoon black pepper - Lemon wedges, for serving The key to this dish is fresh ingredients. First, you need four lobster tails. Look for ones that feel firm and heavy. Next, grab half a cup of unsalted butter. This will give the dish rich flavor. You should also have four garlic cloves. Mince them finely to release their aroma. For a burst of freshness, use two tablespoons of fresh parsley. You will need one tablespoon of lemon juice. This brightens the flavor. Add one teaspoon of paprika for a hint of warmth. Then, include one teaspoon of salt and half a teaspoon of black pepper for seasoning. Lastly, have some lemon wedges ready for serving. They add a nice touch and enhance the dish's taste. First, preheat your oven to 425°F (220°C). This high heat cooks the lobster quickly and evenly. Next, line a large sheet pan with parchment paper. This makes cleanup easy and helps the lobster not stick. Now, let’s make the garlic butter. In a small saucepan, melt 1/2 cup of unsalted butter over medium heat. Once it melts, add 4 minced garlic cloves. Sauté the garlic for about 1-2 minutes. You want it fragrant but not browned. Remove the pan from the heat. Stir in 2 tablespoons of chopped parsley, 1 tablespoon of lemon juice, 1 teaspoon of paprika, 1 teaspoon of salt, and 1/2 teaspoon of black pepper. This mix adds flavor to our lobster. To prepare the lobster tails, use kitchen scissors. Cut each tail in half lengthwise. Be careful to expose the meat while keeping the shell intact. This step helps the meat cook and soak up the butter. Place the lobster tails on the sheet pan with the cut side facing up. Brush each tail generously with the garlic butter mixture. Make sure to cover all the meat for the best flavor. Now, it’s time to bake! Place the sheet pan in your preheated oven. Bake the lobster tails for about 12-15 minutes. They are done when the meat looks opaque and has a light brown color. After baking, remove the tails from the oven. Drizzle any remaining garlic butter from the pan over the lobster. This extra touch enhances the dish's flavor. Serve the lobster tails with fresh lemon wedges on the side. The lemon adds a bright, zesty kick that complements the rich butter. - Avoid overcooking lobster: Lobster cooks fast. Bake it for 12-15 minutes. The meat should be opaque and firm. Overcooking makes it tough. Use a meat thermometer, aiming for 140°F (60°C) for best results. - Best practices for butter application: Brush each tail with the garlic butter mix. Apply it generously for rich flavor. Don’t waste any butter left in the pan. Drizzle it over the tails after baking for more taste. - Pairing lobster tails with sides: Lobster pairs well with simple sides. Try garlic green beans or roasted asparagus. A fresh salad with lemon vinaigrette works great too. These sides balance the rich lobster. - Best wines to complement lobster dishes: Choose white wines for lobster. A crisp Chardonnay or a light Sauvignon Blanc complements the dish well. If you prefer red, go for a light Pinot Noir. These wines enhance the flavor of the lobster without overpowering it. {{image_2}} You can change up the flavor of your lobster tails easily. Adding fresh herbs like thyme or dill gives it a new twist. Both herbs add a nice, fresh taste that pairs well with the garlic butter. If you want a bit of spice, consider using Old Bay seasoning. This classic blend gives a bold flavor that enhances the lobster's natural sweetness. You can mix and match herbs and spices to create your own unique flavor. You have options when it comes to cooking lobster tails. Grilling them adds a smoky flavor that many people enjoy. It gives a nice char and keeps the meat juicy. If you want to stick to the sheet pan method, that works great too. It helps to keep the flavors concentrated and the lobster tender. You can also try broiling the lobster tails. Broiling cooks the tops quickly, which gives a nice texture. It creates a slightly crisp surface while keeping the inside moist. Each method brings out different flavors, so have fun experimenting! To keep your leftover lobster tails fresh, place them in an airtight container. Store them in the fridge. They stay good for up to two days. Always cool them down before sealing. This helps prevent moisture buildup. You can freeze lobster tails, but you'll need to prepare them first. Wrap each tail tightly in plastic wrap. Then, place them in a freezer-safe bag. They can stay in the freezer for up to three months. When you're ready to eat, thaw them in the fridge overnight. To reheat lobster tails without drying out the meat, use a gentle heat. You can steam them on the stove. Place the tails in a steamer basket over boiling water. Cover it and steam for about 5-8 minutes. This keeps the meat moist. You can also use the oven. Preheat it to 350°F (175°C). Place the tails on a baking dish with a splash of water. Cover with foil and heat for 10-15 minutes. Microwaving is quick but tricky. If you choose this method, use a low power setting. Cover the tails with a damp paper towel. Heat in short bursts of 30 seconds. Check often to avoid drying them out. The best way to cook lobster tails is by baking them. Baking gives even heat, which helps the tails cook properly. This method also allows you to infuse flavors easily. Use a mix of garlic butter, lemon juice, and spices for great taste. Follow the recipe carefully for perfect results. You know lobster tails are done when the meat turns opaque and lightly browned. This usually takes about 12-15 minutes at 425°F (220°C). You can also check the internal temperature. It should reach 140°F (60°C). If you see white, flaky meat, it is ready to eat. Yes, you can prepare garlic butter lobster tails ahead of time. Cut the lobster tails and mix the garlic butter. Store them in the fridge for up to 24 hours. When ready to cook, just bake them as directed. This makes dinner easy and quick! You have all the tools to make delicious lobster tails. The ingredients, steps, and tips set you up for success. Remember to avoid overcooking, and don’t forget the lemon. You can add your favorite herbs for a twist. Store leftovers properly to enjoy later. With these tips, you’ll impress your friends and family. Cooking should be fun and rewarding, so dive in and enjoy your tasty lobster meal!

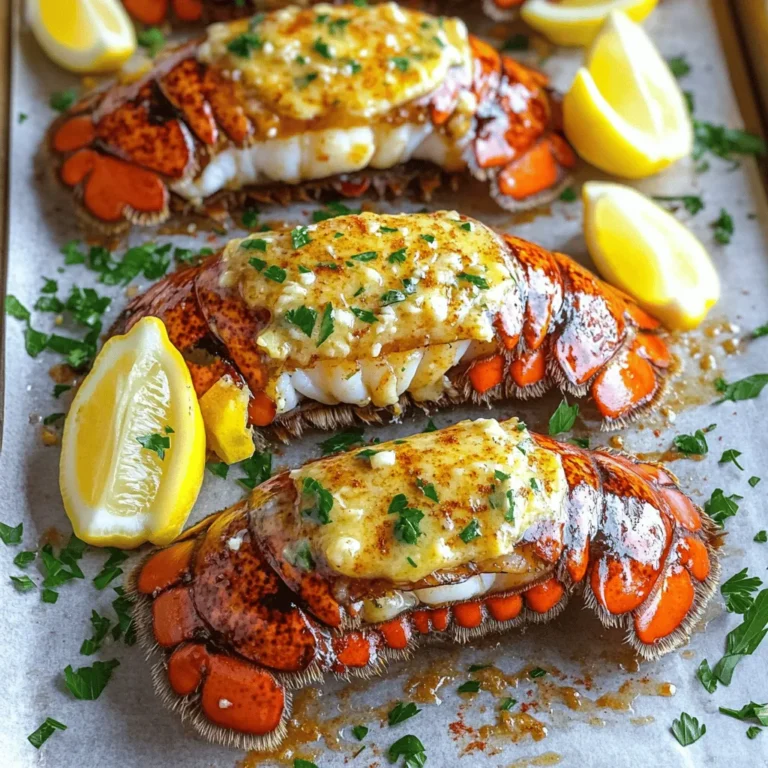
Sheet Pan Garlic Butter Lobster Tails Savory Delight

To make these donut holes, gather these key ingredients: - 1 cup all-purpose flour - 1/2 cup granulated sugar - 2 tsp baking powder - 1/2 tsp salt - 1/4 tsp ground nutmeg - 1/4 cup milk - 1 large egg - 2 tbsp unsalted butter, melted - 1 tsp vanilla extract These ingredients create a soft and tasty base for your donut holes. The flour gives structure, while the sugar adds sweetness. Baking powder helps them rise, and nutmeg brings a warm flavor. For the delicious cinnamon sugar coating, you will need: - 1/4 cup granulated sugar (for rolling) - 1 tsp ground cinnamon This mixture makes your donut holes even more tempting. The cinnamon adds warmth and a nice spice that pairs perfectly with the sweet dough. You can easily swap some ingredients if needed: - Use almond or oat milk instead of regular milk for a dairy-free version. - If you don't have nutmeg, you can use more cinnamon. - Substitute the all-purpose flour with a gluten-free blend for a gluten-free treat. These swaps ensure everyone can enjoy these delightful donut holes without missing out on flavor! First, grab a mixing bowl. Add 1 cup of all-purpose flour. Next, add 1/2 cup of granulated sugar. Then, mix in 2 teaspoons of baking powder, 1/2 teaspoon of salt, and 1/4 teaspoon of ground nutmeg. Whisk these ingredients together until they blend well. This mix forms the base for your donut holes. Now, take another bowl. Pour in 1/4 cup of milk. Crack in 1 large egg. Add 2 tablespoons of melted unsalted butter and 1 teaspoon of vanilla extract. Stir everything until smooth. This mixture adds moisture and flavor to your donut holes. Combine the wet mix with the dry mix slowly. Stir until just combined. It's okay if the batter is a bit lumpy. Preheat your air fryer to 350°F (175°C). Lightly oil your hands to prevent sticking. Scoop about 1 tablespoon of batter and roll it into a ball. Repeat this step until you have around 12 to 15 donut holes. Place them in the air fryer basket, making sure they are not touching. Air fry for 8 to 10 minutes. They should turn golden brown and be cooked through. While the donut holes cook, mix the remaining 1/4 cup of granulated sugar with 1 teaspoon of ground cinnamon in a small bowl. When the donut holes are ready, take them out of the air fryer. Let them cool slightly. While they are still warm, roll each donut hole in your cinnamon sugar mix. Make sure they are well coated. Serve the donut holes warm. They are perfect for breakfast or a snack. Pair them with coffee or milk for a delightful treat. You can also add a drizzle of icing for extra sweetness. Enjoy every bite of these tasty air fryer cinnamon sugar donut holes! To get the best texture for your donut holes, follow some key steps. Use fresh baking powder. This helps them rise well. Be careful not to overmix the batter. A few lumps are fine. Overmixing can make them tough. You want soft, fluffy bites. Also, make sure not to crowd the air fryer. Give them space to cook evenly. Common mistakes can ruin your donut holes. First, avoid skipping the oil on your hands. It helps the dough roll easily. Also, don’t rush the cooling step. If you coat them too soon, the sugar won't stick. Lastly, check the air fryer temperature. If it’s too hot, they may burn. If too low, they won't cook through. For perfect air-fried donut holes, preheat the air fryer. This ensures even cooking. Use parchment paper if your fryer allows it. This helps with cleanup and prevents sticking. Check on them halfway through cooking. You can gently shake the basket for even browning. Finally, coat them in cinnamon sugar while warm. This gives the best flavor and texture. {{image_2}} You can easily switch up the flavor of your donut holes. Try adding cocoa powder for chocolate donut holes. Just replace a few tablespoons of flour with cocoa. You can also add a teaspoon of almond extract for a nutty twist. For something fruity, mix in lemon zest or orange zest. These flavors can brighten your treats. If you want a healthier option, consider using gluten-free flour. Many brands make a 1:1 blend, which works well. You can also swap the sugar for a natural sweetener like honey or maple syrup. Use unsweetened applesauce instead of butter for a lower-fat version. These changes can make your donut holes healthier without losing taste. Get creative with coatings! Instead of cinnamon sugar, try powdered sugar or a chocolate glaze. For a fun twist, roll the donut holes in crushed nuts or sprinkles. You can even dip them in melted chocolate for a richer treat. Each topping gives a new look and taste to your donut holes. To keep your donut holes fresh, place them in an airtight container. You can stack them but add parchment paper between layers. This helps prevent sticking. Store them at room temperature for up to two days. If you want to keep them longer, consider refrigerating them. Just remember, they might lose some of their fluffy texture in the fridge. When you’re ready to enjoy the leftovers, reheating is key. Preheat your air fryer to 300°F (150°C). Place the donut holes in a single layer. Heat them for about 3-5 minutes. This will bring back their warmth and slight crispness. You can also use a microwave if you need a quick fix, but they might turn soft. If you want to save some for later, freezing is a great option! First, let the donut holes cool completely. Arrange them in a single layer on a baking sheet and freeze for about an hour. Once frozen, transfer them to a freezer bag. Make sure to press out any extra air. They can last in the freezer for up to three months. Just thaw and reheat when you crave a sweet treat! Yes, you can! You can bake them in the oven. Preheat your oven to 350°F (175°C). Place the rolled donut holes on a baking sheet. Bake for about 12-15 minutes. Keep an eye on them until they turn golden brown. The texture will be a bit different, but they will still taste great! If you need a milk substitute, use almond milk or oat milk. You can also use water if that's what you have. Each option will work just fine. Just make sure it’s unsweetened if you want to keep the flavor balanced. The donut holes are done when they turn golden brown. You can also check by inserting a toothpick. If it comes out clean, they are ready! They should feel firm but springy when you touch them. Yes, you can use whole wheat flour or gluten-free flour. Just remember that different flours may change the texture. If you use almond flour, your donut holes might be denser. Adjust the liquid if needed to get the right batter consistency. These donut holes stay fresh for about two days at room temperature. For longer storage, place them in an airtight container. You can keep them in the fridge for about a week. If you want to keep them longer, freeze them for up to three months. Just thaw before serving! In this post, we explored how to make delicious donut holes. We covered ingredients, step-by-step instructions, and tips for the best results. You learned about flavor options and healthier swaps. Proper storage and reheating methods help keep them fresh. Remember, air frying gives them a light and fluffy texture. Enjoy your homemade treats today. Embrace your creativity and have fun with different flavors and toppings!

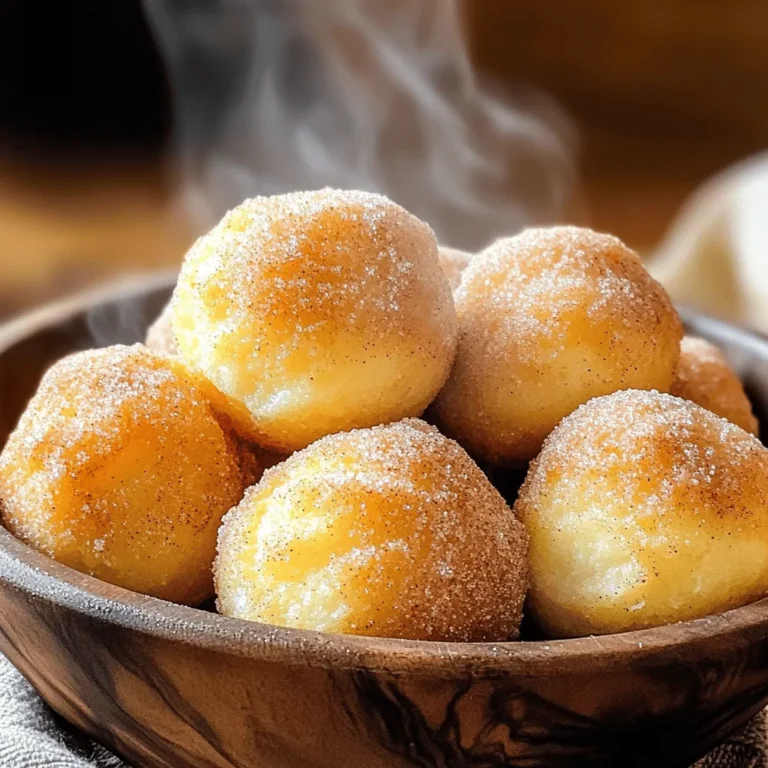
Air Fryer Cinnamon Sugar Donut Holes Delight

- 1 can (15 oz) chickpeas, drained and rinsed - 2 tablespoons olive oil - 1 teaspoon smoked paprika - 1 teaspoon garlic powder - 1 teaspoon cumin - Salt and pepper to taste Chickpeas are the star here. They give protein and fiber to the bowl. Olive oil helps make them crispy. The smoked paprika adds a nice, smoky flavor. Garlic powder and cumin bring warmth and depth. Don’t forget salt and pepper to suit your taste. - 2 cups cooked quinoa - 1 cup cherry tomatoes, halved - 1 cucumber, diced - 1 avocado, sliced - 1 cup spinach or mixed greens Quinoa serves as a base. It’s nutty and fills you up. Cherry tomatoes add sweetness and color. Cucumber gives a crunch. Avocado brings creaminess. Spinach or mixed greens add freshness and nutrients, making the bowl bright and lively. - ¼ cup tahini - 2 tablespoons lemon juice - Water (as needed for tahini sauce) The tahini sauce ties everything together. It’s rich and creamy. Lemon juice adds zing. You can adjust the water to make the sauce as thick or thin as you like. This mix adds a lovely touch to each bite. - First, preheat your oven to 400°F (200°C). This step is key for crispy chickpeas. - In a bowl, toss 1 can of drained and rinsed chickpeas with 2 tablespoons of olive oil, 1 teaspoon of smoked paprika, 1 teaspoon of garlic powder, and 1 teaspoon of cumin. Add salt and pepper to taste. Mix well until all the chickpeas are coated. - Next, spread the seasoned chickpeas on a baking sheet lined with parchment paper. Make sure they are in a single layer for even cooking. - Roast the chickpeas for about 20-25 minutes. Shake the pan halfway through to ensure they crisp up nicely. They should be golden brown when done. - While the chickpeas roast, prepare the sauce. In a small bowl, mix ¼ cup of tahini with 2 tablespoons of lemon juice. - Gradually add water, stirring until you achieve a smooth and pourable sauce. Season with salt to taste. - Now, cook 2 cups of quinoa according to the package instructions. Once it’s fluffy, set it aside. - In serving bowls, start layering the cooked quinoa as your base. - Add a handful of spinach or mixed greens, followed by halved cherry tomatoes, diced cucumber, and sliced avocado. - Finally, top each bowl with the crispy chickpeas. Drizzle the tahini sauce over everything. You can also add seeds or nuts for extra crunch if you like. To get the best crispy chickpeas, roast them at 400°F (200°C). This high heat helps them crisp up nicely. Roast them for about 20-25 minutes. Shake the pan halfway through to cook them evenly. Keep an eye on them towards the end to ensure they don't burn. To avoid sogginess, make sure to dry the chickpeas well after rinsing. A towel can help soak up excess moisture before roasting. For a smooth tahini sauce, mix tahini and lemon juice in a bowl. Gradually add water until you reach the right consistency. If the sauce is too thick, add more water a little at a time. To boost flavor, try adding garlic powder or a pinch of salt. You can even mix in herbs for extra zest. Preparing ingredients ahead saves time. Cook the quinoa and chop the veggies in advance. Store them in airtight containers in the fridge. For the chickpeas, roast them fresh for the best crunch. When you are ready to eat, assemble the bowls with your prepped ingredients. Store any leftover bowls in the fridge, but keep the sauce separate to maintain freshness. {{image_2}} You can change up the protein in your Buddha bowl easily. Adding grilled chicken gives a nice flavor boost. If you want a plant-based option, tofu works great too. Just marinate it in soy sauce before cooking for extra taste. You can also try tempeh or edamame for more variety. These choices keep your meal exciting and full of nutrients. Quinoa is a popular choice, but you have many options. Brown rice or farro can also serve well. They bring different flavors and textures. If you need gluten-free grains, try millet or buckwheat. These grains add fiber and make the meal hearty. You can mix and match grains based on what you have at home. Using seasonal vegetables makes your bowl fresh and vibrant. In spring, add asparagus or peas for crunch. Summer brings ripe bell peppers and zucchini. Fall is perfect for roasted sweet potatoes or squash. Winter might call for hearty kale or brussels sprouts. Don't forget to switch up your dressings too! A lemon-tahini sauce is great, but a balsamic vinaigrette or a spicy sriracha sauce can add a fun twist. To keep your crispy chickpea Buddha bowls fresh, store them in the fridge. Use an airtight container. This keeps flavors and textures intact. For best results, store ingredients separately. Place quinoa, chickpeas, and veggies in different containers. This helps maintain their crunch and taste. You can combine them just before serving. Reheating quinoa is easy. Use a microwave or stovetop. If using a microwave, add a splash of water to keep it moist. Heat in short bursts to avoid overcooking. For chickpeas, the oven is best. Spread them on a baking sheet and heat at 350°F (175°C) for about 10 minutes. This helps them stay crispy. Avoid the microwave for chickpeas; they may become soggy. By following these tips, you can enjoy your Buddha bowls for days! Yes, you can use dried chickpeas. Soak them overnight and cook them until soft. This will take longer than using canned, but you can control the flavor and texture better. If you don't have tahini, try using peanut butter or sunflower seed butter. Both options give a nice creaminess. You can also blend sesame seeds with olive oil for a similar taste. Crispy chickpeas can last about three to four days in an airtight container. They may lose their crunch over time, so eat them soon for the best texture. Yes, this recipe is gluten-free. All the ingredients, like quinoa and chickpeas, are safe for a gluten-free diet. Just make sure your tahini is also gluten-free. You can prepare a lot of this dish ahead of time. Cook the quinoa and roast the chickpeas the day before. Store them in separate containers until you're ready to assemble the bowls. Serve the bowls warm or at room temperature. Layer the ingredients nicely for a pretty look. Drizzle the tahini sauce right before eating for the best flavor. Enjoy! This blog post covered how to create tasty Buddha bowls. You learned about key ingredients like chickpeas, fresh produce, and a simple sauce. I shared step-by-step instructions for roasting chickpeas and preparing the sauce. Tips helped you achieve crispy chickpeas and perfect tahini sauce. You also found variations to cater to your taste and health needs. Buddha bowls are quick, fun, and healthy meals. Try different ingredients to keep things fresh. Enjoy every bite and make it your own!

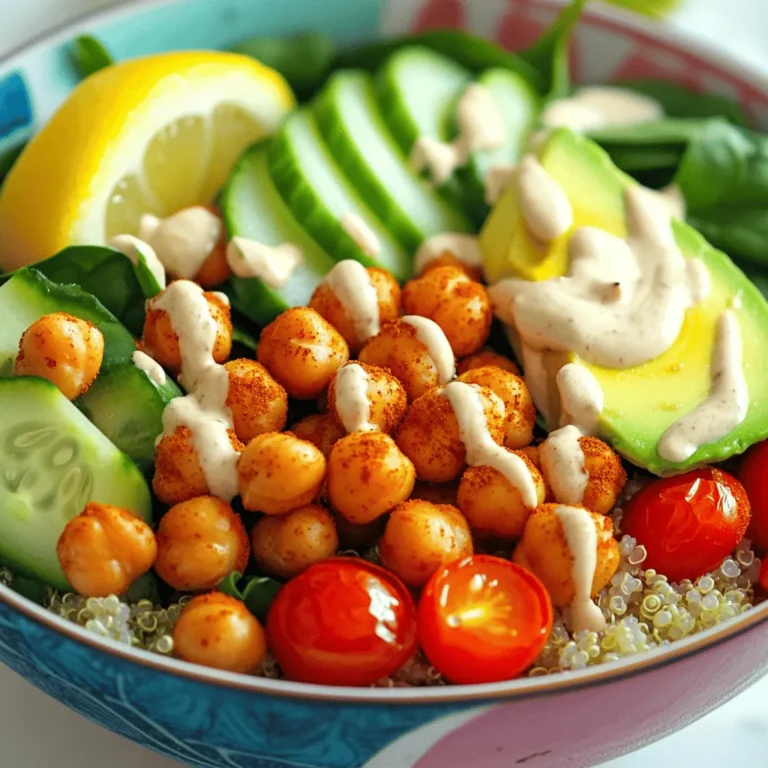
Crispy Chickpea Buddha Bowls Flavorful and Nourishing Meal

- 1 pound ground beef or turkey - 1/2 cup breadcrumbs - 1/4 cup grated Parmesan cheese - 1 large egg For the meatballs, you need ground beef or turkey. Both work well, but turkey can be lighter. Combine it with breadcrumbs for texture. The grated Parmesan cheese adds a nice flavor. Don’t forget the egg; it helps bind everything together. - Honey - Soy sauce (or tamari for gluten-free) - Rice vinegar - Sesame oil The sauce is key to the dish's flavor. Honey gives a sweet note. Soy sauce adds saltiness and umami. Rice vinegar brings in some tang, while sesame oil gives a warm, nutty flavor. This mix creates a perfect glaze for your meatballs. - Minced garlic - Onion powder - Salt - Black pepper - Cornstarch mixed with water Seasonings make the meatballs shine. Minced garlic brings a bold taste. Onion powder adds depth, while salt and black pepper enhance the flavors. For a thicker sauce, you’ll mix cornstarch with water. This will make your sauce glossy and rich. First, gather your ingredients. In a big bowl, combine: - 1 pound ground beef or turkey - 1/2 cup breadcrumbs - 1/4 cup grated Parmesan cheese - 1 large egg - 1 tablespoon minced garlic - 1 teaspoon onion powder - 1 teaspoon salt - 1/2 teaspoon black pepper Mix these well. I like to use my hands for this. It makes sure everything blends nicely. Next, shape the mixture into 1-inch meatballs. You should get about 20 meatballs. Place them on a baking sheet. Now, let’s make the sauce. In a separate bowl, whisk together: - 1/2 cup honey - 1/4 cup soy sauce (or tamari for gluten-free) - 2 tablespoons rice vinegar - 1 tablespoon sesame oil This sauce will give your meatballs that sweet and savory taste. I love how the honey and soy sauce work together. Next, lightly grease the slow cooker with cooking spray or olive oil. Layer the meatballs in a single layer. Pour the honey garlic sauce over the meatballs. Make sure every meatball gets a good coat of sauce. Cover the slow cooker and set it to low for 6 hours or high for 3 hours. You want the meatballs to cook well and become tender. If you want a thicker sauce, stir in the cornstarch mixture 30 minutes before serving. This will make the sauce glossy and rich. When they are ready, use tongs to take out the meatballs. Place them on a serving dish. Drizzle some sauce over the top and garnish with chopped green onions. Enjoy this flavorful delight! When using a slow cooker, you can choose between two settings: low and high. If you set it to low, cook the meatballs for about six hours. On the high setting, they will be ready in about three hours. Both methods work well, but low cooking gives the best flavor. To keep your meatballs juicy, do not overpack them. Gently mix the meat and other ingredients without squishing them. This helps keep air in the meatballs. Also, don't skip the breadcrumbs. They soak up moisture and help keep the meatballs soft. If you want a thicker sauce, add the cornstarch mixture 30 minutes before serving. Stir the mixture well before pouring it in. This ensures it blends nicely. Cover the slow cooker again and let the sauce heat. It will become glossy and rich, perfect for drizzling over your meatballs. Garnishing adds color and flavor. Chopped green onions give a fresh taste. Just sprinkle them over the meatballs before serving. Sesame seeds also work well. They add a nice crunch and look great on the plate. Together, they make your dish more appealing and tasty. {{image_2}} You can switch the meat in this recipe. Ground turkey offers a leaner option. Ground chicken is another great choice. If you prefer plant-based meals, try using lentils or chickpeas. For gluten-free needs, use gluten-free breadcrumbs. Tamari is a safe option for soy sauce. These swaps keep the dish tasty while fitting different diets. To change up the taste, add spices like ginger or chili flakes. Ginger gives a warm, spicy kick. Chili flakes add heat to the sweet sauce. You can also use different sweeteners. Maple syrup is a tasty swap for honey. It gives a rich flavor that works well with the other ingredients. Serve the meatballs over rice for a hearty meal. Noodles are another great option. They soak up the sauce nicely. If you want to serve them as snacks, use toothpicks for easy grabbing. These meatballs also shine at parties as a tasty appetizer. Garnish with green onions for added color and crunch. To store leftover meatballs, let them cool first. Place them in an airtight container. Make sure the lid seals well. You can keep them in the fridge for up to four days. This keeps them fresh and tasty. If you want to enjoy them later, follow the freezing guidelines. For freezing, use a freezer-safe container or bag. Arrange the meatballs in a single layer. This helps them freeze evenly. You can freeze them for up to three months. When you're ready to eat, thaw them in the fridge overnight. Reheat gently in the microwave or on the stove. This way, they stay juicy and flavorful. In the fridge, meatballs last about four days. If you freeze them, they remain good for three months. After that, their taste may change, and they may not be safe to eat. Always check for any signs of spoilage before consuming. Enjoy your delicious meatballs while they're at their best! You can tell meatballs are done when they reach an internal temperature of 165°F. You can also check their color. They should be brown on the outside and no longer pink inside. The sauce should also bubble and thicken. If you follow these signs, you can be sure they are ready to enjoy. Yes, you can make these meatballs ahead of time. You can prepare the meatball mixture and store it in the fridge for up to one day. You can also freeze the shaped meatballs for later use. Just thaw them in the fridge before cooking. For the sauce, mix it up and store it in a sealed container. This makes meal prep quick and easy. Honey garlic meatballs pair well with many sides. Here are a few ideas: - Steamed rice - Noodles - Toasted bread rolls - A fresh green salad - Stir-fried vegetables These options will balance the sweet and savory flavors of the meatballs. Plus, they make for a colorful and tasty meal! Now you know how to make tasty slow cooker honey garlic meatballs. We covered the key ingredients, step-by-step instructions, and useful tips. You also learned about variations and how to store leftovers. These meatballs are perfect for any meal, whether you serve them with rice or enjoy them as a snack. Feel free to mix and match flavors to find your favorite twist. Enjoy cooking and sharing this dish with loved ones.

Slow Cooker Honey Garlic Meatballs Flavorful Delight

To create No-Bake Matcha Cheesecake Bars, gather these simple ingredients: - 1 ½ cups almond flour - ½ cup coconut oil, melted - ¼ cup maple syrup - 1 ½ cups cream cheese, softened - ½ cup Greek yogurt - ½ cup powdered sugar - 3 tablespoons culinary matcha powder - 1 teaspoon vanilla extract - Pinch of salt - Fresh mint leaves for garnish (optional) These ingredients work together to create a creamy and vibrant dessert. Almond flour gives the crust a nutty flavor. Coconut oil adds richness, while maple syrup brings sweetness. Cream cheese and Greek yogurt form a smooth filling, making it indulgent yet light. Culinary matcha powder not only colors the bars but also adds a unique taste. Each ingredient plays a role. For example, the pinch of salt enhances all the flavors. If you want a pop of color and freshness, consider adding mint leaves on top. This mix leads to a treat that's not just tasty but also visually stunning. 1. In a bowl, mix 1 ½ cups almond flour, 1/2 cup melted coconut oil, and 1/4 cup maple syrup. Stir well until a crumbly mixture forms. 2. Press the mixture firmly into the bottom of an 8x8 inch lined baking pan. Aim for an even layer. 3. Refrigerate the crust for 15 minutes to set. This helps it hold together later. 1. In a mixing bowl, combine 1 ½ cups softened cream cheese, 1/2 cup Greek yogurt, 1/2 cup powdered sugar, 3 tablespoons culinary matcha powder, 1 teaspoon vanilla extract, and a pinch of salt. 2. Beat the mixture with an electric mixer on medium speed. Continue until the filling is smooth and fluffy. This step is key for a light texture. 1. Pour the matcha cheesecake filling over the chilled crust. Use a spatula to spread it evenly. 2. Cover the baking pan with plastic wrap. This keeps it fresh while chilling. 3. Refrigerate for at least 4 hours. The bars need to firm up before you slice them. Enjoy the wait! To get a smooth filling, mix the cream cheese well. Use an electric mixer to blend until fluffy. The key is to ensure no lumps remain. Add the Greek yogurt, powdered sugar, matcha, vanilla, and salt. Blend again until it looks creamy and even. Chilling time is very important. After you pour the filling over the crust, cover it with plastic wrap. Let it chill for at least four hours. This helps the bars set properly and makes them easier to slice. You can adjust the flavor by changing the sweetener. Instead of powdered sugar, you can use honey or agave syrup. These options can add a unique taste. If you want less sweetness, reduce the amount of sweetener. Try adding a splash of lemon juice for a tangy twist. It can brighten the matcha flavor. You can also mix in some cocoa powder for a chocolatey taste. Experiment to find your favorite flavor combo! To slice the bars cleanly, use a sharp knife. Dip the knife in warm water before slicing. This helps create clean cuts without messing up the layers. Pair your bars with a nice cup of green tea or matcha latte. The flavors complement each other perfectly. You can also add toppings like fresh berries or whipped cream for extra fun. Fresh mint leaves make a lovely garnish and add a pop of color. {{image_2}} To make these bars vegan, you need to change a few ingredients. For the cream cheese, use a plant-based cream cheese. You can find this in most grocery stores. Swap Greek yogurt for coconut yogurt. For powdered sugar, ensure it does not contain bone char. These simple swaps will keep the creamy texture you love. You can play with flavors to make this treat even better. Try adding fruit, like mashed bananas or berries, to the cheesecake filling. This adds sweetness and freshness. You can also infuse the mix with spices like cinnamon or nutmeg for warmth. A drop of almond or orange extract can give it a unique twist. If you need a gluten-free option, use gluten-free crust recipes. Try crushed gluten-free cookies or oats blended into flour. Check all your ingredients to make sure they are gluten-free. This way, everyone can enjoy these delicious matcha cheesecake bars without worry. To keep your no-bake matcha cheesecake bars fresh, use an airtight container. Glass or plastic containers work well. Make sure the container is not too big, as excess air can spoil the bars. Store the cheesecake bars in the fridge at a temperature of 35°F to 40°F. This helps maintain their creamy texture and flavor. These cheesecake bars stay fresh for about 5 to 7 days in the fridge. After that, they may lose their taste and texture. Look for any signs of spoilage. If you see mold or an off smell, it’s best to toss them out. Enjoy them while they are fresh for the best taste! You can freeze these bars for up to 2 months. To freeze, wrap each bar in plastic wrap, then place them in a freezer bag. Be sure to remove as much air as possible before sealing. When you're ready to eat, take the bars out of the freezer. Let them thaw in the fridge for a few hours for the best flavor. Enjoy them chilled and creamy! Yes, you can make these bars ahead of time. I recommend preparing them a day before your event. This allows the flavors to meld and the cheesecake to set properly. Just store them in the fridge, covered with plastic wrap. This keeps them fresh and ready to serve when you need them. If you can't find matcha powder, you can use green tea powder. It has a similar flavor and color. Another option is to use spirulina for a vibrant green hue, but it will change the taste. You can also try vanilla extract for a different flavor. Just keep in mind that this will alter the final taste of the cheesecake. Matcha offers many health benefits. It is rich in antioxidants, which help fight free radicals. These antioxidants can support your immune system. Matcha also contains L-theanine, which promotes calmness without drowsiness. Additionally, it may boost your metabolism and provide a gentle energy boost. Enjoying matcha in these cheesecake bars adds a tasty way to benefit from its goodness. In this blog post, you learned how to make tasty matcha cheesecake bars. We covered key ingredients, simple steps for making the crust and filling, and tips for great texture and flavor. You also saw variations for vegan, gluten-free options and storage tips for keeping them fresh. These bars are fun to make and share. Experiment with flavors and enjoy your delicious creations. Happy baking!

No-Bake Matcha Cheesecake Bars Delightful Treat

- 1 cup oats (blended into flour) - 1 scoop vanilla protein powder - 1 tablespoon baking powder - 1/2 teaspoon salt - 1 cup almond milk (or any milk of choice) - 1 large egg - 2 tablespoons honey or maple syrup - Zest of 1 lemon - 2 tablespoons freshly squeezed lemon juice - 1/2 cup fresh blueberries (plus extra for topping) - Coconut oil or butter for cooking The first step in making these pancakes is gathering the right ingredients. Start with the dry ingredients. You will need oats, which you can blend into flour. This oat flour gives pancakes a lovely texture. Add a scoop of vanilla protein powder for a nutritious boost. Baking powder is key for fluffiness, so don’t skip it. A pinch of salt enhances all the flavors. Next, for the wet ingredients, grab your milk. Almond milk works well, but feel free to use your favorite milk. You will also need a large egg to bind everything together. Honey or maple syrup adds sweetness. The zest and juice of one lemon really bring the bright flavor to these pancakes. Finally, fresh blueberries are a must. They provide bursts of sweetness. Use coconut oil or butter for cooking. This adds flavor and helps prevent sticking. With these ingredients ready, you will create delicious lemon blueberry protein pancakes that everyone will love. Start with a large mixing bowl. Add 1 cup of oat flour, 1 scoop of vanilla protein powder, 1 tablespoon of baking powder, and 1/2 teaspoon of salt. Whisk these dry ingredients together until they are evenly mixed. This step ensures the pancakes rise well and have a nice flavor. In a separate bowl, whisk together 1 cup of almond milk, 1 large egg, and 2 tablespoons of honey or maple syrup. Add the zest of 1 lemon and 2 tablespoons of freshly squeezed lemon juice. Mix until everything is well blended. This mix makes the pancakes moist and gives them a bright flavor. Now, pour the wet mixture into the dry ingredients. Stir gently until just combined. It’s okay if there are a few lumps; do not overmix. Next, carefully fold in 1/2 cup of fresh blueberries, making sure not to burst them. Heat a non-stick skillet over medium heat. Add a small amount of coconut oil or butter. For each pancake, pour about 1/4 cup of the batter onto the skillet. Cook until bubbles form on the surface, about 2-3 minutes. Carefully flip the pancake and cook for another 1-2 minutes until golden brown. Repeat this with the remaining batter. Serve the pancakes warm, topped with extra blueberries and a drizzle of honey or syrup if you like. Enjoy this tasty breakfast treat! To make fluffy pancakes, avoid overmixing the batter. When you combine the wet and dry ingredients, mix just until you see no dry flour. A few lumps are fine! Overmixing can lead to tough pancakes, which is not what you want. Trust me, being gentle with the batter keeps your pancakes light and airy. The right skillet temperature is key to great pancakes. Heat your non-stick skillet over medium heat. If it's too hot, the outside cooks too fast, leaving the inside raw. To test, sprinkle a drop of water on the skillet. If it dances and evaporates, you're ready to cook. Always use a little coconut oil or butter to prevent sticking. To enhance the flavor, top your pancakes with more fresh blueberries. A drizzle of honey or maple syrup adds sweetness too. You can also add a dollop of Greek yogurt for creaminess. Serve with a side of fresh fruit for a colorful plate. This makes for a fun and tasty breakfast! {{image_2}} You can change the fruit in these pancakes. Strawberries or raspberries work well. Both fruits add a new taste. You can even mix fruits together. This keeps breakfast fun and exciting. Try different fruits each time you make them. You can swap the protein powder flavor or type. If you like chocolate, use chocolate protein powder. You can also try plant-based protein for a healthy twist. Each powder brings its own flavor. This means you can customize the taste to your liking. Want to make these pancakes gluten-free? Just use gluten-free oats instead of regular oats. For a vegan version, swap the egg for a flax egg. Mix one tablespoon of ground flaxseed with three tablespoons of water. Let it sit for a few minutes. This helps bind the pancakes without eggs. You can also use plant-based milk to keep it vegan. These changes let everyone enjoy your pancakes. To store leftover pancakes, let them cool first. Place them in an airtight container. You can stack them with parchment paper between each pancake. This keeps them from sticking together. Store the container in the fridge. They will stay fresh for up to three days. If you want to freeze pancakes, cool them completely. Then, lay them flat on a baking sheet. Place the sheet in the freezer for about an hour. This prevents them from sticking. After that, transfer the pancakes to a freezer-safe bag. Remove as much air as possible before sealing. They can last up to three months in the freezer. To reheat, pop them in the toaster or microwave. Heat until warm. Lemon blueberry protein pancakes can last in the fridge for three days. If stored properly, they can stay fresh in the freezer for up to three months. Check for any signs of spoilage, like off smells or changes in texture. Always trust your senses when it comes to food safety. Yes, you can make these pancakes gluten-free! Use gluten-free oats instead of regular oats. Blend them into flour to keep the texture similar. This way, you enjoy the same fluffy pancakes without gluten. To make these pancakes vegan, swap the egg for a flax egg. Mix 1 tablespoon of ground flaxseed with 3 tablespoons of water. Let it sit for about five minutes until it thickens. Use maple syrup instead of honey for a sweet touch. You can use any milk you like. Options include soy milk, oat milk, or coconut milk. Each milk will give a slightly different taste, so feel free to experiment with your favorite! Yes, frozen blueberries work well! They may release more juice, so be cautious when folding them in. This can add extra color to your pancakes but can make them a touch softer. You can adjust the sweetness by changing the amount of honey or maple syrup. If you want a bit less sweetness, simply reduce the amount by a tablespoon. You can also add a pinch of cinnamon for a warm flavor boost! These Lemon Blueberry Protein Pancakes are both tasty and easy to make. We covered the ingredients, from oat flour to fresh blueberries, and shared step-by-step instructions. I also provided tips for fluffy pancakes and fun variations to mix things up. Storing your pancakes properly ensures you can enjoy them later. With this recipe, you have a healthy breakfast option that fits your diet. Try it today and enjoy a delightful treat that fuels your day!

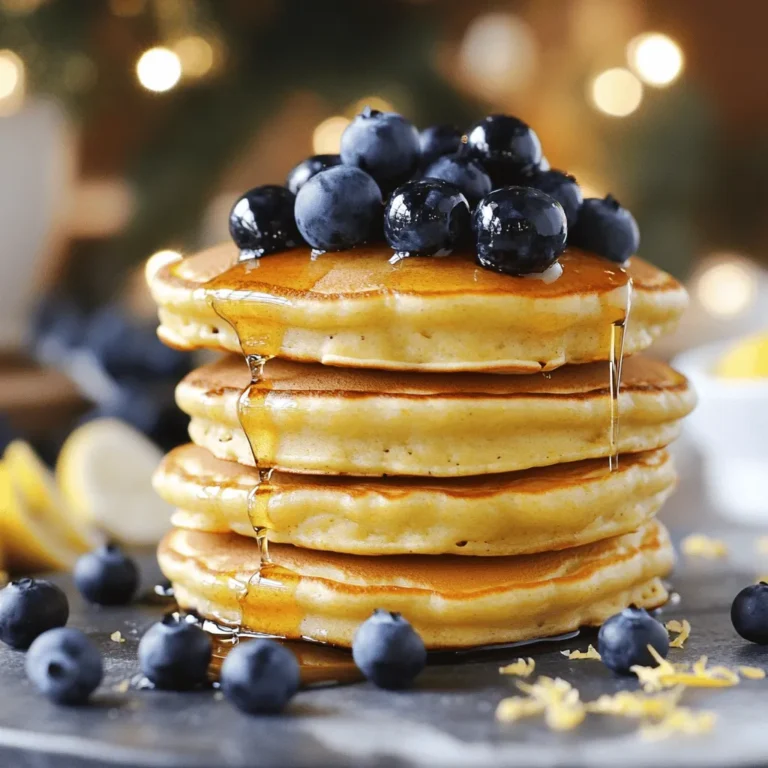
Lemon Blueberry Protein Pancakes Flavorful Breakfast Treat

- 4 medium apples (preferably Granny Smith or Honeycrisp), peeled, cored, and sliced - 1 cup fresh or frozen cranberries - 1/2 cup brown sugar The apples in this recipe provide a crisp texture and tart flavor. I love using Granny Smith or Honeycrisp apples. They hold their shape well during baking. The cranberries add a burst of tartness that balances the sweetness of the brown sugar. You can use fresh or frozen cranberries, which makes this dessert versatile for any season. - 1 tablespoon lemon juice - 1 teaspoon ground cinnamon - 1/2 teaspoon ground nutmeg Lemon juice brightens the flavors of the apples and cranberries. It adds a nice zing. Ground cinnamon is a must for warmth and depth. I often use nutmeg for its earthy aroma. These spices turn the crisp into a cozy dessert that feels like a big hug. - 1 cup rolled oats - 1/2 cup all-purpose flour - 1/2 cup unsalted butter, melted - 1/2 cup chopped walnuts or pecans (optional) The topping adds a delightful crunch to the crisp. Rolled oats give it a chewy texture that pairs well with the soft fruit. All-purpose flour helps bind the topping. The melted butter creates a rich flavor and helps everything brown nicely. If you want an extra crunch, sprinkle some chopped nuts. Walnuts or pecans work well and add a lovely nutty taste. - Preheat the Oven: Start by setting your oven to 350°F (175°C). This step is key for even baking. - Combine Ingredients in a Bowl: In a large bowl, mix sliced apples, cranberries, brown sugar, lemon juice, cinnamon, nutmeg, ginger, and salt. Toss gently to coat all the fruit evenly. - Transfer to Baking Dish: Pour the fruit mixture into a greased 9-inch square baking dish. Spread it out evenly. - Mix Dry Ingredients: In a separate bowl, combine rolled oats, all-purpose flour, and optional chopped nuts. This mix adds great texture. - Add Melted Butter: Pour in the melted butter. Stir until everything comes together and forms a crumbly texture. - Create a Crumbly Texture: Use your fingers to break up any large clumps. You want the topping to be loose and even. - Sprinkle Topping Over Fruit: Evenly distribute the crumbly topping over the fruit mixture. This will form a delicious crust. - Baking Time and Temperature: Place the baking dish in the oven. Bake for 30-35 minutes, or until the topping is golden brown and the fruits are bubbly. - Cooling Before Serving: Once baked, take it out and let it cool for about 10 minutes. This helps the flavors meld and makes it easier to serve. - Best Varieties for Crisp: Granny Smith and Honeycrisp apples are great choices. They hold their shape and add a tart flavor. - Flavor Considerations: Choose apples that balance sweetness and tartness. This mix enhances the overall taste of the crisp. - Adding Extra Spices: You can add a pinch of cloves or allspice for warmth. These spices deepen the flavor profile and make it richer. - Using Different Nuts: Try pecans or almonds instead of walnuts. Each nut adds a unique taste and texture to your crisp. - Ice Cream and Cream Options: Serve the crisp warm with a scoop of vanilla ice cream. Whipped cream also pairs well for a creamy touch. - Presentation Tips for Serving: Use clear bowls to show off the vibrant colors. Add a sprinkle of cinnamon or extra nuts on top for flair. {{image_2}} What fruits can I use instead of apples and cranberries? You can explore many fruit options! Try using other berries like blueberries or raspberries. They add a bright taste. Seasonal fruits like pears or peaches work well too. Keep in mind that different fruits change the flavor and texture. What can I use for gluten-free flour? To make this crisp gluten-free, substitute all-purpose flour with almond flour or coconut flour. Both options work great and taste lovely. You can also use gluten-free rolled oats, which will keep the crisp's texture intact. Can I use honey or maple syrup instead of sugar? Yes! You can replace brown sugar with honey or maple syrup. This choice adds a nice depth of flavor. Just remember to adjust the sweetness. You may need less honey since it’s sweeter than brown sugar. - Refrigeration Tips: Store any leftover warm spiced apple cranberry crisp in an airtight container. Place it in the fridge within two hours of baking. This helps keep it fresh. - Best Practices for Freshness: Consume the leftovers within three to four days for the best taste. Always check for any signs of spoilage before eating. - Oven vs. Microwave: The oven is the best way to reheat your crisp. Preheat it to 350°F (175°C) and bake for about 10-15 minutes. This keeps the topping crunchy. If you’re in a hurry, you can use the microwave. Heat it in 30-second bursts until warm. - Maintaining Texture and Flavor: Cover the crisp with foil in the oven to prevent over-browning. This helps keep the topping crisp and the fruit warm. - How to Freeze: If you have extra crisp, cool it completely. Cut it into portions and wrap each piece tightly in plastic wrap. Then, place them in a freezer-safe bag. This keeps them fresh for longer. - Thawing Tips Before Serving: To enjoy later, move the crisp from the freezer to the fridge. Let it thaw overnight. You can reheat it as mentioned before for the best taste and texture. To get a crunchy topping, use cold butter. Cut it into small pieces and mix it with the oats. This will help create a nice, crumbly texture. - Use rolled oats for better crunch. - Add nuts like walnuts or pecans for extra texture. - Bake until the top is golden brown, around 30-35 minutes. Yes, you can use frozen apples or cranberries. Just remember to thaw them first. - Drain excess liquid to avoid a soggy crisp. - If using frozen fruit, slightly increase the baking time to ensure even cooking. You can store the crisp for about 3-4 days. - Keep it in an airtight container in the fridge. - For longer storage, freeze it for up to 3 months. Just thaw it in the fridge before baking. This blog explored how to create a delicious apple cranberry crisp. We covered ingredients, the step-by-step process, and tips to enhance flavor. You can customize the recipe with different fruits, toppings, or sweeteners. Remember to store leftovers properly for the best taste, and don’t forget to enjoy it warm. Now, you have all the tools to make a delightful treat. Happy baking!

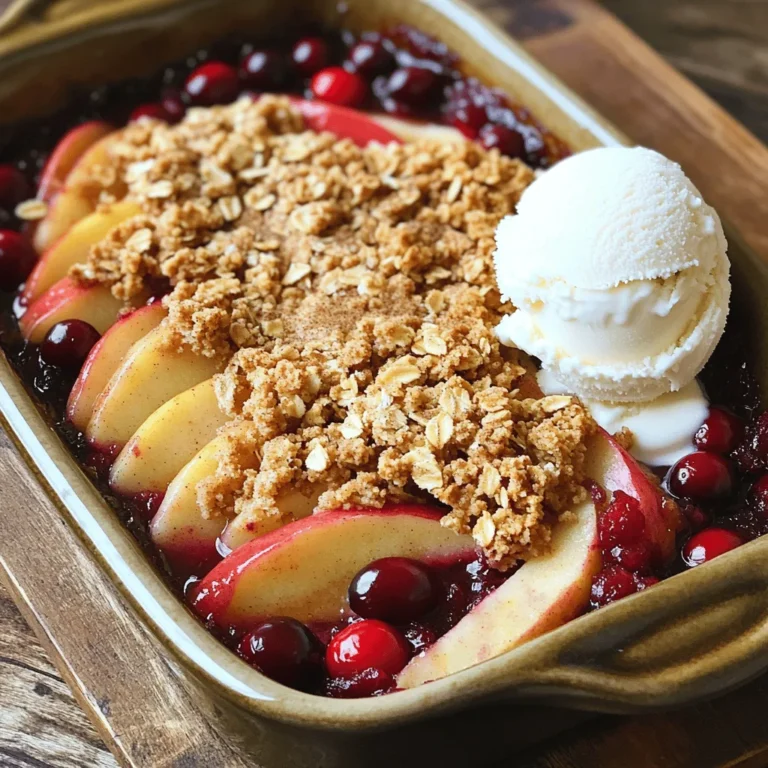
Warm Spiced Apple Cranberry Crisp Savory Dessert Delight

- 1 medium butternut squash, peeled and cubed - 1 can (15 oz) chickpeas, drained and rinsed - 1 medium onion, diced - 3 cloves garlic, minced - 1 tablespoon ginger, grated These vegetables form the base of our dish. The butternut squash brings a sweet and creamy texture. Chickpeas add protein and heartiness. The onion, garlic, and ginger create a fragrant foundation for the curry. - 2 teaspoons curry powder - 1 teaspoon ground cumin - 1 teaspoon turmeric - 1 teaspoon smoked paprika Spices are the stars in this recipe. Curry powder gives warmth and depth. Ground cumin adds earthiness, while turmeric gives a lovely golden color. Smoked paprika offers a touch of smokiness that enhances the flavor. - 1 can (14 oz) coconut milk - 1 can (14.5 oz) diced tomatoes - 1 cup vegetable broth - Salt and pepper to taste - Fresh cilantro for garnish - Cooked rice or quinoa for serving The liquids tie everything together. Coconut milk provides creaminess, while diced tomatoes add acidity and sweetness. Vegetable broth brings extra flavor. Use salt and pepper to balance the taste. Fresh cilantro adds a burst of color and freshness on top. Enjoy this curry with rice or quinoa for a complete meal. - Peeling and cubing the butternut squash: Start by cutting off the top and bottom of the squash. Use a sharp knife to peel the skin. Then, cut it in half and scoop out the seeds. Next, chop it into small cubes, about one inch each. This size cooks well and soaks up flavor. - Rinsing and draining chickpeas: Open a can of chickpeas and pour it into a colander. Rinse them under cold water. This step helps remove extra salt and improves the taste. Drain them well and set aside. - Chopping onion and garlic, and grating ginger: Dice one medium onion into small pieces. Mince three cloves of garlic. For ginger, use a grater to get one tablespoon. These will add great flavor to your curry. - Layering the vegetables: In your slow cooker, start with the cubed butternut squash. Next, add the rinsed chickpeas followed by the diced onion, minced garlic, and grated ginger. The order helps the flavors mix well. - Adding chickpeas and spices: Now, sprinkle in the spices. Use two teaspoons of curry powder, one teaspoon of ground cumin, one teaspoon of turmeric, and one teaspoon of smoked paprika. Stir everything together to coat the veggies with the spices. - Pouring in liquids: Pour in one can of coconut milk, one can of diced tomatoes, and one cup of vegetable broth. Mix well to combine everything. This will create a rich and creamy curry. - Cooking times for low and high settings: Cover the slow cooker. If you set it to low, cook for 6 to 8 hours. For a faster option, set it to high and cook for 3 to 4 hours. The squash should be soft when done, and the flavors will blend beautifully. To adjust spice levels, taste as you go. If you like heat, add more curry powder or a pinch of cayenne. For milder curry, reduce the spice. You can also add a touch of brown sugar for balance. For extra creaminess, stir in a dollop of yogurt or cashew cream before serving. This adds richness and enhances the curry's texture. Coconut milk is already creamy, but a little extra can take it up a notch. The best sides for curry are rice or quinoa. Both soak up the sauce well. Naan bread is another great choice for dipping. You can also serve it with a side salad for freshness. For garnishing, fresh cilantro adds a bright touch. Chop it finely and sprinkle over the curry before serving. You can also add a squeeze of lime for a zesty kick. Avoid overcooking the squash. It should be tender, but not mushy. If it falls apart, it changes the texture of the dish. Check for doneness at the lower end of the cooking time. Watch your seasoning. Adding salt at the start can lead to a salty dish. Taste before you add more salt or pepper. Adjust it near the end for the best flavor. {{image_2}} You can make this curry even better by adding extra vegetables. Seasonal veggies like carrots, spinach, or bell peppers work well. Just chop them up and toss them in the slow cooker. You can also swap the butternut squash for other squashes, like acorn or pumpkin. This gives the dish a new taste and keeps it exciting. If you want to add more protein, consider adding diced chicken or shrimp. For a vegan option, you can use tofu or tempeh. Chickpeas are great, but these options make the dish heartier. If you are vegetarian, you can keep the chickpeas and add eggs or cheese for extra protein. For those needing gluten-free options, this curry is already a great choice. All the ingredients are gluten-free, making it safe for anyone with gluten issues. If you want to adapt it to be low-carb, skip the rice or quinoa. Instead, serve the curry over cauliflower rice or steamed greens. This keeps the meal light and healthy. To store leftover curry, let it cool first. Use an airtight container. This keeps the curry fresh. Store it in the fridge for up to five days. When you want to reheat, use the stove or microwave. Stir it well to heat evenly. If it's too thick, add a splash of water or broth. This helps bring back the creamy texture. Yes, you can freeze curry! It freezes well for later meals. Use a freezer-safe container or bag. Make sure to leave some space for expansion. To thaw, move the curry to the fridge overnight. You can also use the microwave. Just heat it on low until warm. In the fridge, the curry lasts about five days. Always check for signs of spoilage. If it smells off or the color changes, toss it out. Look for mold or unusual textures. If you see these signs, do not eat it. Safety first! Yes, this recipe is already vegan. It uses coconut milk instead of dairy. You can enjoy a warm, creamy, and tasty dish without any animal products. Just make sure your vegetable broth is also vegan. This curry is perfect for anyone who wants a healthy meal that is plant-based. To thicken your curry, you have a few easy options. First, you can mash some of the butternut squash with a fork. This will help create a thicker texture. Another trick is to add a cornstarch slurry. Mix one tablespoon of cornstarch with two tablespoons of water. Stir it in during the last few minutes of cooking. This method works quickly and well. This curry pairs well with grains and bread. Here are some great ideas: - Cooked rice - Quinoa - Naan bread - Couscous These sides soak up the flavors and make your meal filling. You can also add a fresh salad for a nice crunch. This recipe for Slow Cooker Butternut Squash and Chickpea Curry combines simple, healthy ingredients like squash, chickpeas, and spices. You learned how to prepare, cook, and serve this dish with tips for flavor and possible variations. Enjoy experimenting with different veggies and proteins. Remember to refrigerate leftovers properly and note the signs of spoilage. With a few easy steps, you can create a tasty curry that fits many diets. Enjoy your cooking journey!

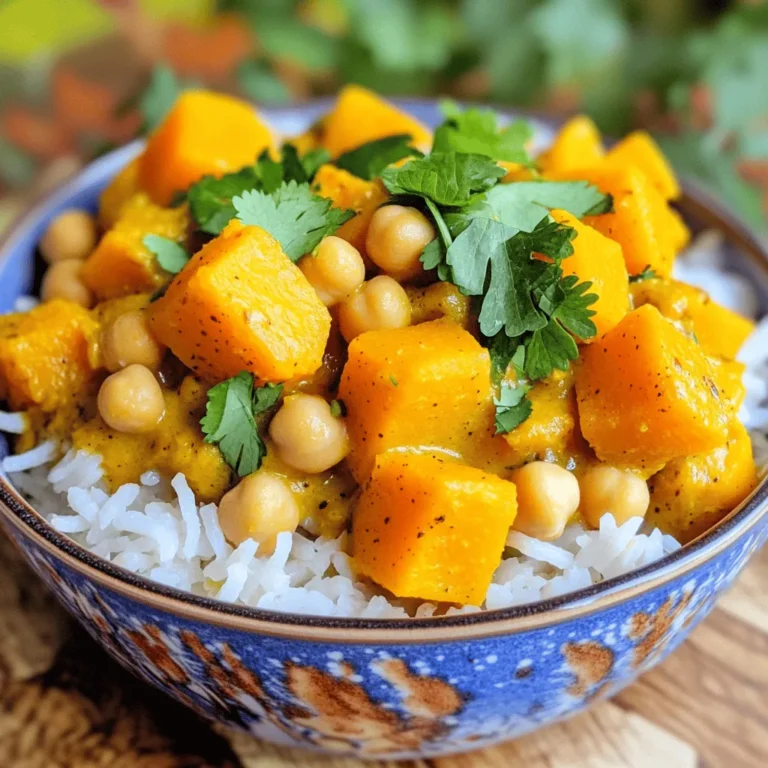
Slow Cooker Butternut Squash and Chickpea Curry Delight

PREV 1 … 21 22 23 … 53 NEXT
cozy citrus kitchen

explore

DessertsDinnerAppetizersDrinks

Our Policies

  • Cookie Policy
  • Copyright Policy
  • Disclaimer
  • GDPR Policy
  • Terms Of Use
Back to Top
  • About
  • Contact Us
  • Privacy Policy
© 2025 cozy citrus kitchen