FREE DINNER EBOOK! Get your copy!
  • Cookie Policy
  • GDPR Policy
  • Disclaimer
  • Terms Of Use
  • Visit my other site: Fun Cookie Recipes
cozy citrus kitchen
  • Home
  • Dinner
  • Desserts
  • Drinks
  • Appetizers
  • Contact
  • About
  • Privacy Policy
  • Home
  • Dinner
  • Desserts
  • Drinks
  • Appetizers
  • Contact
  • About
  • Privacy Policy
  • Cookie Policy
  • GDPR Policy
  • Disclaimer
  • Terms Of Use
Visit my other site: Fun Cookie Recipes

HOME / CATEGORIES /

Latest

To make Minute Spicy Chili Crisp Noodles, gather these key ingredients: - 200g instant noodles - 2 tablespoons chili crisp (store-bought or homemade) - 2 teaspoons soy sauce - 1 teaspoon sesame oil - 1 tablespoon peanut butter - 1 garlic clove, minced - 1 green onion, thinly sliced - 1 small carrot, julienned - ½ cup edamame (fresh or frozen) - Salt and pepper to taste - Sesame seeds for garnish These ingredients create a bold and flavorful dish. The instant noodles cook fast, making this a quick meal. The chili crisp adds heat, while soy sauce and sesame oil give depth. You can add more flavors to your noodles. Try these optional ingredients: - Chopped cilantro for freshness - Sliced bell peppers for crunch - Sriracha for extra spice - Cooked chicken or tofu for protein These extras can elevate your dish. Feel free to mix and match based on your taste. Choose quality ingredients for the best taste. Here are some tips: - Instant Noodles: Go for brands with good reviews. They should have a nice texture and flavor. - Chili Crisp: Look for one with visible chili flakes and spices. This adds flavor and heat. - Soy Sauce: Use a good-quality soy sauce for a rich flavor. - Peanut Butter: Select natural peanut butter without added sugars or oils for a cleaner taste. By picking the right products, you can enhance your cooking experience. Quality ingredients make a big difference in the final dish. Start by boiling a pot of water. This is the first step for perfect noodles. Once the water boils, add 200g of instant noodles. Cook them for about 3 to 4 minutes. Follow the package instructions for the best results. After cooking, drain the noodles and set them aside in a mixing bowl. It's important to keep them warm for the next step. While the noodles cook, you can make the spicy sauce. Grab a small bowl and mix together the following ingredients: - 2 tablespoons chili crisp - 2 teaspoons soy sauce - 1 teaspoon sesame oil - 1 tablespoon peanut butter - 1 minced garlic clove Stir these until the mixture is smooth and well combined. This sauce packs flavor and heat, so taste it and adjust if needed. Add the warm noodles to the bowl with the sauce. Toss them well so that every noodle gets coated. Next, mix in the julienned carrot, edamame, and sliced green onion. These add texture and crunch. Season with salt and pepper to your liking. You can also adjust the spiciness by adding more chili crisp. Finally, serve the dish right away, and sprinkle sesame seeds on top for extra flavor and crunch. Enjoy your bold and flavorful Minute Spicy Chili Crisp Noodles! To ramp up the heat, try adding more chili crisp. You can start with an extra teaspoon. You can also add fresh chopped chili peppers. Slices of jalapeño or Thai bird’s eye chilies work well. If you want a smoky flavor, consider adding some smoked paprika. This will give the dish depth too. Another fun option is to sprinkle in chili flakes. They can give a nice little kick to every bite. Feel free to mix up the ingredients based on what you have. For instance, if you want a nut-free option, skip the peanut butter. Instead, try tahini or sunflower seed butter. If you don’t have edamame, you can use peas or bell peppers. You can also swap the soy sauce for tamari for a gluten-free option. If you need a lighter version, use zucchini noodles instead of instant noodles, but cook them briefly. One common mistake is overcooking the noodles. Follow the package instructions closely. It usually takes just 3-4 minutes. Another mistake is not draining the noodles well. Excess water can dilute the sauce. Make sure to mix the sauce and noodles while they’re warm. This helps the sauce stick better. Lastly, don’t skip the salt and pepper. They enhance the flavors, and make the dish pop! {{image_2}} You can easily make these noodles vegetarian or vegan. Just switch the soy sauce to a gluten-free version if needed. For the sauce, use a plant-based chili crisp. It offers the same heat and flavor. You can add more veggies like bell peppers or zucchini for extra nutrition. They mix well with the noodles and keep it colorful. Adding protein can make the dish more filling. For a vegan option, use firm tofu. Cube it and fry until golden brown. You can also add cooked chicken for a meatier twist. Simply toss it in with the noodles after mixing in the sauce. Shrimp works well too if you prefer seafood. Feel free to swap in your favorite veggies. Broccoli florets add crunch and nutrients. Snap peas bring a nice sweetness. You can also try mushrooms for an earthy flavor. Just remember to cut them small so they cook evenly. Mixing different vegetables keeps the dish fun and fresh. To keep your leftover Minute Spicy Chili Crisp Noodles fresh, first let them cool. Place them in an airtight container. Make sure the container is sealed tight. Store it in the fridge. These noodles can last for about 2-3 days. When you want to enjoy your leftovers, reheating them right is key. Start by placing the noodles in a bowl. Add a splash of water to keep them moist. Cover the bowl with a microwave-safe lid or wrap. Heat in the microwave for about 1-2 minutes. If you prefer the stove, add a bit of water to a pan. Heat on low until warm, stirring gently. This way, your noodles stay tasty and don’t dry out. If you want to save your noodles for later, freezing works well too. Place cooled noodles in a freezer-safe bag. Remove as much air as you can before sealing. They can last up to a month in the freezer. When ready to eat, take them out and let them thaw overnight in the fridge. Reheat as mentioned above. This keeps the flavors intact and your meal quick and easy. Yes, you can use other noodles! Rice noodles or udon work well. Just cook them according to their package directions. This adds a fun twist to the dish. Try different shapes too. They can change the texture and taste. Chili crisp is a crunchy, spicy oil. It has fried garlic, onion, and chili flakes. You can buy it or make your own. To make it, heat oil in a pan, add minced garlic, onion, and chili flakes. Fry until golden and fragrant. Let it cool, and store it in a jar. This gives your noodles a bold flavor. You can change the spice level easily. Use less chili crisp for a milder taste. Add more for a kick! You can also add some honey to balance the heat. If you like, serve it with a side of yogurt or sour cream. They help cool down the spice. You learned how to make Minute Spicy Chili Crisp Noodles with simple steps. We covered key ingredients and some fun variations. Remember to explore flavors and avoid common mistakes for the best taste. Storing and reheating your noodles correctly keeps the dish fresh. With these tips, you can enjoy a great meal every time. Get ready to impress your friends and family with your tasty dishes!

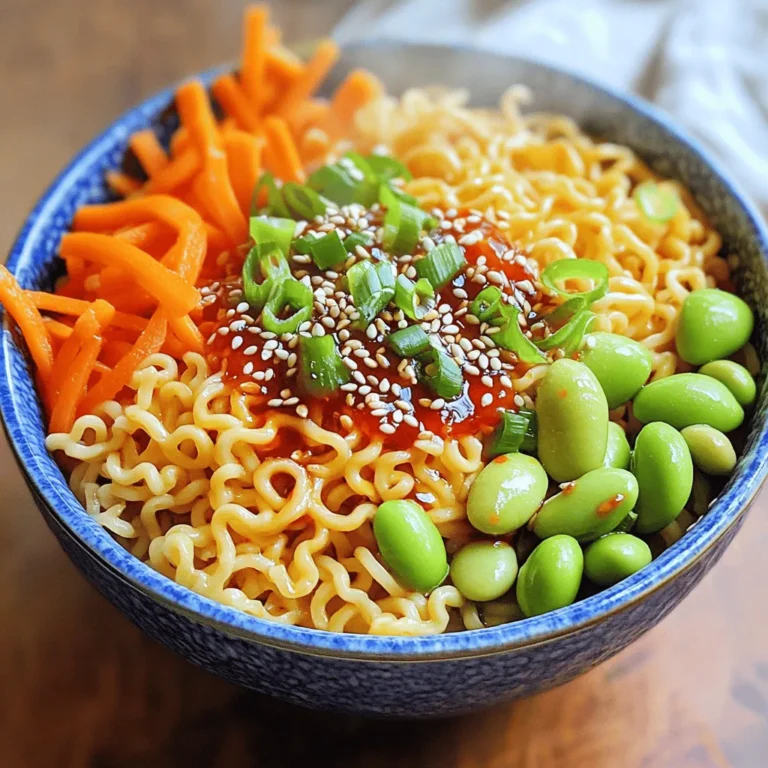
Minute Spicy Chili Crisp Noodles Bold and Flavorful Dish

To make this chowder, you will need: - 4 cups vegetable broth - 2 cups diced potatoes - 1 cup chopped carrots - 1 cup corn kernels (fresh or frozen) - 1 cup diced celery - 1 cup chopped onion - 2 cloves garlic, minced These main ingredients create a base full of flavor and nutrition. The vegetable broth provides a savory depth, while the potatoes and carrots add heartiness and sweetness. Corn brings a pop of texture, and the onion and garlic give a lovely aroma. To flavor the chowder, gather: - 1 teaspoon dried thyme - 1 teaspoon dried oregano - 1/2 teaspoon smoked paprika - Salt and pepper to taste Spices are key in this recipe. Thyme and oregano add warmth, while smoked paprika brings a hint of smoke that enhances the chowder’s taste. Don’t forget to season with salt and pepper for balance. For added creaminess and flavor, consider: - 1 can (15 oz) coconut milk - 1 tablespoon olive oil - Chopped fresh parsley for garnish (optional) Coconut milk gives the chowder a rich, creamy texture. Olive oil adds healthy fat and flavor, while parsley brightens the dish when sprinkled on top. Feel free to use these optional ingredients to make it your own! To start, I heat olive oil in my slow cooker on the sauté setting. I add chopped onion, minced garlic, and diced celery. I cook these for about 3-4 minutes. This brings out their sweet flavors. Once they soften, I stir in diced potatoes, chopped carrots, and corn. These veggies add heartiness and color to the chowder. Next, I pour vegetable broth over the vegetables. This broth is the base of our chowder, giving it depth. I mix in dried thyme, oregano, smoked paprika, salt, and pepper. This step is key for layering flavors. I make sure everything is well combined. Now, I cover the slow cooker. I set it to low for 6-7 hours or high for 3-4 hours. Low heat allows the flavors to develop fully. High heat is great when I need it faster. I check the vegetables for tenderness before adding coconut milk. This adds creaminess and completes the chowder. To make your chowder more exciting, try adding spices like cumin or rosemary. A pinch of cayenne can add heat if you like it spicy. For toppings, consider shredded cheese or crispy bacon bits. Fresh herbs like chives or cilantro also bring a fresh twist. Layering ingredients is key. Start with the harder veggies, like potatoes and carrots. Next, add softer ones, like corn and celery. This helps them cook evenly. Always keep the lid closed while cooking. Each time you lift it, you lose heat and extend cooking time. Do you prefer a thicker chowder? You can mash some of the potatoes after cooking. For a creamier texture, add more coconut milk. If you want to sneak in extra veggies, chop them small and stir them in. Spinach or zucchini works great! {{image_2}} To make this chowder a vegetarian or vegan delight, swap out the vegetable broth for a rich, homemade or store-bought vegan broth. For creaminess, I recommend using almond milk or soy cream in place of coconut milk. These alternatives keep the dish light while still providing a wonderful texture. You can also add legumes like lentils or chickpeas for a protein boost. They cook well in the slow cooker and add a nice bite to the chowder. Try adding one cup of cooked beans or lentils just before serving. If you crave heat, add chopped hot peppers or a dash of cayenne pepper. This will give your chowder a kick! Always taste as you go to get the heat just right. For an extra layer of flavor, serve with spicy condiments like sriracha or a spicy pesto. These can elevate each bowl and let you customize the heat level for each person. Using seasonal vegetables can enhance the flavor and freshness of your chowder. In spring, add peas or asparagus. In fall, consider using butternut squash or sweet potatoes for a sweeter taste. Adjust the cooking time based on your veggies. For example, softer vegetables like zucchini need less time than sturdier potatoes. Just keep an eye on your chowder and taste during cooking to ensure everything is tender and delicious. To store your chowder, let it cool first. Then, pour it into a clean container. Make sure the lid seals tightly. This keeps the chowder fresh. It lasts in the fridge for about 3 to 4 days. If you want to reheat, just warm it on the stove or in the microwave. Stir well before serving. If you want to save chowder for later, freezing is a great choice. Use a freezer-safe container. Leave some space at the top for the chowder to expand. It can last in the freezer for up to 3 months. When ready to eat, thaw it in the fridge overnight. Then, reheat it on the stove. Add a little water or broth if it seems thick. Don’t throw away leftover chowder! You can make new meals. Try using it as a sauce for pasta. Or, pour it over baked potatoes. You can also make a vegetable casserole. For storage, use airtight containers. Glass containers work well. They keep the chowder fresh and are easy to clean. Yes, you can. If you want to skip coconut milk, use regular milk or cream instead. For a dairy-free option, try almond milk or oat milk. These alternatives will still give your chowder a nice, creamy texture. You can also blend some cooked potatoes into the chowder for added creaminess. To make your chowder more filling, add protein-rich foods. You could toss in cooked beans like chickpeas or navy beans. Adding cooked chicken or ham also works well. For extra veggies, consider adding spinach or kale. Serve the chowder with crusty bread or a side salad for a full meal. Yes, frozen vegetables are great for this recipe. They can save you prep time. Just toss them in the slow cooker as you would fresh ones. No need to thaw them first. Keep an eye on the cooking time, as frozen veggies may cook faster than fresh ones. This article covered how to make a tasty slow cooker vegetable chowder. You learned about key ingredients like broth, veggies, and spices. I shared tips for flavor, cooking times, and storage. You can also explore variations to match your taste and dietary needs. Now, you have the tools to create a warm, hearty dish that’s easy to prepare. Enjoy making this chowder and feel free to experiment as you go!

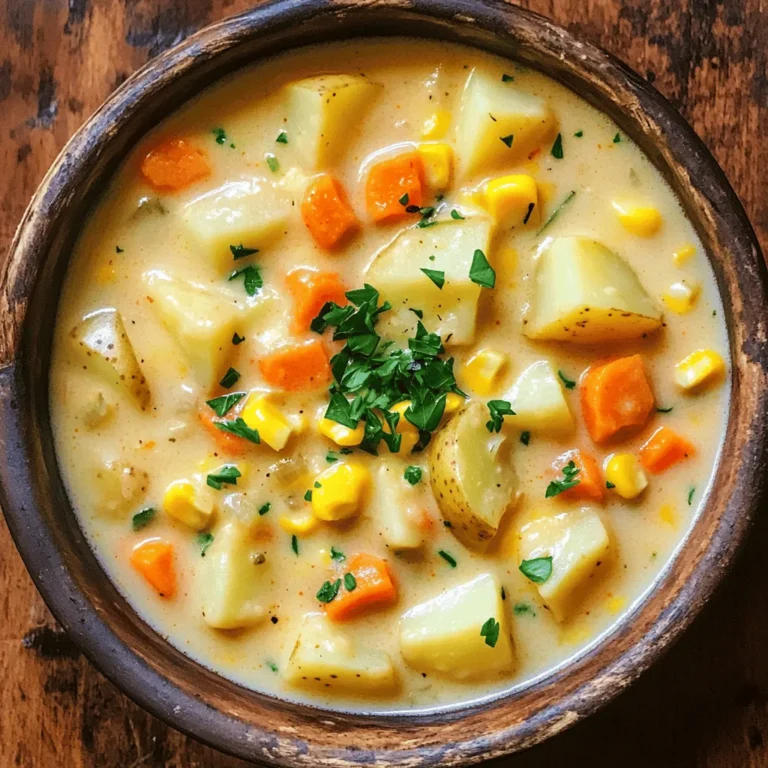
Slow Cooker Creamy Vegetable Chowder Comfort Dish

- 1 lb ground beef - 1/2 lb ground pork (or an extra 1/2 lb of ground beef) - 1/2 cup breadcrumbs - 1/4 cup grated Parmesan cheese - 1/4 cup chopped fresh parsley - 1 egg - 2 cloves garlic, minced - 1 teaspoon Italian seasoning - Salt and pepper to taste - 1 cup mozzarella cheese, cubed (for stuffing) - Marinara sauce (for serving) You can switch the ground pork for more beef. This keeps the taste strong. If you want a lighter option, try ground turkey. For breadcrumbs, use crushed crackers or oats. If you can't find fresh parsley, dried parsley works too. Just use less. You can use any cheese you like for stuffing. Try cheddar or provolone if you want a change. When picking meat, look for bright color and no smell. Fresh ground meat has a red hue. Check the fat content. A bit of fat adds flavor. For cheese, choose blocks over pre-shredded options. Fresh cheese melts better. When buying herbs, look for bright green leaves. They should smell strong and fresh. Fresh ingredients make a big difference in taste. Always read labels to avoid hidden fillers. Start by mixing the meats in a large bowl. I use 1 pound of ground beef and ½ pound of ground pork. If you prefer, you can use another ½ pound of ground beef instead of pork. Next, add ½ cup of breadcrumbs for texture. Then, mix in ¼ cup of grated Parmesan cheese for a savory taste. Toss in ¼ cup of chopped fresh parsley for freshness. Don’t forget the egg; it helps bind everything together. Add 2 minced garlic cloves for that extra flavor kick. Finally, sprinkle in 1 teaspoon of Italian seasoning, and season with salt and pepper to taste. Use your hands to mix everything well until combined. Now it’s time to form the meatballs. Take a handful of the meat mixture and flatten it in your palm. Place a cube of mozzarella cheese in the center. Then, carefully wrap the meat around the cheese and roll it into a ball. Make sure the cheese is fully encased. This step is key for that cheesy surprise inside! Repeat this process until you’ve used all the meat mixture. Aim for even sizes so they cook evenly. Preheat your air fryer to 375°F (190°C) for the best results. Arrange the meatballs in the air fryer basket in a single layer. Make sure to leave space between each meatball for proper air flow. This helps them cook evenly. Cook them for 12-15 minutes. You’ll know they’re done when they are browned and cooked through. Depending on your air fryer size, you might need to cook in batches. Once cooked, serve them hot with warm marinara sauce on the side. This adds a nice touch for dipping! Air frying is fun and easy. Preheat your air fryer to 375°F (190°C). This step helps the meatballs cook evenly. Avoid overcrowding the basket. Leave space around each meatball. This allows hot air to flow and cooks them well. To ensure even cooking, try flipping the meatballs halfway through. This simple step makes a big difference. If your air fryer is small, cook in batches. Avoid stacking meatballs. The heat needs to reach all sides for great results. Serve the meatballs hot for the best taste. Pair them with marinara sauce for dipping. You can also add a sprinkle of fresh parsley on top. This adds color and flavor. Serve with pasta or on a sub for a tasty meal. Enjoy your savory delight! {{image_2}} You can swap out the ground beef and pork. Try ground turkey or chicken for a lighter option. If you prefer a richer flavor, mix in some lamb. For cheese, use cheddar or pepper jack for a kick. This small change can make a big difference in taste. Add spices to boost the flavor. Try crushed red pepper for heat or smoked paprika for depth. You can also mix in chopped olives or sun-dried tomatoes for a unique twist. Fresh herbs like basil or oregano can add bright notes. Experiment with these options to find your favorite flavor combo. To make meatballs vegetarian, use lentils or chickpeas as the base. For a vegan twist, you can use flaxseed meal as a binder instead of an egg. For cheese, opt for vegan mozzarella or cashew cream. These swaps keep the dish tasty while fitting various diets. You can store leftover cheese stuffed meatballs in the fridge. Place them in an airtight container. They stay fresh for up to three days. Before storing, let them cool to room temperature. This helps prevent moisture buildup. Freezing is a great way to keep meatballs longer. First, let them cool completely. Then, place them in a freezer-safe bag. You can also wrap them in plastic wrap. They can last up to three months in the freezer. Label the bags with the date to keep track. To reheat, you have a few options. If using the air fryer, preheat it to 350°F (175°C). Place the meatballs in the basket and heat for about 5-7 minutes. You can also use a microwave. Heat on medium power for 1-2 minutes. Check if they are warm all the way through. Enjoy them with marinara sauce for a tasty meal! You can serve these meatballs with marinara sauce for dipping. Pasta makes a great side too. Garlic bread adds a nice crunch. A fresh salad can help balance the meal. You can also serve them in a sub roll for a fun sandwich. Yes, you can make these meatballs ahead of time. Prepare the meat mixture and form the meatballs. Place them in a single layer on a tray. Cover and refrigerate for up to 24 hours. You can also freeze them before cooking. Just thaw in the fridge before air frying. Check the internal temperature with a meat thermometer. It should reach 160°F (71°C). You can also cut one in half. The meat should be brown and the cheese melted. If you see any pink, cook them longer. You now have all the tools to make delicious cheese stuffed meatballs. You learned about ingredients and cooking methods. I shared tips for air frying and ensuring even cooking. You can explore different variations and storage methods too. Experiment with flavors and find what you like best. Enjoy making and sharing these tasty meatballs. They bring joy to any meal and make cooking fun. Happy cooking!

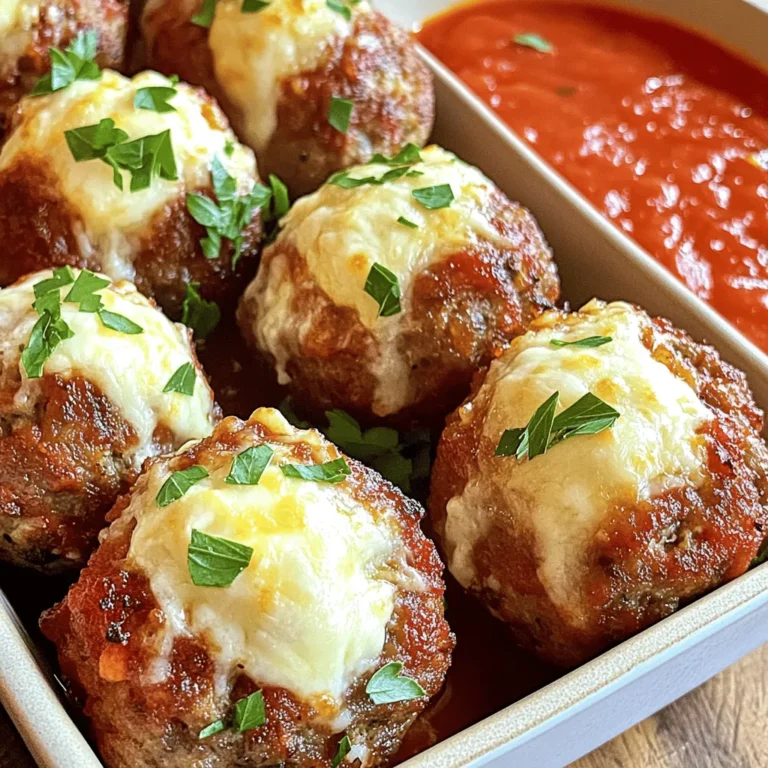
Air Fryer Cheese Stuffed Meatballs Savory Delight

For the One-Pan Honey Garlic Shrimp Quinoa, gather these tasty items: - 1 pound shrimp, peeled and deveined - 1 cup quinoa, rinsed - 2 cups vegetable broth - 4 tablespoons honey - 3 tablespoons soy sauce (or tamari for gluten-free) - 3 cloves garlic, minced - 1 tablespoon ginger, minced - 2 tablespoons olive oil - 1 cup bell peppers, diced (red, yellow, or orange) - 1 cup snap peas - 1 green onion, chopped (for garnish) - Sesame seeds (for garnish) - Salt and pepper to taste You can swap some ingredients based on your taste or needs. - Use chicken or tofu instead of shrimp for protein. - Substitute quinoa with rice or farro if you prefer. - Try maple syrup in place of honey for a vegan option. - Use coconut aminos instead of soy sauce for a different flavor. - Any colorful veggies can work; consider zucchini or carrots. This dish packs a punch of nutrition. Here's why these ingredients shine: - Shrimp is low in fat and high in protein. It also has omega-3 fatty acids. - Quinoa is a complete protein, full of fiber and minerals. It supports digestion. - Bell peppers are rich in vitamins A and C, which help your immune system. - Garlic can boost heart health and has anti-inflammatory properties. - Ginger aids digestion and adds a nice zing to the dish. By choosing these fresh ingredients, you not only enjoy great flavor but also support your health. Start by heating the olive oil in a large skillet over medium heat. Add the minced garlic and ginger once the oil is warm. Stir them for 1-2 minutes until you smell their sweet scent. Be careful not to burn them, as this can change the flavor. Next, raise the heat to medium-high. Toss in the shrimp and sprinkle with salt and pepper. Cook the shrimp for about 2-3 minutes. They should turn pink and opaque. Once cooked, remove them from the skillet and set them aside for later. In the same skillet, add your rinsed quinoa. Toast the quinoa for 1-2 minutes, stirring often until it turns lightly golden. After that, pour in the vegetable broth, honey, and soy sauce. Mix in the diced bell peppers and snap peas. Bring everything to a gentle simmer. Cover the skillet and lower the heat. Let it cook for about 15 minutes. This time allows the quinoa to soak up all the liquid and become fluffy. When the quinoa is ready, take off the lid and fold the cooked shrimp back in. Warm them for another 2 minutes before serving. To cook shrimp well, start with fresh shrimp. Look for shrimp that smells clean and has a firm texture. Heat your skillet on medium-high and add olive oil. Once the oil is hot, add the shrimp. Cook them for 2-3 minutes until they turn pink. Remove them from the heat right away. Overcooking makes shrimp tough and chewy. Seasoning is key to making your dish pop. Salt and pepper add basic flavor. For more depth, use soy sauce and honey. Garlic and ginger bring warmth and zest. Feel free to experiment with fresh herbs like cilantro or parsley. These add freshness and brighten the dish. Taste as you go to get the balance just right. Rinsing quinoa removes its bitter coating. This step is crucial for a light flavor. Toast the rinsed quinoa in the skillet for 1-2 minutes. This brings out its nutty taste. When you add broth, let it simmer on low heat with a lid on. After 15 minutes, check if all liquid is absorbed. Fluff it with a fork to prevent clumping. {{image_2}} You can swap shrimp for other proteins or seafood. Chicken or tofu works well. For seafood lovers, try scallops or salmon. Adjust the cooking time based on your choice. Chicken needs more time, while tofu cooks quickly like shrimp. To make this dish vegetarian or vegan, skip the shrimp. Use firm tofu or tempeh as your protein. Marinate them in soy sauce and honey for flavor. You can also add chickpeas for extra protein and fiber. This keeps the meal hearty and satisfying. You can add seasonal veggies for more freshness. In spring, use asparagus or peas. In summer, zucchini or corn adds color and taste. Fall calls for squash or mushrooms. Each season brings new flavors, making the dish exciting all year. Mix and match to suit your taste. To store leftovers, let the dish cool first. Then, transfer it to an airtight container. This keeps the shrimp and quinoa fresh. Place it in the fridge. It will stay good for up to three days. Make sure to label the container with the date. This helps you know when to eat it. When you are ready to eat, you can reheat it easily. Use a microwave-safe bowl. Add a splash of water or broth to keep it moist. Heat it in the microwave for about 1-2 minutes. Stir halfway through to ensure even heating. You can also reheat it on the stove. Just warm it over low heat until hot. If you want to keep it longer, freezing is a great option. First, let the dish cool completely. Then, scoop it into freezer-safe bags or containers. Remove as much air as possible before sealing. Label the bags with the date. You can freeze it for up to three months. When ready to eat, thaw it in the fridge overnight. Reheat as mentioned above. To make this dish, start by sautéing garlic and ginger in olive oil. After they smell great, add shrimp. Cook the shrimp for about 2-3 minutes until they turn pink. Remove the shrimp and toast the quinoa in the same pan. Next, mix in vegetable broth, honey, and soy sauce. Add bell peppers and snap peas, then simmer it all. Once the quinoa is fluffy, fold in the shrimp and serve hot. If you don't have quinoa, you can use rice or farro. Both grains work well and absorb flavors great. Rice cooks a bit longer, so keep that in mind. For a gluten-free option, try using millet or even cauliflower rice for a low-carb choice. This dish lasts about 3-4 days in the fridge. To store it, place it in an airtight container. Make sure to cool it down first. This keeps it fresh and tasty for your next meal. Yes, you can make this dish in advance! Prepare it up to the point of serving. Then, store it in the fridge. When you’re ready to eat, reheat it on the stove. This makes it easy for quick meals during busy days. In this blog post, we explored the key ingredients for the one-pan honey garlic shrimp quinoa. We covered substitutions, health benefits, and step-by-step cooking instructions. You learned tips for perfect shrimp, flavorful seasoning, and fluffy quinoa. We also shared variations and storage tips to keep your dish fresh. Remember, cooking can be fun and easy. With these insights, you can create a tasty meal that suits your taste. Enjoy experimenting in the kitchen!

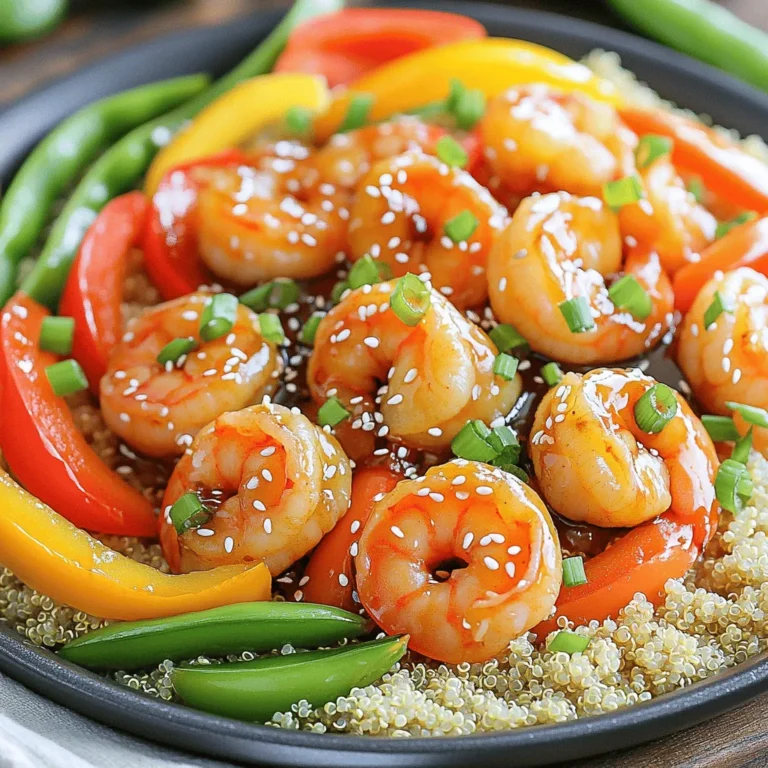
One-Pan Honey Garlic Shrimp Quinoa Flavorful Delight

- 1 cup cottage cheese - 1 cup rolled oats - 1 cup milk (or non-dairy milk) - 2 large eggs - 1 teaspoon vanilla extract - 1 tablespoon honey (or maple syrup) - 1 teaspoon baking powder - 1/2 teaspoon cinnamon - 1 cup fresh or frozen blueberries - A pinch of salt - Butter or oil for cooking When measuring, use a dry measuring cup for the oats. Fill it, then level it off. For liquid ingredients, use a liquid measuring cup. Make sure to check the measurement at eye level. This helps you get it just right. If you want sweeter pancakes, add more honey or syrup. You can swap cottage cheese for Greek yogurt if you want. Use almond or oat milk for a dairy-free option. If you don’t have rolled oats, quick oats work, too. For a vegan option, replace eggs with flax eggs. Mix 1 tablespoon ground flaxseed with 3 tablespoons water for each egg. To start, gather all your ingredients. You will need 1 cup of cottage cheese, 1 cup of rolled oats, and 1 cup of milk. You will also need 2 large eggs, 1 teaspoon of vanilla extract, and 1 tablespoon of honey or maple syrup. Don’t forget the baking powder, cinnamon, a pinch of salt, and 1 cup of blueberries. 1. Blend the ingredients: Place the cottage cheese, rolled oats, milk, eggs, vanilla, honey, baking powder, cinnamon, and salt into a blender. Blend until the mixture is smooth and creamy. This step is key to making your pancakes fluffy. 2. Add the blueberries: Gently fold the blueberries into the batter. If you choose frozen blueberries, you can add them straight from the freezer. Now, it’s time to cook! Heat a non-stick skillet or griddle over medium heat. Add a little butter or oil to grease the surface. You want the pan hot enough to cook the pancakes evenly. 1. Pour the batter: Use about 1/4 cup of batter for each pancake. Pour it onto the skillet. You should see bubbles forming on the surface in about 2-3 minutes. 2. Flip the pancakes: When the bubbles appear, it’s time to flip. Cook for another 2-3 minutes until golden brown. 3. Repeat: Keep cooking the remaining batter, adding more butter or oil as needed. - Don’t over-mix: When adding the blueberries, mix gently. Over-mixing can make the pancakes tough. - Check the heat: If pancakes are browning too quickly, lower the heat. You want them cooked through but not burnt. - Serve warm: Stack the pancakes high on a plate. Top them with more blueberries and a drizzle of honey or maple syrup for a sweet finish. With these steps, you will create delightful cottage cheese blueberry pancakes that everyone will enjoy. Happy cooking! To make perfect cottage cheese blueberry pancakes, follow these simple steps: - Blend well: Use a blender to mix the ingredients until smooth. This creates a nice batter. - Fold in blueberries: After blending, gently stir in the blueberries. This keeps them whole and juicy. - Control the heat: Cook the pancakes on medium heat. Too high can burn them, while too low can make them soggy. Here are some common errors to watch for: - Overmixing: If you mix too much, the pancakes can be tough. Blend just until smooth. - Skipping the salt: A pinch of salt enhances flavor. Don’t skip it! - Wrong pan temperature: If the pan isn’t hot enough, the pancakes won’t cook properly. Test with a drop of water; it should sizzle. These pancakes are great on their own, but you can add fun toppings: - Fresh blueberries: Add more on top for color and taste. - Sweet drizzle: Honey or maple syrup gives a nice touch. - Powdered sugar: A light sprinkle adds sweetness and looks beautiful. Enjoy your delightful pancakes with these tips and tricks! {{image_2}} You can easily make these pancakes gluten-free. Just use gluten-free oats instead of regular rolled oats. For a vegan option, swap the eggs with a flaxseed mixture. Mix one tablespoon of flaxseed meal with three tablespoons of water. Let it sit for about five minutes. This mixture works well as a binding agent. You can also replace milk with almond milk or oat milk. These changes keep the pancakes delicious and suitable for everyone. You can make these pancakes even more fun with some tasty add-ins. Try adding a teaspoon of lemon zest for a fresh twist. Chopped nuts like walnuts or pecans add crunch and flavor. For toppings, think beyond syrup! You can top them with yogurt, fresh fruits, or a sprinkle of granola. A dollop of whipped cream and a few extra blueberries make for a lovely finish. The options are endless! You can take inspiration from different cuisines to change up these pancakes. For a tropical touch, add shredded coconut and pineapple. This gives a taste of the islands! If you crave a more savory pancake, mix in some cheese and herbs like chives or dill. This twist creates a delightful brunch dish. You can even try a Mexican flair by adding cinnamon and a drizzle of agave syrup. Each variation brings a new flavor to your breakfast table! If you have leftover pancakes, store them in an airtight container. Place parchment paper between pancakes to keep them from sticking together. They will stay fresh in the fridge for up to three days. To reheat pancakes, use a microwave or skillet. For the microwave, place pancakes on a plate and cover with a damp paper towel. Heat for 30 seconds to 1 minute. For a skillet, warm them on low heat for 2-3 minutes on each side. This keeps them soft and tasty. You can freeze these pancakes for later use. Stack them with parchment paper in between and place them in a freezer-safe bag. They will last up to two months in the freezer. To eat, thaw them in the fridge overnight and reheat as mentioned above. Yes, you can make these pancakes ahead of time. Cook the pancakes as directed. Once they cool, stack them with parchment paper between each pancake. Store them in an airtight container. Place the container in the fridge for up to three days. To reheat, use a skillet or microwave. This way, you enjoy warm pancakes quickly. If you don’t have cottage cheese, there are good options. You can use ricotta cheese for a similar texture. Greek yogurt is another great choice. Both options add creaminess and protein. Just keep in mind that the flavor may vary slightly. Adjust the sweetness if needed for taste. To make fluffier pancakes, try a few tricks. First, separate the eggs. Beat the egg whites until they are stiff. Fold them into the batter gently. This adds air and makes the pancakes light. You can also add a bit more baking powder. This helps create a rise while cooking. In this article, we covered how to make perfect pancakes. We started with a list of ingredients and tips for measuring them. Then, we went through each step of preparation and cooking to help you master this dish. I shared essential tips and tricks, from cooking methods to common mistakes. We also explored fun variations, dietary options, and how to store leftovers. Remember, perfect pancakes come from practice and creativity. Enjoy your cooking and happy flipping!

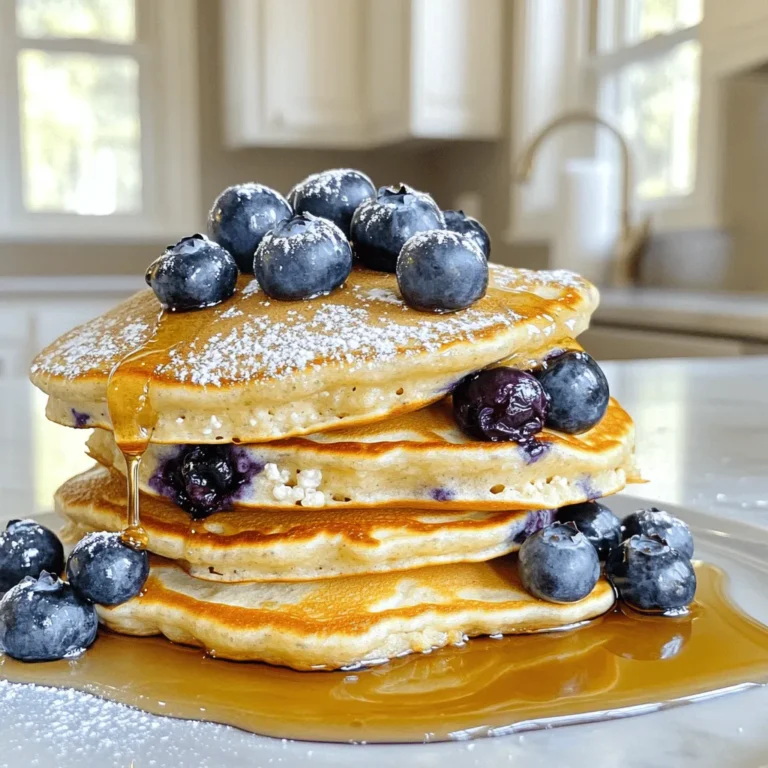
Cottage Cheese Blueberry Pancakes Delightful and Easy

For strawberry shortcake overnight oats, gather these items: - 1 cup rolled oats - 2 cups almond milk (or any milk of choice) - 1 tablespoon chia seeds - 1 tablespoon maple syrup (or honey) - 1 teaspoon vanilla extract - 1 cup strawberries, hulled and sliced - 1/2 cup Greek yogurt (or dairy-free alternative) - 1/4 cup crushed graham crackers - Fresh mint leaves for garnish (optional) You can easily swap out some ingredients to fit your needs. For a nut-free option, choose oat milk or soy milk instead of almond milk. If you need a vegan recipe, use dairy-free yogurt and maple syrup instead of honey. For gluten-free oats, check that your rolled oats are labeled gluten-free. You can also skip the graham crackers or use gluten-free ones. Each ingredient in this recipe adds health benefits: - Rolled oats: High in fiber, they help keep you full longer. - Chia seeds: These tiny seeds pack a protein punch and add omega-3 fatty acids. - Strawberries: Loaded with vitamins, they boost your immune system and brighten your day. - Greek yogurt: It offers protein and probiotics for gut health. - Maple syrup: A natural sweetener that gives a hint of flavor without refined sugars. Using high-quality ingredients makes your overnight oats not just tasty, but also nutritious. Enjoy the blend of flavors and health benefits in every bite! Start by gathering your ingredients. In a large bowl, mix 1 cup of rolled oats, 2 cups of almond milk, and 1 tablespoon each of chia seeds and maple syrup. Add 1 teaspoon of vanilla extract for flavor. Stir until everything is well combined. The oats need to be fully covered in liquid. Next, gently fold in 1 cup of hulled and sliced strawberries. Save a few strawberries for later. This mixture will be creamy and fruity. Now it's time to fill the jars. Take two jars or containers with lids. Spoon the oat mixture into each jar, filling them about three-quarters full. This allows room for toppings. On top of the oats, add a scoop of Greek yogurt, around 1/4 cup per jar. Then sprinkle crushed graham crackers on top. This gives a nice crunch, just like shortcake. Seal the jars tightly and place them in the fridge. Let them sit for at least 4 hours or overnight. This time helps the oats soak up the flavors. When you are ready to eat, stir the oats well. Top each jar with the reserved strawberries and a few fresh mint leaves for a pop of color. Enjoy your delicious strawberry shortcake overnight oats! To make your oats creamy, use rolled oats. They soak up liquid well. Mix oats with almond milk, chia seeds, maple syrup, and vanilla. Stir until the oats are covered. Let them sit overnight. This helps them soften and thicken. If you want a thicker mix, add more chia seeds or yogurt. For a creamier texture, use full-fat yogurt. You can change the fruits based on your taste. Try blueberries, raspberries, or bananas. If you like it sweeter, add more maple syrup or honey. You can also use agave syrup. If you want a new twist, try adding spices like cinnamon or nutmeg. These add flavor without extra sugar. Serve your oats in clear jars. This shows off the layers of oats, yogurt, and fruit. Add a few extra strawberries on top for color. A drizzle of honey makes it look nice and adds flavor. Sprinkle crushed graham crackers on top for crunch. A few mint leaves add a fresh touch and make it pretty. {{image_2}} You can mix things up with different fruits. Blueberries add a burst of flavor. Just swap the strawberries for fresh blueberries. Bananas work well too. Slice them up and fold them in. Each fruit brings a new taste to your oatmeal. If you're vegan, it’s easy to adapt this recipe. Use almond milk or any plant-based milk. Replace Greek yogurt with coconut yogurt. Maple syrup is already vegan, so no changes needed there. This way, you still get a creamy texture without dairy. Seasonal fruits can change your overnight oats game. In summer, try peaches or raspberries. In fall, consider apples or pears. Each season offers unique flavors. Use what’s fresh for the best taste and nutrition. Mixing in seasonal fruits keeps your oats fun and interesting! To keep your strawberry shortcake overnight oats fresh, store them in airtight jars. This helps maintain flavor and texture. Always place the jars in the fridge right after you prepare them. Keep the oats away from strong-smelling foods, as they can absorb odors. If you plan to eat the oats later, add toppings like yogurt and graham crackers just before serving. These delicious oats will last up to five days in the fridge. The oats soak up the liquid, adding flavor over time. However, the strawberries may lose some crunch after a couple of days. It's best to eat them within three days for the best taste and texture. You can freeze these overnight oats if you want to store them longer. Use freezer-safe jars and leave some space at the top. The oats can last for about three months in the freezer. To enjoy them, thaw in the fridge overnight before serving. Add fresh toppings after thawing to keep everything tasty and appealing. Yes, you can use quick oats. They will absorb liquid faster. This change will make your overnight oats softer. If you prefer more texture, stick with rolled oats. They hold their shape and give a nice bite. Quick oats may lead to a creamier finish. You can replace Greek yogurt with dairy-free yogurt. Look for coconut or almond yogurt. These options work great for a creamy texture. If you want to avoid dairy, use silken tofu blended until smooth. This will give you a similar creaminess. To make the recipe nut-free, swap almond milk for oat or soy milk. Both are great choices and have good flavor. Ensure any yogurt you use is also nut-free. Check labels to avoid any hidden nut products. This way, you can enjoy your oats safely! In this post, we explored ingredients and steps to create delicious overnight oats. We listed key ingredients, their benefits, and how to customize flavors. You now know the best practices for prepping and storing your oats. Remember to try different fruits and toppings for variety. Whether you prefer oats with yogurt or a nut-free option, you can easily adjust the recipe. Enjoy making your breakfast fun and healthy with these tips!

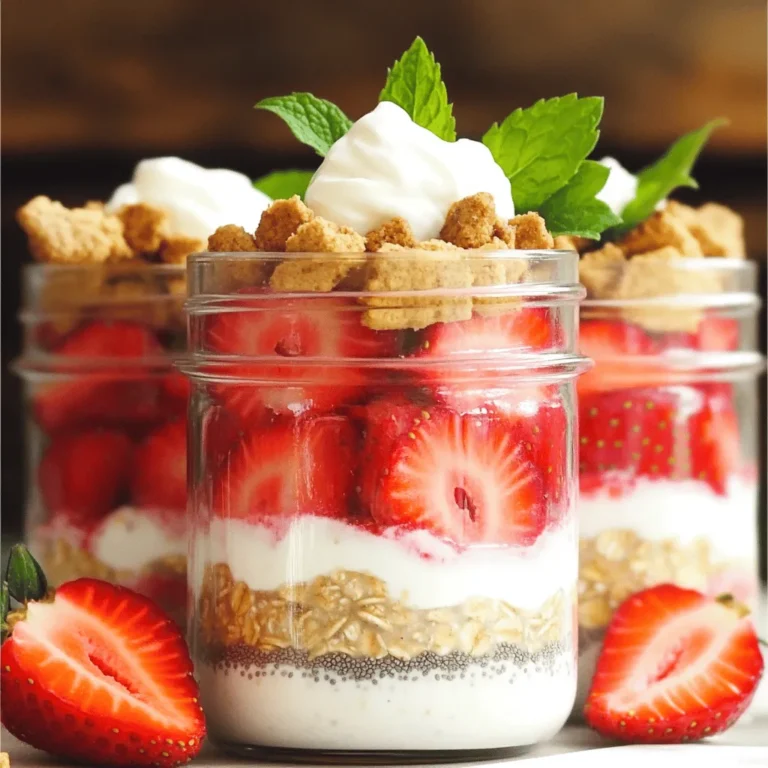
Strawberry Shortcake Overnight Oats Easy and Delicious

- 8 oz cream cheese, softened - 1 cup sour cream - 1 cup shredded cheddar cheese - 1 cup shredded pepper jack cheese - 4-6 fresh jalapeños, diced - 1/2 cup green onions, chopped - 1/2 cup breadcrumbs (optional) - 1 tablespoon garlic powder - 1 teaspoon smoked paprika - Salt and pepper to taste You can swap cream cheese with Greek yogurt for a lighter dip. For sour cream, use plain yogurt or cottage cheese. If you want different cheeses, try gouda or mozzarella. These changes keep the flavors tasty and fun! - Preheat the oven and prepare baking dish First, set your oven to 350°F (175°C). This temperature works best for baking the dip. While it heats, grab an 8x8-inch baking dish. You can lightly grease it with a bit of oil to prevent sticking. - Mixing the base ingredients In a large mixing bowl, add 8 oz of softened cream cheese and 1 cup of sour cream. Use a fork or a mixer to blend them until smooth. This mix is the creamy base of your dip. - Incorporating additional flavors Next, add 1 cup of shredded cheddar cheese and 1 cup of shredded pepper jack cheese. Then, toss in 4-6 diced jalapeños, 1/2 cup of chopped green onions, 1 tablespoon of garlic powder, and 1 teaspoon of smoked paprika. Don’t forget to add salt and pepper to taste. Stir everything until it is well combined. - Transferring dip to baking dish Once mixed, carefully transfer the dip mixture into your greased baking dish. Spread it out evenly with a spatula to ensure even cooking. - Adding topping (if using breadcrumbs) If you like a crunchy topping, sprinkle 1/2 cup of breadcrumbs evenly over the dip. This step is optional but adds a nice texture. - Baking time and checking doneness Place the dish in the preheated oven. Bake for 20-25 minutes. You’ll know it’s done when the dip is bubbly and the top is slightly golden. Once it’s ready, take it out and let it cool for a few minutes before serving. - Achieving the right creaminess: Start with softened cream cheese. Mixing it well with sour cream makes a smooth base. Blend until there are no lumps. This ensures a creamy texture that is easy to scoop. - Balancing spice levels: If you want less heat, remove the seeds from the jalapeños. You can also use fewer jalapeños. For a spicier kick, leave some seeds in. Taste the mixture before baking. Adjust as needed with extra jalapeños or a dash of hot sauce. - Ensuring even baking: Spread the dip evenly in your baking dish. This helps it cook through without hot or cold spots. Keep an eye on it during the last few minutes. When the top is golden, it’s ready! - Best dipping options: Pair the dip with tortilla chips for a classic crunch. Crackers also work well, adding a nice snap. For a fresh touch, use sliced veggies like carrots or bell peppers. They add color and flavor. - Garnishing ideas for presentation: Add sliced green onions or jalapeños on top before serving. This gives a pop of color. You can also sprinkle some smoked paprika for extra flair. It makes the dip look as good as it tastes! {{image_2}} You can change up the taste of this dip easily. Adding different spices can make it unique. Try adding cumin for warmth or chili powder for extra heat. If you want a smoky flavor, toss in some smoked paprika. You can even add a few dashes of hot sauce for a kick. Incorporating meats like bacon or crab can also enhance this dip. Bacon adds a crispy texture and rich flavor. Just cook the bacon until crispy, chop it, and mix it into the dip. If you prefer crab, use lump crab meat for a touch of luxury. Stir it in gently to keep it chunky. For a gluten-free option, simply skip the breadcrumbs. The dip will still taste great without them. You can serve it with gluten-free chips or veggies. If you want a vegan adaptation, swap the cream cheese and sour cream for plant-based versions. Many brands offer vegan cream cheese made from nuts or soy. Use nutritional yeast for a cheesy flavor without dairy. Check labels for gluten-free options if needed. These simple changes make the dip suitable for everyone. To keep your creamy jalapeño popper dip fresh, store it in the fridge. Place it in an airtight container. It will last for about three to four days. If you want to freeze it, that’s simple too. Use a freezer-safe container. Make sure to leave space at the top, as the dip will expand. It can stay in the freezer for up to three months. When ready to enjoy the dip again, you can reheat it. The best way is to use an oven. Preheat it to 350°F (175°C). Place the dip in an oven-safe dish. Heat for about 15-20 minutes until warm. You can also use a microwave. Heat it in short bursts, stirring in between. This method is quick but may change the texture a bit. To keep the dip creamy, avoid overheating. Stirring helps maintain a smooth texture. If it seems thick, add a splash of sour cream or cream cheese to revive it. How do I make my dip less spicy? You can cut down the heat by removing the seeds from the jalapeños. If you want it even milder, use fewer jalapeños. You can also mix in some extra cream cheese or sour cream. This will help cool it down. Can I prepare this dip in advance? Yes, you can make this dip ahead of time. Mix all the ingredients and store it in the fridge. Just bake it right before serving. This makes your party prep easier. What are the best chips to use for dipping? Tortilla chips are a classic choice. They are crispy and tasty. You can also try pita chips or fresh veggie sticks. Carrot and cucumber sticks work well, too. Can I serve the dip cold? This dip tastes best when it is warm and gooey. If you prefer it cold, feel free to try it. Just know the flavors will change a bit. How long can the dip sit out during a party? The dip can sit out for about two hours. After that, it’s best to refrigerate it. Keeping food safe is important, so be mindful of time! This blog explored a tasty layered dip that’s easy to make and adapt. You learned about key ingredients and useful substitutions. The step-by-step guide ensures your dip comes out perfect every time. Remember the tips for balancing spice and garnishing for a great look. Explore flavor options and dietary variations to suit everyone. Store leftovers properly and reheat for the best taste. With these tricks, you’ll impress your guests and enjoy every bite. Get ready to share this delicious dip at your next gathering!

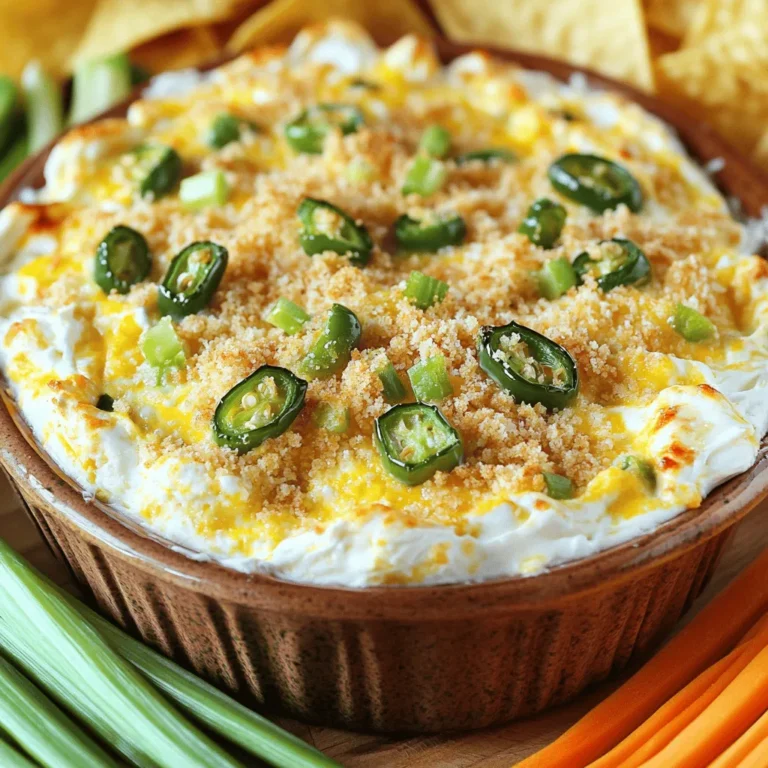
Creamy Jalapeño Popper Dip Tasty and Easy Recipe

For a tasty Loaded Veggie Nacho Sheet Pan, gather these main ingredients: - 1 bag tortilla chips - 1 cup black beans, drained and rinsed - 1 cup corn kernels (fresh or frozen) - 1 small red onion, diced - 1 red bell pepper, diced - 1 cup cherry tomatoes, halved - 1 avocado, diced - 1 jalapeño, sliced (seeds removed for less heat) - 1 cup shredded cheddar cheese - 1 cup shredded pepper jack cheese These ingredients mix well to create a colorful and flavorful dish. The beans add protein, while the veggies bring crunch and taste. The two cheeses melt beautifully, making each bite creamy and rich. To make your nachos even better, consider these optional garnishes: - Sour cream or Greek yogurt - Fresh cilantro and lime juice - Salt, pepper, and olive oil These garnishes add a fresh touch. Sour cream or yogurt gives creaminess, while lime juice adds a zesty kick. Fresh cilantro brings a burst of flavor that brightens up the dish. 1. Preheat your oven to 400°F (200°C). This heat helps the cheese melt well. 2. On a large baking sheet, spread out the tortilla chips. Make sure they cover the whole sheet. 1. In a mixing bowl, combine the black beans, corn, diced onion, diced bell pepper, halved cherry tomatoes, and sliced jalapeño. 2. Drizzle the mixture with olive oil and lime juice. 3. Season it all with salt and pepper. Mix well to combine. 1. Distribute the veggie mixture evenly over the tortilla chips. 2. Sprinkle the shredded cheddar and pepper jack cheese generously on top. 3. Bake in the preheated oven for 10-12 minutes. Look for the cheese to bubble and turn golden. Enjoy the fun of creating this Loaded Veggie Nacho Sheet Pan. The mix of fresh veggies and melted cheese will make your taste buds dance! To get perfect nacho cheese, use a mix of cheeses. I love cheddar and pepper jack. They melt well and add creamy flavor. Grate the cheese yourself for the best texture. Pre-shredded cheese has anti-caking agents that can affect melting. When choosing ingredients, fresh is best. Fresh veggies like red onion and bell pepper make a big difference. They add crunch and bright taste. Frozen corn is great if fresh isn't available. Just make sure to thaw and drain it well. Serve your nachos straight from the sheet pan. This looks fun and makes cleanup easy. For added flair, sprinkle extra cilantro on top. Lime wedges add a fresh touch too. Pair your nachos with dips like sour cream or Greek yogurt. They add creaminess and balance the spice. You can also try guacamole for an extra creamy bite. Salsa is another tasty option. It adds a zesty kick that complements the nachos perfectly. {{image_2}} You can easily switch ingredients in your loaded veggie nachos. Use different beans like pinto or kidney. Each type brings its own flavor and texture. You can also change cheese. Try mozzarella for a milder taste or feta for a tangy bite. These swaps let you customize your nachos to your liking. Adding spices can boost the flavor of your nachos. Cumin and chili powder add warmth and depth. You can sprinkle these on the veggie mix before baking. You can also add more veggies for extra taste. Zucchini and mushrooms work well. They add moisture and nutrients. Feel free to experiment with your favorite flavors! Store any leftovers in airtight containers. This keeps the nachos fresh. Make sure to cool them before sealing. If you leave them out too long, they may spoil. Use a container that fits the nachos well to reduce air exposure. You can keep them in the fridge for up to three days. When you are ready to eat, take them out for reheating. To reheat your nachos, you have a few good options. The oven works best. Preheat it to 350°F (175°C). Spread the nachos on a baking sheet. Heat for about 10 minutes until they are warm and the cheese melts again. You can also use a microwave, but it may make the chips soft. Heat in short bursts of 30 seconds until warm. If you want to keep the crunch, choose the oven. Enjoy your tasty leftovers! To add heat, use jalapeños for a kick. You can keep the seeds for more spice. Another option is adding sliced serrano peppers. If you like it even hotter, try a drizzle of hot sauce over the top. You can also mix in some cayenne pepper or chili powder into the veggie mixture. This will give your nachos a nice, spicy flavor. Yes, you can use store-bought nacho cheese sauce for ease. Look for a brand that has a rich flavor. Just warm it up in a pan before serving. Pour it over the nachos before baking. This saves time and still tastes great. If you want to add more flavor, mix in some spices or jalapeños into the cheese sauce. To serve more people, simply double the ingredients. Use two baking sheets for even cooking. Spread the tortilla chips in a single layer on each sheet. Make sure to evenly distribute the veggie mix and cheese. Bake both sheets at the same time if your oven allows it. This way, everyone can enjoy loaded veggie nachos at the same time! Loaded veggie nachos combine fresh ingredients to create a tasty dish everyone loves. You’ll start with tortilla chips and top them with a colorful mix of beans and veggies. Adding cheese and baking brings everything together. Use the tips for perfect cheese and serving ideas. Don't forget to customize with your favorite flavors! With some basic storage tips, you can enjoy these nachos later. Dive in and make this fun dish your own. You’ll impress your friends and family with your delicious creation.

Loaded Veggie Nacho Sheet Pan Flavorful and Easy Meal

- 3 large Granny Smith apples, peeled and sliced - 1 tablespoon lemon juice - 1/2 cup brown sugar - 1 teaspoon cinnamon - 1 package of refrigerated cinnamon rolls (with icing) - 1/4 cup butter, melted - 1/2 cup chopped pecans (optional) - 1/2 teaspoon nutmeg - Whipped cream or vanilla ice cream for serving You need three large Granny Smith apples for great tartness. The lemon juice helps keep the apples fresh and bright. Use half a cup of brown sugar to add sweetness and depth. One teaspoon of ground cinnamon gives that cozy flavor we love. Grab one package of cinnamon rolls, which comes with icing for drizzling later. You will need a quarter cup of melted butter to soak into the rolls. If you want a nutty crunch, add half a cup of chopped pecans. Lastly, you can serve this cobbler with whipped cream or a scoop of vanilla ice cream for a special touch. You can customize this dessert to your taste. Consider adding raisins for a chewy texture. A pinch of ginger can add a warm spice. You could also swap the nuts for granola for extra crunch. For a sweeter twist, try drizzling caramel sauce over the top before serving. This way, you can make this dessert your own. First, set your oven to 350°F (175°C). This step is vital for even baking. Make sure your oven is hot enough before you start. In a big bowl, mix these items: - 3 large Granny Smith apples, peeled and sliced - 1 tablespoon lemon juice - 1/2 cup brown sugar - 1 teaspoon cinnamon - 1/2 teaspoon nutmeg Toss the apple slices well. This helps coat them with the sweet mix. The lemon juice adds a nice zing that balances the sweetness. Grab your package of refrigerated cinnamon rolls. Cut each roll into quarters. Scatter those pieces over the apple mix in the baking dish. This gives a lovely, gooey texture. If you want extra crunch, sprinkle in 1/2 cup of chopped pecans. Next, drizzle 1/4 cup of melted butter over the cinnamon roll pieces. This ensures they soak up the buttery goodness. Place your dish in the preheated oven. Bake for 35-40 minutes. Watch for golden brown and puffy cinnamon rolls. The apples should be tender, too. While it bakes, warm the icing packet in a bowl of warm water. This makes it easy to drizzle later. After baking, let the cobbler cool for 5-10 minutes. Then, drizzle the warm icing on top. Enjoy your warm cobbler with whipped cream or vanilla ice cream! Choose Granny Smith apples for this recipe. They are tart and firm, perfect for baking. Tart apples hold their shape and add a nice contrast to sweet flavors. Look for apples that are shiny and smooth, with no bruises. Fresh apples make your cobbler taste great. To get the best texture, use refrigerated cinnamon rolls. These rolls are soft and fluffy. Cut them into quarters for even baking. This allows the edges to brown and crisp while the inside stays soft. Drizzle melted butter on top to enhance flavor and moisture. Consider adding chopped pecans for crunch. They add a nutty flavor that complements the apples well. You can also mix in a pinch of nutmeg for warmth. If you love raisins, throw some in for sweetness. These add-ins make the cobbler even more delightful. {{image_2}} You can use many apples for this recipe. Granny Smith gives a tart taste. Honeycrisp adds sweetness and crunch. Fuji apples are juicy and flavorful. Mix and match your favorites for a unique twist. Explore different apple blends for new flavors. Each type brings its own charm to your cobbler. You can get creative with toppings. Instead of pecans, try walnuts or almonds. You can also sprinkle oats for a crunchy layer. Crushed cookies can add sweetness and texture. If you want something sweet, add caramel sauce on top. You might even try whipped cream or yogurt for a fresh touch. These options make your cobbler fun and different every time. For a vegan cobbler, use plant-based butter. You can swap regular cinnamon rolls for vegan ones. Check labels to ensure they are dairy-free and egg-free. For gluten-free, try gluten-free cinnamon rolls. You can also use gluten-free flour for the apple mixture. These swaps let everyone enjoy this dessert, no matter their diet. To store your delicious cobbler, let it cool first. Then, cover it tightly with plastic wrap or foil. You can keep it in the fridge for up to three days. This helps to keep the flavors fresh and tasty. If you want to enjoy it later, storing it well is key! When you are ready to eat your cobbler again, preheat your oven to 350°F (175°C). Place the cobbler in an oven-safe dish. Cover it with foil to keep it from drying out. Heat for about 15-20 minutes or until it’s warm all the way through. This way, you keep the yummy texture and flavor intact. If you want to freeze the cobbler, let it cool completely first. Cut it into squares and place them in a freezer-safe container. You can also wrap individual pieces in plastic wrap. It stays good for up to three months in the freezer. When you crave a piece, thaw it overnight in the fridge before reheating. Enjoy your sweet treat anytime! Cinnamon Roll Apple Cobbler can last up to three days in the fridge. Make sure you cover it well. This keeps it fresh and tasty. If you want to enjoy it later, store it in an airtight container. The flavors will stay strong, and the cobbler will remain soft. Yes, you can use homemade cinnamon rolls. They add a special touch to the cobbler. Just make sure they are baked before adding them to the apples. Cut them into pieces for even cooking. This way, they mix well with the apples and soak up all the flavors. You can substitute brown sugar with white sugar mixed with molasses. Use one cup of white sugar and one tablespoon of molasses. Mix them well, and you'll get a flavor similar to brown sugar. You can also use coconut sugar or maple syrup if you want a different taste. We covered the key parts of making Cinnamon Roll Apple Cobbler. You learned about the ingredients and their measurements. The step-by-step process helps you bake a delicious treat easily. Use the tips for the best apples and perfect texture. Explore fun variations to keep it fresh. Store leftovers right, so nothing goes to waste. Enjoy every bite of your scrumptious cobbler! Happy baking!

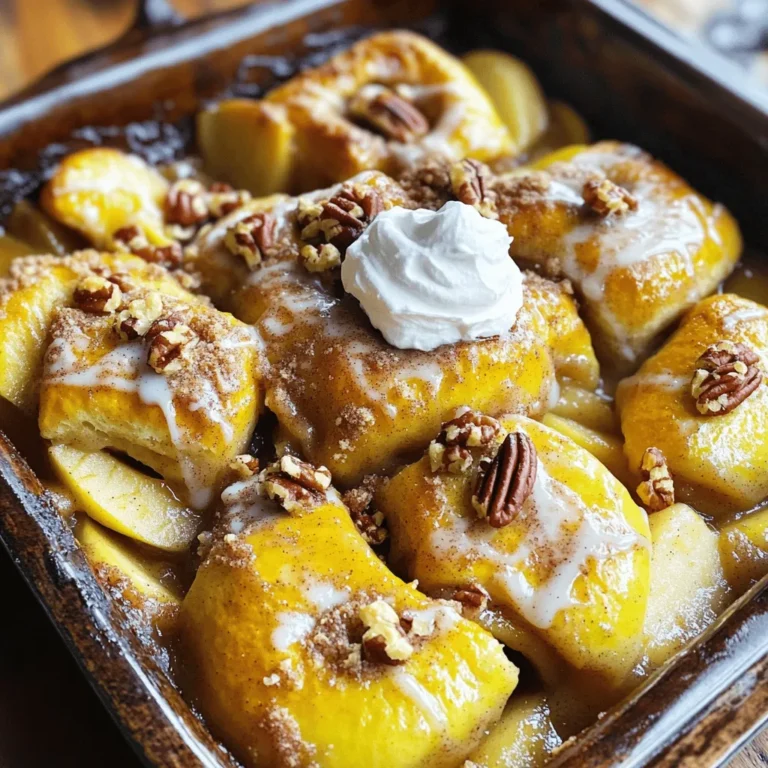
Cinnamon Roll Apple Cobbler Delightful Dessert Recipe

- 1 block (14 oz) firm tofu, pressed and cubed - 1/4 cup soy sauce (or tamari for gluten-free) - 2 tablespoons maple syrup - 1 tablespoon rice vinegar - 1 tablespoon sesame oil - 1 teaspoon cornstarch - 1 tablespoon fresh ginger, minced - 2 cloves garlic, minced - 1/2 teaspoon black sesame seeds (optional) - Chopped green onions for garnish To make these air fryer teriyaki tofu nuggets, I start with firm tofu. Press it to squeeze out extra water. This step is key to getting crispy nuggets. I cut the tofu into bite-sized cubes. This size helps them cook evenly. Next, I prepare a simple marinade. I mix soy sauce, maple syrup, rice vinegar, sesame oil, ginger, and garlic in a bowl. This mix gives the tofu a rich flavor. I toss the tofu cubes in this marinade, letting them soak for at least 30 minutes. This wait time helps the tofu absorb all those tasty flavors. After marinating, I sprinkle cornstarch over the tofu. This powder helps create a crispy outside when cooking. It’s a small step, but it makes a big difference. Now, for the fun part! I preheat the air fryer to 380°F (193°C). It takes just a few minutes. Then, I place the tofu cubes in the basket in a single layer. Cooking takes about 12 to 15 minutes. I shake the basket halfway through for even crispiness. When they turn golden brown and crispy, they are ready! I love to garnish them with black sesame seeds and green onions. They add a nice touch and extra flavor. These nuggets are not just tasty; they’re also fun to make! To start, you need to press the tofu. This removes water that makes tofu soggy. Use a tofu press or wrap it in a clean towel. Then, place a heavy object on top for about 15-20 minutes. After pressing, cut the tofu into 1-inch cubes. This size helps them cook evenly and get crispy. In a bowl, combine 1/4 cup of soy sauce, 2 tablespoons of maple syrup, 1 tablespoon of rice vinegar, and 1 tablespoon of sesame oil. Add 1 teaspoon of cornstarch for extra thickness. Mix well with a whisk. Then, add 1 tablespoon of minced ginger and 2 cloves of minced garlic. This blend gives a rich flavor to the tofu. Place the cubed tofu into a large mixing bowl. Pour the marinade over the tofu and toss gently. Make sure all pieces are coated. Let the tofu sit for at least 30 minutes. This allows the tofu to soak up the flavors. After marinating, sprinkle 1 teaspoon of cornstarch over the tofu. Toss gently again to coat each cube. Preheat your air fryer to 380°F (193°C) for about 5 minutes. Once hot, add the marinated tofu cubes in a single layer in the air fryer basket. Cook for 12-15 minutes. Shake the basket halfway through to ensure even cooking. Check if the nuggets are golden brown and crispy. If you want them extra crispy, cook for 2-3 more minutes. To achieve that perfect crispiness, marinating the tofu is key. I recommend marinating for at least 30 minutes. This helps the tofu soak up all the delicious flavors. If you have more time, marinate it longer for even better taste. Adjust the cooking time based on your personal preference. I suggest starting at 12 minutes. If you want it extra crispy, add 2-3 more minutes. Keep an eye on the nuggets. They should turn golden brown and feel firm to the touch. The best temperature for air frying tofu is 380°F (193°C). This setting cooks the tofu evenly while making it crispy. Make sure to preheat your air fryer for about 5 minutes. It helps to get the cooking process started right. Cooking in batches is also a good idea. Avoid overcrowding the basket. This allows hot air to circulate freely, giving you crispier nuggets. If you have a lot of tofu, cook it in two or three rounds. For serving, these tofu nuggets pair well with rice or steamed veggies. You can also serve them with a side of teriyaki sauce for dipping. It adds an extra flavor boost! For presentation, sprinkle chopped green onions and black sesame seeds on top. This makes your dish look vibrant and appetizing. A colorful plate always catches the eye! {{image_2}} You can spice up your teriyaki tofu nuggets. Try adding chili paste for a kick. This gives a nice heat and depth. Also, consider using Asian-inspired seasonings. Five-spice powder or hoisin sauce can add unique flavors. These tweaks make the dish fun and different each time. If you need gluten-free options, swap soy sauce for tamari. Tamari tastes the same and works well. For vegan-friendly sides, pair the nuggets with fresh veggies. You can use avocado or a tasty salad. These options keep your meal healthy and satisfying. You can enjoy these tofu nuggets in many ways. Use them as a salad topping for added crunch. Wrap them in lettuce for a fresh bite. You can also toss them in stir-fry dishes. This adds flavor and protein to your meals. Each option brings a new twist to the classic nuggets. To keep your cooked tofu nuggets fresh, place them in an airtight container. Make sure they cool down before sealing. Store them in the fridge for up to four days. This keeps their taste and texture intact. Avoid stacking them too much; it helps them stay crispier. To reheat your tofu nuggets and keep them crispy, use the air fryer again. Set it to 350°F (175°C) and cook for about 5-7 minutes. This method revives their crunch. You can also use a skillet over medium heat if you prefer. Just add a little oil to prevent sticking. You can freeze these tofu nuggets too! For uncooked nuggets, place them on a baking sheet and freeze until solid. Then, transfer them to a freezer bag for up to three months. When ready to cook, no need to thaw. Just air fry them straight from the freezer. For cooked nuggets, cool them first, then freeze. They can last for about a month. Marinate the tofu for at least 30 minutes. This allows the cubes to soak up the sauce. For even more flavor, you can marinate it longer, up to 8 hours in the fridge. Just remember to keep it covered. I recommend using firm tofu. Soft tofu can break apart easily during cooking. Firm tofu holds its shape well and gives you those perfect crispy nuggets. Yes, preheating is important. It helps the tofu cook evenly and become crispy. Set your air fryer to 380°F (193°C) and preheat it for about 5 minutes. These nuggets pair well with rice or quinoa. You can also serve them with steamed veggies or in a wrap. A side of dipping sauce, like extra teriyaki, adds a nice touch too. Check for a golden brown color. The tofu should be crispy on the outside. If you want more crunch, add an extra 2-3 minutes of cooking time. In this blog post, we explored how to make delicious air fryer teriyaki tofu nuggets. You learned about key ingredients like firm tofu, soy sauce, and maple syrup. We walked through easy steps to prepare, marinate, and cook the tofu nuggets. You picked up tips for crispiness and variations for different flavors. These nuggets are a tasty, healthy choice. Try them as a snack or meal. Enjoy your cooking journey!

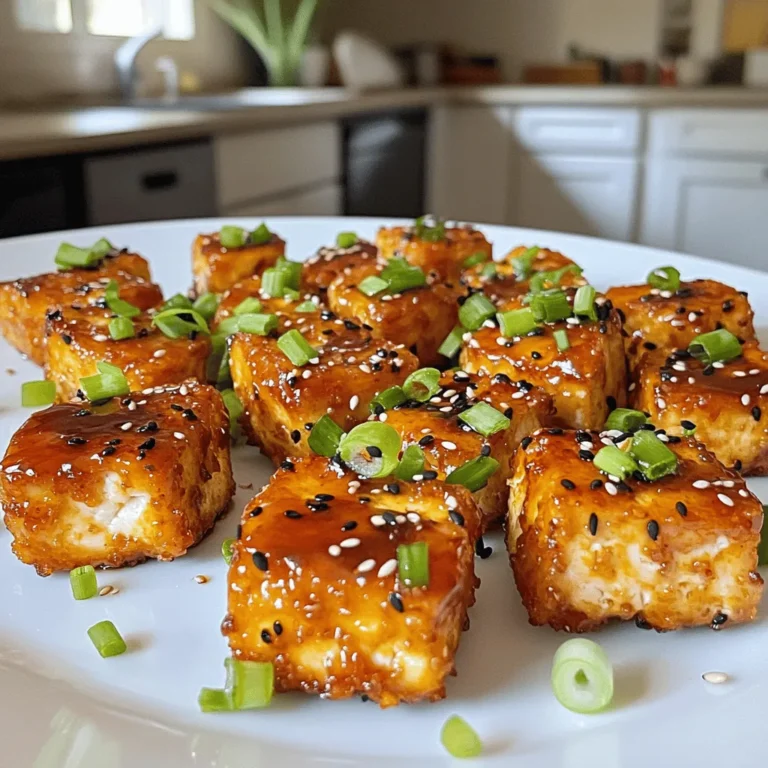
Air Fryer Teriyaki Tofu Nuggets Crispy and Flavorful

PREV 1 … 20 21 22 … 53 NEXT
cozy citrus kitchen

explore

DessertsDinnerAppetizersDrinks

Our Policies

  • Cookie Policy
  • Copyright Policy
  • Disclaimer
  • GDPR Policy
  • Terms Of Use
Back to Top
  • About
  • Contact Us
  • Privacy Policy
© 2025 cozy citrus kitchen