FREE DINNER EBOOK! Get your copy!
  • Cookie Policy
  • GDPR Policy
  • Disclaimer
  • Terms Of Use
  • Visit my other site: Fun Cookie Recipes
cozy citrus kitchen
  • Home
  • Dinner
  • Desserts
  • Drinks
  • Appetizers
  • Contact
  • About
  • Privacy Policy
  • Home
  • Dinner
  • Desserts
  • Drinks
  • Appetizers
  • Contact
  • About
  • Privacy Policy
  • Cookie Policy
  • GDPR Policy
  • Disclaimer
  • Terms Of Use
Visit my other site: Fun Cookie Recipes

HOME / CATEGORIES /

Latest

- 1 cup unsalted butter, melted - 1 ½ cups brown sugar - 1 cup granulated sugar - 1 cup pumpkin puree (canned or fresh) - 2 large eggs - 2 teaspoons vanilla extract - 2 cups all-purpose flour - 1 teaspoon baking powder - 1 teaspoon baking soda - 1 teaspoon pumpkin pie spice - ½ teaspoon salt - 1 cup chocolate chips - ¾ cup salted caramel sauce (store-bought or homemade) - Flaky sea salt for topping These measurements work great for this recipe. If you need a substitute, try these: - Use coconut oil instead of butter for a dairy-free option. - Replace brown sugar with coconut sugar for a lighter flavor. - Use almond flour for a gluten-free version, but adjust the amount. Choose high-quality ingredients for the best taste. Here are some tips: - Use fresh pumpkin puree for rich flavor. If using canned, pick a brand with no additives. - Get good chocolate chips for a melt-in-your-mouth experience. Dark chocolate adds a rich taste. - Select pure vanilla extract over imitation for a deeper, more complex flavor. - Opt for flaky sea salt to finish. It adds a perfect crunch and enhances the sweetness. These tips help you make the best salted caramel pumpkin blondie bars that impress everyone! 1. Preheat the oven to 350°F (175°C). Grease a 9x13 inch baking pan or use parchment paper. 2. In a large bowl, mix melted butter, brown sugar, and granulated sugar. Whisk until smooth. 3. Add pumpkin puree, eggs, and vanilla extract to the sugar mix. Stir until just combined. 4. In a separate bowl, whisk together flour, baking powder, baking soda, pumpkin pie spice, and salt. 5. Gradually add the dry mix to the wet mix. Stir gently until smooth, but do not overmix. 6. Fold in chocolate chips until evenly distributed in the batter. 7. Pour half of the blondie batter into the prepared pan. Spread it evenly across the bottom. 8. Drizzle about ½ cup of salted caramel sauce over the batter. Then place the remaining batter on top. 9. Gently swirl the caramel into the batter using a knife. This adds a lovely pattern. 10. Bake for 25-30 minutes. Check with a toothpick. A few crumbs sticking is fine. 11. Remove from the oven and let cool for about 10 minutes. Drizzle remaining caramel sauce on top. 12. Sprinkle flaky sea salt over the caramel, enhancing the sweet and salty flavor. 13. Let the blondies cool completely in the pan before cutting them into bars. This process creates rich, flavorful blondies that are perfect for any occasion. Enjoy! To bake perfect blondies, always use room-temperature ingredients. This helps to blend better. Make sure your butter is melted but not hot. Hot butter can cook the eggs. Whisk your sugars and butter until smooth. This creates a nice base for your blondies. One common mistake is overmixing the batter. Overmixing can lead to dense and tough blondies. Mix until just combined. It’s okay if there are small lumps. Also, don’t skip the caramel drizzle! It adds rich flavor and makes your blondies shine. The secret to a great texture lies in baking time. Check your blondies at 25 minutes. Use a toothpick to test the center. If it comes out with a few crumbs, they’re done. Let them cool in the pan for at least 10 minutes. This helps them set and makes cutting easier. For a chewy texture, enjoy them warm! {{image_2}} You can change the flavors in your blondie bars. Try adding nuts, like walnuts or pecans. This gives a nice crunch. You can also mix in spices. Cinnamon or nutmeg can add warmth. If you want a sweeter touch, use white chocolate chips instead of dark. The options are endless! If you need gluten-free bars, swap all-purpose flour for a gluten-free blend. This will keep the bars tasty. For vegan options, use flax eggs instead of chicken eggs. Mix one tablespoon of ground flaxseed with three tablespoons of water for each egg. You can also use coconut oil in place of butter. These swaps make the blondies fit many diets without losing flavor. To celebrate the seasons, add fun mix-ins. In fall, try dried cranberries or chopped apples for a fruity twist. For winter holidays, include peppermint chips or orange zest. You can even use crushed candy canes on top. These seasonal touches make your bars festive and fun! To keep your salted caramel pumpkin blondie bars fresh, store them in an airtight container. Place parchment paper between layers to prevent sticking. Make sure they cool completely before you store them. This helps keep the bars moist and tasty. You can freeze these blondies for later. Cut them into bars and wrap each one in plastic wrap. Then, place them in a freezer-safe bag or container. They can last up to three months in the freezer. When you're ready to enjoy, simply thaw them in the fridge overnight. These blondies stay fresh for about a week at room temperature. If you keep them in the fridge, they can last up to two weeks. Always check for any signs of spoilage before eating. The caramel can make them a bit sticky, so using parchment can help. Enjoy these delicious treats! Yes, you can make these blondies a day or two in advance. Just bake them and let them cool completely. Once cool, cut them into bars and store them in an airtight container. This keeps them fresh and tasty. The flavors may deepen overnight, making them even better! To reheat the blondies, place them on a microwave-safe plate. Heat them for about 10 to 15 seconds. This warms them up while keeping them soft. You can also use the oven. Set it to 350°F (175°C) and warm them for about 5 to 10 minutes. Enjoy them warm with a drizzle of caramel! Absolutely! Fresh pumpkin can add a nice touch. Just cook and puree the pumpkin first. Make sure it is smooth and not too watery. This ensures your blondies will have the right texture and flavor. Feel free to use fresh pumpkin whenever you want a special twist! This blog post covered how to make delicious blondies from scratch. We explored the key ingredients and their measurements, ensuring quality at every step. You learned essential baking instructions and best practices. I also shared creative variations to suit your tastes and dietary needs. Finally, I provided tips on storage and answered common questions. Enjoy your baking journey. Use these tips to create perfect blondies every time!

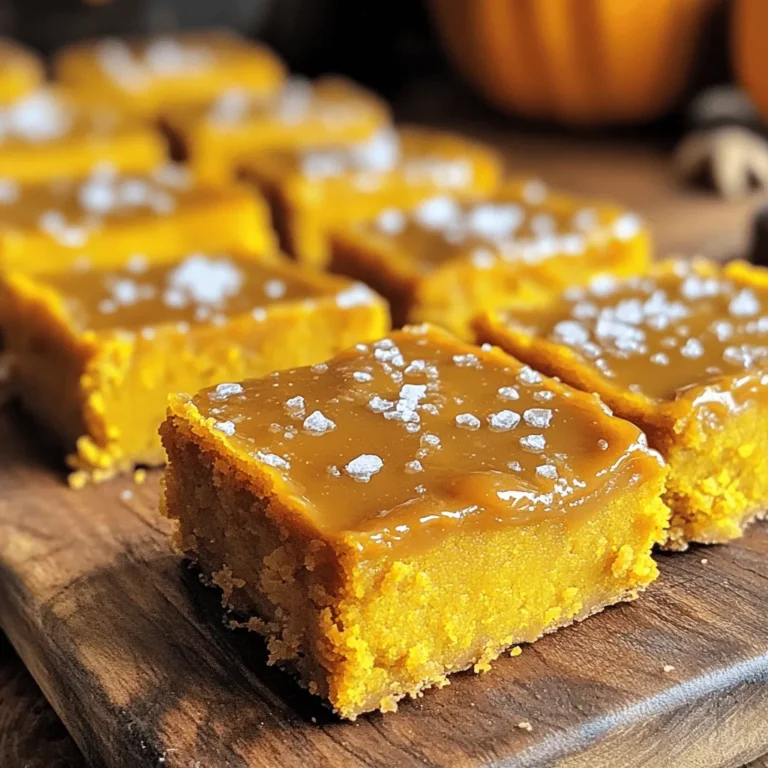
Salted Caramel Pumpkin Blondie Bars Delightful Treat

- 200g noodles (your choice: egg, rice, or soba) - 2 tablespoons sesame oil - 1 tablespoon vegetable oil - 3 garlic cloves, minced - 1 inch ginger, grated - 1 red chili, finely chopped (adjust for spice level) - 2 tablespoons soy sauce - 1 tablespoon rice vinegar - 1 tablespoon chili paste (like sambal oelek) - 2 tablespoons tahini (or peanut butter for a twist) - 1 cup mixed vegetables (bell peppers, broccoli, and carrots work well) - 2 green onions, chopped - Sesame seeds - Fresh cilantro To start, fill a pot with water. Add a pinch of salt and bring it to a boil. This step is key to flavoring the noodles. Once the water is boiling, add your choice of noodles. You can use egg, rice, or soba noodles. Follow the package instructions for cooking time, usually around 5-7 minutes. Check for doneness by tasting a noodle; it should be al dente. After cooking, drain the noodles and rinse them under cold water. This stops the cooking and keeps them firm. Next, let's make the sauce. In a small bowl, whisk together two tablespoons of soy sauce, one tablespoon of rice vinegar, one tablespoon of chili paste, and two tablespoons of tahini or peanut butter. Mix until smooth. The tahini adds creaminess and a nutty taste. If the sauce feels too thick, just add a splash of water to loosen it. This step boosts the flavor and ties the dish together. Now, heat a large skillet or wok over medium-high heat. Pour in one tablespoon of vegetable oil. Once hot, add three minced garlic cloves, one inch of grated ginger, and one finely chopped red chili. Sauté for about one minute until they smell great. Next, add one cup of mixed vegetables like bell peppers, broccoli, or carrots. Stir-fry for 3-4 minutes. You want them tender but still crisp, adding great texture to the dish. Finally, it’s time to mix it all. Add the cooked noodles to the skillet with the vegetables. Pour the sauce over the noodles and toss everything together. Make sure each noodle gets coated in sauce. Drizzle two tablespoons of sesame oil over the dish and toss again. This step adds depth and aroma. Let everything heat for an additional two minutes. Once warmed through, serve topped with chopped green onions and sesame seeds for a nice crunch. Enjoy your Spicy Sesame Chili Noodles! - Avoiding overcooking: Cooking the noodles just right is key. Boil them until they are al dente. This keeps them firm and prevents mushiness. Follow the package instructions but check a minute early. - Rinsing techniques: After draining, rinse the noodles under cold water. This stops the cooking process. It also helps remove excess starch. This step ensures your noodles stay separate and not sticky. - Tips for customizing heat: Start with one red chili for mild heat. If you want more spice, add more chili or extra chili paste. Taste as you go. You can always add more, but you can't take it out. - Flavor balancing with other ingredients: Pair spicy ingredients with sweet or tangy flavors. Add a bit of sugar or extra rice vinegar if the dish feels too hot. This balance can make the meal more enjoyable. - Prepping components in advance: You can prepare the sauce and chop the veggies ahead. Keep them in the fridge until you're ready to cook. This saves time and makes cooking easier on busy days. - Reheating tips: If you make this dish ahead, reheat it in a pan. Add a splash of water or more sesame oil to keep it moist. Stir often over medium heat until warmed through. Enjoy your meal without losing flavor! {{image_2}} You can choose from different types of noodles for your Spicy Sesame Chili Noodles. Egg noodles add a rich taste, while rice noodles are light and chewy. Soba noodles, made from buckwheat, offer a nutty flavor. If you need gluten-free options, go for rice noodles or gluten-free pasta. Each type brings its own unique taste and texture to the dish. Adding protein to your noodles makes them heartier. Tofu works well, especially when you sauté it until golden. Chicken adds a nice, savory touch. Cook it for about 6-8 minutes or until fully cooked. Shrimp is another great choice. It cooks quickly, taking only 2-3 minutes in the pan. Choose the protein that fits your taste and diet. If you want to keep this dish vegetarian or vegan, swap out certain ingredients. Use vegetable broth instead of any meat-based sauces. For a vegan twist, replace tahini with peanut butter or sunflower seed butter. You can also add more vegetables for flavor. Consider mushrooms or spinach for extra depth. These changes keep the dish tasty and satisfying for everyone. To store your Spicy Sesame Chili Noodles, first, let them cool. Place the leftovers in an airtight container. This keeps them fresh and tasty. The noodles will stay good in the fridge for about 3 to 5 days. If you want to enjoy them later, just reheat them in a pan or microwave. Add a splash of water to keep them moist. You can freeze your Spicy Sesame Chili Noodles too. For freezing, separate the noodles and sauce. This helps keep the texture right. Place the cooked noodles and sauce in freezer-safe bags. Remove as much air as you can. They can last in the freezer for up to 3 months. When you're ready to eat, thaw them overnight in the fridge. Reheat in a pan on medium heat. Add a little water if needed. Stir until hot, and enjoy! Yes, you can make this dish without tahini. If you don’t have tahini, peanut butter works well. It adds a nice creaminess. You can also use sunflower seed butter for a nut-free option. To adjust the flavor, you may want to add more soy sauce. This gives a richer taste. You might also try adding a splash of lime juice for brightness. You can use many types of noodles. Egg noodles, rice noodles, and soba noodles are all great choices. Each type brings a unique texture. Cooking times vary. For egg noodles, cook for about 4-6 minutes. Rice noodles usually take 3-5 minutes. Soba noodles need about 6-8 minutes. Always check the package for exact times. Scaling the recipe is easy. If you want to serve four people, double all the ingredients. This keeps the flavors balanced. For example, use 400g of noodles instead of 200g. Adjust the sauce and vegetables in the same way. This way, everyone enjoys the same tasty meal. In this blog post, I shared how to make delicious Spicy Sesame Chili Noodles. We explored essential ingredients like noodles, sauces, and veggies. I gave step-by-step instructions, tips for the perfect texture, and storage advice. You learned about variations with different noodles and proteins. Keep experimenting with flavors and ingredients to find your favorite twist. Cooking should be fun and tasty. With these skills, you’re ready to enjoy your homemade noodles anytime!

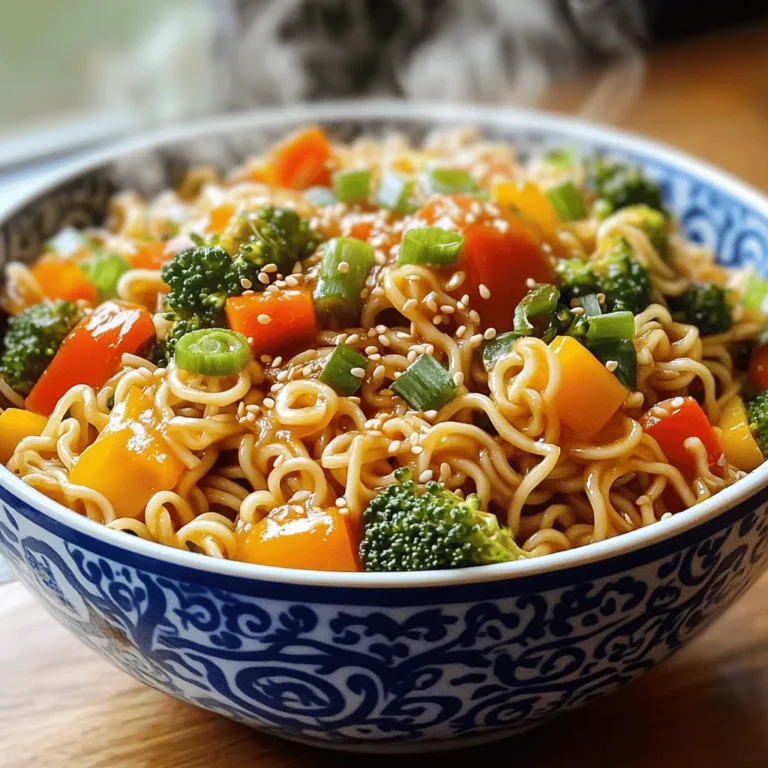
Spicy Sesame Chili Noodles Quick and Flavorful Recipe

- 4 skinless chicken thighs, cut into bite-sized pieces - 2 tablespoons olive oil - 1 medium onion, diced - 3 cloves garlic, minced - 3 carrots, sliced - 2 celery stalks, diced - 3 medium potatoes, cubed - 4 cups chicken broth - 1 cup heavy cream - 1 teaspoon dried thyme - 1 teaspoon dried rosemary - Salt and pepper to taste - Fresh parsley, chopped (for garnish) For this creamy herb chicken stew, I start with chicken thighs. They give the stew a rich flavor. I use skinless thighs for a healthier dish. Olive oil provides a nice base for cooking the onions and garlic. Next, I add vegetables. The onion, garlic, carrots, and celery create a savory base. Potatoes add heartiness. They soak up the broth and cream well. I use fresh herbs like thyme and rosemary for aroma and taste. A pinch of salt and pepper rounds out the flavors. - Additional herbs - Other vegetables - Protein variations To make this stew your own, you can add more herbs. Fresh parsley or basil can brighten the dish. You can also swap in other vegetables, like green beans or bell peppers. If you want more protein, try using chicken breast or turkey. Each option brings a new taste. You can even use beans for a plant-based twist. {{ingredient_image_1}} 1. Start by heating the olive oil in a large pot over medium heat. 2. Add your diced onion to the pot. Sauté it for about 3-4 minutes until it looks clear. 3. Next, toss in the minced garlic, sliced carrots, and diced celery. Cook these veggies for 5 minutes. Stir them often until they begin to soften. 4. Now, raise the heat to medium-high. Add the chicken pieces to the pot. Season them with salt, pepper, thyme, and rosemary. 5. Cook the chicken for about 5-7 minutes until it turns golden brown. 1. Add the cubed potatoes to the pot. Pour in the chicken broth next. 2. Bring everything to a boil. Once boiling, lower the heat and cover the pot. 3. Let it simmer for about 20 minutes. The potatoes should be soft, and the chicken should be fully cooked. 4. Now, stir in the heavy cream. Let the stew simmer for another 5-10 minutes. This will help it thicken a bit. 5. Taste the stew. Adjust the seasoning with salt and pepper if you need to. 1. Remove the pot from heat and let it sit for a few minutes. 2. Serve the stew in bowls. 3. Top it off with fresh chopped parsley for a nice touch. Enjoy your creamy herb chicken stew! To ensure perfect chicken texture, cut the chicken thighs into small, even pieces. This helps them cook through without drying out. Always brown the chicken well before adding broth. This step builds rich flavor. I recommend using a medium-high heat for this part. The goal is to get a nice sear on each piece. Enhancing flavor with herbs is simple. Use dried thyme and rosemary for a great start. These herbs add depth to your stew. Fresh herbs can also elevate the dish. Add parsley just before serving for a fresh touch. One common mistake is overcooking the chicken. When the chicken cooks too long, it becomes rubbery and dry. Keep an eye on the cooking time and check for doneness. Insufficient seasoning can leave your stew bland. Always taste as you go. Add salt and pepper to enhance the dish's flavor. Remember, the broth can vary in saltiness, so adjust your seasoning accordingly. Pro Tips Season the Chicken: To enhance the flavor, season the chicken with salt and pepper before cooking to allow the spices to penetrate the meat. Use Fresh Herbs: If possible, substitute dried herbs with fresh ones for a more vibrant flavor profile in your stew. Thickening the Stew: If you prefer a thicker stew, mix a tablespoon of cornstarch with cold water and stir it into the stew during the last few minutes of cooking. Rest Before Serving: Allow the stew to rest for a few minutes after cooking; this helps the flavors meld and improves the overall taste. {{image_2}} You can change the protein in this stew. Try using turkey or even tofu. These swaps still give you a hearty meal. Each protein brings its own taste and texture. For vegetables, feel free to mix things up. You could add green beans or peas for extra color. Sweet potatoes work well too. They add a sweet touch and a creamy texture. Want to spice things up? Add paprika for a smoky flavor. A pinch of cayenne pepper can give a kick. You can also try curry powder for a unique twist. Changing the broth makes a big difference. Use vegetable broth for a lighter taste. Beef broth adds depth and richness. Each option helps you create a new flavor profile in your stew. To store leftover creamy herb chicken stew, let it cool first. Use airtight containers for best results. Place the stew in the container, leaving some space at the top. Seal it tightly to keep out air. Store it in the fridge for up to three days. When ready to eat, reheat it on the stove over medium heat. Stir it often to heat evenly. If you want to keep the stew longer, freezing is a great option. First, let the stew cool completely. Pour it into freezer-safe containers or bags. Leave some space at the top to allow for expansion. Label the containers with the date. You can freeze it for up to three months. When you want to enjoy it, thaw it overnight in the fridge. Reheat on the stove when ready to serve. You can use milk and butter as a substitute. Mix ¾ cup of milk with ¼ cup of melted butter. This blend gives you a creamy texture similar to heavy cream. You can also try using coconut milk for a dairy-free option. It adds a unique flavor too. Yes, you can use bone-in chicken. It will add more flavor to the stew. Just remember to cook it longer. Bone-in chicken takes more time to get tender. Make sure to remove the bones before serving. This stew can last about 3 to 4 days in the fridge. Store it in an airtight container. Make sure it cools down before putting it in the fridge. If you want to keep it longer, consider freezing it. This blog post covered the essentials for making creamy herb chicken stew. We explored key ingredients like chicken thighs, oils, and veggies. You learned easy steps to prepare, cook, and garnish the stew. I shared tips for the best texture and flavor, plus common mistakes to avoid. Remember, you can vary ingredients for unique twists. With proper storage info, you can enjoy leftovers too. Now, get cooking and enjoy this tasty dish with your loved ones!

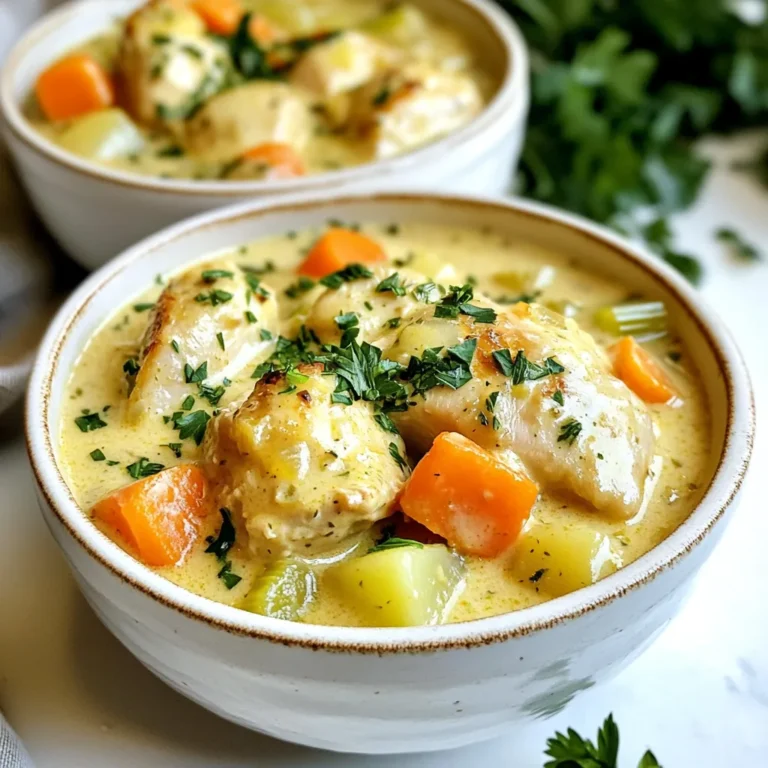
Creamy Herb Chicken Stew Savory and Hearty Dish

White chocolate chips are the star of this recipe. You need 2 cups. They melt down into a creamy, sweet base. Make sure to choose good quality chips for the best flavor. You will need 1 cup of unsalted, roasted pistachios. Chop them roughly before adding them to the mix. The nutty taste and crunchy texture add a nice contrast to the smooth chocolate. I love using ½ cup of dried cranberries or cherries. These sweet and tangy fruits add a burst of flavor. You can also try other dried fruits like apricots or raisins if you want. Add 1 teaspoon of vanilla extract. This simple ingredient boosts the overall taste. For an extra touch, sprinkle some sea salt on top. It creates a great balance with the sweetness of the chocolate. First, grab a baking sheet. Line it with parchment paper. Make sure to let some paper hang over the edges. This helps you lift the bark out later. A flat surface works best for spreading the chocolate. Now, take a microwave-safe bowl. Add the white chocolate chips. Heat them in the microwave for 30 seconds. Stir the chips and repeat until smooth. This usually takes about 1 to 2 minutes. Stir well after each interval to avoid burning. Once the chocolate is melted, stir in the vanilla extract. This adds a nice flavor. Next, fold in the pistachios and dried cranberries or cherries. Make sure they mix well into the chocolate. You want the flavors to spread evenly. Pour the chocolate mixture onto the prepared baking sheet. Use a spatula to spread it out. Aim for an even layer about ¼ inch thick. This will ensure each piece has the same great taste. Now, it’s time to chill. Place the baking sheet in the refrigerator. Let it sit for about 1 to 2 hours. You want the bark to be firm before cutting. When the bark is set, lift it out using the parchment paper. Break it into pieces or cut it into squares. Each piece should be a treat. Enjoy your delicious no bake pistachio white chocolate bark! To melt white chocolate, use a microwave-safe bowl. Heat the chocolate chips in 30-second bursts. Stir after each interval until you achieve a smooth consistency. This method prevents the chocolate from burning. If you notice lumps, keep stirring. The heat will help melt them. After melting, mix in the vanilla extract. Then, fold in the chopped pistachios and dried fruit. Do this gently to avoid breaking the nuts. Make sure each piece gets some nuts and fruit. This way, every bite bursts with flavor. Spread the chocolate mixture evenly on your lined baking sheet. Aim for about ¼ inch thick. If it's too thick, it won't set well. After spreading, sprinkle sea salt on top. This adds a nice contrast to the sweet chocolate. Chill the bark until firm, which usually takes 1-2 hours. This step is key for the right texture. {{image_2}} You can swap pistachios for other nuts. Almonds, walnuts, or cashews work great. Each nut gives a different taste and crunch. Dried fruits can also change the flavor. Try dried apricots or mangoes for a tropical twist. The key is to keep the mix roughly chopped for easy blending. Add fun flavors to your bark! A few drops of mint extract can give it a fresh taste. If you love almond, use almond extract instead of vanilla. These small changes make a big impact. You can even add spices like cinnamon for warmth. Experiment with different flavors until you find your favorite! While this recipe uses white chocolate, dark chocolate is a fantastic choice too. Dark chocolate adds a rich, bold flavor. It also pairs well with salty nuts. If you decide to switch, adjust the sweetness. Dark chocolate is less sweet, so you may want to add more dried fruit. Both options yield a tasty treat! To keep your no bake pistachio white chocolate bark fresh, store it in an airtight container. Use wax paper or parchment paper between layers to prevent sticking. Place the container in a cool, dry spot away from direct sunlight. This helps preserve the bark's taste and texture. When stored correctly, the bark lasts about two weeks. It's best served at room temperature for a soft bite. You can enjoy it as a snack, dessert, or gift. Cut it into smaller pieces for easy sharing. Guests will love this sweet treat! If you want to save some for later, freezing works well. Wrap the bark tightly in plastic wrap, then place it in a freezer bag. Label it with the date. When you're ready to eat it, thaw the bark in the fridge overnight. This keeps the flavors fresh and tasty. Yes, you can use different chocolate types. Dark chocolate or milk chocolate works well. Each type brings a unique taste. Dark chocolate adds richness, while milk chocolate offers sweetness. Just remember, the melting process may differ slightly. The bark lasts up to two weeks when stored properly. Keep it in an airtight container. Store it in a cool, dry place. If you live in a warm area, the fridge is best. This keeps it fresh and tasty. Yes, you can make the recipe vegan-friendly. Use vegan white chocolate chips instead of regular ones. Check the label to ensure they are dairy-free. You may also swap the vanilla extract for a plant-based flavor. If you don’t have pistachios, try almonds or walnuts. Both nuts add a nice crunch. You could also use sunflower seeds for a nut-free option. Each nut will change the flavor slightly but still taste great. Absolutely! You can decorate the bark for any holiday. Add seasonal sprinkles or edible glitter on top. You can also use colored chocolate drizzle to make it festive. This makes your bark look extra special for events. This blog post guided you through making delicious No Bake Pistachio White Chocolate Bark. We covered key ingredients like white chocolate, pistachios, and dried fruit options. I shared step-by-step instructions to help you create this treat. You'll find useful tips to ensure the perfect texture and taste. We also explored variations and storage info to keep your bark fresh. Try it out and have fun tweaking the recipe to your taste! Enjoy your tasty creation!

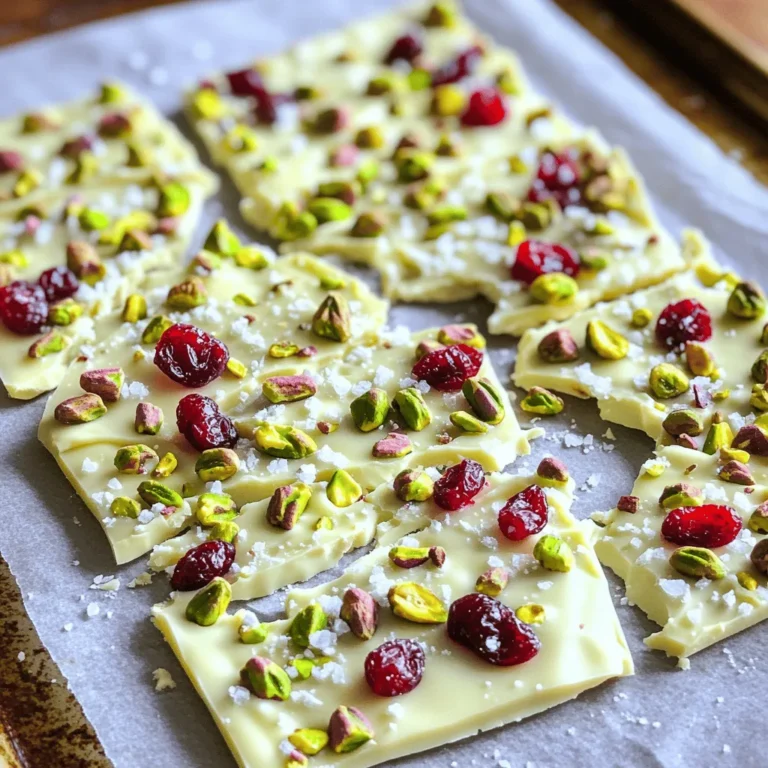
No Bake Pistachio White Chocolate Bark Delight

To make this delightful dip, you need: - 1 cup plain Greek yogurt - 2 tablespoons chocolate protein powder - 2 tablespoons honey (or maple syrup for a vegan option) - 1 teaspoon vanilla extract - 1/4 cup mini marshmallows - 1/4 cup crushed graham crackers - 2 tablespoons chocolate chips (dark or semi-sweet) - Optional: Fresh fruit (like strawberries or banana slices) for dipping Each of these ingredients plays a key role in flavor and texture. If you want to switch things up, here are some options: - Greek yogurt: Use regular yogurt or dairy-free yogurt. - Chocolate protein powder: Try vanilla protein powder for a lighter taste. - Honey: Use agave syrup or a sugar substitute for a lower-calorie option. - Mini marshmallows: Swap for large marshmallows, cut into small bits. - Graham crackers: Use crushed cookies or gluten-free crackers. - Chocolate chips: Use white chocolate or skip them for fewer calories. - Fresh fruit: Use any fruit you love, like apples or raspberries. These alternatives can help customize the dip to your taste. Let’s look at what each main ingredient brings: - Greek yogurt: High in protein, great for muscle health. - Chocolate protein powder: Adds protein for muscle growth and recovery. - Honey: Natural sweetener with antioxidants for better health. - Mini marshmallows: Fun treat, but use in moderation for less sugar. - Graham crackers: Provide carbs for energy and fiber for digestion. - Chocolate chips: Offer small amounts of iron and magnesium. - Fresh fruit: Packed with vitamins, minerals, and fiber for overall wellness. These ingredients not only taste great but also bring health benefits to your snack. To make Protein S’mores Greek Yogurt Dip, start with a medium bowl. Combine 1 cup of plain Greek yogurt, 2 tablespoons of chocolate protein powder, 2 tablespoons of honey, and 1 teaspoon of vanilla extract. Whisk these until smooth. Next, gently fold in 1/4 cup of mini marshmallows and 1/4 cup of crushed graham crackers. Reserve some marshmallows and crumbs for later. Once mixed, transfer the dip to a serving bowl. Smooth the top with a spatula. Finally, sprinkle the reserved graham cracker crumbs, mini marshmallows, and 2 tablespoons of chocolate chips on top. To get the best texture, use full-fat Greek yogurt. It makes the dip creamy and rich. Whisk the yogurt mixture well to avoid lumps. When folding in the marshmallows and graham crackers, use a gentle hand. This keeps the dip light and fluffy. If you want a thicker dip, add a bit more protein powder. If it feels too thick, a splash of milk can help. Serve the dip in a fun bowl to make it eye-catching. Lay out fresh fruit slices, like strawberries or bananas, for dipping. You can also add graham crackers or pretzel sticks for extra crunch. Arrange everything nicely on a platter. This makes it inviting and fun. Enjoy it as a sweet snack or dessert with family and friends. When you mix the dip, use a medium bowl. Start with the Greek yogurt and protein powder. Whisk them together until smooth. This step helps blend the flavors well. Add honey and vanilla extract next. Continue whisking until everything is mixed. For the marshmallows and graham crackers, fold them in slowly. Use a spatula to keep the mix light. This way, you keep the air in the dip. It makes the dip fluffy and fun. Reserve some marshmallows and graham crackers for topping. This adds extra texture and looks great! You can change the flavor of the dip easily. Swap the chocolate protein powder for vanilla for a lighter taste. Try adding peanut butter for a nutty twist. You can also mix in some cinnamon. It gives a warm flavor that pairs well with s’mores. If you want a fruity flavor, add some mashed banana or pureed strawberries. You can even mix in a few chocolate chips for added sweetness. Each variation brings a new twist to this fun dip. To make this dip vegan, use plant-based yogurt. Almond or coconut yogurt works great. For sweetening, replace honey with maple syrup. This keeps the dip sweet and tasty. Ensure your protein powder is also vegan. Many brands offer plant-based options. Use vegan mini marshmallows and dark chocolate chips to keep it dairy-free. This way, everyone can enjoy this delightful dip! {{image_2}} You can make this dip your own with fun twists. Try adding peanut butter for a nutty flavor. You can mix in some shredded coconut for a tropical vibe. If you like crunch, toss in some chopped nuts. Each addition changes the taste and makes it exciting. Seasonal fruits can brighten your dip. In summer, add fresh strawberries or blueberries. In fall, try diced apples or a sprinkle of cinnamon. You can even drizzle some maple syrup in winter for a warm touch. These seasonal additions make the dip perfect for any time of year. If you have food restrictions, there are easy swaps. Use dairy-free yogurt for a vegan option. Swap honey for maple syrup to keep it plant-based. If you can’t have gluten, use gluten-free graham crackers. These simple changes let anyone enjoy this tasty treat. To keep your Protein S’mores Greek Yogurt Dip fresh, store it in an airtight container. This prevents air from getting in and keeps the dip creamy. Make sure the lid is on tight. If you made a large batch, divide it into smaller containers. This way, you can enjoy it without exposing the whole dip to air each time. This dip stays good in the fridge for about 3 to 5 days. After that, it may lose its taste and texture. Check for any changes in smell or color. If it seems off, it’s best to toss it. Always trust your senses when food is involved! You can freeze the dip if you have leftovers. Use a freezer-safe container and leave some space at the top. The dip can last up to 2 months in the freezer. When you are ready to eat it, move it to the fridge to thaw overnight. Avoid reheating in the microwave, as it can change the dip’s texture. Just enjoy it cold or let it sit at room temperature for a bit before serving. Yes, you can. If you want a creamier dip, use full-fat yogurt. For a lighter dip, use low-fat yogurt. Soy or almond yogurt works if you need a dairy-free option. Just remember that the taste may change slightly. Greek yogurt gives a thicker texture and more protein. You have many choices! Try fresh fruit like strawberries or banana slices. Graham crackers are a classic choice. Pretzel sticks add a nice crunch. You can also use rice cakes or apple slices. Each option makes the dip even more fun to enjoy! To boost protein, add more protein powder. You can mix in a scoop or two for extra punch. Another option is to include nut butter, like almond or peanut butter. They not only add protein but also creaminess. You could sprinkle some hemp seeds on top for even more protein. You learned how to make a tasty Protein S'mores Greek Yogurt Dip. We covered the key ingredients, their health benefits, and fun ways to mix things up. I shared step-by-step instructions, best practices, and tips for storage and serving. Try different flavors and use substitutes as needed. This dip can fit many diets and tastes. Enjoy sharing your healthy dip with friends and family! Keep experimenting to find your favorite mix.

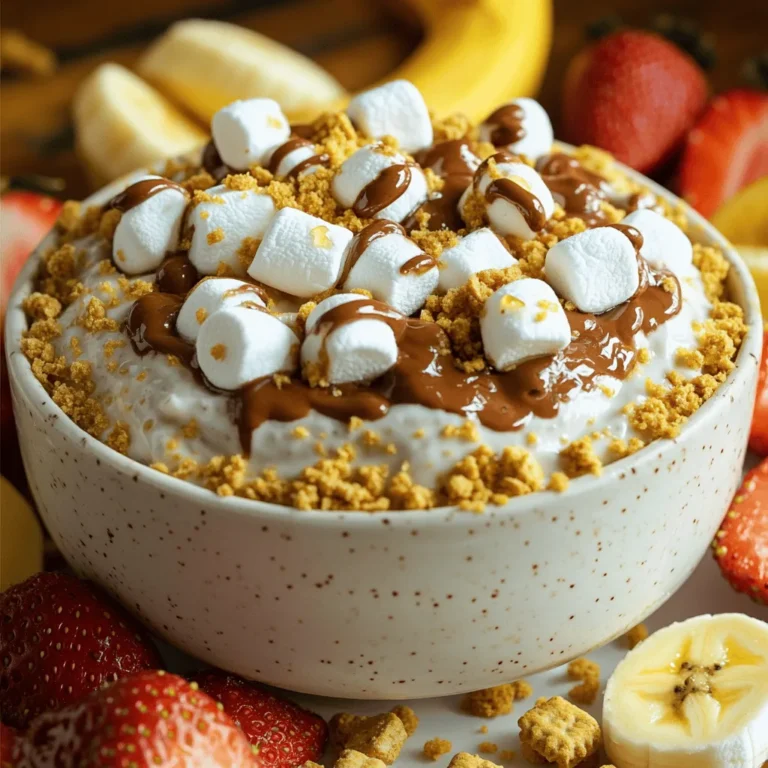
Protein S’mores Greek Yogurt Dip Delightful Treat

- 1 cup orzo pasta - 2 chicken breasts, diced - 2 tablespoons olive oil - 4 cloves garlic, minced - 1 cup chicken broth - 1 cup heavy cream - 1 cup spinach, chopped - 1 lemon, zested and juiced - 1/2 cup grated Parmesan cheese - Salt and pepper to taste - Fresh parsley, chopped (for garnish) To make this dish, start with one cup of orzo pasta. You will need two diced chicken breasts. Use two tablespoons of olive oil to cook the chicken. For flavor, you need four cloves of minced garlic. Add one cup of chicken broth for moisture. For creaminess, use one cup of heavy cream. One cup of chopped spinach adds color and taste. Add zest and juice from one lemon for brightness. Finally, mix in half a cup of grated Parmesan cheese. Season with salt and pepper to your liking. Use fresh parsley as a garnish before serving. You can swap orzo pasta with another small pasta like ditalini or couscous. If you prefer, use turkey or tofu instead of chicken. For a lighter option, switch heavy cream with half-and-half or coconut cream. You can replace spinach with kale or arugula for a new twist. If you don't have Parmesan cheese, try pecorino or nutritional yeast for a vegan option. To start, bring a large pot of salted water to a boil. Add 1 cup of orzo pasta to the pot. Cook the orzo according to the package directions until it is al dente. This usually takes about 8-10 minutes. Once done, drain the orzo and set it aside. It’s great to keep it separate so it doesn’t stick together. In the same pot, heat 2 tablespoons of olive oil over medium heat. Add 2 diced chicken breasts to the pot. Season with salt and pepper to taste. Cook the chicken for about 5-7 minutes. Stir it often until it turns golden brown and is fully cooked. Once ready, remove the chicken from the pot and set it aside. This step adds flavor to your dish. Next, add 4 minced garlic cloves to the pot. Sauté the garlic for about 1 minute until you smell its lovely aroma. Pour in 1 cup of chicken broth and bring it to a simmer. Lower the heat and stir in 1 cup of heavy cream. Add the zest and juice of 1 lemon to the mix. Let this cook for 2-3 minutes. Now, add the cooked orzo, chicken, and 1 cup of chopped spinach to the pot. Mix everything well until the spinach wilts and the sauce coats the pasta. Finally, stir in 1/2 cup of grated Parmesan cheese. Adjust the seasoning with salt and pepper as needed. Cook for an extra 2-3 minutes until heated through. Enjoy your creamy lemon garlic orzo with chicken! To enhance the taste, always use fresh garlic. It gives a bright kick. Zest the lemon before juicing it. The zest adds a lovely aroma. Feel free to add more lemon juice if you like it tangy. Season the chicken well with salt and pepper. This simple step makes a big difference. You can also add fresh herbs like thyme or basil for extra flavor. The secret to creaminess lies in the heavy cream and cheese. Use full-fat heavy cream for the best texture. Stir the cream slowly into the pot to mix well. Add the Parmesan cheese at the end. It melts perfectly, creating a rich sauce. If you want it even creamier, add a little more cream. To save time, prep your ingredients before you start cooking. Chop the chicken and garlic in advance. Use pre-cooked chicken to cut down on cooking time. You can also cook the orzo while prepping the sauce. This way, everything comes together quickly. If you're in a real hurry, consider using frozen spinach. It cooks fast and is still tasty. {{image_2}} You can easily make this dish meat-free. Swap the chicken for chickpeas. They add protein and texture. You can also use mushrooms for a rich flavor. Sauté them with garlic for extra taste. The creamy sauce still shines with these swaps. Feel free to add fresh, seasonal veggies. Asparagus and peas work great in spring. In summer, try zucchini or bell peppers. Just toss them in with the spinach. This keeps the dish colorful and healthy. Want a kick? Add red pepper flakes to the sauce. Start with a pinch and taste as you go. You can also stir in diced jalapeños. They add heat and fun to the dish. Enjoy the zesty twist while keeping the creamy goodness. To keep your creamy lemon garlic orzo with chicken fresh, let it cool first. Use an airtight container for storage. This helps prevent moisture loss and keeps flavors intact. Store it in the fridge if you plan to eat it within three days. For longer storage, freezing is a great option. When you're ready to enjoy leftovers, reheat gently. Place the orzo in a pot over low heat. Add a splash of chicken broth or water to help it warm up. Stir often to prevent sticking. You can also use the microwave. Heat in short bursts, stirring in between. If you want to freeze the orzo, do it within two days of cooking. Portion it into smaller containers for easy meals later. Make sure to leave some space at the top of the container. This allows for expansion as it freezes. To enjoy, thaw in the fridge overnight before reheating. Yes, you can use different pasta. Penne or fusilli work well. Just adjust the cooking time. Follow the package directions for timing. Remember, orzo has a unique shape and texture. It holds sauce nicely, so other shapes may change the dish's feel. But don't worry! You will still enjoy great flavors. You can use half-and-half or whole milk. For a lighter option, try Greek yogurt. Cream cheese is another good choice, but mix it with milk for smoothness. Each choice may slightly change the dish’s creaminess. Experiment to find what you love best! To make this dish gluten-free, use gluten-free orzo. Many brands offer great options. Check the package for cooking times, as they may differ. Ensure all other ingredients are gluten-free too. This way, you can enjoy creamy lemon garlic orzo without worry! This blog post shared easy steps to make a tasty dish using orzo and chicken. We covered ingredients, how to cook them, and fun variations. You can easily swap ingredients based on what you have. Remember, you can store leftovers safely and enjoy them later. With these tips, you’ll impress everyone with your cooking skills. Try making this dish and adapt it to your taste! Happy cooking!

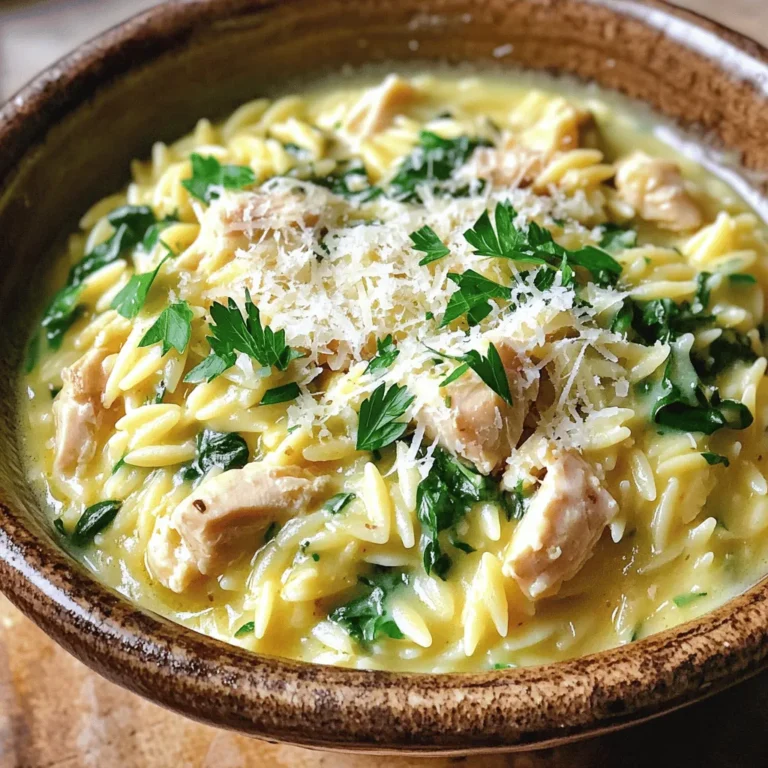
Creamy Lemon Garlic Orzo with Chicken Delight

- 2 medium-sized eggplants, sliced into ½ inch rounds - 3 tablespoons white miso paste - 2 tablespoons maple syrup - 1 tablespoon soy sauce - 1 tablespoon sesame oil - 1 teaspoon rice vinegar - 1 teaspoon grated ginger - 1 teaspoon minced garlic - 1 tablespoon sesame seeds (for garnish) - 2 green onions, sliced (for garnish) - Prep time: 10 minutes - Total time: 20 minutes - Servings: 4 The ingredients for Air Fryer Miso Glazed Eggplant are simple yet flavorful. You need two medium-sized eggplants. These should be sliced into rounds about half an inch thick. The miso glaze is key. You mix three tablespoons of white miso paste with two tablespoons of maple syrup. This gives a sweet touch. Then, add one tablespoon of soy sauce and one tablespoon of sesame oil for depth. Rice vinegar adds a tangy kick. Grated ginger and minced garlic bring warmth and zest. Finally, you will garnish the dish with one tablespoon of sesame seeds and two green onions. This recipe is quick. It takes just ten minutes to prep and twenty minutes total. You can serve four people, making it perfect for a small gathering or family meal. To start, you need to make the miso glaze. Grab a small bowl. Add three tablespoons of white miso paste. Next, pour in two tablespoons of maple syrup. Then, add one tablespoon of soy sauce, one tablespoon of sesame oil, one teaspoon of rice vinegar, one teaspoon of grated ginger, and one teaspoon of minced garlic. Whisk these ingredients together until smooth. Make sure there are no lumps. A smooth glaze coats the eggplant well. Now, move on to the eggplant. Take two medium-sized eggplants. Slice them into rounds, about half an inch thick. Make sure the slices are even. This helps them cook at the same rate. Place the sliced eggplant in a large bowl. Pour the miso glaze over the eggplant. Mix gently until each slice is well-coated. You want the glaze to cling to each piece. Next, preheat your air fryer to 375°F (190°C). This step is important for even cooking. Once it’s ready, start placing the glazed eggplant slices in a single layer in the basket. Do not overcrowd the basket. You may need to cook in batches. Air fry the eggplant slices for 10 to 12 minutes. Flip them halfway through. This helps ensure they cook evenly and get nice and caramelized. When they are tender and golden, they are done. After cooking, take them out of the air fryer. Sprinkle with sesame seeds and sliced green onions for garnish. This adds a nice touch and extra flavor. To get that perfect caramelization on your eggplant, cook at 375°F (190°C). This temperature lets the glaze melt and create a nice crust. Cook the eggplant for 10-12 minutes. Flip the slices halfway for even cooking. If your air fryer is small, work in batches. This way, each piece can fry without crowding. You can add more flavor with some extra spices. Try a pinch of chili flakes for heat or a splash of lime juice for tang. If you want a deeper taste, marinate the eggplant slices for 30 minutes before cooking. This lets the flavors soak in, making each bite even better. You can also swap out the maple syrup for honey or agave for a different sweetness. {{image_2}} You can change the flavor of your Air Fryer Miso Glazed Eggplant by using different types of miso. White miso gives a sweet taste. You can try red miso for a bolder flavor. Yellow miso is a great middle ground. Each type adds its own twist to the dish. If you want to swap out maple syrup, you have options. Honey or agave syrup both work well. You can use brown sugar too. Just mix it well with the other glaze ingredients. Each sweetener will change the taste slightly, so feel free to experiment. For those needing gluten-free options, use tamari instead of soy sauce. Tamari has a similar taste and works great in this recipe. Make sure your miso paste is also gluten-free. If you want vegan substitutions, stick with the original recipe. It is already vegan-friendly. Just ensure your miso and maple syrup are pure and without animal products. Enjoy a tasty dish that fits your dietary needs! To keep your Air Fryer Miso Glazed Eggplant fresh, cool it first. Place the eggplant in an airtight container. Store it in the fridge for up to four days. The eggplant may lose some crispness. To help maintain texture, layer parchment paper between slices. This will reduce moisture buildup. When ready to eat, you can reheat the eggplant. The best way is to use your air fryer. Preheat it to 350°F (175°C). Place the eggplant in the basket for about five minutes. This method keeps the eggplant crispy. You can also use a microwave if you’re short on time. Just heat it for 30 seconds. Be careful not to overheat, as this can make the eggplant soggy. Yes, you can use other vegetables! Try zucchini, bell peppers, or mushrooms. Each will bring a unique taste. Just slice them similarly to the eggplant. You may need to adjust cooking times slightly. Check for tenderness and caramelization. You will know the eggplant is cooked when it is soft and golden. The edges should look crispy and caramelized. A fork should easily pierce through the slices. If it’s still firm, just air fry it a bit longer. This dish pairs well with rice or quinoa. You can also serve it with a fresh salad. It makes a great side for grilled meats or tofu. Try adding it to a grain bowl for a tasty meal! This blog post covered a simple and tasty recipe for Air Fryer Miso Glazed Eggplant. You learned the key ingredients, preparation time, and step-by-step instructions. I shared tips to get caramelized eggplant and how to tweak the flavors. We also explored variations and storage info to keep your dish fresh. Enjoy experimenting with this recipe in your kitchen. It’s a quick way to make a delicious dish that will impress everyone at the table. Happy cooking!

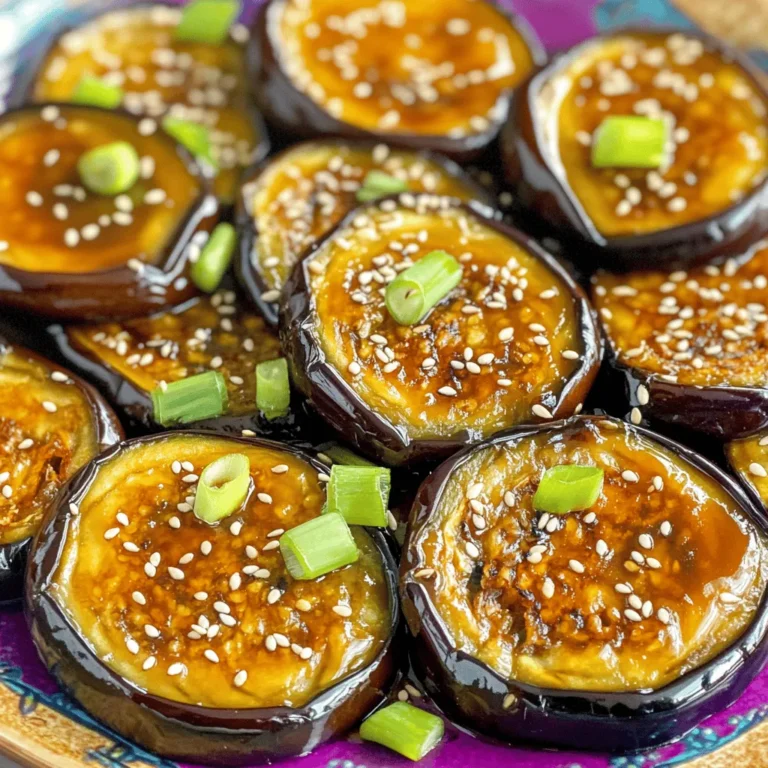
Air Fryer Miso Glazed Eggplant Tasty and Easy Recipe

- 1 loaf of brioche or challah bread, cut into 1-inch cubes - 4 large eggs - 2 cups milk - 1 cup heavy cream - 1/2 cup brown sugar - 1 teaspoon vanilla extract - 1 teaspoon ground cinnamon - 1/4 teaspoon salt These main ingredients create the base of the casserole. Brioche or challah bread works best due to its soft texture. The eggs, milk, and heavy cream form a rich custard. Brown sugar adds sweetness, while vanilla extract gives a warm flavor. Ground cinnamon and salt enhance the taste, creating a comforting dish that everyone loves. - 4 ripe bananas, sliced - 1/2 cup chopped pecans - 1 cup maple syrup (for serving) - Whipped cream (for topping, optional) Toppings make this dish special. Sliced bananas add freshness and natural sweetness. Chopped pecans give a nice crunch. Maple syrup offers a classic touch. You can also add whipped cream for extra creaminess. These toppings enhance the flavors and presentation, making your dish look and taste amazing. Preheating the Oven Start by preheating your oven to 350°F (175°C). This step is key for even baking. A hot oven helps the casserole rise and turn golden. Mixing the Egg Mixture In a large bowl, whisk together the eggs, milk, heavy cream, brown sugar, vanilla extract, ground cinnamon, and salt. Mix until everything blends well. This mixture will soak into the bread, creating a rich base. Layering the Bread Cut the brioche or challah bread into 1-inch cubes. Spread the bread evenly in a greased 9x13-inch baking dish. Pour the egg mixture over the bread. Press down gently to ensure each piece gets soaked. Adding Bananas and Pecans Slice the ripe bananas and sprinkle them over the soaked bread. Next, add the chopped pecans on top. These add a nice crunch and flavor. Refrigeration Time Cover the dish with plastic wrap. Refrigerate it for at least 2 hours or overnight. This allows the bread to soak up the mixture fully. Ready to Bake Before baking, let the dish sit at room temperature for about 30 minutes. This helps it bake evenly. Setting the Oven Temperature Place the dish in your preheated oven. Bake for 45-50 minutes. Keep an eye on it to avoid burning. Checking for Doneness The casserole is done when the top is golden brown and the custard is set. Insert a knife in the center; it should come out clean. Cooling and Serving Let the casserole cool slightly before cutting it into squares. Serve warm, drizzled with maple syrup. If you like, add whipped cream on top for extra delight. - Ensuring Even Soaking Make sure each bread piece is soaked. This helps all the flavors blend. Pour the egg mixture slowly. Press down gently. This way, no dry spots remain. - Choosing the Right Bread I love using brioche or challah. These breads soak well and add sweetness. They also give a soft texture. Avoid bread that is too dense. It won’t absorb the mix properly. - Timing and Organization Plan ahead! Refrigerate the casserole overnight. This allows the bread to soak fully. It also saves time in the morning. Just bake and enjoy. - Plating and Presentation Tips Serve this dish on a large platter. Cut it into squares for easy serving. Add extra banana slices on top. This adds color and looks great. - Garnishing Ideas with Cinnamon A sprinkle of ground cinnamon adds warmth. It also enhances the flavor. Use a light hand to avoid overpowering the dish. - How to Serve with Syrup Drizzle warm maple syrup over each piece. This adds sweetness and moisture. For a special touch, serve whipped cream on the side. It makes each bite a treat! {{image_2}} You can change up the flavors in your Bananas Foster French Toast Casserole easily. Here are some ideas: - Adding Nuts and Fruits: You can add nuts like walnuts or almonds for crunch. Fruits such as berries or apples can add a fresh twist. Just sprinkle them on top or mix them into the bread layer. - Incorporating Nutmeg or Other Spices: Nutmeg gives a warm flavor that pairs well with bananas. You can also try allspice or cardamom for a unique taste. Just a pinch can make a big difference! - Using Different Breads: While brioche or challah are great, you can use sourdough or even whole wheat bread. Each type of bread brings its own taste and texture. If you have special diets, you can still enjoy this casserole. Here are some options: - Gluten-Free Options: Use gluten-free bread to make this dish safe for those with gluten allergies. Many stores sell tasty gluten-free bread that works well here. - Vegan Adaptations: Replace eggs with a mix of flaxseed and water. Use almond or oat milk instead of regular milk. For cream, try coconut cream. This makes it vegan-friendly! - Lower Sugar Substitutes: If you want less sugar, try using a sugar substitute. You can also reduce the brown sugar and add more ripe bananas. The bananas will add natural sweetness. Refrigeration Guidelines After enjoying your Bananas Foster French Toast Casserole, store leftovers in the fridge. Place it in an airtight container. It will stay fresh for about 3 to 5 days. If you want to save some for later, cut it into squares for easy access. Freezing Instructions You can freeze this casserole too. Wrap individual pieces in plastic wrap, then put them in a freezer bag. It can last up to 2 months in the freezer. When you’re ready to eat, just thaw it overnight in the fridge before reheating. Best Methods for Reheating To reheat, the oven works best. Preheat it to 350°F (175°C). Place the casserole in a baking dish and cover it with foil. Bake for about 20 minutes or until warmed through. You can also microwave individual pieces for quick heat-ups, but the oven keeps the texture nice. Ensuring Freshness and Texture To keep the bread from drying out, add a splash of milk before reheating. This helps it stay moist. Always check that it’s heated all the way through to enjoy the best flavors. Can I make this casserole ahead of time? Yes, you can make this casserole ahead of time. Prepare it the night before. After mixing the egg mixture with the bread, cover it. Let it chill in the fridge overnight. This helps the bread soak up the flavors well. How long does Bananas Foster French Toast Casserole last in the fridge? This casserole lasts for about three to four days in the fridge. Store it in an airtight container. Reheat it gently in the oven or microwave when you're ready to enjoy it. Can I substitute the heavy cream? Yes, you can substitute heavy cream. Use whole milk or a mix of milk and yogurt for a lighter option. This change will slightly alter the creaminess but will still taste great. What to do if the casserole is soggy or dry? If your casserole is soggy, it may have too much liquid. Next time, use less milk or let it soak for less time. If it is dry, it may have baked too long. Keep an eye on the baking time for a better result. How to fix over-baked Bananas Foster Casserole? If your casserole is over-baked, try adding a drizzle of syrup on top. You can also serve it with whipped cream to add moisture. Another tip is to pair it with fresh banana slices. This will help balance the dryness. This post covered how to make a tasty Bananas Foster French Toast Casserole. We went over the main ingredients, tips for perfecting your dish, and helpful variations. Try adding your favorite toppings, like nuts or spices, to make it yours. Don't forget, storing leftovers is easy if done right. You'll enjoy this dish fresh or reheated. I hope you feel excited to make this easy, delicious casserole soon!

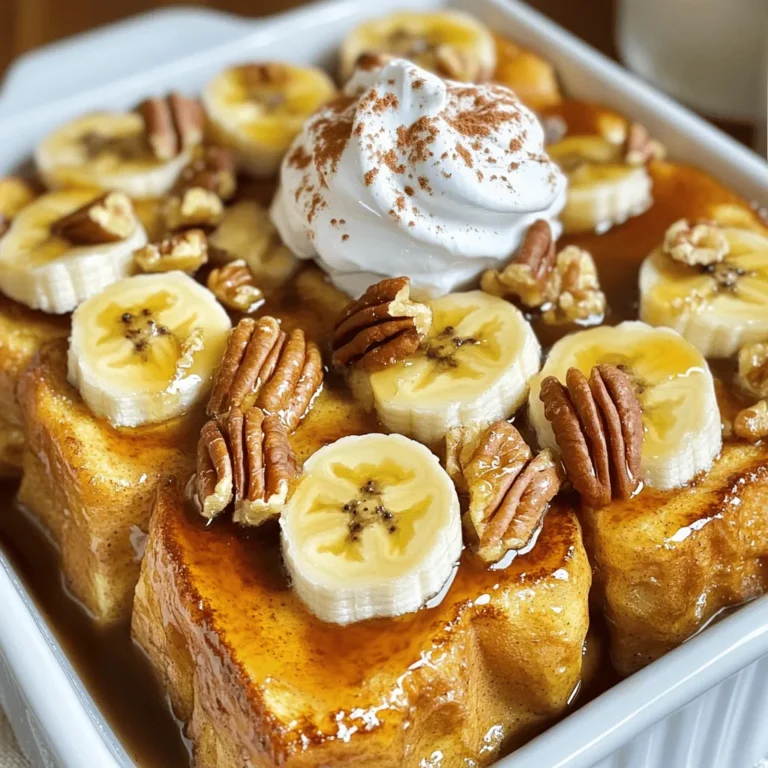
Bananas Foster French Toast Casserole Easy Recipe

To make these fluffy lemon ricotta pancakes, gather the following ingredients: - 1 cup ricotta cheese - 1 cup all-purpose flour - 2 tablespoons sugar - 1 teaspoon baking powder - ½ teaspoon baking soda - ¼ teaspoon salt - 1 cup milk - 2 large eggs - Zest of 1 lemon - 2 tablespoons lemon juice - 1 teaspoon vanilla extract - Butter or oil for cooking - Maple syrup and fresh berries for serving (optional) When measuring ingredients, accuracy is key for fluffy pancakes. Use a dry measuring cup for flour. Spoon flour into the cup and level it off to avoid packing. You can substitute ricotta cheese with cottage cheese for a lighter texture. If you need a gluten-free option, use a gluten-free flour blend. Almond milk can replace regular milk for a dairy-free choice. To enhance your pancakes, consider these tasty toppings: - A drizzle of warm maple syrup - A handful of fresh berries like strawberries or blueberries - A sprinkle of powdered sugar for extra sweetness - A dollop of whipped cream for creaminess - A touch of lemon zest for added zing Feel free to mix and match these toppings to suit your taste! To make fluffy lemon ricotta pancakes, follow these steps carefully. First, mix the wet and dry ingredients separately. Then, combine them gently. This method keeps the pancakes light and fluffy. 1. In a large bowl, whisk together: - 1 cup ricotta cheese - 1 cup milk - 2 large eggs - Zest of 1 lemon - 2 tablespoons lemon juice - 1 teaspoon vanilla extract 2. In another bowl, mix the dry ingredients: - 1 cup all-purpose flour - 2 tablespoons sugar - 1 teaspoon baking powder - ½ teaspoon baking soda - ¼ teaspoon salt 3. Gradually add the dry mixture to the wet mixture. Stir gently until just combined. It’s okay if some lumps remain. 4. Heat a non-stick skillet over medium heat. Add butter or oil to coat the surface. 5. Pour about ¼ cup of batter onto the skillet for each pancake. 6. Cook until bubbles form, about 2-3 minutes. 7. Flip pancakes and cook for another 2-3 minutes until golden brown. 8. Remove pancakes and keep warm while cooking the rest. Cooking pancakes well is all about control. Medium heat works best. Too high, and they burn. Too low, and they don’t rise. - Use a non-stick skillet or griddle: This helps prevent sticking and makes flipping easier. - Don’t overmix the batter: Overmixing makes pancakes tough. Mix just until combined. - Check for bubbles: Look for bubbles on the surface before flipping. This means they are ready. While I can’t share images or videos here, I recommend checking online for visual guides. Watching someone cook can help you grasp the texture you’re aiming for. Look for videos showing fluffy pancake recipes. They can show you the perfect bubble formation and flipping technique. Try making these pancakes at home. With practice, you’ll master them quickly! To make the fluffiest pancakes, use fresh ricotta cheese. It adds great moisture and airiness. When mixing, combine dry and wet ingredients gently. Overmixing can make the pancakes dense. You want some lumps in the batter. This helps keep the pancakes light. Let the batter rest for a few minutes. This allows the baking powder to work its magic. One common mistake is using cold eggs and milk. Always bring them to room temperature first. This helps the batter mix well. Also, don’t skip the lemon zest. It gives a nice bright flavor. Avoid cooking on high heat. This can burn the outside while leaving the inside raw. Medium heat is best for even cooking. Use a non-stick skillet or griddle for best results. Add a small amount of butter or oil, but not too much. Too much fat can make pancakes greasy. When pouring the batter, use about ¼ cup for each pancake. Cook until bubbles form and edges look set. This usually takes 2-3 minutes. Flip them gently and cook until golden brown. Keep pancakes warm in a low oven while you cook the rest. Enjoy them fresh with maple syrup and berries! {{image_2}} You can play with flavors in your pancakes. Adding fruits like blueberries or strawberries makes them fruity and sweet. Chopped bananas also work well. For a spice kick, try adding cinnamon or nutmeg. A hint of vanilla can deepen the taste too. You could even mix in some lemon zest for an extra citrus punch. If you need a gluten-free option, use almond flour or a gluten-free blend. Both will give you nice pancakes. For a dairy-free choice, swap the ricotta with a dairy-free cheese. Coconut or almond milk can replace regular milk easily. These changes can make the recipe fit your needs without losing flavor. Serve these pancakes warm with maple syrup for sweetness. Fresh berries add a nice touch and color. You can also sprinkle some powdered sugar on top. For a fun twist, top with whipped cream or yogurt. If you want something special, drizzle with honey or a fruit sauce. Each option adds a new taste to your breakfast delight. To store leftover pancakes, let them cool completely first. Place them in an airtight container. You can also use plastic wrap or a resealable bag. Keep them in the fridge for up to three days. This keeps them fresh and tasty for your next breakfast. Reheat pancakes in several ways. You can use a microwave, skillet, or toaster. For the microwave, heat for about 20-30 seconds. Check to see if they are warm. In a skillet, warm over low heat for a few minutes. Flip them to heat both sides. Toaster works well too; just toast until warm. Freezing pancakes is easy and great for meal prep. After they cool, stack them with parchment paper between each pancake. Place them in a freezer bag or container. Seal tightly to avoid freezer burn. They can stay good for up to two months. When you want to eat them, thaw overnight in the fridge before reheating. Yes, you can use whole wheat flour. Whole wheat flour makes the pancakes a bit denser. To keep them fluffy, mix in a little extra milk. This will help balance the texture and keep them light. To make these pancakes vegan, swap the ricotta cheese with a vegan alternative. Use plant-based milk instead of regular milk. Replace eggs with flax eggs. Mix one tablespoon of flaxseed meal with three tablespoons of water. Let it sit for five minutes to thicken. The best way to reheat pancakes is in a toaster or on a skillet. For the toaster, place the pancakes in on a low setting. This keeps them fluffy. If using a skillet, heat it on low and add a tiny bit of butter. Heat for a minute on each side until warm. You learned about the key ingredients for perfect pancakes, from measurements to tasty toppings. I shared step-by-step instructions and helpful cooking techniques to ensure your pancakes are a hit. Remember the tips for fluffiness and avoid common mistakes while cooking. I also covered fun variations and storage methods to keep your pancakes fresh. Use this guide to make breakfast fun and delicious. Enjoy your pancake-making journey!

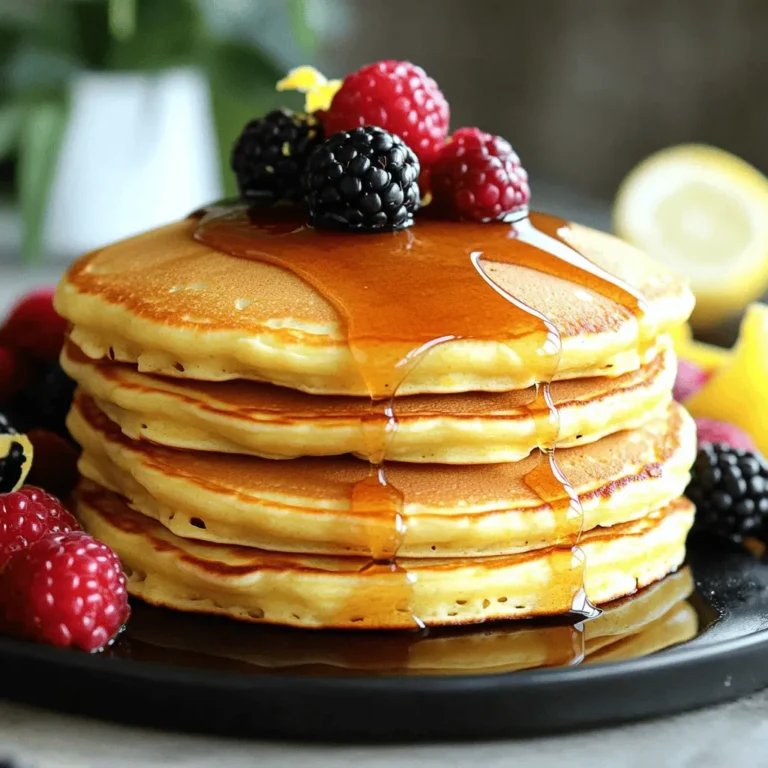
Fluffy Lemon Ricotta Pancakes Easy Breakfast Delight

- 1 cup dried green or brown lentils, rinsed - 1 can (13.5 oz) coconut milk - 4 cups vegetable broth - 1 medium onion, chopped - 3 cloves garlic, minced - 1 tablespoon fresh ginger, grated - 1 tablespoon curry powder - 1 teaspoon ground cumin - 1 teaspoon turmeric powder - 1 red bell pepper, diced - 1 carrot, diced - 2 cups fresh spinach - 2 tablespoons soy sauce (or tamari for gluten-free) - Salt and pepper to taste - Fresh cilantro, for garnish - 1 tablespoon olive oil I love using simple, wholesome ingredients for this soup. The lentils are the star here. They give the soup a hearty feel. Coconut milk adds creaminess and a touch of sweetness. Vegetable broth brings depth to the flavor. The aromatics are key. Onion, garlic, and ginger are a must. They create a strong base and add warmth. The spices make the soup sing. Curry powder, cumin, and turmeric offer rich taste and color. Don't forget the veggies! Red bell pepper and carrot add crunch and sweetness. Fresh spinach brings a lovely green finish. Lastly, garnishing with cilantro adds a fresh note. You can also serve this with warm naan or rice for a filling meal. 1. Sauté Aromatics: Start by heating olive oil in a skillet over medium heat. Add chopped onions, minced garlic, and grated ginger. Cook until the onions turn soft and clear, about 5 minutes. This step brings out the rich flavors. 2. Combine Ingredients: In your slow cooker, add the sautéed onion mix. Next, add rinsed lentils, coconut milk, vegetable broth, diced red bell pepper, diced carrot, curry powder, ground cumin, turmeric, and soy sauce. Stir everything well to mix the flavors. 3. Cooking Times: Cover the slow cooker. Cook on low for 6-8 hours or on high for 3-4 hours, until the lentils are soft. The long cooking time allows all the flavors to blend nicely. 1. How to Properly Incorporate Spinach: About 15 minutes before you serve, add fresh spinach to the soup. Stir it in gently and let it wilt. This adds color and nutrients to your dish. 2. Adjusting Seasonings Before Serving: Before serving, taste the soup. Add salt and pepper as needed. This final touch ensures the flavors shine. Enjoy the comfort of this soup with warm naan or rice for a cozy meal! Rinsing lentils is a key step. Place them in a fine mesh strainer and rinse under cold water. This removes dust and any small stones. Clean lentils will cook evenly and taste better. For the best texture, use dried green or brown lentils. They hold their shape well. Aim for a tender but not mushy consistency. Cook them until they are just soft. This usually takes 6-8 hours on low or 3-4 hours on high in the slow cooker. To amp up the taste, consider adding spices. A pinch of cayenne pepper gives it heat. Fresh herbs like cilantro or basil can brighten the soup. You can also add a squeeze of lime for a zesty kick. Seasoning to taste is very important. Start with the suggested salt and pepper. Taste the soup before serving and adjust. Each ingredient can change how it tastes, so feel free to experiment. Your personal touch makes all the difference! {{image_2}} You might want to swap some ingredients. For a gluten-free option, use tamari instead of soy sauce. Both work well for flavor. If you need a vegan version, ensure your broth is plant-based. If you want to try different lentils, you can use red lentils. They cook faster and give a creamier texture. For vegetables, feel free to mix things up. Instead of red bell pepper, use yellow or orange peppers for a sweeter taste. Carrots can be swapped for zucchini or sweet potatoes. If you have other greens, kale or Swiss chard can replace spinach. These changes will still keep the soup delicious. Curry powder is key here, but don’t stop there. You can try different curry blends to find your favorite. Thai curry paste adds a kick and pairs well with coconut milk. For a mild flavor, use a sweet curry blend. Want to explore more? Regional variations can spice things up. South Asian styles often include mustard seeds and fresh herbs. Caribbean versions might add allspice or thyme for a unique twist. Each change brings a new taste, making every bowl special. To keep your soup fresh, store it in an airtight container. Place the container in the fridge right after cooling. This soup lasts up to five days in the fridge. If you want to save it longer, freeze it. Pour the soup into freezer-safe bags or containers. Make sure to leave some space for expansion. In the freezer, this soup can last up to three months. When you are ready to eat, reheat the soup gently. You can use the stove or the microwave. For stovetop reheating, pour the soup into a pot. Heat it over medium heat. Stir often until it warms through. If using a microwave, heat in short bursts, stirring in between. The soup may thicken after storage. If it does, add a bit of vegetable broth or water. This will bring back its creamy texture. Enjoy the rich flavors as they warm up! Can I use different types of lentils? Yes, you can use other lentils, like red or black. Each type changes the soup's texture and flavor. Red lentils cook faster and can make the soup thicker. Green or brown lentils hold their shape well. Experiment to find your favorite! How can I make this soup spicier? To add heat, try adding red pepper flakes or diced jalapeños. You can also use a spicier curry powder or a dash of hot sauce. Start small, and adjust to your taste. The right spice can elevate your soup! Is it possible to make this dish in a conventional pot? Yes, you can make this soup on the stovetop. First, sauté the onions, garlic, and ginger in a pot. Then, add the other ingredients and bring it to a boil. Reduce the heat and let it simmer until the lentils are tender, about 30-40 minutes. Stir occasionally and enjoy! This blog post covers everything you need for a great slow cooker coconut curry lentil soup. We discussed essential ingredients, step-by-step instructions, tips and tricks, and variations. You learned how to enhance flavors and store leftovers properly. I hope you feel ready to make this comforting dish with confidence. Enjoy the rich flavors and easy prep that will make your soup a hit!

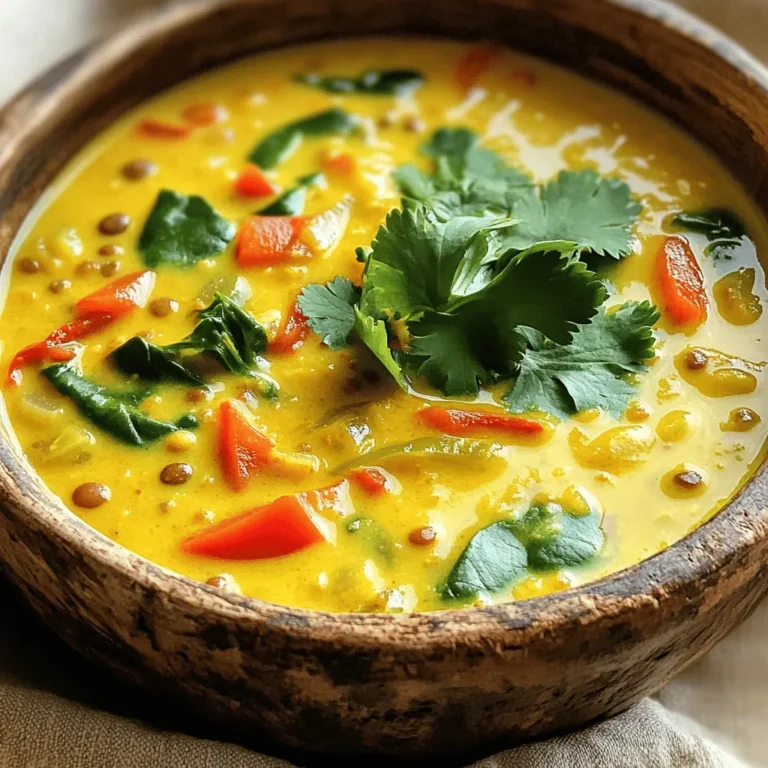
Irresistible Slow Cooker Coconut Curry Lentil Soup Recipe

PREV 1 … 19 20 21 … 53 NEXT
cozy citrus kitchen

explore

DessertsDinnerAppetizersDrinks

Our Policies

  • Cookie Policy
  • Copyright Policy
  • Disclaimer
  • GDPR Policy
  • Terms Of Use
Back to Top
  • About
  • Contact Us
  • Privacy Policy
© 2025 cozy citrus kitchen