FREE DINNER EBOOK! Get your copy!
  • Cookie Policy
  • GDPR Policy
  • Disclaimer
  • Terms Of Use
  • Visit my other site: Fun Cookie Recipes
cozy citrus kitchen
  • Home
  • Dinner
  • Desserts
  • Drinks
  • Appetizers
  • Contact
  • About
  • Privacy Policy
  • Home
  • Dinner
  • Desserts
  • Drinks
  • Appetizers
  • Contact
  • About
  • Privacy Policy
  • Cookie Policy
  • GDPR Policy
  • Disclaimer
  • Terms Of Use
Visit my other site: Fun Cookie Recipes

HOME / CATEGORIES /

Latest

To make the frozen yogurt bark with berries, you'll need a few key ingredients. Here’s what you should gather: - 2 cups Greek yogurt (plain or flavored) - 2 tablespoons honey or maple syrup - 1 teaspoon vanilla extract - 1 cup mixed berries (strawberries, blueberries, raspberries) - 1/4 cup granola (optional, for crunch) - Mint leaves for garnish (optional) Greek yogurt forms the base of the bark. It gives a creamy texture and adds protein. You can choose plain yogurt or one with flavor. Honey or maple syrup sweetens the mixture naturally. Vanilla extract adds a warm flavor that makes each bite delightful. Mixed berries give color and taste. You can use any mix you like. Strawberries, blueberries, and raspberries work well together. Granola is optional but adds a nice crunch to your treat. Mint leaves are perfect for a fresh look and taste. Gather these ingredients, and you're ready to start creating a tasty frozen treat! First, grab a mixing bowl. Add 2 cups of Greek yogurt. Then, pour in 2 tablespoons of honey or maple syrup. Next, add 1 teaspoon of vanilla extract. Mix everything until smooth. This step is key for a creamy texture. Now, let's prepare the baking tray. It's important to use parchment paper. This keeps the yogurt bark from sticking. Choose a shallow tray that fits in your freezer. It should be big enough for the yogurt mixture. Pour the yogurt mixture onto the parchment paper. Use a spatula to spread it evenly. Aim for about half an inch thick. Next, scatter 1 cup of mixed berries on top. Press them down gently so they stick. If you like, sprinkle 1/4 cup of granola for some crunch. Place the baking tray in the freezer. Let it freeze for at least 4 to 6 hours. Check that the bark is fully frozen. This helps it break nicely later. Once frozen, take it out of the freezer. Lift the yogurt bark off the parchment paper. You can break it into pieces or cut it into squares. If you want, add fresh mint leaves on top for color and freshness. You can use Greek yogurt or regular yogurt. Greek yogurt is thicker and creamier. It has more protein, which makes it a great choice. Regular yogurt is lighter and can be a bit tangy. Both work well, but I prefer Greek yogurt for this bark. You can flavor it with honey or maple syrup for sweetness. Adding vanilla extract gives it a lovely aroma. When picking berries, go for strawberries, blueberries, and raspberries. These berries freeze well and keep their shape. You can use fresh or frozen berries, but fresh berries taste best. In summer, berries are abundant and sweet. In winter, you may find frozen berries a better choice. Always check for ripeness and flavor. You can switch out granola for other crunchy toppings. Try crushed nuts or seeds for added texture. Almonds, walnuts, or chia seeds work great. They add a nice crunch and flavor. You can also layer in other fruits like bananas or peaches. Be creative! {{image_2}} To make chocolate frozen yogurt bark, simply add cocoa powder or chocolate chips. You can mix in two tablespoons of cocoa powder into your yogurt blend. This gives a rich and chocolatey flavor. If you prefer, sprinkle chocolate chips on top of the berries. Both options create a sweet treat that chocolate lovers will adore. For a tropical twist, use fruits like mango and pineapple. Chop these fruits into small pieces. Fold them into the yogurt mixture before spreading it on the tray. You can also place them on top of the yogurt. This adds a bright, fruity flavor that transports you to a sunny beach. Adding nut butter gives the bark a creamy texture and rich taste. Swirl in a few tablespoons of your favorite nut butter into the yogurt. Peanut butter or almond butter works great! This variation not only enhances flavor but also offers extra protein, making it a satisfying snack. To store frozen yogurt bark, keep it in an airtight container. This helps it stay fresh and tasty. You can also wrap it tightly in plastic wrap for extra protection. When choosing a container, look for one that is freezer-safe. Glass or BPA-free plastic containers work best. Make sure to leave some space in the container. This helps the yogurt bark expand when it freezes. Frozen yogurt bark lasts about two months in the freezer. After that, it may lose its flavor and texture. To know if it has gone bad, check for ice crystals or freezer burn. These signs mean it's time to toss the bark. If it smells off or has changed color, it’s best to discard it. Always enjoy your frozen yogurt bark fresh for the best taste! Yes, you can use non-dairy yogurt. Many great options exist. Try almond, coconut, or soy yogurt. These options work well. Just check for added sugars. Always choose a plain or unsweetened version for the best taste. It takes about 4-6 hours to freeze. Make sure the yogurt bark is solid. You can leave it overnight for best results. The longer it freezes, the easier it will be to break into pieces. Yes! You can add many toppings. Nuts like almonds or walnuts add crunch. Dried fruits like raisins or cranberries add sweetness. Get creative! You can also add seeds for extra nutrition. You have learned how to make delicious frozen yogurt bark using simple ingredients. Combine Greek yogurt, sweeteners, and your favorite toppings. Follow the steps carefully to get the best results. Feel free to customize your bark with different flavors. Remember to store it right, so it stays fresh longer. This recipe offers fun ways to enjoy a healthy treat. Now, you can impress your friends and family with this tasty snack. Dig in and enjoy your creations!

Frozen Yogurt Bark With Berries Delightful Treat

- 200g noodles (your choice: rice, udon, or soba) - 2 tablespoons gochujang (Korean red chili paste) - 1 tablespoon soy sauce - 1 tablespoon sesame oil - 1 tablespoon honey or maple syrup - 1 cup stir-fry vegetables (carrots, bell peppers, and broccoli) - 2 green onions, chopped - 2 cloves garlic, minced - 1 teaspoon sesame seeds - Salt to taste - Optional: sliced red chili for extra heat To start, you need 200 grams of noodles. You can use rice, udon, or soba noodles. Each type brings its own unique taste and texture. Next, gochujang is key. This Korean red chili paste adds heat and depth. You’ll want two tablespoons for the right kick. You also need soy sauce and sesame oil. Each adds savory flavor. Use one tablespoon of each. For a hint of sweetness, add one tablespoon of honey or maple syrup. This balances the heat nicely. Don't forget your vegetables! A cup of stir-fry veggies like carrots, bell peppers, and broccoli makes the dish colorful and healthy. Chop two green onions and mince two cloves of garlic. These ingredients enhance the aroma and taste. Finally, sprinkle sesame seeds on top. They add a nice crunch. If you like it hot, slice up some red chili for extra spice. With these ingredients, you can create a tasty and vibrant dish in no time! To cook the noodles, follow the package instructions. Bring a pot of water to a boil. Add your noodles and cook until they are tender. This usually takes around 5 to 7 minutes. Stir gently to prevent sticking. Once cooked, drain the noodles in a colander. Rinse them under cool water to stop the cooking process. Set them aside in a bowl. Heat a large pan or wok over medium heat. Add sesame oil and let it warm up. Once hot, add minced garlic and stir for about 30 seconds. This brings out the garlic's flavor. Next, toss in your stir-fry vegetables. Carrots, bell peppers, and broccoli work best. Cook them for 3 to 5 minutes. You want them to soften but stay crisp. In a small bowl, mix gochujang, soy sauce, and honey or maple syrup. This creates a thick, spicy sauce. Taste the sauce and adjust the spice level. If you like it hotter, add more gochujang. If you want it milder, use less. Add the cooked noodles to the pan with the vegetables. Pour the spicy sauce over the noodles. Toss everything together well. Ensure the sauce coats every noodle and vegetable. Keep stirring for another 2 minutes. This helps heat the dish through. Serve the noodles hot, topped with green onions and sesame seeds for crunch. To make your spicy Korean gochujang noodles even better, try adjusting the seasoning. You can add a splash of lime juice or rice vinegar for a tangy kick. If you prefer more heat, toss in extra sliced red chili. Adding proteins makes this dish a full meal. You can use chicken, beef, tofu, or shrimp. Simply cook the protein first, then add it back in with the noodles. A good pan or wok is key for stir-frying. I recommend using a non-stick or cast iron skillet. These help prevent sticking and ensure even cooking. You also need essential tools like a large spatula and a sharp knife. A cutting board is useful for prepping your vegetables. Serve your spicy Korean gochujang noodles with a side of kimchi for added flavor. A simple cucumber salad also pairs well, offering a cool contrast. For garnish, sprinkle sesame seeds and chopped green onions on top. This adds color and crunch to your dish. {{image_2}} To make this dish vegan, simply omit the honey or use maple syrup. Both options work well and keep the sweetness. For protein, try tofu, tempeh, or chickpeas. They add great texture and flavor. If you're gluten-sensitive, choose rice noodles or gluten-free udon. These noodles still taste great with the sauce. For the sauce, replace soy sauce with tamari or coconut aminos. Both options provide a tasty, gluten-free twist. Want more heat? Add extra chilies or a splash of hot sauce. Sliced red chilies are a perfect garnish for added spice. You can also try using spicy kimchi or chili flakes to boost the flavor. To keep your spicy Korean gochujang noodles fresh, use an airtight container. This helps prevent moisture loss and keeps the flavors intact. Place the noodles in the fridge right after they cool down. You can safely store them for up to three days. After that, the taste and texture may change. When you're ready to enjoy your leftovers, you have a few good options. The microwave is quick and easy. Just place the noodles in a microwave-safe bowl, add a splash of water, and cover it. Heat in 30-second intervals until warm. You can also use a pan for reheating. Heat a little oil in the pan and add the noodles. Stir often to keep them from sticking. This method helps maintain their texture. If they seem dry, add a touch of soy sauce or water to revive the sauce. Enjoy your delicious noodles again! Gochujang is a thick, red chili paste from Korea. It has a sweet and spicy flavor. This paste brings depth to many dishes. It combines heat from the chili with sweetness from rice. You will find it in many Korean recipes. Gochujang is key to making these noodles flavorful and exciting. Yes, you can use several types of noodles. Rice noodles, udon, or soba work well. Each type gives a different texture. Rice noodles are light and chewy. Udon noodles are thick and hearty. Soba noodles are nutty and slightly earthy. Choose what you like best for your spicy Korean gochujang noodles. This dish is great for meal prep! You can cook the noodles and veggies in advance. Store them in separate containers. Keep the gochujang sauce in a jar. When you are ready to eat, just heat everything up. This method saves time and makes meals easy during the week. You can find gochujang in Asian grocery stores. Look for it in the international aisle of bigger supermarkets. Online shops like Amazon also sell it. For noodles, most stores carry rice, udon, and soba noodles. Check the pasta aisle or Asian foods section. The spice level can vary based on the amount of gochujang you use. Two tablespoons give a nice kick. If you want it spicier, add more gochujang or sliced red chili. If you prefer less heat, reduce the gochujang. Adjust it to your taste for the perfect bite! This article guides you through making delicious spicy noodles. You learned about key ingredients, from gochujang to optional heat boosters. Then, I shared simple steps for cooking, stir-frying, and making a tasty sauce. Remember, you can customize the recipe with proteins, and even alter spice levels to fit your taste. Experiment with variations like vegan options or gluten-free noodles. Finally, keep your leftovers fresh and flavorful. Enjoy trying this dish and make it your own!

Spicy Korean Gochujang Noodles Flavorful and Easy Dish

- 1 cup vanilla protein powder - 1/2 cup almond flour - 1/2 cup rolled oats - 1/4 cup almond butter - 1/4 cup honey or maple syrup - 1 teaspoon vanilla extract - 1/4 cup rainbow sprinkles - 2 tablespoons unsweetened coconut flakes (optional) The main ingredients create a tasty base for your protein bites. First, the vanilla protein powder gives them a great flavor and adds protein. Almond flour and rolled oats add texture and fiber. Almond butter brings healthy fats and moisture. Honey or maple syrup sweetens the bites. The vanilla extract adds a lovely aroma. Rainbow sprinkles make these bites festive and fun. If you want, add coconut flakes for extra flavor. - Nut butter substitutes - Different sweeteners - Additional flavor enhancers You can get creative with optional add-ins. Use peanut butter or sunflower seed butter instead of almond butter. For sweeteners, try agave syrup or coconut sugar. To enhance flavor, add spices like cinnamon, or a dash of cocoa powder for a chocolate twist. These choices let you customize the bites to your taste. First, we mix the dry ingredients. Grab a large bowl and add: - 1 cup vanilla protein powder - 1/2 cup almond flour - 1/2 cup rolled oats Stir these ingredients well until they blend evenly. This step is key to getting a good base for your bites. Now, we add the wet ingredients. Pour in: - 1/4 cup almond butter - 1/4 cup honey or maple syrup - 1 teaspoon vanilla extract Mix everything together until you get a dough-like texture. If it feels too dry, add a bit more almond butter. If it’s too wet, sprinkle a bit more almond flour. Next, we form the bites. Scoop out tablespoon-sized portions. Roll them into small balls with your hands. This is where the fun starts! After that, let’s coat them with sprinkles. Roll each ball in extra rainbow sprinkles. This gives them a festive look and adds extra sweetness! Now, we need to set the bites. Place them on a parchment-lined baking sheet. Refrigerate for at least 30 minutes. This helps them firm up. For storage, transfer the chilled bites to an airtight container. You can keep them in the fridge for up to one week. Enjoy these tasty treats anytime you want a sweet snack! To get that perfect dough-like consistency, mix the dry ingredients well first. This helps everything blend evenly. If your mixture feels too dry, add a bit more almond butter or honey. If it's too wet, add a little more almond flour or oats. Adjusting these ingredients can create the right texture. You can change the flavor with some easy swaps. Instead of almond butter, try peanut butter or sun butter. For sweeteners, maple syrup is a great choice. Adding spices like cinnamon or nutmeg can also give a warm, cozy taste. Just a pinch can make a big difference! When serving, think fun and bright! Place the protein bites on a colorful plate. You can use extra sprinkles on top for a festive look. Cupcake liners add a cute touch too. These bites are perfect for parties, and they look great on any table! {{image_2}} You can easily change the flavor of your protein bites. For a chocolate twist, use chocolate protein powder instead of vanilla. Mix in cocoa powder for a richer taste. You can also add chocolate chips for extra sweetness. It makes a great chocolate birthday cake protein bite. If you want something festive, try confetti cake bites. Just swap the rainbow sprinkles for different ones. This will give your bites a fun look. You can use heart or star-shaped sprinkles for special occasions. Making these protein bites vegan is simple. Just use a plant-based protein powder. Replace honey with maple syrup for sweetness. Almond butter is often vegan, but check the label to be sure. If you're gluten-free, use certified gluten-free oats and almond flour. These swaps make the bites safe for those with gluten sensitivities. You can enjoy these treats without worry! Don’t feel limited to almond butter. Peanut butter is a great option too. It adds a rich flavor and creamy texture. If you're nut-free, try sun butter or soy nut butter. These options still provide a tasty bite. You can also use cashew butter if you want a different taste. Cashew butter is smooth and has a mild flavor. It blends well with the other ingredients. This gives you a nice variety in your protein bites. Store your no bake birthday cake protein bites in airtight containers. This keeps them fresh. You can use glass jars or plastic containers. Glass jars look nice, but plastic is lighter. Make sure to seal them tight. Refrigerate your bites right after they chill. This helps them stay firm and tasty. Keep them in the fridge until you're ready to eat. These yummy protein bites can last about one week in the fridge. If you see any signs of spoilage, it’s best to toss them. Spoilage signs include a strange smell or visible mold. Always check before enjoying! Yes, you can freeze these protein bites! Just place them in a freezer-safe container. They can last up to three months in the freezer. When you’re ready to eat, simply take them out. Let them thaw at room temperature for about 10 to 15 minutes. Serve them cold for a refreshing treat! No Bake Birthday Cake Protein Bites last for about one week in the fridge. Store them in an airtight container to keep them fresh. I recommend checking for any signs of spoilage, like a change in smell or texture. If they look and smell good, they are still safe to eat. Yes, you can substitute protein powder. Use any flavor you like, such as chocolate or strawberry. You can also try plant-based protein powders if you want a vegan option. Just keep in mind that different powders may change the flavor and texture a bit. Absolutely! These protein bites are great for kids. They are fun, tasty, and packed with nutrients. Kids love the rainbow sprinkles, making them feel like a treat. Just ensure no one has allergies to the ingredients like nuts or gluten. To make these bites vegan, use maple syrup instead of honey. Swap the almond butter for any nut or seed butter that is vegan. Make sure your protein powder is plant-based as well. These easy swaps keep the recipe delicious and friendly for all diets. You can create fun and tasty no-bake birthday cake protein bites quickly. Start with easy-to-find ingredients like protein powder and almond flour. Mixing dry and wet ingredients leads to a delightful treat. Roll them up and chill for the best texture. Try different flavors and adapt for any diet. Store them right to keep them fresh. Enjoy these snacks at parties or as a meal boost. With these tips, you can make delicious bites that everyone will love. Get creative and have fun while making them!

No Bake Birthday Cake Protein Bites Easy Recipe

Here is what you need to make Creamy Roasted Garlic Pumpkin Soup: - Medium pumpkin (about 3-4 pounds), halved and seeded - Head of garlic - Chopped onion - Olive oil - Vegetable broth - Coconut milk (or heavy cream) - Ground cumin - Ground nutmeg - Salt and pepper - Fresh parsley or pumpkin seeds for garnish Each ingredient plays a key role. The pumpkin gives the soup its rich body and flavor. Roasting the garlic adds a sweet, mellow taste. Olive oil helps to bring everything together. The broth gives moisture and depth. Coconut milk or heavy cream makes it smooth and creamy. Ground cumin and nutmeg add warmth and spice. Lastly, salt and pepper balance all the flavors. When you gather these ingredients, remember to pick the best quality. Fresh veggies and spices make a big difference. Enjoy the process of choosing your ingredients, as they set the stage for a delightful meal. Preheating the oven Start by setting your oven to 400°F (200°C). This heat will help roast the pumpkin and garlic. Preparing the pumpkin and garlic Cut the pumpkin in half and remove the seeds. Place the pumpkin cut side up on a baking sheet. Drizzle it with olive oil. Add salt and pepper to taste. For the garlic, slice off the top of the head to show the cloves. Drizzle it with olive oil and wrap it in aluminum foil. Roasting the pumpkin and garlic Carefully place the baking sheet in the preheated oven. Roast the pumpkin and garlic for about 40-50 minutes. The pumpkin should feel soft when pierced with a fork. Sautéing the onion While the pumpkin roasts, heat 2 tablespoons of olive oil in a large pot over medium heat. Add the chopped onion. Cook it until it turns soft and translucent, about 5-7 minutes. Mixing and simmering ingredients Once the pumpkin and garlic are done, let them cool for a bit. Scoop the pumpkin flesh from the skin. Squeeze out the roasted garlic cloves into a bowl. Add both to the pot with the sautéed onion. Pour in the vegetable broth, ground cumin, and ground nutmeg. Bring this mix to a simmer and cook for about 10 minutes. This lets the flavors blend together. Blending the soup Remove the pot from the heat. Use an immersion blender to blend the soup until it is smooth and creamy. If you don’t have this, you can use a countertop blender in batches. Adjusting consistency Stir in the coconut milk (or heavy cream). Taste the soup and add salt and pepper as needed. If the soup is too thick, add more vegetable broth until you reach your desired thickness. Presentation tips Serve the soup in warm bowls. For a pretty touch, add a swirl of coconut milk or cream on top. Sprinkle with fresh parsley and a few toasted pumpkin seeds for extra crunch. - Using fresh spices: Fresh spices bring life to your soup. I love using ground cumin and nutmeg. They add warmth and depth. Freshly ground spices are even better if you have them. Just grind what you need before cooking. - Best oils for roasting: Olive oil works great for roasting. It adds flavor and helps with caramelization. You can also try avocado oil, which has a mild taste. This oil can handle high heat well, making it perfect for roasting. - Alternative cooking methods: If you want to try something different, use a stovetop or pressure cooker. For stovetop cooking, sauté the onion first, then add the pumpkin and garlic. If you use a pressure cooker, cut cooking time by half. Just follow the same steps for flavors. - Tips for using canned pumpkin: Canned pumpkin makes this recipe quick and easy. Use it if you are short on time. Just add it after sautéing the onion. Adjust the broth and seasonings to taste, as canned pumpkin can be less sweet. - Ideal pairings: Serve your soup with warm bread or a fresh salad. Crusty bread helps soak up the soup. A green salad adds nice crunch and freshness. You can also pair it with roasted veggies for a hearty meal. - Garnish options: Garnishing adds flair to your soup. I love using a swirl of coconut milk or cream on top. Fresh parsley brightens the dish. For crunch, sprinkle some toasted pumpkin seeds. They add texture and flavor. {{image_2}} You can change the soup's base. Instead of coconut milk, use almond or oat milk. This adds a nutty taste. If you want protein, add shredded chicken or black beans. They make the soup heartier and more filling. Spices bring life to your soup. Try adding a pinch of cinnamon for warmth. A dash of chili powder gives a spicy kick. You can also explore regional twists. For a Thai flair, add ginger and lime. An Italian version could use basil and oregano. This soup is great hot, but you can serve it cold too. Cold soup is refreshing in warm months. For a fancy touch, serve it as a starter. Use small bowls or cups to present it nicely. As a main dish, pair it with crusty bread for a complete meal. After enjoying your Creamy Roasted Garlic Pumpkin Soup, store leftovers in the fridge. Place the soup in an airtight container. This keeps it fresh and tasty for later. The best way to refrigerate is to let it cool first. Once cool, cover it tightly. You can store it for up to five days. If you want to keep it longer, freezing is a great option. Use freezer-safe containers or bags. Make sure to leave some space for the soup to expand. It can last for about three months in the freezer. When you're ready to enjoy it again, simply thaw it overnight in the fridge. When it comes time to reheat, do it slowly. You can use the stove or microwave. If using the stove, heat it in a pot over low heat. Stir often to keep it from sticking. This method helps keep the soup smooth. If using a microwave, place the soup in a microwave-safe bowl. Cover it loosely to let steam escape. Heat in short bursts, stirring in between. This keeps the texture just right. Avoid boiling the soup, as that can change its creaminess. In the fridge, your soup can last for about five days. Always check for spoilage signs before eating. If it has an off smell or strange color, it’s best to toss it. For frozen soup, it can last up to three months. Again, keep an eye on it. If you see ice crystals or freezer burn, it may not taste great. Always use your senses to check if the soup is still good. Can I use canned pumpkin instead of fresh? Yes, you can use canned pumpkin. It saves time and is still tasty. Choose pure pumpkin puree. Avoid pumpkin pie filling, as it has added sugar and spices. What pairs well with Creamy Roasted Garlic Pumpkin Soup? This soup goes great with crusty bread. A side salad with greens also works well. Add a sprinkle of cheese or toasted seeds for extra flavor. Is this soup gluten-free? Yes, this soup is gluten-free. All the ingredients used are safe for a gluten-free diet. Always check labels to be sure. Can it be made vegan? Yes, you can make this soup vegan. Use coconut milk instead of heavy cream. Ensure the vegetable broth is vegan as well. What to do if the soup is too thick/thin? If the soup is too thick, add more vegetable broth. Stir it in until you like the texture. If it’s too thin, cook it longer to reduce. How to adjust flavors if overly seasoned? If the soup is too salty, add more pumpkin or coconut milk. This will help balance the flavors. You can also add a splash of lemon juice for brightness. In this blog post, we explored how to make Creamy Roasted Garlic Pumpkin Soup. We discussed ingredients, preparation, cooking, blending, and serving. I shared tips to enhance flavor and different variations to try. You now know how to store leftovers and the answers to common questions. This soup is not only tasty but also easy and flexible. Don’t hesitate to experiment with flavors and ingredients. Enjoy making your own version!

Creamy Roasted Garlic Pumpkin Soup Comforting Delight

- 1 lb chicken tenders - 1 cup buttermilk (or milk with a splash of vinegar) - 1 cup all-purpose flour - 2 large eggs - 1 ½ cups panko breadcrumbs - 3 tablespoons everything bagel seasoning - Salt and pepper to taste - Cooking spray For this recipe, I use fresh chicken tenders because they cook quickly. Buttermilk is key. It adds moisture and flavor. If you don't have buttermilk, mix regular milk with a splash of vinegar. This trick works great for a tender result. I use all-purpose flour for coating. It helps the egg and breadcrumbs stick well. The two eggs create a rich, tasty layer on the chicken. The panko breadcrumbs give the chicken a light, crispy texture. I love using panko because it makes the tenders crunchier than regular breadcrumbs. Everything bagel seasoning adds a fun flavor twist. It includes garlic, onion, sesame seeds, and poppy seeds for a savory kick. Lastly, season with salt and pepper to taste. This enhances the dish's overall flavor. And don't forget the cooking spray! It keeps the chicken from sticking and helps it crisp up nicely in the air fryer. Gather all these ingredients for a fun cooking adventure! Start by placing the chicken tenders in a bowl. Pour in the buttermilk until the chicken is fully covered. This step adds flavor and makes the chicken tender. Cover the bowl with plastic wrap and put it in the fridge. Let the chicken marinate for at least 30 minutes. For extra flavor, you can add spices to the buttermilk if you like. Now, let’s set up your breading stations. You need three bowls for this. In the first bowl, mix 1 cup of all-purpose flour with a pinch of salt and pepper. In the second bowl, beat two large eggs until they are well mixed. In the third bowl, combine 1 ½ cups of panko breadcrumbs with 3 tablespoons of everything bagel seasoning. Make sure to mix them well so every piece of breadcrumb is seasoned. Once the chicken has marinated, take each tender out of the buttermilk. Shake off any extra liquid. First, dredge the chicken in the flour mix, coating it evenly. Next, dip it into the beaten eggs, letting the excess drip off. Finally, roll the chicken in the panko mixture, pressing gently to make sure it sticks. Repeat this for all chicken tenders. Before you start cooking, preheat your air fryer. Set it to 380°F (193°C) and let it heat up for about 5 minutes. While it’s preheating, lightly spray the basket with cooking spray. This helps prevent sticking and gives a nice crisp to the chicken. Now it’s time to cook! Place the breaded chicken tenders in a single layer in the air fryer basket. Make sure not to overcrowd them; it’s better to cook in batches. Spray the tops lightly with cooking spray for extra crispiness. Cook for about 10-12 minutes. Flip the tenders halfway through for even cooking. They are done when they are golden brown and reach an internal temperature of 165°F (74°C). Once cooked, carefully remove the chicken tenders from the air fryer. Let them rest for a few minutes before serving. For an appealing presentation, serve them on a wooden board lined with parchment paper. Add a side of your favorite dipping sauce, like honey mustard or spicy mayo. For a colorful touch, garnish with fresh parsley or chives. Enjoy your crispy, flavorful chicken tenders! Marinating chicken is key. I suggest at least 30 minutes in buttermilk. This helps keep the chicken juicy. If you’re short on time, even 15 minutes helps. You can swap buttermilk for milk mixed with a splash of vinegar. This gives a similar tangy taste. For crispy tenders, preheat your air fryer to 380°F (193°C). This helps the chicken crisp up nicely. Lightly spray the basket with cooking spray before you add the chicken. After breading, spray the tops with cooking spray too. This boosts that crunchy texture you want. Fry in a single layer. Avoid overcrowding the basket. This ensures even cooking and crispiness. Watch out for a few key pitfalls. First, don’t skip the marinating step. It keeps the chicken tender. Second, ensure the air fryer is preheated. This makes a big difference. Lastly, avoid using too much breading. It can make the tenders soggy. Aim for a nice, even coat. Following these tips will help you make perfect tenders every time! {{image_2}} You can add a fun spin to your chicken tenders. Mix in spices like smoked paprika or garlic powder with the flour. You can also use herbs like dried oregano or thyme. These additions give a unique taste to the chicken. Get creative and find your favorite mix! If you want a lighter meal, swap out the flour for almond flour. This makes the dish gluten-free and lower in carbs. You can also use whole wheat panko breadcrumbs for more fiber. For a lower-calorie option, try using less oil when cooking. These changes keep the flavor without the extra calories. You can still enjoy these chicken tenders without an air fryer. To bake them, preheat your oven to 400°F (200°C). Place the breaded chicken on a baking sheet lined with parchment paper. Bake for about 15-20 minutes, flipping halfway. For pan frying, heat oil in a skillet over medium heat. Cook the chicken for about 5-7 minutes on each side until golden brown. Enjoy the same great flavors! To keep your Air Fryer Everything Bagel Chicken Tenders fresh, place them in an airtight container. If you have a lot, split them into smaller containers. This helps them cool quickly and stay safe. You can store them in the fridge for up to three days. If you want to keep them longer, you can freeze them. Wrap each tender in plastic wrap, then place them in a freezer bag. To reheat chicken tenders, the air fryer is your best friend. Preheat it to 350°F (175°C) for about 5 minutes. Place the chicken tenders in the basket in a single layer. Heat them for 5 to 7 minutes or until they are crispy again. You can also use an oven for reheating. Set it to 350°F (175°C) and bake for 10 to 12 minutes. Both methods keep the chicken tasty and crisp. In the fridge, cooked chicken tenders last about three days. If you freeze them, they can last up to three months. Always check for signs of spoilage before eating. If they smell off or look strange, it's best to toss them. Enjoy your delicious tenders while they are fresh! Yes, you can use regular breadcrumbs. Panko has a lighter, crispier texture. This helps give your chicken tenders a crunchier bite. If you use regular breadcrumbs, your chicken may not be as crisp. You can also mix regular breadcrumbs with a bit of oil for added crunch. To check if chicken tenders are done, look for a few signs. First, the color should be golden brown. Second, the chicken should feel firm to the touch. Most importantly, use a meat thermometer. The internal temperature should reach 165°F (74°C). This ensures the chicken is safe to eat. Yes, you can prep this recipe ahead. Marinate the chicken in buttermilk and store it in the fridge. You can also bread the chicken and keep it in the fridge. Just make sure to cover it tightly. If you plan to freeze the tenders, freeze them before cooking. They can last up to three months in the freezer. When ready, cook them straight from frozen. Adjust your cooking time as needed. This blog post gave you a complete guide for making tasty chicken tenders. We covered the right ingredients, how to marinate, and step-by-step cooking methods. You now have tips for perfecting crispiness and great serving ideas. Whether you choose to spice them up or keep them classic, these tenders can be a hit. Keep experimenting with flavors and methods to find your favorite version. Enjoy making and sharing these delicious treats with friends and family!

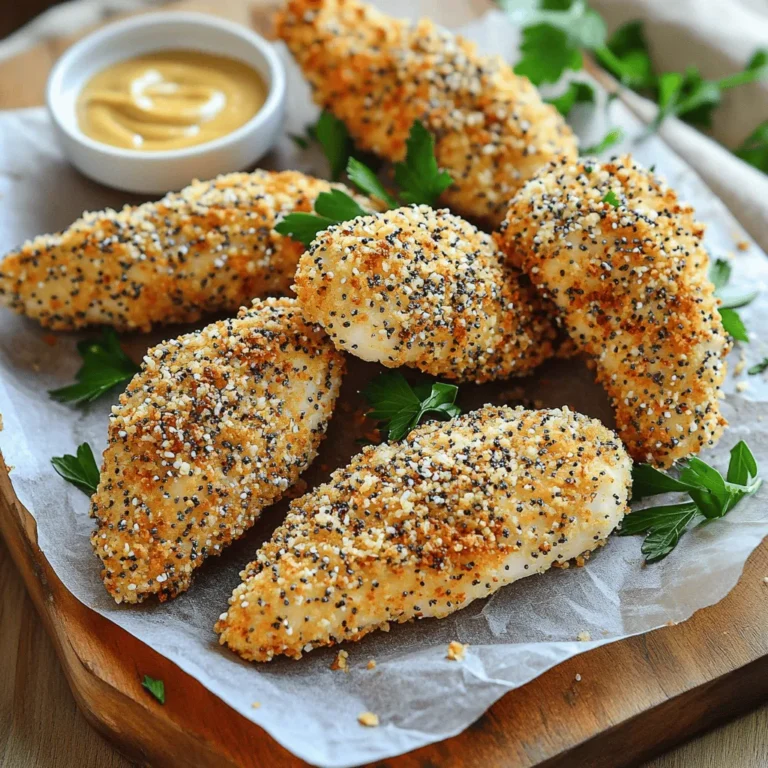
Air Fryer Everything Bagel Chicken Tenders Recipe

- 1 pound chicken breasts, diced - 1 tablespoon olive oil - 3 cloves garlic, minced - 1 cup sun-dried tomatoes, chopped - 2 cups fresh spinach The main ingredients form the heart of this dish. Chicken breasts provide protein and texture. I love using olive oil for its flavor and health benefits. Garlic adds a nice kick, while sun-dried tomatoes bring a sweet, tangy taste. Fresh spinach adds color and nutrients, making the dish vibrant. - 1 cup heavy cream - 1 cup chicken broth - 1 teaspoon Italian seasoning - 16 ounces gnocchi - Grated Parmesan cheese for serving - Fresh basil leaves for garnish The heavy cream creates a rich sauce that coats the gnocchi. Chicken broth adds depth to the flavor, while Italian seasoning brings warmth and spice. Gnocchi is the perfect base; it soaks up the creamy sauce. To finish, I love adding grated Parmesan for a salty touch and fresh basil for a pop of flavor. - Heating the skillet: First, grab a large skillet and heat one tablespoon of olive oil over medium heat. This step is key to achieving that perfect sear on the chicken. - Browning the chicken: Next, add one pound of diced chicken breasts to the skillet. Season it with salt and pepper. Cook for about 6 to 8 minutes. You want it browned and fully cooked. This will lock in the flavor. - Setting the chicken aside: Once the chicken is done, remove it from the skillet and set it aside. This will allow us to build our creamy sauce in the same skillet. - Sautéing the garlic: In the same skillet, toss in three cloves of minced garlic. Sauté it for 1 to 2 minutes. The smell will be amazing! - Adding sun-dried tomatoes and spinach: Stir in one cup of chopped sun-dried tomatoes. Let it cook for a minute. Then add two cups of fresh spinach. Cook until the spinach wilts, about 2 to 3 minutes. - Combining chicken broth and heavy cream: Pour in one cup of chicken broth and one cup of heavy cream. Add one teaspoon of Italian seasoning. Bring it to a simmer and let it cook for about 5 minutes. This makes the sauce rich and thick. - Adding chicken back to the skillet: After the sauce thickens, return the cooked chicken to the skillet. Stir it well to coat the chicken with that creamy goodness. - Cooking gnocchi: While the sauce simmers, cook 16 ounces of gnocchi according to the package instructions. They should float when they're ready, usually in about 2 to 3 minutes. Drain them well. - Folding in gnocchi with the chicken mixture: Gently fold the cooked gnocchi into the creamy chicken mixture. Make sure each piece is well-coated. This is where everything comes together into a delicious dish! To keep chicken juicy, always start with high heat. Heat the olive oil until it shimmers. Then add the diced chicken. Season it well with salt and pepper. Cook it for 6-8 minutes. This browns the meat and locks in moisture. After cooking, set the chicken aside. This keeps it tender while you make the sauce. To avoid overcooking, watch the time closely. Use a meat thermometer if you have one. The chicken should reach 165°F. If it cooks too long, it can become dry and tough. For a creamier sauce, consider using different cream options. Heavy cream is rich, but you can also use half-and-half or sour cream. Each option gives a unique flavor and texture. Adjusting seasoning is key for flavor. Taste the sauce as it simmers. If it needs more flavor, add salt, pepper, or Italian seasoning. Always season in small amounts. This helps you control the taste. For side dishes, serve a simple green salad. A light salad pairs well with the rich gnocchi. You can also offer garlic bread. It complements the creamy sauce nicely. For garnishes, freshly grated Parmesan cheese adds a great touch. Sprinkle it on top before serving. Fresh basil leaves also brighten the dish. They add color and a fresh flavor. {{image_2}} You can switch out the chicken for shrimp or tofu to change the dish. Shrimp cooks fast and adds a light taste. Tofu works great for a plant-based option. Just make sure to brown the tofu well for more flavor. For vegetables, consider using mushrooms or zucchini. These choices add texture and keep the dish fresh. You can also mix in bell peppers or peas for color and crunch. If you need a gluten-free version, look for gluten-free gnocchi. Many brands now make this option, which tastes great in the dish. You can also make your own with gluten-free flour if you like a challenge. For a dairy-free adaptation, use coconut cream instead of heavy cream. This gives a creamy texture without dairy. You can also skip the cheese or use a dairy-free cheese substitute. To add some heat, try adding crushed red pepper flakes. Just a pinch can make a big difference. You can always add more if you like a spicy kick. Fresh herbs like basil or oregano can really brighten the dish. Chop them finely and mix them in right before serving. This gives your Creamy Tuscan Chicken Gnocchi a fresh and vibrant taste. To keep your creamy Tuscan chicken gnocchi fresh, store it in the fridge. Use an airtight container to avoid air exposure. This will help maintain flavor and texture. Make sure the dish cools to room temperature before sealing it. Leftovers will stay good for about three days. To reheat, I recommend using the stovetop for the best texture. Heat a non-stick skillet over medium heat. Add a splash of chicken broth to help keep it creamy. Stir gently until warmed through, about five to seven minutes. If using a microwave, place the gnocchi in a bowl, cover it, and heat in 30-second bursts. Stir in between until hot, which should take around two minutes total. If you want to save some for later, freezing is a great option. First, let the dish cool completely. Then, scoop it into freezer-safe containers or bags. Remove as much air as possible to prevent freezer burn. You can freeze it for up to three months. To thaw, place the container in the fridge overnight. For quick thawing, you can use the microwave on the defrost setting. Once thawed, reheat using the stovetop method for the best results. This way, your creamy sauce will stay rich and tasty. Creamy Tuscan Chicken Gnocchi lasts about 3 to 4 days in the fridge. Store it in an airtight container. Make sure it cools down before placing it in the fridge. This helps keep it fresh longer. Yes, you can prepare the sauce ahead of time. Cook the chicken and make the creamy sauce. Store them separately from the gnocchi. When you are ready to eat, cook the gnocchi and mix them in. This keeps everything fresh and tasty. This dish pairs well with a simple salad or garlic bread. A fresh green salad adds a nice crunch. Garlic bread brings extra flavor and complements the creamy sauce. For drinks, try a light white wine or sparkling water. In this blog post, we explored how to make creamy Tuscan chicken gnocchi. We covered the main and additional ingredients, step-by-step cooking instructions, tips for the best results, and variations to suit different diets. My final thought is that this dish is not only tasty but also adaptable. With just a few swaps, you can make it fit your needs. Enjoy cooking and sharing this meal with others!

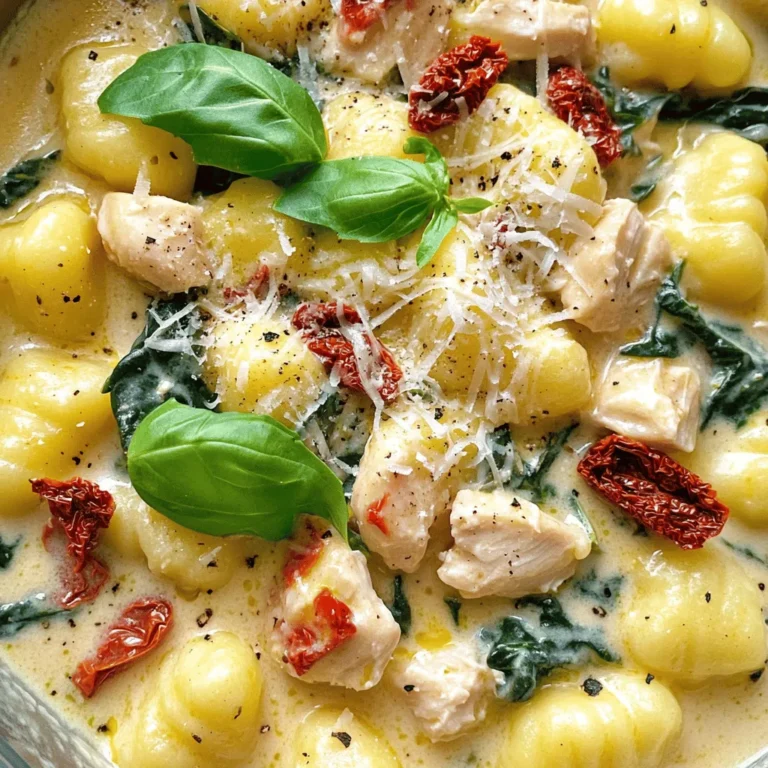
Creamy Tuscan Chicken Gnocchi Rich and Flavorful Dish

For the perfect batch of cinnamon swirl pumpkin pancakes, gather these simple ingredients: - 1 cup all-purpose flour - 1 tablespoon baking powder - 1 teaspoon ground cinnamon - 1/2 teaspoon ground nutmeg - 1/4 teaspoon salt - 1 cup milk - 1/2 cup canned pumpkin puree - 1 large egg - 2 tablespoons brown sugar - 1 teaspoon vanilla extract - 2 tablespoons melted butter - 1/4 cup granulated sugar (for swirl) - 1 teaspoon ground cinnamon (for swirl) These ingredients come together to create a rich, flavorful pancake. The pumpkin puree adds moisture and a subtle sweetness. The spices bring warmth and depth to each bite. The swirl of cinnamon sugar creates a delightful visual and taste experience. This blend makes your breakfast feel like a special treat every time. Start by gathering your dry ingredients. In a large bowl, add 1 cup of all-purpose flour, 1 tablespoon of baking powder, 1 teaspoon of ground cinnamon, 1/2 teaspoon of ground nutmeg, and 1/4 teaspoon of salt. Whisk these together until they are well mixed. This helps to combine flavors and ensure even cooking. Next, grab another bowl for the wet ingredients. Combine 1 cup of milk, 1/2 cup of canned pumpkin puree, 1 large egg, 2 tablespoons of brown sugar, 1 teaspoon of vanilla extract, and 2 tablespoons of melted butter. Stir these ingredients until smooth. The pumpkin adds flavor and moisture to the pancakes. Now it's time to bring the two mixtures together. Pour the wet ingredients into the bowl with the dry mix. Stir gently until just combined. It’s okay if the batter is slightly lumpy. Overmixing can make the pancakes tough, and we want them light and fluffy. In a small bowl, mix 1/4 cup of granulated sugar and 1 teaspoon of ground cinnamon. This will be our sweet swirl. Set it aside for later. This mix adds a delightful surprise to each bite. Preheat your griddle or non-stick skillet over medium heat. Lightly grease it with cooking spray or butter. Pour 1/4 cup of batter onto the hot skillet for each pancake. Now, using a spoon, sprinkle a bit of the cinnamon-sugar mixture on top of the batter. Use a toothpick or the end of a spoon to create a spiral design. Cook until bubbles form on the surface, about 3 to 4 minutes. Flip the pancake and cook for another 2 to 3 minutes, until golden brown. Repeat this process until all the batter is used. Adjust the heat if needed to avoid burning. Enjoy the warm, cozy flavors of these cinnamon swirl pumpkin pancakes! To make the best pancakes, use a hot skillet. If it's not hot enough, your pancakes will not cook well. I recommend using a non-stick pan for easy flipping. Make sure to grease the pan lightly with butter or cooking spray. Pour the batter in a 1/4 cup measure for even sizes. Watch for bubbles on the surface. When you see them, it’s time to flip. Cook until golden brown on both sides. This way, you get a fluffy, golden pancake every time! Feel free to adjust spices to suit your taste. You can add more cinnamon or nutmeg for a stronger flavor. If you want a sweeter pancake, increase the brown sugar slightly. For a richer taste, use whole milk instead of low-fat. You can also try adding a splash of maple syrup into the batter. Each change can bring a new twist to your pancakes, making them your own. These pancakes shine when served warm. Stack them high on a plate and dust with powdered sugar. Drizzle with pure maple syrup for a sweet finish. A dollop of whipped cream adds a nice touch. For a fun twist, sprinkle extra cinnamon or even some chopped nuts on top. You can also serve them with fresh fruit like bananas or berries. These toppings enhance the flavor and make your meal look beautiful! {{image_2}} You can easily make pumpkin spice pancakes. Simply add more spices to the batter. Try adding 1/2 teaspoon of ginger and 1/4 teaspoon of cloves. This will give your pancakes a warm, spicy kick. You might also add a bit more pumpkin puree for extra flavor and moisture. If you want gluten-free pancakes, swap the all-purpose flour for a gluten-free blend. Many blends work great in pancakes. Just check the package for the right amount. You may also need to adjust the liquid slightly, as some blends absorb more moisture. For a fun twist, add chocolate chips or nuts to your batter. Fold in 1/2 cup of semi-sweet chocolate chips or chopped nuts like walnuts or pecans. This adds texture and flavor. Just be careful not to overmix the batter to keep the pancakes fluffy. If you have leftover pancakes, store them in the fridge. Place them in an airtight container or wrap them tightly in plastic wrap. They stay fresh for up to three days. You can also stack them with parchment paper in between to prevent sticking. To freeze pancakes, let them cool completely. Then, layer them with parchment paper in a freezer-safe bag or container. This method keeps them from sticking together. You can freeze them for up to two months. Just label the bag with the date for easy tracking. Reheat your pancakes in several ways. For the microwave, place a pancake on a plate and heat for 20-30 seconds. If you want a crispy edge, use a skillet. Heat it over medium heat for about 1-2 minutes on each side. You can also pop them in a toaster for a quick, crunchy finish. Enjoy them warm, topped with your favorite syrup! Yes, you can use fresh pumpkin. Just cook and mash it first. Use about the same amount as canned pumpkin. Fresh pumpkin adds a vibrant flavor and freshness that is hard to beat. To make your pancakes fluffier, you can separate the egg. Beat the egg white until it is stiff. Then fold it into the batter at the end. This adds air and lightens the texture. Many toppings work well with these pancakes. Some favorites are maple syrup, whipped cream, or a sprinkle of nuts. You could also add fresh fruit like bananas or apples for extra flavor. Yes, you can prepare the batter ahead of time. Store it in the fridge for up to 24 hours. Just give it a good stir before cooking, as it may thicken a bit. To store pancake batter, place it in an airtight container. Keep it in the fridge. Use it within a day for the best taste and texture. This blog post covered how to make delicious Cinnamon Swirl Pumpkin Pancakes. We looked at key ingredients, step-by-step instructions, and helpful tips. I shared ways to customize these pancakes, along with storage options. In conclusion, enjoy the warm flavors and easy prep. You can impress friends and family with these tasty pancakes. Happy cooking!

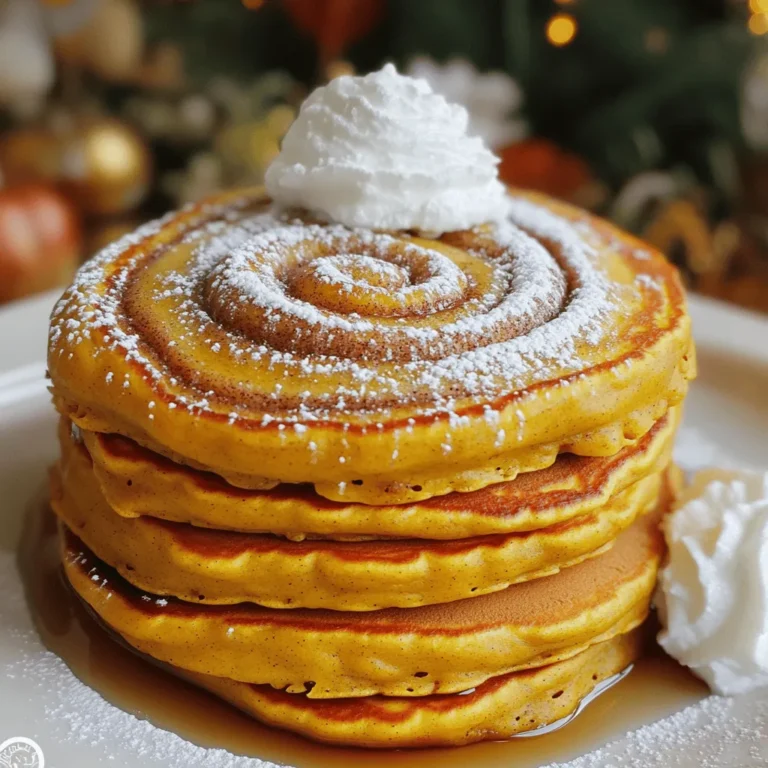
Cinnamon Swirl Pumpkin Pancakes Delightful Morning Treat

- 2 cups all-purpose flour - 2 tablespoons granulated sugar - 1 tablespoon baking powder - 1/2 teaspoon salt - 1/2 cup milk - 1/4 cup unsalted butter, melted - 1 large egg For these cinnamon rolls, start with the main ingredients. Flour gives rolls their structure. Sugar adds sweetness, while baking powder helps them rise. Salt balances the flavors. Milk keeps the dough moist. Melted butter adds richness, and the egg helps bind everything together. - 1/2 cup apple butter - 1 tablespoon ground cinnamon - 1/2 cup brown sugar, packed The filling is where the magic happens. Apple butter brings a deep, fruity flavor. Ground cinnamon gives warmth and spice. Brown sugar adds a rich sweetness that melts into the rolls. - 1 cup powdered sugar - 2 tablespoons cream cheese, softened - 2 tablespoons milk The frosting makes each bite special. Powdered sugar is sweet and smooth. Cream cheese adds a tangy richness. Milk helps to create a creamy texture that drizzles perfectly over the warm rolls. - In a large bowl, whisk together the dry ingredients: 2 cups of flour, 2 tablespoons of sugar, 1 tablespoon of baking powder, and 1/2 teaspoon of salt. Mix them well. - In another bowl, combine 1/2 cup of milk, 1/4 cup of melted butter, and 1 large egg. Stir until mixed. Pour this wet mix into the dry mix. Stir it all until a dough forms. - On a lightly floured surface, roll out the dough. Make it a rectangle, about 12x18 inches. - Spread 1/2 cup of apple butter over the dough. Leave a small border at the edges. - In a small bowl, mix 1/2 cup of brown sugar with 1 tablespoon of cinnamon. Evenly sprinkle this over the apple butter. - Roll the dough tightly from the long edge to make a log. Cut it into 1-inch thick rolls. You should get about 12 rolls. - Grease the bottom of the slow cooker or line it with parchment paper. Place the rolls inside, leaving space between them. - Cover the cooker and cook on low for 2 to 3 hours. Check for fluffiness and doneness. To make the best dough, avoid overmixing. When you mix too much, the rolls become tough. Combine the wet and dry ingredients until just mixed. This keeps the rolls fluffy. Proper flour measurements are key. Use a spoon to aerate the flour, then scoop it into the measuring cup. Level it off with a knife. This method helps you avoid using too much flour, which can lead to dense rolls. Adjust the cooking time based on your slow cooker model. Some cook faster than others. Start checking the rolls after 2 hours. They should be fluffy and spring back when touched. To keep the rolls moist, place a clean kitchen towel under the slow cooker lid. This traps steam and prevents dryness. You want your rolls soft and tender. Serve the rolls warm with apple butter on the side. The sweet apple flavor pairs perfectly with the cinnamon. These rolls go great with coffee or tea. The warm spices and creamy frosting make every bite special. Enjoy them fresh for the best experience! {{image_2}} You can change the filling in many ways. Try nut butter as a spread. Almond or peanut butter works well. It adds creaminess and flavor. You can also add chopped nuts like walnuts or pecans. Dried fruits, like raisins or cranberries, add sweetness too. These simple swaps can make each roll special. If you want a vegan frosting, use coconut cream. It adds a rich taste. Blend it with powdered sugar for sweetness. Another option is to add spices to your frosting. A pinch of nutmeg or ginger gives a warm flavor. You can also try orange or lemon zest for a fresh twist. These options make your rolls even more delightful. For a gluten-free version, swap regular flour for gluten-free flour. This change keeps the rolls fluffy. Make sure to check the flour blend. Some blends work better than others. To keep your rolls moist, add a bit of extra milk. You can also use applesauce as a substitute for some butter. This keeps the rolls soft and tasty. To keep your leftover rolls fresh, store them in an airtight container. Place parchment paper between layers to avoid sticking. Refrigerate them if you plan to eat them within a week. If you want to keep them longer, freezing is a great option. Wrap each roll in plastic wrap and then place them in a freezer bag. This helps prevent freezer burn. They can last up to three months in the freezer. When reheating, you have two main options: the microwave or the oven. If you use the microwave, heat a roll for about 15 to 20 seconds. This method is quick but can make the rolls tough if overdone. The oven is a better choice for soft rolls. Preheat the oven to 350°F and place the rolls on a baking sheet. Cover them with foil and heat for about 10 minutes. This keeps the rolls soft and warm, just like when they were first made. These rolls take about 2 to 3 hours in a slow cooker on low heat. Cooking time depends on your slow cooker. Check the rolls after 2 hours. They should be fluffy and cooked through. Yes, you can prepare the rolls ahead. After cutting the rolls, store them in the fridge. Cover the rolls tightly. When ready to bake, let them sit at room temperature for 30 minutes before cooking. If you don’t have apple butter, you can use applesauce. Make sure to use unsweetened applesauce for a similar taste. Or, try mixing apple pie filling with a little cinnamon for a fun twist. To make these rolls dairy-free, substitute milk with almond milk or oat milk. Use dairy-free butter in place of unsalted butter. You can also choose a dairy-free cream cheese for the frosting. Yes, you can use pre-made dough. Look for biscuit dough or crescent roll dough. Just roll it out, spread the apple butter, and follow the remaining steps. It saves time and still tastes great! We explored how to make delicious Slow Cooker Apple Butter Cinnamon Rolls. You learned about the key ingredients like flour, apple butter, and cream cheese frosting. I shared step-by-step instructions for making the dough and filling. Plus, you got tips for perfecting your rolls and various toppings. In conclusion, these cinnamon rolls are easy and fun to make. Enjoy them fresh or with a warm drink. With practice, you’ll create a treat everyone will love. Try different fillings and frostings to find your favorite!

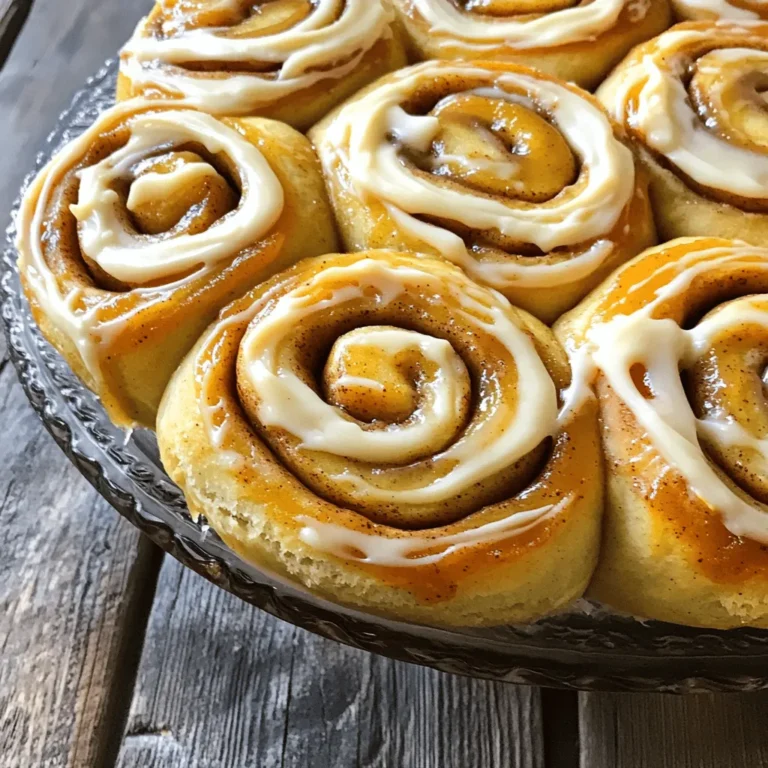
Slow Cooker Apple Butter Cinnamon Rolls Delight

- 1 medium head of cauliflower - ½ cup grated Parmesan cheese - 1 cup breadcrumbs (preferably panko) - 2 tablespoons olive oil - 1 teaspoon garlic powder - 1 teaspoon onion powder - ½ teaspoon paprika - Salt and pepper to taste - Chopped parsley for garnish To make these Air Fryer Parmesan Cauliflower Bites, you need fresh ingredients. Start with a medium head of cauliflower. Cut it into bite-sized florets. This ensures that they cook evenly and become crispy. Next, gather ½ cup of grated Parmesan cheese. I love using fresh cheese for the best taste. For the crispy coating, use 1 cup of breadcrumbs, preferably panko. Panko gives a nice crunch. You will also need 2 tablespoons of olive oil. The oil helps the coating stick and crisp up in the air fryer. Now, let's add some flavor with seasoning. You need 1 teaspoon of garlic powder and 1 teaspoon of onion powder. These spices add depth to the flavor. A ½ teaspoon of paprika brings a subtle warmth. Don't forget to add salt and pepper to taste. Finally, you can garnish your bites with chopped parsley. It adds color and freshness. This simple mix of ingredients will create a crunchy delight that everyone will love. Rinse the cauliflower head under cold water. Cut it into small, bite-sized florets. Pat them dry with a paper towel. This step is key for keeping the bites crispy. In a large bowl, mix 1 cup of breadcrumbs and ½ cup of grated Parmesan cheese. Add 1 teaspoon of garlic powder, 1 teaspoon of onion powder, and ½ teaspoon of paprika. Sprinkle in salt and pepper to taste. Stir until everything is well combined. This coating gives the bites a crunchy and tasty outer layer. Drizzle 2 tablespoons of olive oil over the cauliflower florets. Toss them well to coat each piece evenly. Take each floret and dip it into the breadcrumb mixture. Press gently to make sure the coating sticks. Place the coated florets in a single layer in the air fryer basket. This helps them cook evenly and get nice and crispy. Set your air fryer to 400°F (200°C). Air fry the cauliflower bites for about 12-15 minutes. Shake the basket halfway through to ensure even cooking. The bites should turn a lovely golden brown and be crispy on the outside. Once cooked, remove the cauliflower bites from the air fryer. Let them cool for a few minutes. Garnish with chopped parsley before serving. This adds a fresh touch and makes your dish look great. Enjoy your crunchy delight! To get those perfect, crunchy bites, you must dry the florets well. Moisture makes them soggy. After rinsing, use a paper towel to pat them dry. This step is key. For the coating, I suggest using panko breadcrumbs instead of regular ones. Panko gives a lighter, crispier texture. It helps your bites turn out golden and crunchy. To make these bites even tastier, add spices like cayenne for heat or Italian seasoning for herbs. These spices bring life to your dish. Using freshly grated Parmesan cheese also makes a big difference. It melts better and tastes richer than pre-grated cheese. Don’t skip this step if you want bold flavors! Keep a close eye on your cooking time. Air fryers can cook unevenly, so shake the basket halfway through. This helps all the bites cook evenly. If your air fryer runs hot, consider lowering the temperature a bit. Each air fryer is different, so adjust as needed to avoid burnt bites. {{image_2}} You can switch the Parmesan for other cheeses. Cheddar adds a sharp taste. Mozzarella gives a creamy texture. If you prefer vegan options, try vegan mozzarella or cashew cheese. These still provide a nice flavor. You can enjoy the same crunch with different cheese types. Adding fresh herbs can boost flavor. Thyme and rosemary are great choices. They add a nice aroma and taste. You can also try spices like cayenne or chili powder for some heat. Experimenting with different spices can lead to fun new flavors. You can mix in cooked bacon bits for a savory twist. The bacon adds great depth to each bite. Chopped vegetables like bell peppers can also be included. They add color and crunch. Playing with extra ingredients makes this dish your own. To keep your Air Fryer Parmesan Cauliflower Bites fresh, store them in airtight containers. This method prevents moisture and keeps them crispy. You can place them in the fridge for up to three days. After that, they may lose their crunch and flavor. The best way to reheat these bites is in the air fryer. Set it to 350°F (175°C) and heat for about 5-7 minutes. This method helps restore their crispiness. If you don’t have an air fryer, you can use an oven. Preheat the oven to 350°F (175°C) and heat them for around 10 minutes. The microwave works too, but it may make them soggy. For the best taste, stick with the air fryer or oven. Yes, you can use frozen cauliflower. Just thaw it first. Drain excess water to keep it crispy. Coat and air fry as usual. Frozen florets may need a few extra minutes to cook. To make these bites gluten-free, swap regular breadcrumbs with gluten-free panko. Check all other ingredients for gluten. Parmesan cheese is typically gluten-free, so you’re good there. Great sauces include ranch, marinara, or garlic aioli. You can also try a spicy sriracha mayo. These flavors complement the bites perfectly. Feel free to mix and match! Leftovers can last about 3-4 days in the fridge. Store them in an airtight container. Reheat in the air fryer for best results. This keeps them crispy and delicious. Absolutely! You can use cheddar, mozzarella, or even a vegan cheese. Each will give a different flavor. Just ensure it melts well for the best crunch. You learned how to make tasty Air Fryer Parmesan Cauliflower Bites. We covered important ingredients, easy step-by-step instructions, and helpful tips for the best results. Remember to dry the florets for a crisp finish and experiment with different spices to add flavor. Try new cheeses or even mix in extra ingredients. This dish is fun, quick, and versatile. Enjoy your tasty snack anytime you want!

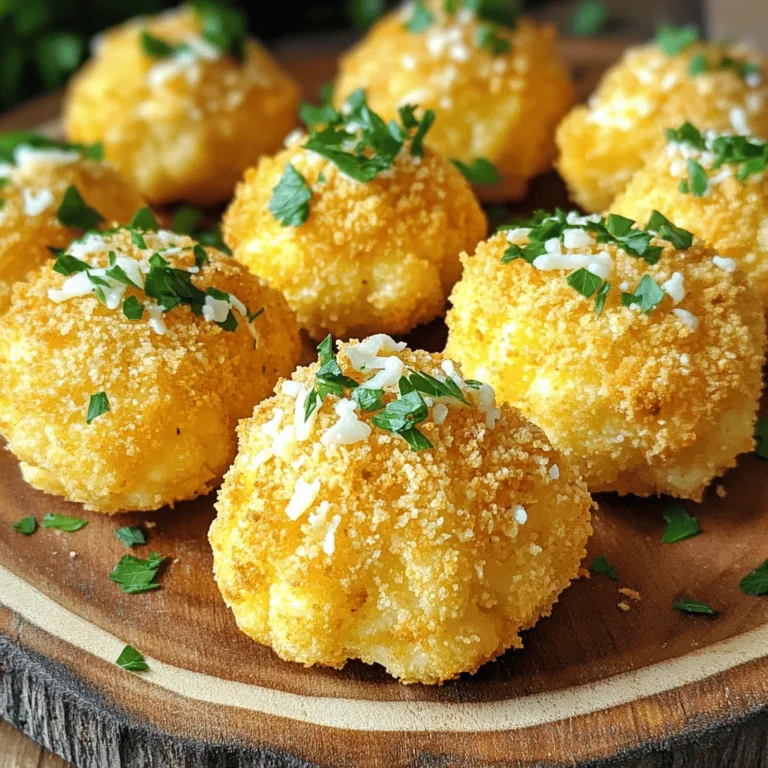
Air Fryer Parmesan Cauliflower Bites Crunchy Delight

To make Lemon Herb Chicken Couscous, gather these key ingredients: - 2 chicken breasts, boneless and skinless - 1 cup couscous - 1 1/4 cups chicken broth (or water) - 1 lemon (zested and juiced) - 2 tablespoons olive oil - 2 cloves garlic, minced - Salt and pepper to taste These items form the base of your dish. The chicken gives protein, while the couscous adds texture. The lemon brings a bright flavor that lifts the whole meal. This dish shines with the herbs and seasonings. You will need: - 1 teaspoon dried oregano - 1 teaspoon dried thyme - 1/4 cup fresh parsley, chopped Oregano and thyme add depth. Fresh parsley brightens the dish and gives a pop of color. Garlic adds a rich, savory taste that ties everything together. Want to make this dish even more exciting? Try these optional add-ins: - 1/4 cup cherry tomatoes, halved - 1/4 cup cucumber, diced Cherry tomatoes give sweetness and a juicy burst. Diced cucumber adds crunch and freshness. You can mix and match based on your taste. These small additions can transform your meal into a colorful feast. To start, grab a mixing bowl. Combine olive oil, lemon juice, minced garlic, oregano, thyme, salt, and pepper. Whisk it well to blend the flavors. Now, take your chicken breasts and place them in the bowl. Make sure every piece gets coated by the marinade. Cover the bowl with plastic wrap and let it sit for at least 30 minutes. For more flavor, you can marinate it longer, up to 2 hours in the fridge. Next, turn your attention to the couscous. Pour 1 1/4 cups of chicken broth into a medium saucepan. Bring it to a boil over medium heat. Once boiling, add 1 cup of couscous and stir it well. Cover the saucepan and remove it from the heat. Let it sit for about 5 minutes. It will absorb the liquid and soften. After that, fluff the couscous with a fork. Mix in the lemon zest, fresh parsley, chopped cherry tomatoes, and diced cucumber for a burst of flavor. Now, it’s time to grill the chicken. Preheat your grill pan or skillet over medium heat. Take the marinated chicken out of the bowl, letting the excess marinade drip off. Place the chicken on the hot grill. Cook each side for about 6-7 minutes. You want the chicken to reach an internal temperature of 165°F (75°C). Once cooked, remove the chicken from the heat. Let it rest for a few minutes before slicing it into pieces. Now, you have a delicious Lemon Herb Chicken Couscous ready to enjoy! To make the chicken burst with flavor, marinate it well. Combine olive oil, lemon juice, garlic, oregano, thyme, salt, and pepper. Let the chicken sit in this mix for at least 30 minutes. This lets the spices soak in. If you have time, marinate for up to 2 hours. The longer, the better! Cook the chicken on medium heat for 6-7 minutes on each side. This cooking time helps it stay juicy and tender. Use a meat thermometer to check for doneness. The internal temperature should reach 165°F (75°C). Remember, letting it rest for a few minutes before slicing keeps it moist. When cooking couscous, bring your broth or water to a boil first. Once it boils, stir in the couscous and cover the pot. After 5 minutes, take off the lid and fluff it with a fork. This will give you that light and airy texture. Mixing in lemon zest and fresh herbs adds great taste! {{image_2}} You can easily add vegetables to your couscous. This adds color and nutrition. Try mixing in diced bell peppers, peas, or zucchini. You can also use spinach or kale for an extra boost. Just sauté the veggies in olive oil before folding them into the couscous. This step enhances their flavor and keeps them tender. If you like heat, spice up your chicken. Add red pepper flakes to your marinade. Just a pinch can change the whole taste. You can also use a dash of hot sauce for extra flavor. This kick pairs well with the lemon. It makes the dish exciting and bold. Quinoa is a great substitute for couscous. It has a nutty flavor and is gluten-free. To make this switch, cook 1 cup of quinoa in 2 cups of chicken broth. Just follow the cooking steps for couscous. Quinoa will give your dish a different texture but still be delicious. Plus, it adds more protein to your meal, making it even better for you. To keep your Lemon Herb Chicken Couscous fresh, place it in an airtight container. Store it in the fridge. It can last for about three days. Make sure you let it cool first before sealing it up. This will help keep it from getting soggy. When you are ready to enjoy the leftovers, reheat them gently. You can use a microwave or a pan on low heat. If using the microwave, add a splash of chicken broth or water. This helps the couscous stay moist. Stir it every minute to heat evenly. In a pan, stir often and add a little oil if needed. You can freeze Lemon Herb Chicken Couscous if you want to save it for later. Use a freezer-safe container or bag. It can stay good for about two months in the freezer. When you are ready to eat it, thaw it in the fridge overnight. Reheat it as described above for the best taste. Yes, you can use various proteins. Try turkey, shrimp, or even tofu for a veggie option. Each protein will soak up the marinade and add its own twist. Adjust cooking times as needed. For shrimp, cook for about 3-4 minutes on each side. For turkey, follow similar grilling times as chicken. You can marinate the chicken for at least 30 minutes. For deeper flavor, let it sit for up to 2 hours in the fridge. Marinating longer helps the meat soak up the lemon and herbs. Just don’t exceed 24 hours, as the acid can make the chicken mushy. This dish pairs well with many sides. Here are some favorites: - A fresh green salad with a light vinaigrette - Roasted vegetables for added texture and flavor - Grilled asparagus or zucchini for a healthy touch - A tangy yogurt sauce to balance the flavors - Crusty bread to soak up the juices These sides enhance the meal and provide vibrant colors. Feel free to mix and match based on your taste! This blog post covered key ingredients, from marinating the chicken to cooking the couscous. You learned step-by-step how to grill the chicken perfectly and add herbs for great flavor. Tips helped you understand cooking times and fluffing couscous. You also saw variations like spicy options and veggie add-ins. Finally, I shared storage tips for leftovers, including how to reheat and freeze. With this knowledge, you can make a tasty meal that everyone will love. Enjoy cooking!

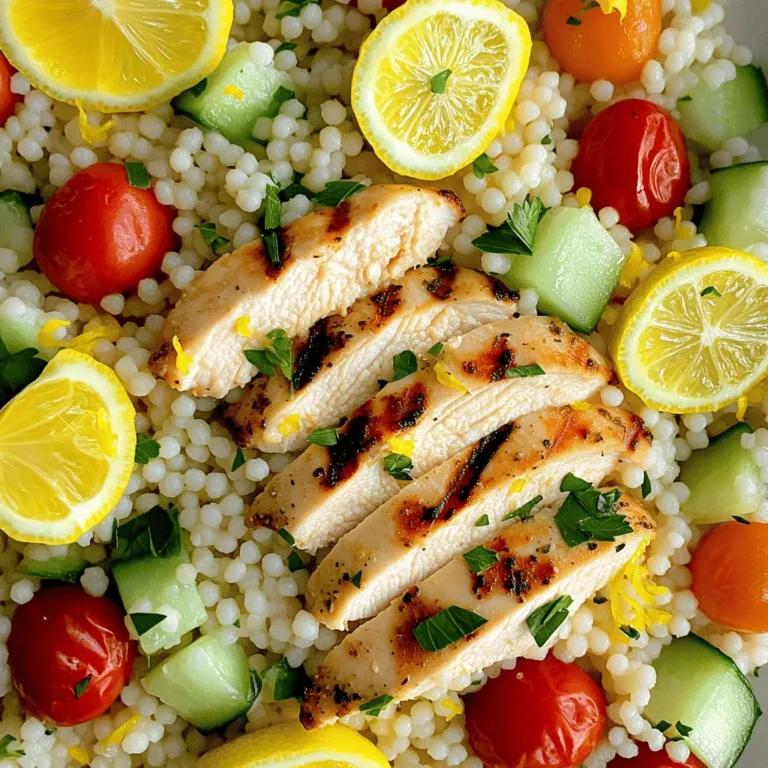
Lemon Herb Chicken Couscous Tasty and Simple Recipe

PREV 1 … 18 19 20 … 53 NEXT
cozy citrus kitchen

explore

DessertsDinnerAppetizersDrinks

Our Policies

  • Cookie Policy
  • Copyright Policy
  • Disclaimer
  • GDPR Policy
  • Terms Of Use
Back to Top
  • About
  • Contact Us
  • Privacy Policy
© 2025 cozy citrus kitchen