FREE DINNER EBOOK! Get your copy!
  • Cookie Policy
  • GDPR Policy
  • Disclaimer
  • Terms Of Use
  • Visit my other site: Fun Cookie Recipes
cozy citrus kitchen
  • Home
  • Dinner
  • Desserts
  • Drinks
  • Appetizers
  • Contact
  • About
  • Privacy Policy
  • Home
  • Dinner
  • Desserts
  • Drinks
  • Appetizers
  • Contact
  • About
  • Privacy Policy
  • Cookie Policy
  • GDPR Policy
  • Disclaimer
  • Terms Of Use
Visit my other site: Fun Cookie Recipes

HOME / CATEGORIES /

Latest

To make these tasty tacos, you need: - 1 medium head of cauliflower, cut into florets - 2 tablespoons olive oil - 1 teaspoon paprika - 1 teaspoon ground cumin - 1 teaspoon garlic powder - Salt and pepper to taste - 8 small corn tortillas - 1 cup shredded red cabbage - 1 avocado, sliced - Fresh cilantro leaves for garnish These ingredients work together to create a flavorful dish. The cauliflower gives a hearty base, while the spices add warmth. The tortillas wrap everything up nicely, and the cabbage adds crunch. For the chipotle crema, gather these items: - 1/2 cup Greek yogurt - 1-2 tablespoons chipotle in adobo sauce (adjust based on spice preference) - 1 tablespoon lime juice - Salt to taste The Greek yogurt makes the crema rich and creamy. The chipotle in adobo sauce adds a smoky kick. Lime juice brightens the flavor, making each bite refreshing. You can enhance your tacos with these garnishes: - Extra cilantro leaves - Lime wedges These add freshness and a zesty touch to your tacos. You can also try adding hot sauce for more spice. Enjoy the fun of customizing your meal with these extras! First, grab a medium head of cauliflower. Cut it into small florets. In a large bowl, add the florets. Drizzle two tablespoons of olive oil over the cauliflower. Then, sprinkle one teaspoon of paprika, ground cumin, and garlic powder. Add salt and pepper to taste. Toss everything together until the cauliflower is well coated. Next, preheat your oven to 425°F (220°C). Spread the seasoned cauliflower florets in a single layer on a baking sheet. Make sure they are not crowded. Roast them for 25 to 30 minutes. Flip the florets halfway through cooking. You want them golden brown and tender when they are done. While the cauliflower roasts, let’s make the chipotle crema. In a small bowl, mix half a cup of Greek yogurt with one to two tablespoons of chipotle in adobo sauce. You can adjust the amount based on how spicy you want it. Add one tablespoon of lime juice and a pinch of salt. Stir until it is smooth, then set it aside. Roasting cauliflower can make it crispy and flavorful. Here are some tips: - Cut Florets Evenly: Try to cut the cauliflower into similar-sized florets. This helps them cook evenly. - Don’t Overcrowd the Pan: Spread the florets in a single layer on the baking sheet. If you pack them too tight, they will steam instead of roast. - Use High Heat: Preheat your oven to 425°F (220°C). This high heat gives the cauliflower a nice golden color. - Flip Halfway: Be sure to flip the florets halfway through cooking. This ensures they brown on all sides. The chipotle crema adds a creamy kick to the tacos. Here are ways to boost its flavor: - Adjust Spice Level: Start with one tablespoon of chipotle in adobo sauce. Taste and add more if you like it spicier. - Fresh Lime Juice: Use fresh lime juice instead of bottled for a brighter taste. - Chill Before Serving: Let the crema sit in the fridge for 15 minutes before using. This helps the flavors meld together. - Add Garlic Powder: A pinch of garlic powder can give the crema an extra punch. Warming tortillas makes them soft and pliable. Here’s how to do it right: - Use a Dry Skillet: Heat a dry skillet over medium heat. - Warm for 30 Seconds: Place the tortilla in the skillet for about 30 seconds. Flip and warm the other side for the same time. - Keep Them Covered: After warming, stack the tortillas on a plate and cover them with a clean kitchen towel. This keeps them warm and soft. - Avoid Microwave: Avoid using the microwave. It can make tortillas tough and chewy. {{image_2}} You can easily make these tacos even more veggie-friendly. Swap the roasted cauliflower for other vegetables. Sweet potatoes add a nice sweetness. Zucchini gives a fresh crunch. You can also use bell peppers for a pop of color. Each option brings its unique flavor while keeping the meal plant-based. Corn tortillas are naturally gluten-free, making this dish a great choice. If you want to switch things up, try lettuce wraps. They offer a crisp, refreshing alternative. You can also use gluten-free tortillas, which are now widely available. Just check the label to ensure they fit your needs. Customize your tacos with fun toppings. Try adding diced tomatoes for freshness. Pickled onions add a tangy crunch. You can even throw in some black beans for protein. Cheese lovers can sprinkle on feta or cotija. Don't forget a squeeze of lime for extra zing. Store leftover tacos in an airtight container. Keep the roasted cauliflower, cabbage, and avocado separate from the tortillas. This way, the tortillas stay soft and fresh. Place the crema in a small container. It stays creamy and tasty when stored correctly. To reheat the roasted cauliflower, place it in a skillet. Heat over low to medium heat until warm. For the tortillas, warm them briefly in a dry skillet. This keeps them soft and pliable. Avoid the microwave, as it can make them tough. If you want to reheat the crema, do it gently on low heat. You can freeze roasted cauliflower for later use. Allow it to cool completely. Then, place it in a freezer-safe bag or container. Use it within three months for the best taste. For the chipotle crema, freeze it in small portions. Thaw it in the fridge before use. This way, you can enjoy this tasty dish at any time! Yes, you can make parts of this recipe ahead of time. Roast the cauliflower and store it in the fridge. It stays good for about three days. Make the chipotle crema, too, and keep it in an airtight container. When you’re ready to eat, warm the cauliflower and tortillas. This makes it quick and easy. You can use many other veggies in these tacos. Try bell peppers, zucchini, or sweet potatoes. These options add great texture and flavor. Just roast them the same way as the cauliflower. Feel free to mix and match to suit your taste! To change the spice level, adjust the chipotle in adobo sauce. Start with one tablespoon if you want it mild. Gradually add more until you reach your desired heat. You can also add a bit of honey to balance the heat if you find it too spicy. Yes, you can swap Greek yogurt with sour cream or a non-dairy option. For a lighter version, use plain yogurt. These options keep the crema creamy while changing the flavor slightly. Choose what fits your diet best! Roasted cauliflower tacos are easy and tasty. We covered key ingredients, from cauliflower to crema. I shared step-by-step instructions so you can roast perfectly. Tips help you enhance flavors and warm tortillas right. There are fun variations and easy storage ideas too. Try this dish today to impress friends and family. These tacos are simple to make, yet full of flavor. Enjoy the process and experiment with your own ideas!

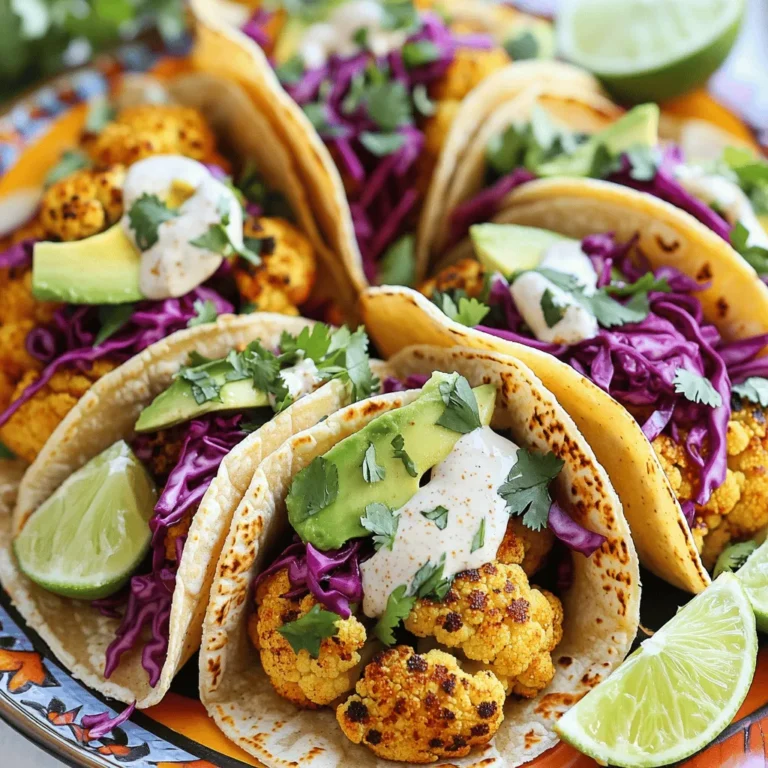
Roasted Cauliflower Tacos with Chipotle Crema Delight

- 1 cup all-purpose flour (heat-treated) - 1/2 cup unsalted butter, softened - 1/3 cup brown sugar, packed - 1/3 cup granulated sugar - 1/2 teaspoon vanilla extract - 1/4 teaspoon salt - 1/2 cup mini chocolate chips - 8 oz. milk chocolate, for coating - Sea salt flakes, for garnish Heat-treated flour is key for safety. Raw flour can contain bacteria that might make you sick. Heating it in the microwave kills these germs. To do this, place the flour in a bowl, then microwave for one minute. Allow it to cool slightly before mixing it into your dough. This step keeps your truffles safe and tasty. For the best taste, use high-quality chocolate. Milk chocolate is sweet and creamy, perfect for coating. You can also try dark chocolate for a richer flavor. If you want a fun twist, use white chocolate. Each chocolate type gives a unique taste. Experiment and find your favorite! To start, we need to prepare the cookie dough. First, heat-treat the flour. Place 1 cup of all-purpose flour in the microwave for 1 minute. This step kills any bacteria. Let the flour cool for a bit. Next, in a large bowl, cream 1/2 cup of softened unsalted butter with 1/3 cup each of brown and granulated sugar. Mix until it feels light and fluffy. Add in 1/2 teaspoon of vanilla extract and a pinch of salt. Stir until combined. Now, slowly add the heat-treated flour to the mix. Use low speed and mix until just combined. Don't overmix here; we want a soft dough. Finally, fold in 1/2 cup of mini chocolate chips. Make sure they spread evenly throughout the dough. Scoop out small bits of dough and roll them into 1-inch balls. Place these balls on a parchment-lined baking sheet. Chill them in the fridge for about 30 minutes. This helps them firm up for coating. While your dough balls chill, it's time to melt the chocolate. Take 8 ounces of milk chocolate and place it in a microwave-safe bowl. Heat it in intervals of 30 seconds. Stir after each interval until the chocolate is smooth. Be careful not to burn it. This melted chocolate will create a rich coating for your truffles. Once your dough balls are chilled, it's time to dip them. Use a fork to pick up each ball and dip it into the melted chocolate. Let any extra chocolate drip off before placing them back on the parchment-lined sheet. While the chocolate is still wet, sprinkle a tiny bit of sea salt flakes on each truffle. This adds a nice touch of flavor. After dipping, place the truffles back in the refrigerator for about 15 to 20 minutes. This time allows the chocolate to set and harden. Enjoy the process of making these treats; they are a fun way to impress family and friends! One big mistake is not heat-treating the flour. This step is key to safety. Always microwave the flour for one minute. Let it cool before using it. Overmixing the dough is another issue. Mix just until combined to keep truffles soft. Lastly, when dipping, let excess chocolate drip off. This keeps the coating neat. You can make these truffles your own! Try using different types of chocolate. Dark chocolate adds a rich taste. You can also add nuts for crunch. Chopped pecans or walnuts work well. Want a twist? Add a splash of almond extract. It gives a nice flavor boost! Chilling the dough is crucial for the right texture. After rolling the dough into balls, chill them for 30 minutes. This helps them firm up. When coating, chill the truffles after dipping too. For 15-20 minutes, this sets the chocolate. Remember, cold truffles are easier to handle! {{image_2}} If you want nut-free truffles, simply skip any nuts. The cookie dough stays rich and tasty without them. Focus on the chocolate chips for sweetness and texture. You can also add seeds like sunflower seeds for a little crunch. This way, you still enjoy those truffles without any nut worries. You can switch up the chocolate coating for fun. Try dark chocolate for a richer flavor. White chocolate gives a sweet contrast and looks pretty too. For a twist, use flavored chocolates, like mint or orange. Each choice adds a new taste to your truffles. To make your truffles even better, think about adding flavors. A bit of almond or hazelnut extract can change the taste. You can also mix in crushed cookies or candy pieces. If you love a good crunch, add mini pretzels or rice crisps. These little changes make your truffles unique and exciting. To keep your truffles fresh, store them in an airtight container. Use a container that fits the truffles without too much space. This helps prevent them from getting squished. I like to layer parchment paper between the truffles. This keeps them from sticking together. Place the container in the refrigerator for the best freshness. Freezing is a great way to save truffles for later. First, let the truffles set in the fridge. Then, place them on a baking sheet in a single layer. Freeze them for about an hour. After that, transfer the truffles to a freezer-safe bag. Make sure to remove as much air as possible. You can enjoy a sweet treat anytime! When stored properly, chocolate chip cookie dough truffles can last up to two weeks in the fridge. If you freeze them, they can last up to three months. Always check for signs of spoilage before eating. If they look or smell off, it's best to toss them. Enjoy your truffles at their best! Yes, you can eat raw cookie dough if it is made safely. We use heat-treated flour. It kills harmful bacteria. This makes the dough safe to eat. Remember to use pasteurized eggs if your recipe includes them. You can keep chocolate chip cookie dough truffles in the fridge for about a week. Store them in an airtight container. If you want to keep them longer, freeze them. They can last up to three months in the freezer. If you need a butter substitute, try using coconut oil or applesauce. For sugar, consider using honey or maple syrup. Adjust the amounts based on your taste. Each substitute can change the texture and flavor slightly, so experiment to find what you like best! In this blog post, we explored making delicious cookie dough truffles. We covered key ingredients, the need for heat-treated flour, and the best chocolate. You learned step-by-step instructions for dough prep, chocolate melting, and dipping. We shared tips for common mistakes, ways to customize, and best chilling practices. Variations include nut-free options, different coatings, and flavor boosts. Finally, we discussed storage tips and frequently asked questions. Remember, making truffles is fun and easy. Enjoy your tasty treats!

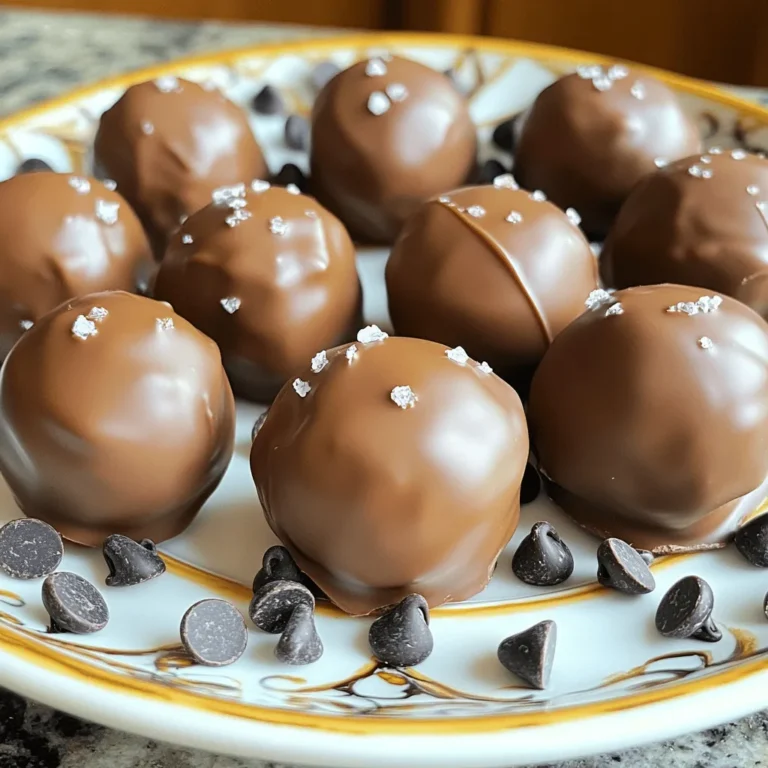
Chocolate Chip Cookie Dough Truffles Decadent Delight

To make these tasty Pumpkin Spice Energy Bites, gather the following ingredients: - 1 cup rolled oats - 1/2 cup canned pumpkin puree - 1/4 cup almond butter (or peanut butter) - 1/4 cup honey or maple syrup - 1 tsp pumpkin spice blend - 1/2 tsp vanilla extract - 1/4 cup ground flaxseed - 1/4 cup mini chocolate chips (optional) - Pinch of salt You can easily swap some ingredients. Use peanut butter if you don’t have almond butter. Honey can change to maple syrup for a vegan option. If you need a nut-free recipe, try sunflower seed butter. For a fun twist, add dried fruit or nuts. If you want less sugar, reduce the honey or syrup. Each serving, or one energy bite, offers a good mix of nutrients: - Calories: About 100 - Protein: 3 grams - Fiber: 2 grams - Fat: 5 grams - Carbohydrates: 12 grams These bites provide energy and good nutrition, making them a great snack choice. {{ingredient_image_1}} To start, gather your ingredients. You need rolled oats, pumpkin puree, almond butter, and honey or maple syrup. Then, add pumpkin spice, vanilla extract, ground flaxseed, and a pinch of salt. If you like, mini chocolate chips can add sweetness. In a mixing bowl, combine all these ingredients. Use a spatula or your hands to mix them until you have a sticky dough. Make sure everything blends well. This is the base for your energy bites. When mixing, I suggest using your hands. This helps you feel the texture better. If the mixture feels too dry, add a bit more pumpkin puree or almond butter. If it's too wet, add more oats or flaxseed. The goal is to have a dough that sticks together but is not too sticky. If you’re adding chocolate chips, fold them in gently. This keeps them from breaking apart. Now, scoop out tablespoon-sized portions of the mixture. Roll each portion into a ball using your hands. Place these balls on a baking sheet lined with parchment paper. It's best to give them some space. Once you finish rolling, refrigerate the bites for at least 30 minutes. This helps them firm up. After chilling, store them in an airtight container. Enjoy your tasty, nutritious snack anytime! To get the best texture, use rolled oats. They give a chewy bite. Mix well to combine all ingredients. This helps each bite taste great. If your dough is too sticky, add more oats. You want a firm but moist feel. Chilling the bites in the fridge helps them firm up. This makes them easier to roll. You can add fun ingredients to your energy bites. Try nuts or seeds for a crunch. Dried fruit adds sweetness and texture. You can also use protein powder for more nutrition. If you love chocolate, mix in mini chocolate chips. They make each bite a treat. Just remember to keep the balance. Too many add-ins can change the texture. One mistake is not measuring ingredients correctly. This can lead to a dry or too wet mix. Always measure with cups or a scale for best results. Another mistake is skipping the chill time. This step helps the bites hold their shape. Lastly, don’t skip the salt. A pinch of salt enhances all the flavors. Pro Tips Use Fresh Pumpkin Spice: If possible, make your own pumpkin spice mix using cinnamon, nutmeg, ginger, and cloves for a fresher flavor. Chill for Better Texture: Chilling the energy bites not only firms them up but also enhances their flavor as the ingredients meld together. Customize Your Add-Ins: Feel free to swap the mini chocolate chips for dried fruit, nuts, or seeds to suit your taste and dietary preferences. Perfect Portioning: Use a cookie scoop for evenly sized bites, ensuring that they all cook and firm up at the same rate. {{image_2}} You can switch up the flavors in these bites. If you want a twist, try adding dried fruit like cranberries or raisins. For nut lovers, walnuts or pecans add a nice crunch. You can also experiment with spices. Swap pumpkin spice for cinnamon or add a touch of nutmeg. Each change gives a new taste. If you have allergies or dietary needs, you can make these bites fit. Instead of almond butter, use sunflower seed butter for nut-free options. For a vegan version, swap honey with agave syrup. If you need gluten-free, ensure your oats are certified gluten-free. These small changes let everyone enjoy the energy bites. Sometimes, you might not have time to make these bites. Many stores have healthy snacks like pumpkin spice energy bites. Look for brands that use natural ingredients. Check the labels for added sugars or preservatives. While homemade is often best, store-bought can save you time without losing flavor. To keep your pumpkin spice energy bites fresh, store them in an airtight container. A glass jar works well. Keep them in the fridge to maintain their taste and texture. Avoid placing them near strong-smelling foods. This helps keep their flavor intact. These energy bites can last about one week in the fridge. If you want them to stay fresh longer, consider freezing them. They taste best when eaten fresh, but they still hold their flavor for a week when stored properly. To freeze your energy bites, first, place them on a baking sheet. Make sure they are not touching each other. Freeze them for about 1-2 hours until firm. Then, transfer the bites to a freezer-safe bag or container. Label it with the date. They can stay frozen for up to three months. When you're ready to eat, just thaw them in the fridge overnight. Yes, you can make these energy bites vegan. Simply swap honey for maple syrup. Almond butter is already vegan. Use a plant-based protein powder if you want to add protein. These energy bites last about one week in the fridge. Keep them in an airtight container. You can also freeze them for up to three months. Just thaw them in the fridge before eating. Yes, you can use fresh pumpkin. Cook the pumpkin until soft, then puree it. Be sure to drain any excess water. Canned pumpkin is thicker and easier to use, though. You can use agave nectar or brown rice syrup. Both will add sweetness. Keep in mind that these may change the taste slightly. Adjust the amount based on your preference. You have now learned how to make tasty pumpkin spice energy bites. We covered the key ingredients, step-by-step instructions, and tips to create perfect bites. Don’t forget the variations for different tastes and dietary needs. Storing these bites correctly ensures they stay fresh. In conclusion, these energy bites are easy to make and customize. Enjoy the process, and share them with friends or family. Grab your ingredients and start creating your own delicious snacks today!

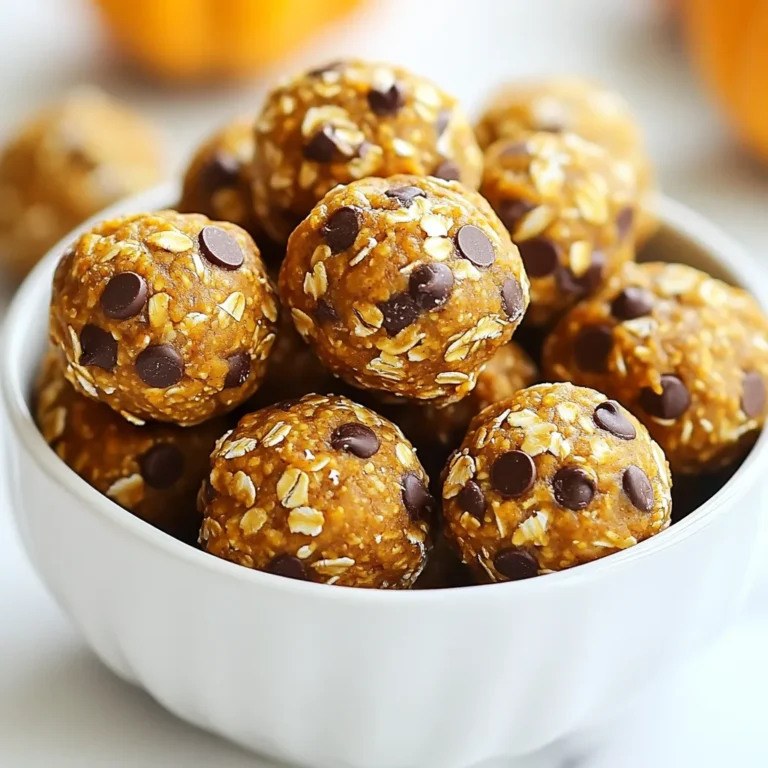
Pumpkin Spice Energy Bites Nourishing and Tasty Snack

- 4 boneless, skinless chicken thighs - 2 cups cherry tomatoes, halved - 1 cup cucumbers, diced - 1 bell pepper (red or yellow), sliced - 1 red onion, sliced - 1 cup Kalamata olives, pitted and halved The main ingredients for this dish are simple and fresh. Chicken thighs bring flavor and moisture. The vegetables add color and crunch. I love using cherry tomatoes for their sweetness. Cucumbers and bell peppers add a nice, crisp texture. Red onions give a mild bite, while Kalamata olives provide a salty kick. - Feta cheese, crumbled (optional for serving) - Cooked quinoa or rice (for serving) Feta cheese is a great topping, but it’s not needed. It adds creaminess and saltiness if you choose it. Quinoa or rice makes this meal heartier. Both options are great for soaking up the sauce. - Fresh herbs - Spices To season the chicken and veggies, I use a mix of dried oregano, garlic powder, salt, and pepper. This blend gives a Mediterranean flair. Fresh parsley adds a bright touch on top. You can also use other herbs like basil or mint for extra flavor. Always adjust the spices to fit your taste. - Preheat your oven to 400°F (200°C). - Line a large sheet pan with parchment paper for easy cleanup. - In a small bowl, mix together: - 3 tablespoons olive oil - 2 tablespoons lemon juice - 2 teaspoons dried oregano - 1 teaspoon garlic powder - Salt and pepper to taste This mix will be your marinade. - Place the 4 boneless, skinless chicken thighs on one side of the prepared sheet pan. - Pour half of the marinade over the chicken. Make sure it is well coated. - On the other side, arrange: - 2 cups cherry tomatoes, halved - 1 cup cucumbers, diced - 1 sliced bell pepper (red or yellow) - 1 sliced red onion - 1 cup Kalamata olives, pitted and halved - Drizzle the remaining marinade over the vegetables and toss to combine. - Bake in the preheated oven for 25-30 minutes. - Check that the chicken is cooked through. The internal temperature should reach 165°F. - The vegetables should be tender and flavorful. To ensure juicy chicken, use bone-in thighs if you like. They stay moist and tender. If you prefer boneless, skinless thighs, marinate them well. Use a mix of olive oil, lemon juice, and spices. Let the chicken soak for at least 30 minutes. This adds great flavor. For the best vegetables, choose colorful options like bell peppers, cherry tomatoes, and red onions. These not only taste great but also look appealing. Roast them for 25-30 minutes at 400°F. They should be soft yet crisp. Serve your Mediterranean chicken bowls in deep bowls for a nice look. Add a lemon wedge for a pop of color. Sprinkle fresh parsley on top for a touch of green. For extra flavor, drizzle olive oil or add tzatziki sauce. You can also offer crumbled feta cheese to enhance taste. {{image_2}} You can swap proteins in this dish for a new twist. Try using: - Boneless, skinless chicken breasts for a leaner option. - Shrimp for a quick-cooking seafood choice. - Tofu for a plant-based protein. For vegetables, think outside the box. You could use: - Zucchini or yellow squash for a summer touch. - Broccoli or asparagus for extra crunch. - Spinach or kale for a leafy boost. Adjust the spice level to fit your taste. If you like heat, add: - Crushed red pepper flakes for a kick. - Smoked paprika for a warm flavor. Toppings can elevate your meal. Consider: - Avocado slices for creaminess. - A dollop of tzatziki sauce for a cool contrast. - Toasted pine nuts for crunch. Make this dish gluten-free easily. Just ensure your: - Quinoa or rice is certified gluten-free. For a vegan option, you can: - Replace chicken with chickpeas or lentils. - Omit feta cheese or use a plant-based substitute. These variations let you explore new tastes while keeping the heart of the dish intact. Enjoy your cooking adventure! To store your Mediterranean chicken bowls, place leftovers in an airtight container. This keeps flavors fresh and prevents spills. The dish stays good for about 3 to 4 days in the fridge. Make sure to let it cool before sealing to avoid steam buildup. If you want to save some for later, freezing is a great option. Divide the chicken and vegetables into portions and place them in freezer-safe bags. Press out excess air to avoid freezer burn. It’s best to use them within 2 to 3 months for the best taste. To thaw, simply place the bag in the fridge overnight. This gradual thawing helps keep the texture. You can also use the microwave on low power if you're in a hurry. When it's time to eat again, reheating is key. The oven is best for keeping chicken tender. Preheat to 350°F and bake for about 15 minutes. You can also use a microwave, but be careful. Heat in short bursts to avoid drying out the chicken. Adding a splash of water can help keep it moist. How long to bake chicken at 400°F? Bake chicken thighs for 25 to 30 minutes at 400°F. Use a meat thermometer to check. The internal temperature should reach 165°F. This ensures the chicken is safe to eat and juicy. Can I use frozen chicken thighs? Yes, you can use frozen chicken thighs. However, adjust your baking time. It may take an extra 10 to 15 minutes to cook through. Always check the internal temperature before serving. Can I meal prep Mediterranean chicken bowls? Absolutely! These bowls are perfect for meal prep. Cook the chicken and veggies, then store them in containers. You can keep them in the fridge for up to four days. This makes for quick and tasty lunches. How to reheat effectively? To reheat, use the microwave or oven. If using a microwave, heat for one to two minutes. If using the oven, preheat to 350°F and heat for about 10 minutes. This keeps the chicken tender and the veggies flavorful. What can I substitute for olives? If you don't like olives, you can skip them. Try adding some capers for a salty taste. You can also use pickles or artichoke hearts for a different flavor. Is feta necessary for this dish? Feta is optional. It adds creaminess and flavor, but you can leave it out. You can use another cheese like goat cheese or even a dairy-free option if needed. This blog post covered the essentials for making a delicious Mediterranean chicken dish. I shared the key ingredients, preparation steps, and baking tips. You learned about ingredient swaps and variations to make it your own. Storing leftovers properly helps keep your meal fresh. The FAQs section addressed common questions for easy meal prep. Enjoy experimenting with this recipe to find your favorite version. Happy cooking!

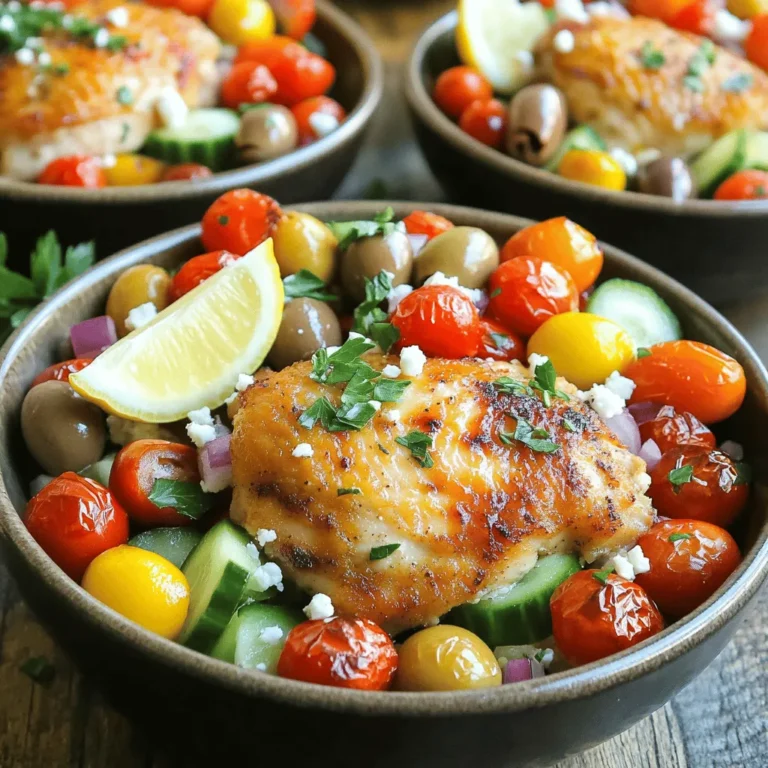
Mediterranean Chicken Bowls Sheet Pan Delight

- 1 lb ground chicken or turkey - 1/2 cup breadcrumbs - 1/4 cup grated parmesan cheese - 1/4 cup finely chopped green onions The main ingredients form the base of these meatballs. Ground chicken or turkey gives them a lean and tasty profile. Breadcrumbs bring in the right texture. Grated parmesan cheese adds a nice salty touch. Green onions offer a fresh crunch. - 1/4 cup honey - 1/4 cup Sriracha sauce - 2 tablespoons soy sauce - 2 tablespoons rice vinegar The sauce is where the magic happens. Honey gives sweetness while Sriracha adds a spicy kick. Soy sauce brings umami, and rice vinegar rounds out the flavor with a bit of tang. Together, they create a rich and balanced sauce. - 1 teaspoon sesame oil - 1 teaspoon grated ginger - 2 cloves minced garlic You can enhance the dish with optional ingredients. Sesame oil adds a nutty flavor. Grated ginger gives a warm spice. Minced garlic boosts the savory taste. These extras can elevate your dish to a new level. In a large mixing bowl, combine these key ingredients for the meatballs: - 1 lb ground chicken or turkey - 1/2 cup breadcrumbs - 1/4 cup grated parmesan cheese - 1/4 cup finely chopped green onions - 1 large egg - 2 cloves garlic, minced - Salt and pepper to taste Mix these well until every ingredient blends. This helps the flavors come together. Next, roll the mixture into 1-inch balls. You should have about 20 meatballs. Make sure they are all similar in size. This ensures they cook evenly. In a separate bowl, whisk together the sauce ingredients: - 1/4 cup honey - 1/4 cup Sriracha sauce - 2 tablespoons soy sauce - 2 tablespoons rice vinegar - 1 teaspoon grated ginger - 1 teaspoon sesame oil Mix until smooth. A smooth sauce coats the meatballs better and adds flavor. Now, turn on the Instant Pot and select the 'Sauté' function. Allow it to heat for a couple of minutes. Add the meatballs in a single layer. Sauté for about 2-3 minutes until they turn brown on the outside. Turn them occasionally for even cooking. Once browned, take out the meatballs and set them on a plate. Pour the prepared sauce into the pot. Scrape the bottom to get all the tasty bits. Return the meatballs to the pot and gently coat them in the sauce. Close the lid and set the Instant Pot to 'Manual' mode at high pressure for 8 minutes. Make sure the valve is set to sealing. After cooking, let it release naturally for 5 minutes. Then, manually release any remaining pressure. Carefully open the lid and serve the meatballs. Drizzle them with extra sauce from the pot for added flavor. Enjoy! - Tips for moisture and texture: To keep your meatballs moist, don’t overmix the meat. Mix just until combined. This helps keep them tender. Adding a bit of grated parmesan also helps with moisture and adds flavor. - Recommendations for binding agents: Use breadcrumbs and egg as your main binders. They hold everything together and add a nice texture. If you want a gluten-free option, try using almond flour or gluten-free breadcrumbs. - Suggested seasoning options: Besides salt and pepper, you can add garlic powder or onion powder for depth. Fresh herbs like cilantro or parsley can brighten the dish. - Variations in the sauce: You can adjust the sauce by adding more honey if you prefer it sweeter. For a tangy twist, a splash of lime juice works great. If you like it spicier, add more Sriracha or a pinch of red pepper flakes. - Avoiding common pressure cooking mistakes: Always ensure there is enough liquid in the pot. This helps build pressure. If you skip this step, your Instant Pot may not work correctly. - Time-saving techniques: Prepare your meatball mixture and sauce in advance. You can store them in the fridge until you’re ready to cook. This way, you save time on busy days. {{image_2}} You can switch the ground chicken or turkey for beef or pork. This change adds a richer flavor. If you prefer a lighter option, use lean ground turkey. You can also make these meatballs vegetarian. Try plant-based meat like lentils or chickpeas. This keeps the dish hearty while being meat-free. Adjust the heat level to suit your taste. If you like it spicy, add more Sriracha. For a milder option, reduce the Sriracha amount. You can also swap honey for maple syrup or agave. This change gives a unique flavor twist. Each sweetener adds its own character to the sauce. Pair these meatballs with rice or noodles for a filling meal. You can also serve them as appetizers at parties. Create a meatball sub by placing them in a bun with sauce. Top with cheese for extra flavor. Try garnishing with sesame seeds or chopped green onions. This adds a nice touch to your presentation. To keep your meatballs fresh, use airtight containers. Glass or plastic containers both work well. Always let the meatballs cool to room temperature before sealing. This helps prevent moisture build-up inside. Store them in the fridge for up to three days. When you’re ready to eat, just reheat on the stove or in the microwave. For longer storage, freeze the meatballs and sauce separately. Place meatballs in a freezer-safe bag or container. Make sure to remove as much air as possible. For the sauce, use a small container or ice cube trays. This helps portion it easily. When you’re ready to enjoy, thaw in the fridge overnight. Reheat meatballs gently on the stove until warm. These meatballs last three days in the fridge. In the freezer, they can stay good for up to three months. Check for signs of spoilage before eating. If you see any off smells or discoloration, it's best to toss them. Always trust your senses when it comes to food safety. Yes, you can prepare these meatballs in advance. Start by mixing all the meatball ingredients. Once you form the meatballs, place them on a baking sheet. Freeze them for about an hour. After they freeze, transfer them to a freezer bag. They can last up to three months in the freezer. When you're ready to cook, you can skip the thawing. Just add a few extra minutes to the cooking time. To tone down the heat, try these tips. First, reduce the amount of Sriracha sauce. You can start with just two tablespoons instead of four. Another option is to add more honey. This will balance the heat with sweetness. You might also mix in some ketchup for extra flavor without the spice. Lastly, serve the meatballs with a side of yogurt or sour cream. This will cool down the heat nicely. Absolutely! You can bake or pan-fry the meatballs. For baking, preheat your oven to 400°F. Place the meatballs on a lined baking sheet. Bake for about 20 minutes, turning halfway through. If you prefer pan-frying, heat a bit of oil in a pan over medium heat. Cook the meatballs for about 10-12 minutes, turning often. After cooking, toss them in the sauce on the stove. This gives you a great flavor too! This blog covered how to make tasty meatballs in the Instant Pot. We explored main ingredients, like ground chicken, breadcrumbs, and parmesan. The sauce, made with honey and Sriracha, adds great flavor. Tips on texture and cooking methods help you create the best meatballs. Try different proteins or sauces to make it your own. Store or freeze leftovers for later enjoyment. With these insights, you can confidently whip up delicious meatballs that everyone will love. Enjoy your cooking adventure!

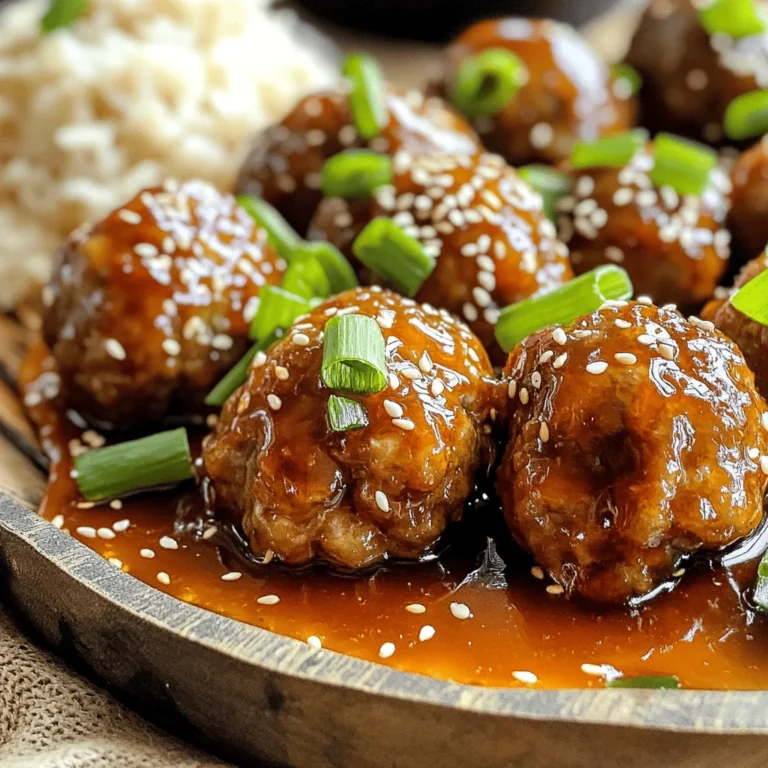
Instant Pot Honey Sriracha Meatballs Flavor Boost

- Bread types and options: For this recipe, I love using thick slices of brioche or challah. These types of bread soak up the egg mixture well. They also give a rich flavor and perfect texture. You can also experiment with sourdough or Texas toast. - Apples and their variations: I recommend using Granny Smith or Honeycrisp apples. Granny Smith offers a tartness that balances the sweetness. Honeycrisp apples are sweet and crisp, adding a delightful crunch. Feel free to mix different apple types for added flavor depth. - Cream cheese and caramel sauce choices: Use full-fat cream cheese for a creamy texture. You can pick store-bought caramel sauce for convenience. If you want to impress, make homemade caramel sauce. It’s simple and adds a special touch. - Powdered sugar for dusting: Dusting with powdered sugar adds a lovely finish. It makes the dish look more appealing and sweetens each bite. - Extra caramel sauce for serving: Drizzling more caramel sauce on top enhances the flavor. It creates a beautiful presentation and brings extra sweetness. - Butter for frying specifics: Use unsalted butter for frying. It helps achieve a rich flavor, and it prevents the French toast from sticking to the skillet. You can also use coconut oil for a different taste. To start, I cook the diced apples in a skillet over medium heat. I add brown sugar, cinnamon, and lemon juice to the apples. This mix creates a sweet and spiced flavor. I cook them for about 5-7 minutes. The apples should become tender but still hold their shape. Once done, I take the skillet off the heat and let the mixture cool slightly. It’s important to let it cool so it won’t melt the cream cheese. Next, I prepare the cream cheese filling. In a small bowl, I take softened cream cheese and caramel sauce. I blend them together until the mixture is smooth and creamy. This mix adds a rich and sweet layer to the French toast. I set this aside for later use. Now comes the fun part—putting it all together! I take two slices of thick bread and spread half of the cream cheese mixture on each slice. Then, I add a generous amount of the apple mixture on top. I spread the remaining cream cheese on two more slices of bread and place them on top to form two sandwiches. To get that perfect golden brown crust, I whisk together eggs, milk, and vanilla extract in a shallow bowl. I dip each stuffed sandwich in this egg mixture, making sure to coat both sides well. I heat a large skillet over medium heat and add a tablespoon of butter. Once hot, I place the sandwiches in the skillet. I cook them for about 3-4 minutes on each side, or until they are golden and crispy. If needed, I add more butter during cooking for extra flavor. After they are cooked, I remove them from the skillet and cut each sandwich in half. For a final touch, I dust them with powdered sugar and drizzle with extra caramel sauce if I want to impress. Each bite is a delightful mix of sweet apples, creamy filling, and crispy bread! To make the best Caramel Apple Stuffed French Toast, start by ensuring your bread is well-soaked in the egg mixture. This step is key. If the bread is not soaked enough, it won't absorb the flavors. Dip each sandwich in the egg mixture and let it sit for a few seconds. This helps the bread soak up the mix. Next, use the right skillet and temperature. A non-stick skillet works best for easy flipping. Heat it over medium heat. If it's too hot, the bread will burn before cooking through. If it's too cool, the bread will not get that nice golden color. Serving this dish well can make a big difference. Serve on a warm plate with the cut sides facing up. This will show off the delicious apple filling. Drizzle with extra caramel sauce for a sweet touch. Don't forget to sprinkle some powdered sugar on top for a pretty finish. You can also add some fresh apple slices on the side for color and crunch. This makes your plate look even more inviting and delicious. {{image_2}} You can switch up the apples for your French toast. Each type adds a unique taste. Granny Smith apples are tart, which balances the sweet caramel. Honeycrisp apples are sweet and crisp, perfect for a softer flavor. You might also try Fuji or Braeburn apples if you want something different. Just remember, use apples that hold their shape when cooked. You do not have to stick to cream cheese. Nutella brings a rich chocolate flavor to your dish. Peanut butter adds protein and a nutty taste. You can even mix peanut butter with banana slices for a fun twist. If you want a fruity option, try almond butter with sliced strawberries. The choice is yours! For those needing gluten-free options, use gluten-free bread. Many brands offer tasty choices that work well in this recipe. If you want a dairy-free cream cheese, look for brands made from nuts or soy. These options can make this dish fit your dietary needs without losing flavor. To store cooked French toast, let it cool first. Place it in a single layer on a plate. Cover it with plastic wrap or aluminum foil. You can also put it in an airtight container. This keeps it fresh for up to three days in the fridge. For longer storage, you might want to freeze it. Wrap each piece in plastic wrap and then in foil. Store them in a freezer bag. This way, they can last for up to three months. When you want to reheat your French toast, avoid the microwave if you can. This can make it soggy. Instead, use the oven. Preheat it to 350°F (175°C). Place the French toast on a baking sheet. Heat for about 10-15 minutes until warmed through. You can also use a skillet. Heat it over medium-low heat and add a little butter. Cook each slice for about 2-3 minutes on each side. This helps keep the crispiness. Enjoy your delicious treat again, just like fresh! Yes, you can make this recipe ahead. Prep the apple mixture and cream cheese filling the night before. Cook the French toast in the morning. Prep time is about 15 minutes, while cooking takes around 30 minutes. Great sides include fresh fruit, like berries or bananas. You can also serve it with yogurt or crispy bacon. These sides balance the sweetness of the French toast. Yes, you can freeze the stuffed French toast. After cooking, let it cool completely. Wrap each piece tightly in plastic wrap. Place the wrapped toast in a freezer bag. To thaw, leave it in the fridge overnight and reheat in a skillet. This blog post covered how to make delicious Caramel Apple Stuffed French Toast. We explored key ingredients, from bread types to apples and cream cheese. I shared steps for preparing the apple mixture and making the filling, plus tips for assembly and cooking. You learned about presentation tips and variations suitable for different diets. Finally, we discussed storage and reheating methods to keep your dish fresh. With these insights, you can enjoy this treat any time, impressing family and friends with your skills. Enjoy your cooking!

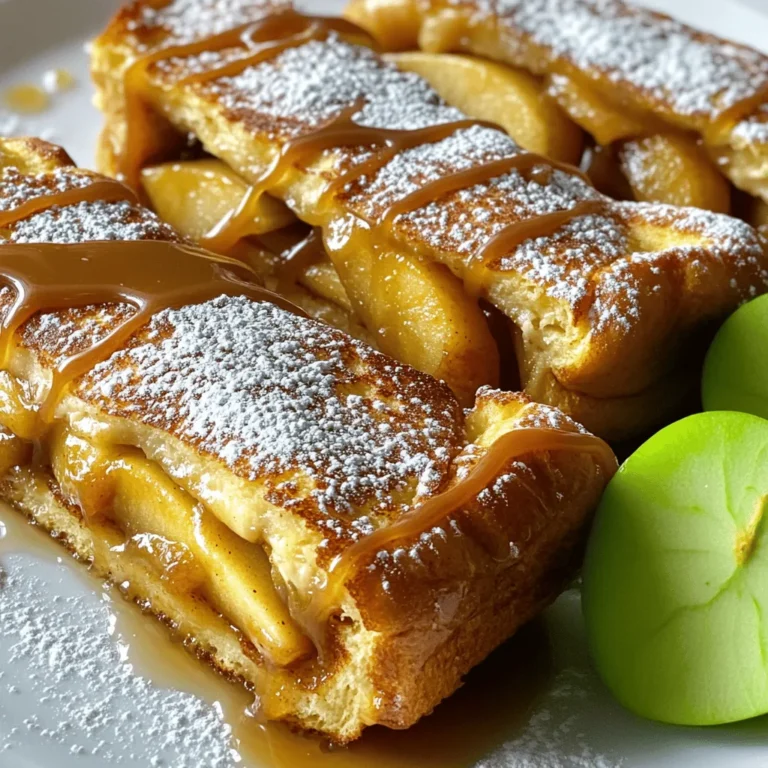
Caramel Apple Stuffed French Toast Delightful Treat

- 1 cup unsweetened almond milk - 1 ripe banana - 1 scoop chocolate protein powder - 1 tablespoon unsweetened cocoa powder - 1 tablespoon instant coffee granules - 1 tablespoon almond butter - 1 tablespoon chia seeds - 1 teaspoon honey or maple syrup (optional) - Ice cubes (as needed) This high-protein mocha smoothie combines rich flavors and healthy ingredients. Each item on this list plays a key role in making your drink tasty and nutritious. The unsweetened almond milk serves as a creamy base. It keeps the smoothie light while adding calcium. The ripe banana gives natural sweetness and a smooth texture. Chocolate protein powder boosts the protein content. It helps you stay full longer. Unsweetened cocoa powder adds a rich chocolatey flavor without the sugar. Instant coffee granules provide that coffee kick. It energizes your morning or afternoon. Almond butter contributes healthy fats and a nutty taste. Chia seeds are tiny but mighty. They add fiber and omega-3 fatty acids. Honey or maple syrup is optional for extra sweetness, but you can skip it if you prefer. Finally, ice cubes make the smoothie cold and refreshing. Adjust the amount based on how thick you like your drink. Gather these ingredients, and you’re ready to blend up a delicious, high-protein mocha smoothie! 1. Start by adding 1 cup of unsweetened almond milk and 1 ripe banana to your blender. Blend them together until smooth. This step creates a creamy base for your smoothie. 2. Next, add the 1 scoop of chocolate protein powder, 1 tablespoon of unsweetened cocoa powder, 1 tablespoon of instant coffee granules, 1 tablespoon of almond butter, and 1 tablespoon of chia seeds. If you like it sweet, add 1 teaspoon of honey or maple syrup. 3. Blend everything on high until it combines fully. You want a creamy texture that feels rich and delicious. 4. If you want a colder or thicker smoothie, add a few ice cubes. Blend again until you reach your desired consistency. 5. Taste your smoothie. If it needs a bit more sweetness, adjust it now. 6. Pour your smoothie into a glass and enjoy it right away! - To get the best mix, always start with your liquid first. This helps the blender work better. - If your smoothie is too thin, add more ice or a bit more protein powder. For a thinner smoothie, add a splash more almond milk. Making a High-Protein Mocha Smoothie is easy and fun. These steps will help you create a tasty drink that supports your health goals. Enjoy the process! This High-Protein Mocha Smoothie packs a protein punch. It uses chocolate protein powder, almond butter, and chia seeds. These ingredients boost muscle growth and repair. Protein helps you feel full, too. If you want to build strength or lose weight, protein is key. It fuels workouts and aids recovery. By adding protein to your diet, you support your fitness goals effectively. Chia seeds and almond butter offer many health perks. Chia seeds are rich in fiber and omega-3s. They help with digestion and heart health. Almond butter is a great source of healthy fats and vitamin E. It can lower bad cholesterol levels. Cocoa and coffee bring antioxidant benefits. Antioxidants fight free radicals in your body. They help reduce inflammation and support overall health. The cocoa powder adds a rich flavor while boosting your mood. Instant coffee gives you that extra energy kick. Together, these ingredients create a delightful drink that nourishes your body and mind. {{image_2}} To make your High-Protein Mocha Smoothie even better, you can tweak the sweetness. If you like it sweeter, add a teaspoon of honey or maple syrup. Start with a small amount, taste, and add more if needed. This way, you control the sugar. For blending, I recommend adding the almond milk first. Then add the banana. This helps the blender mix everything well. Blend on high until smooth. If it’s too thick, add ice cubes. Blend again until you reach your favorite consistency. For a great look, pour your smoothie into a tall glass. This makes it more inviting. You can sprinkle a few chia seeds on top for added texture. A slice of banana or a dusting of cocoa powder also gives it a nice touch. Serve it right away to enjoy the fresh flavors. This way, you impress your friends or family with your tasty creation! You can change some ingredients to fit your needs. If you want a dairy-free option, use oat milk or coconut milk instead of almond milk. These options still taste great and add creaminess. If you want to replace protein powder, consider using Greek yogurt or silken tofu. Both add protein and make the smoothie thick. You can also switch up the nut butter. Try peanut butter, cashew butter, or sunflower seed butter. Each choice brings a unique flavor and texture. Get creative with flavors by adding fruits or spices. For a fruity twist, add a handful of berries or a few slices of mango. You could also add a pinch of cinnamon or nutmeg for warmth. Experiment with different base liquids. You can use coconut water for a refreshing taste or add coffee for a stronger mocha flavor. Each change can make your smoothie feel fresh and new. To keep your high-protein mocha smoothie fresh, store it in an airtight container. This helps prevent oxidation and keeps flavors bright. If you want to save some for later, consider freezing it. Pour your smoothie into ice cube trays or small containers. This way, you can grab just the right amount for future use. Enjoy your smoothie as a quick breakfast or a post-workout snack. Pair it with a handful of nuts or some whole-grain toast for extra energy. This smoothie also works great as a mid-afternoon treat to keep you fueled. For the best benefits, drink it soon after blending to enjoy the fresh flavors and nutrients. To thicken your smoothie, add more ice cubes. You can also use less almond milk. Another option is to add a bit more almond butter or a second banana. These methods help create a creamier texture. Yes, frozen bananas work great in this smoothie. They make it colder and thicker. Just blend them in like you would with fresh bananas. This gives a nice, creamy taste. Absolutely! This recipe is already vegan if you use plant-based protein powder. Stick with almond milk and skip honey for a fully vegan drink. You can use maple syrup as a sweetener instead. You can store your smoothie in the fridge for about 24 hours. Keep it in a sealed container to keep it fresh. Just give it a good shake or stir before drinking. If you don’t have almond milk, try other plant milks like soy, oat, or coconut milk. Each brings its own flavor, so choose what you like best. You can even use regular cow's milk if you prefer. You can create a delicious and healthy smoothie with simple steps. We covered the key ingredients, from almond milk to chia seeds. You learned how to blend them for the best taste and texture. Adding protein helps with fitness goals, and the nutritional benefits support your health. Feel free to explore variations and storage tips for freshness. With these ideas, you can enjoy your smoothie at any time. Dive into these recipes and make them your own!

High-Protein Mocha Smoothie for a Healthy Boost

To make a tasty One-Pot Lemon Parmesan Risotto, gather these simple items: - 1 cup Arborio rice - 4 cups vegetable broth - 1 medium onion, finely chopped - 3 cloves garlic, minced - 1 tablespoon olive oil - 1 tablespoon butter - Zest of 1 lemon - 1/4 cup fresh lemon juice - 1 cup grated Parmesan cheese - 1/2 teaspoon salt - 1/4 teaspoon black pepper - Fresh parsley, chopped (for garnish) Each ingredient plays a key role in creating the dish’s creamy texture and bright flavor. Arborio rice is special because it absorbs liquid well and becomes creamy. The vegetable broth adds depth to the taste. Onions and garlic give a sweet and savory base. Olive oil and butter create a rich foundation. Lemon zest and juice bring a refreshing zing. Grated Parmesan cheese adds a salty richness that ties everything together. Seasoning with salt and pepper enhances the flavors. Finally, garnish with parsley to add color and freshness. With these ingredients, you’ll create a dish that’s both simple and delightful. 1. First, heat 1 tablespoon of olive oil and 1 tablespoon of butter in a large pot. Set the heat to medium. Wait until the butter melts and bubbles. 2. Next, add 1 finely chopped medium onion. Sauté it for about 4-5 minutes until it turns soft and clear. 3. Stir in 3 minced garlic cloves. Cook for 1 minute until the kitchen smells great. 4. Now, add 1 cup of Arborio rice to the pot. Stir the rice for 2-3 minutes. This toasts the rice and gives it a nice flavor. 5. Gradually add 4 cups of vegetable broth, one ladle at a time. Stir the rice as you pour in the broth. 6. Wait for each ladle to be absorbed before adding the next. This step takes about 18-20 minutes. 7. Keep stirring until the rice is creamy and just a bit firm to the bite. 8. Remove the pot from the heat. Stir in the zest of 1 lemon and 1/4 cup of fresh lemon juice. 9. Add 1 cup of grated Parmesan cheese, 1/2 teaspoon of salt, and 1/4 teaspoon of black pepper. Mix it well until the cheese melts and becomes creamy. 10. Taste your risotto. If it needs more flavor, adjust the seasoning as needed. Stirring is key when making risotto. When you stir, you help release the starch from the rice. This starch makes the risotto creamy. So, keep stirring as you add the broth. To test if your rice is done, taste it. It should be creamy yet firm. If it feels too hard, let it cook a bit longer. Adding fresh herbs can boost the flavor. Try using parsley, thyme, or basil. These herbs add a nice touch. Using homemade broth is another great way to enhance flavor. Store-bought broth works, but homemade broth adds depth. If you have time, try making your own! For garnishing, use fresh parsley and lemon zest. This adds color and brightness. A sprinkle of extra Parmesan on top makes it look special. Serve the risotto in warm bowls. This keeps the dish hot and inviting. A side salad or crusty bread pairs well with the risotto. {{image_2}} You can make this risotto even better by adding veggies. Seasonal vegetables work well. Think peas in spring or butternut squash in fall. You can also add spinach or kale for a pop of color and nutrition. Just toss them in when you add the broth. They will cook down nicely and add great taste. Want to make this meal heartier? You can add protein easily. Grilled chicken or shrimp makes a great option. Just cook them separately and stir them in at the end. For a vegetarian twist, consider chickpeas or lentils. They add protein and flavor without meat. Don’t be afraid to play with flavors! Different cheeses can change the taste. Try using goat cheese or feta for a tangy kick. You can also experiment with citrus. Lime or orange zest can add a unique twist. Just remember to adjust the lemon juice to balance the flavors. To keep your One-Pot Lemon Parmesan Risotto fresh, let it cool first. Spread it out on a plate to speed up cooling. Once cool, transfer it to an airtight container. Make sure to seal it well. This will help keep the risotto moist and flavorful. It can last in the fridge for about three days. When it's time to enjoy leftovers, reheat your risotto gently. The best way is to use a stovetop. Add a splash of broth or water to keep it creamy. Stir it often to avoid sticking. You can also use the microwave, but check every minute to keep it from drying out. Yes, you can freeze risotto! But keep in mind, the texture might change. To freeze, place it in a freezer-safe container. Leave some space at the top for expansion. When you want to eat it, thaw it in the fridge overnight. Reheat it on the stovetop, adding liquid to restore creaminess. Arborio rice is the best choice for risotto. This rice has a high starch content. When cooked, it releases creamy goodness. This makes your risotto smooth and rich. Other types of rice do not work as well. They lack the right texture for risotto. Yes, you can make risotto ahead of time. To store it, let it cool down first. Place it in an airtight container. You can keep it in the fridge for up to three days. When you reheat it, add a splash of broth. This keeps it creamy and delicious. To make a dairy-free risotto, swap the cheese. Use nutritional yeast for a cheesy flavor. You can also try coconut cream for creaminess. This gives the dish a nice texture. Just be sure to adjust the seasoning to taste. You can use chicken broth in your risotto. It will change the flavor a bit. Chicken broth adds a richer taste. If you like a deeper flavor, go for it. Just remember to adjust the salt in your dish. Perfect risotto combines simple ingredients and steps for a delicious dish. We discussed how to make it creamy and flavorful, focusing on key steps like toasting the rice and gradually adding broth. I shared tips on enhancing flavor, adding proteins, and presenting your dish beautifully. Don’t forget about storage methods for leftovers! With these insights, you can confidently create risotto that impresses. Enjoy experimenting with flavors and variations that suit your taste!

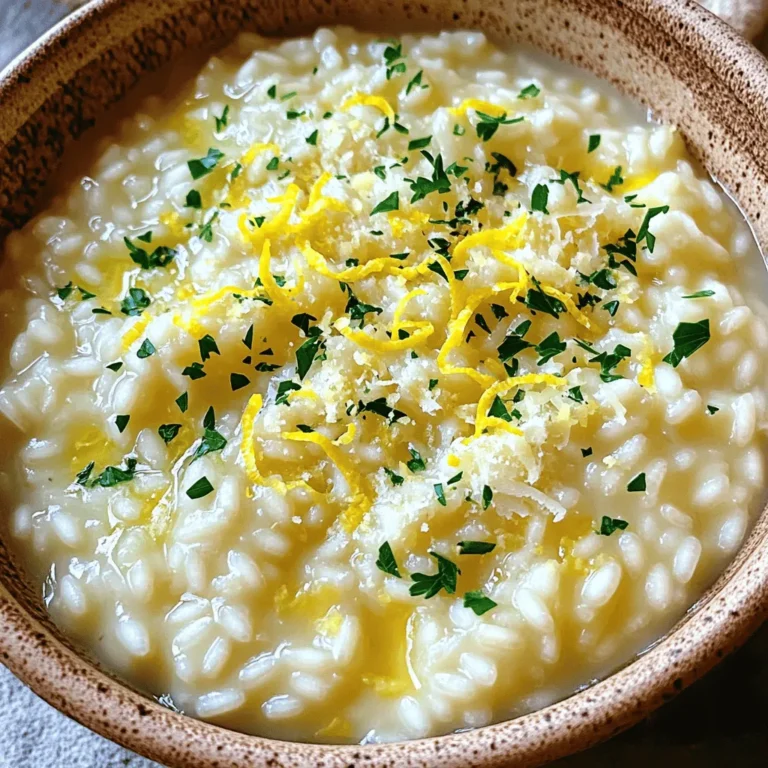
One-Pot Lemon Parmesan Risotto Simple and Creamy Dish

- 1 block (14 oz) firm tofu, drained and cubed - 1 cup broccoli florets - 1 bell pepper (red or orange), sliced - 1 cup snap peas, trimmed - 2 carrots, thinly sliced - 3 green onions, chopped - 3 cloves garlic, minced - 2 tablespoons ginger, finely grated - 1/4 cup fresh orange juice - Zest of 1 orange - 2 tablespoons soy sauce - 1 tablespoon cornstarch, mixed with 2 tablespoons water - 2 tablespoons sesame oil - 1 tablespoon olive oil - Salt and black pepper to taste I love starting with firm tofu for this dish. It holds its shape well. You need to drain it first. Press it to remove extra water. This helps it absorb all the tasty flavors later. The veggies add color and crunch. I like using broccoli, bell pepper, snap peas, and carrots. They not only taste great together, but they also look good on the plate. Fresh orange juice and zest give this dish its bright and zesty flavor. - Sesame seeds for garnish (optional) Sesame seeds add a nice touch. They give a little crunch and look pretty too. You can sprinkle them on top before serving. - Sesame oil - Olive oil I use a mix of sesame oil and olive oil. Sesame oil brings a rich, nutty taste. Olive oil is great for cooking the tofu. This mix helps the dish shine with flavor. {{ingredient_image_1}} Start by pressing the tofu. This step helps remove extra moisture. Wrap the tofu in a clean kitchen towel. Place a heavy object on top. Let it sit for about 15 to 20 minutes. After pressing, cut the tofu into 1-inch cubes. This size helps it cook evenly. In a large skillet or wok, heat olive oil over medium-high heat. Add the cubed tofu once the oil is hot. Season the tofu with a pinch of salt. Sauté the tofu until it turns golden brown on all sides. This should take about 6 to 8 minutes. Once done, remove the tofu from the skillet and set it aside. Using the same skillet, add sesame oil. Next, add minced garlic and grated ginger. Sauté this mixture for about 30 seconds until it smells great. Now, add the broccoli, bell pepper, snap peas, and sliced carrots. Stir-fry these vegetables for about 4 to 5 minutes. The goal is to keep them vibrant and crisp. In a small bowl, whisk together the fresh orange juice, orange zest, and soy sauce. This mixture is key to your glaze. Pour this orange mix over the cooked vegetables in the skillet. It adds a bright flavor to the dish. Return the cooked tofu to the skillet. Mix everything well to combine. Bring the mixture to a gentle simmer. Stir in the cornstarch slurry to thicken the sauce. Cook for another 2 to 3 minutes. The sauce should become glossy and coat the tofu and vegetables. Taste and adjust seasoning with salt and black pepper if needed. Finally, sprinkle chopped green onions over the stir fry for added crunch and flavor. Pressing tofu helps it absorb flavors. To do this, wrap the tofu in a clean kitchen towel. Place a heavy object on top, like a cast iron skillet. Let it sit for 15 to 20 minutes. This step makes a big difference in taste and texture. For a great stir-fry, use firm tofu. Cut it into 1-inch cubes for even cooking. Sauté the tofu in olive oil until golden brown. This takes about 6 to 8 minutes. Cook the vegetables until they are bright and crisp. Aim for 4 to 5 minutes of stir-frying. This keeps them fresh and tasty. To boost flavor, use fresh ingredients like garlic and ginger. They add a nice zing to your dish. When adding the orange juice and zest, whisk them well for even flavor. Use soy sauce for a salty depth. Adjust seasoning with salt and black pepper to your taste. For extra crunch, top your dish with sesame seeds and chopped green onions. Pro Tips Press Tofu Well: Make sure to press the tofu for at least 15-20 minutes to remove excess moisture, allowing it to absorb more flavors during cooking. Use Fresh Ingredients: Opt for fresh vegetables and juice for the best flavor. Fresh orange juice enhances the stir fry's brightness. Adjust the Sauce: Feel free to tweak the soy sauce and orange juice ratio to suit your taste preferences; a little more soy sauce can add a nice umami flavor. Garnish for Flavor: Don’t skip the sesame seeds and green onions as garnishes; they add a delightful crunch and visual appeal to the dish. {{image_2}} If you want a different protein, consider chickpeas. They add a nice texture. Tempeh is another great choice. It has a nutty flavor and holds up well in stir-fries. For a meat option, use chicken or shrimp. Just remember to adjust the cooking time. These proteins can cook faster than tofu. You can swap out any veggies in this dish. Cauliflower works well in place of broccoli. Zucchini adds a nice crunch. If you like spice, try adding sliced jalapeños. You can also add mushrooms for an earthy taste. Just make sure to cut them into small pieces for even cooking. To make this dish gluten-free, use tamari instead of soy sauce. Tamari has a similar taste but is safe for gluten-free diets. Check your cornstarch to ensure it's gluten-free as well. Most brands are, but it’s always good to verify. Serve with rice that’s marked gluten-free, like jasmine or basmati. To keep your Orange Glazed Tofu Stir Fry fresh, store it in an airtight container. Let it cool to room temperature first. This prevents moisture buildup. You can store it in the fridge for up to three days. If you want to keep it longer, consider freezing. When it's time to enjoy your leftovers, reheat them gently. You can use a skillet over medium heat. Add a splash of water or oil to keep it moist. Stir often for even heating. You can also use the microwave. Place it in a microwave-safe dish. Heat for 1-2 minutes, stirring halfway through. Make sure it’s heated all the way through. Freezing is a great option for long-term storage. Place the stir fry in a freezer-safe bag or container. Remove as much air as possible to prevent freezer burn. It can last for up to three months in the freezer. When ready to eat, thaw in the fridge overnight. Reheat it without cooking again. This keeps the tofu and veggies from getting mushy. Enjoy your tasty meal later! Yes, you can prep this dish ahead. You can press the tofu and chop the veggies a day before. Keep them in the fridge in sealed containers. When you're ready to cook, just follow the recipe steps. This saves time and makes dinner easier. If you need a soy sauce swap, try tamari. It’s gluten-free and works well. You can also use coconut aminos for a lighter flavor. Both options still give you that salty taste without soy. Tofu is ready when it turns golden brown on all sides. This takes about 6-8 minutes. You want it crispy outside but soft inside. This texture adds a nice crunch to your stir fry. This stir fry goes well with steamed rice or quinoa. Both add great texture. You can also serve it with a simple salad for freshness. These sides balance the rich orange glaze perfectly. This blog post guide covers everything you need for a great orange glazed tofu stir fry. We explored key ingredients and how to make the dish perfectly. You learned about cooking techniques and tips for pressing tofu. We also discussed tasty variations and best practices for storing leftovers. Remember to stay creative and enjoy the process. You can make this dish your own with different flavors. Try it out, and share your delicious results!

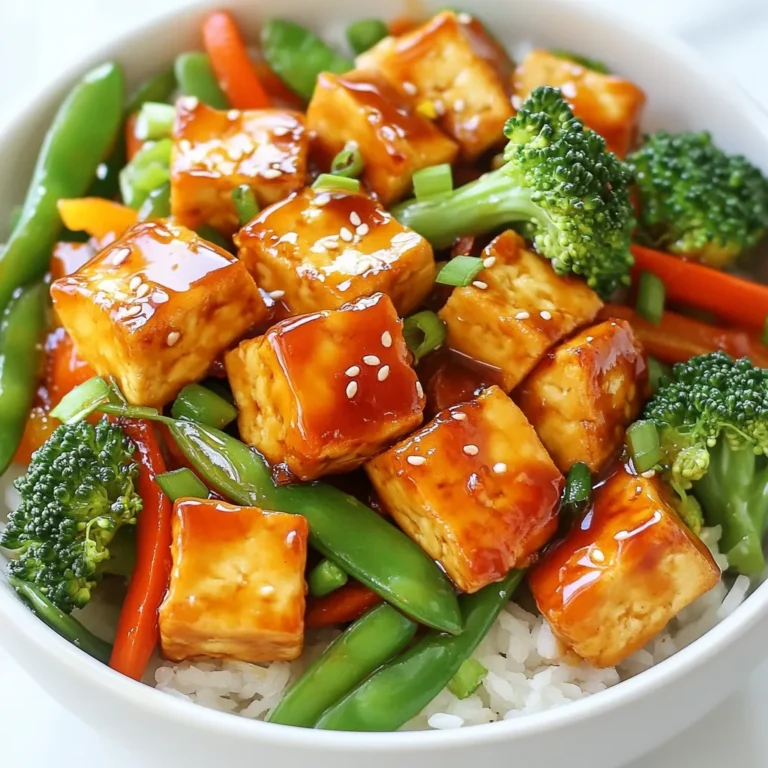
Orange Glazed Tofu Stir Fry Flavorful and Simple Meal

- 2 cups all-purpose flour - 1 tablespoon baking powder - 1 teaspoon salt - 1/2 cup unsalted butter, melted (plus more for brushing) - 1/2 cup milk - 1 teaspoon garlic powder - 1/2 cup grated Parmesan cheese - 2 tablespoons fresh parsley, chopped (optional for garnish) - 1/2 teaspoon black pepper For this recipe, I use standard U.S. measurements. Here’s a breakdown of the ingredients: - Flour: It provides the base for the biscuits. - Baking Powder: This helps the biscuits rise. - Salt: It enhances the flavor, balancing the dish. - Unsalted Butter: I recommend using unsalted butter for better control of salt. - Milk: It adds moisture to the dough. - Garlic Powder: This gives a strong garlic flavor. - Parmesan Cheese: It adds a rich, savory taste. - Fresh Parsley: It adds color and a fresh touch. - Black Pepper: This gives a little kick to the biscuits. You will need a few key tools for this recipe: - Mixing Bowl: For combining dry and wet ingredients. - Whisk: To mix the dry ingredients well. - Rolling Pin: To shape the dough into a log. - Sharp Knife: To cut the dough into pieces. - Baking Pan: A 9-inch round pan is best for this recipe. - Oven: Preheat it to 425°F (220°C) for perfect baking. - Pastry Brush: For brushing melted butter on top of the biscuits. These tools make your baking process smoother and more fun! 1. Start by preheating your oven to 425°F (220°C). This step is key for a nice rise. 2. Grease a 9-inch round baking pan. This helps the biscuits come out easily. 3. In a large bowl, whisk together 2 cups of flour, 1 tablespoon of baking powder, 1 teaspoon of salt, 1 teaspoon of garlic powder, and 1/2 teaspoon of black pepper. This mix gives the biscuits flavor. 4. Pour in 1/2 cup of melted butter and 1/2 cup of milk. Stir it all together until just mixed. The dough should feel slightly sticky. 5. Turn the dough out onto a floured surface. Knead it gently a few times until it feels smooth. 6. Roll the dough into a log shape. Cut it into 12 equal pieces. 7. Roll each piece into a small ball. Make sure they are all about the same size. 1. Dip each ball into the rest of the melted butter. Make sure they get coated well. 2. Roll the balls in 1/2 cup of grated Parmesan cheese until they are fully covered. 3. Place the coated dough balls in the greased pan, stacking them for that pull-apart look. 4. Bake in the preheated oven for 15-20 minutes. Watch for a golden-brown color on top. 1. Look for a golden-brown color on the biscuits. This means they are likely done. 2. Insert a toothpick into the center of the biscuits. If it comes out clean, they are ready. 3. If the tops are brown but the insides seem wet, reduce the oven heat and bake a bit longer. To get fluffy biscuits, use cold butter. Cold butter helps the dough rise well. Don't over-mix the dough; mix until just combined. This keeps the biscuits light and airy. Also, make sure your baking powder is fresh. Old baking powder can lead to dense biscuits. A common mistake is using too much flour. Measuring flour correctly is key. Use a kitchen scale if you have one. Another mistake is not kneading the dough gently. Knead just a few times to keep it soft. Lastly, don’t skip the butter coating. It adds flavor and helps the cheese stick. You can boost the flavor in many ways. Try adding herbs like rosemary or thyme. Fresh herbs give a nice aromatic touch. For a spicy kick, add red pepper flakes. You can also experiment with different cheeses. Cheddar or mozzarella can add a fun twist. {{image_2}} You can change up the flavor of these biscuits easily. Try adding dried herbs like oregano or thyme. A teaspoon of Italian seasoning gives a nice twist. If you love heat, sprinkle in some red pepper flakes for a kick. Fresh herbs like rosemary or chives can also boost the taste. Just mix them into the dry ingredients for better flavor. While Parmesan is tasty, you can use other cheeses too. Cheddar adds a sharp flavor. Mozzarella gives a gooey texture. If you want something bolder, try blue cheese or feta. Each cheese brings its unique taste, so feel free to experiment. Just remember to adjust the amount based on the cheese's strength. If you need a gluten-free version, use a gluten-free flour blend. Look for one made for baking to keep the texture. You may need to add a bit more baking powder for lift. Keep an eye on the dough; it may feel different. Follow the same steps, and you’ll have a tasty treat for everyone. To keep your Garlic Parmesan Pull Apart Biscuits fresh, store them in the fridge. Place them in an airtight container. They will stay good for about 2 to 3 days. For best taste, reheat them before serving. Avoid leaving them out at room temperature for too long. This keeps them soft and tasty. You can freeze these biscuits for later use. First, let them cool completely. Then, wrap each biscuit in plastic wrap. After that, place them in a freezer bag. Be sure to remove as much air as possible. They can last up to 2 months in the freezer. When you're ready to eat, thaw them in the fridge overnight. Reheating is easy and helps restore the biscuits' softness. You can use the oven or microwave. For the oven, preheat it to 350°F (175°C). Place the biscuits on a baking sheet and cover them with foil. Bake for about 10 minutes. If using a microwave, heat them for 15 to 20 seconds. Check if they are warm enough. Enjoy your tasty biscuits again! You can serve these biscuits with a variety of tasty sides. They pair well with marinara sauce for dipping. A fresh garden salad adds a nice crunch. You might also enjoy them with a bowl of soup. Try them alongside a creamy pasta dish for a fun twist. Yes, you can prepare the dough ahead of time. After mixing the ingredients, wrap the dough tightly in plastic wrap. Store it in the fridge for up to 24 hours. When you're ready, let it sit at room temperature for about 30 minutes before shaping and baking. To boost the savory flavor, add more garlic powder. You can also mix in herbs like thyme or rosemary. Using aged Parmesan gives a stronger taste. A sprinkle of crushed red pepper adds some heat too. Experiment to find your perfect flavor balance! This post covered everything you need for Garlic Parmesan Pull Apart Biscuits. We looked at ingredients, measurements, and equipment. Then, I shared step-by-step instructions to guide your baking. You learned tips for fluffy biscuits and how to avoid mistakes. I added ways to change flavors and storage tips. In the end, making these biscuits is simple and fun. Give them a try and enjoy the yummy results!

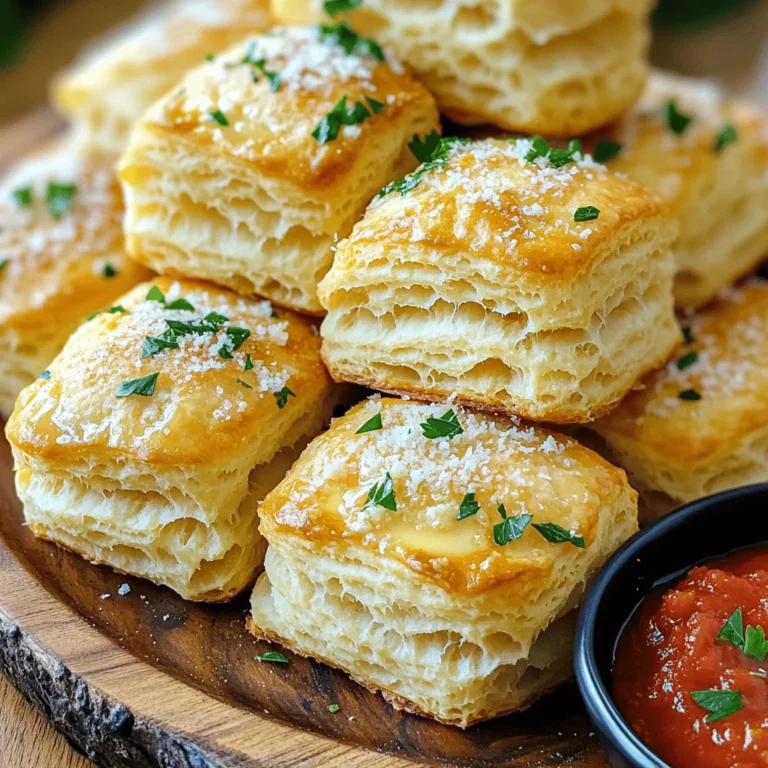
Garlic Parmesan Pull Apart Biscuits Savory Delight

PREV 1 … 17 18 19 … 53 NEXT
cozy citrus kitchen

explore

DessertsDinnerAppetizersDrinks

Our Policies

  • Cookie Policy
  • Copyright Policy
  • Disclaimer
  • GDPR Policy
  • Terms Of Use
Back to Top
  • About
  • Contact Us
  • Privacy Policy
© 2025 cozy citrus kitchen