FREE DINNER EBOOK! Get your copy!
  • Cookie Policy
  • GDPR Policy
  • Disclaimer
  • Terms Of Use
  • Visit my other site: Fun Cookie Recipes
cozy citrus kitchen
  • Home
  • Dinner
  • Desserts
  • Drinks
  • Appetizers
  • Contact
  • About
  • Privacy Policy
  • Home
  • Dinner
  • Desserts
  • Drinks
  • Appetizers
  • Contact
  • About
  • Privacy Policy
  • Cookie Policy
  • GDPR Policy
  • Disclaimer
  • Terms Of Use
Visit my other site: Fun Cookie Recipes

HOME / CATEGORIES /

Latest

- 1 lb boneless, skinless chicken thighs - 1 cup broccoli florets - 1 red bell pepper, sliced - 1 cup snap peas, trimmed - 4 cloves garlic, minced - 1 tablespoon grated ginger - 1/4 cup low-sodium soy sauce - 2 tablespoons brown sugar - 1 tablespoon sesame oil - 1 teaspoon chili flakes (optional) - 3 tablespoons vegetable oil, divided - 2 tablespoons cornstarch - 3 green onions, sliced (white and green parts separated) - Cooked jasmine rice, for serving For this recipe, you need exact measurements to get the best flavor. - Chicken: Use 1 pound of boneless, skinless chicken thighs. They stay juicy and cook well. - Vegetables: I like to use 1 cup of broccoli, 1 sliced red bell pepper, and 1 cup of snap peas. These add color and crunch. - Aromatics: Use 4 cloves of minced garlic and 1 tablespoon of grated ginger. They boost the dish’s flavor. - Sauces: Measure 1/4 cup of low-sodium soy sauce, 2 tablespoons of brown sugar, and 1 tablespoon of sesame oil. These create a sweet and savory base. - Chili flakes: Add 1 teaspoon if you want a bit of heat. Adjust based on your taste. When selecting your chicken, look for thighs that feel firm and moist. For vegetables, pick fresh, bright ones. Avoid anything that looks wilted or brown. This will ensure your stir fry is both tasty and healthy. To coat the chicken with cornstarch, take your sliced chicken thighs. Place them in a bowl and sprinkle the cornstarch over them. Use your hands or a spoon to toss the chicken until every piece is covered. This step helps to lock in moisture and gives the chicken a nice crisp when cooked. Marinate the chicken for at least 10 minutes. This waiting time is key. It allows the cornstarch to stick well and tenderizes the meat. Next, heat 2 tablespoons of vegetable oil in a large skillet or wok. Set the heat to medium-high. Wait until the oil gets hot. Then, add the marinated chicken. Stir-fry it for about 5-7 minutes. Look for a golden brown color and ensure it’s cooked through. Once done, remove the chicken from the skillet and set it aside. In the same skillet, add 1 tablespoon of vegetable oil. Toss in the broccoli, red bell pepper, and snap peas. Stir-fry these vegetables for about 3-4 minutes. You want them to stay bright and slightly crunchy. To enhance the flavor, push the veggies to one side of the skillet. Add minced garlic and grated ginger into the center. Cook them for about 1 minute. This will release their wonderful aromas. Now, it's time to bring it all together. Return the cooked chicken to the skillet. Pour in the soy sauce, brown sugar, sesame oil, and chili flakes if you like some heat. Toss everything together. Make sure every piece is well-coated in the sauce. Cook for an additional 2-3 minutes until the sauce thickens slightly. To finish, add the green onions’ white parts and stir to combine. Reserve the green tops for garnish. The dish is ready when the chicken is hot, and the sauce clings nicely. Serve it over jasmine rice for a complete meal. To make your chicken tender, start with boneless, skinless thighs. They stay juicy and cook well. Coat the chicken with cornstarch for a great texture. This helps it sear nicely. Letting it marinate for 10 minutes is key. It allows the cornstarch to stick better. For your vegetables, avoid overcooking them. Stir-fry the broccoli, red bell pepper, and snap peas for just a few minutes. You want them tender but still crisp. This keeps their bright color and nutrients. To boost flavor, consider adding spices like garlic powder or onion powder. A splash of rice vinegar can add a lovely tang. If you like heat, increase the chili flakes. Adjust the soy sauce and brown sugar to suit your taste. If you prefer it sweeter, add more sugar. If you want it saltier, add extra soy sauce. Tasting as you go is important! Serve your Mongolian chicken stir fry over jasmine rice for a perfect meal. The rice absorbs the sauce and balances the flavors. You can also use noodles if you prefer. For garnishing, sprinkle the reserved green onion tops on the dish. This adds a pop of color and freshness. A few sesame seeds can make it look fancy. Enjoy your beautiful meal! {{image_2}} You can switch the chicken for beef, shrimp, or tofu. Each option brings a new taste. For beef, choose flank steak or sirloin. Slice it thinly and stir-fry for about 3-5 minutes. Shrimp cooks fast, so add it last. Toss it in for only 2-3 minutes. For a vegan option, use firm tofu. Press it dry, cube it, and fry for 5-7 minutes. If you don’t have broccoli or snap peas, try other veggies. Bell peppers, carrots, or zucchini work well. You can also use seasonal vegetables like asparagus in spring or squash in fall. Just remember to adjust the cook time. Aim for tender, yet crisp veggies. For a low-sodium dish, use low-sodium soy sauce. You can also swap soy sauce for coconut aminos for a gluten-free option. Need a vegan twist? Replace the chicken with tofu and use a vegan sauce. This way, you keep all the flavors without meat. To keep your Mongolian chicken stir fry fresh, use airtight containers. Glass or plastic containers work well. Store your leftovers in the fridge. They will stay good for about 3 to 4 days. Be sure to let the dish cool completely before sealing it. This helps prevent moisture buildup. When reheating, the stove is best for keeping texture. Heat a skillet over medium heat. Add the stir fry and a splash of water. Stir it gently to warm it through. If you prefer, you can use a microwave. Just cover it loosely to let steam escape. To refresh flavors, add a sprinkle of soy sauce or a dash of sesame oil. This boosts the taste and makes it feel fresh again. Yes, you can prep this dish ahead. Cook the chicken and veggies, then cool them. Store them in airtight containers in the fridge for up to three days. When you're ready to eat, reheat everything in a skillet. Add a splash of soy sauce to revive the flavors. This dish pairs well with jasmine rice. You can also try noodles or quinoa for a twist. Fresh salad or steamed veggies make great sides too. They add color and crunch to your meal. To reduce heat, skip the chili flakes. You can also add more sugar to balance the heat. Another option is to add more vegetables, which will tone down the spice. Creamy sauces like peanut sauce can help too. Yes, you can freeze it. Let the stir fry cool completely. Place it in a freezer-safe container. It can last for about three months in the freezer. To eat, thaw in the fridge overnight and reheat in a skillet. In this blog post, we covered how to make Mongolian chicken stir fry with fresh ingredients. You learned about key ingredients and careful measurements to ensure quality. I shared step-by-step cooking instructions, plus tips for texture and flavor. Don’t forget the options for variations and dietary needs! Proper storage and reheating methods help keep your meal fresh. Enjoy experimenting with this dish, and feel free to make it your own!

Mongolian Chicken Stir Fry Flavorful Weeknight Meal

For these no bake chocolate raspberry cheesecake bites, gather the following: - 1 cup almond flour - 1/4 cup cocoa powder - 2 tablespoons maple syrup - 1/4 cup coconut oil, melted - 1 teaspoon vanilla extract - 8 ounces cream cheese, softened - 1/4 cup powdered sugar - 1/2 cup fresh raspberries - 1/4 cup chocolate chips, melted (for drizzling) - Fresh mint leaves for garnish (optional) You can easily swap items to fit your needs: - Almond flour: Use oat flour or crushed graham crackers for a different base. - Cocoa powder: Unsweetened carob powder works well if you want a milder flavor. - Maple syrup: Honey or agave syrup can replace maple syrup for sweetness. - Coconut oil: Use unsalted butter or any neutral oil if you prefer. - Cream cheese: For a dairy-free option, try a vegan cream cheese. - Powdered sugar: You can make your own by blending granulated sugar until fine. Fresh raspberries make a big difference in taste. Here’s how to find the best ones: - Look for bright color: Choose berries that are deep red and vibrant. - Check for firmness: Fresh raspberries should feel firm and not mushy. - Smell the berries: They should have a sweet, fruity scent. - Inspect for mold: Avoid containers with any signs of mold or squished berries. - Buy local: If possible, shop at farmers' markets for the freshest options. With these tips, you’re set to create delicious no bake chocolate raspberry cheesecake bites! Start by mixing almond flour, cocoa powder, maple syrup, melted coconut oil, and vanilla extract in a bowl. Make sure to blend well until the mixture sticks together. This forms the yummy chocolate base. Next, line an 8x8 inch pan with parchment paper. Press the chocolate mix evenly into the bottom of the pan. Refrigerate this for about 15 minutes. This sets the base and makes it firm. In another bowl, beat the softened cream cheese with powdered sugar. Mix until it's smooth and creamy. This is the rich filling that adds sweetness. Gently fold in the fresh raspberries. Keep some pieces whole for texture. This step fills your bites with fruity flavor. Spread the cream cheese mix over the chilled chocolate base. Use a spatula to smooth the top. This layer adds a nice touch of creaminess. Place the pan back in the fridge for at least one hour. This allows the bites to firm up. Once set, cut the mixture into small squares. For a fun finish, drizzle melted chocolate on top. If you like, add a mint leaf for garnish. These little bites are now ready to enjoy! Always measure your ingredients carefully. If you use too much almond flour, the texture will be dry. Make sure to mix the chocolate base until it holds together. When you spread the cream cheese, be gentle; otherwise, you might break the base. Ensure your cream cheese is at room temperature. Cold cream cheese won’t mix well and can leave lumps. The secret to great flavor is fresh raspberries. They add a burst of taste. Don’t overmix the raspberries when folding them in. You want some whole pieces for texture. Use high-quality cocoa powder for a richer chocolate flavor. If you want a sweeter bite, add more powdered sugar. Drizzling melted chocolate on top gives it a fancy look and taste. To save time, use a food processor for the chocolate base. It mixes quickly and evenly. You can also buy pre-softened cream cheese to skip waiting. If you’re in a rush, chill the bites for just 30 minutes instead of an hour. They will still taste great, though they might be softer. {{image_2}} You can change the flavors in these bites. For a tropical twist, use mango instead of raspberries. You can also swap the almond flour for hazelnut flour for a nutty taste. If you like citrus, add lemon zest to the cream cheese layer. This makes each bite bright and fresh. To make these bites vegan, replace cream cheese with a vegan cream cheese. Use maple syrup instead of powdered sugar for sweetness. For gluten-free bites, ensure your almond flour is certified gluten-free. This makes the recipe safe for all diets while still being delicious. Serve these bites on a fun platter. You can create a dessert board with fresh fruits and nuts. Drizzle extra chocolate over the bites for a fancy touch. You can even add edible flowers for a beautiful look. Each bite will stand out and impress your guests. To keep your No Bake Chocolate Raspberry Cheesecake Bites fresh, store them in an airtight container. Use parchment paper to separate layers. This prevents sticking and keeps them nice. You can place them in the fridge for best taste and texture. These cheesecake bites last about 5 days in the fridge. If you want to save some for later, you can freeze them. Wrap each bite in plastic wrap and place them in a freezer-safe bag. They will stay good for about 3 months in the freezer. When you're ready to enjoy a frozen cheesecake bite, remove it from the freezer. Let it sit in the fridge overnight to thaw. This keeps the texture smooth. Avoid using the microwave, as it can make them too soft. Yes, you can use other fruits. Strawberries, blueberries, or blackberries work well. Each fruit gives the bites a unique taste. Just make sure to chop the fruits into small pieces. This way, they mix well with the cream cheese. Use a sharp knife to cut the bites. First, remove the cheesecake from the pan. Place it on a cutting board. Wipe the knife with a damp cloth after each cut. This keeps the edges clean and neat. You can store these bites in the fridge for up to five days. Keep them in an airtight container. This helps them stay fresh and tasty. If you freeze them, they can last up to three months. Yes, you can make these bites dairy-free. Use vegan cream cheese instead of regular cream cheese. You can also use coconut milk or almond milk. This keeps the bites creamy while being dairy-free. In this blog post, we explored how to make delicious cheesecake bites with fresh raspberries. You learned about key ingredients, helpful tips, and tasty variations. Remember to source fresh raspberries for the best flavor. Avoid common mistakes to perfect your treats. With these easy steps, anyone can enjoy these bites. Try different flavors and serve them creatively. Now, get ready to enjoy your homemade cheesecake bites!

No Bake Chocolate Raspberry Cheesecake Bites Delight

- 2 cups all-purpose flour - 1 cup granulated sugar - 1 teaspoon baking powder - 1/2 teaspoon baking soda - 1/2 teaspoon salt - 1 teaspoon ground cinnamon - 1/2 teaspoon ground nutmeg - 2 large eggs - 1/2 cup vegetable oil - 1 teaspoon vanilla extract - 1 cup apples, peeled and diced (about 2 medium apples) - 1/2 cup caramel sauce, plus extra for drizzling - 1/2 cup chopped walnuts or pecans (optional) Gather these ingredients for the caramel apple bread loaf. Use fresh apples for the best taste. I love using a mix of sweet and tart apples. This gives the bread a nice balance of flavor. For the nuts, walnuts or pecans work great, but they are optional. If you want a nut-free version, just leave them out. Make sure you have all-purpose flour and granulated sugar on hand. These are the base for the loaf. The spices, cinnamon and nutmeg, add warmth and depth. Eggs, vegetable oil, and vanilla extract add moisture. They help create a soft, tender bread. The caramel sauce adds sweetness and a rich flavor. Check your pantry for these items. Once you have everything ready, you can start making your delicious caramel apple bread loaf! 1. Preheat your oven to 350°F (175°C). Grease a 9x5 inch loaf pan. 2. In a large bowl, mix 2 cups of flour, 1 cup of sugar, 1 teaspoon of baking powder, 1/2 teaspoon of baking soda, 1/2 teaspoon of salt, 1 teaspoon of cinnamon, and 1/2 teaspoon of nutmeg. Stir until well mixed. 3. In another bowl, beat 2 large eggs, 1/2 cup of vegetable oil, and 1 teaspoon of vanilla extract. Mix until smooth. 4. Slowly add the wet mix to the dry mix. Stir gently until just combined. Do not overmix! 5. Fold in 1 cup of peeled and diced apples and 1/2 cup of chopped walnuts or pecans, if you like. 1. Pour half the batter into the loaf pan. Drizzle about 1/4 cup of caramel sauce over the batter. 2. Add the rest of the batter on top. 3. Bake for 55-65 minutes. Check if a toothpick comes out clean from the center. 1. Let the loaf cool in the pan for about 10 minutes. 2. Carefully transfer to a wire rack to cool completely. 3. Drizzle extra caramel sauce on top right before serving for a sweet finish. - Low-sugar alternatives: Use stevia or erythritol instead of granulated sugar. This keeps sweetness without the extra calories. - Gluten-free options: Replace all-purpose flour with a gluten-free blend. This keeps the loaf soft and tasty. - Avoiding overmixing: Mix gently when combining wet and dry ingredients. Overmixing can make the loaf tough. - Checking for doneness: Use a toothpick to test the center. If it comes out clean, your bread is ready. - Pairing with drinks or sides: Serve with hot apple cider or a scoop of vanilla ice cream. These enhance the apple flavor. - How to present the bread loaf: Slice the loaf and arrange on a platter. Drizzle with caramel sauce for a beautiful touch. {{image_2}} You can make your caramel apple bread more interesting by adding spices. Try using ground ginger or cloves for a warm taste. These spices blend well with the apples and caramel. You can also switch up the apple types. Granny Smith gives a tartness, while Honeycrisp adds sweetness. This lets you control the bread's flavor. Want to change the texture? Add chocolate chips or dried fruits. These ingredients give your bread a sweet surprise. You can also use different nuts like almonds or skip them altogether for a nut-free option. This way, you make the recipe fit your taste. To add some crunch, try a crumb topping. Just mix butter, flour, and sugar for a delicious layer on top. If you prefer something creamy, a cream cheese frosting works wonders. It adds a rich flavor that pairs nicely with the bread. Store your caramel apple bread loaf at room temperature for up to two days. Use an airtight container to keep it fresh. If you want it to last longer, refrigerate it. Wrap it in plastic wrap or foil first. This helps to avoid drying out. To freeze the bread loaf, let it cool completely. Wrap it tightly in plastic wrap, then in foil. This prevents freezer burn. You can freeze it for up to three months. When you're ready, thaw it in the fridge overnight. Reheat slices in the microwave for a warm treat. The bread lasts about five days at room temperature. In the fridge, it can last up to a week. Check for mold or a sour smell. If you see either, it’s best to toss it. Enjoy your delicious loaf while it’s fresh! You can check if the bread is done by using a toothpick. Insert it into the center. If it comes out clean, the bread is ready. If it has wet batter, bake for a few more minutes. I suggest checking around the 55-minute mark. The bread should also look golden brown on top. Yes, you can use a different pan size. If you use a smaller pan, the bread will need more time to bake. If you choose a larger pan, it may bake faster. Keep an eye on the bread as it bakes. Adjust the baking time as needed. Yes, you can make this recipe vegan. Replace the eggs with flax eggs or applesauce. Use a plant-based oil instead of vegetable oil. Check the caramel sauce for dairy. You can make vegan caramel using coconut milk and brown sugar. To make caramel sauce, you need sugar and water. Combine one cup of sugar with a quarter cup of water in a saucepan. Heat over medium heat. Stir until the sugar dissolves. Let it boil without stirring until it turns a golden color. Remove from heat and add butter and cream. Mix well. Caramel apple bread pairs well with coffee or tea. It also goes nicely with vanilla ice cream. For a fun twist, serve it with a scoop of cinnamon ice cream. You can also enjoy it with a drizzle of more caramel sauce on top. This blog post covered all you need for delicious caramel apple bread. You learned the ingredients, preparation steps, baking process, and how to cool and serve the bread. We also shared tips, variations, and storage info to enhance your baking. Remember, you can easily adjust the recipe to suit your taste. Try different flavors or nuts for a unique twist. Enjoy sharing your tasty creation with friends and family! Happy baking!

Caramel Apple Bread Loaf Delightful and Easy Recipe

- 2 cups all-purpose flour - 1 cup granulated sugar - 1 tablespoon baking powder - ½ teaspoon baking soda - ½ teaspoon salt - ½ cup unsalted butter, melted and cooled - 2 large eggs - 1 teaspoon vanilla extract - 1 cup buttermilk (or milk with 1 tablespoon vinegar added) - 1 ½ cups fresh blueberries - ½ cup sliced almonds, plus extra for topping - Zest of 1 lemon - 1 tablespoon almond extract In this recipe, each ingredient plays a key role. The flour gives structure. The sugar adds sweetness and helps with browning. Baking powder and baking soda work together to make the muffins rise. Salt enhances the flavors. The melted butter adds richness, while eggs bind everything. Vanilla and almond extracts give amazing taste. Buttermilk keeps the muffins moist. The blueberries burst with flavor, and almonds add crunch. Lemon zest brightens the taste, making these muffins truly special. When you gather your ingredients, measure them carefully. This ensures that your muffins turn out just right. Fresh blueberries and sliced almonds make a big difference in taste. Enjoy the process, and get ready for some delicious baking! First, set your oven to 375°F (190°C). This step is key for even baking. Next, prepare your muffin tin by lining it with paper liners or greasing it with cooking spray. This prevents sticking and makes cleanup easy. In a large bowl, combine the dry ingredients: 2 cups of all-purpose flour, 1 cup of granulated sugar, 1 tablespoon of baking powder, ½ teaspoon of baking soda, and ½ teaspoon of salt. Whisk these together until mixed well. This blend helps the muffins rise and gives them flavor. In a separate bowl, blend together ½ cup of melted butter, 2 large eggs, 1 teaspoon of vanilla extract, 1 cup of buttermilk (or milk with a splash of vinegar), 1 tablespoon of almond extract, and the zest of 1 lemon. Mix until smooth. This mixture adds moisture and richness to your muffins. Pour the wet mixture into the dry ingredients. Gently fold them together. Be careful not to overmix; it’s okay to have some lumps. Next, gently fold in 1 ½ cups of fresh blueberries and ½ cup of sliced almonds. This ensures that every muffin has a mix of flavors and textures. Use a large spoon or an ice cream scoop to divide the batter into your prepared muffin cups. Fill each cup about 2/3 full. This allows room for the muffins to rise. Then, sprinkle extra sliced almonds on top for a crunchy finish. Bake in the preheated oven for 20 to 25 minutes. Check for doneness by inserting a toothpick into the center. It should come out clean. To get the best muffin texture, avoid overmixing the batter. This keeps your muffins light and fluffy. When you mix, stop as soon as you see no dry flour. A few lumps are fine! Baking soda and baking powder serve different roles. Baking powder helps muffins rise while baking soda adds a nice brown color. Use both for the best results. To boost flavor, add zest from a lemon or orange to the batter. It brightens the muffins. Almond extract adds a sweet touch. You could also use vanilla extract for a different twist. For toppings, consider adding more sliced almonds or a sprinkle of coarse sugar. This adds crunch and sweetness on top. Use a sturdy muffin tin for even baking. Silicone liners work well, but paper liners are also great. They help with easy removal. Mixing bowls should be large and sturdy. A good whisk makes blending dry and wet ingredients easier. A spatula helps fold in blueberries without crushing them. {{image_2}} You can switch blueberries for other fruits. Raspberries and strawberries work well too. They add a different taste and color. Dried fruits like cranberries or apricots also taste great. You can even try adding chocolate chips. They’ll make your muffins sweet and fun. If you want to change the nuts, use walnuts or pecans. They give a nice crunch and flavor. You can also use almond flour for a gluten-free option. This swap keeps the muffins soft and moist. Adding different extracts can change the taste. Try using vanilla or orange extract for a twist. They add a bright flavor. You can also sprinkle in spices like cinnamon or nutmeg. These spices give warmth and depth to your muffins. To keep your blueberry almond muffins fresh, follow these steps: - Room Temperature: Store muffins in an airtight container. They last 2-3 days. Keep them away from sunlight. - Refrigeration: If you want to store them longer, place them in the fridge. They can stay fresh for up to a week. Make sure they are in a sealed container to avoid drying out. - Freezing: For long-term storage, freeze the muffins. Wrap them tightly in plastic wrap and then place them in a freezer bag. They can last for up to three months. Label the bags with dates for easy tracking. When you are ready to enjoy your muffins again, here are some methods to reheat them: - Microwave: Place one muffin on a plate and cover it with a damp paper towel. Heat for 10-15 seconds. This keeps the muffin moist. - Oven: Preheat your oven to 350°F (175°C). Place muffins on a baking sheet for about 5-10 minutes. This method gives a nice crisp outside. - Toaster Oven: This works great too! Set it to 350°F (175°C) and heat for 5-8 minutes. Keep an eye on them while reheating to ensure they stay moist. Enjoy your muffins warm! To keep muffins moist, use buttermilk. It adds richness and tenderness. Mix your wet and dry ingredients gently. Overmixing leads to dry muffins. Another tip is to avoid baking at too high a temperature. Bake at 375°F for the best results. Let muffins cool in the pan for five minutes. This step helps them stay moist before transferring them to a wire rack. Yes, you can use frozen blueberries. They are convenient and delicious. But, they may release more juice. To avoid blue batter, toss them in a bit of flour. This helps them stay intact during baking. Add them straight from the freezer without thawing. This keeps them firm and prevents mushiness. Muffins are done when they are golden brown. You can check with a toothpick. Insert it into the center of a muffin. If it comes out clean or with just a few crumbs, they are ready. Also, the tops should spring back when lightly pressed. If they feel wet or sticky, bake them a little longer. Yes, you can make these muffins gluten-free. Use a gluten-free flour blend instead of all-purpose flour. Look for a blend that includes xanthan gum. This helps with texture and structure. Almond flour is another good option. It adds a nice nutty flavor and pairs well with the other ingredients. Just adjust the liquid slightly, as almond flour absorbs less moisture. You’ve learned how to make delicious muffins with fresh blueberries and almonds. We covered the key ingredients, step-by-step instructions, and useful tips for perfect texture. Remember to experiment with fruits and nuts to create your unique muffins. Store them properly for freshness and enjoy warm or cold. Baking can be fun and rewarding, so grab your ingredients and start today!

Bakery Style Blueberry Almond Muffins Easy and Tasty

To make Sweet Chili Pineapple Meatballs, gather these key ingredients: - 1 lb ground chicken or turkey - 1/2 cup breadcrumbs - 1/4 cup grated Parmesan cheese - 1 egg - 2 cloves garlic, minced - 1 teaspoon ginger, minced - 1/4 cup finely chopped green onions - 1 teaspoon salt - 1/2 teaspoon black pepper - 1 cup pineapple chunks (fresh or canned, drained) - 1/2 cup sweet chili sauce - 1 tablespoon soy sauce (low sodium) - 1 tablespoon sesame seeds (for garnish) Using these ingredients, you create a dish full of flavor. The ground chicken or turkey gives a light texture. Breadcrumbs and Parmesan add a nice crunch. The egg helps bind everything together. Garlic and ginger bring a warm, rich taste. Green onions add a fresh bite. The sweet and savory mix comes from the sweet chili sauce and soy sauce. Pineapple chunks add a juicy, sweet burst. Finally, sesame seeds give a delightful finish. This blend of ingredients makes the meatballs unique and tasty. Start by preheating your oven to 400°F (200°C). This step helps ensure the meatballs cook evenly. Line a baking sheet with parchment paper for easy cleanup. In a large mixing bowl, combine the following: - 1 lb ground chicken or turkey - 1/2 cup breadcrumbs - 1/4 cup grated Parmesan cheese - 1 egg - 2 cloves garlic, minced - 1 teaspoon ginger, minced - 1/4 cup finely chopped green onions - 1 teaspoon salt - 1/2 teaspoon black pepper Mix these ingredients well. I like to use my hands to make sure everything blends nicely. Shape the mixture into small meatballs. Aim for about 1 inch in diameter. Place them on the baking sheet, keeping space between each one. Bake the meatballs for about 20 minutes. They should turn golden brown and be cooked through. While the meatballs bake, you can make the sauce. In a small saucepan over medium heat, mix: - 1/2 cup sweet chili sauce - 1 tablespoon soy sauce (low sodium) Add in 1 cup of pineapple chunks, either fresh or canned. Cook for 3-4 minutes, stirring often until everything is heated through. When the meatballs are done, take them out of the oven. Place them in a large mixing bowl. Pour the sweet chili pineapple sauce over them. Gently toss to coat every meatball evenly. Transfer the meatballs onto a serving platter. For a nice touch, sprinkle 1 tablespoon of sesame seeds on top. This adds flavor and makes your dish look great! To make great meatballs, start with the right mix. Use ground chicken or turkey for a lean option. Add breadcrumbs for texture and moisture. The egg helps bind all the ingredients together. Mix until everything is combined, but do not overwork the meat. This keeps them tender. If you like, add a bit more Parmesan for extra flavor. Preheat your oven to 400°F (200°C). This high heat cooks the meatballs quickly. Line your baking sheet with parchment paper. This makes cleanup easy and prevents sticking. Space the meatballs about an inch apart. This allows even cooking. Bake for about 20 minutes, or until golden brown and cooked through. These meatballs shine with the sweet chili pineapple sauce. Serve them over rice or noodles for a full meal. They work great as an appetizer too. For a crunchy side, try a fresh salad. Garnish with sesame seeds for a nice touch. You can also pair them with a light dipping sauce for extra flavor. {{image_2}} You can switch up the meat in this recipe. Ground beef or pork works well. You could also try plant-based options like lentils or chickpeas. Mixing in some tofu adds a nice twist too. These alternatives keep the dish fun and fresh. They also let you cater to different diets. To make this recipe gluten-free, use gluten-free breadcrumbs. Many brands offer great options. You can also use oats instead of breadcrumbs. They add a nice texture. Just blend them into a fine powder. This way, you keep the meatballs tasty without gluten. While sweet chili sauce shines here, you can try other flavors. A teriyaki sauce adds a nice twist. Or mix soy sauce with honey for a sweet touch. You could even make a spicy mango sauce for a fruity kick. Each change keeps the dish exciting and unique. To store leftover meatballs, let them cool first. Place them in an airtight container. They can last in the fridge for up to three days. Make sure to separate them from the sauce if you want them to stay firm. If they are in sauce, use them within two days for best taste. To reheat meatballs, you have a few options. You can use the microwave or the oven. If using the microwave, place them on a plate and cover them. Heat them for 1-2 minutes until warm. For the oven, preheat it to 350°F (175°C). Place them on a baking sheet and heat for about 10-15 minutes. This method keeps them nice and juicy. Freezing meatballs is a great way to save time. Once they are cooked and cooled, place them in a freezer bag. Make sure to remove as much air as possible. They can last up to three months in the freezer. When you are ready to use them, thaw them in the fridge overnight before reheating. Enjoy your tasty meatballs anytime! Yes, you can use other meats. Ground beef or pork works well. You can also use plant-based meat for a vegan option. Just remember to adjust cooking times if needed. The sauce has a mild heat. Sweet chili sauce is sweet with just a hint of spice. If you want it spicier, add some red pepper flakes. Leftovers last up to three days in the fridge. Make sure to store them in an airtight container. Reheat them well before serving for the best taste. Yes, you can prepare the meatballs a day in advance. Just form them and store them in the fridge. Bake them just before serving for fresh taste. These meatballs pair well with rice or noodles. You can also serve them with a fresh salad. They make a great appetizer, too! In this post, I shared how to make sweet chili pineapple meatballs with easy steps. You learned about the tasty ingredients, from ground chicken to the sweet sauce. I provided tips for perfect meatballs and made sure you have ideas for variation and storage. Remember, cooking is fun! Don’t hesitate to try new things. With these simple methods, you can impress anyone at the table. Enjoy your cooking adventure and make these meatballs your own. Happy cooking!

Sweet Chili Pineapple Meatballs Tasty and Easy Dish

To make chewy molasses ginger cookies, gather these ingredients: - 1/2 cup unsalted butter, softened - 1 cup brown sugar, packed - 1/4 cup molasses - 1 large egg - 2 cups all-purpose flour - 2 teaspoons ground ginger - 1 teaspoon ground cinnamon - 1/2 teaspoon ground cloves - 1/2 teaspoon baking soda - 1/4 teaspoon salt - Granulated sugar for rolling Each ingredient plays a key role. The unsalted butter gives the cookies a rich base. Brown sugar adds sweetness and a slight chew. Molasses gives that warm, spicy flavor we love. The spices—ginger, cinnamon, and cloves—create a cozy aroma. Flour gives structure, while baking soda helps them rise. Salt enhances all the flavors. Lastly, rolling the dough in granulated sugar gives a nice crunch. Having fresh ingredients is important. Fresh spices can make a big difference in taste. Measuring accurately ensures you get the right texture. Use a kitchen scale for best results if you can. Enjoy preparing these treats! First, set your oven to 350°F (175°C). This step is key for even baking. Line a baking sheet with parchment paper. This keeps the cookies from sticking and makes cleanup easy. In a large bowl, take 1/2 cup of softened butter and 1 cup of packed brown sugar. Cream them together until the mix looks light and fluffy. Add 1/4 cup of molasses and 1 large egg. Beat these together until they blend well. Grab another bowl to mix dry ingredients. Whisk together 2 cups of all-purpose flour, 2 teaspoons of ground ginger, 1 teaspoon of ground cinnamon, 1/2 teaspoon of ground cloves, 1/2 teaspoon of baking soda, and 1/4 teaspoon of salt. This mix will give your cookies a great flavor and texture. Now, it's time to chill the dough. Pour the dry mix into the wet mix gradually. Stir until just combined. Cover the bowl and put it in the fridge for about 30 minutes. Chilling makes the dough easier to shape. After chilling, scoop out tablespoons of dough. Roll each scoop into a ball. Then, roll each ball in granulated sugar. This sugar coating will give your cookies a sweet crunch. Place the sugar-coated balls on the prepared baking sheet. Keep them about 2 inches apart. Bake for 8-10 minutes. The edges should be set, while the centers stay soft. When done, let them cool on the baking sheet for a few minutes. Then, transfer them to a wire rack to cool completely. Enjoy the sweet aroma in your kitchen! To get that chewy bite, use the right butter. Softened unsalted butter works best. Cream it well with brown sugar. This adds air, making the cookies light. Chill the dough for at least 30 minutes. Cold dough helps cookies keep their shape while baking. Bake just until the edges are set. The centers should look soft. This keeps them chewy after cooling. Using fresh spices makes a big difference. Buy whole spices and grind them at home. Freshly ground ginger, cinnamon, and cloves give a bright taste. Make sure to measure spices carefully. Too much can overpower your cookies. A good balance of spices brings warmth and depth to every bite. If your cookies spread too much, your dough might be too warm. Chill it longer before baking. If they are hard, you may have baked them too long. Check them at the 8-minute mark. If they look too puffy, they need more time in the oven. Let them cool on the tray for a few minutes. This helps them set without getting too hard. {{image_2}} You can make these cookies even better by adding chocolate chips or nuts. Chocolate chips bring sweetness and richness. I love dark chocolate chips for a bold flavor. You can also use milk chocolate for a creamier taste. If you prefer nuts, try walnuts or pecans. Chop them into small pieces and mix them into the dough. Start with one cup of chips or nuts. This way, you keep the chewy texture. If you need a gluten-free version, you can use a gluten-free flour blend. Look for a blend that works well for baking. You can swap the all-purpose flour with an equal amount of this blend. Make sure it includes xanthan gum. This will help the cookies hold their shape. You can also try almond flour for a nutty twist. Just remember, the texture may change a bit. For a fun twist, add extra spices to your cookie dough. A pinch of nutmeg can enhance the warm flavors. You can also try adding a bit of cayenne pepper for heat. Just use a small amount, so it doesn’t overpower the cookies. Another option is to add orange zest for a fresh and bright taste. Mix in a teaspoon for a zesty kick. These small changes can make your cookies stand out! To keep your chewy molasses ginger cookies fresh, store them in an airtight container. This helps keep them soft and tasty. You can stack them neatly, but place parchment paper between layers. This simple step prevents sticking. Keep the cookies at room temperature for up to one week. If you want to keep them longer, consider freezing. To freeze the cookies, wait until they cool completely. Place them in a single layer on a baking sheet. Freeze for about one hour. Once frozen, transfer them to a freezer bag. Remove as much air as possible to avoid freezer burn. They stay good for up to three months. When you want to enjoy them, take out a few cookies. Let them thaw at room temperature for about 30 minutes. If you prefer warm cookies, reheating is easy. Preheat your oven to 350°F (175°C). Place the cookies on a baking sheet. Bake them for about 5 minutes. This will make them warm and soft again. Avoid microwaving for too long. This can make them tough. A quick oven reheat keeps them chewy and delightful. Yes, you can use light molasses. It will give your cookies a milder flavor. Dark molasses has a richer taste, while light molasses is sweeter. Both work well, but the cookie’s taste may change slightly. If you want a deeper flavor, stick with dark molasses. These cookies can stay fresh for about a week when stored correctly. Place them in an airtight container at room temperature. If you want them to last longer, you can freeze them. Just make sure to separate layers with parchment paper to avoid sticking. You can replace butter with coconut oil or vegetable oil. This change may affect the texture. Cookies made with coconut oil may have a slight coconut flavor. If you use vegetable oil, your cookies may be less rich but still tasty. These cookies pair well with milk or hot tea. You can also serve them with a scoop of vanilla ice cream for a fun dessert. If you want to impress guests, dust them with extra cinnamon before serving. They look and taste great this way! Absolutely! These cookies make a lovely gift. Place them in a decorative tin or box. You can even tie them with a ribbon for a personal touch. Everyone loves homemade treats, and these cookies are sure to delight anyone who receives them. In this blog post, I shared the key ingredients for chewy molasses ginger cookies. You learned how to mix, chill, and shape the dough for perfect cookies. I also provided tips for achieving the right texture and flavor. Variations allow you to adjust the recipe to your taste. Proper storage keeps your cookies fresh longer. Now, go ahead and bake your own batch. Enjoy every chewy bite!

Chewy Molasses Ginger Cookies Delightful and Simple

- 2 boneless, skinless chicken breasts - 2 tablespoons olive oil - 2 teaspoons dried oregano - 1 teaspoon garlic powder - 1 teaspoon onion powder - Salt and pepper to taste The main ingredients create a tasty base for this dish. The chicken is juicy and tender. Olive oil adds richness and helps the spices stick. Dried oregano gives that classic Greek flavor. Garlic and onion powder enhance the taste. Seasoning with salt and pepper makes everything pop. - 1 cup cooked quinoa or rice - 1 cup cherry tomatoes, halved - 1 cucumber, diced - 1/2 red onion, thinly sliced - 1/2 cup feta cheese, crumbled - 1/4 cup pitted Kalamata olives, halved - Fresh parsley, chopped, for garnish Fresh veggies add color and crunch. Quinoa or rice serves as the perfect base. Cherry tomatoes bring sweetness, while cucumbers offer coolness. Red onion adds a bit of bite. Feta cheese gives a salty touch, and Kalamata olives add a briny flavor. Don’t forget the fresh parsley for a beautiful finish. - 1 cup plain Greek yogurt - Juice of 1 lemon - 1 clove garlic, minced - Pinch of salt Tzatziki sauce is a must-have. It cools down the meal and adds creaminess. The Greek yogurt is thick and rich. Fresh lemon juice brings brightness. Minced garlic boosts the flavor, and a pinch of salt ties it all together. This sauce is simple, but it makes a big impact. To start, you need to marinate the chicken. In a bowl, mix these ingredients: - 2 tablespoons olive oil - 2 teaspoons dried oregano - 1 teaspoon garlic powder - 1 teaspoon onion powder - Salt and pepper to taste Add the chicken breasts to the bowl. Make sure they are well-coated. Let the chicken marinate for at least 30 minutes. If you have time, marinate it overnight in the fridge for even better flavor. You can cook the chicken in two ways: grilling or in a skillet. Preheat your grill or skillet over medium-high heat. Cook the chicken for about 6 to 8 minutes on each side. You want the chicken to reach an internal temperature of 165°F (75°C). This ensures it is fully cooked. After cooking, let the chicken rest for 5 minutes before slicing. This keeps it juicy. Next, make the tzatziki sauce. In a small bowl, mix together: - 1 cup plain Greek yogurt - Juice of 1 lemon - 1 clove garlic, minced - A pinch of salt Stir the mixture well. This sauce is best chilled. So, refrigerate it until you are ready to serve. This helps the flavors blend nicely. Now, it’s time to assemble your bowls. Start with a base of cooked quinoa or rice. Add these toppings: - Diced cucumber - Halved cherry tomatoes - Sliced red onion - Crumbled feta cheese - Halved Kalamata olives Once you layer the toppings, place the sliced chicken on top. Finally, drizzle the tzatziki sauce over everything. For a finishing touch, sprinkle fresh parsley on top. This adds color and flavor to your Greek chicken gyro bowls. To get the perfect grill marks, preheat your grill or skillet. Cook the chicken for 6-8 minutes on each side. Look for nice, dark grill lines. This gives the chicken that great look and flavor. After cooking, let the chicken rest for 5 minutes. This helps keep it juicy. If you cut it too soon, all the juices run out. Trust me; waiting is worth it! When you serve the bowls, think about colors and layers. Start with a base of quinoa or rice. This adds texture. Then, pile on the fresh veggies like cucumbers and tomatoes. Combine flavors by adding crumbled feta and Kalamata olives. They add saltiness and creaminess. Drizzle tzatziki sauce on top. It ties everything together and makes it look amazing! If you need alternatives, swap chicken for chickpeas or grilled veggies. Both options are tasty and add protein. For dietary needs, use brown rice or a gluten-free grain instead of quinoa. This keeps the dish friendly for everyone. You can still enjoy the flavors and feel good about your meal! {{image_2}} You can easily make a delicious vegetarian gyro bowl. Instead of chicken, use grilled vegetables. Bell peppers, zucchini, and eggplant work great. Marinate them just like the chicken for flavor. Grill them until they are tender and have nice char marks. This swap keeps your meal fresh and tasty. To make your gyro bowl even better, think about adding more toppings. Try adding avocado slices for creaminess. You can also add pickled red onions for extra zing. Fresh herbs like dill or mint can enhance the flavors too. Experiment with different sauces. A spicy harissa or a sweet tahini can change the whole vibe of your dish. Serve your gyro bowls with some tasty side dishes. Greek salad pairs perfectly with these bowls. You can also offer pita bread for a fun touch. For drinks, consider serving iced tea or a light red wine. These options will complement the Greek flavors and make your meal complete. To keep your Greek Chicken Gyro Bowls fresh, use airtight containers. Glass or plastic containers work well. Make sure the chicken and toppings are separated to keep them fresh. Store them in the fridge for up to three days. When reheating, the best method is using the microwave. Heat the chicken in short bursts. Aim for one minute, then check if it’s warm. Stir the bowls to heat evenly. You can also use a skillet on low heat. This method keeps the chicken juicy and tasty. You can freeze the assembled bowls, but it’s best to freeze the chicken separately. Wrap each bowl tightly in plastic wrap, then in foil. They can last up to three months in the freezer. When ready to eat, thaw it overnight in the fridge before reheating. You can use several tasty alternatives. Try cauliflower rice for a low-carb option. Couscous is also a good choice if you want something light. For a gluten-free option, use millet or even lentils. Each adds a unique flavor and texture to your gyro bowls. You can store tzatziki sauce for about 3 to 5 days. Keep it in a sealed container in the fridge. The flavors get better as it sits, so it’s great for meal prep. If you see any changes in color or smell, it's best to toss it out. Absolutely! You can grill the chicken a day in advance. Just cool it completely and store it in the fridge. When you are ready to eat, slice and warm it up in a skillet. This saves time and makes meal prep easier. Several sides pair well with these bowls. Greek salad adds freshness and crunch. Grilled vegetables bring out great flavors. Pita bread is perfect for scooping up toppings. You can also serve a simple lemon rice as a side. Yes, Greek Chicken Gyro Bowls are great for meal prep! You can make everything in advance and store them in separate containers. Just keep the tzatziki sauce separate until you are ready to eat. This way, everything stays fresh and flavorsome. In this blog post, we explored how to make delicious Greek Chicken Gyro Bowls. We covered the main ingredients, including chicken, fresh veggies, and tzatziki sauce. You learned step-by-step instructions for marinating, cooking, and assembling the bowls. Tips on cooking and serving added ease to your meal prep. Overall, these bowls are tasty and full of flavor. Enjoy experimenting with ingredients and variations to make this dish your own. You can create a healthy and satisfying meal that everyone will love.

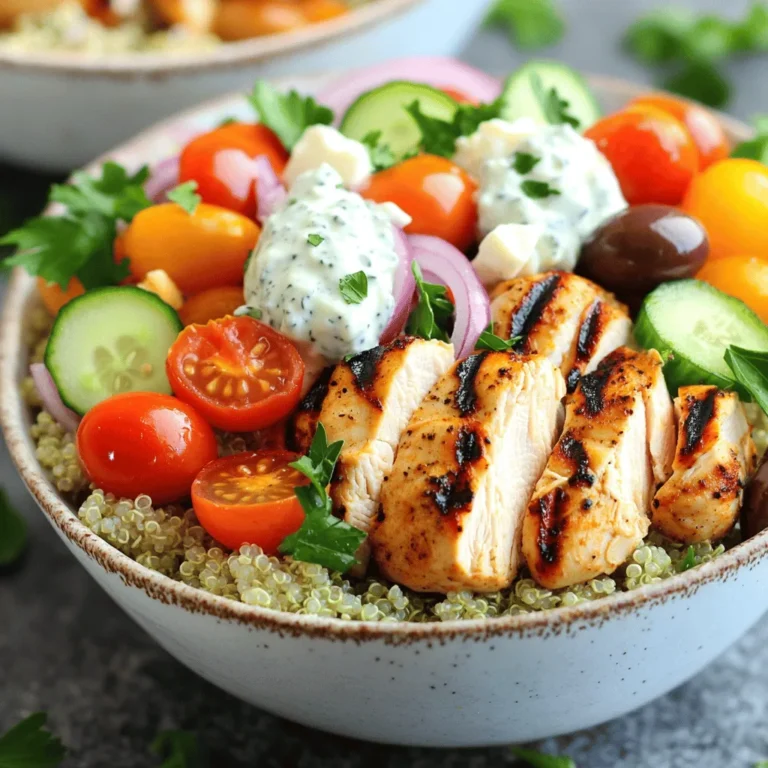
Greek Chicken Gyro Bowls Fresh and Flavorful Recipe

Here is what you will need to make Nutella Stuffed French Toast: - 4 slices of thick brioche or challah bread - 1/2 cup Nutella - 2 large eggs - 1/2 cup milk - 1 teaspoon vanilla extract - 1/2 teaspoon ground cinnamon - Pinch of salt - Butter for frying - Powdered sugar for dusting - Fresh berries for garnish Each ingredient plays a key role in the taste and texture of this dish. The brioche or challah adds a rich flavor and soft texture. Nutella brings a sweet and chocolatey goodness. Eggs, milk, and vanilla create a creamy custard mix that coats the bread. Cinnamon adds warmth, while a pinch of salt balances all the flavors. Butter gives that golden crispiness when frying. Finally, powdered sugar and fresh berries make the dish look and taste even better. When you gather these ingredients, you set the stage for an unforgettable breakfast. This recipe is perfect for special occasions or just a cozy weekend treat. To start, take two slices of thick brioche or challah bread. Spread a generous amount of Nutella on one side of each slice. Make sure to cover the slice well. Next, place the other two slices on top to form two Nutella sandwiches. Press them gently together to ensure they stick. Now, grab a shallow bowl. In it, whisk together two large eggs, half a cup of milk, and one teaspoon of vanilla extract. Add half a teaspoon of ground cinnamon and a pinch of salt. Mix until everything is smooth and combined. This mixture gives the French toast its rich flavor. Take each Nutella-stuffed sandwich and dip it quickly into the egg mixture. Make sure it is coated well, but do not soak it too long. You want it to absorb the flavor without becoming soggy. Let any excess egg mixture drip off before cooking. Heat a large skillet over medium heat. Add a small pat of butter to the pan and let it melt. The butter will help create a nice golden crust. Place the soaked sandwiches in the skillet. Cook for about 3-4 minutes on each side. Keep an eye on them to ensure they don’t burn. You want them crispy and golden brown. Once the French toast is done, take it out of the skillet. Dust the top with powdered sugar for a sweet touch. Add fresh berries like strawberries, blueberries, or raspberries for color and flavor. These toppings make the dish look pretty and taste great! Enjoy your warm, gooey Nutella-filled treat. - Adjusting heat settings: Start with medium heat. If the toast cooks too fast, lower the heat. A steady temperature helps cook the toast evenly. - Ensuring the center is heated through: Cook each side for about 3-4 minutes. Check the center by cutting a small slice. It should be warm and gooey, not cold. - Storing leftovers: If you have any French toast left, let it cool. Then, wrap it in plastic wrap or foil. Store it in the fridge for up to two days. - Reheating French toast: Reheat in a skillet over low heat. You can also use a toaster oven for crispiness. Heat until warm, about 5 minutes. - Pairing with syrup or cream: Drizzle warm maple syrup over the toast. You can also add whipped cream for a special touch. - Adding additional toppings: Fresh berries add color and flavor. You can use strawberries, blueberries, or raspberries. A sprinkle of powdered sugar makes it look fancy! {{image_2}} You can change the filling to mix things up. Try using peanut butter instead of Nutella. The creamy texture pairs well with the toast. You can also spread fruit preserves. Strawberry or raspberry jam offers a nice fruity twist. Adding slices of banana or strawberries gives your French toast a fresh taste. The fruit adds sweetness and a fun texture that kids love. If you need gluten-free options, use gluten-free bread. Many brands offer tasty choices. For dairy-free substitutions, choose almond or oat milk. You can also use dairy-free butter for frying. These swaps keep your meal delicious and friendly for different diets. Meal prep is a smart way to save time. You can make Nutella sandwiches ahead. Just spread the Nutella and stack the bread. Wrap each sandwich tightly in plastic wrap. Store them in the fridge for up to 24 hours. When ready to cook, dip them in the egg mixture and fry. This method makes breakfast easy and quick. To make Nutella Stuffed French Toast vegan, replace milk and eggs. Use plant-based milk like almond or oat. For the egg, use a mix of 1 tablespoon of ground flaxseed and 2.5 tablespoons of water. Let this sit for a few minutes until it thickens. The rest of the steps stay the same. You’ll still enjoy that delicious, gooey center! Yes, you can use regular bread. Sourdough or whole wheat bread works well too. Just ensure the bread is thick enough to hold the filling. Regular bread will not have the same rich flavor as brioche. But it will still taste great with Nutella! Serve Nutella Stuffed French Toast with fresh berries. Strawberries, blueberries, or raspberries add color and flavor. You can also add maple syrup or whipped cream. A sprinkle of powdered sugar on top makes it look fancy! Nutella Stuffed French Toast is best when fresh. If you have leftovers, store them in the fridge for up to 2 days. Reheat them in a skillet over low heat. This keeps them crispy on the outside and warm inside. Yes, you can freeze Nutella Stuffed French Toast. Wrap each sandwich tightly in plastic wrap. Place them in a freezer bag to avoid freezer burn. They can last for up to 2 months. Reheat in a toaster oven for the best texture. Each serving of Nutella stuffed French toast has about 650 calories. This includes the bread, Nutella, and added ingredients. If you want to enjoy this treat, keep the calories in mind. This dish packs a punch with its macronutrients. Here’s a quick look: - Fats: About 30 grams, mostly from Nutella and butter. - Carbohydrates: Roughly 80 grams, mainly from the bread and Nutella. - Proteins: Around 12 grams, coming from eggs and milk. The balance of these macronutrients makes it a filling breakfast. You can lighten this dish easily. Here are some tips: - Use Whole Grain Bread: Swap brioche for whole grain. It adds fiber. - Reduce Nutella: Use less Nutella or try a nut butter. It cuts sugar and fat. - Low-Fat Milk: Substitute whole milk with low-fat or almond milk for fewer calories. - Skip the Sugar: Omit powdered sugar on top. Fresh berries add sweetness without added sugar. These small changes keep the flavor while making your meal a bit healthier. Nutella Stuffed French Toast is a delightful treat that’s simple to make. We covered the ingredients, easy steps, and tips for perfect results. You learned how to prepare delightful variations, store leftovers, and serve this dish in new ways. Remember, you can adjust the recipe for dietary needs. Enjoy cooking and savoring this sweet breakfast. You’ll impress yourself and others with this dish!

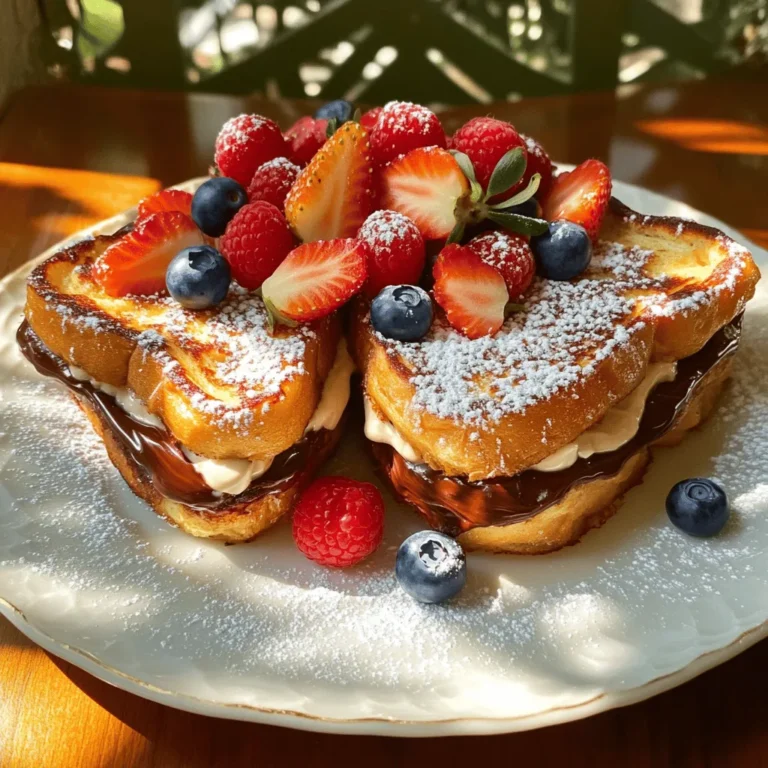
Nutella Stuffed French Toast Irresistible Breakfast Idea

- 2 cups edamame (in pods) - 4 cloves garlic, minced - 2 tablespoons olive oil - 1 tablespoon soy sauce - 1 teaspoon red pepper flakes - Sea salt to taste - 1 teaspoon sesame oil - 1 tablespoon sesame seeds (for garnish) - Chopped green onions (for garnish) These simple ingredients come together to create a tasty snack. Edamame packs protein and fiber, making it a healthy choice. Garlic adds a robust flavor, while the red pepper flakes give it a nice kick. I love using fresh ingredients, but frozen edamame works well too. Just remember to thaw it before cooking. Olive oil brings richness, while soy sauce adds umami. Sesame oil rounds out the flavor with a nutty taste. The sesame seeds and green onions provide a lovely finish. Together, these ingredients create a snack that's not only fun to eat but also full of flavor. Enjoy! - Boiling the Edamame Start with a pot of salted water. Bring it to a boil. Add 2 cups of edamame pods. Cook for 4-5 minutes. You want them tender but still firm. - Ice Water Bath After boiling, drain the edamame. Quickly transfer them to a bowl of ice water. This stops the cooking and keeps the color bright. Once cooled, drain again to remove excess water. - Sautéing the Garlic Heat 2 tablespoons of olive oil in a large skillet over medium heat. Add 4 cloves of minced garlic. Sauté for about 1 minute. Watch closely to avoid browning the garlic. - Adding Sauce Ingredients Next, stir in 1 tablespoon of soy sauce, 1 teaspoon of red pepper flakes, and 1 teaspoon of sesame oil. Mix well and let the sauce simmer for another minute. - Tossing the Edamame Add the drained edamame to the skillet. Toss them to coat evenly with the spicy garlic mixture. Cook for an additional 2-3 minutes until everything is heated through. - Final Touches and Serving Once done, remove from heat. Sprinkle sea salt to taste. Transfer the edamame to a serving dish. Garnish with 1 tablespoon of sesame seeds and chopped green onions. Enjoy your tasty snack! - Choosing Fresh Edamame Look for bright green pods. They should feel firm to the touch. Avoid any pods that are yellow or brown. Fresh edamame tastes better and has the best texture. - Adjusting Spice Levels Start with one teaspoon of red pepper flakes. You can always add more if you like it hotter. Taste as you go. This way, you ensure it matches your spice preference. - Ensuring Garlic Doesn’t Burn Sauté garlic on medium heat. Stir it often and watch it closely. Garlic can burn quickly and turn bitter. Cook it for just about one minute for the best flavor. - Pairing with Dips These edamame go well with soy sauce or a spicy mayo dip. You can also serve them with a tangy ponzu sauce for extra flavor. This adds a nice twist. - Best Serving Utensils Use a large bowl to serve the edamame. A wooden spoon works great for tossing and serving. You can also provide small bowls for soy sauce. - Presentation Ideas Garnish with sesame seeds and chopped green onions. This makes it look vibrant and fresh. Serve in a colorful bowl to catch the eye. {{image_2}} - Citrus Zest Option: For a bright twist, add some citrus zest. Lemon or lime zest gives a fresh taste. Just sprinkle it on before serving. It wakes up the flavors of the dish. - Alternative Sauces: You can try different sauces. Instead of soy sauce, use tamari for a gluten-free option. Coconut aminos also work well for a sweeter touch. - Vegetarian and Vegan Modifications: This recipe is already vegan! If you want more protein, add some tofu. Just sauté it with the garlic. - Using Frozen Edamame: Frozen edamame is a great shortcut. It cooks quickly and saves time. Just follow the same cooking steps. - Substituting with Other Beans: You can use other beans like black beans or chickpeas. They will change the taste but still be delicious. - Incorporating Different Vegetables: Mix in other veggies too! Try bell peppers or snap peas. They add crunch and color to your snack. After enjoying your Spicy Garlic Edamame, you may have some left. To keep them fresh, place the leftovers in an airtight container. Store them in the fridge. They will stay good for about three days. If you want to keep them longer, you can freeze the edamame. First, let them cool completely. Then, place them in a freezer bag. Try to remove as much air as possible before sealing. They can last up to three months in the freezer. When you’re ready to enjoy your leftovers, you can reheat them in a few ways. The best method is to use a skillet. Heat the skillet over medium heat. Add a splash of olive oil to help prevent sticking. You can also use a microwave. Place the edamame in a microwave-safe bowl. Cover it with a damp paper towel to keep moisture. Heat in short intervals, stirring in between. To avoid soggy edamame, skip the steaming method. It can make the edamame too wet. Instead, focus on gentle heating methods to keep them crisp and tasty. Enjoy your snack! How to choose fresh edamame? Look for bright green pods. They should feel firm and plump to the touch. Avoid any that appear brown or shriveled. Fresh edamame has a slight sheen on its skin. You can find them in the frozen section or fresh produce aisle. Can you make Spicy Garlic Edamame ahead of time? Yes, you can prepare it in advance. Cook the edamame and toss it in the sauce. Allow it to cool, then store it in the fridge. When you're ready to serve, just reheat it in a skillet. This keeps the flavor fresh and delicious. What are the health benefits of edamame? Edamame is packed with protein and fiber. It contains essential vitamins like K and folate. These nutrients support heart health and aid digestion. Edamame is also low in calories, making it a smart snack choice. Can I use pre-cooked edamame? Absolutely! Pre-cooked edamame saves time. Just heat it up and toss it into your spicy garlic mix. It still tastes great and keeps the meal quick and easy. What is a good substitution for soy sauce? If you want a soy sauce alternative, try tamari or coconut aminos. Both options have a similar taste but cater to different diets. They work well in this recipe without losing flavor. Where can I find edamame in stores? You can find edamame in most grocery stores. Check the frozen food section for pods or shelled edamame. Some stores also sell fresh edamame in the produce aisle. If you can't find it, look for Asian markets. They often have a good selection. In this blog post, I shared a simple recipe for Spicy Garlic Edamame. You learned about key ingredients, preparation steps, and cooking tips. We explored variations and storage advice to keep your edamame fresh. Try customizing the recipe with your favorite flavors. Remember, enjoying cooking can make meals even better. Keep experimenting, and soon you'll be a pro at making perfect edamame!

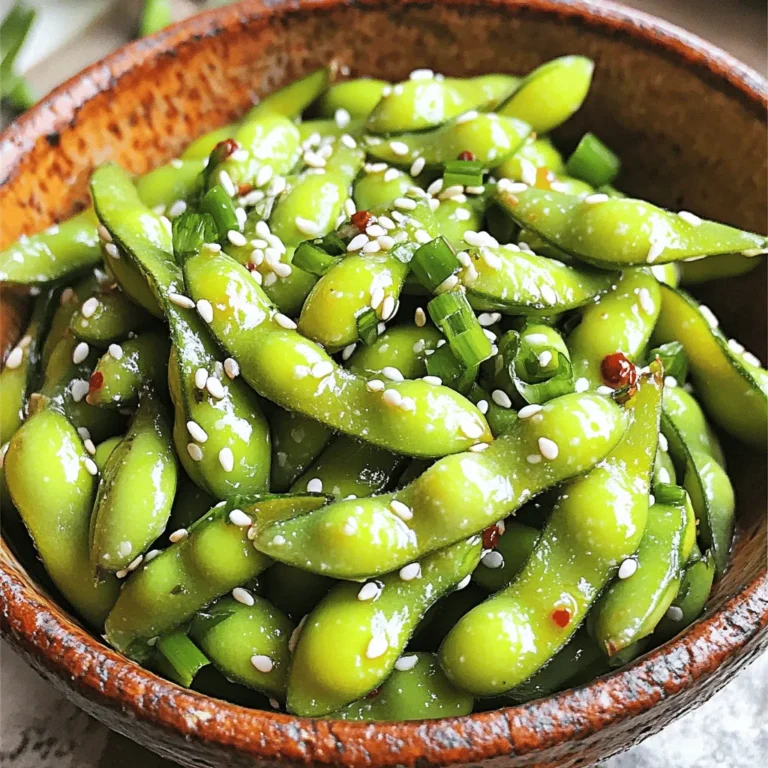
Spicy Garlic Edamame Tangy and Flavorful Snack

- 1 lb sirloin steak, cut into bite-sized cubes - 4 tablespoons unsalted butter, melted - 4 cloves garlic, minced - 1 teaspoon fresh rosemary, chopped - 1 teaspoon fresh thyme, chopped - Salt and black pepper to taste - 1 tablespoon olive oil - Fresh parsley for garnish (optional) - Add a splash of Worcestershire sauce for a tangy kick. - Include red pepper flakes for some heat. - Consider using fresh herbs like oregano or basil for a unique twist. - Sirloin steak can be swapped with ribeye or tenderloin for richer flavors. - Use ghee or olive oil instead of butter for a dairy-free option. - If fresh herbs are not available, dried herbs work well too; just use less. - Garlic powder can replace fresh garlic in a pinch, but fresh is best for taste. To start, gather your ingredients. In a medium bowl, mix the melted butter and minced garlic. Add chopped rosemary and thyme. Sprinkle in salt and black pepper to taste. This mix is your garlic herb butter marinade. It adds rich flavor to the steak. Next, cut your sirloin steak into bite-sized cubes. Place these cubes in your marinade. Make sure each piece gets coated well. This step is key for tasty bites. Let the steak marinate for 15-20 minutes. This time allows the flavors to soak in. Keeping it at room temperature helps too. Now, preheat your air fryer to 400°F (200°C). After marinating, drizzle olive oil over the steak bites. Toss them gently to coat. Place the bites in a single layer in the air fryer basket. You might need to do this in batches. Cook for 8-10 minutes. Shake the basket halfway through to cook evenly. When they are done, you can drizzle extra garlic butter over them for more taste. Add fresh parsley on top for a nice touch. For perfect steak bites, timing is key. Here’s a quick guide: - Medium-rare: Cook for 8 minutes. The inside will be warm and red. - Medium: Cook for 9 minutes. The center will be pink and warm. - Medium-well: Cook for 10 minutes. The center will be slightly pink. - Well done: Cook for 11 minutes. The steak will be brown throughout. Always check the internal temperature with a meat thermometer. Aim for 130°F for medium-rare and 160°F for well-done. To get that crispy crust on your steak bites, follow these steps: 1. Pat Dry: Before marinating, pat the steak cubes dry with paper towels. This helps them crisp up. 2. Oil Coating: Drench the steak bites in olive oil before air frying. This adds flavor and helps with browning. 3. Single Layer: Arrange the bites in a single layer in the air fryer basket. Avoid overcrowding for even cooking. 4. Shake It Up: Halfway through cooking, shake the basket to let all sides cook well. These tips will give you a nice, crunchy exterior that pairs perfectly with the tender inside. These garlic butter steak bites are great on their own but shine with sides. Here are some tasty ideas: - Salads: Serve with a fresh garden salad or a Caesar salad for crunch. - Veggies: Roasted or air-fried vegetables like broccoli or asparagus complement the steak well. - Dips: Offer a garlic aioli or a spicy sauce for dipping. - Carbs: Try them with fluffy mashed potatoes or crispy fries for a hearty meal. Get creative and mix and match! The steak bites will make any meal special. {{image_2}} You can use many cuts of steak for this recipe. Sirloin is great, but ribeye works too. Ribeye gives more flavor due to its fat content. Tenderloin is another option if you want a leaner bite. Each cut brings its own taste and texture. Just remember, the cooking time may change with thicker cuts. Spice it up! You can add spices to the garlic herb butter. Try paprika for a smoky touch or cayenne for heat. Marinades can change the flavor too. A soy sauce or balsamic vinegar mix adds depth. You can even use fresh herbs like oregano or basil. Get creative! The goal is to enhance the steak's natural taste. You can serve these steak bites in different ways. For appetizers, keep them small and bite-sized. Serve with toothpicks for easy eating. Pair with a dipping sauce like chimichurri or ranch. As a main dish, serve larger portions with sides like mashed potatoes or veggies. The steak bites are versatile and fit any meal style. To keep your steak bites fresh, store them in an airtight container. Let them cool first, then cover tightly. Place them in the fridge if you plan to eat them within three days. For longer storage, consider freezing them. Always label your container with the date, so you know when you made them. When you want to enjoy leftover steak bites, preheat your air fryer to 350°F. Place the steak bites in the basket in a single layer. Heat them for about 4-5 minutes, shaking halfway through. This helps them heat evenly and regain some of their crispiness. You can also microwave them, but they may lose some texture. If you want to freeze your steak bites, do so right after they cool. Place them in a freezer-safe bag or container. Squeeze out as much air as possible to prevent freezer burn. They can last up to three months in the freezer. When ready to eat, thaw them in the fridge overnight before reheating. You should marinate steak bites for at least 15-20 minutes. This lets the flavors soak in. If you have time, go for an hour. Longer marinating gives deeper flavor. Yes, you can use other meats. Chicken, pork, or shrimp work well. Just adjust cooking times for each type. Each meat brings its own taste, so get creative! Great side dishes include mashed potatoes or roasted vegetables. A simple salad adds freshness. You can also serve garlic bread for a tasty touch. Enjoy your meal with a side that balances the rich steak bites. This guide covered everything you need for making garlic butter steak bites. We explored ingredients, step-by-step instructions, and helpful tips. You learned how to enhance flavor and serve them well. Remember to store any leftovers properly and reheat with care. Try different cuts and spice blends to keep dishes fresh. Enjoy your cooking journey and impress your friends and family with these tasty bites. Your meals can be simple yet delicious!

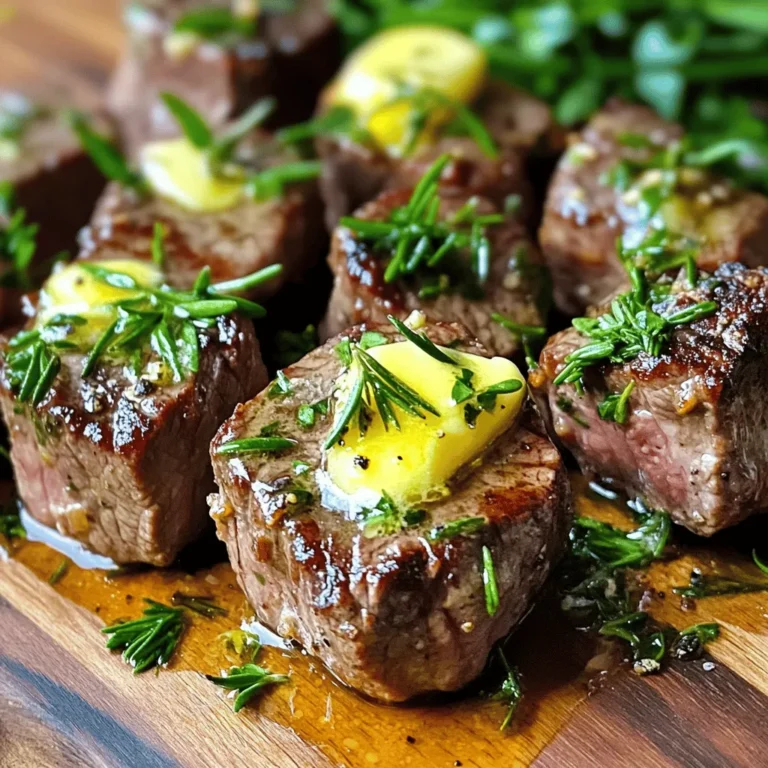
Air Fryer Garlic Butter Steak Bites Easy and Flavorful

PREV 1 … 14 15 16 … 52 NEXT
cozy citrus kitchen

explore

DessertsDinnerAppetizersDrinks

Our Policies

  • Cookie Policy
  • Copyright Policy
  • Disclaimer
  • GDPR Policy
  • Terms Of Use
Back to Top
  • About
  • Contact Us
  • Privacy Policy
© 2025 cozy citrus kitchen