FREE DINNER EBOOK! Get your copy!
  • Cookie Policy
  • GDPR Policy
  • Disclaimer
  • Terms Of Use
  • Visit my other site: Fun Cookie Recipes
cozy citrus kitchen
  • Home
  • Dinner
  • Desserts
  • Drinks
  • Appetizers
  • Contact
  • About
  • Privacy Policy
  • Home
  • Dinner
  • Desserts
  • Drinks
  • Appetizers
  • Contact
  • About
  • Privacy Policy
  • Cookie Policy
  • GDPR Policy
  • Disclaimer
  • Terms Of Use
Visit my other site: Fun Cookie Recipes

HOME / CATEGORIES /

Latest

To make Air Fryer Crispy Teriyaki Cauliflower, you need simple ingredients that pack a punch. Here’s the list of what you will need: - Medium head of cauliflower, cut into bite-sized florets - 1/4 cup teriyaki sauce (you can use store-bought or homemade) - 2 tablespoons cornstarch - 1 tablespoon olive oil - 1/2 teaspoon garlic powder - 1/2 teaspoon onion powder - 1/4 teaspoon black pepper - 1/4 teaspoon salt - Garnishes: Sesame seeds and sliced green onions Each ingredient adds flavor and texture to the dish. The cauliflower serves as the main star, while the teriyaki sauce adds a sweet and salty kick. Cornstarch gives it that extra crunch you crave. The garlic and onion powders infuse a savory depth, making every bite delightful. I recommend using fresh cauliflower for the best taste. If you opt for homemade teriyaki sauce, it will allow you to adjust the flavors to your liking. Remember, the garnishes are not just for looks; they add a nice finish to the dish. Enjoy the process of gathering your ingredients, and let’s get cooking! Set your air fryer to 400°F (200°C). This high heat helps make the cauliflower crispy. Preheat it for about 5 minutes. A hot air fryer cooks the florets evenly and quickly. Start with a medium head of cauliflower. Cut it into bite-sized florets. In a large bowl, mix the cauliflower with olive oil and teriyaki sauce. Add garlic powder, onion powder, black pepper, and salt. Toss well to coat every piece. This mixing helps the flavors blend and stick to the cauliflower. Next, sprinkle 2 tablespoons of cornstarch over the coated florets. This step is key for extra crispiness. Mix again until all florets have a light dusting of cornstarch. Arrange the coated florets in the air fryer basket. Lay them in a single layer. This prevents them from steaming and keeps them crispy. Avoid overcrowding the basket for the best results. Air fry the cauliflower for 10 to 12 minutes. Halfway through, shake the basket gently. This helps them cook evenly and get golden brown. Once done, remove them and garnish with sesame seeds and sliced green onions. Enjoy your crispy teriyaki cauliflower! To get that perfect crunch, use cornstarch wisely. After you coat the cauliflower, sprinkle cornstarch on top. This helps create a crispy outer layer. Mix it in well to cover each floret. Cooking in a single layer is key. If you pile the cauliflower, steam builds up. This can make them soggy. Place the florets in the basket without stacking. It allows hot air to circulate. This way, every piece gets that nice golden finish. Making your own teriyaki sauce is easy. You need just a few simple ingredients. Combine soy sauce, honey, garlic, and ginger in a bowl. Stir them well until mixed. You can adjust the sweetness by adding more honey or sugar. If you like it salty, add a splash more soy sauce. Taste as you go to get it just right. Pair your crispy teriyaki cauliflower with rice or noodles. It makes for a great meal. You can also serve it as a snack or appetizer. For a touch of flair, garnish with sesame seeds and sliced green onions. This not only adds flavor but also makes the dish look beautiful. {{image_2}} You can change the flavors of the dish by using different spices. Try adding smoked paprika for a nice smoky taste. Or, use curry powder to give it an Indian twist. Another fun idea is to add heat with chili flakes. This spice will bring a fiery kick that many enjoy. Just sprinkle a pinch to start, and add more if you like it hot. If you need a vegan version, great news! The ingredients are already plant-based. Just ensure your teriyaki sauce is vegan. For gluten-free options, choose a gluten-free teriyaki sauce. You can also use tamari instead of regular soy sauce. This keeps the dish tasty while meeting dietary needs. If you don’t have an air fryer, you can still enjoy this dish. For oven-baking, preheat your oven to 425°F (220°C). Spread the cauliflower on a baking sheet. Bake for about 20-25 minutes, turning halfway for even cooking. If you prefer stovetop frying, heat oil in a pan over medium heat. Cook the cauliflower in batches until golden brown and crispy. Adjust the cooking time as needed, and enjoy your crispy treat! To store leftover crispy teriyaki cauliflower, place it in an airtight container. This keeps the cauliflower fresh. You should refrigerate it right away. Leftovers can last up to three days in the fridge. If you want to keep it longer, consider freezing. To reheat the cauliflower and keep it crispy, use the air fryer. Set it to 350°F (175°C) and heat for about 5 minutes. This restores the crunch. You can also use the microwave, but it may not keep the texture. If you use a microwave, heat it for 1-2 minutes at a time. To freeze crispy teriyaki cauliflower, let it cool first. Once cooled, place it in a freezer-safe bag or container. Make sure to remove as much air as possible. It can stay in the freezer for up to three months. When you're ready to eat, thaw it in the fridge overnight. Then, reheat it in the air fryer to get it crispy again. Yes, you can use frozen cauliflower. However, it will change the texture. Frozen cauliflower tends to be softer than fresh. To cook it, increase the time by a few minutes. Start with 12 to 14 minutes at 400°F (200°C). Check for crispness before serving. Many sauces can enhance cauliflower's flavor. Here are a few tasty options: - BBQ sauce - Buffalo sauce - Sweet chili sauce - Garlic aioli - Lemon-garlic sauce Each sauce gives cauliflower a unique taste. Feel free to get creative! To avoid overcrowding, follow these tips: - Arrange cauliflower in a single layer. - Leave space between each piece. - Cook in batches if needed. This helps the air circulate and gives you that perfect crispiness. Enjoy your cooking! I covered how to make crispy air-fried cauliflower with teriyaki flavor. We discussed the needed ingredients, preparation steps, and tips for perfecting your dish. You can even try variations to suit your needs. Remember to store leftovers properly and reheat them for the best taste. This dish is easy, tasty, and fun to make. Enjoy cooking and sharing it with others!

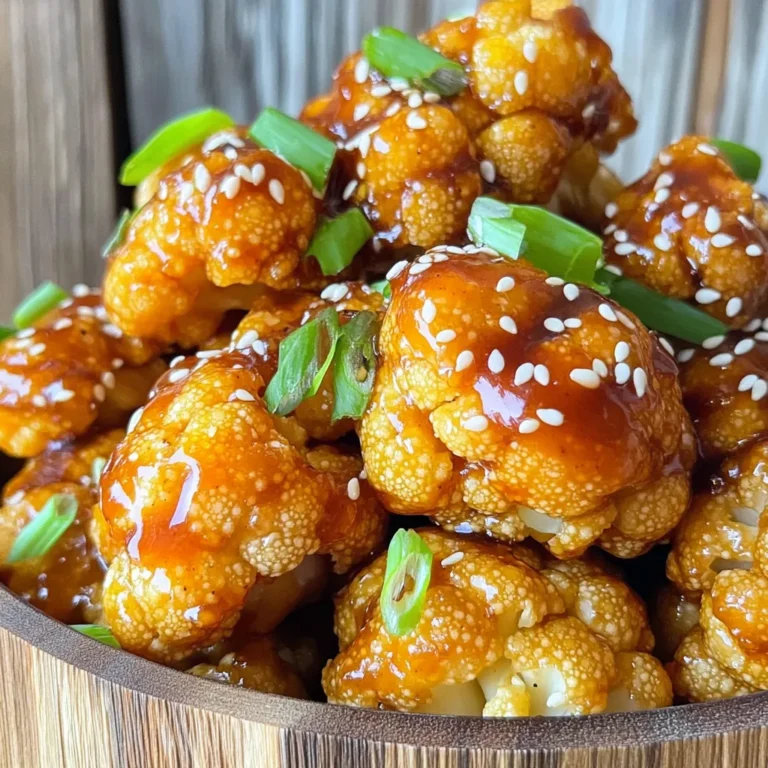
Air Fryer Crispy Teriyaki Cauliflower Delight

To make pumpkin spice protein pancakes, you need these key ingredients: - 1 cup rolled oats - 1 banana, mashed - 1 cup pumpkin puree - 2 scoops vanilla protein powder - 1 teaspoon baking powder - ½ teaspoon cinnamon - ¼ teaspoon nutmeg - ¼ teaspoon ginger - 1 cup almond milk (or regular milk) - 1 tablespoon maple syrup (optional) - Cooking spray or coconut oil for the pan You can swap out some ingredients if needed. Here are some ideas: - Rolled oats: Use oat flour if you want a smoother batter. - Banana: Applesauce can replace the banana for a less sweet pancake. - Pumpkin puree: If you can’t find it, use sweet potato puree instead. - Protein powder: You can try chocolate or plant-based protein instead. - Almond milk: Regular milk, soy milk, or coconut milk work well too. - Maple syrup: Honey or agave syrup can sweeten your batter just fine. Each serving of these pancakes offers great nutrition. Here’s a rough breakdown: - Calories: Approximately 250 - Protein: About 20 grams - Carbohydrates: Around 35 grams - Fiber: Approximately 5 grams - Sugar: Roughly 6 grams These pancakes are a tasty way to start your day with a healthy boost! To start, I blend the rolled oats in a blender. I keep blending until they look like flour. This step makes the pancakes light and fluffy. If you don’t have a blender, you can use a food processor. It works just as well. Next, I add the mashed banana and pumpkin puree to the oats. I also include two scoops of vanilla protein powder. Then, I sprinkle in the baking powder, cinnamon, nutmeg, and ginger. This mix gives the pancakes a warm, spiced flavor. After that, I pour in the almond milk and maple syrup if I want some extra sweetness. I blend everything until it’s smooth and creamy. I let the batter sit for about five minutes. This helps it thicken up. If it seems too thick, I add a splash more almond milk. Now it’s time to cook! I heat a non-stick skillet over medium heat. I lightly grease it with cooking spray or coconut oil. Then, I pour about ¼ cup of batter for each pancake onto the skillet. I cook them for about three to four minutes. When bubbles start to form, I know it’s time to flip. I cook the other side for another two to three minutes until it’s golden brown. I repeat this with the rest of the batter, adding more oil as needed. Once done, I serve them warm with my favorite toppings! To get the best pancake texture, focus on the batter. Blend your oats until they are fine like flour. This helps the pancakes rise well. If your batter is too thick, add more almond milk. Let the batter rest for five minutes. This waiting time helps the oats absorb the liquid. Your pancakes will be fluffy and soft. Pumpkin spice flavor shines with extra ingredients. Try adding a pinch of vanilla extract for sweetness. A handful of chopped nuts can add crunch. For a touch of sweetness, drizzle maple syrup on top. You can also mix in chocolate chips if you like. They add a rich taste and make breakfast fun! Avoid over-mixing the batter. This can make your pancakes tough. Flip the pancakes only when bubbles form on top. This shows they are ready to turn. If you cook them too fast, they may burn. Keep the heat at medium to cook evenly. Lastly, don’t skip the oil or cooking spray. It prevents sticking and ensures a nice golden color. {{image_2}} To make gluten-free pumpkin spice pancakes, swap rolled oats for gluten-free oats. Oats are naturally gluten-free, but check for cross-contamination. This swap keeps the texture and flavor while catering to gluten-free diets. You can still enjoy the warm spices and protein boost. For a vegan version, replace the eggs with a flaxseed meal. Mix 1 tablespoon of flaxseed with 3 tablespoons of water to create a binding agent. Use plant-based protein powder and almond milk. It keeps the pancakes fluffy and delicious without any animal products. You can add fun mix-ins to your pancakes. Try folding in chocolate chips for a sweet twist. Nuts like walnuts or pecans add a nice crunch and healthy fats. Dried fruit, like cranberries or raisins, brings extra sweetness. Get creative and make these pancakes your own! After you make these pancakes, let them cool first. Place any leftover pancakes in an airtight container. You can store them in the fridge for up to three days. If you want to keep them longer, freezing is a great option. To reheat, use a microwave or a skillet. If using a microwave, place pancakes on a plate and heat for about 20-30 seconds. For the skillet, warm it up on medium heat and add the pancakes for about 1-2 minutes on each side. This keeps them soft and tasty. To freeze, stack the pancakes with parchment paper between each one. This prevents them from sticking together. Store the stack in a freezer-safe bag. When you want to eat them, take out the pancakes and let them thaw in the fridge overnight. You can reheat them in the morning for a quick breakfast. Yes, you can use any protein powder you like. I often try whey, casein, or plant-based options. Just make sure the flavor matches your taste. If you use chocolate powder, it will change the flavor. You might want to skip some spices or add more chocolate to balance it. You can still make these pancakes without a blender. Just mash the banana well in a bowl. Then mix in the pumpkin puree and protein powder. Use a fork to blend the rolled oats into a fine powder. Add the baking powder and spices, then stir in the milk. You may need to whisk a bit more to get a smooth batter. Toppings can make these pancakes even better. Here are some great ideas: - Maple syrup - Whipped cream - Chopped nuts - Sliced bananas - Greek yogurt - Dark chocolate chips Try mixing and matching to find your favorite combo! This blog post covers everything you need to make delicious pumpkin spice protein pancakes. We explored the key ingredients and substitutions for your needs. I shared easy step-by-step instructions for preparing and cooking the pancakes. You also learned tips for great texture and flavor. Variations allow you to customize your pancakes, while storage tips help keep them fresh. Remember, if you use different protein powder or want no blender, you can still enjoy these pancakes. Now, you’re ready to whip up tasty, nutritious pancakes any time!

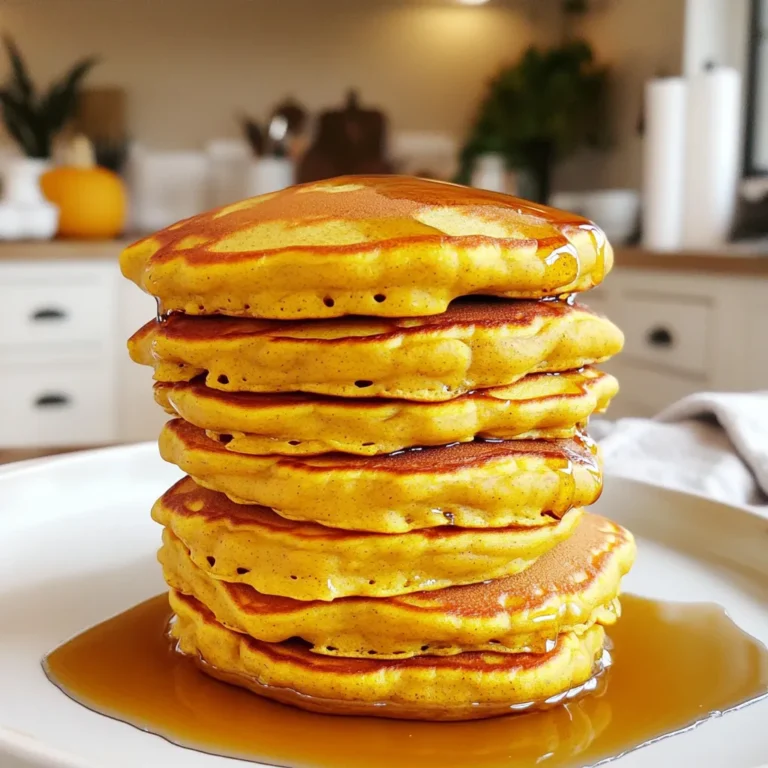
Pumpkin Spice Protein Pancakes Tasty Healthy Treat

To create this tasty dip, gather these simple items: - 8 oz cream cheese, softened - 1 cup pumpkin puree - 1 cup powdered sugar - 1 teaspoon vanilla extract - 1 tablespoon pumpkin spice mix (or a blend of cinnamon, nutmeg, and ginger) - 1 cup whipped topping Each ingredient plays a key role. The cream cheese gives it a rich base. Pumpkin puree adds that warm, fall flavor. Powdered sugar sweetens it just right. Vanilla extract gives a nice, smooth taste. Pumpkin spice mix brings in the classic aroma of autumn. Finally, whipped topping lightens the dip, making it fluffy and fun. You need some fun dippers to enjoy this dip! Here are my favorites: - Graham crackers - Apple slices - Cinnamon sugar pitas Graham crackers add a sweet crunch. Apple slices give a fresh and crisp bite. Cinnamon sugar pitas bring a unique twist. Each choice pairs well with the creamy dip. Try mixing and matching them for a tasty experience! 1. Beating the cream cheese Start with 8 oz of softened cream cheese. Use an electric mixer to beat it. Mix until it is smooth and creamy. This step is key to a great dip. 2. Mixing ingredients together Next, add 1 cup of pumpkin puree, 1 cup of powdered sugar, 1 teaspoon of vanilla extract, and 1 tablespoon of pumpkin spice mix to the bowl. Mix them well. You want everything to blend into a fluffy mixture. 3. Folding in the whipped topping Gently fold in 1 cup of whipped topping. This makes the dip light and airy. Be careful not to mix too hard. You want to keep that fluffy texture. 1. Chilling time Transfer your dip to a serving bowl. Smooth the top with a spatula. Now, chill it in the fridge for at least 30 minutes. This helps the flavors blend nicely. 2. Serving suggestions Serve the dip with fun dippers. Graham crackers, apple slices, or cinnamon sugar pitas work great. Arrange them around the dip for a pretty fall-themed platter. 3. Garnishing tips For a special touch, sprinkle a little more pumpkin spice on top before serving. It adds a nice look and extra flavor. Enjoy your No-Bake Pumpkin Spice Cheesecake Dip! Sweetness adjustments You may want to tweak the sweetness. If you prefer a sweeter dip, add more powdered sugar. Start with a tablespoon at a time. Mix well and taste. This helps you find the perfect balance. Spice adjustments Pumpkin spice can vary in strength. If you love a stronger spice flavor, add more pumpkin spice mix. A half teaspoon can make a big difference. Mix and taste until it feels just right. Achieving the right fluffiness The goal is to make your dip light and fluffy. Beat the cream cheese well first. Then mix in the pumpkin puree and sugar. Finally, fold in the whipped topping gently. This keeps the dip airy. Avoiding deflation while mixing When folding in the whipped topping, use a spatula. Gently fold rather than stirring. This helps keep the air in the dip. Be careful not to overmix. The dip should remain light and creamy. {{image_2}} If you want to change things up, try different sweeteners. Instead of powdered sugar, use honey or agave syrup for a natural touch. Each sweetener gives the dip a unique taste. You can also switch up the whipped topping. Use a flavored one, like vanilla or caramel, to add a twist. This small change can make each bite feel fresh and exciting. Add some fun by mixing in chocolate chips. They blend well with the pumpkin spice. The sweetness of chocolate pairs nicely with the creaminess of the dip. Another idea is to sprinkle on nut toppings. Chopped pecans or walnuts add a nice crunch. This texture contrast makes the dip even more enjoyable. Plus, it brings in a festive feel that suits the season perfectly. This dip stays fresh in the fridge for about five days. Store it in an airtight container. Make sure to keep it covered to prevent it from absorbing other food smells. The longer it sits, the more the flavors meld together, which can make it even tastier! You can freeze this dip, but it changes the texture. To freeze it, place the dip in a freezer-safe container. Leave some space at the top because it will expand when frozen. When ready to eat, thaw it in the fridge overnight. Stir it well before serving to make it creamy again. Yes, you can make this dip ahead of time. I recommend preparing it the day before. This gives the flavors time to meld and improves the taste. Simply cover it and store it in the fridge. It stays fresh for up to three days. Just remember to give it a good stir before you serve it. You can easily make your own pumpkin spice mix. Use a blend of cinnamon, nutmeg, and ginger. Just mix one teaspoon of cinnamon, one-quarter teaspoon of nutmeg, and one-quarter teaspoon of ginger. This gives you a nice flavor, just like the store-bought mix. Feel free to adjust the spices to suit your taste. Yes, there is a vegan option for this dip. You can use vegan cream cheese instead of regular cream cheese. Also, choose a plant-based whipped topping. Make sure your powdered sugar is vegan too. This way, you can enjoy a tasty dip that fits your diet. This blog post covered how to make a delicious pumpkin dip. We explored the key ingredients, like cream cheese and pumpkin puree. We shared step-by-step instructions for prep and chilling. You learned tips to adjust flavors and perfect the dip’s texture. Variations help keep it exciting, while storage info ensures freshness. Enjoy this tasty dip with your favorite dippers. Get creative and make it your own!

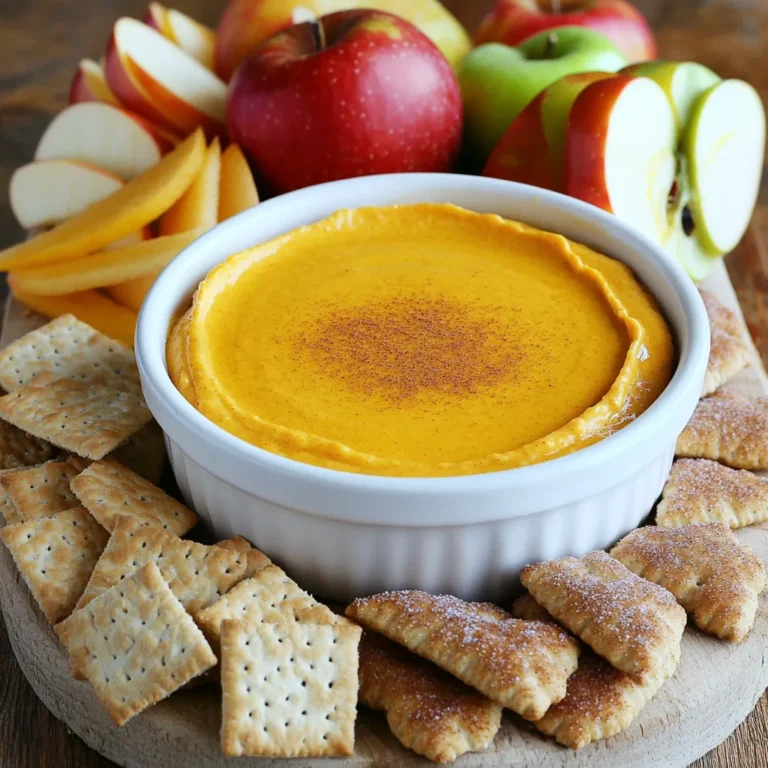
No-Bake Pumpkin Spice Cheesecake Dip Delight

To make this tasty dish, you need: - 2 ribeye steaks (about 1 inch thick) - 1 pound baby potatoes, halved - 4 tablespoons unsalted butter, divided - 4 cloves garlic, minced - 1 teaspoon dried rosemary - 1 teaspoon paprika - Salt and pepper to taste - Fresh parsley, chopped (for garnish) You can swap ingredients if you need to. Here are some easy swaps: - Steak: You can use sirloin or flank steak instead of ribeye. - Potatoes: Yukon gold or red potatoes work well too. - Butter: Olive oil can replace butter for a lighter taste. - Garlic: Garlic powder can be a quick substitute if you lack fresh garlic. - Herbs: If you don’t have rosemary, thyme or oregano can add nice flavor. Choosing the right steak is key for great flavor. Ribeye steaks are rich and juicy. They have a good amount of fat, which adds flavor. Look for steaks that have a nice marbling. This fat helps keep the meat tender and tasty when cooked. If you want a leaner cut, sirloin is a good choice. It is still flavorful but has less fat. Flank steak is another option. It has a bold taste but is best when cooked medium-rare. Avoid tough cuts like round steak, as they need longer cooking times. When selecting your steak, always check for freshness. Fresh meat should have a bright color. It should also smell clean. By choosing the best steak, you set the stage for a delicious meal. To make the garlic butter mixture, first, melt 2 tablespoons of unsalted butter in a small bowl. Add 4 minced garlic cloves, 1 teaspoon of dried rosemary, and 1 teaspoon of paprika. Mix well. Season with salt and pepper to taste. This mixture is vital for adding flavor to the steak. It will bring out the best in your dish. Next, take 1 pound of baby potatoes and cut them in half. Place them on a large sheet pan. Drizzle with 1 tablespoon of olive oil and sprinkle with salt and pepper. Toss the potatoes until they are well coated. Spread them out in a single layer to ensure even cooking. Roast the potatoes in a preheated oven at 425°F (220°C) for about 15 minutes. You want them to start softening but still hold their shape. While the potatoes roast, season 2 ribeye steaks on both sides with salt and pepper. After 15 minutes, take the sheet pan out of the oven. Move the potatoes to the edges of the pan to make space for the steaks. Place the seasoned steaks in the center. Brush the garlic butter mixture generously over the steaks. Return the pan to the oven. Roast for 10 to 12 minutes for medium-rare. Adjust cooking time for your desired doneness. Once cooked, let the steaks rest for 5 minutes before slicing against the grain. Serve with the roasted potatoes and any remaining garlic butter drizzled on top. To get the perfect steak, use a meat thermometer. For medium-rare, aim for 135°F (57°C). Insert the thermometer in the thickest part of the steak. Let the steak rest for five minutes after cooking. This helps the juices stay inside. If you prefer it more done, add a few more minutes. Steak thickness plays a big role in cooking time. Roast the potatoes first to ensure they soften. Toss them in olive oil and seasonings before baking. Spread them out evenly on the pan. If they start to brown too much, cover them lightly with foil. This keeps them cooking without burning. Check them regularly while the steaks are cooking. Add extra herbs to elevate the flavor. Fresh thyme or oregano work well. You can also try adding a pinch of cayenne for heat. A splash of lemon juice brightens the dish too. Feel free to mix and match spices based on your taste. Experimenting can lead to exciting new flavors. This makes the dish uniquely yours. {{image_2}} Adding vegetables can boost flavor and nutrition. You can include carrots, bell peppers, or green beans. Cut them into similar sizes as the potatoes. Toss with olive oil, salt, and pepper. Place them on the sheet pan with the potatoes. This way, they roast together and soak up the garlic butter taste. If you want a change from steak, try chicken thighs or pork chops. Both cook well in the oven and absorb flavors nicely. Season them just like you do the ribeye steaks. Adjust cooking time as needed. Chicken usually takes about 20-25 minutes, while pork can be around 15-20 minutes, depending on thickness. Experimenting with seasonings can make this dish unique. Swap out the paprika for chili powder for heat. Or use Italian herbs like oregano and basil for a fresh twist. You can even try a citrus zest for a bright flavor. Just remember to keep the garlic butter, as it ties everything together beautifully. To store your leftovers, let the dish cool completely. Place the steak and potatoes in an airtight container. Make sure to separate them to keep the steak juicy. Store in the fridge for up to three days. If you want to keep them longer, freezing is a good option. When you’re ready to eat, reheating is simple. Preheat your oven to 350°F (175°C). Place the steak and potatoes on a baking sheet. Cover them with foil to keep moisture in. Heat for about 15-20 minutes until warm. You can also use a microwave, but it may dry out the steak. Freezing this dish is easy. Wrap each steak and portion of potatoes in plastic wrap. Then place them in a freezer-safe bag. This helps prevent freezer burn. You can freeze them for up to three months. To thaw, move them to the fridge overnight before reheating. Enjoy your meal anytime! Yes, you can use other cuts of steak. Cuts like sirloin, flank, or strip work well. Each cut has a different taste and texture. Ribeye is juicy and flavorful, but sirloin is leaner. Just adjust the cooking time. Thinner steaks may need less time. This dish pairs well with a fresh salad. A simple green salad adds a nice crunch. You could also serve it with steamed veggies. Broccoli or green beans complement the steak well. For a cozy touch, add some warm bread. To keep potatoes firm, cut them evenly. Halve baby potatoes for uniform cooking. Make sure they roast in a single layer on the pan. Avoid overcrowding, as steam can make them mushy. Roasting at 425°F helps them crisp up nicely. Keep an eye on them and adjust cooking time as needed. In this post, we explored tasty ingredients, step-by-step cooking, and helpful tips for your meal. You learned how to prepare garlic butter, roast potatoes, and achieve perfect steak doneness. Remember to choose the best cuts and avoid mushy potatoes. You can mix in other veggies and try new seasonings for variety. Store your leftovers well, and enjoy this dish later. Cooking can be simple and fun. Get creative, and make it your own!

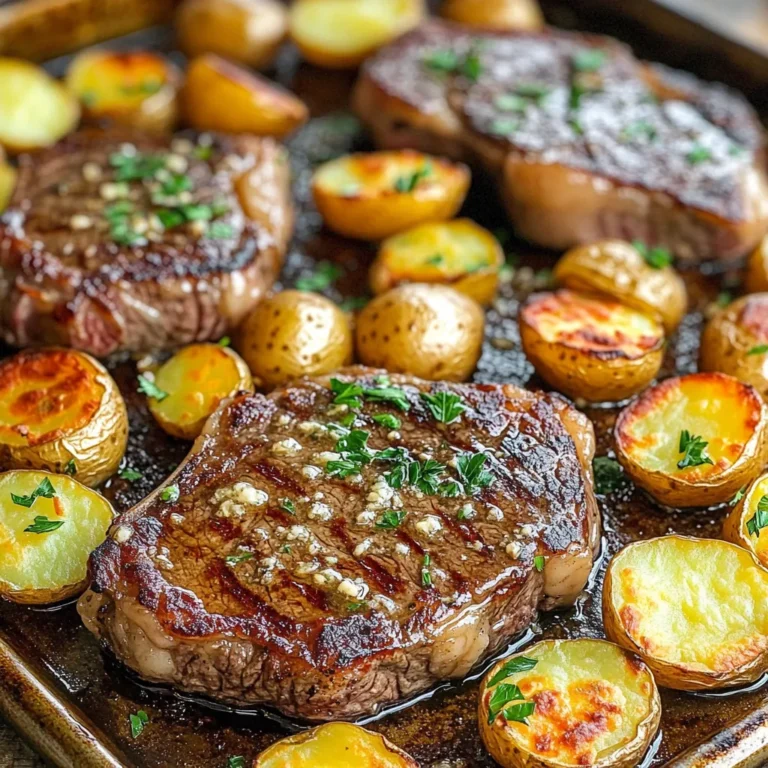
Sheet-Pan Garlic Butter Steak and Potatoes Delight

- 1 lb chicken tenderloins - 1 cup buttermilk (or dairy-free alternative) - 1 cup all-purpose flour - 1 teaspoon garlic powder - 1 teaspoon onion powder - 2 tablespoons everything bagel seasoning - 1 cup panko breadcrumbs - 2 large eggs - 1/2 teaspoon salt - 1/2 teaspoon black pepper - Cooking spray Each ingredient plays a key role in making these chicken tenders fun and tasty. Chicken tenderloins are the star, giving you juicy bites. The buttermilk helps the chicken stay moist and adds flavor. If you're dairy-free, a plant-based milk works too. The flour adds a nice base for the spices. Garlic powder and onion powder give depth. Everything bagel seasoning adds that classic flavor we all love. Panko breadcrumbs create a crispy texture that air frying enhances. You will also need eggs to help the coating stick. Don't forget salt and black pepper for seasoning. Lastly, cooking spray helps achieve a golden finish without extra oil. With these ingredients in hand, you’re ready to create a delicious meal! Start by marinating the chicken tenderloins in buttermilk. This step adds moisture and makes the chicken tender. You want to soak them for at least 30 minutes. If you have time, let them sit for up to 4 hours. The longer they soak, the better they taste. Next, set up your breading station with three shallow bowls. In the first bowl, mix 1 cup of flour with 1 teaspoon of garlic powder, 1 teaspoon of onion powder, 1/2 teaspoon of salt, and 1/2 teaspoon of black pepper. In the second bowl, beat 2 large eggs. In the third bowl, combine 1 cup of panko breadcrumbs with 2 tablespoons of everything bagel seasoning. This mix gives your chicken a tasty crunch. Now, it's time to coat the chicken. Remove the tenderloins from the buttermilk. Shake off the extra but do not rinse them. First, dredge each tenderloin in the flour mix. Make sure they are well-coated. Then, dip them into the egg wash. Finally, press each one into the panko mixture to coat evenly. This three-step coating helps create a crispy outer layer. Preheat your air fryer to 400°F (200°C) for about 5 minutes. Lightly spray the basket with cooking spray to prevent sticking. Place the chicken tenders in a single layer in the air fryer. Don't overcrowd them; give them space to cook evenly. Spray the tops lightly with cooking spray. Cook for 10-12 minutes. Flip them halfway through for even browning. Check that the internal temperature reaches 165°F (74°C) to ensure they are fully cooked. To get that perfect crunch, use panko breadcrumbs. Panko makes the chicken tenders light and crispy. Regular breadcrumbs won’t give the same texture. Spray the chicken tenders lightly with cooking spray before cooking. This helps them brown nicely and keeps them from being dry. Use just enough to coat the tops. Too much spray can make them soggy. Want to kick up the flavor? Try adding some spices. Smoked paprika or cayenne pepper can add a nice kick. You can also mix in some dried herbs like thyme or oregano. For dipping sauces, ranch or honey mustard works great. Sweet chili sauce adds a fun twist too. Pairing the tenders with a tasty sauce makes each bite better. A big mistake is overcrowding the air fryer basket. Give the chicken tenders space. This allows hot air to circulate and cook them evenly. Another mistake is not marinating long enough. Soak the chicken in buttermilk for at least 30 minutes. This makes the chicken tender and juicy. If you have time, marinate for up to 4 hours for even better results. {{image_2}} You can change the coating for your chicken tenders. If you want to switch things up, try using crushed cornflakes instead of panko breadcrumbs. Cornflakes add a fun crunch. You can also use a gluten-free breadcrumb if needed. For the seasoning blend, feel free to get creative! Try adding some smoked paprika for a smoky taste. You can also mix in some dried herbs like oregano or thyme for extra flavor. The goal is to make these tenders your own. You don’t have to stick to chicken tenderloins. Chicken breasts or thighs work great too. Just cut them into strips and keep the cooking time the same. If you want a vegetarian option, tofu or eggplant are tasty choices. Slice the eggplant into strips or cubes. For tofu, use firm or extra-firm tofu and press it to remove extra moisture. These options will give you a nice, crispy texture too. Dips can make your meal even better. Try serving your chicken tenders with ranch dressing or honey mustard. You could also make a simple yogurt dip with herbs. For sides, think about serving with sweet potato fries or a fresh salad. You can also include some sliced veggies for a colorful plate. These ideas make your meal balanced and fun! To keep your chicken tenders fresh, place them in a shallow container. Use a container with a tight lid to seal in moisture. Line the bottom with paper towels to absorb excess moisture. Store the chicken in the fridge. Enjoy the leftovers within three days for best taste. For the best results, use your air fryer to heat the chicken tenders. Set the air fryer to 350°F (175°C). Cook the tenders for about 5 to 7 minutes. This keeps them crispy and warm. If you don't have an air fryer, use a microwave. Microwave in short bursts to prevent sogginess. You can freeze cooked chicken tenders for later. Place them in a freezer-safe bag or container. Remove as much air as possible to avoid freezer burn. They can stay frozen for up to three months. When ready to eat, thaw them in the fridge overnight. Reheat as mentioned above for best results. Everything bagel seasoning is a mix of flavors. It usually includes sesame seeds, poppy seeds, garlic, onion, and salt. This blend gives a tasty crunch and a savory bite to dishes. You can use it on many foods, not just bagels. It adds a fun twist to your chicken tenders! To check if your chicken is done, use a meat thermometer. The safe internal temperature for chicken is 165°F (74°C). This ensures it is safe to eat. Insert the thermometer into the thickest part of the tender. Do not touch the bone, as it can give a false reading. Yes, you can use different cuts of chicken. Chicken breasts and thighs work well. If you use breasts, cut them into strips for even cooking. Thighs will add more flavor and stay juicy. Just adjust the cooking time if the pieces are thicker. To make these chicken tenders gluten-free, swap the flour and panko breadcrumbs with gluten-free options. You can use almond flour or a gluten-free flour blend. Look for gluten-free panko at the store. This way, you can enjoy the same crispy texture without gluten. You can bake the chicken tenders if you prefer. Preheat your oven to 425°F (220°C). Place the breaded tenders on a baking sheet lined with parchment paper. Bake for 20-25 minutes, flipping halfway through. Check that they reach the safe internal temperature of 165°F (74°C). Enjoy the crunchy goodness! This blog post covered the essential ingredients, step-by-step instructions, and helpful tips for making chicken tenders. You learned about marinating and the importance of using panko for crunch. We also explored various variations, toppings, and storage tips to enjoy your tenders later. In conclusion, using these methods, you can create tasty chicken tenders perfect for any meal. Enjoy experimenting with flavors and techniques. With practice, you’ll master this dish and impress anyone at the table.

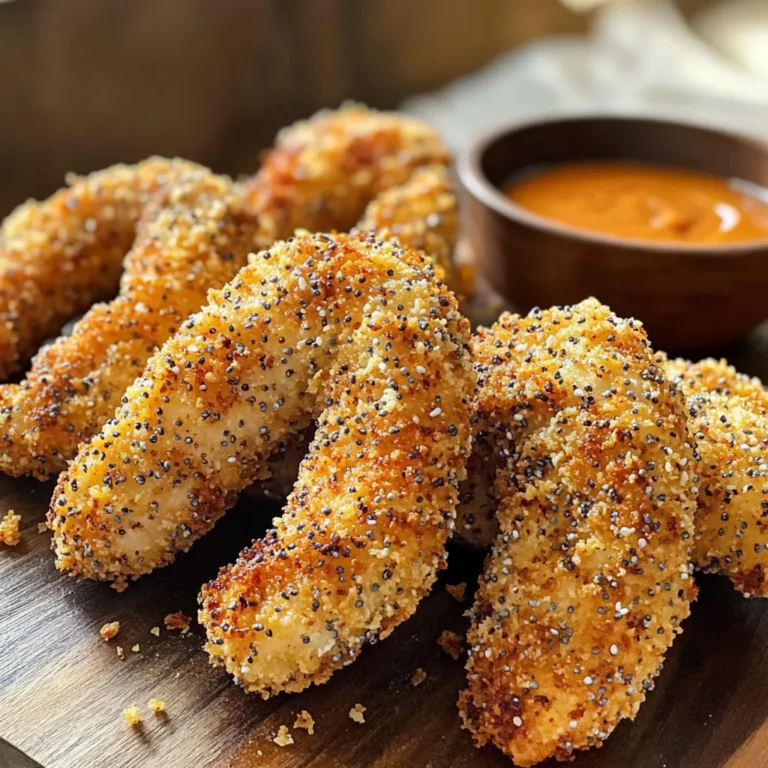
Air Fryer Everything Bagel Chicken Tenders Delight

- 2 cups rotini or penne pasta - 1 pound boneless, skinless chicken breasts, diced - 1 tablespoon olive oil - 1 cup chicken broth - 1 cup heavy cream - 1/2 cup buffalo sauce (adjust to taste) - 1 cup shredded cheddar cheese - 1/2 cup cream cheese, softened - 1 teaspoon garlic powder - 1 teaspoon onion powder - Salt and pepper to taste - Chopped green onions or parsley for garnish You need quality ingredients for a great dish. Start with 2 cups of rotini or penne pasta. This pasta holds sauce well. Next, get 1 pound of boneless, skinless chicken breasts. Dice them into small pieces for even cooking. You'll also need 1 tablespoon of olive oil. This helps to cook the chicken and adds flavor. For the sauce, use 1 cup of chicken broth and 1/2 cup of buffalo sauce. Adjust the buffalo sauce to match your spice level. Dairy is key for creaminess. You'll need 1 cup of heavy cream and 1/2 cup of softened cream cheese. The cream cheese makes it extra rich. Don't forget 1 cup of shredded cheddar cheese for that gooey texture. Seasoning is important too. Use 1 teaspoon each of garlic powder and onion powder. Add salt and pepper to taste for balance. Finally, garnish with chopped green onions or parsley. This adds color and freshness to your dish. With these ingredients, you are set for a delicious meal! First, heat one tablespoon of olive oil in a large pot over medium-high heat. Next, add 1 pound of diced chicken breasts. Season the chicken with salt, pepper, garlic powder, and onion powder. Cook the chicken for about 5-7 minutes. You want it to be fully cooked and no longer pink inside. This step is key for a safe and tasty dish. After the chicken is done, it’s time to add the flavor! Pour in 1 cup of chicken broth and 1/2 cup of buffalo sauce. Stir it well and bring the mixture to a simmer. Now, add 2 cups of rotini or penne pasta to the pot. Cook the pasta according to the package instructions, usually about 10-12 minutes. Stir it often to keep it from sticking. Once the pasta is al dente, reduce the heat to low. Pour in 1 cup of heavy cream and add 1/2 cup of softened cream cheese. Stir continuously until the cream cheese melts completely. This will make your dish creamy and rich. Now for the best part—cheese! Gradually add 1 cup of shredded cheddar cheese while stirring. Keep stirring until everything is creamy and smooth. If you like more heat, adjust the buffalo sauce to your taste. Once it’s all combined and heated through, remove the pot from the heat. Serve hot, garnished with chopped green onions or parsley for a fresh finish. To keep your pasta from sticking, stir it often. Use a large pot with enough water. Make sure to add salt to the water. This helps flavor the pasta. Check for doneness by tasting a piece. It should be firm but not hard. You can also look for a slight bounce. This means it's al dente. Adjust the spice level to fit your taste. If you want more heat, add more buffalo sauce. Just do it a little at a time. For extra flavor, try adding vegetables. Chopped bell peppers or spinach work great. You can also mix in some cooked bacon for added richness. Use a large, shallow bowl to serve. This makes the dish look inviting. For garnish, chop some green onions or parsley. Sprinkling these on top adds color and freshness. You can also add a drizzle of extra buffalo sauce for flair. {{image_2}} You can change the pasta type in this recipe. Rotini or penne works well. But you can also use gluten-free pasta if you need. Just follow the cooking time on the package. For proteins, chicken is great, but you can swap it out. Turkey is a good choice, too. If you prefer a plant-based option, use diced tofu. It absorbs flavors well, making it a tasty alternative. Want a spicy kick? Add jalapeños to your dish. They give heat and a nice crunch. You can also mix in veggies like spinach or bell peppers. They add color and nutrients, making your meal even better. Don’t be afraid to experiment! You can add more buffalo sauce if you like it hot. Adjust the flavors to fit your taste. If you are gluten-free, use gluten-free pasta. This way, you can enjoy the meal without worry. For a dairy-free option, swap the heavy cream and cheese with plant-based alternatives. Use coconut milk or cashew cream. These give creaminess without the dairy. These variations make this dish flexible and fun to enjoy in many ways! To store your One-Pot Creamy Buffalo Chicken Pasta, let it cool first. Place it in an airtight container. This keeps the flavors fresh. You can store it in the fridge for up to three days. When you are ready to eat, just take it out and reheat. If you want to save some for later, freezing works well. Use a freezer-safe container to store the pasta. You can freeze it for up to three months. To thaw, move it to the fridge overnight. This helps keep the taste and texture. For the best flavor, reheat the pasta on the stove. Add a splash of chicken broth or cream to keep it creamy. Stir it over low heat until warm. You can also use the microwave, but keep an eye on it. Heat in short bursts to avoid overcooking. Enjoy your tasty meal again! Yes, you can make this dish ahead of time. To prep, cook the pasta and chicken as directed. After that, let it cool. Store the pasta in an airtight container. Keep it in the fridge for up to three days. When ready to eat, simply reheat on the stove. Add a splash of chicken broth to keep it creamy. This dish pairs well with several sides. Here are some ideas: - Garlic bread for dipping - A fresh garden salad - Steamed broccoli for a healthy touch - Roasted vegetables for extra flavor These sides will balance out the richness of the pasta and add more texture to your meal. If you want to tone down the heat, follow these tips: - Use less buffalo sauce. Start with a quarter cup and add more if needed. - Mix in some cream cheese to balance the spice. - Add a dollop of sour cream on top when serving. This cools it down nicely. - Consider using a milder hot sauce if you prefer less heat. These changes help you enjoy the dish without too much spice. This blog post covered how to make One-Pot Creamy Buffalo Chicken Pasta. You learned about the key ingredients, step-by-step cooking instructions, and helpful tips for perfecting the dish. I also shared variations to suit different tastes and dietary needs. In my final thoughts, this is a fun and easy recipe. You can adapt it to fit your taste. Enjoy making it from scratch and impress your family or friends!

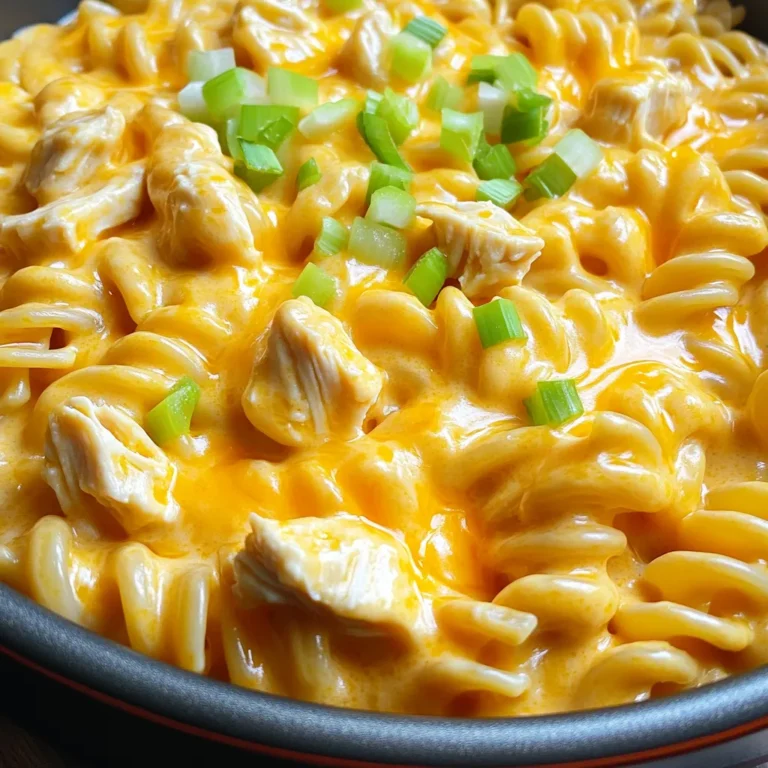
One-Pot Creamy Buffalo Chicken Pasta Delight

To make TikTok Baked Feta Pasta, you need the following ingredients: - Feta cheese: 200g - Cherry tomatoes: 300g - Garlic: 3 cloves, thinly sliced - Dried oregano: 1 teaspoon - Crushed red pepper flakes: 1 teaspoon (adjust to taste) - Olive oil: 3 tablespoons - Salt and pepper: to taste - Pasta: 300g (penne or fusilli) - Fresh basil leaves: for garnish - Lemon: zest and juice of 1 Each ingredient plays a key role in this dish. The feta cheese is creamy and tangy, while the cherry tomatoes add sweetness. Garlic gives a nice flavor kick, and oregano brings that Mediterranean vibe. Crushed red pepper flakes add heat, but you can change this to fit your taste. Olive oil helps blend the flavors and adds richness. Salt and pepper enhance everything, while the pasta makes it hearty. Finally, fresh basil brightens the dish, and lemon adds a zesty twist. Gather these items before you start cooking. This will make your cooking process smooth and fun! First, set your oven to 200°C (400°F). This step gets the oven ready and hot. You want it to be nice and warm for the dish. Next, grab a baking dish. Place the block of feta cheese in the center. Then, surround it with 300g of cherry tomatoes. Add 3 thinly sliced cloves of garlic around the feta. This mix adds great flavor and aroma. Drizzle 3 tablespoons of olive oil over the feta and tomatoes. Then, sprinkle 1 teaspoon of dried oregano, 1 teaspoon of crushed red pepper flakes, and some salt and pepper to taste. Now, place the dish in the oven. Bake for 25-30 minutes. The tomatoes should burst, and the feta will turn golden. While the feta and tomatoes bake, cook 300g of pasta. Use penne or fusilli for best results. Follow the package instructions until the pasta is al dente. Once done, drain the pasta but save ½ cup of the pasta water. When the feta and tomatoes are ready, take them out of the oven. Use a fork to mash the feta and tomatoes together. This creates a creamy sauce. Stir in the zest and juice of 1 lemon for a fresh taste. Add the cooked pasta to this mixture. Mix well so the pasta gets coated. If it looks dry, add a bit of the reserved pasta water. Taste your dish and adjust the seasoning if needed. Serve it warm in bowls. For garnish, add fresh basil leaves on top. You can drizzle some extra olive oil for a nice finish. Enjoy your delicious, creamy pasta! To get that smooth, creamy texture, the key is to mash the feta and tomatoes well. Once they come out of the oven, use a fork to mix them together. This creates a rich sauce. You can also add some of the reserved pasta water if the sauce seems thick. It helps the sauce cling to the pasta. The beauty of this dish is its versatility. Start with the basic seasonings: salt, pepper, and red pepper flakes. Taste the dish after mixing the pasta. If you want more heat, add more red pepper flakes. For a fresh kick, a splash of lemon juice can brighten the flavors. A beautiful dish makes it even tastier. Serve the pasta in warm bowls. Drizzle with a bit of extra olive oil for shine. Top with fresh basil leaves for color. For a touch of elegance, add grated Parmesan cheese. This not only looks great but adds flavor too. Enjoy the vibrant colors and creamy goodness! {{image_2}} You can make this dish even better by adding veggies. Try mixing in spinach, zucchini, or bell peppers. These add color and nutrients. Just chop them up and add them to the baking dish. The heat will cook them perfectly while your feta and tomatoes bake. For a heartier meal, add protein. Grilled chicken, shrimp, or chickpeas work great. Just cook your protein separately and mix it in with the pasta. This will make your dish more filling and tasty. You can also use cooked sausage for a spicy kick. If you need a gluten-free option, swap the pasta for a gluten-free type. Brown rice pasta or chickpea pasta are great choices. They taste good and work well with the sauce. Just follow the cooking instructions on the package for perfect results. After you make this baked feta pasta, you might have leftovers. Let the dish cool down first. Then, transfer it to an airtight container. You can store it in the fridge for up to three days. Make sure to cover it well to keep the flavors fresh. When you’re ready to eat, you can enjoy it warm or cold. If you want to keep this dish for longer, freezing is a great option. Allow the pasta to cool completely before freezing. Place it in a freezer-safe container or bag. Try to remove as much air as possible to prevent freezer burn. You can freeze it for up to three months. To enjoy later, just thaw it in the fridge overnight. To reheat your baked feta pasta, you have a few options. The best way is to use an oven. Preheat the oven to 180°C (350°F). Place the pasta in an oven-safe dish, cover it with foil, and heat for about 15-20 minutes. You can also use a microwave. Just heat it in short bursts, stirring in between, until it's warm. If it seems dry, add a splash of olive oil or a little pasta water to restore creaminess. You can use penne or fusilli for this dish. These shapes hold sauce well. They cook evenly and mix nicely with the creamy feta sauce. Other pasta types can work too, but these are my favorites. Yes, you can. Cream cheese or goat cheese are good options. They will change the taste a bit. If you want a stronger flavor, try feta from a different region. Just keep in mind that the texture may vary. The spice level depends on how much you add. One teaspoon gives a light kick. If you like it hotter, add more to taste. You can always start mild and adjust as you cook. Absolutely! You can replace feta with a vegan cheese option. Look for creamy plant-based cheeses. Nutritional yeast adds a cheesy flavor without dairy. This way, you keep the taste while making it vegan-friendly. This dish lasts about 3 to 5 days in the fridge. Store it in an airtight container. Reheat it on low heat to keep it creamy. If it seems dry, add a splash of olive oil or a little water. This blog post shared an easy baked feta pasta recipe. You learned about key ingredients like feta cheese, cherry tomatoes, and pasta. I provided step-by-step instructions for baking and cooking. I also shared tips for creaminess and flavor adjustments, plus variations for your taste. In closing, this dish is simple and tasty, perfect for any meal. Try it out and enjoy!

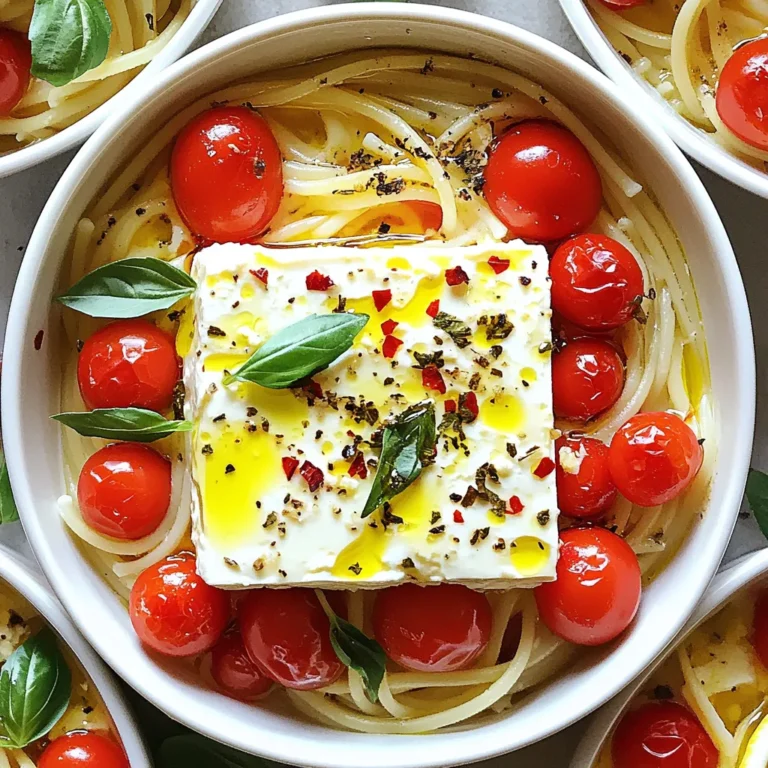
TikTok Baked Feta Pasta Quick and Simple Recipe

First, bring a large pot of salted water to a boil. Add the gnocchi once the water is bubbling. Cook the gnocchi until they float. This takes about 2-3 minutes. Once they float, drain them well and set them aside. In a large skillet, melt the butter over medium heat. Add minced garlic and chopped sage leaves. Sauté them for about 1-2 minutes. You want the garlic to smell great and the sage to get crispy. Next, stir in the pure pumpkin and heavy cream. Mix it well and let it simmer gently. Now, add the grated Parmesan cheese, nutmeg, salt, and pepper. Stir until the cheese melts and the sauce becomes creamy. This takes just a minute or two. Gently fold the cooked gnocchi into the creamy pumpkin sauce. Make sure to coat them well. Let them cook together for another 2-3 minutes. This step helps the gnocchi soak up the sauce. Once heated through, your dish is ready to serve! To get the right sauce, use heavy cream. It makes the sauce creamy and rich. If it feels too thick, add a splash of water or more cream. Stir it well to blend. The goal is a smooth, velvety sauce that coats the gnocchi nicely. Season your sauce with nutmeg, salt, and pepper. Nutmeg adds warmth and depth. For a boost, try adding a pinch of cayenne for heat. Fresh sage gives a fresh, herbal taste that brightens the dish. Taste as you go; adjust the flavors to your liking. For a beautiful finish, serve the gnocchi in deep bowls. Sprinkle extra Parmesan on top. A dash of freshly cracked black pepper adds a nice touch. If you want added crunch, top with toasted pumpkin seeds. A drizzle of olive oil will make it shine! {{image_2}} You can make creamy pumpkin sage gnocchi vegan and dairy-free. Use plant-based gnocchi instead of regular ones. For the sauce, swap heavy cream with coconut cream or cashew cream. Nutritional yeast gives a cheesy flavor without dairy. It’s a tasty way to enjoy this dish without animal products. While gnocchi is perfect here, you can try other pasta types. Use fettuccine, penne, or even spaghetti. Cook these pastas according to package directions. Then, mix them with the creamy pumpkin sauce as you would with gnocchi. Each type of pasta adds a unique twist to the dish. Seasonal ingredients can enhance your creamy pumpkin sage gnocchi. In fall, add roasted butternut squash for a sweet touch. In winter, try sautéed kale or spinach for color and nutrition. Fresh herbs like thyme or rosemary can also change the flavor profile. Explore local markets for fresh produce to add to your dish. To store leftover creamy pumpkin sage gnocchi, place it in an airtight container. This helps keep moisture in and prevents drying out. Make sure to let it cool before sealing. Leftovers last for about three days in the fridge. If you want to keep it longer, freezing is a great option. Reheating this dish is easy. You can use a microwave or a stovetop. For the microwave, place the gnocchi in a bowl and cover it with a damp paper towel. Heat in 30-second bursts, stirring in between. On the stovetop, add a bit of cream or water to a pan over low heat. Stir gently until warm. This keeps the sauce creamy and prevents it from sticking. To freeze creamy pumpkin sage gnocchi, first let it cool completely. Then, portion it into freezer-safe bags or containers. Squeeze out as much air as possible to avoid freezer burn. It can last up to three months in the freezer. When ready to eat, thaw it in the fridge overnight. Reheat as mentioned above, and enjoy your delicious meal! To make gnocchi from scratch, you need just a few simple ingredients. Start with potatoes, flour, and egg. Boil the potatoes until soft. Then, mash them until smooth. Mix the mashed potatoes with flour and a beaten egg. Knead the dough until it is soft. Roll the dough into ropes and cut them into small pieces. Press each piece with a fork for texture. Finally, cook the gnocchi in boiling water until they float. This process takes about 2-3 minutes. Yes, you can use fresh pumpkin. To do this, start by roasting a pumpkin. Cut it in half, remove the seeds, and place it cut side down on a baking sheet. Roast it at 400°F for about 40 minutes or until soft. Scoop out the flesh and mash it until smooth. Use this fresh puree in your creamy pumpkin sage gnocchi. It adds a lovely flavor and makes the dish even more special. Creamy pumpkin sage gnocchi pairs well with a simple salad. A mix of arugula, spinach, and cherry tomatoes works great. You can also serve it with crusty bread to soak up the sauce. For a heartier meal, try adding grilled chicken or sautéed mushrooms. A sprinkle of toasted pumpkin seeds on top adds a nice crunch. Finish with a drizzle of olive oil for extra flavor. This post covered how to make creamy pumpkin sage gnocchi. We discussed the main and optional ingredients, plus easy substitutions. I provided step-by-step cooking instructions for both the gnocchi and sauce. You learned tips for the perfect sauce and how to present your dish well. We also explored variations, storage, and answers to common questions. Now, you can enjoy this tasty meal any time. Happy cooking!

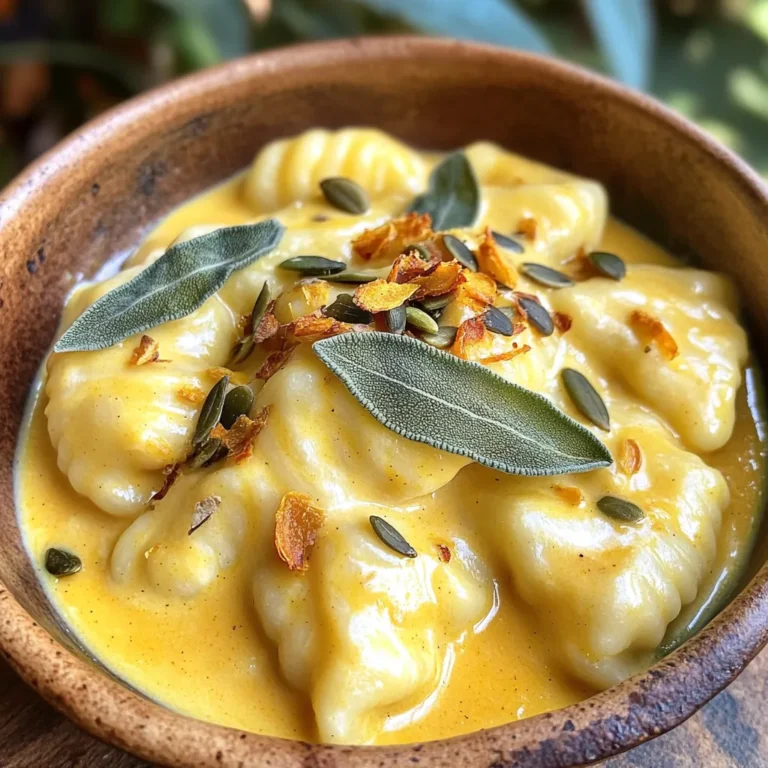
Creamy Pumpkin Sage Gnocchi Savory Flavor Explosion

- 2 cups baby potatoes, halved - 3 tablespoons olive oil - 4 cloves garlic, minced - ½ cup grated Parmesan cheese - 1 teaspoon dried oregano - ½ teaspoon smoked paprika - Salt and pepper to taste - Fresh parsley, chopped Gathering the right ingredients makes all the difference. First, I use baby potatoes. Their small size means they cook faster and get crispier. Halve them to let the flavors soak in. Next is olive oil. It helps the garlic and cheese stick to the potatoes. I love using fresh garlic. It adds a strong, tasty punch. Grated Parmesan cheese is key for that cheesy crust. For seasoning, I reach for dried oregano and smoked paprika. They add depth and warmth. Don’t forget salt and pepper. These simple seasonings enhance the flavors. Finally, I like to garnish with fresh parsley. It adds color and a fresh taste. With these ingredients, you're set for a tasty treat. Preheating the air fryer Start by preheating your air fryer to 400°F (200°C). This takes about five minutes. Preheating helps the potatoes cook evenly and become crispy. Coating the potatoes In a large bowl, add two cups of halved baby potatoes. Pour in three tablespoons of olive oil. Add four minced garlic cloves, one teaspoon of dried oregano, and half a teaspoon of smoked paprika. Sprinkle in salt and pepper for taste. Toss everything until the potatoes are well coated. This mix brings out great flavor. Arranging the potatoes in the air fryer Take the coated potato bites and place them in the air fryer basket. Make sure they are in a single layer. Avoid overcrowding; this lets hot air circulate around each potato for crispiness. Cooking duration and method Air fry the potato bites for 15 to 18 minutes. Shake the basket halfway through cooking. This step ensures even crisping. When done, the potatoes should look golden brown and crispy outside. Garnishing and serving tips Once you remove the potato bites from the air fryer, sprinkle them with fresh chopped parsley. This adds a pop of color and freshness. Serve them warm on a nice plate. They make a great snack or side dish! To get your potato bites nice and crispy, set your air fryer to 400°F (200°C). This high heat cooks the potatoes fast, making them golden brown. It is key to toss the potatoes halfway through cooking. This helps them crisp evenly on all sides. You can play with flavors by adding spices like garlic powder or cayenne pepper. These can add a nice kick! You can also switch up the cheese. Try sharp cheddar or crumbled feta for a fun twist. Be careful not to overcrowd the air fryer basket. This can lead to uneven cooking and soggy bites. Also, always preheat your air fryer before adding the potatoes. This step helps to lock in that crispy texture right from the start. {{image_2}} You can use many baby potato types for this recipe. Red, yellow, or fingerling potatoes all work well. Each type adds a unique taste and texture. If you want to switch things up, try root vegetables like sweet potatoes or turnips. They will give your bites a new twist. Just remember to cut them to the same size for even cooking. To make your potato bites special, think about adding herbs or spices. Rosemary, thyme, or dill can enhance the flavor. You can also try adding a pinch of chili powder for heat. Want more cheese? Blend in some cheddar or feta for a cheesy twist. This will take your bites to a whole new level. Pair your garlic parmesan potato bites with tasty dipping sauces. A simple garlic aioli is a great choice. You can mix mayo, lemon juice, and minced garlic for a quick dip. If you prefer something spicy, try a sriracha mayo. For a store-bought option, ranch dressing is a classic that goes well with these bites. Enjoy dipping! To keep your Air Fryer Garlic Parmesan Potato Bites fresh, follow these tips: - Place leftovers in an airtight container. - Store the container in the fridge. - These bites will stay good for up to 3 days. When you're ready to enjoy your leftovers, use these methods: - Preheat your air fryer to 350°F (175°C). - Heat the potato bites for about 5-7 minutes. - This method keeps them crispy. - Avoid using a microwave, as it makes them soggy. You can freeze these bites for later use: - Make sure they are completely cool. - Place them in a freezer-safe bag. - They will stay good for about 2 months. When you are ready to eat them: - Thaw in the fridge overnight. - Reheat in the air fryer at 350°F (175°C) for 7-10 minutes. Yes, you can use larger potatoes. Just cut them into smaller pieces. Aim for similar sizes for even cooking. If you use larger chunks, increase the cooking time. Start with 20-25 minutes instead of 15-18. Always check for doneness by poking with a fork. These bites pair well with many dishes. Serve them alongside grilled chicken or steak. They also go well with fish or as a side for burgers. Add a fresh salad or roasted veggies for balance. You can even enjoy them as a snack with dipping sauce. To make these bites gluten-free, check your seasonings. Use gluten-free Parmesan cheese. Most spices like oregano and paprika are gluten-free. If using a store-bought seasoning blend, read the label carefully. This way, you can enjoy the same great taste without gluten. In this blog post, we explored how to make tasty Air Fryer Garlic Parmesan Potato Bites. We covered the key ingredients like baby potatoes, garlic, and cheese. You learned step-by-step instructions and tips for crispiness. We also shared variations and storage tips for your leftovers. These potato bites are simple and fun to make. They are a great snack or side dish. I hope you enjoy trying this recipe and experimenting with your flavor ideas. Happy cooking!

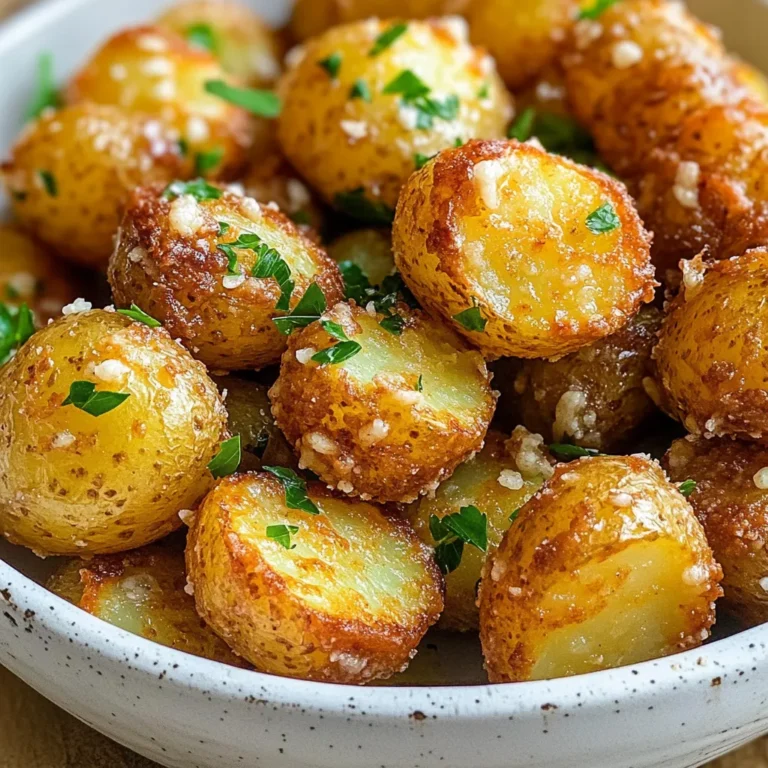
Air Fryer Garlic Parmesan Potato Bites Flavorful Treat

- 1 pound potato gnocchi - 1 cup frozen artichoke hearts - 2 cups fresh spinach - 1 cup heavy cream - 1 cup cream cheese, softened - 1 cup shredded mozzarella cheese - 1/2 cup grated Parmesan cheese - 3 cloves garlic, minced - 1 teaspoon onion powder - 1 teaspoon Italian seasoning - Olive oil, salt, and pepper Gather these ingredients before you start cooking. Each one plays a role in making this dish creamy and tasty. The potato gnocchi brings a soft texture, while artichokes add a nice bite. Spinach gives it color and a fresh taste. Heavy cream is key for that rich flavor. The cream cheese, mozzarella, and Parmesan create a cheesy, smooth sauce. Garlic adds depth, and the onion powder and Italian seasoning enhance the overall taste. Olive oil helps sauté the garlic and artichokes. Don't forget salt and pepper to balance all the flavors. With everything ready, you’ll enjoy your cooking process more. Each bite of the finished dish will be a delight. Start by heating a drizzle of olive oil in a large pot over medium heat. Add the minced garlic. Sauté it for about one minute until you smell its strong aroma. This step adds a great flavor base to your dish. Next, toss in the thawed and chopped artichoke hearts. Sauté them for 2-3 minutes until they start to brown slightly. This browning brings out their natural sweetness and enhances the taste. Now, pour in the vegetable broth and heavy cream. Stir these together until they blend well. This mixture forms the base of your creamy sauce. Then, add in the softened cream cheese. Simmer the pot, stirring often, until the cream cheese melts fully into the sauce. This creates a rich, velvety texture that coats the gnocchi perfectly. Next, add the potato gnocchi and the roughly chopped spinach into the pot. Sprinkle in the Italian seasoning, onion powder, salt, and pepper. Gently stir everything together. Bring the mixture to a gentle boil. Once it starts boiling, reduce the heat to low. Cover the pot and let it cook for 5-7 minutes. Stir occasionally until the gnocchi are tender. The spinach will wilt down, adding a lovely green color. Once the gnocchi are soft, remove the pot from the heat. Fold in the shredded mozzarella and grated Parmesan cheese. This step adds creaminess and flavor. Stir until the cheeses melt into the dish. Taste and adjust the seasoning if needed. Enjoy! To make your dish shine, taste is key. Adjust the seasoning to fit your liking. I often add a pinch of salt and pepper for balance. For a twist, try red pepper flakes for heat. You can also add fresh herbs like basil or thyme for extra depth. Cook the gnocchi just right. They should float and be soft but not mushy. To keep your sauce creamy, add the cheese slowly. Stir gently to mix it in without clumping. If the sauce is too thick, a splash of vegetable broth can help. Make your dish look as good as it tastes. After serving, top it with freshly grated Parmesan cheese. A sprinkle of black pepper brings a nice pop. For color, add a few fresh spinach leaves on top. This not only enhances the look but also adds fresh flavor. {{image_2}} You can switch up the vegetables in this dish. Try using kale or mushrooms for a new twist. Both add flavor and nutrition. If you want a dairy-free version, use a non-dairy cream. Coconut cream or cashew cream work well. These will keep the dish rich and creamy. Want to boost the taste? Add cooked chicken or shrimp for protein. They blend well with the creamy sauce. You can also mix in sun-dried tomatoes or olives. These add a nice tang and depth to the dish. If you need a gluten-free option, use gluten-free gnocchi. They taste great and keep the dish intact. For vegan choices, swap out the cream and cheese. Use cashew cheese or almond milk cream. Both will keep your dish delicious and plant-based. To store your creamy spinach artichoke gnocchi, let it cool first. Place it in an airtight container. It will stay fresh in the fridge for up to three days. Make sure to label the container with the date. This helps you track how long it has been stored. You can freeze this dish if you want to save some for later. Use a freezer-safe container and fill it to leave some space for expansion. It can keep well for up to three months in the freezer. When you want to eat it, thaw it overnight in the fridge. Reheat in a pot over low heat, adding a splash of cream or broth if needed. This dish pairs well with a simple side salad. A fresh green salad with a lemon vinaigrette adds a nice touch. You can also serve it with garlic bread for a comforting meal. For drinks, a crisp white wine like Pinot Grigio works great. If you prefer non-alcoholic options, try sparkling water with a slice of lemon. This dish takes about 30 minutes to cook. You will spend 10 minutes prepping. Cooking the gnocchi and sauce takes around 20 minutes. It’s quick, easy, and perfect for busy days when you want something tasty! Yes, you can make this dish ahead of time! Prepare the gnocchi and sauce, then let it cool. Store it in an airtight container in the fridge for up to two days. When you are ready to eat, just reheat it on the stove. Add a little broth if it seems thick. If you don’t have fresh spinach, use frozen spinach instead. Thaw and drain it well before adding it to the pot. You can also try kale or Swiss chard as a substitute. Both will add great flavor and nutrition! This recipe for One Pot Creamy Spinach Artichoke Gnocchi is simple and delicious. You learned about the main ingredients, how to make the creamy sauce, and tips for the best texture. I shared variations to fit your taste and dietary needs, plus storage tips to keep it fresh. Enjoy cooking this dish, and feel free to be creative with your ingredients. With practice, you will master it and impress your friends and family. Enjoy your meal!

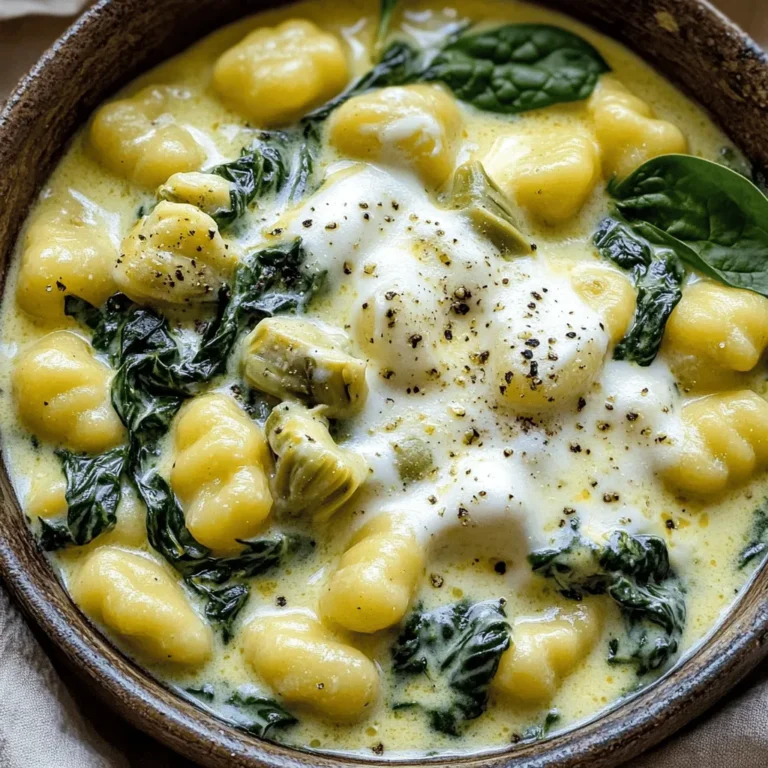
One Pot Creamy Spinach Artichoke Gnocchi Delight

PREV 1 … 13 14 15 … 52 NEXT
cozy citrus kitchen

explore

DessertsDinnerAppetizersDrinks

Our Policies

  • Cookie Policy
  • Copyright Policy
  • Disclaimer
  • GDPR Policy
  • Terms Of Use
Back to Top
  • About
  • Contact Us
  • Privacy Policy
© 2025 cozy citrus kitchen