FREE DINNER EBOOK! Get your copy!
  • Cookie Policy
  • GDPR Policy
  • Disclaimer
  • Terms Of Use
  • Visit my other site: Fun Cookie Recipes
cozy citrus kitchen
  • Home
  • Dinner
  • Desserts
  • Drinks
  • Appetizers
  • Contact
  • About
  • Privacy Policy
  • Home
  • Dinner
  • Desserts
  • Drinks
  • Appetizers
  • Contact
  • About
  • Privacy Policy
  • Cookie Policy
  • GDPR Policy
  • Disclaimer
  • Terms Of Use
Visit my other site: Fun Cookie Recipes

HOME / CATEGORIES /

Latest

- 1 loaf of brioche or challah bread, cut into 1-inch cubes - 6 large eggs - 2 cups whole milk The main ingredients set the stage for our Maple Pecan French Toast Bake. I love using brioche or challah bread. These breads are soft and have a rich flavor. The bread needs to be cut into cubes to soak up the custard well. Large eggs and whole milk create a creamy texture. They make the bake rich and satisfying. - 1/2 cup maple syrup (plus more for serving) - 1 teaspoon vanilla extract - 1 teaspoon ground cinnamon Sweeteners and flavorings give our dish its unique taste. Maple syrup adds a sweet note. It also adds a beautiful amber color. Vanilla extract enhances the overall flavor. Ground cinnamon gives a warm touch. Together, they make each bite delightful. - 1 cup pecans, roughly chopped - 1/2 cup brown sugar - 1 tablespoon unsalted butter, melted The topping is where the magic happens. Chopped pecans add a crunch to the bake. Brown sugar gives it a caramel-like sweetness. Melting unsalted butter helps the pecans stick together. This topping creates a lovely contrast to the soft bread below. To start, preheat your oven to 350°F (175°C). This helps the bake cook evenly. Next, grease a 9x13 inch baking dish. You can use non-stick spray or butter. Greasing the dish stops the bake from sticking. In a large bowl, whisk together the eggs, milk, maple syrup, vanilla extract, cinnamon, and salt. Mix well until everything is smooth. This custard is the base for your French toast. Now, add the cubed bread to the egg mixture. Gently fold it in, making sure all pieces get coated. Let it sit for about 10 minutes. This soaking helps the bread absorb the flavor. While the bread soaks, prepare the pecan topping. In another bowl, mix the chopped pecans, brown sugar, and melted butter. Stir until the pecans are well coated. After the bread has soaked, transfer the mixture to the greased baking dish. Spread it evenly. Finally, sprinkle the pecan topping over the bread mixture. Place the baking dish in the preheated oven. Bake for 35-40 minutes. You want the top to be golden brown and the center to be set. To check for doneness, insert a toothpick in the center. If it comes out clean, it’s ready. Let it cool for about 10 minutes before serving. To make the best custard, soak the bread well. Place cubed bread in the egg mixture. Let it rest for about 10 minutes. This helps the bread absorb all the flavors. If you want a richer texture, use more eggs. For a lighter dish, try using fewer eggs. You can make the pecan topping more exciting! Add spices like nutmeg or cardamom for warmth. You can also mix in chocolate chips for sweetness. If you don't have pecans, use walnuts or almonds instead. Both will add a nice crunch. Maple Pecan French Toast Bake pairs well with fresh fruit. Sliced bananas or berries can brighten the dish. For a special touch, add whipped cream on top. Dusting the bake with powdered sugar adds elegance. Serve with extra maple syrup on the side for drizzling. {{image_2}} You can switch up the flavor of your Maple Pecan French Toast Bake in fun ways. - Pumpkin spice version: Add 1 cup of pumpkin puree and 1 teaspoon of pumpkin spice to your egg mixture. This gives a warm, cozy taste that is great for fall. - Berry-infused option: Toss in 1 cup of mixed berries, like blueberries or strawberries, into the bread mix. This adds a juicy burst of flavor and color. Need to tweak the recipe for special diets? Here are options. - Gluten-free alternatives: Use gluten-free bread instead of brioche or challah. This keeps the dish safe for those who avoid gluten. - Vegan-friendly adjustments: Replace the eggs with 1 cup of unsweetened applesauce and use almond milk. This makes the dish plant-based. The type of bread you choose can change the whole dish. - Other suitable bread types: You can use sourdough, French bread, or even cinnamon raisin bread. Each brings a different taste. - Impact of bread choice on texture: Brioche gives a soft, rich texture, while sourdough adds a slight tang. Choose what you like best! To store Maple Pecan French Toast Bake, let it cool first. Place it in an airtight container. Store it in the fridge for up to three days. This keeps it fresh and tasty. If you want to save it longer, you can freeze it. Cut the bake into portions. Wrap each piece in plastic wrap. Then, place them in a freezer-safe bag. It will last for up to three months in the freezer. When it comes to reheating, you can use either a microwave or an oven. For the microwave, place a portion on a plate. Heat for about 30 seconds to one minute. Check if it is warm enough. If not, heat for a little longer. The oven is a great option too. Preheat it to 350°F (175°C). Place the bake in an oven-safe dish. Cover it with foil to keep it moist. Heat for about 15-20 minutes. This way, it stays soft and delicious. Maple Pecan French Toast Bake lasts about three to four days in the fridge. Make sure to cover it well to keep it fresh. If you want to enjoy it longer, freeze it. It can last for about two months in the freezer. Yes, you can prepare this dish the night before. Just follow the recipe steps until you put the bread in the baking dish. Then, cover it with plastic wrap and place it in the fridge overnight. This helps the bread soak up the custard well. In the morning, you just need to add the pecan topping and bake it. If you need a substitute for maple syrup, you can use honey or agave syrup. These options add sweetness but will change the flavor a little. For a different taste, try using brown sugar dissolved in water. Yes, you can make this dish without eggs. Use a mixture of ground flaxseed and water or mashed bananas as a substitute. Mix one tablespoon of ground flaxseed with three tablespoons of water for each egg. Let it sit for a few minutes until it thickens. This keeps the texture nice and moist. This blog post covered how to make a delicious Maple Pecan French Toast Bake. We explored key ingredients like brioche or challah, eggs, and milk. You learned about sweeteners, toppings, and steps to create the perfect bake. Remember, the right bread makes a big difference. Enjoy experimenting with flavors and variations to make it your own. With these tips, you can create a warm, inviting dish for any meal. Happy baking!

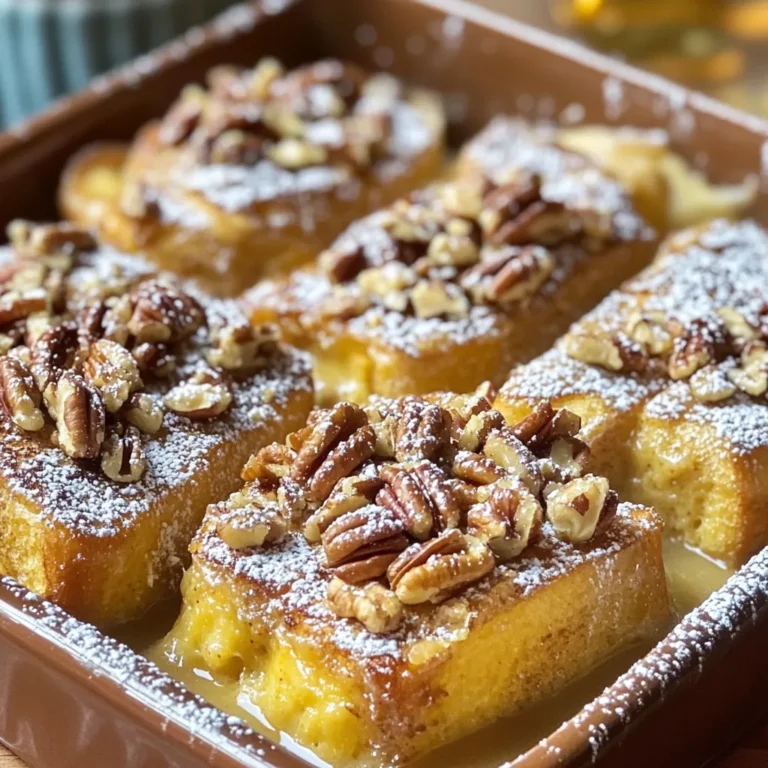
Maple Pecan French Toast Bake Easy and Delicious Recipe

To make these delightful mousse cups, you need the following ingredients: - 1 cup heavy whipping cream - 1/2 cup canned pumpkin puree - 1/3 cup powdered sugar - 1 teaspoon vanilla extract - 1 teaspoon pumpkin pie spice - 1/2 cup strong brewed coffee, cooled - 1 tablespoon gelatin powder - 3 tablespoons cold water These ingredients create a rich and fluffy mousse with a warm spice flavor. The heavy cream adds lightness, while the pumpkin brings a smooth texture. The coffee adds depth, and the spices give it that cozy fall taste. You can add a personal touch with these optional toppings: - Whipped cream for topping - Ground cinnamon for garnish - Mini chocolate chips (optional) Whipped cream adds richness. Ground cinnamon provides an extra touch of spice. Mini chocolate chips can add a fun crunch and sweetness. To prepare the mousse, gather these tools: - Medium mixing bowl - Small bowl for gelatin - Small saucepan - Electric mixer or whisk - Serving cups or glasses Using the right tools makes the process easier. A mixer helps whip the cream quickly, while clear glasses show off the lovely layers of your mousse. Start by blooming the gelatin. Take a small bowl and sprinkle 1 tablespoon of gelatin powder over 3 tablespoons of cold water. Let it sit for about 5 minutes. This helps the gelatin soften. Next, brew your coffee. You want 1/2 cup of strong coffee. Let it cool down before using. In a small saucepan, heat the bloomed gelatin and the cooled coffee together on low. Stir it gently until the gelatin dissolves completely. This mixture will add great flavor to your mousse. Now, take 1 cup of heavy whipping cream. In a medium mixing bowl, beat the cream with a mixer on medium speed. Keep mixing until you see soft peaks form. It should look fluffy. While mixing, slowly add 1/3 cup of powdered sugar. Continue to whip until you reach stiff peaks. Set this aside for later. In another bowl, mix together 1/2 cup of canned pumpkin puree, 1 teaspoon of vanilla extract, and 1 teaspoon of pumpkin pie spice. Stir these ingredients until they blend well. Once your coffee-gelatin mixture has cooled slightly, combine it with the pumpkin mixture. Gently fold them together to mix. Next, take your whipped cream and fold it into the pumpkin mixture. Be gentle here; you want to keep the air in the whipped cream. Mix until there are no white streaks left. This step is key for a light and fluffy mousse. Now, it’s time to assemble. Use small cups or glasses for serving. Spoon or pipe the mousse into these cups. Make sure you fill each cup evenly. Once filled, cover them with plastic wrap. Refrigerate the mousse cups for at least 2 hours. This time helps the mousse set properly. When you're ready to serve, add a dollop of whipped cream on top. Sprinkle some ground cinnamon for extra flavor. If you like, you can also add mini chocolate chips for a fun touch. Enjoy your delightful fall treat! To get the best texture for your mousse, start with cold tools. Chill your mixing bowl and beaters. This helps the cream whip faster and fluffier. Whip the cream until it forms stiff peaks. Be careful not to over-whip, or it will turn grainy. When mixing, fold gently to keep the air in. This makes the mousse light and airy. One common mistake is not letting the gelatin bloom. Always let it sit in cold water first. This step is key for the right texture. Another mistake is rushing the cooling process. If the coffee-gelatin mixture is too hot, it can ruin the mousse. Make sure to cool it slightly before mixing. Lastly, avoid mixing too hard. Gentle folding is crucial to keep the mousse fluffy. For a beautiful presentation, use clear glass cups. This lets the layers shine through. Add a dollop of whipped cream on top for a nice finish. Sprinkle ground cinnamon for an extra touch of flavor. You can also add mini chocolate chips for fun. For a rustic look, consider using a cinnamon stick as a stirrer. This adds charm and invites a cozy fall vibe. {{image_2}} You can make this mousse vegan by swapping a few ingredients. Use coconut cream instead of heavy cream. For the gelatin, replace it with agar-agar, which is plant-based. Use brewed coffee, but let it cool completely. Blend the pumpkin puree, vanilla, and pumpkin pie spice as usual. Mix the coconut cream until it’s fluffy, then fold it in. Agar-agar needs boiling, so heat it with your coffee. Then, pour it into the pumpkin mixture. Chill until it sets. This version is creamy and just as delicious. If you love chocolate, this variation adds rich flavor. Start by melting dark chocolate. You can use about ½ cup. Mix the melted chocolate into the pumpkin puree blend after combining the vanilla and spice. Follow the same steps for whipping the cream and adding gelatin. The chocolate adds depth to the pumpkin’s sweetness. Top it with chocolate shavings or mini chocolate chips for a fun touch. This mousse is perfect for chocolate lovers. Feel free to get creative with flavors! Try adding a splash of maple syrup for added sweetness. You can use chai spice instead of pumpkin pie spice for a different spice profile. If you want a fruity twist, mix in some pureed banana or apple. Each flavor adds a new twist, so don’t hesitate to experiment. These variations keep the mousse exciting and fun, perfect for any fall gathering. To keep your leftover mousse fresh, place it in an airtight container. Use a lid or plastic wrap to seal it well. This prevents air from getting in and keeps the mousse creamy. Store it in the fridge for the best taste. You can freeze mousse cups, but some care is key. First, make sure they are in a freezer-safe container. Leave some space at the top for expansion. Cover them tightly with plastic wrap or a lid. When ready to eat, thaw them in the fridge overnight. Avoid microwaving, as it can ruin the texture. In the fridge, your pumpkin spice mousse will last about three days. If you freeze it, it can last up to a month. However, for best taste and texture, enjoy it fresh within a week. Always check for any off smells or changes in texture before eating leftovers. Yes, you can use fresh pumpkin puree. It gives a fresher taste. Just cook and blend your pumpkin until smooth. Make sure it is thick, like canned puree. This will help your mousse set well. To make a non-dairy mousse, replace the heavy cream with coconut cream. Chill the can overnight for best results. Use almond milk instead of coffee for a lighter flavor. You can also use a non-dairy gelatin substitute like agar-agar. For a gelatin substitute, use agar-agar or carrageenan. Both work well to help the mousse set. Follow package instructions for the right amount. These substitutes are plant-based, great for vegans. Serve the mousse cups in clear glass dishes. This shows off the pretty layers. Top each cup with whipped cream, a sprinkle of cinnamon, and mini chocolate chips. You can also add a cinnamon stick as a stirrer for fun! In this post, we explored how to make delicious Pumpkin Spice Latte Mousse Cups. We covered the key ingredients, optional toppings, and tools needed. The step-by-step guide included tips for the perfect texture and common mistakes to avoid. You can even adapt this recipe with vegan or chocolate variations. Finally, I shared storage tips to keep your mousse fresh. This treat is easy to make and perfect for any season. Enjoy making these mousse cups and impress your friends!

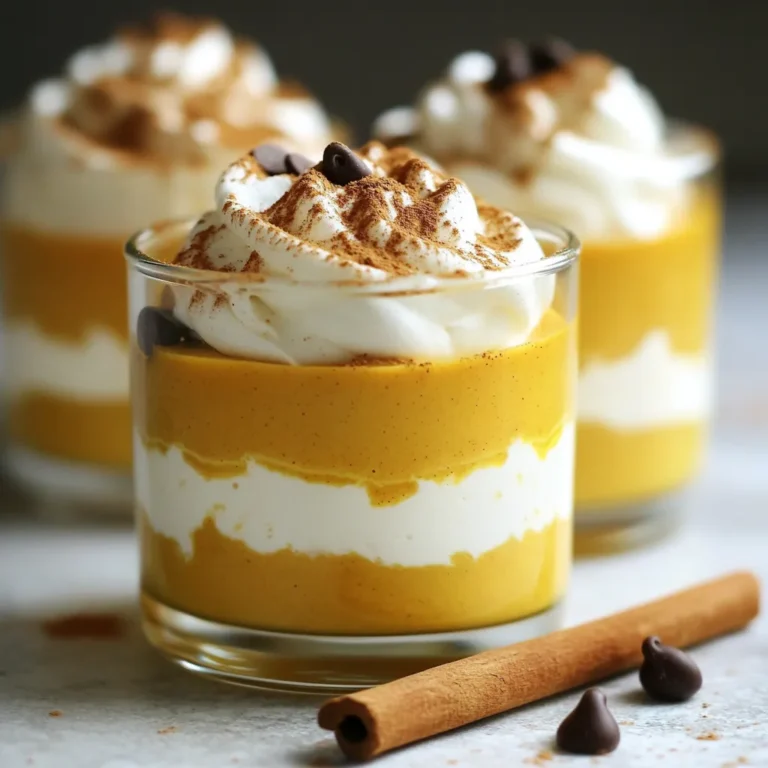
Pumpkin Spice Latte Mousse Cups Delightful Fall Treat

- 1 can (15 oz) chickpeas - 1 tablespoon olive oil - 2 teaspoons ranch seasoning mix - 1/2 teaspoon garlic powder - 1/2 teaspoon onion powder - 1/2 teaspoon smoked paprika - Salt to taste - Fresh parsley for garnish Gathering the right ingredients is key for great Air Fryer Ranch Chickpeas. First, grab a can of chickpeas. I like using a 15-ounce can. Make sure to drain and rinse them well. This step helps remove excess salt and keeps them from being mushy. Next, you'll need olive oil. Just one tablespoon does the trick. It helps the flavors stick to the chickpeas and gives them a nice crunch. Now, let’s talk seasoning. The star of the show is ranch seasoning mix. You need two teaspoons for that classic ranch taste. To kick it up a notch, add some spices: - Garlic powder - Onion powder - Smoked paprika Each spice adds layers of flavor. Finally, don’t forget a pinch of salt to bring it all together. If you want to make your dish look pretty, fresh parsley makes a great garnish. It adds color and a fresh taste. Once you have all these ingredients, you’re ready to make a tasty snack. First, set your air fryer to 400°F (200°C). Preheat it for about 5 minutes. This step helps the chickpeas cook evenly and get crispy. Next, open a can of chickpeas. Drain them in a colander and rinse under cold water. This removes extra salt and makes them taste fresher. After rinsing, pat them dry with a clean kitchen towel. This is key for getting that crispy texture. In a mixing bowl, add the dried chickpeas. Pour in 1 tablespoon of olive oil. Then, add 2 teaspoons of ranch seasoning mix, 1/2 teaspoon of garlic powder, 1/2 teaspoon of onion powder, and 1/2 teaspoon of smoked paprika. Toss everything well so each chickpea gets coated with the tasty mix. Now, place the seasoned chickpeas in the air fryer basket. Make sure they are in a single layer. If your air fryer is small, you may need to cook in batches. Air fry the chickpeas for 15-20 minutes. Shake the basket halfway through to help them cook evenly. You want them to be crispy and golden brown. After cooking, taste the chickpeas. If they need more flavor, adjust the seasoning. You can add a little salt if you like. This final touch makes them even more delicious. If you want, garnish with fresh parsley before serving. Enjoy your crunchy ranch chickpeas! To make your chickpeas crispy, start by drying them well. After draining and rinsing, use a clean towel to pat them dry. Removing moisture is key. If you skip this step, your chickpeas might not crisp up as they should. You can enjoy ranch chickpeas in many ways. Serve them as a snack on their own or sprinkle them on salads for a crunchy twist. You can also mix them into a wrap or bowl for added protein. Try serving them with a dip, like hummus or yogurt sauce. Watch out for overcrowding the air fryer basket. If you pile the chickpeas, they will steam instead of fry. Make sure to shake the basket halfway through cooking. This helps ensure that all sides get crispy and golden. Lastly, be careful not to over-season. Taste before adding more salt or spices. {{image_2}} You can switch up the flavor of ranch chickpeas easily. Try a spicy ranch mix by adding cayenne pepper or chili powder. This will give your snack a nice kick! You could also use lemon herb seasoning for a bright and fresh taste. Just mix it in with the chickpeas before air frying. If you want a lighter snack, you can reduce the oil. Use just a teaspoon of olive oil or skip it altogether. The chickpeas will still get crispy, and you can season them with your favorite spices. Another option is to use a light spray of oil for a healthier air fry. Feel free to add more ingredients to your chickpeas. You can mix in other vegetables like bell peppers or zucchini, cut into small pieces. These add color and flavor. You can also try other legumes, like black beans or kidney beans, for a different twist. Just make sure they are cooked and drained before adding them to the mix. To keep your ranch chickpeas fresh, use an airtight container. Glass or plastic containers work well. Store them at room temperature for up to 2 days. If you want to keep them longer, put them in the fridge. They can last up to a week in the fridge. Just remember, they may lose some crispiness over time. When reheating, the goal is to keep them crispy. The best way is to use the air fryer again. Set it to 350°F (175°C) and cook for about 5 minutes. This will help revive their crunchiness. If you don’t have an air fryer, you can use an oven. Place them on a baking sheet and heat at the same temperature. Yes, you can freeze ranch chickpeas! Spread them out on a baking sheet first. Freeze them for about an hour until firm. Then, transfer them to a freezer bag. They can stay good for up to 3 months. When you want to eat them, just reheat in the air fryer. This keeps them nice and crispy. Air-fried chickpeas stay fresh for about 3 to 5 days. Store them in an airtight container. Keep them in a cool, dry place. If you want them crispy, don’t store them in the fridge. Yes, you can use dried chickpeas. First, soak them overnight in water. Then, boil them for about 1 to 1.5 hours until they are soft. Drain and dry them. After that, coat and cook as usual. Ranch seasoning mix usually includes: - Dried dill - Garlic powder - Onion powder - Parsley - Black pepper - Buttermilk powder You can buy it or make your own at home. Chickpeas are very nutritious. They are high in protein and fiber. This helps with digestion and keeps you full. They also have vitamins and minerals, like iron and magnesium. Eating chickpeas can help support heart health and maintain stable blood sugar levels. In this blog post, I shared a simple and tasty recipe for ranch chickpeas. You learned about the main ingredients, spices, and optional garnishes. I detailed the steps for preparation and air frying, along with helpful tips to ensure the perfect crispiness. You explored flavor variations, storage options, and answered common questions. Give this recipe a try to enjoy a healthy snack that's packed with flavor. With just a bit of effort, you can create a delicious treat that everyone will love!

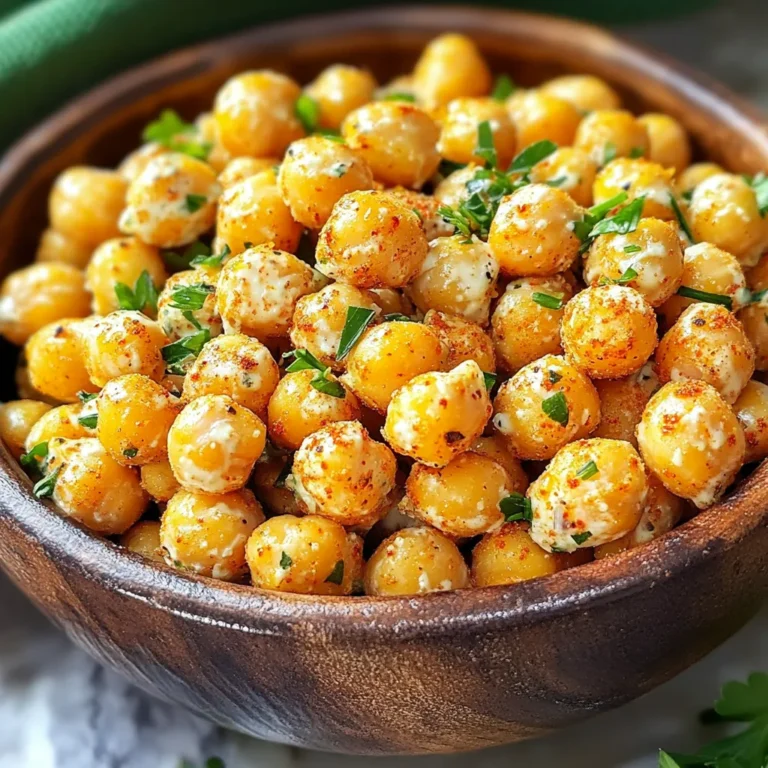
Air Fryer Ranch Chickpeas Crispy and Flavorful Snack

To make these no-bake cookie dough bites, you will need: - 1 cup almond flour - 1/4 cup coconut flour - 1/4 cup peanut butter (or almond butter) - 1/4 cup maple syrup (or honey) - 1/2 tsp vanilla extract - 1/2 tsp sea salt - 1/2 cup mini chocolate chips - 2 tbsp chia seeds (optional, for added nutrition) You can swap some ingredients to fit your taste or needs. Here are some ideas: - Use sunflower seed butter instead of peanut butter for a nut-free option. - Replace maple syrup with honey or agave syrup for sweetness. - If you do not have almond flour, try oat flour or all-purpose flour. - You can skip chia seeds if you want, but they add good nutrition. Each ingredient brings unique health benefits to the table: - Almond flour is low in carbs and high in healthy fats. It gives protein and fiber. - Coconut flour is also high in fiber and helps keep you full longer. - Peanut butter contains protein and healthy fats, great for energy. - Maple syrup has antioxidants and can be a better sweetener than refined sugar. - Chia seeds boost fiber, omega-3s, and protein, adding extra nutrition. - Mini chocolate chips add joy and a small amount of antioxidants to your bites. These ingredients make your cookie dough bites not only tasty but also good for you! Making no-bake cookie dough bites is easy and quick. You will need about 10 minutes for prep. Gather your ingredients first. This will help you work faster and smoother. 1. Start with a large mixing bowl. Add 1 cup almond flour and 1/4 cup coconut flour. Mix them well. 2. Next, add 1/4 cup peanut butter and 1/4 cup maple syrup. Pour in 1/2 tsp vanilla extract and 1/2 tsp sea salt. Stir until the mix forms a thick dough. 3. If you want extra crunch, fold in 1/2 cup mini chocolate chips and 2 tbsp chia seeds. This step is optional but adds great taste. 4. Use your hands to roll the dough into balls. Each ball should be about 1 inch in size. You will make around 12 to 15 bites. 5. Place the cookie dough bites on a baking sheet lined with parchment paper. Make sure they do not touch each other. 6. Put the sheet in the fridge for about 30 minutes. This will help the bites firm up. 7. After chilling, enjoy your tasty no-bake cookie dough bites as a snack or dessert! - Make sure to blend the dry ingredients well before adding wet ones. This helps mix flavors. - If the dough is too sticky, you can add a little more almond flour. This will make it easier to handle. - Use a small cookie scoop for even-sized bites. This helps them look nice and uniform. One of the biggest mistakes is not measuring the flours correctly. Use a scale for the best results. If you pack the flour too tightly, your bites may be dry. Another mistake is skipping the chilling step. This helps the bites firm up and improves their texture. Remember to mix the dough well. If you don't combine the ingredients thoroughly, the flavors won’t blend properly. Lastly, don’t rush when forming the bites. Take your time to shape them evenly for a better bite. To make the dough easier to handle, chill the mixture for about 10 minutes before shaping. This will make it less sticky. If your hands get sticky while forming balls, dampen them with water. This simple trick prevents the dough from sticking to your hands. You can also use a cookie scoop for even portioning. This helps in creating uniform bites that look great. You can enhance flavor by adding spices like cinnamon or nutmeg. These spices give a warm touch to the bites. For texture, consider mixing in chopped nuts or seeds. They add a nice crunch. You can also use flavored nut butters, like hazelnut, for a twist. Don’t forget the chocolate chips! They bring sweetness and richness. If you want a more decadent bite, try adding a drizzle of melted dark chocolate on top. {{image_2}} You can change the flavor of your no bake cookie dough bites easily! Swap peanut butter for almond butter for a nutty twist. If you want a sweeter taste, use cashew butter instead. Each nut butter brings its unique flavor. You can also add a pinch of cinnamon or cocoa powder for extra depth. The fun part of this recipe is adding your favorite mix-ins. You can fold in dried fruits like raisins or cranberries for sweetness. Chopped nuts like walnuts or pecans add crunch. Want some protein? Add seeds like sunflower or pumpkin seeds. Get creative! You can make a new flavor every time. If you're vegan, simply replace honey with maple syrup. This keeps it plant-based and delicious. For gluten-free options, stick with almond flour and coconut flour, which are both gluten-free. You can enjoy these bites without worry. They fit many diets, making them a great treat for everyone! To keep your no-bake cookie dough bites fresh, store them in an airtight container. This helps prevent them from drying out. You can place parchment paper between layers to avoid sticking. Keep the container in the fridge for easy access. If you want to save some bites for later, freezing is a great option. Just arrange the bites on a baking sheet first. Freeze them for about an hour until firm. Then, transfer them to a freezer-safe bag or container. They will stay fresh for up to three months. These cookie dough bites last about one week in the fridge. After that, they may lose some taste and texture. It’s best to enjoy them fresh for the best flavor. No, these cookie dough bites are meant to be no-bake. Baking them changes their texture and taste. The fun is in enjoying them raw! The mix of almond flour and peanut butter gives a great taste without needing heat. You can tell they are firm after chilling for about 30 minutes. The bites should feel solid to the touch. If they still feel soft, give them extra time in the fridge. This step helps them hold their shape when you eat them. You have many tasty options! You can use dried fruit, like raisins or cranberries. Chopped nuts, like walnuts or pecans, can add crunch. You can also use carob chips for a different flavor. Get creative with what you like! You learned about the key ingredients and the health benefits they bring. We covered how to prepare and cook your bites with clear steps. I shared tips to avoid mistakes and improve texture. You also discovered fun variations and storage tips for your bites. Remember, these cookie dough bites are easy to customize. Enjoy making them your own and sharing them with others. Happy cooking!

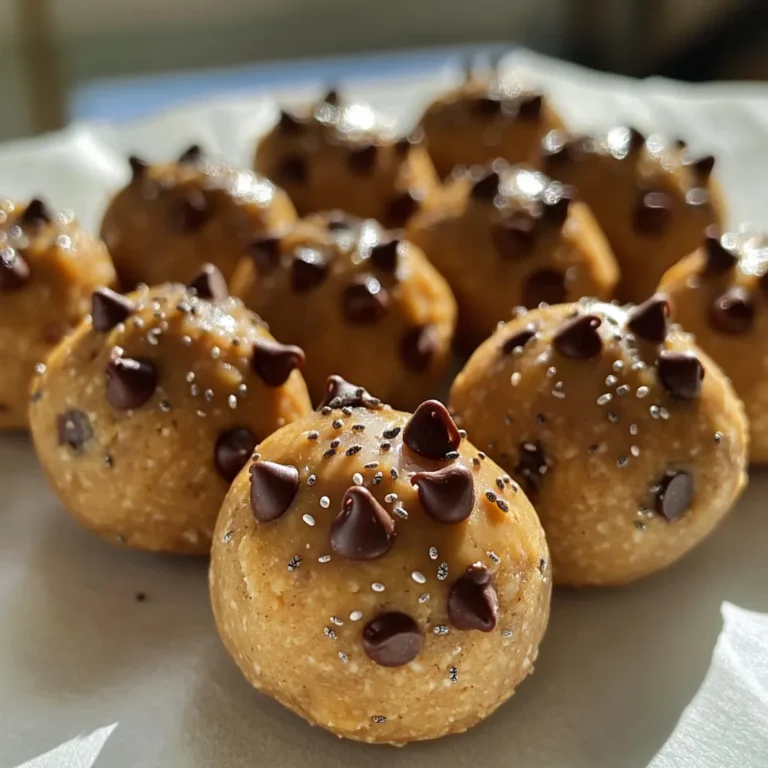
No Bake Cookie Dough Bites Easy Recipe to Enjoy

- 2 large zucchini, spiralized into noodles (zoodles) - 1 red bell pepper, sliced thin - 1 cup shredded carrots - 1 cup bean sprouts - ½ cup fresh cilantro, chopped - ¼ cup green onions, sliced - ½ cup roasted peanuts, roughly chopped - 1 tablespoon sesame oil For this recipe, start with fresh zucchini. Spiralizing the zucchini makes it fun and light. The red bell pepper adds sweetness and color. Shredded carrots bring crunch and a bright orange hue. Bean sprouts add a fresh bite, while cilantro and green onions give a burst of flavor. Roasted peanuts provide a lovely crunch that you will enjoy. Finally, a drizzle of sesame oil rounds out the taste perfectly. - ¼ cup natural peanut butter - 2 tablespoons soy sauce (or tamari for gluten-free) - 1 tablespoon lime juice - 1 tablespoon maple syrup (or honey) - 1 tablespoon sriracha (adjust to your spice preference) - 2-3 tablespoons warm water (to thin the dressing) The dressing combines rich peanut butter with soy sauce for depth. Lime juice adds acidity, balancing the flavors. Maple syrup or honey brings sweetness. Adjust the sriracha to fit your spice level. Warm water helps to make the dressing pourable and smooth. - Additional chopped cilantro - Lime wedges - Sesame seeds For a touch of finishing flair, consider adding extra cilantro. Lime wedges brighten the dish as a side. A sprinkle of sesame seeds adds a lovely texture and visual appeal. These toppings enhance the flavor and presentation, making your salad truly pop! Start by spiralizing the zucchini. You want long, thin noodles called zoodles. Use a spiralizer to get perfect shapes. Next, slice the red bell pepper into thin strips. This adds nice color and crunch. Shred the carrots and rinse the bean sprouts. Chop the fresh cilantro and slice the green onions. Once all the veggies are ready, combine them in a large bowl. Toss gently to mix everything well. Grab a separate bowl for the dressing. Add the natural peanut butter first. Then pour in the soy sauce, lime juice, maple syrup, and sriracha. Mix these ingredients well until they form a smooth sauce. If the dressing is too thick, add warm water a little at a time. Keep mixing until you reach a pourable consistency. Adjust the sriracha for your spice level. Now it's time to combine everything. Drizzle the spicy peanut dressing over the zoodle salad mixture. Use tongs to toss the salad well. Make sure each zoodle and vegetable gets coated in the dressing. Transfer the salad to a serving platter or individual bowls. Top with chopped roasted peanuts for extra crunch. Finish by drizzling sesame oil over the salad for a richer taste. Enjoy your fresh and flavorful dish! To spiralize zucchini, start with fresh, firm zucchini. Cut off both ends of the zucchini. Place it in a spiralizer and twist to create long noodles. If you don’t have a spiralizer, a vegetable peeler can work too. Just peel thin strips until you reach the core. Aim for long, thin strands for the best texture. Zoodles cook quickly and add a fun twist to any dish. The spicy peanut dressing can be as mild or fiery as you like. Start with one tablespoon of sriracha for a gentle heat. Mix it well and taste. Add more sriracha bit by bit until it’s just right for you. If it gets too spicy, add a little more peanut butter to balance the flavors. You can also reduce the amount of lime juice for a less tangy taste. A great presentation makes your salad stand out. Serve the zoodle salad in a large bowl or on a platter. Sprinkle chopped roasted peanuts on top for crunch. Add fresh cilantro and lime wedges for color and zest. For a professional touch, drizzle sesame oil over the salad just before serving. You can also sprinkle sesame seeds for added flair. Enjoy the compliments! {{image_2}} You can boost your salad’s protein with many options. Grilled chicken adds a savory flavor. Just slice it thin and toss it in. For a plant-based choice, try cubed tofu. Use firm tofu and pan-fry it for a nice texture. Shrimp also works well; simply cook them until pink and juicy. Feel free to mix in other veggies to suit your taste. Thinly sliced cucumbers add a cool crunch. You can also use shredded red cabbage for color and texture. Snap peas give a sweet bite, and radishes add a peppery kick. The key is to keep the colors bright and flavors fresh. To make this salad gluten-free, swap soy sauce for tamari. This keeps the flavor without gluten. For a vegan twist, use maple syrup instead of honey in the dressing. Every ingredient can fit your dietary needs while still being delicious. This salad remains tasty and nutritious for everyone! To keep your Spicy Thai Peanut Zoodle Salad fresh, store it in an airtight container. This helps maintain its crunch and flavor. I recommend separating the dressing from the salad if you have leftovers. This way, the zoodles don’t get soggy. You can mix them just before serving. When stored correctly, the salad lasts about 2-3 days in the fridge. After that, the freshness fades. Zoodles can release water over time, making the salad watery. To enjoy the best taste, eat it sooner rather than later. This salad is best served cold. If you want to warm it up, do so gently. Place it in a pan over low heat for a short time. Stir often to avoid cooking the zoodles too much. You can also add a little more dressing before heating. It helps keep the flavors bright and fresh. Yes, you can make this salad in advance. I recommend preparing the zoodles and veggies ahead of time. Keep them in an airtight container in the fridge. Make the dressing separately. When you’re ready to eat, mix them together. This keeps the veggies fresh and crunchy. If you need a substitute for peanut butter, try sunflower seed butter. It has a similar texture and taste. You can also use almond butter or cashew butter. Just watch out for allergies! Yes, you can use other vegetables to make a lower-carb option. Try spiralized cucumbers or carrots. They add a nice crunch and are low in carbs. You can mix them with zoodles for extra flavor and texture. Yes, feel free to use other nut butters for the dressing. Almond butter or cashew butter work well. Each nut butter adds its own unique flavor. Just remember to adjust the taste to your liking! In this blog post, we explored fresh ingredients, condiments, and optional toppings for a flavorful salad. I shared step-by-step instructions for preparing vegetables, making a spicy peanut dressing, and combining it all. Tips on spiralizing zucchini and adjusting spice levels help you achieve the best results. You can also find ways to customize the salad with proteins and vegetables and learn about storage practices. Remember, making your salad unique can be fun. Enjoy experimenting with ingredients and presentations!

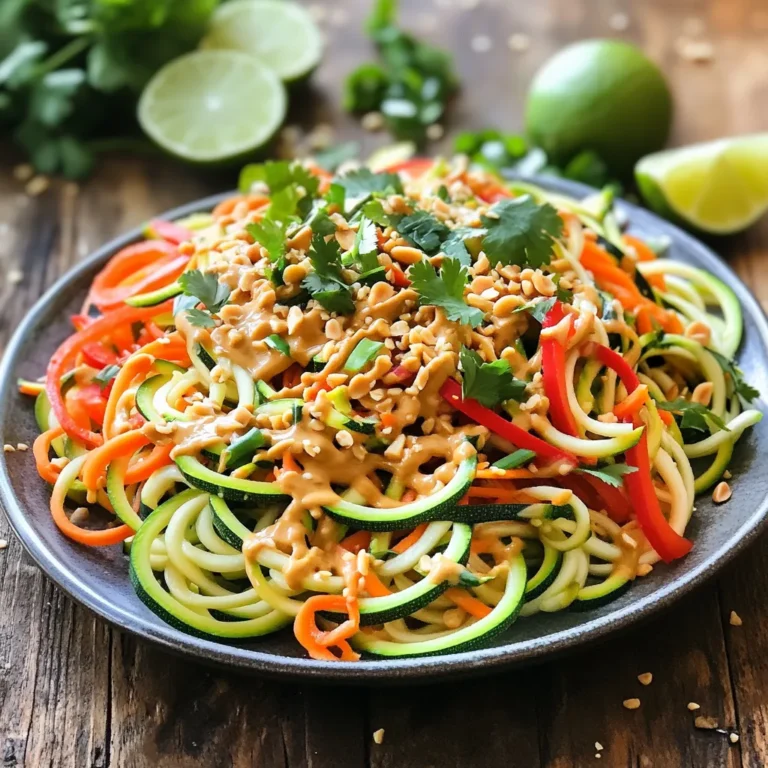
Spicy Thai Peanut Zoodle Salad Fresh and Flavorful Dish

To make these tasty muffins, you need a few key ingredients. Here’s the list: - 2 cups all-purpose flour - 1 tablespoon baking powder - 1/2 teaspoon baking soda - 1/2 teaspoon salt - 1/2 cup unsalted butter, softened - 3/4 cup granulated sugar - 2 large eggs - 1 teaspoon vanilla extract - 1/2 cup milk (whole or almond) - 1 cup mixed berries (blueberries, raspberries, strawberries, chopped if large) These ingredients form the base of your muffins, giving them structure and flavor. You can add extra ingredients to make your muffins even better. Consider these: - 1 tablespoon lemon zest - 2 tablespoons coarse sugar for topping Lemon zest gives a bright flavor. Coarse sugar adds a nice crunch on top. When you choose berries, look for these tips: - Pick berries that are firm and plump. - Check for bright colors; they should look vibrant. - Avoid berries that are mushy or have spots. Fresh berries make a big difference in taste and texture. Always wash them gently before use. Start by preheating your oven to 375°F (190°C). Then, line a muffin tin with paper liners or grease it lightly. In a medium bowl, whisk together 2 cups of all-purpose flour, 1 tablespoon of baking powder, 1/2 teaspoon of baking soda, and 1/2 teaspoon of salt. In a large bowl, beat 1/2 cup of softened unsalted butter and 3/4 cup of granulated sugar using an electric mixer. Mix until it is light and fluffy, which should take about 2-3 minutes. Next, add 2 large eggs, one at a time, mixing well after each. Stir in 1 teaspoon of vanilla extract. Gradually mix the dry ingredients into the wet mixture, alternating with 1/2 cup of milk. Start with the dry mix, then add a little milk, and repeat. Remember, a few lumps are fine. Finally, fold in 1 cup of mixed berries and 1 tablespoon of lemon zest if you like. Now, divide the batter evenly into the muffin cups, filling each about 2/3 full. If you want, sprinkle 2 tablespoons of coarse sugar on top for extra crunch. Place the muffin tin in the preheated oven. Bake for 18-22 minutes. To check if they are done, insert a toothpick into the center of a muffin. If it comes out clean, they’re ready! After baking, let the muffins cool in the pan for 5 minutes. Then, transfer them to a wire rack to cool completely. For serving, present them on a beautiful platter. You can garnish with fresh berries for a pop of color. Enjoy these muffins warm or at room temperature. A drizzle of honey or a spread of butter adds a lovely touch! To get the best muffin texture, focus on mixing. Use a gentle hand when combining the wet and dry ingredients. Overmixing makes muffins tough. A few lumps in the batter are okay. This keeps your muffins light and fluffy. Always fill the muffin cups about two-thirds full. This allows room for the muffins to rise nicely. One common mistake is skipping the baking powder. This ingredient is key for fluffiness. Also, don’t forget to soften the butter. Cold butter will not mix well and will affect the texture. Lastly, make sure your oven is fully preheated. If it’s not, your muffins may bake unevenly. You can easily switch up the berries in this recipe. Try adding chopped peaches, apples, or even bananas. Each fruit will give a unique flavor. For a tropical twist, use diced pineapple or mango. Just keep the same amount as the original recipe. This way, you can enjoy new tastes while keeping it simple. {{image_2}} You can make these muffins gluten-free. Use gluten-free all-purpose flour instead of regular flour. Make sure the blend has xanthan gum. This helps with texture. Follow the recipe as usual. The muffins will still taste great. Enjoy the same berry goodness without gluten! To create vegan muffins, swap out the eggs and butter. Use flax eggs instead of real eggs. Mix 1 tablespoon of ground flaxseed with 2.5 tablespoons of water. Let it sit until thick. For butter, use coconut oil or vegan butter. Replace the milk with almond milk or any plant-based milk. These vegan muffins are just as tasty! You can add fun ingredients to the muffins. Try adding nuts like walnuts or pecans for crunch. Chocolate chips are a sweet option too! For a hint of spice, mix in cinnamon or nutmeg. Chopped apples or bananas also work well. Feel free to get creative and customize your muffins! To keep your triple berry muffins fresh, store them in an airtight container. This helps retain their moisture and flavor. Make sure they cool completely before storing. If you leave them out, they can dry out quickly. You can keep them at room temperature for up to three days. For longer storage, consider freezing them. Freezing muffins is simple and effective. First, let the muffins cool completely. Wrap each muffin in plastic wrap or foil. Then, place them in a freezer-safe bag or container. You can freeze them for up to three months. When you're ready to enjoy, just take out the number you want. Reheating muffins restores their soft texture. You can use an oven or microwave. For the oven, preheat it to 350°F (175°C). Place the muffins in for about 10 minutes. If you use a microwave, heat each muffin for about 15-20 seconds. Wrap them in a damp paper towel for best results. Enjoy your muffins warm! To make sure your muffins rise, follow a few key steps. First, use fresh baking powder. If it’s old, it may not work. Second, mix your batter just enough. Overmixing can make muffins dense. Finally, fill the muffin cups to about two-thirds full. This allows room for rising. Yes, you can use frozen berries! They work well in muffins. However, they can add extra moisture. To fix this, you may want to reduce the milk slightly. Also, don’t thaw them before mixing. Add them frozen right into the batter for best results. You can use several options for milk substitutes. Almond milk, oat milk, or soy milk are great choices. If you want a richer flavor, try coconut milk. Keep in mind, the taste may change a bit. Adjust to your preference, and enjoy the muffins! You learned how to make tasty triple berry muffins today. We covered key ingredients, step-by-step instructions, and tips for perfect texture. I shared storage tips and even variations for gluten-free or vegan diets. Remember, using fresh berries will boost flavor. Avoid common mistakes for the best results. Keep this guide handy for your next baking adventure. Enjoy your muffins warm and fresh!

Triple Berry Muffins Delightfully Easy Recipe

For this tasty dish, gather these simple ingredients: - 1 pound gnocchi (store-bought or homemade) - 1 cup fresh basil pesto - 1 cup heavy cream - 1 cup cherry tomatoes, halved - 1 cup spinach, roughly chopped - 1/2 cup grated Parmesan cheese - 2 cloves garlic, minced - 1 tablespoon olive oil - Salt and pepper to taste - Pine nuts, toasted for garnish (optional) You can use any store-bought gnocchi for this recipe. If you want homemade gnocchi, it’s easy to make from potatoes and flour. Fresh basil pesto gives the best flavor. If you can’t find it, you can use a jarred version. Heavy cream makes the sauce rich and creamy. If you want a lighter option, use half-and-half or a non-dairy cream. Cherry tomatoes add sweetness. You could swap them for diced bell peppers or sun-dried tomatoes. Spinach adds color and nutrition. Kale or arugula works well too. Parmesan cheese brings a salty, nutty flavor. You can use Pecorino Romano for a sharper taste. Garnishing with toasted pine nuts adds a nice crunch. You could also sprinkle more Parmesan cheese on top. Fresh basil leaves make it look pretty and add extra flavor. For a kick, try a dash of red pepper flakes. Start by gathering all your ingredients. You need: - 1 pound gnocchi (store-bought or homemade) - 1 cup fresh basil pesto - 1 cup heavy cream - 1 cup cherry tomatoes, halved - 1 cup spinach, roughly chopped - 1/2 cup grated Parmesan cheese - 2 cloves garlic, minced - 1 tablespoon olive oil - Salt and pepper to taste - Pine nuts, toasted for garnish (optional) Next, wash the cherry tomatoes and spinach. Halve the tomatoes and chop the spinach. Mince the garlic. This prep makes cooking smooth and easy. Heat a large pot or deep skillet over medium heat. Add the olive oil. Once it's hot, toss in the minced garlic. Sauté it for about a minute. You want it fragrant, not brown. Then, add the halved cherry tomatoes. Cook them for 2-3 minutes. They should soften but not fall apart. Pour in the heavy cream. Stir it well and let it simmer for a couple of minutes. Now, it's time for the gnocchi. Add it to the pot. Make sure it gets coated with the creamy mix. Cook according to the package instructions, usually 2-3 minutes. After cooking, mix in the fresh basil pesto and chopped spinach. Stir until the spinach wilts. Add the grated Parmesan cheese. Stir until it melts and blends in. Season with salt and pepper to your taste. If you want a thicker sauce, let it simmer for another minute. To make sure your gnocchi is perfect, watch the cooking time closely. Overcooking can make it mushy. Use heavy cream for a rich texture. If you want it lighter, you can use half-and-half. Make sure to stir gently when mixing in the pesto and spinach. This helps keep the gnocchi intact. Finally, if you like a bit of crunch, sprinkle toasted pine nuts on top before serving. They add a nice texture and flavor. Enjoy your meal! When cooking One Pot Creamy Pesto Gnocchi, some errors can ruin your dish. Here are some to watch out for: - Overcooking the gnocchi: Gnocchi cooks fast, usually in 2-3 minutes. Keep an eye on it! - Burning the garlic: Sauté garlic for only a minute. If it turns brown, it will taste bitter. - Not stirring enough: Stir the gnocchi well. It helps mix the flavors and prevents sticking. You can change the taste of this dish easily. Here are some ideas: - Add protein: Cook chicken, shrimp, or sausage in the pot for extra heartiness. - Switch up the greens: Try kale or arugula instead of spinach. They add different flavors. - Use different nuts: Swap pine nuts for walnuts or almonds for a new crunch. Having the right tools makes cooking easier. Here’s what you need: - Large pot or deep skillet: This allows enough space for cooking and mixing. - Wooden spoon or spatula: Use this for stirring gently without scratching your pot. - Measuring cups: Accurate measurements help you get the right flavors. These tips will help you create a tasty and creamy gnocchi dish that impresses! {{image_2}} You can easily make One Pot Creamy Pesto Gnocchi vegetarian. Just skip the Parmesan cheese, or use a plant-based cheese. For a vegan version, swap heavy cream for coconut cream or a nut-based cream. These options keep the dish rich and creamy while catering to plant-based diets. To make this dish gluten-free, choose gluten-free gnocchi. Many brands offer tasty alternatives made from potato or rice flour. Just check the label to ensure it meets your needs. The rest of the ingredients are naturally gluten-free, so you can enjoy this creamy dish without worry. You can add extra ingredients to make this dish even better. Consider adding cooked chicken or shrimp for a protein boost. You can also toss in some sautéed mushrooms or bell peppers for added texture. For a kick, sprinkle in red pepper flakes or a squeeze of lemon juice. Each of these options brings a new layer of flavor to the table, making your meal even more delightful. To store leftovers, place them in an airtight container. Make sure the dish cools down first. You can keep it in the fridge for up to three days. If you want to enjoy it later, consider freezing it. When you reheat your gnocchi, do it gently. Use a skillet over low heat. Add a splash of cream or water to keep it moist. Stir often to prevent sticking. You can also use the microwave. Heat it in short bursts, stirring in between. To freeze One Pot Creamy Pesto Gnocchi, let it cool completely. Place portions in freezer-safe bags. Squeeze out any air before sealing. Label with the date. You can freeze it for up to three months. When ready to eat, thaw it in the fridge overnight before reheating. Yes, you can use homemade pesto. Fresh pesto gives a bright flavor. If you make it yourself, you can control the taste. Use fresh basil, garlic, nuts, and oil for a great mix. Make sure it is smooth and well-blended for the best result. Cooking gnocchi takes about 2 to 3 minutes. Fresh gnocchi cooks quickly in boiling water. You'll know it's done when it floats to the top. If you use store-bought gnocchi, follow the package directions for best results. You can serve this dish with a simple salad or garlic bread. A light green salad pairs well with the creamy gnocchi. You can also add grilled chicken or shrimp for protein. For an extra touch, sprinkle some extra Parmesan cheese on top before serving. This blog post covered how to make One Pot Creamy Pesto Gnocchi. We detailed all the ingredients, offered helpful cooking tips, and shared great variations. Remember to avoid common mistakes and know your options for customizing flavors. Storing leftovers properly will keep your dish fresh for later. With these steps, you can enjoy this creamy delight any night of the week. Happy cooking!

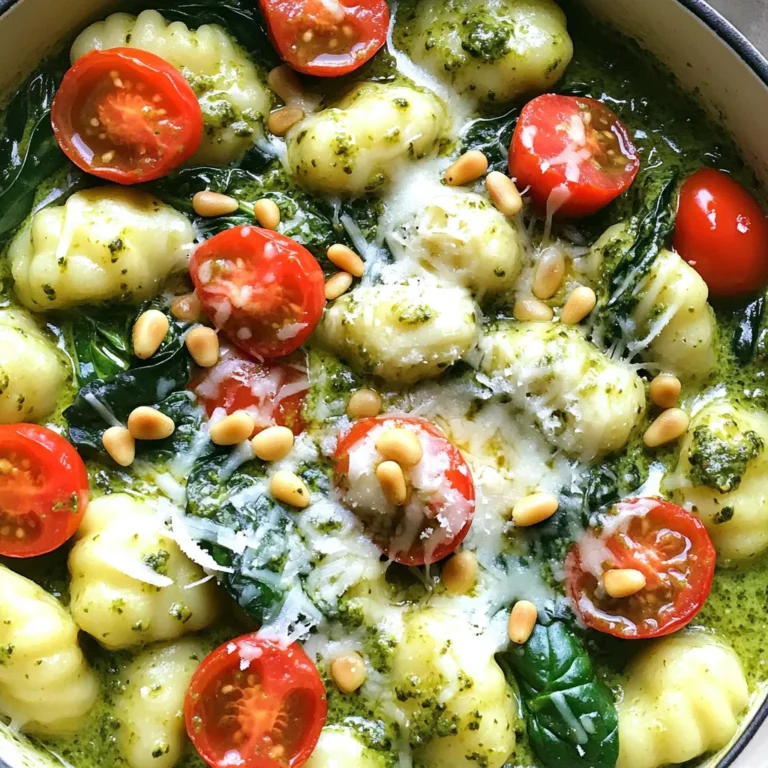
One Pot Creamy Pesto Gnocchi Simple and Tasty Recipe

- 1 cup creamy peanut butter - 1 cup brown sugar, packed - ½ cup granulated sugar - 2 large eggs - 1 teaspoon vanilla extract - 1 ½ cups all-purpose flour - 1 teaspoon baking powder - ½ teaspoon salt - 1 cup semi-sweet chocolate chips - ½ cup chopped peanuts (optional) These ingredients make a rich and sweet treat. I love using creamy peanut butter for a smooth texture. The brown sugar gives it a deep flavor, while the granulated sugar adds sweetness. You need two large eggs for moisture and binding. A teaspoon of vanilla extract enhances the taste. The all-purpose flour makes the blondies chewy. Baking powder helps them rise, and salt balances the sweetness. The semi-sweet chocolate chips give those gooey bursts of chocolate. If you want extra crunch, add chopped peanuts. They add a nice texture and flavor. This combination makes for a decadent dessert that everyone will enjoy. - Preheat oven to 350°F (175°C). - Grease and line an 8x8-inch baking pan. First, turn on your oven. Set it to 350°F. This heat will help the blondies bake evenly. While the oven warms, take an 8x8-inch pan. Grease it well. Then, line it with parchment paper. Leave some paper hanging over the edges. This makes it easy to lift the blondies out later. - Combine peanut butter, brown sugar, and granulated sugar. - Add eggs and vanilla extract. In a big bowl, mix the creamy peanut butter with the brown sugar and granulated sugar. Stir it until it is smooth and well mixed. Next, add two large eggs. Mix well after each egg. Then, pour in one teaspoon of vanilla extract. This adds a nice flavor to the mix. - Whisk together flour, baking powder, and salt. - Mix dry ingredients into wet ingredients. Now, grab another bowl. In it, whisk together 1 ½ cups of all-purpose flour, one teaspoon of baking powder, and half a teaspoon of salt. This mix helps your blondies rise. Slowly add the dry mix into the wet ingredients. Stir gently until everything is just combined. Don’t overmix, or your blondies might be tough. - Fold in chocolate chips and optional chopped peanuts. - Spread batter in prepared pan and bake. Next, fold in one cup of semi-sweet chocolate chips. If you want a crunch, add half a cup of chopped peanuts too. Now, pour the batter into your prepared pan. Use a spatula to spread it evenly. Place the pan in the oven. Bake for 25 to 30 minutes. The edges should look golden brown. A toothpick should come out clean, but a few moist crumbs are okay. - Remove from oven and cool in pan. - Cut into squares and serve. When the blondies are done, take them out of the oven. Let them cool in the pan for about 10 minutes. Then, lift the blondies out using the parchment paper. Place them on a wire rack to cool completely. When they are cool, cut them into squares. Now, they are ready to serve! Enjoy your delicious blondies. To check if your blondies are done, use a toothpick. Insert it in the center of the pan. If it comes out clean or with a few moist crumbs, they are ready. Avoid waiting too long, as this can dry them out. For a smoother batter, mix the peanut butter and sugars well before adding eggs. Make sure the peanut butter is at room temperature. This helps it blend better. One common mistake is overmixing the batter. This can lead to tough blondies. Mix until just combined for a soft, chewy texture. Also, be careful with the oven temperature. An incorrect temperature can ruin your blondies. Always use an oven thermometer for accuracy. To boost flavor, try adding a pinch of cinnamon or nutmeg. A splash of almond extract also works wonders. These spices bring warmth and depth to your blondies. For chocolate varieties, consider using dark chocolate chips or even white chocolate. You can mix different types for an exciting flavor. This adds layers and makes each bite unique. {{image_2}} You can change up the flavor of your blondies easily. Try using different nut butters, like almond or cashew. Each nut butter brings a unique taste. You can also swap chocolate chips for other mix-ins. Consider using butterscotch chips, white chocolate, or even a mix of nuts. This way, your blondies stay fun and fresh. Want a healthier twist? Use natural sweeteners like honey or maple syrup. They add great flavor and keep the blondies moist. You can also try gluten-free flour options, such as almond or coconut flour. These choices make the recipe more inclusive for everyone. Seasonal add-ins can brighten your blondies. Dried fruits like cranberries or apricots work well. They add sweetness and chewiness. You can also incorporate seasonal nuts, like pecans in the fall or walnuts in the winter. These small changes make your blondies special for every occasion. To keep your blondies fresh, store them at room temperature. Place them in an airtight container. This will help them stay soft and moist. You can also place parchment paper between layers for extra protection. If you want to store them longer, refrigeration is an option. Wrap them in plastic wrap and put them in the fridge. Freezing blondies is easy. First, let them cool completely. Then, cut them into squares. Wrap each square in plastic wrap. Place the wrapped blondies in a freezer-safe bag. Make sure to squeeze out the air. To thaw, remove a square and leave it at room temperature. It will be ready in about an hour. When stored properly, blondies last for about a week at room temperature. If you refrigerate them, they can last up to two weeks. In the freezer, they stay fresh for about three months. Always check for any signs of spoilage before eating. Enjoy your blondies at their best! Yes, you can use crunchy peanut butter. It adds a nice texture. The blondies will have little bits of peanut in each bite. This change can make them even more fun to eat. Just keep in mind that it may change the smoothness of the blondies. You know the blondies are done when the edges turn golden brown. You can also use a toothpick. Insert it into the center, and if it comes out clean or with a few moist crumbs, they are ready. Be careful not to overbake them, as they can dry out quickly. Yes, you can substitute the sugar. You could use coconut sugar or a sugar alternative like Stevia. Just remember that this may change the taste and texture. Coconut sugar gives a nice caramel flavor, while Stevia is much sweeter. Adjust the amount as needed. To cut blondies neatly, use a sharp knife. First, let them cool completely. You can chill them in the fridge for a firmer texture. For clean edges, wipe the knife with a damp cloth after each cut. This will make each piece look great for serving. This blog post covered how to make delicious peanut butter blondies. You learned about the ingredients needed, the step-by-step instructions, and tips for success. Remember to check for doneness with a toothpick and avoid overmixing. You can explore different flavors or healthy swaps to personalize your treats. For storage, keep them at room temperature or freeze for later. Enjoy baking these blondies, and share them with friends and family for a tasty experience!

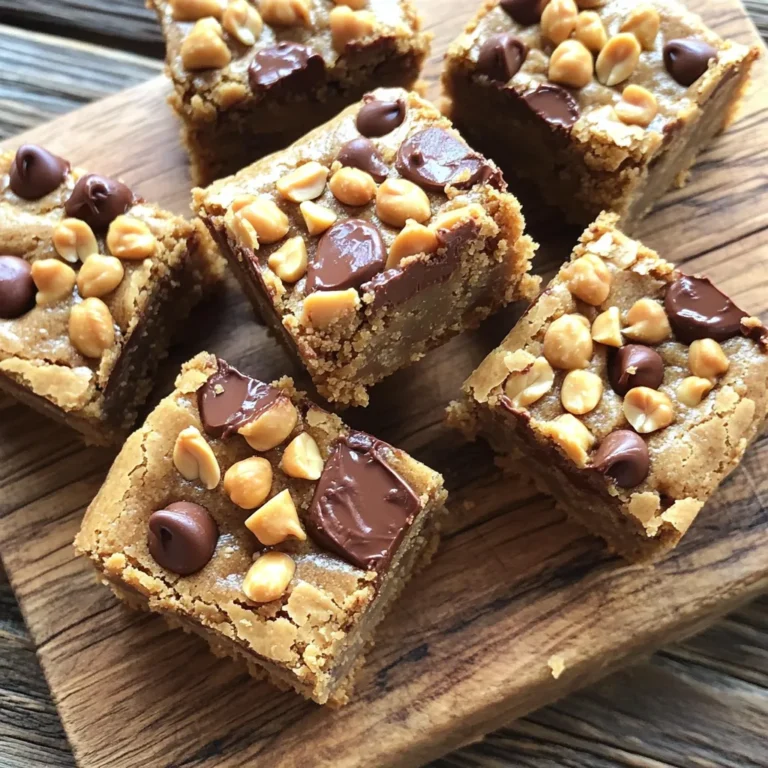
Peanut Butter Chocolate Chip Blondies Tasty and Simple

To make creamy white bean soup, gather these key ingredients: - 2 cups canned white beans (like cannellini or great northern), drained and rinsed - 1 onion, finely chopped - 2 garlic cloves, minced - 1 carrot, diced - 2 celery stalks, diced - 4 cups vegetable broth - 1 cup coconut milk (or heavy cream for a non-vegan option) - 1 teaspoon thyme (dried or fresh) - 1 teaspoon smoked paprika - Salt and pepper to taste - 2 tablespoons olive oil - Fresh parsley for garnish - Lemon wedges for serving If you have dietary needs, there are some easy swaps. - Use any white beans you like. Navy beans or even chickpeas work well. - For a vegan version, stick with coconut milk instead of cream. - Swap vegetable broth for chicken broth if you prefer. - If you're gluten-free, ensure your broth is certified gluten-free. Want to make your soup even better? Here are some add-ins: - Toss in some spinach or kale for extra greens. - Add a pinch of red pepper flakes for heat. - Throw in some diced potatoes for heartiness. - Stir in a tablespoon of nutritional yeast for a cheesy flavor. These options can make your creamy white bean soup unique and delicious! {{ingredient_image_1}} Start by gathering your ingredients. You need onion, garlic, carrot, and celery. Chop the onion finely. Dice the carrot and celery into small pieces. Mince the garlic cloves. This prep makes the soup taste fresh and bright. In a large pot, heat two tablespoons of olive oil over medium heat. Add the chopped onion, carrot, and celery. Sauté these for about 5-7 minutes. You want the veggies soft and the onion clear. Add the minced garlic, thyme, and smoked paprika. Cook for one to two minutes. This step brings out the flavors in your soup. Next, stir in the white beans and vegetable broth. Bring this mixture to a gentle simmer. Let it cook for 15-20 minutes. This time helps the flavors mix well together. After simmering, it's time to blend the soup. You can use an immersion blender directly in the pot. This makes it easy and quick. If you prefer, you can transfer the soup to a regular blender. Just be careful with the hot liquid. Blend until the soup is smooth and creamy. Finally, stir in one cup of coconut milk or heavy cream. Let the soup simmer for another 5 minutes. Season with salt and pepper to your liking. Now your creamy white bean soup is ready to serve! To make your creamy white bean soup really shine, focus on the seasoning. Adding fresh herbs like rosemary or basil can give it a nice twist. You can also try adding a splash of lemon juice or some zest for brightness. If you want a touch of heat, a pinch of red pepper flakes works well too. Remember, taste as you go. Adjust the salt and pepper to suit your preference. One common mistake is not sautéing the vegetables long enough. This step builds flavor, so don’t rush it. Another pitfall is over-blending the soup. You want it smooth but not too thin. Finally, don't forget to taste the soup before serving. This ensures the flavors blend well. Adjusting the seasoning is key to a great final dish. Garnishing your soup can elevate it. Fresh parsley adds color and a fresh taste. A drizzle of olive oil can enhance richness. For a crunchy texture, try croutons or roasted chickpeas. A sprinkle of smoked paprika on top adds depth too. Lemon wedges on the side can brighten each bowl when served. Pro Tips Use Fresh Herbs: Fresh thyme can elevate the flavor of the soup immensely compared to dried. Add it towards the end of cooking to preserve its delicate flavor. Adjusting Creaminess: For a thicker soup, blend longer or add more beans. If you prefer a lighter texture, simply blend less. Flavor Boost: Consider adding a splash of white wine while sautéing the vegetables for an extra depth of flavor. Serving Suggestions: This soup pairs wonderfully with crusty bread or a side salad for a complete meal. {{image_2}} You can easily make this soup vegan. Just replace heavy cream with coconut milk. Using vegetable broth keeps it plant-based. The creamy texture of coconut milk gives a rich taste. Your soup will still be hearty and delicious. This creamy white bean soup is naturally gluten-free. All the ingredients are safe for those who avoid gluten. Just ensure your vegetable broth is also gluten-free. This way, everyone can enjoy the soup without worry. You can boost this soup with extra proteins or veggies. Try adding cooked chicken, sausage, or tofu for a heartier meal. Spinach, kale, or bell peppers add color and nutrients. Just toss them in during the last few minutes of cooking. This helps them stay vibrant and fresh. You can store leftover creamy white bean soup in the fridge. Place the soup in an airtight container. It will stay fresh for up to five days. Make sure to cool the soup to room temperature before sealing. This helps keep it fresh longer. If you want to save some for later, freezing is a great option. Pour the cooled soup into freezer-safe containers. Leave some space at the top since it will expand when frozen. The soup can last for three months in the freezer. To use, just thaw it in the fridge overnight. When you are ready to enjoy the soup again, reheat it on the stove. Pour the soup into a pot and warm it over medium heat. Stir often to prevent sticking. If the soup seems thick, add a splash of water or broth. You can also microwave it in a bowl, but cover it to avoid splatters. You can use heavy cream for a non-vegan option. Other choices include almond milk or oat milk. These will change the flavor slightly. Choose what you like best. Creamy white bean soup lasts up to five days in the fridge. Store it in an airtight container. For best taste, reheat it gently on the stove. Yes, you can make this soup in a slow cooker. Sauté the veggies first, then add all ingredients to the slow cooker. Cook on low for 6-8 hours or high for 3-4 hours. Yes, creamy white bean soup is healthy. It’s packed with fiber and protein from the beans. Plus, it has fresh veggies and healthy fats from olive oil. Serve this soup with crusty bread for dipping. A fresh salad makes a great side too. You can also enjoy it with a sprinkle of cheese or fresh herbs on top. This blog post covered the key parts of making creamy white bean soup. You learned about the main ingredients, helpful substitutions, and optional add-ins. The step-by-step instructions guided you through preparation and cooking methods. I shared tips to enhance flavors and avoid common mistakes. You also found variations for vegan and gluten-free diets, plus storage info to keep your soup fresh. Remember, cooking can be fun and flexible. Enjoy making your creamy white bean soup just the way you like it!

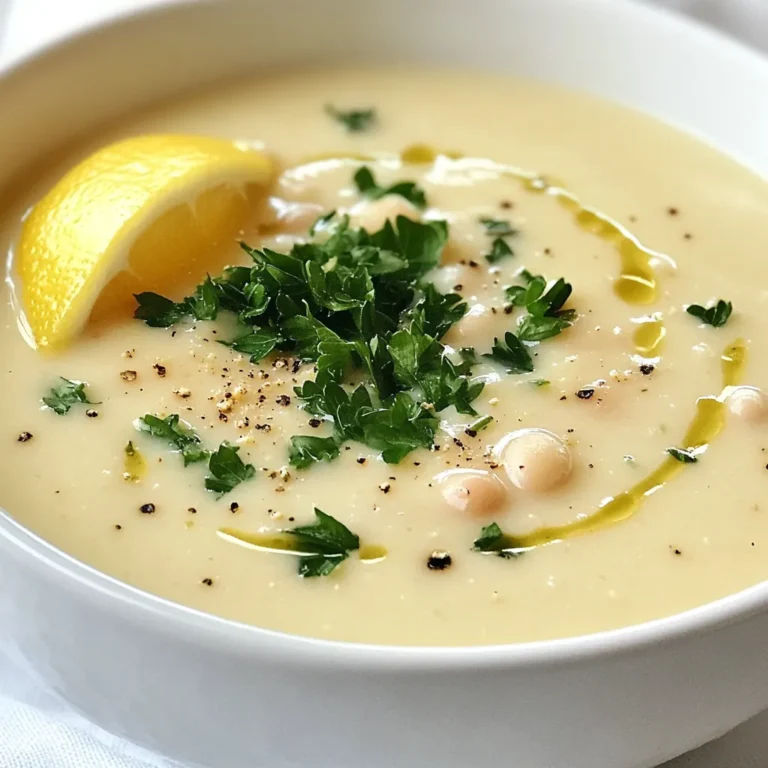
Creamy White Bean Soup Savory and Simple Recipe

- 4 large carrots, cut into fries - 2 tablespoons olive oil - 3 cloves garlic, minced - 1/4 cup grated Parmesan cheese - 1 teaspoon dried Italian herbs (oregano, thyme, basil) - Salt and pepper to taste - Fresh parsley, chopped (for garnish) To make these carrot fries, gather the following tools: - Air fryer - Large bowl - Knife and cutting board - Peeler - Measuring spoons - Spatula or tongs This recipe serves four and provides the following nutrition per serving: - Calories: 130 - Total Fat: 6g - Saturated Fat: 2g - Carbohydrates: 18g - Fiber: 4g - Protein: 4g - Sodium: 150mg These carrot fries are a tasty and healthy snack. They offer a good mix of fiber and vitamins. The Parmesan adds a nice touch of flavor and richness. You can enjoy them guilt-free! Start by peeling the carrots. Use a sharp peeler for ease. Cut them into fry-shaped pieces. Aim for 1/4 inch thick to cook evenly. This size helps them get crispy. Place them in a large bowl once cut. In the same bowl, add 2 tablespoons of olive oil. Mince three cloves of garlic and add them too. Sprinkle in 1 teaspoon of dried Italian herbs. Season with salt and pepper to taste. Toss everything together until the carrots are well coated. Make sure every fry gets the flavors. Preheat your air fryer to 400°F (200°C). This takes about 3-5 minutes. Once preheated, place the carrot fries in the basket. Keep them in a single layer. If your air fryer is small, do this in batches. Cook for 15-18 minutes. Shake the basket halfway through for even cooking. The fries should look golden and crispy. When done, remove them and sprinkle 1/4 cup of grated Parmesan cheese on top. Toss gently so the cheese sticks. Garnish with fresh parsley before serving. Enjoy your tasty carrot fries! For crispy carrot fries, cut them into even pieces. Aim for about 1/4 inch thick. This helps them cook evenly. Make sure to dry the carrots well after washing. Moisture can make them soggy. When you season them, use just enough olive oil to coat. Too much oil can lead to less crispiness. Finally, do not crowd the air fryer basket. Cook in batches if needed to allow air to flow. Seasoning is key for great flavor. Start by tossing the carrot fries with olive oil. Use about 2 tablespoons for 4 large carrots. Add minced garlic for a bold taste. I like to use 3 cloves. Sprinkle in 1 teaspoon of dried Italian herbs. This mix of oregano, thyme, and basil adds a nice touch. Finish with salt and pepper to taste. Taste the mixture before cooking. Adjust if needed for your flavor preference. To boost the flavor, consider adding lemon zest. A little zest brightens the dish. You can also use fresh herbs like rosemary or dill. If you want more heat, add a pinch of cayenne pepper. After cooking, sprinkle more Parmesan cheese on top. It melts beautifully and adds creaminess. For freshness, don’t forget the chopped parsley for garnish. This adds color and a burst of flavor. {{image_2}} You can change the flavor of your carrot fries easily. Try using smoked paprika for a smoky taste. If you like a kick, add cayenne pepper for heat. You can also use chili powder for a rich flavor. For a zesty twist, mix in lemon zest. Experimenting with these spices can create a new favorite dish! Carrots are great, but other veggies can also shine. Sweet potatoes offer a sweet flavor that pairs well with garlic. Zucchini fries are lighter and cook quickly in the air fryer. You can even use parsnips for a unique taste. Just cut them into similar shapes for even cooking. Each veggie brings its own fun twist to this dish. Making this dish fit your needs is easy. To keep it gluten-free, ensure your seasonings are certified gluten-free. For a vegan option, skip the Parmesan cheese or use a plant-based cheese instead. You can also try nutritional yeast for a cheesy flavor without dairy. These swaps keep the dish tasty while fitting your dietary choices. After you enjoy your Air Fryer Garlic Parmesan Carrot Fries, store any extras in an airtight container. They will stay fresh for up to three days in the fridge. Make sure they cool down before sealing the container. This helps keep them crispy longer. To reheat your carrot fries, use the air fryer again for the best results. Set it to 350°F (175°C). Heat the fries for about 5-7 minutes, shaking the basket halfway through. This method keeps them crispy and tasty. You can also use a microwave, but the texture won't be as great. You can freeze these carrot fries for later. First, lay them out on a baking sheet in a single layer. Freeze them for about one hour until hard. Then, transfer them to a freezer bag. They can last up to three months in the freezer. When you're ready to eat, cook them straight from frozen in the air fryer. Air fryer carrot fries stay fresh for about 3 to 5 days in the fridge. To keep them tasty, store them in an airtight container. Reheat in the air fryer for a few minutes to regain that crispiness. Yes, you can use baby carrots! Just cut them into fry shapes. They may cook a bit faster than larger carrots, so keep an eye on them while air frying. Garlic parmesan carrot fries pair well with many dishes. You can serve them with grilled chicken, burgers, or even as a snack with dipping sauces. Try ranch or garlic aioli for an extra kick! In this blog post, we explored how to make tasty carrot fries. We discussed the key ingredients, cooking steps, and helpful tips for perfect crispiness. You can spice up your fries with different flavors and store leftovers easily. Remember, using fresh ingredients and the right seasonings enhances taste. Experiment with plant-based options to suit your diet. Enjoy making these fries your own and impress your friends and family with your delicious dish. Now, grab your air fryer and start cooking!

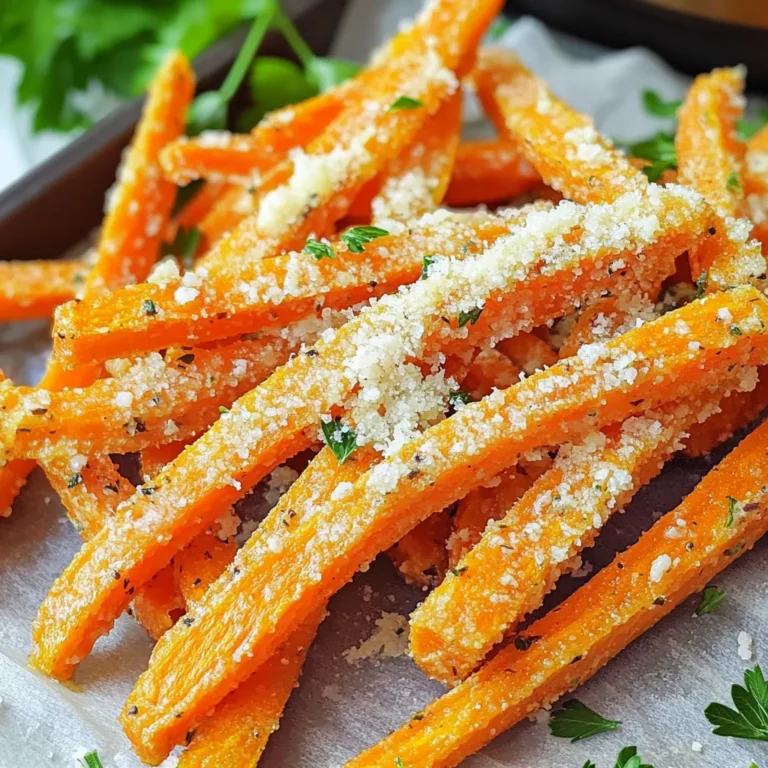
Air Fryer Garlic Parmesan Carrot Fries Savory Delight

PREV 1 … 10 11 12 … 52 NEXT
cozy citrus kitchen

explore

DessertsDinnerAppetizersDrinks

Our Policies

  • Cookie Policy
  • Copyright Policy
  • Disclaimer
  • GDPR Policy
  • Terms Of Use
Back to Top
  • About
  • Contact Us
  • Privacy Policy
© 2025 cozy citrus kitchen